remove seats MERCEDES-BENZ ML430 1997 Complete Workshop Manual
[x] Cancel search | Manufacturer: MERCEDES-BENZ, Model Year: 1997, Model line: ML430, Model: MERCEDES-BENZ ML430 1997Pages: 4133, PDF Size: 88.89 MB
Page 3575 of 4133
Safety belts/emergency tensioning retractors
Luggage nets
Child seats
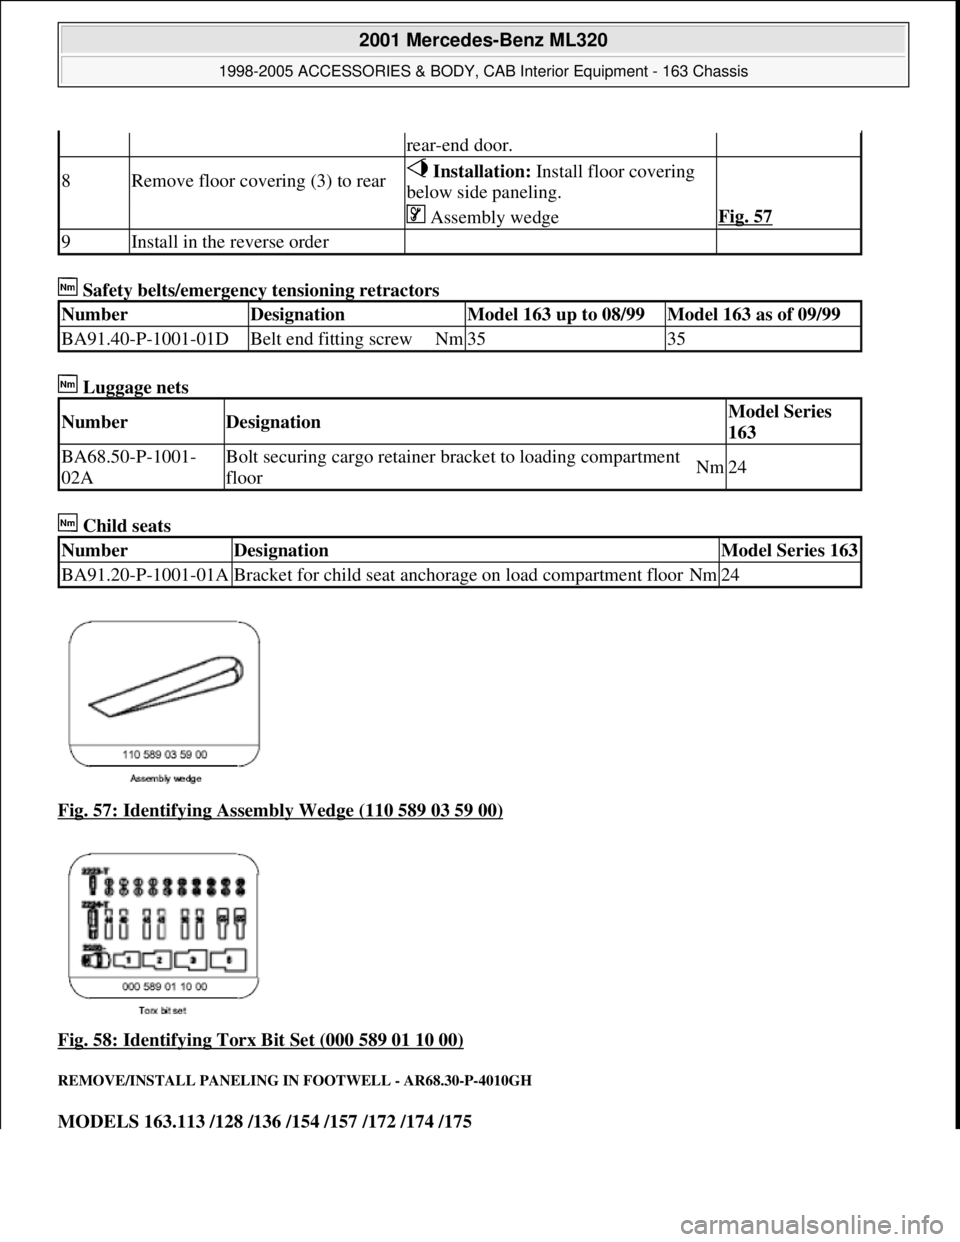
Fig. 57: Identifying Assembly Wedge (110 589 03 59 00)
Fig. 58: Identifying Torx Bit Set (000 589 01 10 00)
REMOVE/INSTALL PANELING IN FOOTWELL - AR68.30-P-4010GH
MODELS 163.113 /128 /136 /154 /157 /172 /174 /175
rear-end door.
8Remove floor covering (3) to rear Installation: Install floor covering
below side paneling.
Assembly wedgeFig. 57
9Install in the reverse order
NumberDesignationModel 163 up to 08/99Model 163 as of 09/99
BA91.40-P-1001-01DBelt end fitting screwNm3535
NumberDesignationModel Series
163
BA68.50-P-1001-
02ABolt securing cargo retainer br acket to loading compartment
floorNm24
NumberDesignationModel Series 163
BA91.20-P-1001-01ABracket for child seat anchorage on load compartment floorNm24
2001 Mercedes-Benz ML320
1998-2005 ACCESSORIES & BODY, CAB In terior Equipment - 163 Chassis
me
Saturday, October 02, 2010 3:35:22 PMPage 57 © 2006 Mitchell Repair Information Company, LLC.
Page 3583 of 4133
5Remove roof frame handles at
rear
on each side, simultaneously press handle upward
and pull out
As of 01.09.01:With integrated coat hook. Open
cover and unscrew screws.
6.1Remove roof frame handles in
load compartment
Only with 3rd row of seats, Code 847 Up to
31.08.01: Open covers for handles, press clip for
handle down on each side, simultaneously press
handle upward and pull out.
As of 01.09.01: Open cover and unscrew screws.
Installation: only up to 31.8.01 and only with
3rd row of seats, Code 847:
Prepare headliner for installing handlesAR68.30-P-
4300-01GH
Fabricate template for
installing handles in headliner WF58.50-P-
6830-02GH
7.1Remove rear dome lamp As of 01.09.01: Open plastic cover, then
unscrew screws
8Disconnect connectors from
dome lamps in rear
9.1Remove coat hanger hook (3)
in roof frame Up to 31.08.01: Open covers of coat hooks,
press both clips together and press coat hooks
upward, simultaneously pull out coat hooks.
10Remove cover for mounting
points of cargo net (4)Up to 31.08.01: open cover and remove screws.
As of 01.09.01: unclip covers at sides
11
Remove mount (5) on roof
frame for mounting third seat
row Open covers for screws and unscrew both
screws. Press clips together, simultaneously press
mount upward and pull out.
12.1Remove shock absorber (12) Only from 01.09.99 to 31.08.01
13Clip in rear interior lamp
(E15/3) AR82.20-P-
0113GH
14
Remove sun visors with
illuminated mirror (E14/1 on
left and E14/2 right)
AR68.60-P-
5480GH
15Remove paneling on B-pillar AR68.30-P-
4700GH
16Remove rear roof frame
paneling AR68.30-P-
4470GH
17Remove paneling on C-pillar AR68.30-P-
4490GH
18Remove rubber door seals
19.1
Pull off edge guard on
headliner in sliding / pop-up
roof cutout (6) Only with electric glass sliding/tilting roof, Code
414a.
Pull plastic clip (7) out of
2001 Mercedes-Benz ML320
1998-2005 ACCESSORIES & BODY, CAB Interior Equipment - 163 Chassis
me
Saturday, October 02, 2010 3:35:22 PMPage 65 © 2006 Mitchell Repair Information Company, LLC.
Page 3782 of 4133

AZ91.20-P-0001A
Retrofitting anchor rings for child seat restraint attachments
14.11.00
MODEL
163.113 /136 /154 /172 /174
P91.20-2039-06
2
Anchor mounting plate
3
Long spacer
4
Short spacer
5
Trim plate
6
Anchor ring
7
Long bolt
8
Short bolt
9
Trim cover
P91.20-2040-01
1
Template
12
Bolt location for
mounting plate
13
Rivet locations for
mounting plate
Hole in carpet,
Ø=57 mm
10
Center hole for
anchor ring, Ø=9.5
mm
11
Hole for rivet, Ø=4
mm
P91.20-2038-01
Removing
1
Remove compact spare tire
See Owner's Manual.
2
Fold 3rd row seats to storage position
Only with code (847). See Owner's Manual.
3
Remove footwell covers
See Owner's Manual.
4
Remove cargo anchor rings
Modifying
5
Place template (1) on top of load
compartment floor covering and secure with
cargo anchor bolts (arrows)
Turn template over for opposite side.
Template
*163589066300
6
Mark floor covering through center of bolt
location (12) for anchor mounting plate (2)
Only for those positions at which anchor
rings will be installed.
7
Remove template (1)
8
Remove load compartment floor covering
f
AR68.20-P-4810GH
9
Place floor covering faceup on suitable surface
10
Using hole saw, create Ø=57 mm hole for
anchor ring assembly
Only for those positions at which anchor
rings will be installed. Secure floor covering
appropriately to ensure hole is cut cleanly.
Use mark as a guide for center of hole.
11
Lower rear axle carrier
Only Model 163.174 for installation of 2nd
row center anchor ring.
f
AR35.10-P-0020-01GH
12
Place template (1) on floor pan and secure
with cargo anchor bolts
Copyright DaimlerChrysler AG 14.06.2006 CD-Ausgabe G/10/04 . This WIS print-out will not be recorde
d by Modification services.
Page 1
Page 3789 of 4133

AR91.29-P-0008GH
Remove/install seat adjustment control module
23.6.99
MODEL
163.113 /128,
163.136 /154 as of 1.9.99,
163.157,
163.172 as of 1.9.99,
163.175
with CODE (241) Memory for electrically adjustable left front seat
with CODE (242a) Memory for electrically adjustable right front seat
MODEL
163.174
P91.29-2108-06
1
Coupling for left front seat
adjustment switch or right front seat
adjustment switch
2
Coupling for interior wiring harness
3
Coupling for height adjustment
motor for rear front seat cushion
4
Coupling for horizontal adjustment
motor for front seat
5
Coupling for height adjustment
motor for front front seat cushion
6
Coupling for electrical line for seat
belt buckle of front seat
P91.29-2108-06
7
Coupling for front seat backrest
angle motor
8
Coupling for automatic child seat
recognition
9
Coupling for heated seats
10
Bracket
11
Retaining lugs
N32/1
Left front seat adjustment control
module with memory
N32/2
Right front seat adjustment control
module with memory
Remove/Install
1
Move front seat forwards and adjust rear front
seat cushion upwards
2
Disconnect connector from coupling for left
front seat adjustment switch or right front seat
adjustment switch (1) and from the coupling
for interior wiring harness (2) on the left front
seat adjustment control module with memory
(N32/1) or right front seat adjustment control
module with memory (N32/2)
Copyright DaimlerChrysler AG 14.06.2006 CD-Ausgabe G/10/04 . This WIS print-out will not be recorde
d by Modification services.
Page 1
Page 3792 of 4133

AR91.10-P-1060GH
Remove and install front seat backrest
5.3.97
MODEL
163.113 /136 /154 /157 /172
with CODE (221b) Electrically adjustable driver and passenger seat
with CODE (241) Memory for electrically adjustable left front seat
with CODE (242a) Memory for electrically adjustable right front seat
MODEL
163.128 /175
with CODE (241) Memory for electrically adjustable left front seat
with CODE (242a) Memory for electrically adjustable right front seat
MODEL
163.174
P91.10-0550-06
Shown on front seat without memory
switch for left electrically adjustable front
seat, code 241/memory switch for right
electrically adjustable front seat, code 242a
1
Front seat backrest
2
Screws
P91.10-2149-06
Shown on front seat with memory switch
for left electrically adjustable front seat,
code 241/memory switch for right
electrically adjustable front seat, code 242a
1
Front seat backrest
2
Screws
3
Heated seats connector
4
Connector for front seat backrest
incline motor
N32/1
Left front seat adjustment control
module with memory
N32/2
Right front seat adjustment control
module with memory
Remove/install
1
Remove front seat
AR91.10-P-1000GH
2
Remove paneling on front seat frame
AR91.10-P-1200GH
Copyright DaimlerChrysler AG 09.05.2006 CD-Ausgabe G/10/04 . This WIS print-out will not be recorde
d by Modification services.
Page 1
Page 3793 of 4133

3.1
Disconnect heated seats connector (3) and
connector for front seat backrest incline motor
(4) from left front seat adjustment control
module with memory (N32/1) or right front
seat adjustment control module with memory
(N32/2)
Only for memory switch for left electrically
adjustable front seat, code 241 or memory
switch for right electrically adjustable front
seat, code 242a.
Installation:
Ensure that the electrical
lines are routed properly!
4
Unscrew screws (2) from backrest fittings
*BA91.10-P-1003-01B
Torx bit set
*000589011000
5
Remove front seat backrest (1)
6
Install in the reverse order
Front seats
Number
Designation
Model
Series 163
BA91.10-P-1003-01B
Bolt, front seat backrest to seat frame
Nm
30 (
F
3)
Torx bit set
000 589 01 10 00
Copyright DaimlerChrysler AG 09.05.2006 CD-Ausgabe G/10/04 . This WIS print-out will not be recorde
d by Modification services.
Page 2
Page 3801 of 4133

AR91.29-P-1420GH
Removing and installing front power seat motor group (seat cushion)
7.3.97
MODEL
163 with CODE (221b) Electrically adjustable left and right front seats
P91.29-0333-06
1
Seat cushions
2
Screws
3
Screws
4
Front bearing plate
5
Rear bearing plate
6
Snap rings
7
Bearing pin
8
Screws
M25m2
Rear up/down motor
M25m3
Front up/down motor
Operation no. of operation texts or of standard texts and flat rates
Division
Operation
no.
Operation text
P
916008
REMOVING DRIVE MOTOR FOR DRIVER'S SEAT LONGITUDINAL ADJUSTMENT (SEAT REMOVED)
P
916013
REMOVING DRIVE MOTOR FOR DRIVER'S SEAT HEIGHT ADJUSTMENT (SEAT REMOVED)
P
916058
REMOVING DRIVE MOTOR FOR PASSENGER SEAT LONGITUDINAL ADJUSTMENT (SEAT REMOVED)
P
916063
REMOVING DRIVE MOTOR FOR PASSENGER SEAT HEIGHT ADJUSTMENT (SEAT REMOVED)
Removal, installation
1
Remove front seat backrest
AR91.10-P-1060GH
2
Unscrew screws (2) on seat frame
Torx bit set
*000589011000
3
Remove seat cushion (1) from seat
adjustment mechanism
4
Disconnect connectors from adjustment
motors (M25m2, M25m3)
5
Unscew screws (3) on bearigng plates (4, 5)
Torx bit set
*000589011000
6
Remove bearing plates (4, 5)
7
Remove snap rings (6) on bearing pins (7),
press bearing pins out of fork heads
8
Unscrew screws (8) on shaft beerings
Torx bit set
*000589011000
9
Remove adjustment motors (M25m2, M25m3)
10
Install in opposite order
11
Check for proper function
See Owner's Manual
Copyright DaimlerChrysler AG 14.06.2006 CD-Ausgabe G/10/04 . This WIS print-out will not be recorde
d by Modification services.
Page 1
Page 3803 of 4133

AR91.10-P-1000GH
Remove/install front seat
3.3.97
MODEL
163.113 /128 /136 /154 /157 /172 /174 /175 with CODE (221b) Electrically adjustable driver and passe
nger seat
P91.10-0547-06
1
Torx socket screws
2
Cover cap
3
Front seat
4
Torx socket bolt
5
Belt end fitting
6
Connector
X55/3
Left front seat contacting strip
X55/4
Right front seat connector block
Remove/install
1
Remove headrest
See owner's manual
2
Remove cover cap (2) from seat rail paneling
Set the seat height adjustment such that
the screw on the belt end fitting is visible.
3
Unscrew internal Torx drive bolt (4) from the
belt end fitting (5)
*BA91.40-P-1001-01D
Torx bit set
*000589011000
4
Remove belt end fitting (5)
5
Unscrew internal Torx drive bolts (1) from the
front seat console
Installation:
Replace bolts.
*BA91.10-P-1001-01B
Torx bit set
*000589011000
6
Move the front seat (3) forward
7
Unscrew internal Torx drive bolts (1) from the
back seat console
Installation:
Replace bolts.
*BA91.10-P-1001-01B
Torx bit set
*000589011000
8
Detach connector (6) from the front left seat
connector block (X55/3) and the front right
seat connector block (X55/4)
9
Remove front seat (3)
10
Install in the reverse order
Front seats
Number
Designation
Model
Series 163
BA91.10-P-1001-01BBolt of seating mounting bracket to vehicle
floor
Nm
40
Safety belts/emergency tensioning retractors
Copyright DaimlerChrysler AG 09.05.2006 CD-Ausgabe G/10/04 . This WIS print-out will not be recorde
d by Modification services.
Page 1
Page 3810 of 4133

13
Unhook vertical adjustment cable (6) from
vertical adjustment handle (5)
14
Guide vertical adjustment cable (6) through
grommet (12)
Installation:
If a new rear seat cushion
frame is used, the grommet must be installed
in the new rear seat cushion frame.
15
Remove handle locking device (13) from rear
seat cushion frame
16
Unhook horizontal adjustment cable (8) at clip
(10) and at front of rear seat cushion frame
Risk of breakage!
17
Unscrew bolts from horizontal adjustment
handle
18
Detach horizontal adjustment cable (8) from
horizontal adjustment handle
Risk of breakage!
Pull out horizontal adjustment handle.
19
Remove rear seat seat belt buckle
40% rear seat without side airbag in left
and right rear, code 293.
AR91.40-P-1516GH
40% rear seat with side airbag in left and
right rear, code 293.
AR91.40-P-1516GK
60% rear seat outer seat.
AR91.40-P-1516GJ
20
Unscrew mounting screws for rear seat
cushion frame (2)
Installation:
Replace damaged shims at
the diagonal supports of the rear seat.
*BA91.12-P-1010-03A
21
Remove rear seat cushion frame (3)
Remove rear seat cushion frame through
tailgate
22
Install in the reverse order
Rear seats
Number
Designation
Model
163 as of
09/99
BA91.12-P-1009-03A
Bolt for clamping band to seat frame
Nm
45
BA91.12-P-1010-03A
Screw for bracket to seat frame
Nm
23
Torx bit set
000 589 01 10 00
Copyright DaimlerChrysler AG 14.06.2006 CD-Ausgabe G/10/04 . This WIS print-out will not be recorde
d by Modification services.
Page 2
Page 3811 of 4133

AR91.12-P-1730GI
Remove and install locking mechanism for folding rear seat backrest
5.5.99
MODELS
163.136 /154 /172 as of 1.9.99,
163.113 /128 /157 /174 /175
P91.12-2133-06
1
Rear backrest release cable
2
Adjuster
3
Screws
4
Bolts
5
Rear backrest fitting
Remove/Install
1
Remove side covers at rear backrest
fitting (5)
2
Detach rear seat backrest release cable (1) at
adjuster (2)
Mark adjustment position on the thread.
Turn the adjuster counterclockwise until the
rear backrest release cable can be unhooked.
3
Unscrew bolts (3) from rear backrest fitting
With 60% rear seat:
Unscrew bolts (3) at
the same time in order to prevent the rear
backrest fitting from tipping.
*BA91.12-P-1006-03A
4
Unscrew bolts (4) from rear backrest fitting
*BA91.12-P-1007-03A
Torx bit set
*000589011000
5
Remove backrest fitting (5)
6
Install in the reverse order
Installation:
check unlocking function of
folding rear backrest.
Rear seats
Number
Designation
Model
163 as of
09/99
BA91.12-P-1006-03A
Bolt from backrest fitting to backrest
Nm
30
BA91.12-P-1007-03A
Screw for backrest fitting on seat frame
Nm
30
Copyright DaimlerChrysler AG 14.06.2006 CD-Ausgabe G/10/04 . This WIS print-out will not be recorde
d by Modification services.
Page 1