MERCEDES-BENZ ML430 1997 Complete Repair Manual
Manufacturer: MERCEDES-BENZ, Model Year: 1997, Model line: ML430, Model: MERCEDES-BENZ ML430 1997Pages: 4133, PDF Size: 88.89 MB
Page 651 of 4133
184
Driving instructions
Te ch n ica l
data
Instruments
and controls Operation
Driving Instrument
cluster display Practical hints Car care Index
Checklist before off-road driving •Tires: Check the tread depth and maintain specified
tire pressure (see tire pressure label inside the fuel
filler flap). Check tires for possible damage and
remove foreign objects. The valve caps must be
mounted.
•Rims: Dented or bent rims can cause tire pressure
loss and damage the tire beads. For this reason
change rims before driving off-road.
• Vehicle tool kit: Check if the vehicle jack is
functional. In all cases take the vehicle tool kit, a
strong tow rope, a shovel and a small plank (to put
under the vehicle jack on sandy soil) with you. Driving in steep terrain
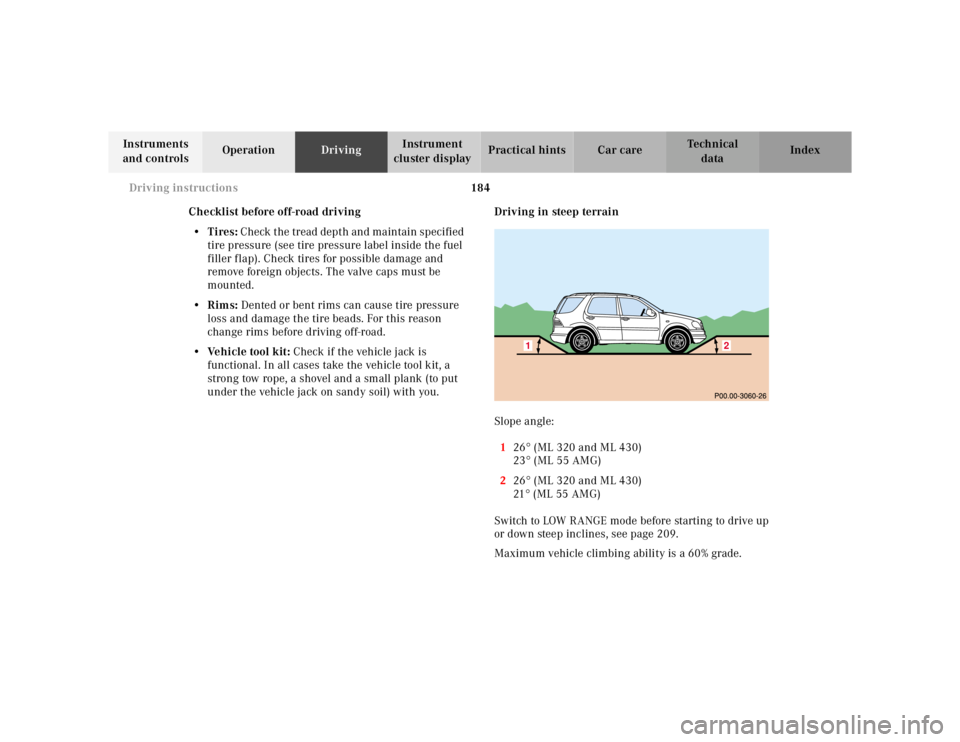
Slope angle:
1 26° (ML 320 and ML 430)
23 ° (ML 55 AMG)
2 26° (ML 320 and ML 430)
21 ° (ML 55 AMG)
Switch to LOW RANGE mode before starting to drive up
or down steep inclines, see page 209.
Maximum vehicle climbing ability is a 60% grade.
1
2
Page 652 of 4133
185
Driving instructions
Te ch n ica l
data
Instruments
and controls Operation
Driving Instrument
cluster display Practical hints Car care Index
Driving on embankments, slopes and other steep
inclines should only be done straight up or downhill, i.e.
in the line of gravity.
Do not drive along the side of a slope (danger of vehicle
rollover). If in doing so, the vehicle begins to show a
tendency to roll, immediately steer into a line of gravity
(straight up or downhill).
To help avoid the vehicle rolling over, never turn it
around on steep inclines. If the vehicle cannot complete
the attempted climb, back it down in reverse gear.
Utilize the engine’s braking power when descending a
slope, observe the engine speed (do not overrev the
engine). Apply the service brake as needed.
Check the brakes after a lengthy downgrade drive.
Notes:
Avoid excessive engine speeds – drive with moderate
engine speeds (max. 3000 RPM).
Select gear range “2” or “1” on the automatic
transmission, see page 165. Traction in steep terrain:
Be easy on the accelerator and watch for continuous
wheel traction when driving in steep terrain.
The 4-ETS+ helps greatly when starting out on a steep
incline. The front wheels have then the tendency to slip
due to the weight reduction over the front axle. The ETS
recognizes the situation and limits the torque for the
front wheels by braking them. Simultaneously the
torque for the rear wheels is increased.
See page 203 for four wheel electronic traction system
(4-ETS+).
Driving across a hilltop:
To prevent the vehicle from speeding up too much after
climbing a hill, decelerate just ahead of a hilltop (do not
select gear range “N”). Use the momentum of the
vehicle to drive across the hilltop. Driving in this
manner prevents the vehicle from jumping across the
hilltop and thus loosing its forward momentum.
Page 653 of 4133
186
Driving instructions
Te ch n ica l
data
Instruments
and controls Operation
Driving Instrument
cluster display Practical hints Car care Index
Driving downhill:
Select gear range “1” on the automatic transmission,
see page 165.
Drive downhill observing the same rules as driving
uphill.
Driving on embankments, slopes and other steep
inclines should only be done straight up or downhill, i.e.
in the line of gravity.
Do not drive along the side of a slope (danger of vehicle
rollover). If in doing so, the vehicle begins to show a
tendency to roll, immediately steer into a line of gravity
(straight up or downhill). Utilize the engine’s braking power when descending a
slope, observe the engine speed (do not overrev the
engine). Apply the service brake as needed.
The special low range ABS setting allows for precise and
brief (cyclical) blocking of the front wheels, permitting
them to dig into loose ground. Remember that the front
wheels when stopped, slide across a surface, thus loose
their ability to steer the vehicle.
Check the brakes after a lengthy downgrade drive.
Important!
Only apply the service brake if the vehicle travels
straight downhill, i.e. in the line of gravity.
Page 654 of 4133
187
Driving instructions
Te ch n ica l
data
Instruments
and controls Operation
Driving Instrument
cluster display Practical hints Car care Index
Driving through water
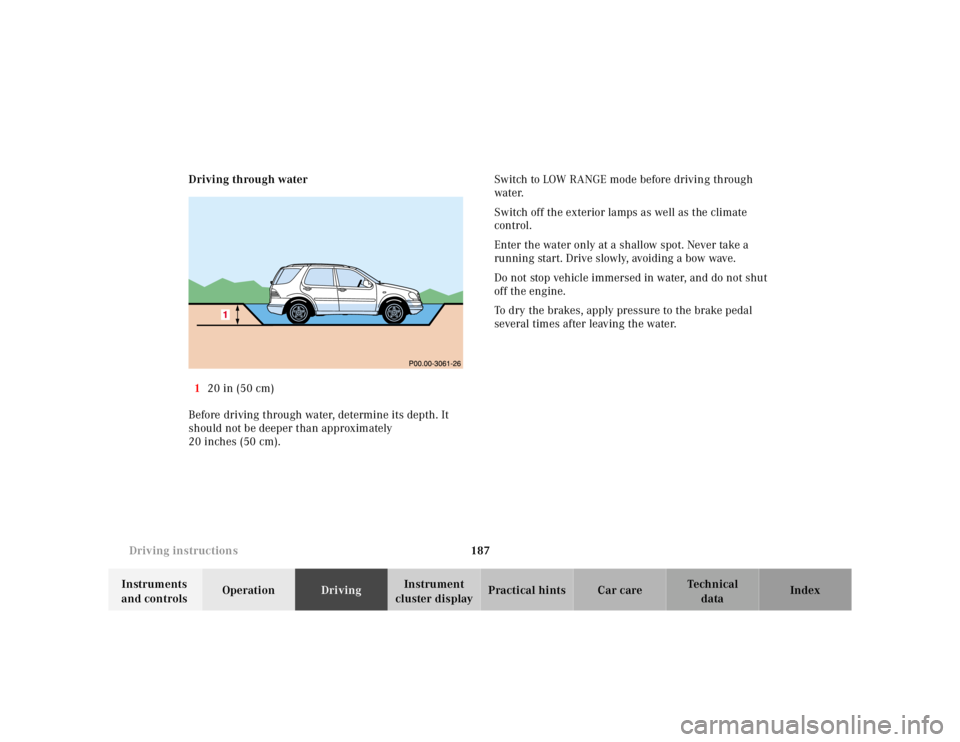
1 20 in (50 cm)
Before driving through water, determine its depth. It
should not be deeper than approximately
20 inches (50 cm). Switch to LOW RANGE mode before driving through
water.
Switch off the exterior lamps as well as the climate
control.
Enter the water only at a shallow spot. Never take a
running start. Drive slowly, avoiding a bow wave.
Do not stop vehicle immersed in water, and do not shut
off the engine.
To dry the brakes, apply pressure to the brake pedal
several times after leaving the water.
Page 655 of 4133
188
Driving instructions
Te ch n ica l
data
Instruments
and controls Operation
Driving Instrument
cluster display Practical hints Car care Index
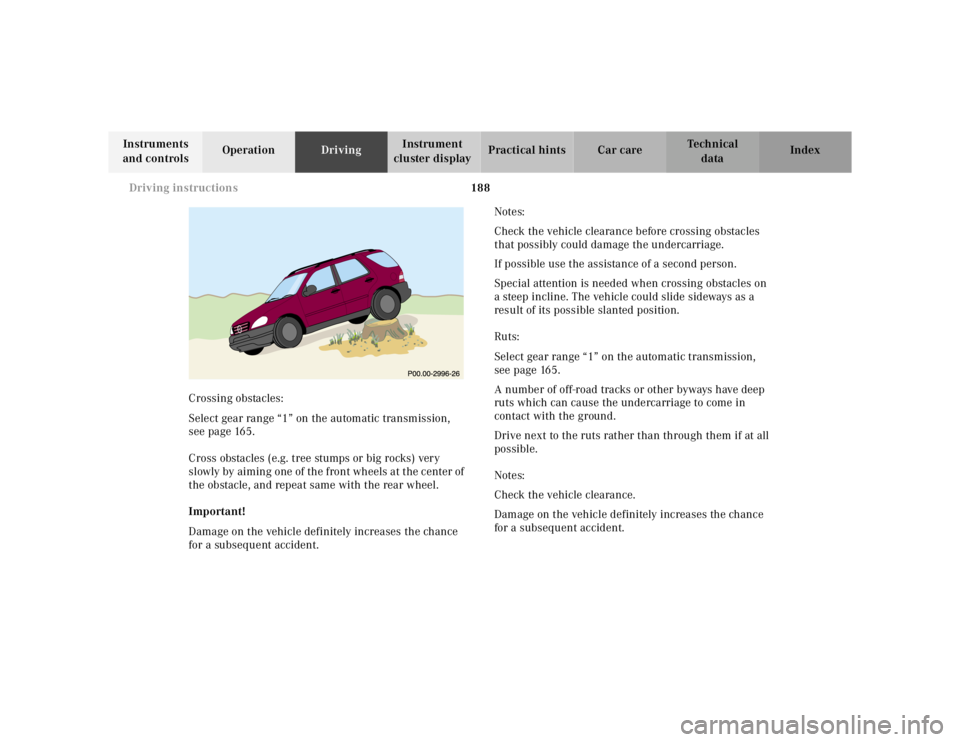
Crossing obstacles:
Select gear range “1” on the automatic transmission,
see page 165.
Cross obstacles (e.g. tree stumps or big rocks) very
slowly by aiming one of the front wheels at the center of
the obstacle, and repeat same with the rear wheel.
Important!
Damage on the vehicle definitely increases the chance
for a subsequent accident. Notes:
Check the vehicle clearance before crossing obstacles
that possibly could damage the undercarriage.
If possible use the assistance of a second person.
Special attention is needed when crossing obstacles on
a steep incline. The vehicle could slide sideways as a
result of its possible slanted position.
Ruts:
Select gear range “1” on the automatic transmission,
see page 165.
A number of off-road tracks or other byways have deep
ruts which can cause the undercarriage to come in
contact with the ground.
Drive next to the ruts rather than through them if at all
possible.
Notes:
Check the vehicle clearance.
Damage on the vehicle definitely increases the chance
for a subsequent accident.
Page 656 of 4133
189
Driving instructions
Te ch n ica l
data
Instruments
and controls Operation
Driving Instrument
cluster display Practical hints Car care Index
Returning from off-road driving
Off-road driving increases strain on the vehicle.
We recommend that you inspect the vehicle for possible
damage after each off-road trip. Recognizing any
damage and a subsequent timely repair reduces the
chance of a possible breakdown or accident later on.
Proceed as follows:
• Switch off the LOW RANGE mode, see page 209.
• Remove excessive dirt from tires, wheels, wheel
housings, and underbody. For instance, after driving
in mud, clean the radiator, chassis, engine, brakes,
and wheels from extreme dirt, using a strong jet of
water.
• Inspect frame, oil pan, brake hoses, etc., as well as
vehicle underbody for possible damage.
• Check tires for possible damage, clean all exterior
lamps, and conduct a brake test. •
Check for brush or branches caught in the
undercarriage. They could increase the possibility of
a fire, as well as cut fuel and / or brake lines,
puncture rubber bellows of the axles or drive shafts.
Wa r n i n g !
If you feel a sudden significant vibration or ride
disturbance, or you suspect that possible damage to
your vehicle has occurred, you should turn on the
hazard warning flashers, carefully slow down, and
drive with caution to an area which is a safe
distance from the roadway.Inspect the tires and under the vehicle for possible
damage. If the vehicle or tires appear unsafe, have
it towed to the nearest Mercedes-Benz Light Truck
Center or tire dealer for repairs.
Page 657 of 4133
190
Driving instructions
Te ch n ica l
data
Instruments
and controls Operation
Driving Instrument
cluster display Practical hints Car care Index
Trailer towing Trailer Hitches
Only install a trailer hitch receiver approved for your
vehicle. For information on availability and installation,
please see your authorized Mercedes-Benz Light Truck
Center.
The bumpers on your vehicle are not designed for use
with clamp-type hitches. Do not attach rental hitches or
other bumper-type hitches to them.
To reduce the possibility of damage, remove the hitch
ball adaptor from the receiver when not in use.
Wa r n i n g !
Failure to use proper equipment and driving
technique can result in a loss of vehicle control
when towing a trailer.Improper towing or failure to follow the
instructions contained in this guide can result in
serious injury. Follow the guidelines below
carefully to assure safe trailer operation.Ask your authorized Mercedes-Benz Light Truck
Center should you require an explanation of
information contained in this guide.
Page 658 of 4133
191
Driving instructions
Te ch n ica l
data
Instruments
and controls Operation
Driving Instrument
cluster display Practical hints Car care Index
Electrical connections
The vehicle is prewired to accept the seven-wire harness
included in the Mercedes-Benz approved trailer hitch
receiver kit. An additional four-pole conversion plug is
included in the Mercedes-Benz supplied trailer hitch
receiver kit. For further information, please see your
authorized Mercedes-Benz Light Truck Center.
In order to prevent possible damage to the vehicle’s
electrical system by incorrectly installing the trailer
wiring plug, we recommend having the harness
connected at an authorized Mercedes-Benz Light Truck
Center. Vehicle and trailer weights and ratings
Gross Vehicle Weight Rating (GVWR) is the maximum
permissible vehicle weight: 6005 lbs. (2724 kg)
Gross Vehicle Weight (GVW): comprises weight of
vehicle including fuel, tools, spare wheel, installed
accessories, passengers, cargo and trailer tongue. It
must never exceed the GVWR.
Gross Axle Weight Rating (GAWR) is the maximum
permissible axle weight:
Gross Trailer Weight (GTW) is the maximum
permissible trailer weight to be towed:
5000 lbs. (2260 kg)
Trailer Tongue Weight Rating (TWR) is the maximum
permissible weight of the trailer tongue:
[500 lbs. (225 kg) limit for MB approved hitch receiver]
front
rear 2755 lbs.
3527 lbs. (1250 kg)
(1600 kg)
Page 659 of 4133
192
Driving instructions
Te ch n ica l
data
Instruments
and controls Operation
Driving Instrument
cluster display Practical hints Car care Index
Loading a trailer
When loading a trailer, you should observe that neither
the permissible GTW, nor the GVWR are exceeded.
Maximum permissible values are listed on the safety
compliance certification labels for the vehicle and for
the trailer to be towed. The lowest value listed must be
selected when determining how the vehicle and trailer
are loaded.
We recommend loading the trailer in such a manner
that it has a tongue weight (TW) between 10% and 15%
of the GTW.
The tongue weight at the hitch ball must be added to the
GVW to prevent exceeding your Mercedes-Benz tow
vehicle’s rear GAWR. Checking weights of vehicle and trailer
To assure that the tow vehicle and trailer are in
compliance with the maximum permissible weight
limits, and to know the actual weights, have the loaded
rig (tow vehicle including driver, passengers and cargo,
trailer fully loaded) weighed on a commercial scale.
Check the vehicle’s front and rear Gross Axle Weight
(GAW), the GTW and TW. The values as measured must
not be exceeded, according to the weight listed under
“Vehicle and trailer weight and ratings”.
Page 660 of 4133
193
Driving instructions
Te ch n ica l
data
Instruments
and controls Operation
Driving Instrument
cluster display Practical hints Car care Index
Attaching a trailer
Please observe maximum permitted trailer dimensions
(width and length).
Most states and all Canadian provinces require safety
chains between your tow vehicle and the trailer. The
chains should be crisscrossed under the trailer tongue.
They must be attached to the hitch receiver, and not to
the vehicle’s bumper or axle. Be sure to leave enough
slack in the chains to permit turning corners.
Most states and all Canadian provinces require a
separate brake system at various trailer weights. Caution!
Do not connect a trailer brake system (if trailer is so
equipped) directly to the vehicle’s hydraulic brake
system, as your vehicle is equipped with antilock
brakes. If you do, neither the vehicle’s brakes nor the
trailer’s brakes will function properly.
The provided vehicle electrical wiring harness for trailer
towing has a brake signal wire (color orange) for
hook-up to a brake controller.
Most states and all Canadian provinces require a
break-away switch on trailers with a separate brake
system. The switch activates the trailer brakes in the
possible event that the trailer might separate from the
tow vehicle.
You should consider using a trailer sway control system.
For further information see your authorized
Mercedes-Benz Light Truck Center.