brake fluid MERCEDES-BENZ ML55AMG 2002 W163 Owner's Manual
[x] Cancel search | Manufacturer: MERCEDES-BENZ, Model Year: 2002, Model line: ML55AMG, Model: MERCEDES-BENZ ML55AMG 2002 W163Pages: 342, PDF Size: 13.75 MB
Page 7 of 342

4 Contents
Instrument cluster displayMalfunction and
indicator lamps in
the instrument cluster .............240
On-board diagnostic system –
Check engine malfunction
indicator lamp .............................240
Brake warning lamp .................. 241
Supplemental restraint system
(SRS) indicator lamp ..................242
Fuel reserve warning .................242Electronic stability program
(ESP) / Electronic traction
system (ETS) – warning lamp .. 243
BAS/ESP malfunction
indicator lamp ............................ 243
4-ETS malfunction
indicator lamp ............................ 243
LOW RANGE
indicator lamp ............................ 243
ABS malfunction
indicator lamp ............................ 244
Adjustable steering wheel –
indicator lamp ............................ 244
AIRBAG OFF
indicator lamp ............................ 244Seat belt warning lamp .............245
Charge indicator lamp ...............245
Low engine oil level
warning lamp ..............................246
Low engine coolant level
warning ........................................246
Low windshield and
headlamp washer system fluid
level warning lamp ....................247
Brake pad wear i
ndicator lamp ..............................247
FSS indicator ...............................247
Page 9 of 342

6 Contents
Vehicle careCleaning and care of the vehicle .298
Power washer ..............................299
Tar stains .....................................299
Paintwork, painted body
components .................................299
Engine cleaning ..........................300
Vehicle washing .........................300
Ornamental moldings ................300
Headlamps, taillamps, turn signal
lenses ...........................................300
Cleaning the parktronic system
sensors ......................................... 301
Window cleaning ........................ 301
Wiper blades ............................... 301
Light alloy wheels ......................302
Instrument cluster .....................302
Steering wheel and gear selector
lever ..............................................302
Cup holder ...................................302
Seat belts .....................................302
Headliner .....................................302
Upholstery ...................................303Hard plastic trim items ............. 303
Plastic and rubber parts ........... 303
Technical dataSpare parts service ....................... 306
Warranty coverage ........................ 306
Identification labels ...................... 307
Layout of poly-V-belt drive ........... 308
Technical data ................................ 309
Fuels, coolants, lubricants etc. –
capacities .................................... 314
Engine oils ....................................... 316
Engine oil additives ....................... 316
Air conditioner refrigerant ........... 316
Brake fluid ....................................... 316
Premium unleaded gasoline ......... 317
Fuel requirements ......................... 317
Gasoline additives .......................... 318
Coolants ........................................... 318
Consumer information ................. 320
IndexIndex ................................................322
Page 87 of 342
84 Instrument cluster
Te ch n i c a l
data Instruments
and controlsOperationDrivingInstrument
cluster displayPractical hints Car care Index
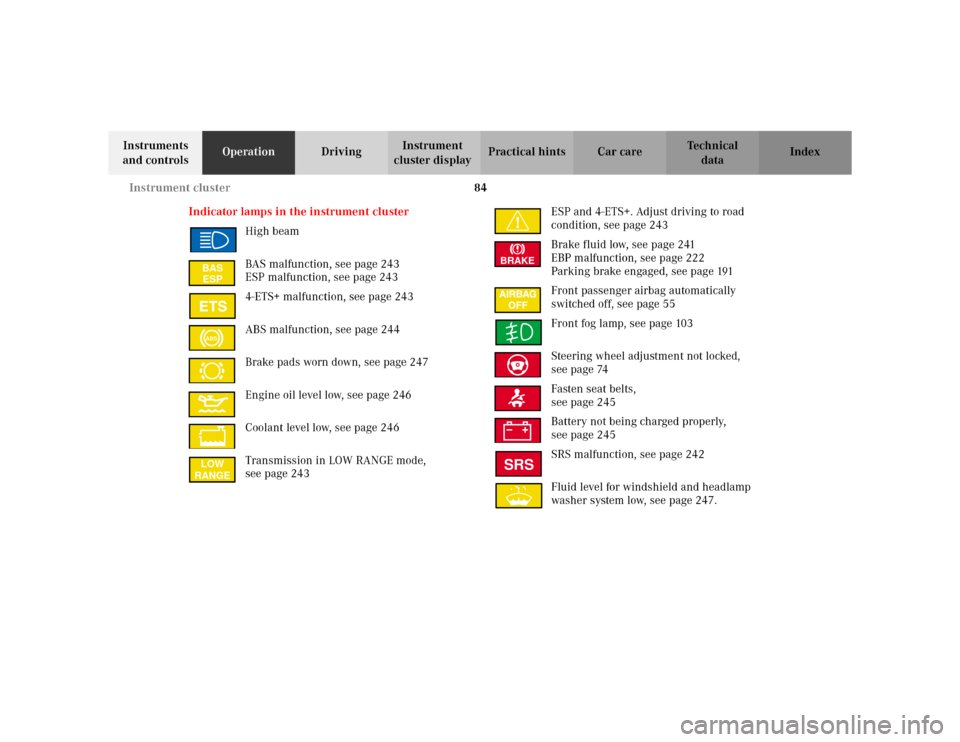
Indicator lamps in the instrument cluster
High beam
BAS malfunction, see page 243
ESP malfunction, see page 243
4-ETS+ malfunction, see page 243
ABS malfunction, see page 244
Brake pads worn down, see page 247
Engine oil level low, see page 246
Coolant level low, see page 246
Transmission in LOW RANGE mode,
see page 243ESP and 4-ETS+. Adjust driving to road
condition, see page 243
Brake fluid low, see page 241
EBP malfunction, see page 222
Parking brake engaged, see page 191
Front passenger airbag automatically
switched off, see page 55
Front fog lamp, see page 103
Steering wheel adjustment not locked,
see page 74
Fasten seat belts,
see page 245
Battery not being charged properly,
see page 245
SRS malfunction, see page 242
Fluid level for windshield and headlamp
washer system low, see page 247.
BAS
ESPABSLOW
RANGE
BRAKESRS
Page 196 of 342
193 Driving instructions
Te ch n i c a l
data Instruments
and controlsOperationDrivingInstrument
cluster displayPractical hints Car care Index Power assistance
BrakesExcessive use of road salt and other snow melting
chemicals spread on roads during the winter months
may cause a build up of moisture or residue to form on
the braking components. This build up or residue could
cause light corrosion of the braking components if the
vehicle is parked with the brakes cold. Apply steady and
even braking pressure when stopping the vehicle to
warm up and dry the brake components.
Important!
Please pay attention to the function of the brake assist
system (BAS), see page 217.
The condition of the parking brake system is checked
each time the vehicle is in the shop for the required
maintenance service.
If the parking brake is released and the brake warning
lamp in the instrument cluster stays on and there is no
audible warning (EBP), the brake fluid level in the
reservoir is too low.
Brake pad wear or a leak in the system may be the
reason for low brake fluid in the reservoir.
Have the brake system inspected at an authorized
Mercedes-Benz Light Truck Center immediately.
Wa r n i n g !
When the engine is not running, the brake and
steering systems are without power assistance.
Under these circumstances, a much greater effort is
necessary to stop or steer the vehicle.Wa r n i n g !
After driving in heavy rain for some time without
applying the brakes or through water deep enough
to wet brake components or salty road conditions,
the first braking action may be somewhat reduced
and increased pedal pressure may be necessary to
obtain expected braking effect. Be sure to maintain
a safe distance from vehicles in front.Resting your foot on the brake pedal will cause
excessive and premature wear of the brake pads.It can also result in the brakes overheating thereby
significantly reducing their effectiveness. It may
not be possible to stop the vehicle in sufficient time
to avoid an accident.
Page 197 of 342
194 Driving instructions
Te ch n i c a l
data Instruments
and controlsOperationDrivingInstrument
cluster displayPractical hints Car care Index
All checks and service work on the brake system should
be carried out by an authorized Mercedes-Benz Light
Truck Center.
Install only brake pads and brake fluid recommended by
Mercedes-Benz.Caution!
When driving down long and steep grades, relieve the
load on the brakes by shifting into a lower gear to use
the engine’s braking power. This helps prevent
overheating of the brakes and reduces brake pad wear.
After hard braking, it is advisable to drive on for some
time, rather than immediately parking, so the air stream
will cool down the brakes faster.
Driving off
Apply the service brakes to test them briefly after
driving off. Perform this procedure only when the road
is clear of other traffic.
Warm up the engine smoothly. Do not place full load on
the engine until the operating temperature has been
reached.
When starting off on a slippery surface, do not allow one
drive wheel to spin for an extended period with the ESP
switched off. Doing so may cause serious damage to the
drive train which is not covered by the Mercedes-Benz
Limited Warranty.
Wa r n i n g !
If other than recommended brake pads are
installed, or other than recommended brake fluid
is used, the braking properties of the vehicle can be
degraded to an extent that safe braking is
substantially impaired. This could result in an
accident.
Page 241 of 342
238 Check regulary and before a long trip
Te ch n i c a l
data Instruments
and controlsOperationDrivingInstrument
cluster displayPractical hints Car care Index
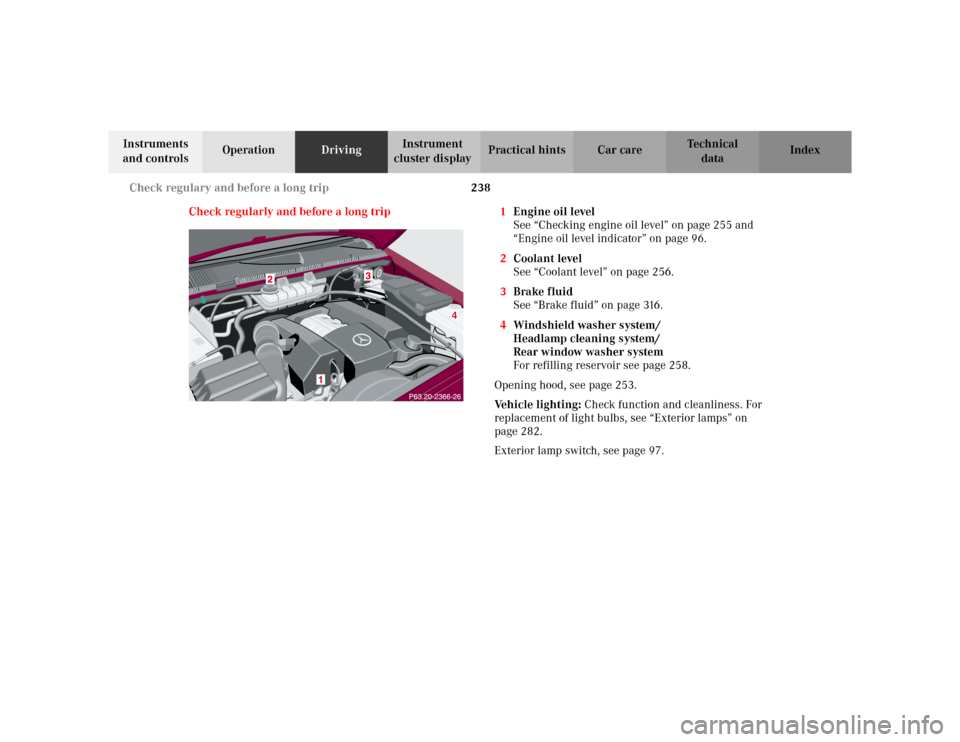
Check regularly and before a long trip 1Engine oil level
See “Checking engine oil level” on page 255 and
“Engine oil level indicator” on page 96.
2Coolant level
See “Coolant level” on page 256.
3Brake fluid
See “Brake fluid” on page 316.
4Windshield washer system/
Headlamp cleaning system/
Rear window washer system
For refilling reservoir see page 258.
Opening hood, see page 253.
Vehicle lighting: Check function and cleanliness. For
replacement of light bulbs, see “Exterior lamps” on
page 282.
Exterior lamp switch, see page 97.
Page 242 of 342
239 Contents - Instrument cluster display
Te ch n i c a l
data Instruments
and controlsOperation DrivingInstrument
cluster displayPractical hints Car care Index
Instrument cluster displayMalfunction and
indicator lamps in
the instrument cluster .............240
On-board diagnostic system –
Check engine malfunction
indicator lamp .............................240
Brake warning lamp .................. 241
Supplemental restraint system
(SRS) indicator lamp ..................242
Fuel reserve warning .................242Electronic stability program
(ESP) / Electronic traction
system (ETS) – warning lamp .. 243
BAS/ESP malfunction
indicator lamp ............................ 243
4-ETS malfunction
indicator lamp ............................ 243
LOW RANGE
indicator lamp ............................ 243
ABS malfunction
indicator lamp ............................ 244
Adjustable steering wheel –
indicator lamp ............................ 244
AIRBAG OFF
indicator lamp ............................ 244Seat belt warning lamp .............245
Charge indicator lamp ...............245
Low engine oil level
warning lamp ..............................246
Low engine coolant level
warning ........................................246
Low windshield and
headlamp washer system fluid
level warning lamp ....................247
Brake pad wear i
ndicator lamp ..............................247
FSS indicator ...............................247
Page 244 of 342
241 Malfunction and indicator lamps
Te ch n i c a l
data Instruments
and controlsOperation DrivingInstrument
cluster displayPractical hints Car care Index Notes:
When running out of fuel, the “CHECK ENGINE”
malfunction indicator lamp comes on and the engine
possibly switches to its limp-home (emergency
operation) mode.
To cancel the limp-home mode, the engine may have to
be started three or four times after refueling. The
malfunction indicator lamp remains illuminated. Have
the system checked at your authorized Mercedes-Benz
Center immediately.
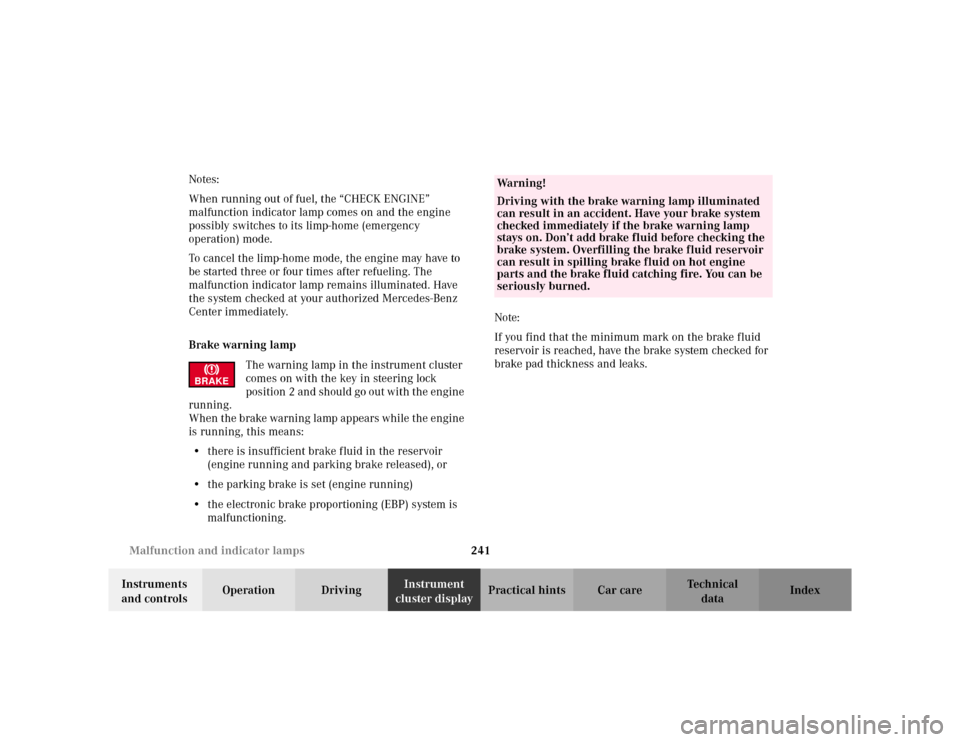
Brake warning lamp
The warning lamp in the instrument cluster
comes on with the key in steering lock
position 2 and should go out with the engine
running.
When the brake warning lamp appears while the engine
is running, this means:
•there is insufficient brake fluid in the reservoir
(engine running and parking brake released), or
•the parking brake is set (engine running)
•the electronic brake proportioning (EBP) system is
malfunctioning.Note:
If you find that the minimum mark on the brake fluid
reservoir is reached, have the brake system checked for
brake pad thickness and leaks.
BRAKE
Wa r n i n g !
Driving with the brake warning lamp illuminated
can result in an accident. Have your brake system
checked immediately if the brake warning lamp
stays on. Don’t add brake fluid before checking the
brake system. Overfilling the brake fluid reservoir
can result in spilling brake fluid on hot engine
parts and the brake fluid catching fire. You can be
seriously burned.
Page 250 of 342
247 Malfunction and indicator lamps
Te ch n i c a l
data Instruments
and controlsOperation DrivingInstrument
cluster displayPractical hints Car care Index Low windshield and headlamp washer system fluid
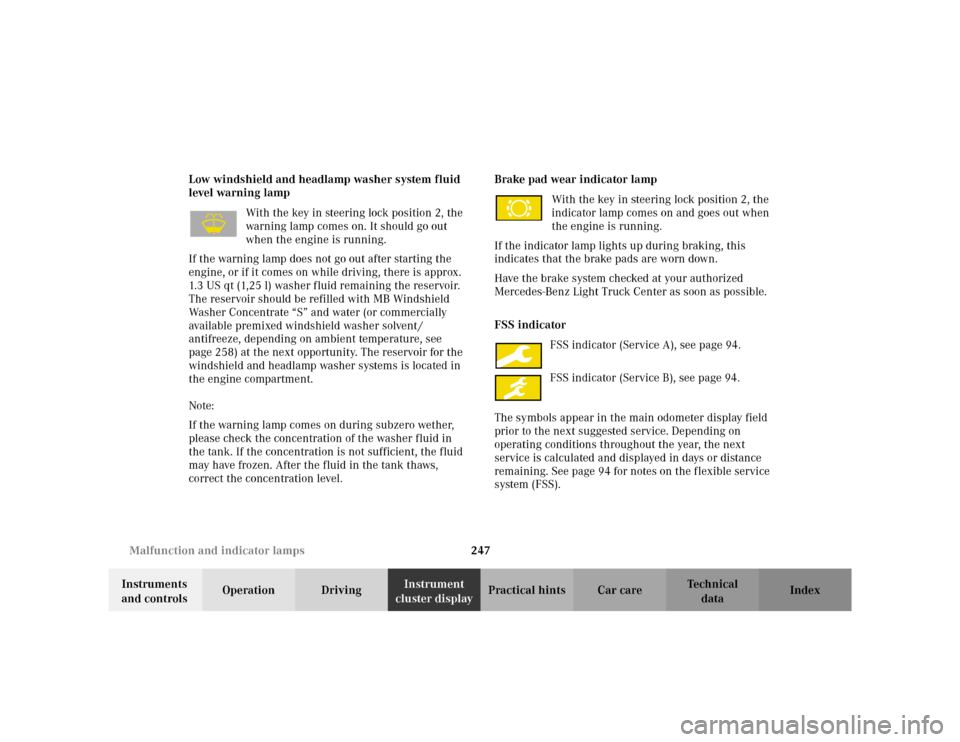
level warning lamp
With the key in steering lock position 2, the
warning lamp comes on. It should go out
when the engine is running.
If the warning lamp does not go out after starting the
engine, or if it comes on while driving, there is approx.
1.3 US qt (1,25 l) washer fluid remaining the reservoir.
The reservoir should be refilled with MB Windshield
Washer Concentrate “S” and water (or commercially
available premixed windshield washer solvent /
antifreeze, depending on ambient temperature, see
page 258) at the next opportunity. The reservoir for the
windshield and headlamp washer systems is located in
the engine compartment.
Note:
If the warning lamp comes on during subzero wether,
please check the concentration of the washer fluid in
the tank. If the concentration is not sufficient, the fluid
may have frozen. After the fluid in the tank thaws,
correct the concentration level. Brake pad wear indicator lamp
With the key in steering lock position 2, the
indicator lamp comes on and goes out when
the engine is running.
If the indicator lamp lights up during braking, this
indicates that the brake pads are worn down.
Have the brake system checked at your authorized
Mercedes-Benz Light Truck Center as soon as possible.
FSS indicator
FSS indicator (Service A), see page 94.
FSS indicator (Service B), see page 94.
The symbols appear in the main odometer display field
prior to the next suggested service. Depending on
operating conditions throughout the year, the next
service is calculated and displayed in days or distance
remaining. See page 94 for notes on the flexible service
system (FSS).
Page 262 of 342
259 Windshield wiper
Te ch n i c a l
data Instruments
and controlsOperation DrivingInstrument
cluster displayPractical hintsCar care Index Windshield and headlamp washer
fluid mixing ratio
For temperatures above freezing:
MB Windshield Washer Concentrate “S” and water
1 part “S” to 100 parts water
(40 ml “S” to 1 gallon water).
For temperature below freezing:
MB Windshield Washer Concentrate “S” and
commercially available premixed windshield washer
solvent / antifreeze
1 part “S” to 100 parts solvent
(40 ml “S” to 1 gallon solvent).Vehicle jack, wheel bolt wrench and screwdriver
Wa r n i n g !
The jack is designed exclusively for jacking up the
vehicle at the jack take-up brackets built into either
side of the vehicle. To help avoid personal injury,
use the jack only to lift the vehicle during a wheel
change. Never get beneath the vehicle while it is
supported by the jack. Keep hands and feet away
from the area under the lifted vehicle. Always
firmly set parking brake and block wheels before
raising vehicle with jack.Do not disengage parking brake while the vehicle is
raised. Be certain that the jack is always vertical
when in use, especially on hills. Always try to use
the jack on level surface. Be sure that the jack arm
end is fully seated in the jack take-up bracket.
Always lower the vehicle onto sufficient capacity
jackstands before working under the vehicle.