audio MERCEDES-BENZ R-Class 2011 W251 Comand Manual
[x] Cancel search | Manufacturer: MERCEDES-BENZ, Model Year: 2011, Model line: R-Class, Model: MERCEDES-BENZ R-Class 2011 W251Pages: 214, PDF Size: 4.69 MB
Page 152 of 214

X
Sel ect Aux us
ing the 9: buttons
and pressthe 9button toconfi rm.
The audioAUX menu appe ars .You will hear
the medium inthe exter nalaudio source if
it is conn ected andswitched toplayb ack. For
operation ofthe exter nalaudio source,
please seethecorrespon dingoperating
instr uctions.
You willfind details onvolume (Ypage 27)
and sound (Ypage 28)settings inthe "Ata
glance" section. G
War
ning!
Ext ernal audio sources mayhave different
volumes, whichcanmean thatsystem
messages suchastraffic announc ementsand
navigation systemannounc ementsare much
louder. Ifnecessary, pleasedeactivate the
system messages oradjust theirvolume
manually. 150
Audio
AUXmodeAudio
Page 155 of 214
There
isarisk ofbeing distract edfrom the
road andtraff iccondit ionsifthis isdone while
the vehicle isin motion . Notes
ondiscs
There maybeplayb ackproblems when
playi ngcopied discs.Therearealarge variety
of discs, DVDauthoring software,writing
software andwriters available.This variety
means thatthere isno guarantee thatthe
system willbeable toplay discs thatyouhave
copied yourself.
! Donot affix stick ersorlabels tothe discs,
as they could peeloffand damage
COMAND .Stic kers cancause thedisc to
bend, which canresult inread errors and
disc recogn itionproblems.
! COMAND isdesigned toaccommo date
discs which comply withtheEN6090 8
standard. Youcantheref oreonly usediscs
with amaximum thickness of1.3 mm.
If you insert thickerdiscs, e.g.those that
cont aindata onboth sides (DVD onone
side andaudio dataonthe other), they
cann otbe eject edand candamage
COMAND .
Use round discswithadiameter of12 cm.
Do not use discs withadiameter of8cm,
even withanadapter. DVD
playback conditions
Video DVDsnot conf orming tothe standards
are commer ciallyavaila ble.
These DVDscan create picture, soundor
other problems duringplayback.
COMAND canplay back video DVDs
produced accordingto the following
standards:
R region code1orregion code0(no reg ion
cod e) i
Ifyo uins ert avid eo DVD with adi ffer ent
reg ionc ode, youwillsee amessage tothis
effect .
R PAL orNTSC TVstandard
You willgenerally findtherelevant details
either onthe DVD itself oron the DVD case.
i COMAND isset toregion code1at the
factor y.This settingcan bechanged atan
authorized Mercedes-B enzCenter. Thiswill
allow youtoplay video DVDswith a
different regioncode,provided thatthey
are produced inaccordanc ewith thePAL
or NTSC standard. Theregion codecanbe
changed amaximum offive times. Function
restrictions
Dependin gon the DVD ,it is possible that
cert ainfunct ionsoractions willbe
temporarily blockedormay notfunct ionatall.
As soon asyou trytoactivate thesefunctions
or actions ,you willsee theKicon inthe
display . Inserting
andejecting aDVD
X Pro cee das descri bedin the "Inser ting and
ejec ting CDs andDVDs" section
(Y page 129) . Sw
itchin gon video DVD mode
Opti on1 X
Inse rtavid eo DVD (Y pa ge 129) .
CO MAND load sthe med iumi nser tedand
sta rts toplay it.
Opti on2 X
Pre ssthe h functio nbu tton.
CO MAND switch estothe previouslyset
di sc mod e(a ud ioCD, audio DVD, MP3CD
or vid eo DVD) ortoMed iaInter face mod e. Vide
oDVD mode
153Vide o Z
Page 157 of 214

?
Media selection
A Sound settings Fast
forward /rewind
X Press andhold the= or; button
until thedesired position hasbeen
reached.
or
X Press andhold theE orF button
until thedesired position hasbeen
reached.
You seethenavigation menu. Selec
tingavideo DVD
X Show themen u(Y page 154).
X Selec tMedi a and
press the9butt onto
con firm .
The media listappears. The#dot
indic atesthecurr entmedium beingplayed. Media
list
: Video DVDicon
; Video DVDcurrentlyplaying
X Selec tavideoDVD using the 9
or : button andpress the9button to
confirm.
COMAND loadsthe vide oDVD.
i Ifyou selectaCD, anaudio DVD oran
MP3 medium,youswitch tothe audio mode
in que stion. Youcanfind further informati
onabo utthe medi alist on
(Y page 131). Stop
function
X Sho wthe men u(Y page 154).
X To inter rupt pla yback :selec t± and
press the9butt ontocon firm .
The «display changestoM.T hevideo
image ishidden.
X To continue playback: selectMand press
the 9button toconfirm .
Play back continues fromthepoint where it
was interrupted. Themenu ishidden.
X To stop playback: whileplayback is
interrupted, select±again andpress the
9 button toconfirm .
M ishighlighted.
X To restar tplayback: selectMand press
the 9button toconfirm .
Play back starts atthe beginning ofthe
DVD .The menu ishidden. Pause
function
X Show themenu (Ypage 154).
X To pause playback: select«and press
the 9button toconfirm .
The «displa ychanges toM.
X To continue playback: selectMand press
the 9button toconfirm .
The menu ishidden. Selec
tingascene/ch apter
If th efilm isdivi ded intosc en es orchapt ers,
th ese can bedire ctly sele cted oryou can skip
th roug hth em while thefilm isrun ning.So me
DV Ds disab lethis feat ure atsom epoin tsin
th eplaybac k(e.g. during theopenin gcredit s).
Scen e/ch apter select ionmay alsobe
possible fromtheDVD menu storedon the
DVD itself. Vid
eoDVD mode
155Vid eo Z
Page 159 of 214
There
maybefurther options tochoose
from.
COMAND thenswitches backtothe DVD
menu.
i Dependin gon the DVD ,the menu items
Back (tomovie) ,
Play ,
Stop ,
., /orGo Up only
work at
cert ainpoints inthe DVD menu ordo not
work atall. You willsee theKicon inthe
display asan indicator .
or
X Show thenavigation menuwhileinvideo
DVD mode, ifnecess ary.
X Select Menu using
the=;
9: buttonsand press the9button
to conf irm.
X Select DVD-Video in
the menu usingthe
=;9: buttonsand press
the 9button toconf irm.
X Select DVDFunctions and
press the9
button toconf irm.
X Navigate withintheDVD menu usingthe
arrow keys.
Stopp ingafilm orskipping tothe
beginning orend ofas cene X
Se lec tany men uitem fromthe DVD menu .
Th emenu appe ars.
X To sto pthe film: select the Stop menu
ite ma ndpre ssthe 9button toconfi rm.
X To skipto the endof asc en e:sel ect
the / menu itema ndpre ssthe 9
bu tton toconfi rm.
X To skiptoth ebeginnin gof as cene:
selec tthe . menu itemandpress the
9 button toconfirm .
Moving upone level inthe DVD menu X
Press thek button.
or X
Select thecorresponding menuiteminthe
DVD menu andpress the9button to
confirm .
or
X Select anymenu itemfrom theDVD menu.
X Select DVD-Video in
the menu usingthe
=;9: buttonsandpress
the 9button toconfirm .
X Select DVDFunctions and
press the9
button toconfirm .
X Select GoUp and
press the9button to
confirm .
Going backtothe movie X
Press the% button repeatedly untilyou
see thefilm.
or
X Select thecorresponding menuiteminthe
DVD menu.
X Select theBack (to movie) menu
itemin
the menu andpress the9button to
confirm . Setting
thelanguage andaudio
forma t
This funct ionisnot availa bleonallDVD s.Ifit
is availa ble,youcan setthe DVD menu
language ,the audi olanguage orthe audi o
format. Thenumber ofsettin gsisdetermined
by the DVD content. Itis possible thatthe
settin gsmay alsobeaccessed inthe DVD
menu (Ypage 156).
X Show themenu (Ypage 154).
X Select DVD-Video in
the menu using
the :=; buttonsandpress the
9 button toconfirm .
X Select DVDFunctions and
press the9
button toconfirm . Video
DVDmode
157Video Z
Page 160 of 214
X
Sel ect MenuLan guage or
Aud io Lan
guage and
pressthe 9button to
confi rm.
In both cases, amenu appe ars afte rafew
seconds. The#dot infront ofan entry
indi cates thecurrently selected langua ge.
X Select asetting using the 9:
buttons andpress the9button toconfirm.
X To exitthe menu: pressthe=
or ; button. Subtitle
sand camera angle
These functions arenot available onallDVDs.
The numbe rofsubt itle lang uages andcam era
ang lesavailab ledepe ndson theco nten to f
the DVD. Itis po ssi ble tha tthe settin gsmay
also beaccessed inthe DVD menu
(Y page 156).
X Show themenu (Ypage 154).
X Select DVD-Video in
the menu using
the :=; buttonsandpress the
9 button toconfirm .
X Select DVDFunctions and
press the9
button toconfirm .
X Select Subtitles or
Camera Angle and
press the9button toconfirm .
In both cases, amenu appears.The #dot
in front ofan entr yindicates thecurrent
settin g.
X Select asettin gusing the9:
buttons andpress the9button toconfirm .
X To exit themenu: pressthe=
or ; button. Interactive
content
DVD scan cont aininteract ivecont ent(e.g. a
video game). Inavideo game, forexample,
you may beable toinfluence eventsby
selecting andtriggering actions.Thetype and
number ofactions depend onthe DVD . X
Select anaction usingthe
9:=; buttonsandpress
the 9button toexecute it.
A menu appearsand thefirst entry,
Select ,
is highlighted.
X Press the9button.
or
X Show thenavigation menuwhileinvideo
DVD mode, ifnecessary.
X Select Menu using
the=;
9: buttonsandpress the9button
to confirm .
X Select DVD-Video in
the menu usingthe
=;9: buttonsandpress
the 9button toconfirm .
X Select DVDFunctions and
press the9
button toconfirm .
X Select orexecute anaction usingthearrow
keys. Video
AUXoperation Conne
ctingexternal videosources
If your vehicle isequipp edwith aMedia
Int erface, youcan conn ectanextern alvideo
source.
You require anadditional audio/video cable
set toconn ectanextern alvideo source to
Media Interface.
For details, pleaseconsult anauthorized
Mercedes-Ben zCenter orvisit http://
www .mer<00030005000400050013002500020005000E001D00210003000F000D00220003
000FF nnect.and
proceed asdescribed under"Media
Int erface".
The conn ection jacksarelocated:
R in the cent erconsole stowage
compartmen t(SL)
R in the glove box 158
Video
AUXoperat ionVideo
Page 161 of 214

Aud
io/vid eosocke t
: Videopor t(V)
; Audio port(L)
= Audio port(R)
i Tofacilitate correctplayback, itmay be
necessary toset asuitab levideo standard
in the external videosource.
X Connect theexternal deviceto
corresponding port:,;or=.
COMAND activatesthedevice. Switchi
ngon video AUXmode
X Select Video in
the main function barusing
the 9=; buttonsandpress the
9 button toconfirm.
If video AUXmode wasthelast mode
selected, itwill now beactive.
If another videosource isswitched on,you
can now switch tovideo AUXmode inthe
video menu.
X Select Video and
press the9button to
confirm.
X Select Aux and
press the9button to
confirm.
The video AUXmenu appears.You willhear
and seetheconten tof the external video
source ifthis isconnect edand switched to
play back. Video
AUXmode
For detail son how tooperate theexternal
video source, seetherespective device's
operating instructions.
Ext ernal video sources mayhave different
aud iooutput volume. Youcanselect two
different inputvolume levelsforthe AUX
connect ion:
R Standard Ext
ernal sources withamediu mtohigh
audio output volume.
R Boost Ex
tern alsources withalow audio output
volume. X
Setting thedesired inputvolume:
Select Volume using
the
9:=; buttonsand press
the 9button toconf irm.
X Select Standard or
Boost and
press the
9 button toconf irm. Video
AUXoperat ion
159Video Z
Page 163 of 214

Vehi
cle equi pmen t<0023002300230023002300230023002300230023002300230023002300230023
002300230023002300230023002300230023002300230023> 162
General information<0023002300230023002300230023002300230023002300230023002300230023
002300230023002300230023002300230023> 162
Basic functions <0023002300230023002300230023002300230023002300230023002300230023
0023002300230023002300230023002300230023002300230023002300230023
0023> 163
System settings <0023002300230023002300230023002300230023002300230023002300230023
0023002300230023002300230023002300230023002300230023002300230023> 165
CD/DVD audioand MP3 mode ........ 166
Video DVDmode <0023002300230023002300230023002300230023002300230023002300230023
002300230023002300230023002300230023002300230023002300230023> 171
AUX mode <0023002300230023002300230023002300230023002300230023002300230023
0023002300230023002300230023002300230023002300230023002300230023
0023002300230023002300230023002300230023> 175 161Rear
SeatEntert ainment
Page 165 of 214

X
Insert newbatteries. Observethepola rity
marking onthe batteries andinthe battery
compartment whendoing so.
Left-hand battery:thepositive pole(+)
must faceupwards.
Rig ht-hand battery: thepositive pole(+)
must facedownwa rds.
X To clo sethe battery compartment: first
pla cebattery compartment cover=into
the battery compartment withretaining
lug s? and allow lug ;toclip into place.
In the wirel essheadphones The
battery compartment coverislocated on
the left head phone. :
Battery compartment cover
The wirel esshead phones contain 2type AAA
1. 5V bat terie s.
X To ope nth ebat tery com partme nt:fo ld
th ebat tery compar tmentco ver :
upwar ds.Whe ndoing so,hold theleft
headphone asshown toprevent the
insert edbatteries fromfalling out.
X Remove thedischarged batteriesfromthe
compart ment.
X Insert newbatteries. Observethepolarity
marking onthe batteries andinthe battery
compart mentwhen doing so.
Left- hand battery: thepositive pole(+)
must faceupwards. Right-hand
battery:thepositive pole(+)
must facedownwards.
X To close thebatt erycompar tment:
press thebattery compartm entlid
downwards untilitclips intoplace.
If the batteries havebeen insert ed
correc tly,the indicator lampwilllight up
green whentheheadphones areswitched
on. Basic
functions Using
headphones
You canusethewireless headphones
supplied and/oruptotwo sets ofwired
headphones connected tothe correspon ding
jack ofthe rear-com partmentscreen s
(Y page 30).
Infor mation on:
R switching thewireless headphones on/off
R adjusting thevolume ofthe headphones
R selecting ascreen forthe headphones
can befound inthe "Wireless headphones"
section (Ypage 33). Using
themain loudspeaker s
You canusethevehicle loudspeakers to
listen toadisc insert edinthe rear-
compart mentdrive. Todo so, atleast oneof
the rear-com partmentscree nsmus tbeset to
disc mode.
X Sett ingusing COMAND: press,for
example, the$ function button to
switch onanaudio mode.
X Select Audio using
the9 button and
press the9button tocon firm.
The audio menu (Ypage 21)appears.
X Select Rear using
the9: buttons
and press the9button tocon firm.
i The headphones' volumesettingdoes not
affect themain loudspeakers. Ba
sic functions
163RearSeatEntert ainment Z
Page 166 of 214
Adj
usting thesoun dsettings
You canselec tthe sound settingsinthe audi o
CD/DV D/MP3, TV,video DVDandAUX
modes.
X Switch onanoperating mode(e.g.CD
mode).
X Select Treble or
Bass using
the :=; buttonsonthe remote
cont roland press the9button toconfirm .
As etting scale appears.
X Select asett ingusing the9:
button sand press the9button tocon firm. Several
users
Simult aneous useofthe rear -
compa rtment drive i
The two rear-c ompartm entscreen scan
be operated almostentirely independen tly
from oneanoth er.However, therecan bea
con flict insome menus ifthe two screen s
are used atthe same time.
If the rear-c ompartm entdrive isbeing used
for both screen ssimultaneously, selecting
cert ainmenus orsett ings onone ofthe
screen salso affect sthe other screen .
The following functionsaffect bothscreen s:
R changin gplayback options
R select ingatrac k(from thetrac klist ora
folder)
R using play,pause andstop
R fast forward/r ewindorscrollin g
R calling upthe DVD menu andnavigatin g
within it
R sett ingthe language, subtitlesandcamera
angle
R calling upinteract iveDVD content The
following functionsaffect onlyone
screen :
R audio andvideo functionsas well aspicture
sett ings
R switch ingbetween fullscreen andthe
screen showing themenu
Switching betweenoperatingmodes The
curren tsett ings aresaved whenyouexit
an operatin gmode (e.g.audio CDmode). If
you callupthis operatin gmode againlater,
ther eare two possibilities:
R the operatin gmode hasbeen adjusted on
the other screen .
R the operatin gmode hasnotbeen adjusted.
In the first case, theoperatin gmode appears
as shown onthe other screen .
In the secon dcase, thesett ingappears onthe
screen asitwas when youlast exitedthe
operatin gmode. Pictur
esettings
Overview You
canselect thesesettings invideo DVD
and AUX mode. Instruct ions forAUX mode
(Y page 32).
Adju sting thebright ness,contra stand
color X
Switc hon video DVDmode.
X To show themenu: pressthe9button
on the remot econ trol.
or
X Select Menu while
thenavigation menu
(Y page 154)is shown andpress the9
button tocon firm.
X Select DVD-Vid eo using
the :=; buttonsand press the
9 button tocon firm. 164
Ba
sic functionsRear SeatEntert ainment
Page 168 of 214
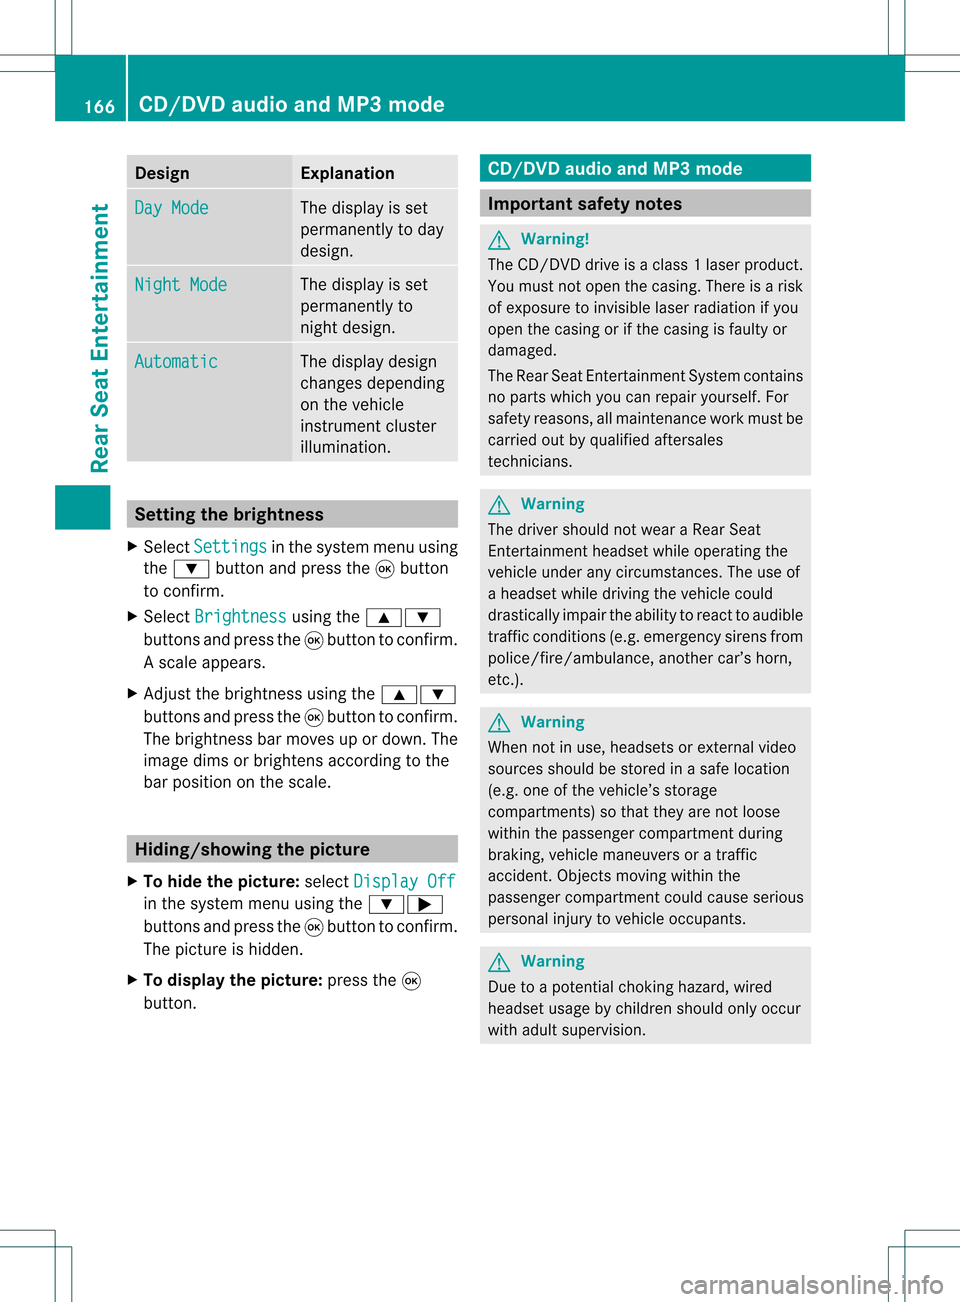
Design Exp
lanation Day
Mode The
displayisset
per man ently to day
des ign. Nig
htMode The
displayisset
per man ently to
ni ght design. Aut
omatic The
displaydes ign
ch ang esdepe nding
on theveh icle
in st rum entclu ster
illum inati on. Set
ting thebr igh tness
X Se lec tSet tings in
thesyst emmen uusin g
th e: buttona nd pre ssthe 9button
to confi rm.
X Sel ect Brightness us
ing the 9:
bu ttons andpressthe 9button toconfi rm.
As caleap pea rs.
X Adju stthe brightne ssusing the 9:
bu ttons andpressthe 9button toconfi rm.
The brightne ssbarm oves upordown. The
image dimsorbrightens according tothe
bar position onthe scale. Hiding/showing
thepictur e
X To hide thepictur e:select Display Off in
the system menuusingthe:;
button sand press the9button toconf irm.
The picture ishidden.
X To display thepictur e:press the9
button . CD/D
VDaudio andMP3 mode Import
antsafety notes G
War
ning!
The CD/D VDdrive isaclass 1laser product.
You must noto pen thecasing. Thereisarisk
of exposure toinvisible laserradiation ifyou
open thecasing orifthe casing isfaulty or
damaged.
The Rear SeatEntert ainmen tSystem contains
no parts which youcan repair yourself. For
safety reasons ,all maint enanc ework must be
carried outbyqualified aftersales
tec hnic ians. G
War
ning
The driver should notwear aRear Seat
En tert ainmen theadset whileoperatin gthe
vehicle underanycircumstan ces.Theuseof
a headset whiledriving thevehicle could
drastic allyimpair theability toreact toaudible
traff iccon ditions (e.g.emergen cysirens from
police/fir e/ambulance, anothercar’s horn,
etc .). G
War
ning
When notinuse, headsets orext ernal video
sources shouldbestor edinas afe locatio n
(e. g.on eof theveh icle’sstorag e
com partmen ts)so that they are notloose
within thepassenger compartmentduring
braking, vehiclemaneuvers oratraffic
accident .Object smoving withinthe
passenger compartmentcould cause serious
personal injurytovehicle occupant s. G
War
ning
Due toapotent ialchokin ghazar d,wired
heads etusage bychildre nshould onlyoccur
with adultsuper vision . 166
CD/DVD
audio and MP3 modeRearSe at Ent ertai nme nt