fuel fill door release MERCEDES-BENZ R-Class 2011 W251 Owner's Manual
[x] Cancel search | Manufacturer: MERCEDES-BENZ, Model Year: 2011, Model line: R-Class, Model: MERCEDES-BENZ R-Class 2011 W251Pages: 364, PDF Size: 16.5 MB
Page 11 of 364

Flat tireChanging a wheel/mounting the
spare wheel ................................... 301
MOExtended run-flat system .........307
Preparing the vehicle .....................296
Raising the vehicle .........................303
TIREFIT kit ...................................... 297
Floormat ............................................. 276
Front fog lamp (display
message) ............................................ 223
Fuel Additives ........................................ 353
Notes ............................................. 352
Premium-grade unleaded gasoline . 352
Refueling ........................................ 160
Specifications ................................ 352
Troubleshooting ............................. 164
Fuel consumption
Current (on-board computer) .........211
Notes ............................................. 168
Fuel filler cap (display message) ..... 227
Fuel filler flap Emergency release ........................162
Opening/closing ............................ 162
Fuel filter (display message) ............ 227
Fuel level Calling up the range (on-board
computer) ...................................... 211
Fuses
Dashboard fuse box .......................316
Engine emergency stop .................317
Fuse allocation chart .....................315
Fuse box in the cargo
compartment ................................. 316
Fuse box in the engine
compartment ................................. 316
Notes ............................................. 315
G
Garage door opener Clearing the memory .....................275
Notes ............................................. 272
Opening/closing the garage door ..275
Programming the remote control ...273
Gear or selector lever (cleaning
guidelines) ......................................... 288
Genuine Mercedes-Benz parts ......... 348
Genuine wood trim and trim strips
(cleaning instructions) ...................... 288
Glove box ........................................... 247
GTW (Gross Trailer Weight)
(definition) ......................................... 341
H
Headlamp cleaning system .............. 119
Adding washer fluid .......................281
Notes ............................................. 357
Headlamp delayed switch-off
see Delayed switch-off, exterior lighting
Headlamp mode (daytime driving)
see Daytime running lamps
Headlamps
Cleaning ......................................... 286
Misting up ...................................... 120
Head restraint
Adjusting (electrically) ...................101
Head restraints
Adjusting (manually) ......................101
Adjusting (rear) .............................. 102
Installing/removing (rear) ..............102
Luxury ............................................ 101
see NECK-PRO head restraints/
NECK-PRO luxury head restraints
Heating
see Climate control
High beam flasher ............................. 119
Hill start assist .................................. 152
Hood Closing ........................................... 279
Opening ......................................... 278
Hydroplaning ..................................... 171
I
Immobilizer .......................................... 71
Indicator and warning lamps ABS ................................................ 239
Brakes ........................................... 236
DISTRONIC .................................... 243
Engine diagnostics .........................242
ESP ®
.............................................. 240
Fuel tank ........................................ 242
Reserve fuel ................................... 242
Seat belt ........................................ 237
Index9BA 251 USA, CA Edition A 2011; 1; 3, en-USd2sboikeVersion: 3.0.3.52010-04-16T14:31:55+02:00 - Seite 9
Page 79 of 364

If you pull on the handle of the tailgate, only
the cargo area of the vehicle is unlocked.
i If the vehicle has been parked for a long
time, you must pull the door handle to
activate the KEYLESS-GO functions.
Changing the settings of the locking
system
You can change the settings of the locking
system in such a way that only the driver's
door and the fuel filler flap are unlocked. This
is useful if you frequently travel on your own.
XTo change the setting: press the %
and & buttons simultaneously for
approximately six seconds until the battery
check lamp flashes twice.
The SmartKey now functions as follows:
XTo unlock the driver's door: press the
% button once.XTo unlock centrally: press the %
button twice.XTo lock centrally: press the & button.
The KEYLESS-GO function is changed as
follows:
XTo unlock the driver's door: touch the
inner surface of the door handle on the
driver's door.XTo unlock centrally: touch the inner
surface of the door handle on the front-
passenger door or the rear door.XTo lock centrally: press locking
button : on one of the door handles.
Restoring the factory settings
XPress the % and & buttons
simultaneously for approximately six
seconds until the battery check lamp
flashes twice.Mechanical key
General notes
If you use the mechanical key to unlock and
open the driver's door, the anti-theft alarm
system will be triggered ( Y page 71).
There are several ways to turn off the alarm:
XPress the % or & button on the
SmartKey.
or
XInsert the SmartKey into the ignition lock.
or
XPress the Start/Stop button in the ignition
lock. The SmartKey must be in the vehicle.
or
XLock or unlock the vehicle using KEYLESS-
GO. The SmartKey must be outside the
vehicle.
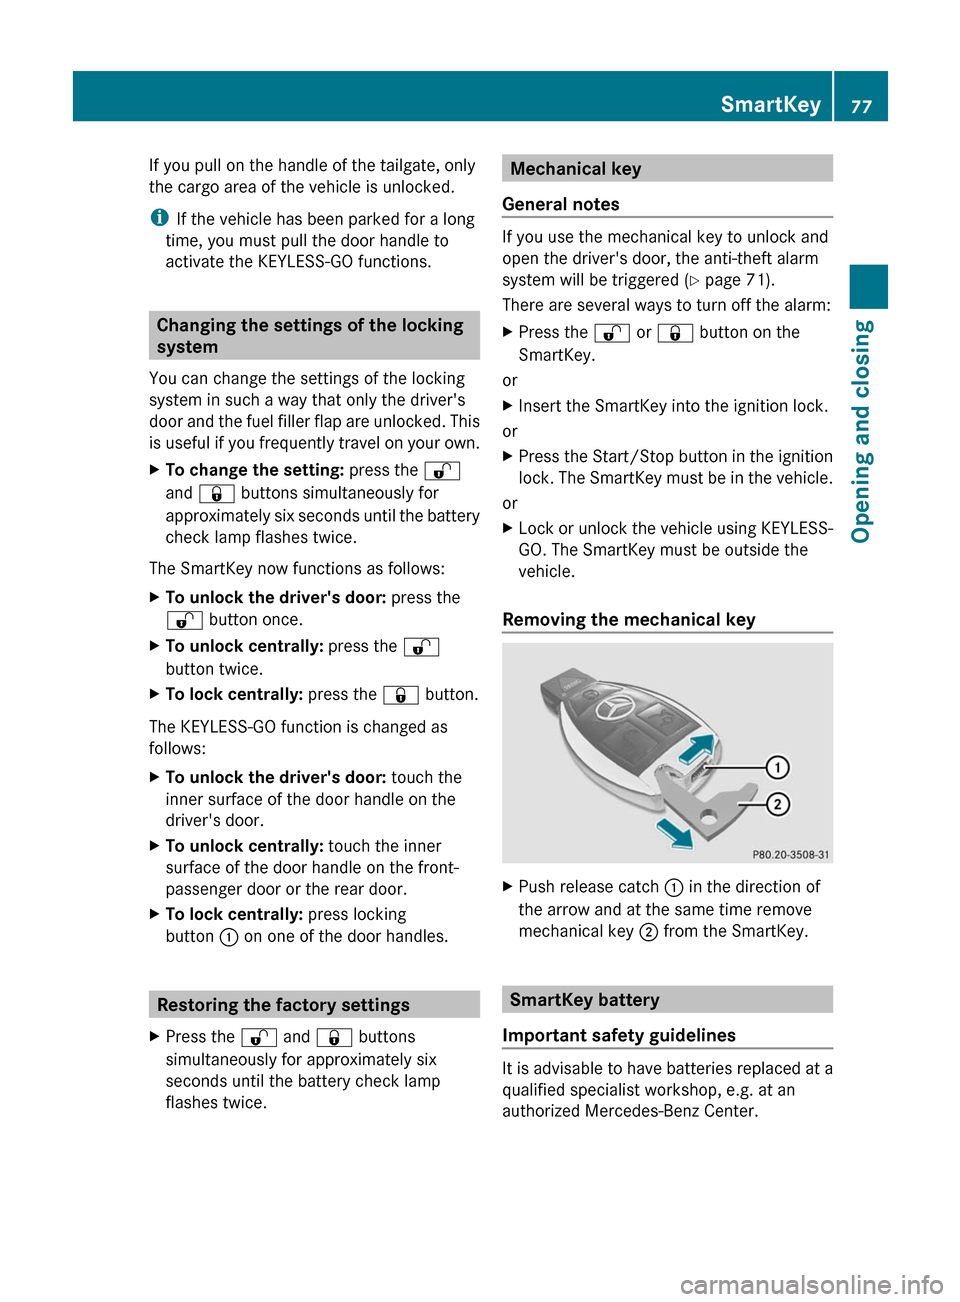
Removing the mechanical key
XPush release catch : in the direction of
the arrow and at the same time remove
mechanical key ; from the SmartKey.
SmartKey battery
Important safety guidelines
It is advisable to have batteries replaced at a
qualified specialist workshop, e.g. at an
authorized Mercedes-Benz Center.
SmartKey77Opening and closingBA 251 USA, CA Edition A 2011; 1; 3, en-USd2sboikeVersion: 3.0.3.52010-04-16T14:31:55+02:00 - Seite 77Z
Page 164 of 364

Refueling
Fuel filler flap
The fuel filler flap is unlocked or locked
automatically when you open or close the
vehicle with the SmartKey or using KEYLESS-
GO.
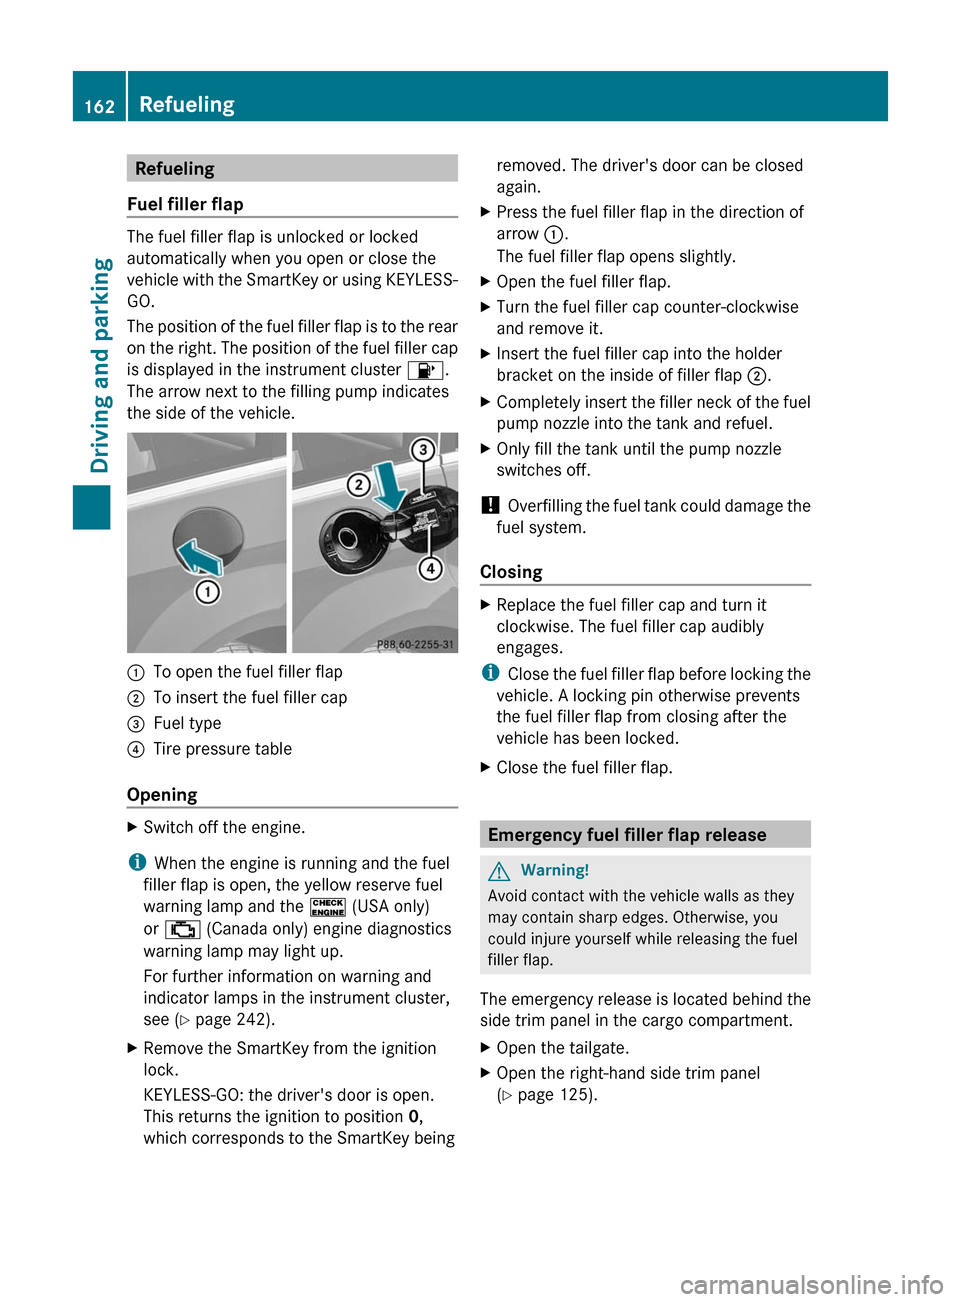
The position of the fuel filler flap is to the rear
on the right. The position of the fuel filler cap
is displayed in the instrument cluster 8.
The arrow next to the filling pump indicates
the side of the vehicle.
:To open the fuel filler flap;To insert the fuel filler cap=Fuel type?Tire pressure table
Opening
XSwitch off the engine.
i When the engine is running and the fuel
filler flap is open, the yellow reserve fuel
warning lamp and the ! (USA only)
or ; (Canada only) engine diagnostics
warning lamp may light up.
For further information on warning and
indicator lamps in the instrument cluster,
see ( Y page 242).
XRemove the SmartKey from the ignition
lock.
KEYLESS-GO: the driver's door is open.
This returns the ignition to position 0,
which corresponds to the SmartKey beingremoved. The driver's door can be closed
again.XPress the fuel filler flap in the direction of
arrow :.
The fuel filler flap opens slightly.XOpen the fuel filler flap.XTurn the fuel filler cap counter-clockwise
and remove it.XInsert the fuel filler cap into the holder
bracket on the inside of filler flap ;.XCompletely insert the filler neck of the fuel
pump nozzle into the tank and refuel.XOnly fill the tank until the pump nozzle
switches off.
! Overfilling the fuel tank could damage the
fuel system.
Closing
XReplace the fuel filler cap and turn it
clockwise. The fuel filler cap audibly
engages.
i Close the fuel filler flap before locking the
vehicle. A locking pin otherwise prevents
the fuel filler flap from closing after the
vehicle has been locked.
XClose the fuel filler flap.
Emergency fuel filler flap release
GWarning!
Avoid contact with the vehicle walls as they
may contain sharp edges. Otherwise, you
could injure yourself while releasing the fuel
filler flap.
The emergency release is located behind the
side trim panel in the cargo compartment.
XOpen the tailgate.XOpen the right-hand side trim panel
( Y page 125).162RefuelingDriving and parking
BA 251 USA, CA Edition A 2011; 1; 3, en-USd2sboikeVersion: 3.0.3.52010-04-16T14:31:55+02:00 - Seite 162