navigation MERCEDES-BENZ R-Class 2011 W251 Owner's Manual
[x] Cancel search | Manufacturer: MERCEDES-BENZ, Model Year: 2011, Model line: R-Class, Model: MERCEDES-BENZ R-Class 2011 W251Pages: 364, PDF Size: 16.5 MB
Page 13 of 364
Malfunctions relevant to safetyReporting ......................................... 23
mbrace
Call priority .................................... 271
Display message ............................ 215
Downloading destinations
(COMAND) ..................................... 271
Emergency call .............................. 268
Important safety notes ..................267
Locating a stolen vehicle ...............272
MB info call button ........................270
Roadside Assistance button ..........269
Self-test ......................................... 268
System .......................................... 268
Vehicle remote unlocking ..............272
Mechanical key
Function/notes ................................ 77
Memory card (on-board computer) . 203
Memory function ............................... 114
Menu (on-board computer) Additional functions .......................210
AIRMATIC/compass ......................204
Audio ............................................. 203
DISTRONIC .................................... 180
DVD ............................................... 204
Message memory .......................... 213
Navigation ..................................... 204
Overview of menus ........................201
Resetting to factory settings ..........205
Settings ......................................... 205
Standard display ............................ 202
Telephone ...................................... 211
Trip computer ................................ 210
Messages
see Display messages
Mirrors
Sun visor ........................................ 262
see Exterior mirrors or Rear-view mirror
MOExtended run-flat system ........... 307
MP3 Operating (on-board computer) .....203
see separate operating instructions
Multicontour seat .............................. 107
Multifunction display ........................ 199
Multifunction steering wheel Operating the on-board computer . 199
Overview .......................................... 30N
Navigation On-board computer .......................204
see separate operating instructions
NECK-PRO head restraints
Operation ......................................... 52
Resetting after being triggered ........53
NECK-PRO luxury head restraints
Operation ......................................... 52
Resetting after being triggered ........53
Notes on breaking-in a new
vehicle ................................................ 148
O
Occupant Classification System
(OCS) Faults ............................................... 47
Operation ......................................... 42
System self-test ............................... 45
Occupant safety
Children in the vehicle .....................59
System overview .............................. 36
OCS
Faults ............................................... 47
Operation ......................................... 42
System self-test ............................... 45
Octane number (fuel) ........................ 352
Odometer ........................................... 202
Off-road 4MATIC .......................................... 185
Oil
see Engine oil
On-board computer
Additional functions menu .............210
AIRMATIC/compass menu ............204
Audio menu ................................... 203
Convenience submenu ..................209
Displaying a service message ........283
Displaying the coolant
temperature ................................... 202
Displaying the outside
temperature ................................... 202
Display messages ..........................213
DISTRONIC menu .......................... 180
Factory settings ............................. 205
Important safety notes ..................198
Index11BA 251 USA, CA Edition A 2011; 1; 3, en-USd2sboikeVersion: 3.0.3.52010-04-16T14:31:55+02:00 - Seite 11
Page 14 of 364
Instrument cluster submenu ..........205
Lighting submenu .......................... 206
Message memory menu ................. 213
Navigation menu ............................ 204
Operating video DVD .....................204
Operation ....................................... 199
Overview of menus ........................201
Selecting the language ..................206
Settings menu ............................... 205
Standard display menu ..................202
Telephone menu ............................ 211
Time/Date submenu .....................206
Trip computer menu ......................210
Vehicle submenu ........................... 208
Opening and closing the side trim
panels ................................................. 125
Operating system see On-board computer
Outside temperature
Calling up (on-board computer) .....202
Display ........................................... 198
Overhead control panel
Overview .......................................... 32
Override feature
Rear side windows ...........................66
P
Paint code number ............................ 349
Paintwork (cleaning instructions) ... 285
Panic alarm .......................................... 66
Panorama roof with power tilt/
sliding panel Opening/closing .............................. 93
Resetting ......................................... 94
Parking ............................................... 167
Parking aid PARKTRONIC ................................. 186
Rear view camera .......................... 189
Parking brake .................................... 167
Parking lamp (display message) ...... 223
Parking position Exterior mirror on the front-
passenger side ............................... 113
PARKTRONIC ...................................... 186
Activating/deactivating .................188
Malfunction .................................... 189
Problem ......................................... 189
Range of the sensors .....................186
Trailer towing ................................. 188
Warning display ............................. 187
PASSENGER AIRBAG OFF indicator
lamp (only Canada) ............................. 48
PASSENGER AIRBAG OFF indicator
lamp (only USA) ................................... 42
Pedals ................................................. 169
Permanent four-wheel drive see 4MATIC
Plastic trim (cleaning instructions) . 287
Power supply (trailer) ....................... 196
Power washers .................................. 285
Power windows see Side windows
Pre-emptive occupant safety
system
see PRE-SAFE ®
system
PRE-SAFE ®
system
Display message ............................ 215
Operation ......................................... 51
Product information ............................ 19
Program selector button .................. 158
Pulling away Automatic transmission .................151
R
Radar sensor system (on-board
computer) .......................................... 208
Radiator cover ................................... 279
Radio Changing a station (on-board
computer) ...................................... 203
see separate operating instructions
Radio-controlled equipment
Assembly ....................................... 276
Range (on-board computer) ............. 211
Rear axle level control ...................... 182
Rear compartment Activating/deactivating climate
control ........................................... 139
Setting the air vents ..............145, 146
Setting the temperature ................141
Rear-compartment seat
see Rear seat
Rear fog lamp (display message) ..... 223
12IndexBA 251 USA, CA Edition A 2011; 1; 3, en-USd2sboikeVersion: 3.0.3.52010-04-16T14:31:55+02:00 - Seite 12
Page 203 of 364
Menus and submenus
Menu overview
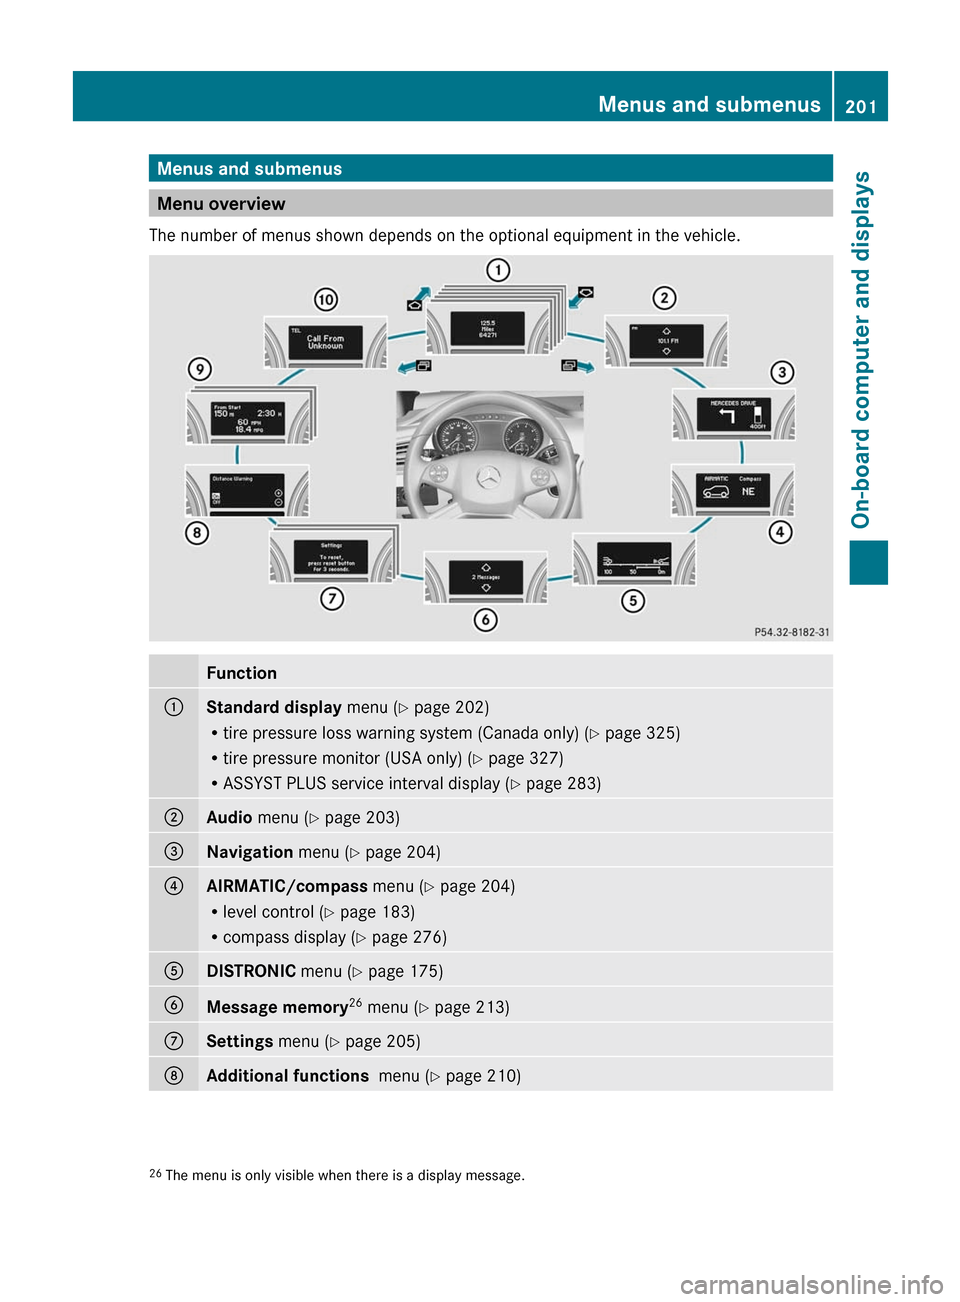
The number of menus shown depends on the optional equipment in the vehicle.
Function:Standard display menu (Y page 202)
R tire pressure loss warning system (Canada only) ( Y page 325)
R tire pressure monitor (USA only) ( Y page 327)
R ASSYST PLUS service interval display ( Y page 283);Audio menu ( Y page 203)=Navigation menu (Y page 204)?AIRMATIC/compass menu (Y page 204)
R level control ( Y page 183)
R compass display ( Y page 276)ADISTRONIC menu (Y page 175)BMessage memory 26
menu ( Y page 213)CSettings menu (Y page 205)DAdditional functions menu (Y page 210)26
The menu is only visible when there is a display message.Menus and submenus201On-board computer and displaysBA 251 USA, CA Edition A 2011; 1; 3, en-USd2sboikeVersion: 3.0.3.52010-04-16T14:31:55+02:00 - Seite 201Z
Page 206 of 364
XTo select the next/previous track:
briefly press the & or * button.XTo select a track from the track list
(rapid scrolling): press and briefly hold the
& or * button.
The current track will not be displayed in
audio AUX mode ( Auxiliary audio mode:
external audio source connected).
Video DVD operation
XSwitch on COMAND APS and select video
DVD (see the separate operating
instructions).XPress V or U on the steering wheel
to select the Audio menu.
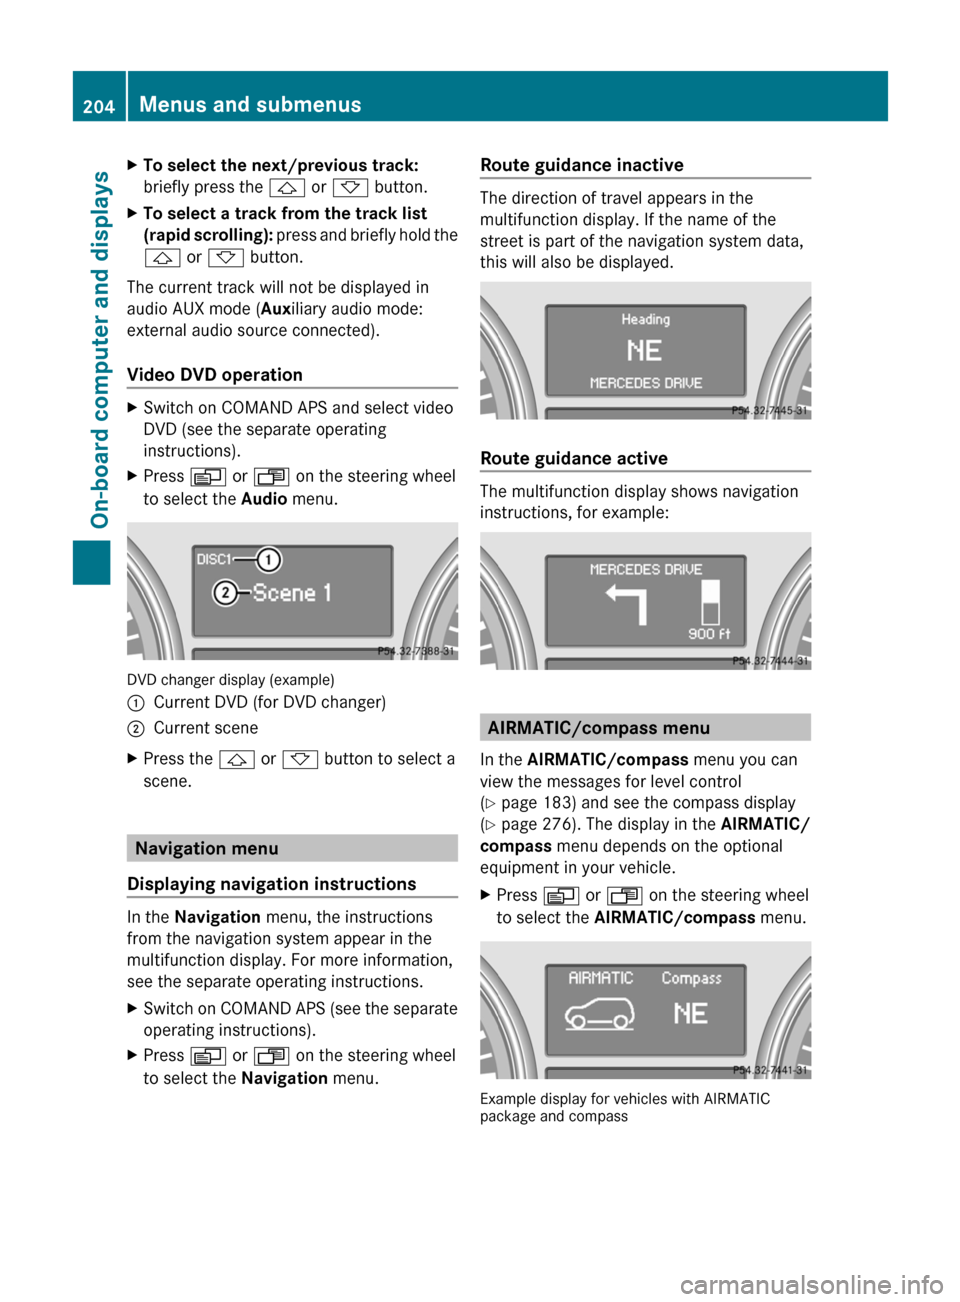
DVD changer display (example)
:Current DVD (for DVD changer);Current sceneXPress the & or * button to select a
scene.
Navigation menu
Displaying navigation instructions
In the Navigation menu, the instructions
from the navigation system appear in the
multifunction display. For more information,
see the separate operating instructions.
XSwitch on COMAND APS (see the separate
operating instructions).XPress V or U on the steering wheel
to select the Navigation menu.Route guidance inactive
The direction of travel appears in the
multifunction display. If the name of the
street is part of the navigation system data,
this will also be displayed.
Route guidance active
The multifunction display shows navigation
instructions, for example:
AIRMATIC/compass menu
In the AIRMATIC/compass menu you can
view the messages for level control
( Y page 183) and see the compass display
( Y page 276). The display in the AIRMATIC/
compass menu depends on the optional
equipment in your vehicle.
XPress V or U on the steering wheel
to select the AIRMATIC/compass menu.
Example display for vehicles with AIRMATIC
package and compass
204Menus and submenusOn-board computer and displays
BA 251 USA, CA Edition A 2011; 1; 3, en-USd2sboikeVersion: 3.0.3.52010-04-16T14:31:55+02:00 - Seite 204
Page 207 of 364
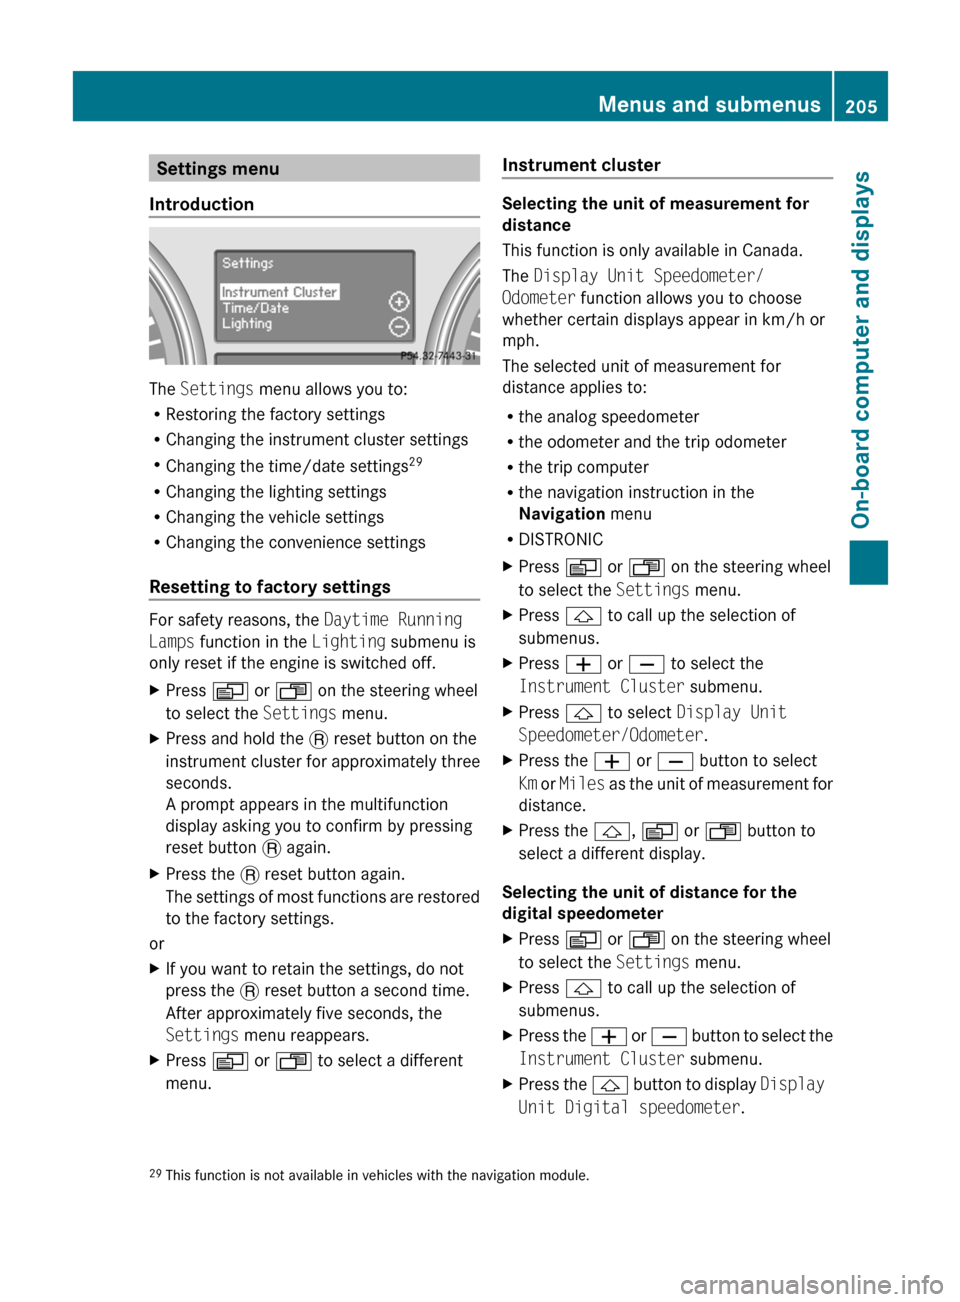
Settings menu
Introduction
The Settings menu allows you to:
R Restoring the factory settings
R Changing the instrument cluster settings
R Changing the time/date settings 29
R Changing the lighting settings
R Changing the vehicle settings
R Changing the convenience settings
Resetting to factory settings
For safety reasons, the Daytime Running
Lamps function in the Lighting submenu is
only reset if the engine is switched off.
XPress V or U on the steering wheel
to select the Settings menu.XPress and hold the . reset button on the
instrument cluster for approximately three
seconds.
A prompt appears in the multifunction
display asking you to confirm by pressing
reset button . again.XPress the . reset button again.
The settings of most functions are restored
to the factory settings.
or
XIf you want to retain the settings, do not
press the . reset button a second time.
After approximately five seconds, the
Settings menu reappears.XPress V or U to select a different
menu.Instrument cluster
Selecting the unit of measurement for
distance
This function is only available in Canada.
The Display Unit Speedometer/
Odometer function allows you to choose
whether certain displays appear in km/h or
mph.
The selected unit of measurement for
distance applies to:
R the analog speedometer
R the odometer and the trip odometer
R the trip computer
R the navigation instruction in the
Navigation menu
R DISTRONIC
XPress V or U on the steering wheel
to select the Settings menu.XPress & to call up the selection of
submenus.XPress W or X to select the
Instrument Cluster submenu.XPress & to select Display Unit
Speedometer/Odometer .XPress the W or X button to select
Km or Miles as the unit of measurement for
distance.XPress the &, V or U button to
select a different display.
Selecting the unit of distance for the
digital speedometer
XPress V or U on the steering wheel
to select the Settings menu.XPress & to call up the selection of
submenus.XPress the W or X button to select the
Instrument Cluster submenu.XPress the & button to display Display
Unit Digital speedometer .29
This function is not available in vehicles with the navigation module.Menus and submenus205On-board computer and displaysBA 251 USA, CA Edition A 2011; 1; 3, en-USd2sboikeVersion: 3.0.3.52010-04-16T14:31:55+02:00 - Seite 205Z
Page 208 of 364
XPress the W or X button to select
Km or Miles as the unit of measurement for
distance.XPress the &, V or U button to
select a different display.
Selecting the language
The Language function allows you to select
the language for the instrument cluster.
XPress V or U on the steering wheel
to select the Settings menu.XPress & to call up the selection of
submenus.XPress W or X to select the
Instrument Cluster submenu.XPress the & button to select Language.XPress the W or X button to select the
desired language.XPress the &, V or U button to
select a different display.
Selecting the status line display
XPress V or U on the steering wheel
to select the Settings menu.XPress & to call up the selection of
submenus.XPress W or X to select the
Instrument Cluster submenu.XPress & to select Status Line
Display .XPress W or X to select the display in
the status line: speed ( Speed) or outside
temperature ( Outside Temperature ).
The selected display now appears
constantly in the lower multifunction
display. When you scroll through the
Standard display menu (Y page 202), you
will see the display you have not selected.XPress the &, V or U button to
select a different display.Time/date
Only vehicles without the navigation module
have this submenu. To set the time and date
on vehicles without the navigation module,
see the separate operating instructions.
In the Time / Date submenu, you can set the
time and date.
XPress V or U on the steering wheel
to select the Settings menu.XPress & to call up the selection of
submenus.XPress the W or X button to select the
Time / Date submenu.XTo set the clock: press & on the
steering wheel to select Clock Set hour
or Clock Set Minute(s) .
or
XTo set the date: press & to select
Date Set day , Date Set Month or Date
Set Year .XPress W or X to set a value.XPress the &, V or U button to
select a different display.
Lighting
Switching the daytime running lamps on/
off
This function is not available in Canada.
If you have activated the daytime running
lamps function and the light switch is in the
$ or à position, the daytime running
lamps are switched on automatically when
the engine is running.
In the dark, the following also light up:
R the low-beam headlamps
R the side lamps
R the tail lamps
R the license plate lamp
R the side marker lamp
On vehicles with daytime running lamps, the
factory setting is On.
206Menus and submenusOn-board computer and displays
BA 251 USA, CA Edition A 2011; 1; 3, en-USd2sboikeVersion: 3.0.3.52010-04-16T14:31:55+02:00 - Seite 206
Page 241 of 364
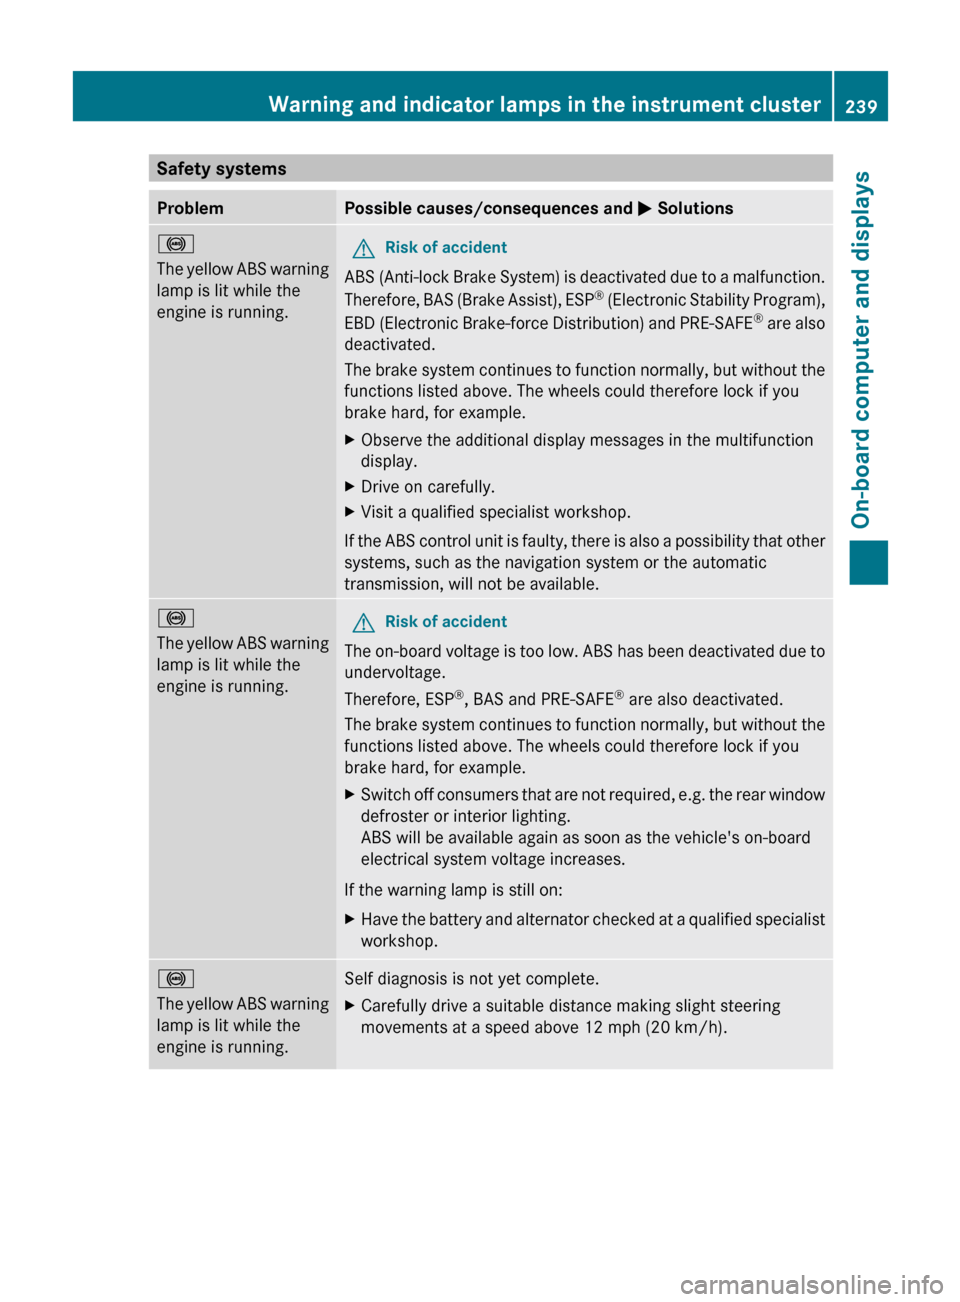
Safety systemsProblemPossible causes/consequences and M Solutions!
The yellow ABS warning
lamp is lit while the
engine is running. GRisk of accident
ABS (Anti-lock Brake System) is deactivated due to a malfunction.
Therefore, BAS (Brake Assist), ESP ®
(Electronic Stability Program),
EBD (Electronic Brake-force Distribution) and PRE-SAFE ®
are also
deactivated.
The brake system continues to function normally, but without the
functions listed above. The wheels could therefore lock if you
brake hard, for example.
XObserve the additional display messages in the multifunction
display.XDrive on carefully.XVisit a qualified specialist workshop.
If the ABS control unit is faulty, there is also a possibility that other
systems, such as the navigation system or the automatic
transmission, will not be available.
!
The yellow ABS warning
lamp is lit while the
engine is running.GRisk of accident
The on-board voltage is too low. ABS has been deactivated due to
undervoltage.
Therefore, ESP ®
, BAS and PRE-SAFE ®
are also deactivated.
The brake system continues to function normally, but without the
functions listed above. The wheels could therefore lock if you
brake hard, for example.
XSwitch off consumers that are not required, e.g. the rear window
defroster or interior lighting.
ABS will be available again as soon as the vehicle's on-board
electrical system voltage increases.
If the warning lamp is still on:
XHave the battery and alternator checked at a qualified specialist
workshop.!
The yellow ABS warning
lamp is lit while the
engine is running.Self diagnosis is not yet complete.XCarefully drive a suitable distance making slight steering
movements at a speed above 12 mph (20 km/h).Warning and indicator lamps in the instrument cluster239On-board computer and displaysBA 251 USA, CA Edition A 2011; 1; 3, en-USd2sboikeVersion: 3.0.3.52010-04-16T14:31:55+02:00 - Seite 239Z
Page 272 of 364
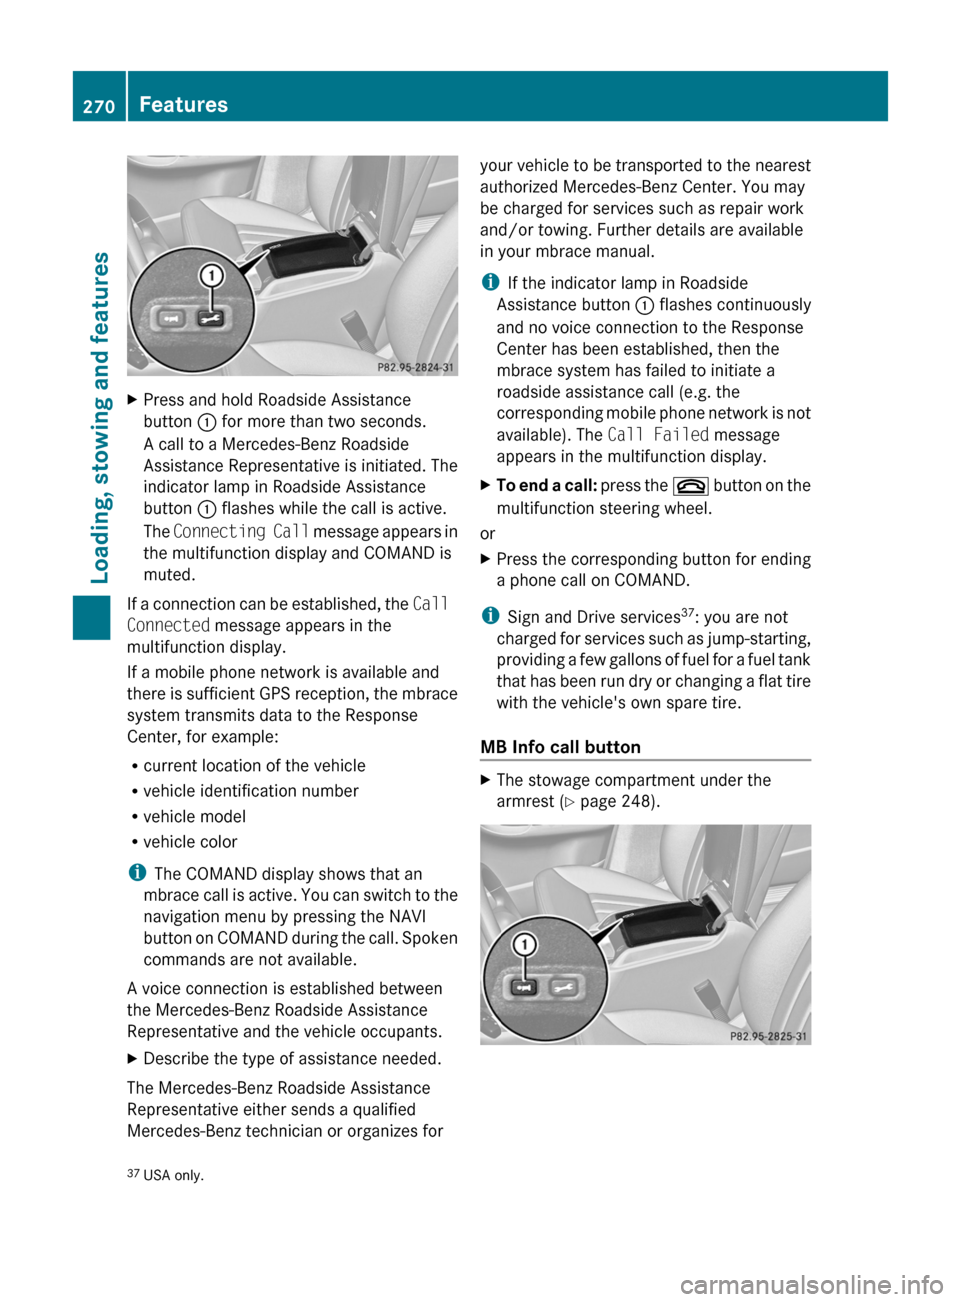
XPress and hold Roadside Assistance
button : for more than two seconds.
A call to a Mercedes-Benz Roadside
Assistance Representative is initiated. The
indicator lamp in Roadside Assistance
button : flashes while the call is active.
The Connecting Call message appears in
the multifunction display and COMAND is
muted.
If a connection can be established, the Call
Connected message appears in the
multifunction display.
If a mobile phone network is available and
there is sufficient GPS reception, the mbrace
system transmits data to the Response
Center, for example:
R current location of the vehicle
R vehicle identification number
R vehicle model
R vehicle color
i The COMAND display shows that an
mbrace call is active. You can switch to the
navigation menu by pressing the NAVI
button on COMAND during the call. Spoken
commands are not available.
A voice connection is established between
the Mercedes-Benz Roadside Assistance
Representative and the vehicle occupants.
XDescribe the type of assistance needed.
The Mercedes-Benz Roadside Assistance
Representative either sends a qualified
Mercedes-Benz technician or organizes for
your vehicle to be transported to the nearest
authorized Mercedes-Benz Center. You may
be charged for services such as repair work
and/or towing. Further details are available
in your mbrace manual.
i If the indicator lamp in Roadside
Assistance button : flashes continuously
and no voice connection to the Response
Center has been established, then the
mbrace system has failed to initiate a
roadside assistance call (e.g. the
corresponding mobile phone network is not
available). The Call Failed message
appears in the multifunction display.XTo end a call: press the ~ button on the
multifunction steering wheel.
or
XPress the corresponding button for ending
a phone call on COMAND.
i Sign and Drive services 37
: you are not
charged for services such as jump-starting,
providing a few gallons of fuel for a fuel tank
that has been run dry or changing a flat tire
with the vehicle's own spare tire.
MB Info call button
XThe stowage compartment under the
armrest ( Y page 248).37
USA only.270FeaturesLoading, stowing and features
BA 251 USA, CA Edition A 2011; 1; 3, en-USd2sboikeVersion: 3.0.3.52010-04-16T14:31:55+02:00 - Seite 270
Page 273 of 364
XPress and hold MB info call button : for
more than two seconds.
A call to the Response Center is initiated.
MB info call button indicator lamp :
flashes while the connection is being
established. The Connecting Call
message appears in the multifunction
display and COMAND is muted.
If a connection can be established, the Call
Connected message appears in the
multifunction display.
If a mobile phone network is available and
there is sufficient GPS reception, the mbrace
system transmits data to the Response
Center, for example:
R current location of the vehicle
R vehicle identification number
R vehicle model
R vehicle color
i The COMAND display shows that an
mbrace call is active. You can switch to the
navigation menu by pressing the NAVI
button on COMAND during the call. Spoken
commands are not available.
A voice connection between the Response
Center and the vehicle occupants is
established. You can obtain information on
how to operate your vehicle's systems, on the
location of the nearest authorized Mercedes-
Benz Center, and on further products and
services offered by Mercedes-Benz USA.
Further details on the mbrace system can be
found under http://www.mbusa.com 38
.
Log in under "Owners Online".
i If the indicator lamp in MB info call
button : flashes continuously and no
voice connection to the Response Center
has been established, then the mbrace
system has failed to initiate an MB info call
(e.g. the corresponding mobile phone
network is not available). The Call
Failed message appears in the
multifunction display.
XTo end a call: press the ~ button on the
multifunction steering wheel.
or
XPress the corresponding button for ending
a phone call on COMAND.
Call priority
An emergency call can still be initiated even
if a service call is currently active, e.g. a
Roadside Assistance call or an MB info call.
In this case, an emergency call will take
priority and override all other active calls.
The indicator lamp of the respective button
flashes until the call is ended. An emergency
call can only be terminated by the Response
Center. All other calls can be ended by
pressing the ~ button on the
multifunction steering wheel or the
corresponding button for ending a telephone
call on COMAND.
Downloading destinations in COMAND
i Information on the components and
operating principles of COMAND can be
found in the separate COMAND operating
instructions.
Destination Download gives you access to a
database with over 10 million points of
interest (POIs) which can be downloaded onto
the navigation system of your vehicle. If you
know the destination, you can download the
address or obtain the location of points of
interest (POIs) or important destinations in
the surrounding area.
You are prompted to confirm route guidance
to the entered address.
XSelect Yes using the = button or
select ; on COMAND.XPress the 9 button on COMAND to
confirm.38 USA only.Features271Loading, stowing and featuresBA 251 USA, CA Edition A 2011; 1; 3, en-USd2sboikeVersion: 3.0.3.52010-04-16T14:31:55+02:00 - Seite 271Z
Page 312 of 364
iIf the power supply has been interrupted,
e.g. if the battery has been reconnected,
you must carry out the following tasks:
R set the clock ( Y page 206)
On vehicles with COMAND and a
navigation system, the clock is set
automatically.
R reset the sliding sunroof ( Y page 93)
R reset the panorama roof with power tilt/
sliding panel ( Y page 94)
R reset the function for folding the exterior
mirrors in/out automatically by folding
the mirrors out once ( Y page 112)
R reset the side windows ( Y page 88)
Charging the battery
GWarning
Never charge a battery while still installed in
the vehicle unless the accessory battery
charge unit approved by Mercedes-Benz is
being used. Gases may escape during
charging and cause explosions that may
result in paint damage, corrosion or personal
injury.
An accessory battery charge unit specially
adapted for Mercedes-Benz vehicles and
tested and approved by Mercedes-Benz is
available. It permits the charging of the
battery in its installed position. Contact an
authorized Mercedes-Benz Center for
information and availability.
Charge the battery in accordance with the
separate instructions for the accessory
battery charger.
GWarning!
There is a risk of acid burns during the
charging process due to the gases which
escape from the battery. Do not lean over the
battery during the charging process.
GWarning!
Battery acid is caustic. Avoid contact with the
skin, eyes or clothing.
! Only charge the installed battery with a
battery charger which has been tested and
approved by Mercedes-Benz. These battery
chargers allow the battery to be charged
while still installed.
! Only use battery chargers with a
maximum charging voltage of 14.8 V.
! Only charge the battery using the jump-
starting connection point.
The jump-starting connection point is in the
engine compartment ( Y page 311).XOpen the hood ( Y page 278).XConnect the battery charger to the positive
terminal and earth point in the same order
as when connecting the donor battery in
the jump-starting procedure
( Y page 311).310BatteryRoadside Assistance
BA 251 USA, CA Edition A 2011; 1; 3, en-USd2sboikeVersion: 3.0.3.52010-04-16T14:31:55+02:00 - Seite 310