ECU MERCEDES-BENZ R-Class 2012 W251 Comand Manual
[x] Cancel search | Manufacturer: MERCEDES-BENZ, Model Year: 2012, Model line: R-Class, Model: MERCEDES-BENZ R-Class 2012 W251Pages: 210, PDF Size: 5.11 MB
Page 140 of 210

!
Retain theoriginal musicfilesinasecure
location. Anerror inCOMAND mightresult
in the loss ofthe music filesstored inthe
MUSIC REGISTER. Mercedes-Benz isnot
liab lefor any loss ofdata. Switchin
gto MUSIC REGISTER
Option 1 X
Press theh function buttonrepeatedly
until theMUSIC REGISTER isswitched on.
If there areany music files,youwillhear the
first track inthe first folder foundor
play back willbegin atthe point itwas last
interrupted.
If there arenomusic files,youwillsee a
message tothis effect.
By pressing theh function button
repeatedly ,you can switch modes inthe
followi ngorder:
R audi oCD/DVD /MP3(disc)
R SD memory cardmode
R MUSIC REGISTER
R Media Interfacemode
X You first need tocopy music filestothe
MUSIC REGISTER (Ypage 138).
Option 2 X
Select Audio in
the main function barusing
the 9=; buttonsandpress the
9 button toconfirm.
If MUSIC REGISTER wasthelast mode
selected, itis now switched on.
If another audiosource isswitched on,you
can now switch onthe MUSIC REGISTER in
the audi omenu.
X Select Audio using
the9 button and
press the9button toconfirm.
The audi omenu appears.
X Select Music Register and
press the9
button toconfirm. Option
3 X
Press ther number button.
The MUSIC REGISTER isswitched on. Example
display:MUSIC REGISTER
: Type ofdata carrier: MUSICREGISTER
; Track number
= CD orDVD inserted
? Track name
A Track time
B Graphi ctime and track display
C Curren tplayback settings (no symbol for
"Norm altrack sequen ce")
D Soun dset tings
E Media selection
F Curren tfolder
G Folder functions
H Data carrier position inthe media list
I Tocall upthe MUSIC REGISTER menu Copying
musicdatato the MUSIC
REGISTER
Introdu ction You
cancopy music filesfrom discs inthe
DVD changer orfrom thememory card,as
long asthey areinMP3 and/or WMAformat.
i While copying, severalfunctionswillnot
be availa ble.Ifthis isthe case, youwillsee
a message tothis effect . 138
MUSIC
REGISTERAudio
Page 143 of 210

:
Fold ersel ectio nsymbo l
; Icon formus icfile
= Curr entfolder
X To select onefolder higher: selectthe
U symbol.
The display changes tothe next folder up.
Changing thefolder/tr ackname X
Select Folder using
the:=;
button sand press the9button toconf irm.
X Select afolder/t rackusing the:9
button sand press the9button toconf irm.
X Select Options and
press the9button to
conf irm.
X Select Change and
press the9button to
conf irm.
X En ter aname forthe folder/t rack.
X To save thechanges: select¬and
press the9button toconf irm.
Dele ting folders/tr acks X
Select Folder using
the:=;
button sand press the9button toconf irm.
X Select afolder/t rackusing the:9
button sand press the9button toconf irm.
X Select Options and
press the9button to
conf irm.
X Select Delete and
press 9toconf irm.
Aq uery appear s.No is
high light ed.
If you selectYes ,
th efol der s/track sare
delet ed.You seethePle ase Wait... mes
sage .Then, youseetheDeletion Procedure
Successful message.
If you select No ,
the process willbeaborted. Playback
options
The following optionsareavaila bletoyou:
R Normal TrackSequence The
track sare play edinthe normal order
(e.g. track 1,2,3, etc. ).
R Random Tracks All
the track son the medium areplay edin
random order.
R Random Folder (only
inMP3 mode)
The track sin the current lyactive folderare
play edinrandom order.
X To selec toptio ns:switch onthe MUSIC
REG ISTER (Ypage 138).
X Sel ect Musi cRegi ster .
The options list appea rs.The #dot
ind icates the optionselected .
X Sel ect anopti on.
The optionisswi tched on.For allopti ons
excep tNorm alTrac kSequ ence ,
yo uwi ll
see acorre spondingdispl ayinthe displ ay/
sel ectio nwindow.
i The Norm alTrac kSequ ence opt
ion is
autom atically selec tedwhen youchan ge
the disc youarecurr entlylist enin gto or
when youselec tadifferent medium.Ifan
option isselect ed,itremains selectedafter
COMAND isswitc hedonoroff. Media
Interfacemode Connection
options
Overview The
connection jacksare located:
R in the centercon sole stowage
compart ment(SL)
R in the glove box Media
Interfacemod e
141Audio Z
Page 144 of 210
To
conn ectexter naldevices tothe Media
Int erface, yourequire device-spec ificadapter
cables whichareincluded inthe Media
Int erface scopeofdelivery.
i Stow the individual partsinasecure
location.
Use only genuine Mercedes- Benz
conn ectin gcables.
You canconn ectthe following datacarriers
to COMAND viathe Media Interface:
R iPod ®
R USB devices (USBsticks,USB hard drives)
i iPod ®
is aregistered trademark ofApple
Inc .,Cupertino, California,USA.
Supp orted iPod®
varia nts The
following areexamples ofsupported
iPod ®
variants:
R iPod ®
mini
R iPod ®
nano
R iPod ®
classic
R iPod ®
touch
Supp orted USBdevices The
following USBdevices aresupported:
R USB sticks(flash memory)
R USB hard drives requiring astart up/
permanen tcurren tof max. 800mA(itmay
be necess arytoconn ectaseparate power
supply)
R cert ainMP3 players
i The Media Interface supports USB
storage mediaof"USB Device Subclass 6".
Infor mation concernin gUSB Device
Subclass 6isavail able from theequip ment
manufacturer.
For further detailsandalist ofsupported
devices, pleasecontactanauthorized
Mercedes-Benz Centerorvisit http://
www .mercedes-be nz.com/conne ctand proceed
asdescribed under"Media
Interf ace". Conne
ctinganexternal device
i Donot leave extern aldevices inthe
vehicle, asatextreme temperatures (e.g.in
direct sunlight orextremely lowoutside
temperatures) theycannot beguara nteed
to function correctly(see theoperating
instruct ionsforthe respective device).
Mercedes-Benz doesnottake
responsibili tyfor any damage toextern al
devices.
Never connectmore thanonedevice ata
time. Youwillotherwise notbeable toplay
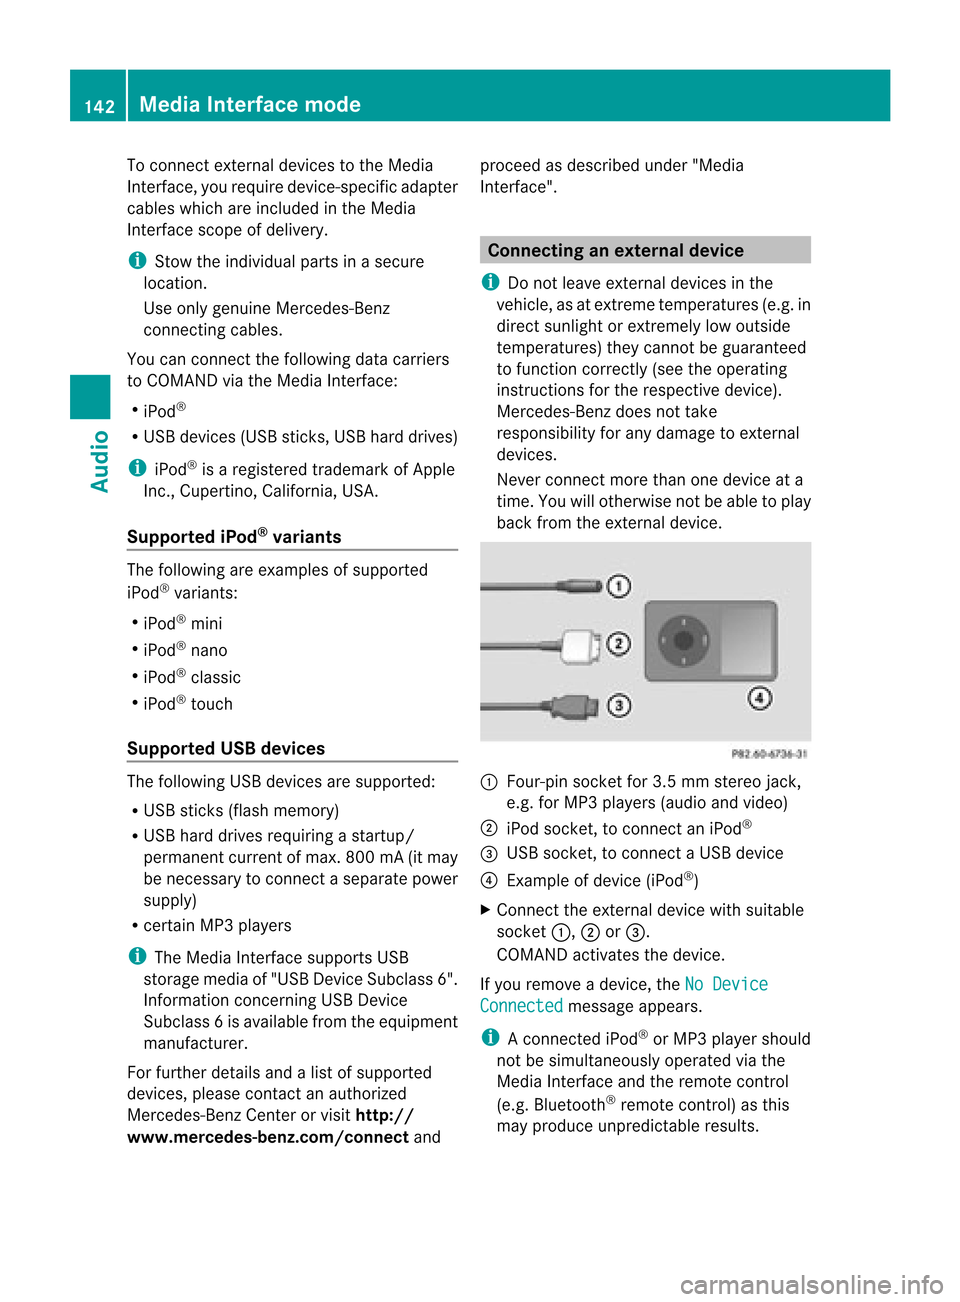
back fromtheextern aldevice. :
Four-pin socketfor3.5 mm stereo jack,
e.g. forMP3 players(audio and video)
; iPod socket ,to conn ectaniPod ®
= USB socket ,to conn ectaUSBdevice
? Examp leof device (iPod ®
)
X Co nnect theexter naldevice with suita ble
socke t:, ;or=.
CO MAND activate sthe device .
If yo uremo veade vice ,the No Device Connected message
appears.
i Aconn ected iPod®
or MP3 playershould
not besimultaneously operatedviathe
Media Interface andtheremote control
(e.g. Bluetooth ®
remote control)asthis
may produce unpredictable results.142
Media
Interface modeAudio
Page 146 of 210
H
Artis t(ifsupplied)
I Playback options
Type ofdevic e: con nected isindic ated by
the correspo ndingicon foriPod ®
,MP3 player
or USB mass storage device.
i Ifthe devic econ nected does notcontain
any playable track s,amess ageappears to
this effect . Selecting
music files
Not es COMA
NDdisplays thedata stored onthe
iPod ®
,MP3 player orUSB mass storage
devic eacc ordin gto the filingst ruct ureused
in the respe ctive medium.
Selecting byskip ping toatrac k X
To skipfo rwa rds orbac kwards toa
trac k:pre ssthe ; or= button.
or
X Pre ssthe F orE button.
Skip ping forwa rdski ps tothe next track.
Skip ping backwa rdsskips tothe beginning
of the curre nttra ck ifthe track hasbe en
pl ay ing formor etha neight seco nds.Ift he
track hasbeen playingforless than eight
seconds, itskips tothe start ofthe previous
track .Ify ou have selected aplayb ack
option otherthanNormal Track Sequence ,
the track sequence israndom.
Selecting usingthenumber keypad X
To mak eane ntr y:press theU button .
An input menu appears. Thenumber of
charact ersavailable forinput depends on
the number ofstor edtrac ks.
X To enter atr ack number :press anumber
key, such asq.
The digit isent ered inthe first position in
the input line. i
COMAND willignore andnotdisplay an
invalid digit.
X Ifdesired, enterfurth erdigits.
X To confirm anentry :press the9button
or press andhold thenumber key
corr espondin gto the last digit ofthe
desired tracknumbe r.
The selected track isplayed.
Fast forwar d/rewind X
Wit hth edisp lay/s election win dow active,
pre ssthe; or= buttonr epeatedly
until youreach thedesired position.
or
X Press andhold theF orE button
until thedesired position hasbeen
reached.
i OnaniPod ®
,the fast rewind function can
only beused within thecurren tlyplaying
trac k. Selecting
acatego ry/play list/fol der
iPo d®
and selected MP3 playe rs You
canselect tracks foraniPo d®
and MP3
pla yera ccord ingtocate goriesand folder s.
Ca tego riescan include:
R Curr entTracklist R
Play lists (e
.g. All )
R Arti sts R
Albu ms R
Trac ks R
Podc asts R
Genr es R
Comp osers R
Audi obooks i
Some play ba ck cate goriescontai nthe
All entr
y.Ifthis entryhas been selected,
the entire contentofthe category selected
will beplay ed. 144
Media
Interface modeAudio
Page 155 of 210
?
Media selection
A Sound settings Fast
forward ing/rew inding
X Press andhold the= or; button
until thedesired position isreached.
or
X Press andhold theE orF button
until thedesired position isreached.
You seethenavigation menu. Selec
tingavideo DVD
X Show themen u(Y page 152).
X Selec tMedi a and
press the9butt onto
con firm .
The media listappears. The#dot
indic atesthecurr entmedium beingplayed. Media
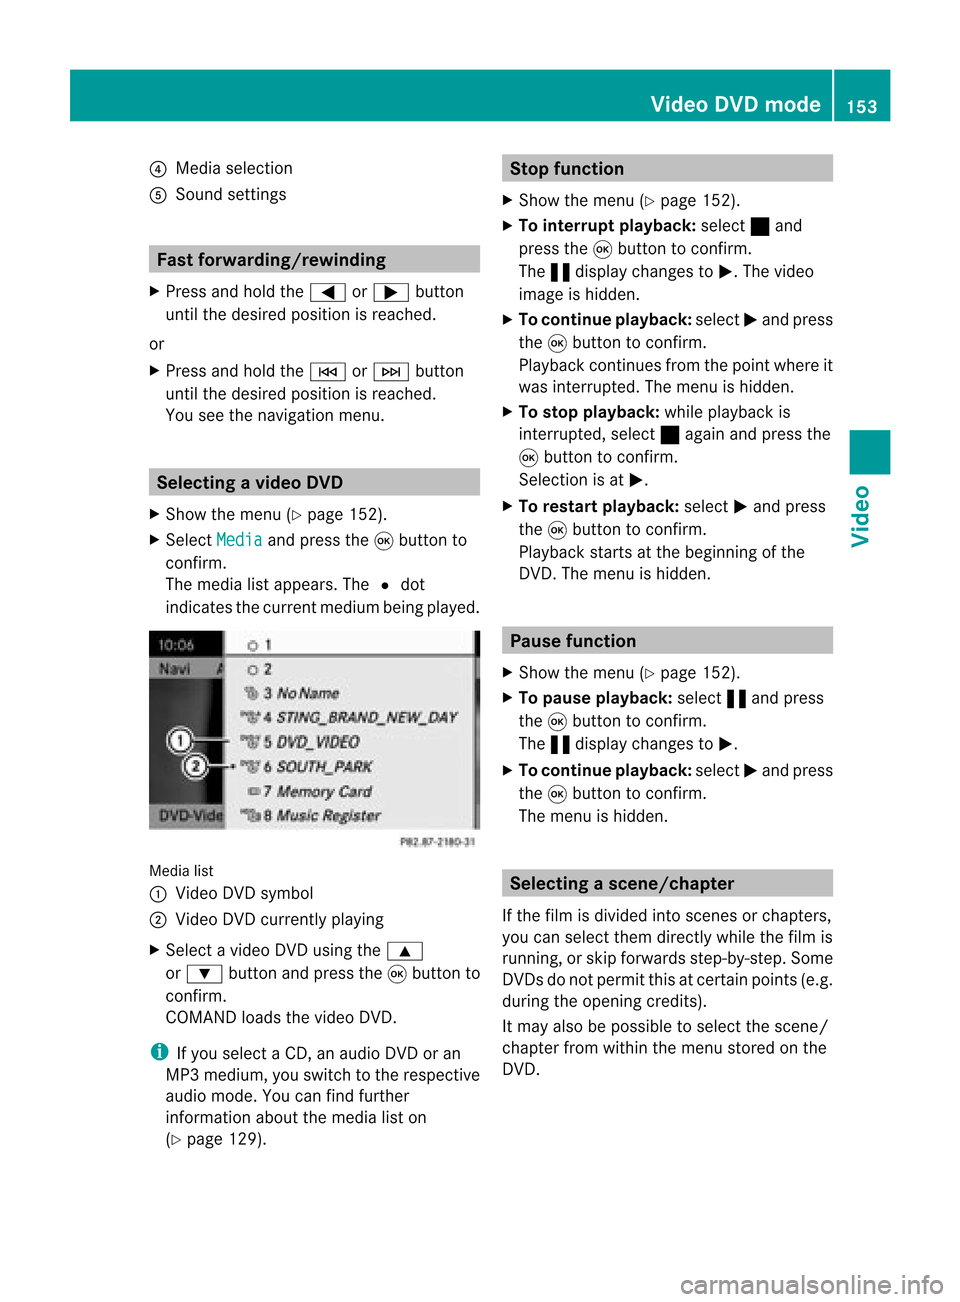
list
: Video DVDsymbol
; Video DVDcurrentlyplaying
X Selec tavideoDVD using the 9
or : button andpress the9button to
confirm.
COMAND loadsthe vide oDVD.
i Ifyou selectaCD, anaudio DVD oran
MP3 medium,youswitch tothe respe ctive
au dio mode. Youcanfind further
informati onabo utthe medi alist on
(Y page 129). Stop
function
X Sho wthe men u(Y page 152).
X To inter rupt pla yback :selec t± and
press the9butt ontocon firm .
The «display changestoM.T hevideo
image ishidden.
X To continue playback: selectMand press
the 9button toconfirm .
Play back continues fromthepoint where it
was interrupted. Themenu ishidden.
X To stop playback: whileplayback is
interrupted, select±again andpress the
9 button toconfirm .
Selection isat M.
X To restar tplayback: selectMand press
the 9button toconfirm .
Play back starts atthe beginning ofthe
DVD .The menu ishidden. Pause
function
X Show themenu (Ypage 152).
X To pause playback: select«and press
the 9button toconfirm .
The «displa ychanges toM.
X To continue playback: selectMand press
the 9button toconfirm .
The menu ishidden. Selec
tingascene/ch apter
If th efilm isdivi ded intosc en es orchapt ers,
you can selectthem dire ctly while thefilm is
run ning,or skip for wards step- by-s tep. So me
DV Ds donotpermit thisatcert ainpoint s(e.g.
during theopenin gcredit s).
It may alsobepossible toselect thescen e/
chapter fromwithin themenu storedon the
DVD . Vid
eoDVD mode
153Vid eo Z
Page 156 of 210
X
To skipfo rwa rds orbac kwards: press
the = or; button.
or
X Pre ssthe E orF button onthe
contro lpa nel .
The navigati on menu (Ypage 152) appe ars
for appro xima telyei ght second s. Se
lecti ng afilm/t itle
This function isonly available ifthe DVD is
divided intosever alfilms /titles .
If the DVD contain ssever alfilms ,the secan
be selec teddirec tly.Afilm can beselec ted
eith erwhen theDVDisbeing playedback or
when itis stopped.
The film canalso beselected fromthemenu
on the DVD itself.
X Show themenu (Ypage 152).
X Select DVD-Video in
the menu using
the :=; buttonsandpress the
9 button toconfirm.
X Select DVDFunctions and
press the9
button toconfirm.
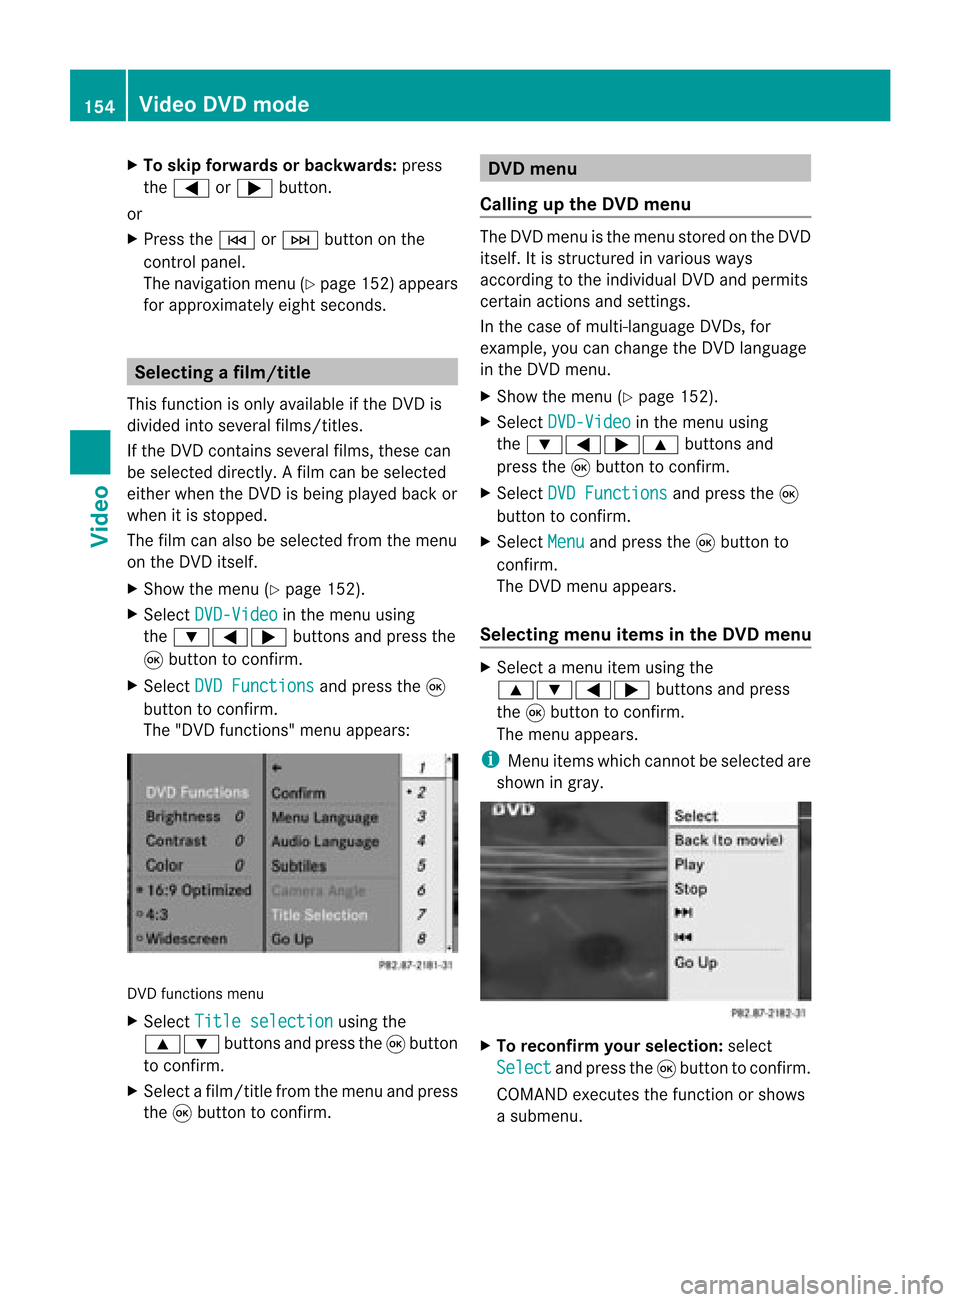
The "DVD function s"menu appears: DVD
functions menu
X Select Title selection using
the
9: buttonsandpress the9button
to confirm.
X Select afilm/title fromthemenu andpress
the 9button toconfirm. DVD
menu
Callin gup the DVD menu The
DVD menu isthe menu stored onthe DVD
itself. Itis struct uredinvarious ways
according tothe individua lDVD andpermits
certain actions andsettings.
In the case ofmulti-langua geDVDs, for
example, youcan change theDVD langua ge
in the DVD menu.
X Show themenu (Ypage 152).
X Select DVD-Video in
the menu using
the :=;9 buttonsand
press the9button toconfirm.
X Select DVDFunctions and
press the9
button toconfirm.
X Select Menu and
press the9button to
confirm.
The DVD menu appears.
Selec tingmenu itemsinthe DVD menu X
Select amenu itemusing the
9:=; buttonsandpress
the 9button toconfirm.
The menu appears.
i Menu itemswhich cannot beselected are
shown ingray. X
To reconfirm yourselec tion:select
Select and
press the9button toconfirm.
COMAND executesthefunction orshows
a submenu. 154
Video
DVDmodeVideo
Page 158 of 210
X
Sel ect Menulan guage or
Aud io lan
guage and
pressthe 9button to
confi rm.
In both cases, amenu appe ars afte rafew
seconds. The#dot infront ofan entry
indi cates thecurrently selected langua ge.
X Select asetting using the 9:
buttons andpress the9button toconfirm.
X To exitthe menu: pressthe=
or ; button. Subtitle
sand camera angle
These functions arenot available onallDVDs.
The numbe rofsubt itle lang uages andcam era
ang lesavailab ledepe ndson theco nten to f
the DVD. Itis po ssi ble tha tthe settin gsmay
also beaccessed inthe DVD menu
(Y page 154).
X Show themenu (Ypage 152).
X Select DVD-Video in
the menu using
the :=; buttonsandpress the
9 button toconfirm .
X Select DVDFunctions and
press the9
button toconfirm .
X Select Subtitles or
Camera Angle and
press the9button toconfirm .
In both cases, amenu appears.The #dot
in front ofan entr yindicates thecurrent
settin g.
X Select asettin gusing the9:
buttons andpress the9button toconfirm .
X To exit themenu: pressthe=
or ; button. Interactive
content
DVD scan cont aininteract ivecont ent(e.g. a
video game). Inavideo game, forexample,
you may beable toinfluence eventsby
selecting andtriggering actions.Thetype and
number ofactions depend onthe DVD . X
Select anaction usingthe
9:=; buttonsandpress
the 9button toexecute it.
A menu appearsand thefirst entry,
Select ,
is highlighted.
X Press the9button.
or
X Show thecont rolmenu whileinvideo DVD
mode, ifnecessary.
X Select Menu using
the=;
9: buttonsandpress the9button
to confirm .
X Select DVD-V in
the menu usingthe
=;9: buttonsandpress
the 9button toconfirm .
X Select DVDFunctions and
press the9
button toconfirm .
X Select orexecute anaction usingthearrow
keys. Video
AUXmode Conne
ctingexternal videosources
If your vehicle isequipp edwith aMedia
Int erface, youcan conn ectanextern alvideo
source.
You require anadditional audio/video cable
set toconn ectanextern alvideo source to
Media Interface.
For details, pleaseconsult anauthorized
Mercedes-Ben zCenter orvisit http://
www .mer<00030005000400050013002500020005000E001D00210003000F000D00220003
000FB nnect.and
proceed asdescribed under"Media
Int erface".
The conn ection jacksarelocated:
R in the cent erconsole stowage
compartmen t(SL)
R in the glove box 156
Video
AUXmodeVideo
Page 164 of 210
Adj
usting thesoun dsettings
You canselec tthe sound settingsinthe audi o
CD/DV D/MP3, TV,video DVDandAUX
modes.
X Switch onanoperating mode(e.g.CD
mode).
X Select Treble or
Bass using
the :=; buttonsonthe remote
cont roland press the9button toconfirm .
An adjustment scaleappea rs.
X Select asettin gusing the9:
buttons andpress the9button toconfirm . Multiple
users
Simulta neoususeofthe rear-
compart mentdiscdrive i
The two rear-compart mentscreens can
be operated almostentirely independently
from oneanother. However, therecanbea
conflict insome menus ifthe two screens
are used simultaneously .
If the rear-compart mentdiscdrive isbeing
used forboth screens simultaneously ,
selecting certainmenusorsettin gson one of
the screens alsoaffects theother screen.
The following functionsaffect bothscreens:
R changing playback options
R selecting atrack (from atrack listorfolder)
R using play,pause andstop
R fast <0006000F001200170001001200040009000E000700240012000500170009000E
00040009000E0007> orscrolling
R calling upthe DVD menu andnavigating
within it
R settin gthe language ,subtitles andcamera
angle
R calling upinteract iveDVD content
The following functionsaffect onlyone
screen:
R audi oand video functionsaswell aspicture
settin gs
R switching betweenfullscreen andthe
screen showing themenu Switching
betweenoperat ingmodes When
youexit anoperating mode(e.g.audio
CD mode), thecurrent settingis saved. Ifyou
call upthis operating modeagainlater,there
are two possibili ties:
R the operating modehasbeen changed on
the other screen.
R the operating modehasnotbeen changed.
In the first case, theoperating modeappears
as itis on the other screen.
In the second case,thesettin gappea rson the
screen asitwas when youlast exited the
operating mode. Picture
settings
Overview You
canselect thesesettingsinvideo DVD
and AUX mode. Instructions forAUX mode
(Y page 31).
Adjust ingthe brightness, contrastand
colo r X
Switch onvideo DVDmode.
X To show themenu: pressthe9button
on the remote control.
or
X Select Menu while
thenavigation menu
(Y page 152)isshown andpress the9
button toconfirm .
X Select DVD-Video using
the :=; buttonsandpress the
9 button toconfirm .
X Select Brightness ,
Contrast or
Color and
press the9button toconfirm .
An adjustment scaleappea rs.
X Select thesettin gand press the9button
to confirm . 162
Basic
functionsRearEnterta inment System
Page 165 of 210
Cha
nging thepict urefor ma t X
To show themen u:pres sth e9 button
on therem oteco ntrol.
or
X Sel ect Menu while
thenav igat ionmen u
(Y page 152)issho wnand pres sth e9
but tonto confirm .
X Sel ect DVD-Vi deo usin
g
th e:=; buttons and pres sth e
9 buttonto confirm .
The äiconin fron tof the16: 9 Opt
imized ,
4:3 or
Wid escreen men
uite m
ind icat esthefor mat curren tlyset .
X Sel ect thefor mat andpres sth e9 button
to confirm . Sys
tem settings Not
e
You canadjust almos tallsyst emsettings
indiv idually foreach screen witho utaffec ting
the otherscr een. Youmakethe seset tings
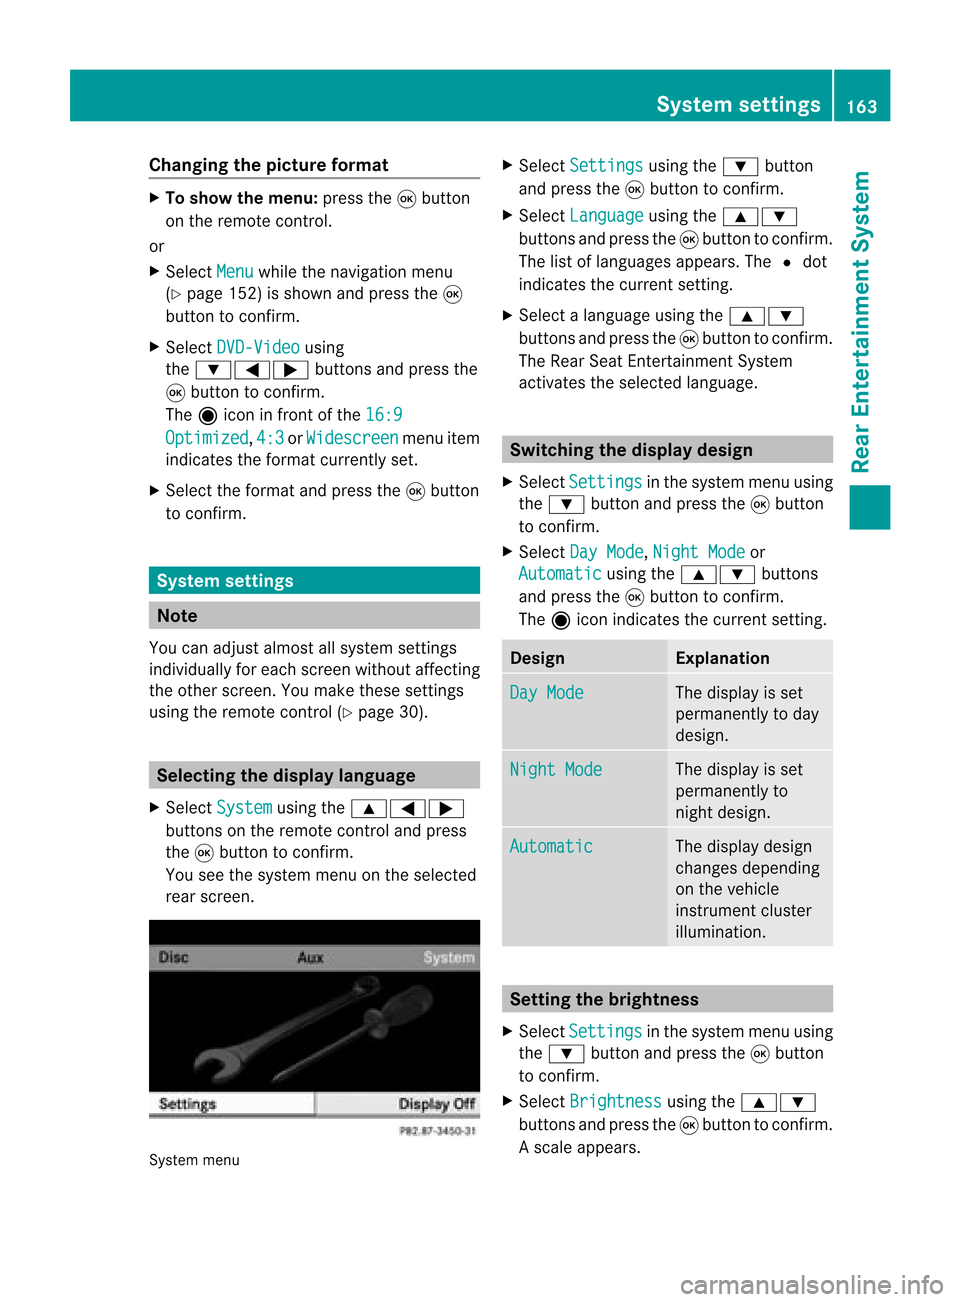
using theremo tecon trol (Y page 30). Selecting
thedisp laylangu age
X Selec tSyst em using
the9=;
butt ons onthe remo tecon trol and press
the 9butt ontocon firm .
You seethesyst emmen uon the selec ted
rear screen. Syst
emmen u X
Selec tSett ings using
the: button
and press the9butt ontocon firm .
X Selec tLang uage using
the9:
butt onsand press the9butt ontocon firm .
The listoflanguages appears.The#dot
indic ates thecurr entsetting.
X Selec talanguage usingthe9:
butt onsand press the9butt ontocon firm .
The Rear SeatEnter tain men tSyst em
act ivat esthe selec tedlanguage. Switch
ingthedisp laydesign
X Selec tSett ings in
the syst emmen uusing
the : buttonand press the9butt on
to con firm .
X Selec tDay Mode ,
Nigh tMode or
Auto matic using
the9: buttons
and press the9butt ontocon firm .
The äicon indicates thecurr entsetting. Design Expla
nation Day
Mode The
display isset
perm anentlytoday
design . Nigh
tMode The
display isset
perm anentlyto
nigh tdesign. Automat
ic The
display design
changes depending
on the vehicle
inst rument cluster
illumination. Sett
ingthe bright ness
X Select Setting s in
the system menuusing
the : button andpress the9button
to con firm.
X Select Brightn ess using
the9:
button sand press the9button tocon firm.
As caleap pea rs. Sys
tem setting s
163Rear Entertain mentSystem Z
Page 175 of 210

ang
lesavailabl edepen dson theco nten to f
the DVD. Itis po ssi ble tha tthe settin gsmay
also beaccessed fromtheDVD menu.
X Show themenu (Ypage 170).
X Select DVD-Video and
press the9
button onthe remote controltoconfirm .
X Select DVDFunctions and
press the9
button toconfirm .
X Select Subtitles or
Camera Angle and
press the9button toconfirm .
In both cases, amenu appearsafter afew
seconds. The#dot infront ofan entr y
indicates thecurrent setting.
X Select asettin gusing the9:
buttons andpress the9button toconfirm .
X To exit themenu: pressthe=
or ; button. Interactive
content
DVD scan also containinteract ivecont ent
(e.g. avideo game). Inavideo game, youmay
be able toinfluence eventsbyselecting and
triggering actions.Thetype andnumber of
actions depend onthe DVD .
X Select anaction usingthe
9:=; buttonsandpress
the 9button toexecute it.
A menu appearsand thefirst entry,
Select ,
is highlighted.
X Press the9button. AUX
mode Introduction
You canconn ectone extern alvideo source to
each ofthe displa ysofthe Rear Seat
Ent ertainment System(AUXdispla y)and also
one extern alvideo source tothe rear-
compartmen tCD/DV Ddrive (AUX drive) with
a sound andvideo signal. Please
seethecorresponding operating
instruct ionsforinformation onhow to
operate theextern alvideo source.
For further detailsaboutextern alvideo
sources, pleaseconsult anauthorized
Mercedes-Ben zCent er. Connecting
AUXequip ment
AUX drive The
AUX drive jacksare located onthe CD/
DVD drive onthe right nextto the CD/D VD
ejec tbutton (Ypage 31).
Displaying AUX The
AUX display jacksare onthe side ofthe
screen (Ypage 30).
Audio andvideo connection X
Inser tthe audi oplugs forthe left and right
signals intothecorresponding Land R
jacks .
X Insert thevideo plugintotheVjack. Activating
AUXmode
AUX drive X
Select Aux in
the menu usingthe
9=; buttonsonthe remote
cont roland press the9button toconfirm .
The AUX menu appears. AUX
menu AUX
mode
173RearEnterta inment System Z