audio MERCEDES-BENZ R-Class 2012 W251 Comand Manual
[x] Cancel search | Manufacturer: MERCEDES-BENZ, Model Year: 2012, Model line: R-Class, Model: MERCEDES-BENZ R-Class 2012 W251Pages: 210, PDF Size: 5.11 MB
Page 148 of 210
X
To switchto the supe rordinate folde r:
sel ect the U iconu sing the9:
buttons andpress the9button toconfirm.
i The U iconisalwa yslisted rightatthe
top ofthe respective folder. Playing
thecontent ofacategory or
folder
X Select acategory orfolder.
X Press the9button forlonger thantwo
seconds.
The cont entofthe category orfolder
selected isplay edinaccordance withthe
play back option (Ypage 147)selected. Alphabetical
track sele ction
iPod ®
and MP3 player This
function isavail able foralpha betically
sorted categories andfolders. Thisfunction
is not avail able foralbu msorplay lists, for
example.
X Select acategory, e.g.Artists .
The avail able artists appear.
X Press thecorresponding numberkeyonce
or several timestoselect thefirst letter of
the artist's name(e.g.foranartist
beginning withtheletter "C",press number
key l three times).
You seetheavail able letters atthe bottom
edge ofthe displa y.
X Press the9button.
Aft eramessage, thefirst entry inthe list
which matches theletter entered is
highlig hted.
i Ifthere isno entry which matches the
letter which hasbeen entered, thelast
entry inthe listwhich matches aprevious
letter ishighlig hted.
i For iPods ®
and MP3 players, thequal ity
of the search results ishighly dependent on
the version andlangua gevariant ofthe software
(e.g.iTunes ®
version) usedto
popul atethe device.
USB mass storage devices This
function isavail able foralpha betically
sorted directories. Thisfunction isnot
avail able foralbu msorplay lists, forexample.
X In adirectory, pressthecorresponding
number keyonce orseveral timestoselect
the first letter ofthe artist's name(e.g.for
an artist beginning withtheletter "C",press
number keyl three times).
You seetheavail able letters atthe bottom
edge ofthe displa y.
If the directory onlycontains folders,
COMAND searchesforfolders. Aftera
message, thefirst entry found which
matches theletters entered appearsfirst in
the list.
If there isno entry beginning withtheletter
entered, thelast entry beginning withthe
previous letterisshown atthe top ofthe
list. Selec
tinganactive partition (forUSB
mass storage devices only)
You canselect thisfunction forUSB mass
storage devices whenthestorage deviceis
partitioned. Uptofour partitions (primaryor
logical andFAT- formatted) aresupported.
i The Windows formattingprogram
supports FATpartitions ofup to32 GB as
standard.
X Select Media Int. in
the basic displa y
using the:=; buttonsand
press the9button toconfirm.
X Select Select ActivePartition using
the 9: buttonsandpress the9
button toconfirm. 146
Media
Interface modeAudio
Page 149 of 210

Playback
options
The following optionsareavaila bletoyou:
R Normal TrackSequence You
hear thetrack sin their normal order
(numerical oralphab etical,forexample).
R Random Tracks All
the track son the medium areplay edin
random order.
R Random Categories or
Random Folder (in
the case ofUSB devices whenFolder has
been selected):
The track sin the current lyactive category
or folder, including anysub-folders, are
play edinrandom order.
i ForUSB devices, therandom playlists can
cont ainamaximum of300 randomly
selected tracks.
X To selec ta playback option:select
Media Int. in
the basic display using
the :=; buttonsandpress the
9 button toconf irm.
The options listappears. The#dot
indicates theoption selected.
X Select anoption usingthe9:
buttons andpress the9button toconf irm. Notes
onUSB devices
Data forma ts The
following dataformats aresupported:
R mp3: CBR,VBR(upto320 kbit/ s)
R wma: CBR,VBR(upto320 kbit/ s)
Notes onUSB devices R
Avoid storing dataother thanmusic dataon
the USB device sothat thestart- uptime is
not exten dedunnecessarily.
R Up toeight directory levelswithupto1000
track sare supported. R
Do not use aUSB exten sioncable or
adapter. Thesemayimpair functionality.
R As earch ofthe USB device isperform edin
the backgr oundandanyplaylists foundare
provided inaseparate categoryin addition
to the folders. Initialization oflarger USB
mass storage devices containin gahigh
number offiles cantake uptoseveral
minut es.
i Files protec tedwith DRM (Digital Rights
Managemen t)are not supported bythe
Media Interface. Audio
AUXmode Notes
onaud ioAUX mode
You canconnectan ext ernal audio source
(AUX) toCOMAND .The sock etfor this is
located inthe glove box.
If COMAND isequipped withaMedia
Int erface, external audio sources are
con nected using theassociated cableset.
The audio cablesetreplaces theaudio AUX
sock et.
i You canfind more information onthe
Int ernet athtt p://ww w.mer cedes-
benz.com /connectand inthe "Media
Int erface mode" section(Ypage 141). Switching
onaud ioAUX mode
When youconnectane xterna lau dio sou rce,
au dio AUX isnot selecte dau toma tically.
X Sel ect Aud io in
the mainfunctio nbarusin g
th e9=; buttons and pres sth e
9 buttonto confirm .
If AU Xmod ewas thelast mod eselec ted, it
will nowbe act ive.
If ano ther audio sourceisswit ched on,you
can nowswit chtoaudio AUXmod ein the
audio menu.
X Sel ect Audio usin
gth e9 buttonand
pres sth e9 buttonto confirm .
The audio menuappear s. Aud
ioAUX mode
147Aud io Z
Page 150 of 210
X
Sel ect Aux us
ing the 9: buttons
and pressthe 9button toconfi rm.
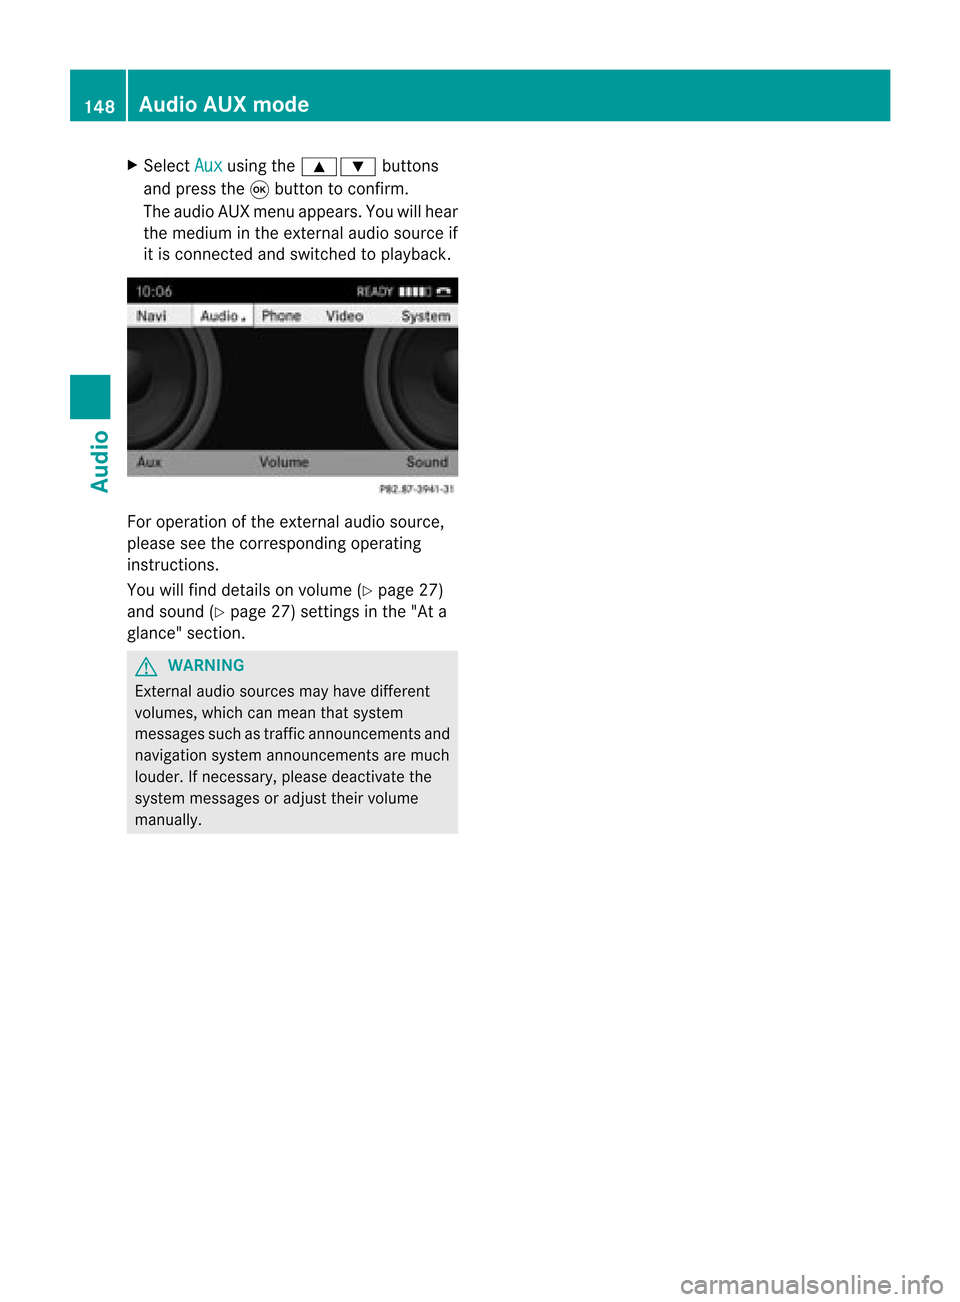
The audioAUX menu appe ars .You will hear
the medium inthe exter nalaudio source if
it is conn ected andswitched toplayb ack. For
operation ofthe exter nalaudio source,
please seethecorrespon dingoperating
instr uctions.
You willfind details onvolume (Ypage 27)
and sound (Ypage 27)settings inthe "Ata
glance" section. G
WARNIN
G
Ext ernal audio sources mayhave different
volumes, whichcanmean thatsystem
messages suchastraffic announc ementsand
navigation systemannounc ementsare much
louder. Ifnecessary, pleasedeactivate the
system messages oradjust theirvolume
manually. 148
Audio
AUXmodeAudio
Page 153 of 210
There
isarisk ofbeing distract edfrom the
road andtraff iccondit ionsifthis isdone while
the vehicle isin motion . Notes
aboutdiscs
Playba ckproblems mayoccur whenplaying
copied discs.Therearealarge variety of
discs, DVDauthoring software,writing
software andwriters available.This variety
means thatthere isno guarantee thatthe
system willbeable toplay discs thatyouhave
copied yourself.
! Donot affix stick ersorlabels tothe discs,
as they could peeloffand damage
COMAND .Stic kers cancause thedisc to
bend, which canresult inread errors and
disc recogn itionproblems.
! COMAND isdesigned toaccommo date
discs which comply withtheEN6090 8
standard. Youcantheref oreonly usediscs
with amaximum thickness of1.3 mm.
If you insert thickerdiscs, e.g.those that
cont aindata onboth sides (DVD onone
side andaudio dataonthe other), they
cann otbe eject edand candamage
COMAND .
Use round discswithadiameter of12 cm.
Do not use discs withadiameter of8cm,
even withanadapter. DVD
playback conditions
There arevideo DVDsavaila bleonthe market
which donot conf orm tothe curren t
standards.
These DVDscan create picture, soundor
other problems duringplayback.
COMAND canplay back video DVDs
produced accordingto the following
standards:
R region code1orregion code0(no reg ion
cod e) i
Ifyo uins ert avid eo DVD with adi ffer ent
reg ionc ode, youwillsee amessage tothis
effect .
R PAL orNTSC standard
You willgenerally findtherelevant details
either onthe DVD itself oron the DVD case.
i COMAND isset toregion code1at the
factor y.This settingcan bechanged atan
authorized Mercedes-B enzCenter. Thiswill
allow youtoplay video DVDswith a
different regioncode,provided thatthey
are produced inaccordanc ewith thePAL
or NTSC standard. Theregion codecanbe
changed uptofive times. Function
restrictions
Dependin gon the DVD ,it is possible that
cert ainfunct ionsoractions willbe
temporarily blockedormay notfunct ionatall.
As soon asyou trytoactivate thesefunctions
or actions ,you willsee theKsymbol inthe
display . Inserting
andremoving DVDs
X Proceed asdescribed inthe "Insert ingand
eject ingCDs andDVD s"section
(Y page 127). Switching
tovideo DVDmode
Option 1 X
Insert avideo DVD(Ypage 127).
COMAND loadsthemedium insertedand
start sto play it.
Option 2 X
Press theh functionbutton .
COMAND switchestothe disc mode last
set (audi oCD, audio DVD,MP3 CD, video
DVD )or Media Interface. COMAND
accesses alldiscs inthe DVD changer. Video
DVDmode
151Video Z
Page 155 of 210
?
Media selection
A Sound settings Fast
forward ing/rew inding
X Press andhold the= or; button
until thedesired position isreached.
or
X Press andhold theE orF button
until thedesired position isreached.
You seethenavigation menu. Selec
tingavideo DVD
X Show themen u(Y page 152).
X Selec tMedi a and
press the9butt onto
con firm .
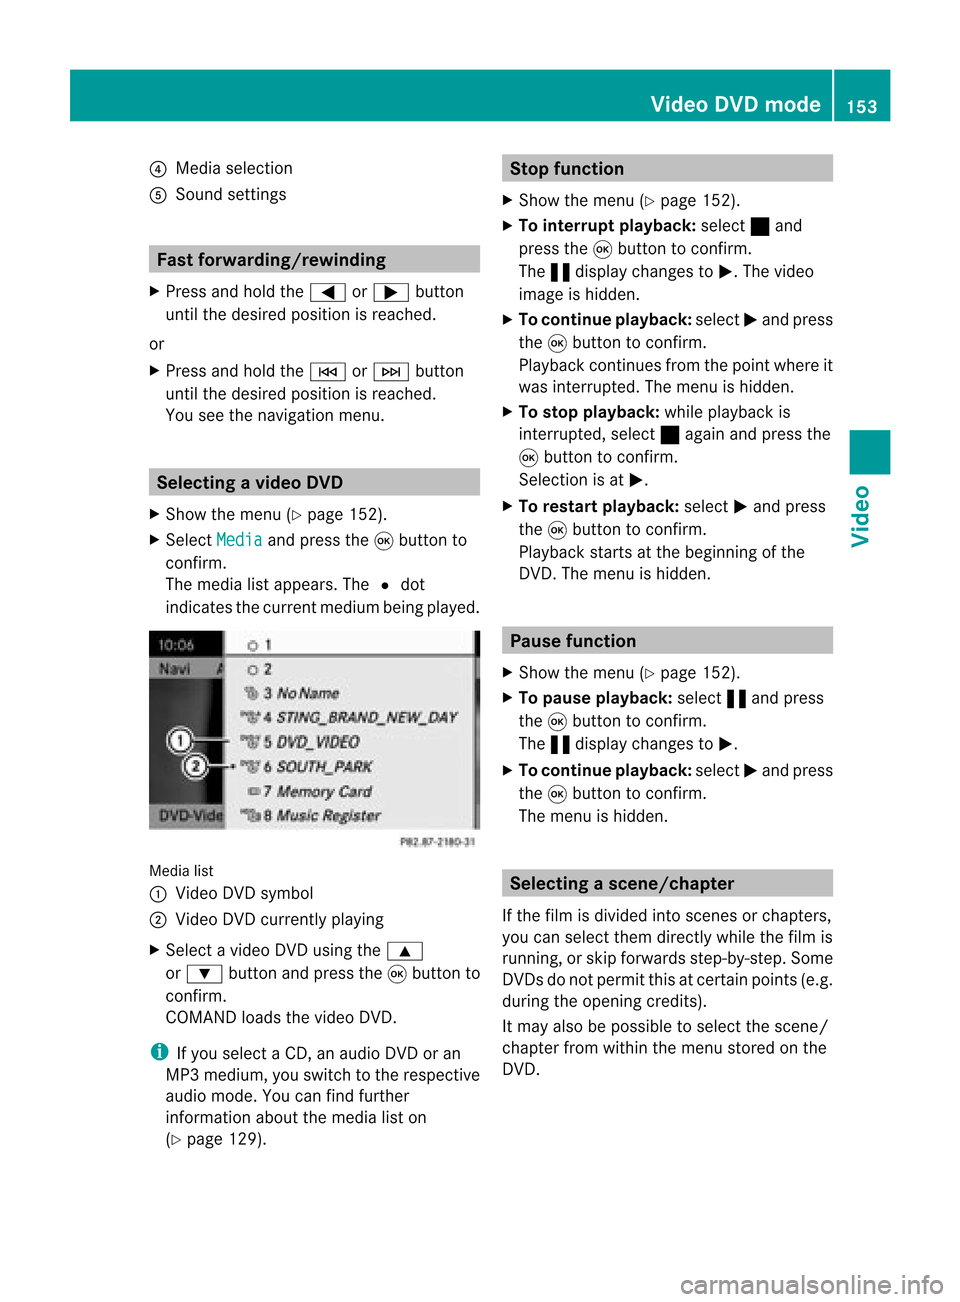
The media listappears. The#dot
indic atesthecurr entmedium beingplayed. Media
list
: Video DVDsymbol
; Video DVDcurrentlyplaying
X Selec tavideoDVD using the 9
or : button andpress the9button to
confirm.
COMAND loadsthe vide oDVD.
i Ifyou selectaCD, anaudio DVD oran
MP3 medium,youswitch tothe respe ctive
au dio mode. Youcanfind further
informati onabo utthe medi alist on
(Y page 129). Stop
function
X Sho wthe men u(Y page 152).
X To inter rupt pla yback :selec t± and
press the9butt ontocon firm .
The «display changestoM.T hevideo
image ishidden.
X To continue playback: selectMand press
the 9button toconfirm .
Play back continues fromthepoint where it
was interrupted. Themenu ishidden.
X To stop playback: whileplayback is
interrupted, select±again andpress the
9 button toconfirm .
Selection isat M.
X To restar tplayback: selectMand press
the 9button toconfirm .
Play back starts atthe beginning ofthe
DVD .The menu ishidden. Pause
function
X Show themenu (Ypage 152).
X To pause playback: select«and press
the 9button toconfirm .
The «displa ychanges toM.
X To continue playback: selectMand press
the 9button toconfirm .
The menu ishidden. Selec
tingascene/ch apter
If th efilm isdivi ded intosc en es orchapt ers,
you can selectthem dire ctly while thefilm is
run ning,or skip for wards step- by-s tep. So me
DV Ds donotpermit thisatcert ainpoint s(e.g.
during theopenin gcredit s).
It may alsobepossible toselect thescen e/
chapter fromwithin themenu storedon the
DVD . Vid
eoDVD mode
153Vid eo Z
Page 157 of 210
Make
aselection fromthefurther options,
if necessary.
COMAND thenswitches backtothe DVD
menu.
i Depending onthe DVD ,the menu items:
Back (tomovie) ,
Play ,
Stop ,
., /orGo Up may
not
funct ionornot funct ionatcertain pointsin
the DVD menu. Toindicate this,theK
symbol appearsinthe displa y.
or
X Show thecont rolmenu whileinvideo DVD
mode, ifnecessary.
X Select Menu using
the=;
9: buttonsandpress the9button
to confirm .
X Select DVD-V in
the menu usingthe
=;9: buttonsandpress
the 9button toconfirm .
X Select DVDFunctions and
press the9
button toconfirm .
X Navigate inthe DVD menu usingthe
directional arrows.
Stopping afilm orskipping tothe
beginn ingorend ofas cene X
Se lec tany men uitem fromthe DVD menu .
Th emenu appe ars.
X To sto pthe film: select the Stop menu
ite ma ndpre ssthe 9button toconfi rm.
X To skipto the endof asc en e:sel ect
the / menu itema ndpre ssthe 9
bu tton toconfi rm.
X To skiptoth ebeginnin gof as cene:
selec tthe . menu itemandpress the
9 button toconfirm .
Moving upone level inthe DVD menu X
Press thek backbutton.
or X
Select thecorresponding menuiteminthe
DVD menu andpress the9button to
confirm .
or
X Select anymenu itemfrom theDVD menu.
X Select DVD-V in
the menu usingthe
=;9: buttonsandpress
the 9button toconfirm .
X Select DVDFunctions and
press the9
button toconfirm .
X Select Goup and
press the9button to
confirm .
Back tothe film X
Press the% backbutton repeatedly
until youseethemovie.
or
X Select thecorresponding menuitemfrom
the DVD menu.
X Select theBack (to movie) menu
itemin
the menu andpress the9button to
confirm . Setting
thelanguage andaudio
forma t
This funct ionisnot availa bleonallDVD s.Ifit
is availa ble,youcan setthe DVD menu
language ,the audi olanguage orthe audi o
format. Thenumber ofsettin gsisdetermined
by the DVD content. Itis possible thatthe
settin gsmay alsobeaccessed inthe DVD
menu (Ypage 154).
X Show themenu (Ypage 152).
X Select DVD-Video in
the menu using
the :=; buttonsandpress the
9 button toconfirm .
X Select DVDFunctions and
press the9
button toconfirm . Video
DVDmode
155Video Z
Page 158 of 210
X
Sel ect Menulan guage or
Aud io lan
guage and
pressthe 9button to
confi rm.
In both cases, amenu appe ars afte rafew
seconds. The#dot infront ofan entry
indi cates thecurrently selected langua ge.
X Select asetting using the 9:
buttons andpress the9button toconfirm.
X To exitthe menu: pressthe=
or ; button. Subtitle
sand camera angle
These functions arenot available onallDVDs.
The numbe rofsubt itle lang uages andcam era
ang lesavailab ledepe ndson theco nten to f
the DVD. Itis po ssi ble tha tthe settin gsmay
also beaccessed inthe DVD menu
(Y page 154).
X Show themenu (Ypage 152).
X Select DVD-Video in
the menu using
the :=; buttonsandpress the
9 button toconfirm .
X Select DVDFunctions and
press the9
button toconfirm .
X Select Subtitles or
Camera Angle and
press the9button toconfirm .
In both cases, amenu appears.The #dot
in front ofan entr yindicates thecurrent
settin g.
X Select asettin gusing the9:
buttons andpress the9button toconfirm .
X To exit themenu: pressthe=
or ; button. Interactive
content
DVD scan cont aininteract ivecont ent(e.g. a
video game). Inavideo game, forexample,
you may beable toinfluence eventsby
selecting andtriggering actions.Thetype and
number ofactions depend onthe DVD . X
Select anaction usingthe
9:=; buttonsandpress
the 9button toexecute it.
A menu appearsand thefirst entry,
Select ,
is highlighted.
X Press the9button.
or
X Show thecont rolmenu whileinvideo DVD
mode, ifnecessary.
X Select Menu using
the=;
9: buttonsandpress the9button
to confirm .
X Select DVD-V in
the menu usingthe
=;9: buttonsandpress
the 9button toconfirm .
X Select DVDFunctions and
press the9
button toconfirm .
X Select orexecute anaction usingthearrow
keys. Video
AUXmode Conne
ctingexternal videosources
If your vehicle isequipp edwith aMedia
Int erface, youcan conn ectanextern alvideo
source.
You require anadditional audio/video cable
set toconn ectanextern alvideo source to
Media Interface.
For details, pleaseconsult anauthorized
Mercedes-Ben zCenter orvisit http://
www .mer<00030005000400050013002500020005000E001D00210003000F000D00220003
000FB nnect.and
proceed asdescribed under"Media
Int erface".
The conn ection jacksarelocated:
R in the cent erconsole stowage
compartmen t(SL)
R in the glove box 156
Video
AUXmodeVideo
Page 159 of 210
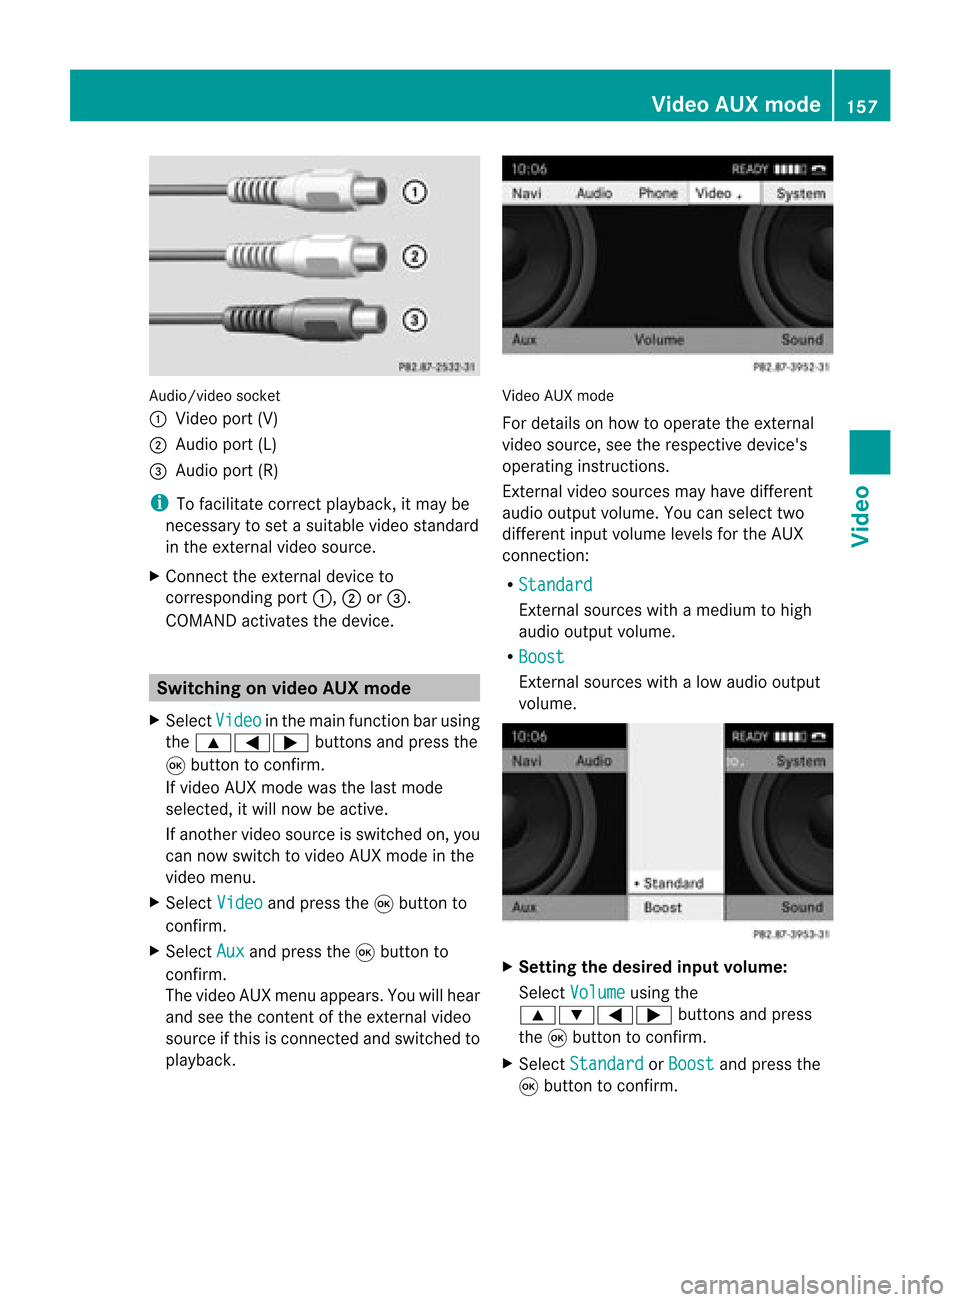
Aud
io/vid eosocke t
: Videopor t(V)
; Audio port(L)
= Audio port(R)
i Tofacilitate correctplayback, itmay be
necessary toset asuitab levideo standard
in the external videosource.
X Connect theexternal deviceto
corresponding port:,;or=.
COMAND activatesthedevice. Switchi
ngon video AUXmode
X Select Video in
the main function barusing
the 9=; buttonsandpress the
9 button toconfirm.
If video AUXmode wasthelast mode
selected, itwill now beactive.
If another videosource isswitched on,you
can now switch tovideo AUXmode inthe
video menu.
X Select Video and
press the9button to
confirm.
X Select Aux and
press the9button to
confirm.
The video AUXmenu appears.You willhear
and seetheconten tof the external video
source ifthis isconnect edand switched to
play back. Video
AUXmode
For detail son how tooperate theexternal
video source, seetherespective device's
operating instructions.
Ext ernal video sources mayhave different
aud iooutput volume. Youcanselect two
different inputvolume levelsforthe AUX
connect ion:
R Standard Ext
ernal sources withamediu mtohigh
audio output volume.
R Boost Ex
tern alsources withalow audio output
volume. X
Setting thedesired inputvolume:
Select Volume using
the
9:=; buttonsand press
the 9button toconf irm.
X Select Standard or
Boost and
press the
9 button toconf irm. Video
AUXmode
157Video Z
Page 161 of 210

COMAN
Dfea tures ........ .......... ........... 160
Gener alinfor mation <0023002300230023002300230023002300230023002300230023002300230023
002300230023002300230023002300230023> 160
Basic functions <0023002300230023002300230023002300230023002300230023002300230023
0023002300230023002300230023002300230023002300230023002300230023
0023> 161
System settings <0023002300230023002300230023002300230023002300230023002300230023
0023002300230023002300230023002300230023002300230023002300230023> 163
Audio CD/DVD andMP3 mode ........ 164
Video DVDmode <0023002300230023002300230023002300230023002300230023002300230023
002300230023002300230023002300230023002300230023002300230023> 169
AUX mode <0023002300230023002300230023002300230023002300230023002300230023
0023002300230023002300230023002300230023002300230023002300230023
0023002300230023002300230023002300230023> 173 159Rear
Entert ainmentSystem
Page 163 of 210
X
Insert thenew batteries. Observethe
pola ritymarkings onthe batteries and
battery compartment whendoing so.
Left-hand battery:thepositive pole(+)
must faceupwards.
Rig ht-hand battery: thepositive pole(+)
must facedownwa rds.
X To clo sethe battery compartment:
insert battery compartment cover=
starting withretaining lugs? into the
battery compartment andallow catch
tab ;toengage inpla ce.
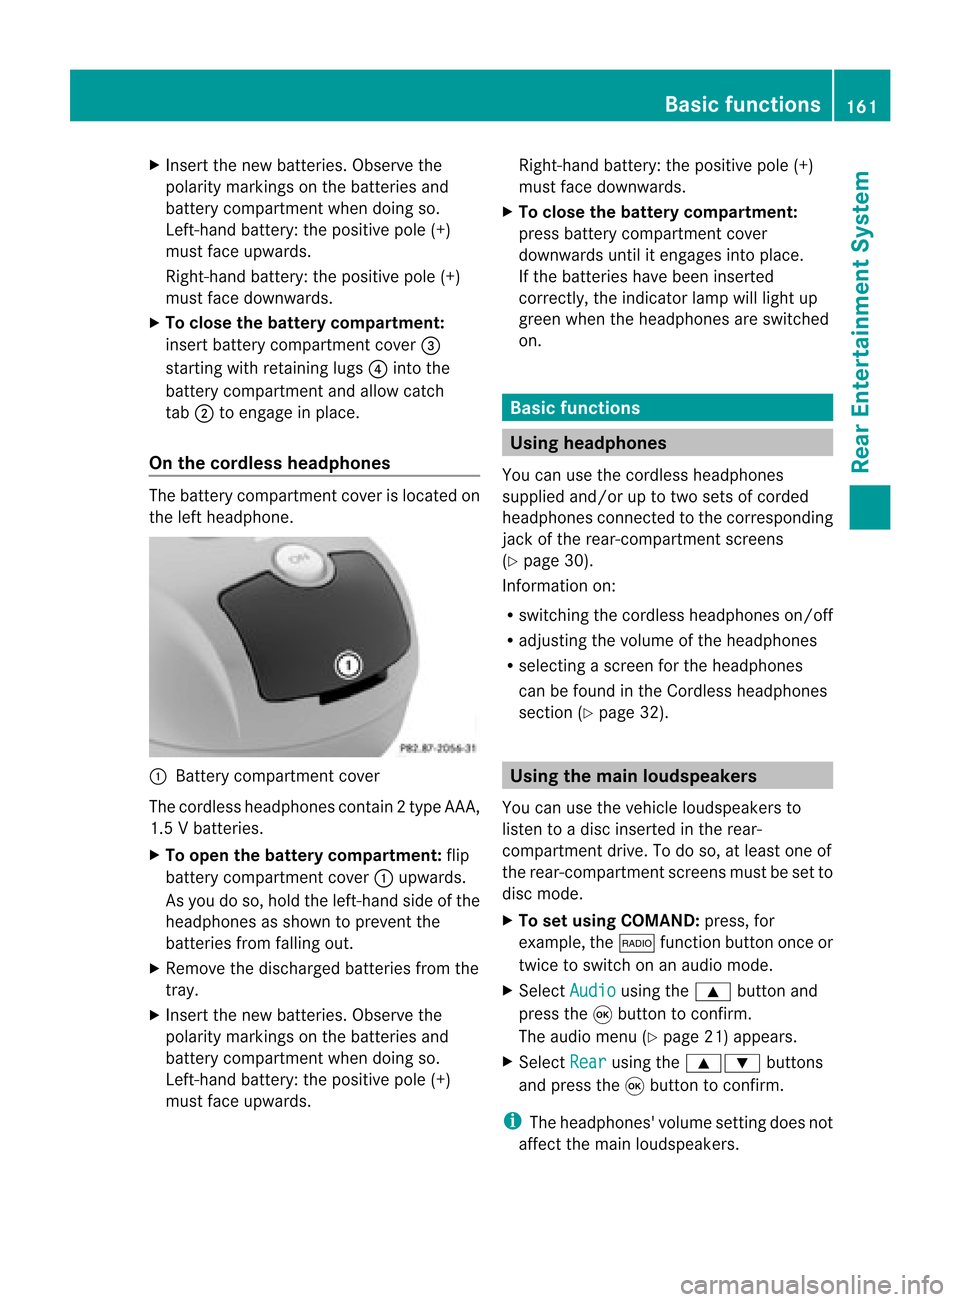
On the cordle ssheadphones The
battery compartment coverislocated on
the left head phone. :
Battery compartment cover
The cordless headphones contain 2type AAA,
1. 5V bat terie s.
X To ope nth ebat tery com partme nt:fli p
bat tery compar tmentco ver :upwar ds.
As you doso, holdth elef t-han dside ofthe
head phonesas sho wntopre ven tthe
batteries fromfalling out.
X Remove thedischarged batteriesfromthe
tray.
X Insert thenew batteries. Observethe
polarity markings onthe batteries and
battery compartmen twhen doing so.
Left- hand battery: thepositive pole(+)
must faceupwa rds. Right-hand
battery:thepositive pole(+)
must facedownwards.
X To close thebatt erycompart ment:
press battery compartmen tcover
downwards untilitengages intoplace.
If the batteries havebeen inserted
correct ly,the indicator lampwilllight up
green whentheheadphones areswitched
on. Basic
functions Using
headph ones
You canusethecordless headphones
suppli edand/or uptotwo sets ofcorded
headphones connected tothe corresponding
jack ofthe rear-compart mentscreens
(Y page 30).
Inform ationon:
R switching thecordless headphones on/off
R adjusting thevolume ofthe headphones
R selecting ascreen forthe headphones
can befound inthe Cordless headphones
section (Ypage 32). Using
themain loudspeakers
You canusethevehicle loudspe akersto
listen toadisc inserted inthe rear-
compartmen tdrive. Todo so, atlea stone of
the rear-compa rtmentscreens mustbeset to
disc mode.
X To set using COMA ND:press, for
exampl e,the $ function buttononceor
twice toswi tch onanaudio mode.
X Select Audio usi
ng the 9 button and
press the9button toconfirm.
The audio menu (Ypag e21) appears.
X Select Rear usi
ng the 9: buttons
and press the9button toconfirm.
i The headpho nes'volumesetting doesnot
affect themain loudspe akers. Basic
functio ns
161Rear Entertainmen tSystem Z