stop start MERCEDES-BENZ R-Class 2012 W251 User Guide
[x] Cancel search | Manufacturer: MERCEDES-BENZ, Model Year: 2012, Model line: R-Class, Model: MERCEDES-BENZ R-Class 2012 W251Pages: 368, PDF Size: 15.19 MB
Page 85 of 368
compartment opening when closing the
tailgate. Be especially careful when small
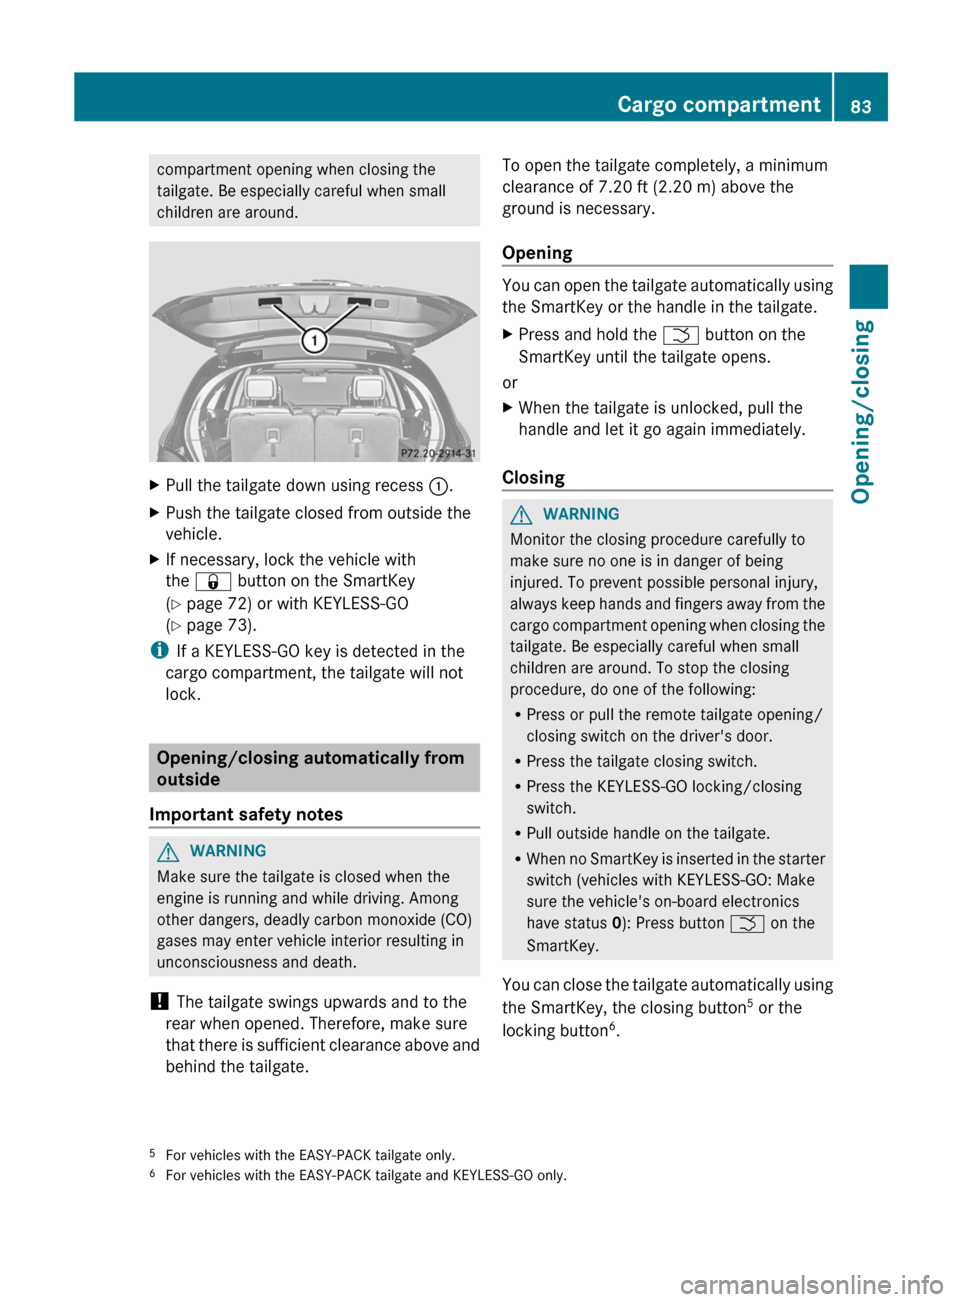
children are around.XPull the tailgate down using recess :.XPush the tailgate closed from outside the
vehicle.XIf necessary, lock the vehicle with
the & button on the SmartKey
( Y page 72) or with KEYLESS-GO
( Y page 73).
i
If a KEYLESS-GO key is detected in the
cargo compartment, the tailgate will not
lock.
Opening/closing automatically from
outside
Important safety notes
GWARNING
Make sure the tailgate is closed when the
engine is running and while driving. Among
other dangers, deadly carbon monoxide (CO)
gases may enter vehicle interior resulting in
unconsciousness and death.
! The tailgate swings upwards and to the
rear when opened. Therefore, make sure
that there is sufficient clearance above and
behind the tailgate.
To open the tailgate completely, a minimum
clearance of 7.20 ft (2.20 m) above the
ground is necessary.
Opening
You can open the tailgate automatically using
the SmartKey or the handle in the tailgate.
XPress and hold the F button on the
SmartKey until the tailgate opens.
or
XWhen the tailgate is unlocked, pull the
handle and let it go again immediately.
Closing
GWARNING
Monitor the closing procedure carefully to
make sure no one is in danger of being
injured. To prevent possible personal injury,
always keep hands and fingers away from the
cargo compartment opening when closing the
tailgate. Be especially careful when small
children are around. To stop the closing
procedure, do one of the following:
R Press or pull the remote tailgate opening/
closing switch on the driver's door.
R Press the tailgate closing switch.
R Press the KEYLESS-GO locking/closing
switch.
R Pull outside handle on the tailgate.
R When no SmartKey is inserted in the starter
switch (vehicles with KEYLESS-GO: Make
sure the vehicle's on-board electronics
have status 0): Press button F on the
SmartKey.
You can close the tailgate automatically using
the SmartKey, the closing button 5
or the
locking button 6
.
5 For vehicles with the EASY-PACK tailgate only.
6 For vehicles with the EASY-PACK tailgate and KEYLESS-GO only.Cargo compartment83Opening/closingZ
Page 88 of 368
DeactivatingXPress and hold the closing button
( Y page 83) in the tailgate until you hear
two short tones.
Side windows
Important safety notes
GWARNING
When opening or closing the windows, make
sure there is no danger of anyone being
harmed by the opening/closing procedure.
The door windows are equipped with the
express operation and automatic reversal
function. If in express operation mode a door
window encounters an obstruction that
blocks its path, the automatic reversal
function will stop the door window and open
it slightly.
The door windows operate differently when
the switch is pulled and held. See the "Closing
when a door window is blocked" section in
this chapter for details.
The closing of a door window can be
immediately halted by releasing the switch or,
if the switch was pulled past the resistance
point and released, by either pressing or
pulling the respective switch.
The closing of the hinged quarter windows can
be immediately halted by pressing or pulling
the switch.
If a window encounters an obstruction that
blocks its path in a circumstance where you
are closing the windows by pressing and
holding button & on the SmartKey or by
pressing and holding the lock button (vehicles
with KEYLESS-GO) on an outside door handle,
the automatic reversal function will not
operate.
Activate the override switch when children
are riding in the back seats of the vehicle. The
children may otherwise injure themselves,
e.g. by becoming trapped in the window
opening.
GWARNING
Do not keep any part of your body up against
the window pane when opening a window. The
downward motion of the pane may pull that
part of your body down between the window
pane and the door frame and trap it there. If
there is a risk of entrapment, release the
switch and pull it to close the window.
Opening and closing the side
windows
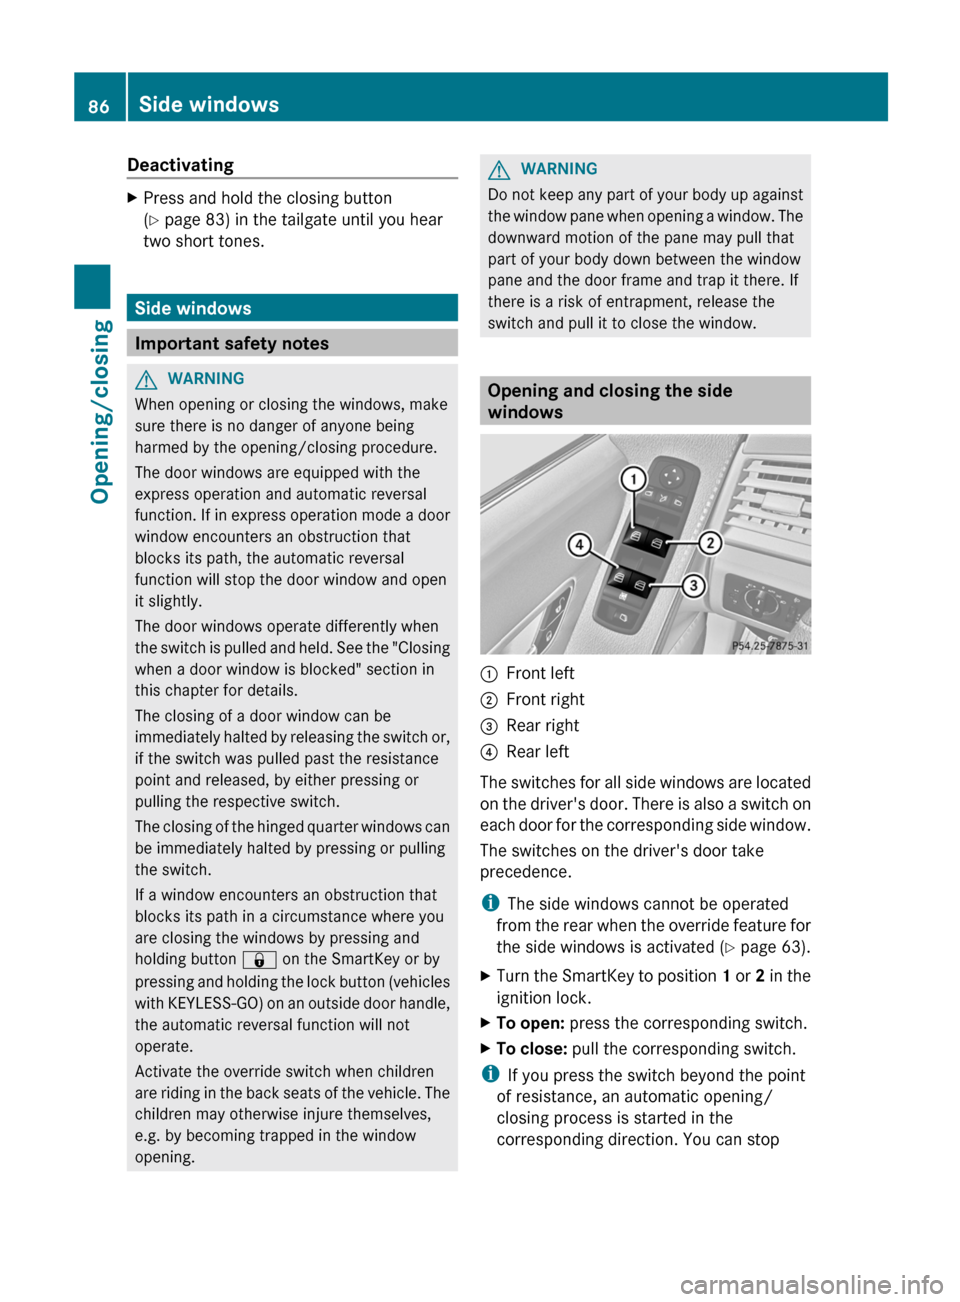
:Front left;Front right=Rear right?Rear left
The switches for all side windows are located
on the driver's door. There is also a switch on
each door for the corresponding side window.
The switches on the driver's door take
precedence.
i The side windows cannot be operated
from the rear when the override feature for
the side windows is activated ( Y page 63).
XTurn the SmartKey to position 1 or 2 in the
ignition lock.XTo open: press the corresponding switch.XTo close: pull the corresponding switch.
i
If you press the switch beyond the point
of resistance, an automatic opening/
closing process is started in the
corresponding direction. You can stop
86Side windowsOpening/closing
Page 89 of 368

automatic operation by operating the
switch again.
i You can continue to operate the side
windows after you switch off the engine or
remove the SmartKey. This function is
available for up to five minutes or until the
driver's or front-passenger door is opened.
Opening and closing the hinged side
windows
The hinged side windows are operated
electrically from the from the driver's seat.
GWARNING
Make sure that nobody can become trapped
as you close the hinged side windows. If there
is a risk of somebody becoming trapped,
release the switch or push the switch again to
reopen the side window.
Door control panel
XMake sure that the SmartKey is in position
1 or 2 in the ignition lock.XTo open fully: press switch : and release.XTo close fully: pull switch : and release.XTo stop the closing procedure: press
switch : again.
Both hinged side windows open fully.
i If the hinged side windows are blocked
when closing, the closing procedure is
terminated and the hinged side windows
open again slightly.
i For safety reasons, the hinged side
windows can only be opened again after
four seconds.
Convenience opening feature
You can ventilate the vehicle before you start
driving. To do this, the key is used to carry out
the following functions simultaneously:
R unlock the vehicle
R open the side windows
R open the hinged side windows
R open the sliding sunroof or the panorama
roof with power tilt/sliding panel and the
roller sunblinds
i The convenience opening feature can
only be operated using the SmartKey. The
SmartKey must be close to the driver's
door handle.
XPoint the tip of the SmartKey at the driver's
door handle.XPress and hold the % button until the
side windows and the sliding sunroof or the
panorama roof with power tilt/sliding
panel are in the desired position.
If the roller sunblinds of the panorama roof
with power tilt/sliding panel are closed, the
roller sunblinds are opened first.
XPress and hold the % button again until
the panorama roof with power tilt/sliding
panel is in the desired position.XTo interrupt convenience opening:
release the % button.Side windows87Opening/closingZ
Page 92 of 368
The opening/closing procedure of the sliding
sunroof can be immediately halted by
releasing the sliding sunroof switch or, if the
sliding sunroof switch was moved past the
resistance point and released, by moving the
sliding sunroof switch in any direction.GWARNING
The sliding sunroof is made out of glass. In the
event of an accident, the glass may shatter.
This may result in an opening in the roof.
In a vehicle rollover, occupants not wearing
their seat belts or not wearing them properly
may be thrown out of the opening. Such an
opening also presents a potential for injury for
occupants wearing their seat belts properly,
as entire body parts or portions of them may
protrude from the passenger compartment.
! Only open the sliding sunroof if it is free
of snow and ice. Otherwise, malfunctions
may occur.
Do not allow anything to protrude from the
sliding sunroof. Otherwise, the seals could
be damaged.
! The weather can change abruptly. It could
start to rain or snow. Make sure that the
sliding sunroof is closed when you leave the
vehicle. The vehicle electronics can be
damaged if water enters the vehicle
interior.
i Resonance noises can occur in addition
to the usual airflow noises when the sliding
sunroof is open. They are caused by minor
pressure fluctuations in the vehicle interior.
Change the position of the sliding sunroof
or open a side window slightly to reduce or
eliminate these noises.
Operating the sliding sunroof
Opening and closing
i You can continue to operate the sliding
sunroof after switching off the engine or
removing the SmartKey from the ignition
lock. This function is available for up to five
minutes or until the driver's or front-
passenger door is opened.
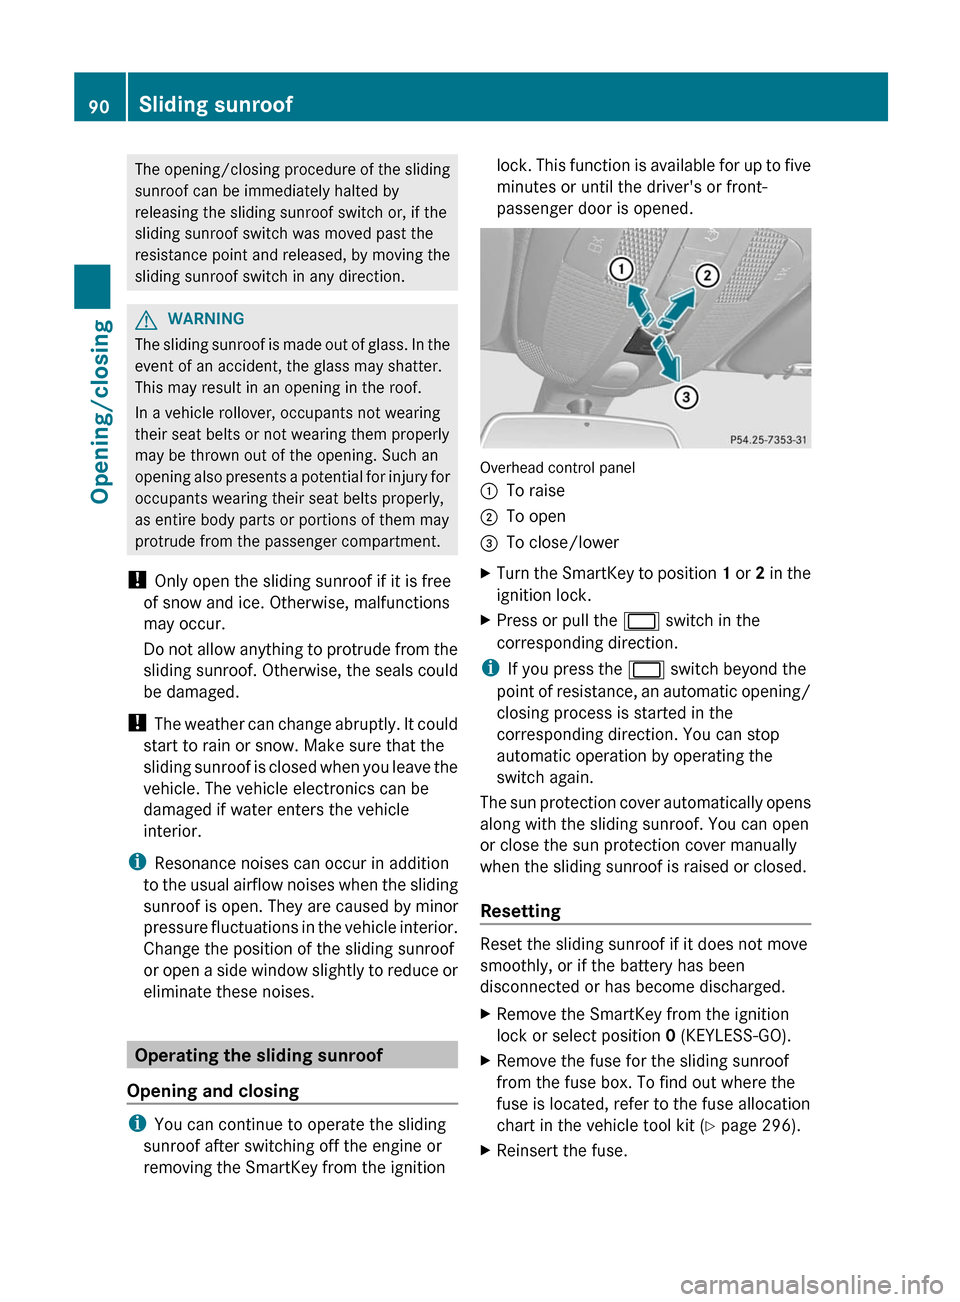
Overhead control panel
:To raise;To open=To close/lowerXTurn the SmartKey to position 1 or 2 in the
ignition lock.XPress or pull the 2 switch in the
corresponding direction.
i If you press the 2 switch beyond the
point of resistance, an automatic opening/
closing process is started in the
corresponding direction. You can stop
automatic operation by operating the
switch again.
The sun protection cover automatically opens
along with the sliding sunroof. You can open
or close the sun protection cover manually
when the sliding sunroof is raised or closed.
Resetting
Reset the sliding sunroof if it does not move
smoothly, or if the battery has been
disconnected or has become discharged.
XRemove the SmartKey from the ignition
lock or select position 0 (KEYLESS-GO).XRemove the fuse for the sliding sunroof
from the fuse box. To find out where the
fuse is located, refer to the fuse allocation
chart in the vehicle tool kit ( Y page 296).XReinsert the fuse.90Sliding sunroofOpening/closing
Page 111 of 368
To stop steering wheel movement do one of
the following:
R Move steering wheel adjustment stalk.
R Press one of the memory position buttons.
R Press memory button M.
Do not leave children unattended in the
vehicle, or with access to an unlocked vehicle.
Children could open the driver's door and
unintentionally activate the easy-entry/exit
feature, which could result in an accident
and/or serious personal injury.GWARNING
Let the system complete the adjustment
procedure before setting the vehicle in
motion. All steering wheel adjustment must
be completed before setting the vehicle in
motion. Driving off with the steering wheel
still adjusting could cause the driver to lose
control of the vehicle.
Position of the steering wheel when the
EASY-ENTRY/EXIT feature is active
The steering wheel swings upwards when
you:
R remove the SmartKey from the ignition lock
R open the driver's door and KEYLESS-GO is
in position 1
R open the driver's door and the SmartKey is
in position 0 or 1 in the ignition lock
i The steering wheel only moves upwards if
it has not already reached the upper end
stop.
Position of the steering wheel for
driving
The steering wheel is moved to the last
selected position when:
R the driver's door is closed.
R you insert the SmartKey into the ignition
lock.
or
R you press the Start/Stop button once on
vehicles with KEYLESS-GO.
When you close the driver's door with the
ignition switched on, the steering wheel is
also automatically moved to the previously
set position.
The last position of the steering wheel is
stored when you switch off the ignition or
when you store the setting with the memory
function ( Y page 112).
Crash-responsive EASY-EXIT feature
If the crash-responsive EASY-EXIT feature is
triggered in an accident, the steering column
will move upwards when the driver's door is
opened. This occurs irrespective of the
position of the SmartKey in the ignition lock.
This makes it easier to exit the vehicle and
rescue the occupants.
The crash-responsive EASY-EXIT feature is
only operational if the EASY-EXIT/ENTRY
feature is activated in the on-board computer.
Mirrors
Rear-view mirror
Rear-view mirror (manual anti-glare)
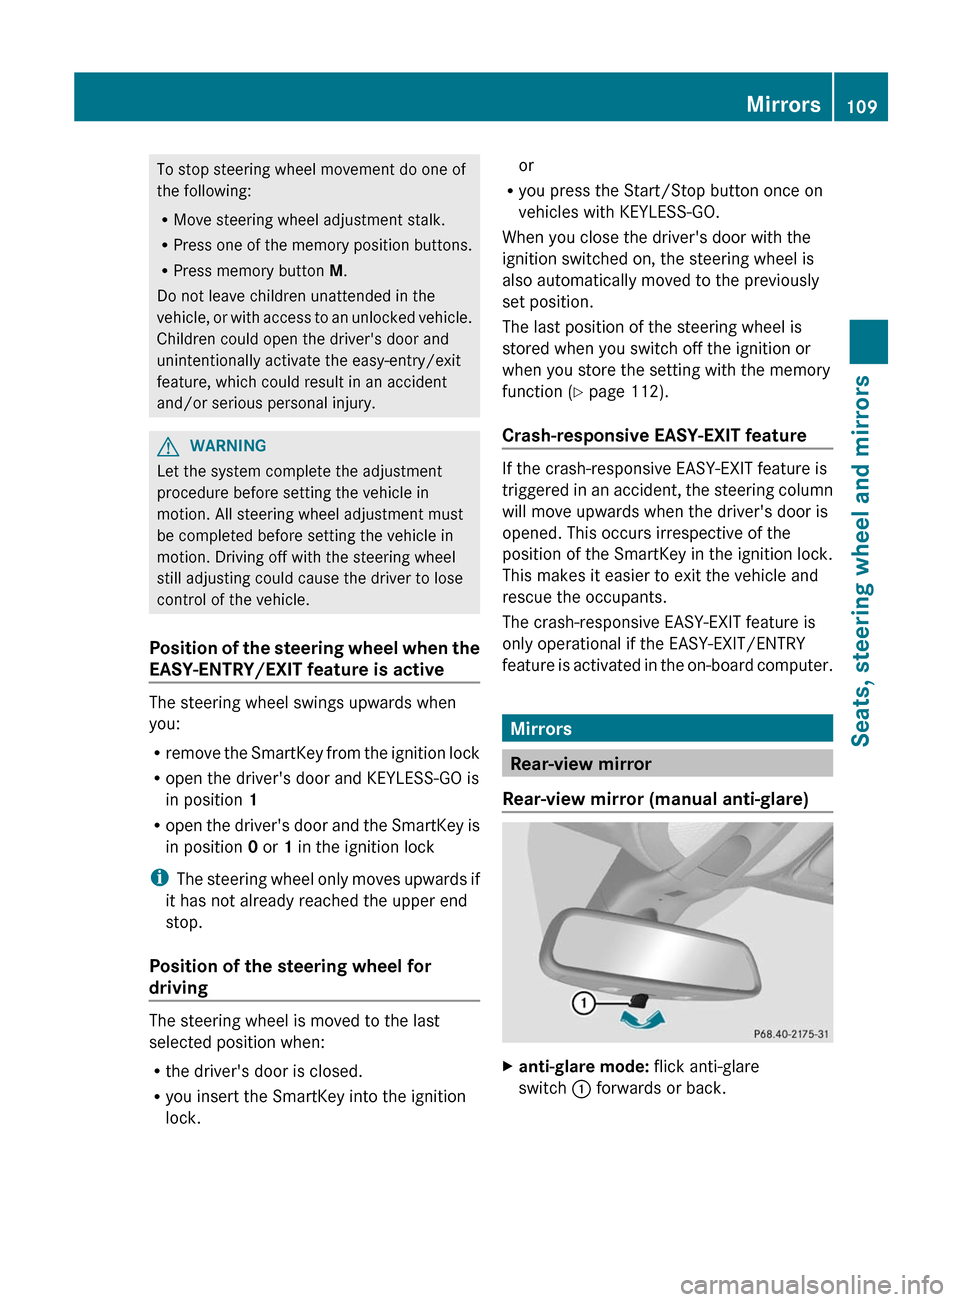
Xanti-glare mode: flick anti-glare
switch : forwards or back.Mirrors109Seats, steering wheel and mirrorsZ
Page 117 of 368
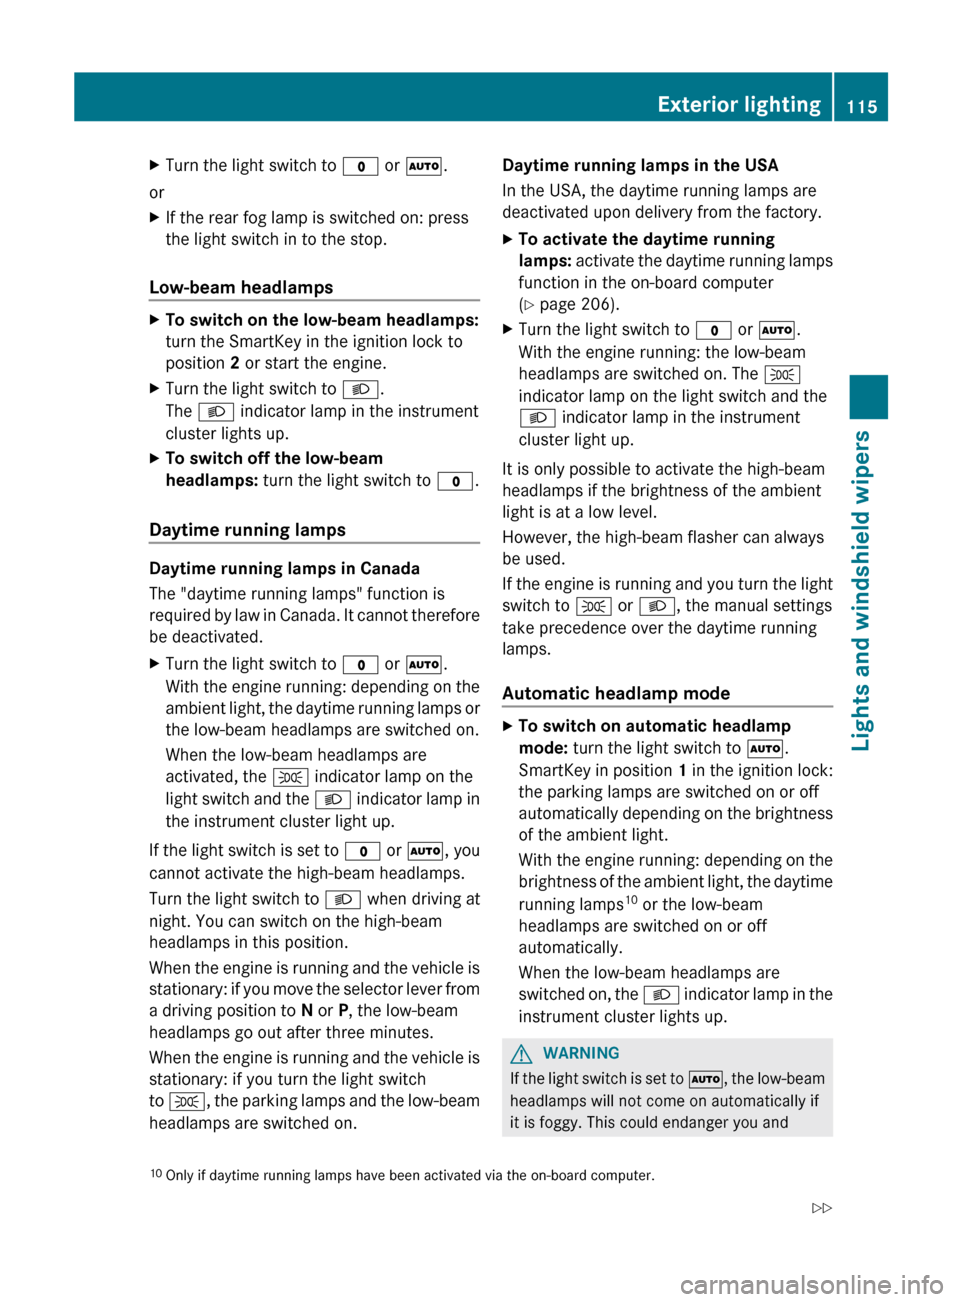
XTurn the light switch to $ or à .
or
XIf the rear fog lamp is switched on: press
the light switch in to the stop.
Low-beam headlamps
XTo switch on the low-beam headlamps:
turn the SmartKey in the ignition lock to
position 2 or start the engine.XTurn the light switch to L.
The L indicator lamp in the instrument
cluster lights up.XTo switch off the low-beam
headlamps: turn the light switch to $.
Daytime running lamps
Daytime running lamps in Canada
The "daytime running lamps" function is
required by law in Canada. It cannot therefore
be deactivated.
XTurn the light switch to $ or à .
With the engine running: depending on the
ambient light, the daytime running lamps or
the low-beam headlamps are switched on.
When the low-beam headlamps are
activated, the T indicator lamp on the
light switch and the L indicator lamp in
the instrument cluster light up.
If the light switch is set to $ or à , you
cannot activate the high-beam headlamps.
Turn the light switch to L when driving at
night. You can switch on the high-beam
headlamps in this position.
When the engine is running and the vehicle is
stationary: if you move the selector lever from
a driving position to N or P, the low-beam
headlamps go out after three minutes.
When the engine is running and the vehicle is
stationary: if you turn the light switch
to T , the parking lamps and the low-beam
headlamps are switched on.
Daytime running lamps in the USA
In the USA, the daytime running lamps are
deactivated upon delivery from the factory.XTo activate the daytime running
lamps: activate the daytime running lamps
function in the on-board computer
( Y page 206).XTurn the light switch to $ or à .
With the engine running: the low-beam
headlamps are switched on. The T
indicator lamp on the light switch and the
L indicator lamp in the instrument
cluster light up.
It is only possible to activate the high-beam
headlamps if the brightness of the ambient
light is at a low level.
However, the high-beam flasher can always
be used.
If the engine is running and you turn the light
switch to T or L , the manual settings
take precedence over the daytime running
lamps.
Automatic headlamp mode
XTo switch on automatic headlamp
mode: turn the light switch to Ã.
SmartKey in position 1 in the ignition lock:
the parking lamps are switched on or off
automatically depending on the brightness
of the ambient light.
With the engine running: depending on the
brightness of the ambient light, the daytime
running lamps 10
or the low-beam
headlamps are switched on or off
automatically.
When the low-beam headlamps are
switched on, the L indicator lamp in the
instrument cluster lights up.GWARNING
If the light switch is set to Ã, the low-beam
headlamps will not come on automatically if
it is foggy. This could endanger you and
10 Only if daytime running lamps have been activated via the on-board computer.Exterior lighting115Lights and windshield wipersZ
Page 118 of 368
others. Therefore, turn the light switch to
L in fog.
The automatic headlamp feature is only an
aid. The driver is responsible for the vehicle's
lighting at all times.GWARNING
In low ambient lighting or foggy conditions,
only switch from position à to L with
the vehicle at a standstill in a safe location.
Switching from à to L will briefly
switch off the headlamps. Doing so while
driving in low ambient lighting conditions may
result in an accident.
Front fog lamps and rear fog lamp
Front fog lamps
Only vehicles with front fog lamps have the
"fog lamps" function.
GWARNING
If you suspect that driving conditions will be
foggy, turn the light switch to L before you
start your journey. Otherwise, your vehicle
may not be visible and you could endanger
yourself and others.
GWARNING
In low ambient lighting or foggy conditions,
only switch from position à to L with
the vehicle at a standstill in a safe location.
Switching from à to L will briefly
switch off the headlamps. Doing so while
driving in low ambient lighting conditions may
result in an accident.
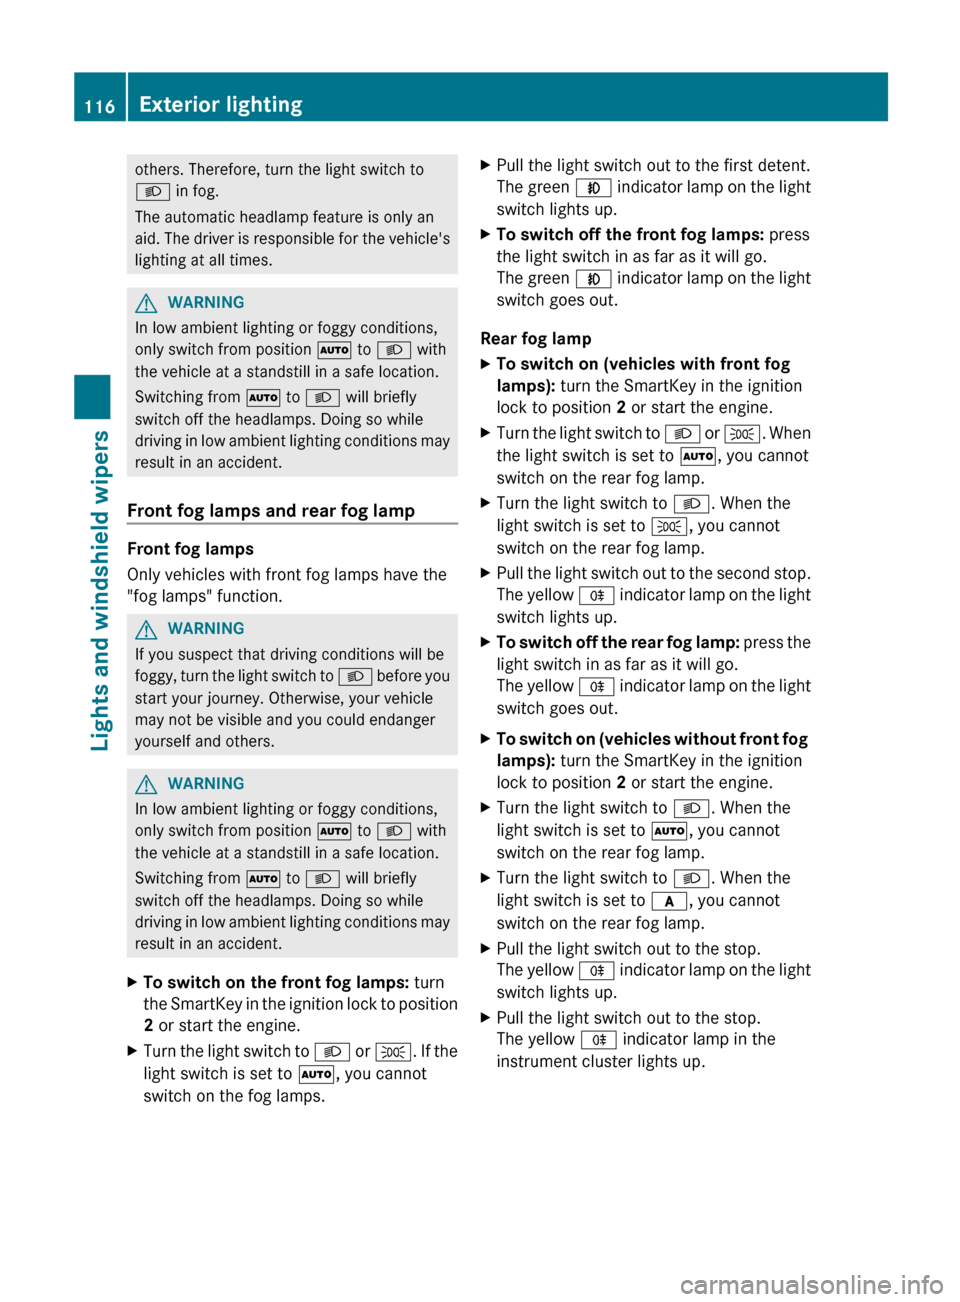
XTo switch on the front fog lamps: turn
the SmartKey in the ignition lock to position
2 or start the engine.XTurn the light switch to L or T . If the
light switch is set to Ã, you cannot
switch on the fog lamps.XPull the light switch out to the first detent.
The green N indicator lamp on the light
switch lights up.XTo switch off the front fog lamps: press
the light switch in as far as it will go.
The green N indicator lamp on the light
switch goes out.
Rear fog lamp
XTo switch on (vehicles with front fog
lamps): turn the SmartKey in the ignition
lock to position 2 or start the engine.XTurn the light switch to L or T . When
the light switch is set to Ã, you cannot
switch on the rear fog lamp.XTurn the light switch to L. When the
light switch is set to T, you cannot
switch on the rear fog lamp.XPull the light switch out to the second stop.
The yellow R indicator lamp on the light
switch lights up.XTo switch off the rear fog lamp: press the
light switch in as far as it will go.
The yellow R indicator lamp on the light
switch goes out.XTo switch on (vehicles without front fog
lamps): turn the SmartKey in the ignition
lock to position 2 or start the engine.XTurn the light switch to L. When the
light switch is set to Ã, you cannot
switch on the rear fog lamp.XTurn the light switch to L. When the
light switch is set to c, you cannot
switch on the rear fog lamp.XPull the light switch out to the stop.
The yellow R indicator lamp on the light
switch lights up.XPull the light switch out to the stop.
The yellow R indicator lamp in the
instrument cluster lights up.116Exterior lightingLights and windshield wipers
Page 129 of 368
XFor safety reasons, you should remove the
SmartKey from the ignition lock.
or
XSwitch off the engine using the Start/Stop
button and open the driver's door.XRemove the cause of the obstruction.XSwitch the windshield wipers back on.
The windshield wipers are inoperative
The windshield wiper drive is malfunctioning.
XSelect another wiper speed on the
combination switch.XHave the windshield wipers checked at a
qualified specialist workshop.
The spray nozzles are misaligned
The windshield washer fluid from the spray
nozzles no longer hits the center of the
windshield. The spray nozzles are misaligned.
XHave the spray nozzles adjusted at a
qualified specialist workshop.Windshield wipers127Lights and windshield wipersZ
Page 147 of 368
Where possible, avoid spinning the drive
wheels when pulling away on slippery
roads. You could otherwise damage the
drive train.
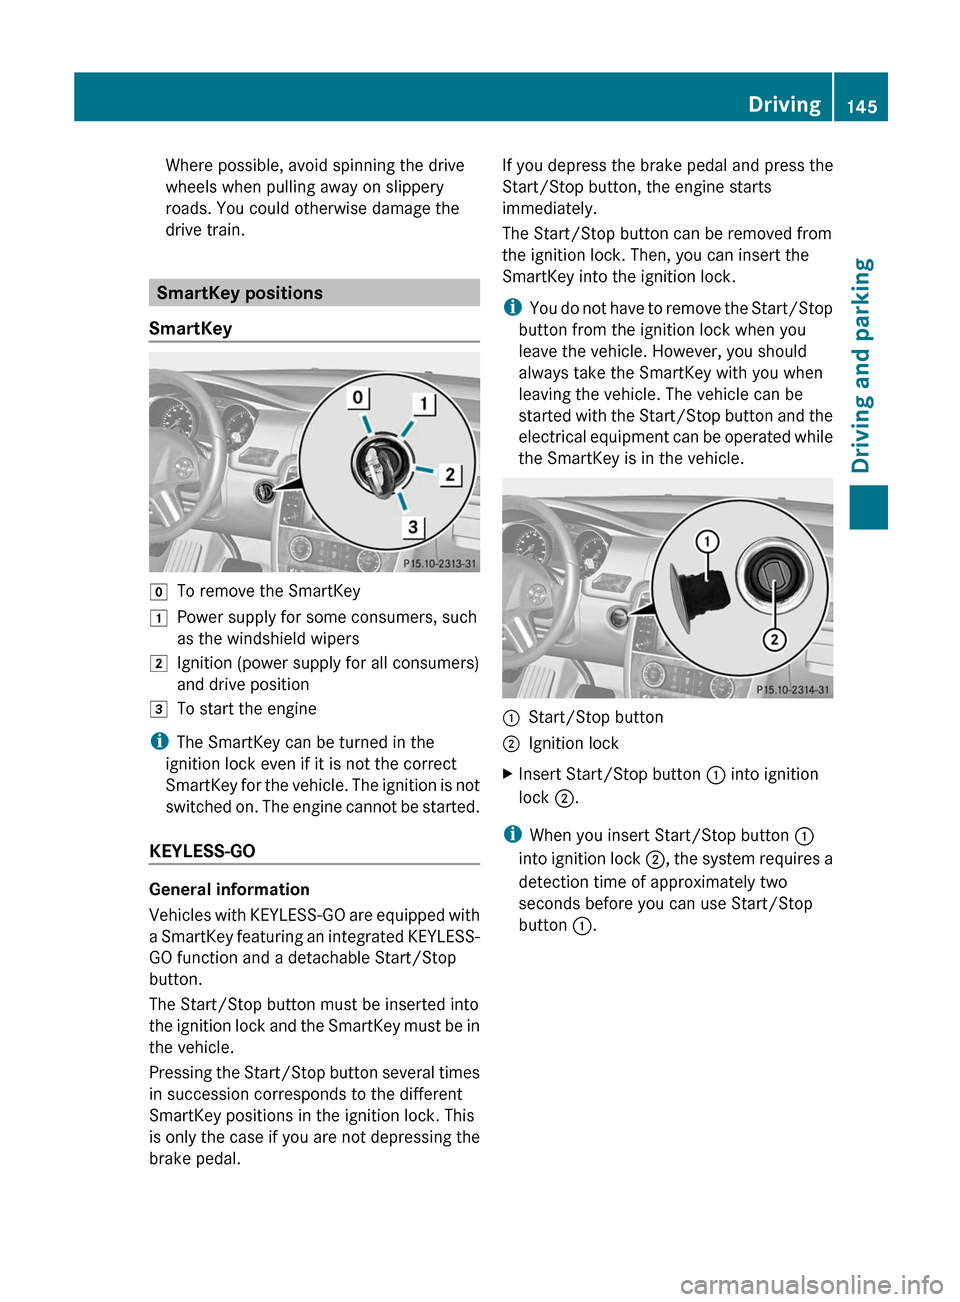
SmartKey positions
SmartKey
gTo remove the SmartKey1Power supply for some consumers, such
as the windshield wipers2Ignition (power supply for all consumers)
and drive position3To start the engine
i The SmartKey can be turned in the
ignition lock even if it is not the correct
SmartKey for the vehicle. The ignition is not
switched on. The engine cannot be started.
KEYLESS-GO
General information
Vehicles with KEYLESS-GO are equipped with
a SmartKey featuring an integrated KEYLESS-
GO function and a detachable Start/Stop
button.
The Start/Stop button must be inserted into
the ignition lock and the SmartKey must be in
the vehicle.
Pressing the Start/Stop button several times
in succession corresponds to the different
SmartKey positions in the ignition lock. This
is only the case if you are not depressing the
brake pedal.
If you depress the brake pedal and press the
Start/Stop button, the engine starts
immediately.
The Start/Stop button can be removed from
the ignition lock. Then, you can insert the
SmartKey into the ignition lock.
i You do not have to remove the Start/Stop
button from the ignition lock when you
leave the vehicle. However, you should
always take the SmartKey with you when
leaving the vehicle. The vehicle can be
started with the Start/Stop button and the
electrical equipment can be operated while
the SmartKey is in the vehicle.:Start/Stop button;Ignition lockXInsert Start/Stop button : into ignition
lock ;.
i
When you insert Start/Stop button :
into ignition lock ;, the system requires a
detection time of approximately two
seconds before you can use Start/Stop
button :.
Driving145Driving and parkingZ
Page 148 of 368
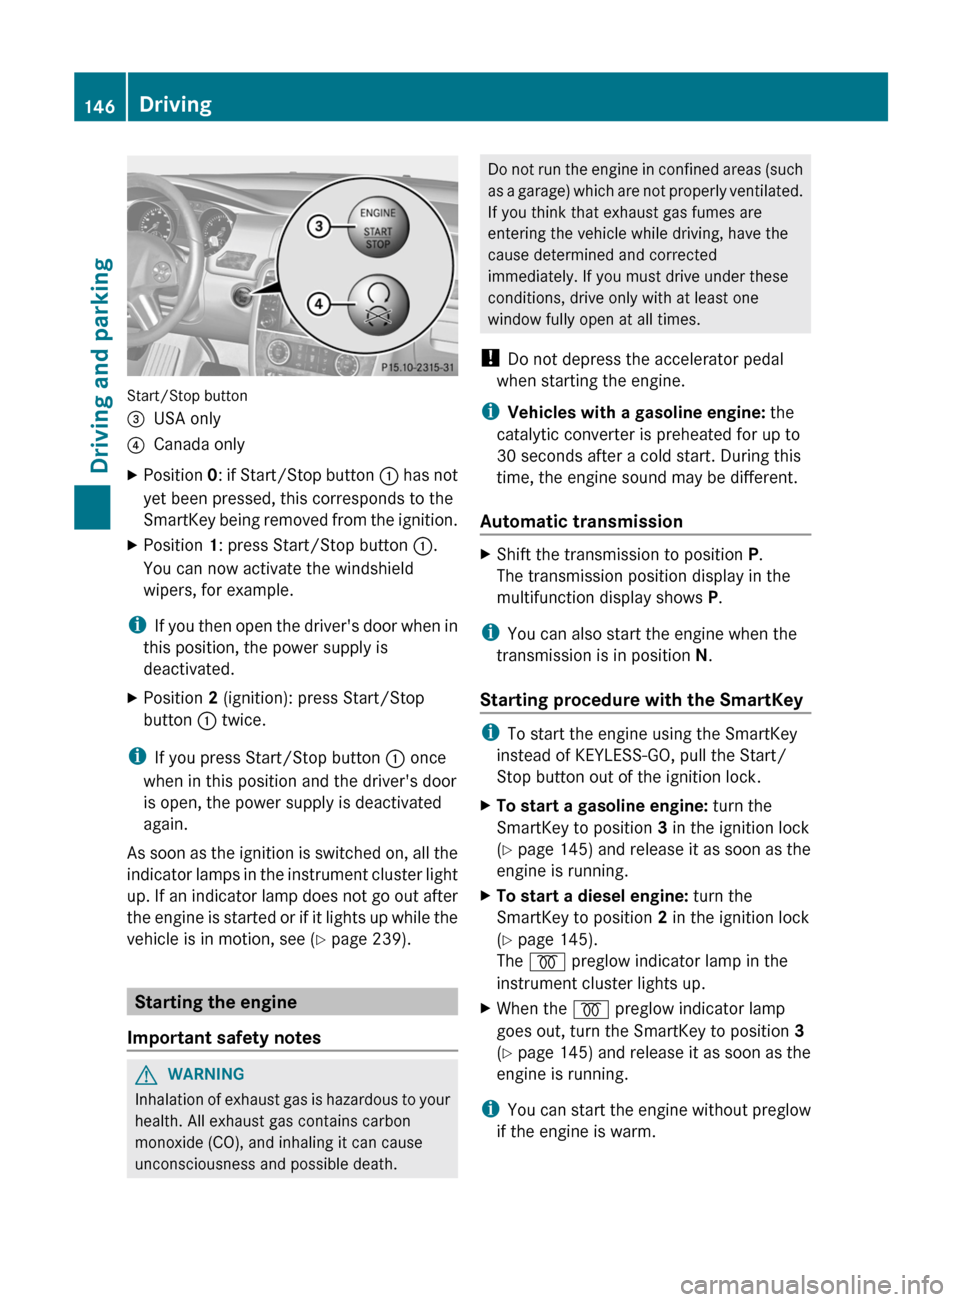
Start/Stop button
=USA only?Canada onlyXPosition 0: if Start/Stop button : has not
yet been pressed, this corresponds to the
SmartKey being removed from the ignition.XPosition 1: press Start/Stop button :.
You can now activate the windshield
wipers, for example.
i If you then open the driver's door when in
this position, the power supply is
deactivated.
XPosition 2 (ignition): press Start/Stop
button : twice.
i
If you press Start/Stop button : once
when in this position and the driver's door
is open, the power supply is deactivated
again.
As soon as the ignition is switched on, all the
indicator lamps in the instrument cluster light
up. If an indicator lamp does not go out after
the engine is started or if it lights up while the
vehicle is in motion, see ( Y page 239).
Starting the engine
Important safety notes
GWARNING
Inhalation of exhaust gas is hazardous to your
health. All exhaust gas contains carbon
monoxide (CO), and inhaling it can cause
unconsciousness and possible death.
Do not run the engine in confined areas (such
as a garage) which are not properly ventilated.
If you think that exhaust gas fumes are
entering the vehicle while driving, have the
cause determined and corrected
immediately. If you must drive under these
conditions, drive only with at least one
window fully open at all times.
! Do not depress the accelerator pedal
when starting the engine.
i Vehicles with a gasoline engine: the
catalytic converter is preheated for up to
30 seconds after a cold start. During this
time, the engine sound may be different.
Automatic transmissionXShift the transmission to position P.
The transmission position display in the
multifunction display shows P.
i
You can also start the engine when the
transmission is in position N.
Starting procedure with the SmartKey
i To start the engine using the SmartKey
instead of KEYLESS-GO, pull the Start/
Stop button out of the ignition lock.
XTo start a gasoline engine: turn the
SmartKey to position 3 in the ignition lock
( Y page 145) and release it as soon as the
engine is running.XTo start a diesel engine: turn the
SmartKey to position 2 in the ignition lock
( Y page 145).
The % preglow indicator lamp in the
instrument cluster lights up.XWhen the % preglow indicator lamp
goes out, turn the SmartKey to position 3
( Y page 145) and release it as soon as the
engine is running.
i You can start the engine without preglow
if the engine is warm.
146DrivingDriving and parking