stop start MERCEDES-BENZ S-Class 2013 W221 User Guide
[x] Cancel search | Manufacturer: MERCEDES-BENZ, Model Year: 2013, Model line: S-Class, Model: MERCEDES-BENZ S-Class 2013 W221Pages: 542, PDF Size: 7.97 MB
Page 82 of 542
X
To sto pthe alarm using KEYLESS-GO:
grasp the outside door handle. The
SmartKey must be outside the vehicle.
The alarm is switched off.
or
X Press the Start/Stop button on the
dashboard. The SmartKey must be inside
the vehicle.
The alarm is switched off. 80
Theft deterrent locking systemSafety
Page 86 of 542
X
To unloc kthe vehicle: pull the door
handle.
X To loc kthe vehicle: touch sensor
surface 0002.
X Convenience closing feature: touch
recessed sensor surface 0003for an
extended period (Y page 97).
If you pull on the handl eofthe trunk lid, only
the trunk of the vehicle is unlocked.
If the vehicle has been parked for a long time,
the sensor surfaces are deactivated
automatically .Inorder to unlock the door,
pull the door handle. In order to reactivate the
sensor surface, switch the ignitio nonagain. Changing the settings of the locking
system
You can change the setting of the locking
system in such a way that only the driver's
door and the fuel filler flap are unlocked. This
is useful if you frequently travel on your own.
X To change the setting: press and hold
down the 000Band0009 buttons
simultaneously for approximately
six seconds until the battery check lamp
flashes twice (Y page 85).
i If the setting of the locking system is
changed within the signal range of the
vehicle, pressing the 0009or000B button
locks or unlocks the vehicle.
The SmartKey now functions as follows:
X To unlock the driver's door: press the
000B button once.
X To unlock centrally: press the000B
button twice.
X To lock centrally: press the0009button. The KEYLESS-GO function is changed as
follows:
X
To unlock the driver's door :pull the door
handle on the driver's door.
X To unlock centrally: pull the door handle
on the front-passenger door or on the rear
doors.
X To lock centrally: touch the outer sensor
surface on one of the door handles. Restoring the factory settings
X Press the 000Band0009 buttons
simultaneously for approximately
six seconds until the battery chec klamp
flashes twice. Mechanical key
General notes If you use the mechanical key to unlock and
open the driver's door or the trunk lid, the
anti-thef
talarm system will be triggered
(Y page 79).
There are several ways to tur noff the alarm:
X To turn the alarm off with the
SmartKey: press the000Bor0009 button
on the SmartKey.
or
X Insert the SmartKey into the ignition lock.
or
X To deactivate the alarm with KEYLESS-
GO: press the Start/Stop button in the
ignition lock. The SmartKey must be in the
vehicle.
or
X Lock or unlock the vehicle using KEYLESS-
GO. The SmartKey must be outside the
vehicle. 84
SmartKeyOpening/closing
Page 95 of 542
Opening/closing automatically from
outside
Important safety notes G
WARNING
Make sure the trun klid is closed when the
engine is running and while driving. Among
other dangers, deadly carbo nmonoxide (CO)
gases may enter the vehicle interior resulting
in unconsciousness and death.
! The trunk lid swings upwards when
opened. Therefore, make sure that there is
sufficient clearance above the trunk lid.
To open the trunk lid completely, a minimum
clearance of 5.90 ft (1.80 m) above the
ground is necessary.
Opening You can open the trunk lid using the
SmartKey.
X
Press and hold the 0004button on the
SmartKey until the trunk lid opens.
Closing G
WARNING
Monitor the closing procedure carefully to
make sure no one is in danger of being
injured. To prevent possible personal injury,
always keep hands and fingers away from the
trunk opening when closing the trunk lid. Be
especially careful when small children are
around. To stop the closing procedure, do one
of the following:
R Press button 0004on the SmartKey.
R Press the remote trunk opening/closing
switch (on the driver's door).
R Press the trunk closing switch.
R Press the KEYLESS-GO locking/closing
switch.
R Pull the trunk lid handle. Even with the SmartKey removed from the
starter switch or the SmartKey with KEYLESS-
GO removed from the vehicle, the remote
trunk opening/closing switch can be
operated. Therefore, do not leave children
unattended in the vehicle, or with access to
an unlocked vehicle.
Achild's unsupervised
access to a vehicle could result in an accident
and/or serious personal injury.
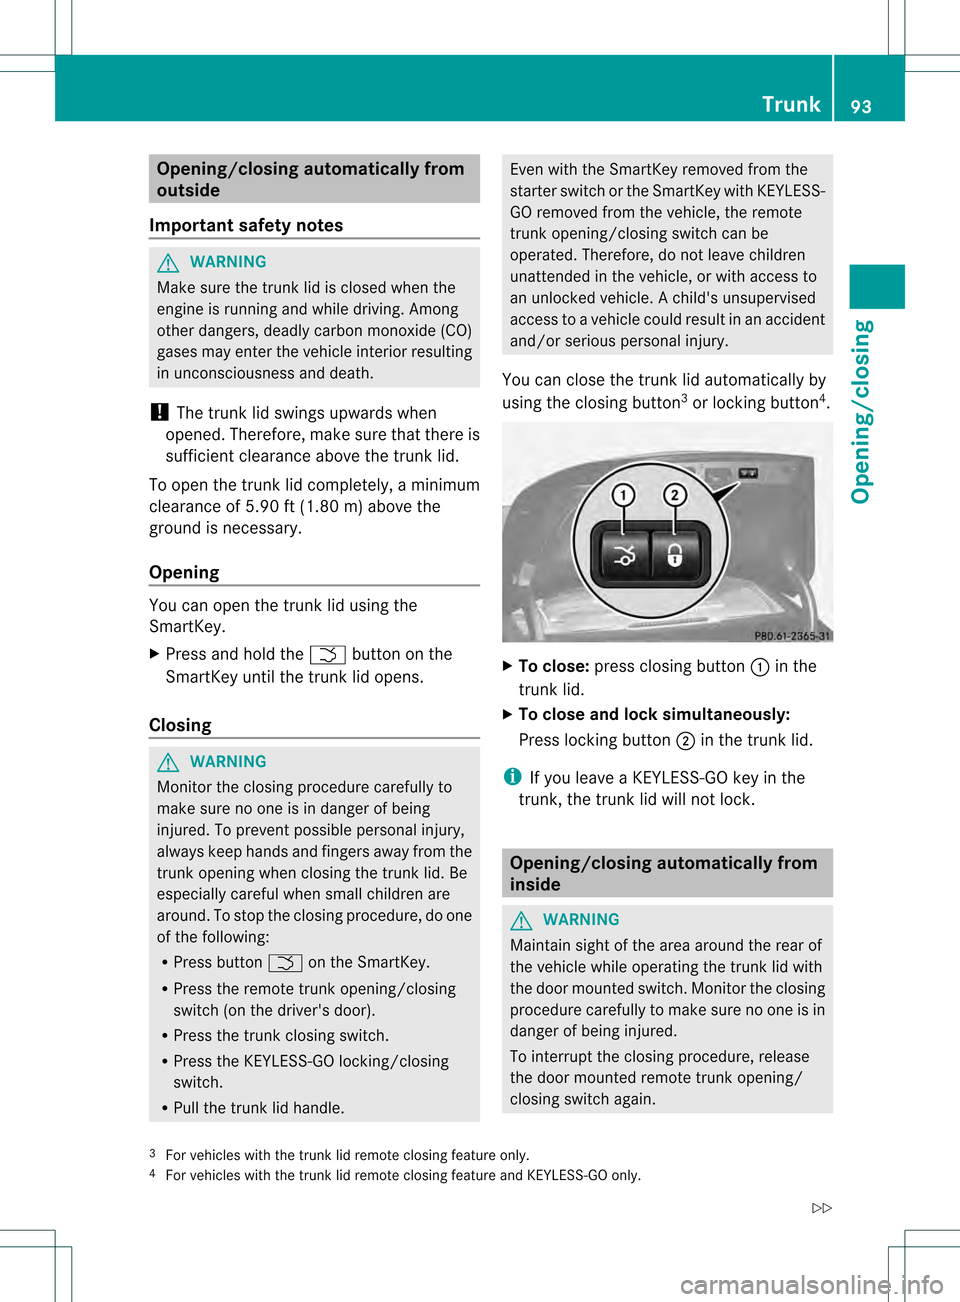
You can close the trunk lid automatically by
using the closing button 3
or locking button 4
. X
To close: press closing button 0002in the
trunk lid.
X To close and lock simultaneously:
Press locking button 0003in the trunk lid.
i If you leave a KEYLESS-GO key in the
trunk, the trunk lid will not lock. Opening/closing automatically from
inside
G
WARNING
Maintain sight of the area around the rear of
the vehicle while operating the trunk lid with
the door mounted switch. Monitor the closing
procedure carefully to make sure no one is in
danger of being injured.
To interrupt the closing procedure, release
the door mounted remote trunk opening/
closing switch again.
3 For vehicles with the trunk lid remote closing feature only.
4 For vehicles with the trunk lid remote closing feature and KEYLESS-GO only. Trunk
93Opening/closing
Z
Page 96 of 542

Even with the SmartKey removed from the
starter switch or the SmartKe
ywith KEYLESS-
GO removed from the vehicle, the remote
trunk opening/closing switch can be
operated. Therefore, do not leave children
unattended in the vehicle, or with access to
an unlocked vehicle. Achild's unsupervised
access to a vehicle could result in an accident
and/or serious personal injury. G
WARNING
Make sure the trunk lid is closed when the
engine is running and while driving. Among
other dangers, deadly carbon monoxide (CO)
gases may enter the vehicle interior resulting
in unconsciousness and death.
You can open and close the trunk lid from the
driver's seat when the vehicle is stationary
and unlocked. X
To open: press remote operating switch for
trunk lid 0002until the trunk lid opens.
X To close: press remote operating switch
for trunk lid 0002until the trunk lid is closed. Locking the trunk separately
You can lock the trunk separately.Ify ou then
unlock the vehicle centrally, the trunk
remains locked and cannot be opened.
X Close the trunk lid.
X Take the mechanical key out of the
SmartKey (Y page 84). X
Insert the mechanical key into the trunk lid
lock as far as the stop.
X Turn the mechanical key clockwise from
position 0005to position 0006.
X Remove the mechanical key.
X Insert the mechanical key into the
SmartKey. Unlocking the trunk (mechanical key)
! The trunk lid swings upwards when
opened. Therefore, make sure that there is
sufficient clearance above the trunk lid.
If the trunk cannot be unlocked with the
SmartKey or KEYLESS-GO, use the
mechanical key.
If you use the mechanical key to unlock and
open the trunk lid, the anti-theft alarm system
will be triggered (Y page 79).
X Take the mechanical key out of the
SmartKey (Y page 84).
X Insert the mechanical key into the trunk lid
lock as far as the stop. 94
TrunkOpening/closing
Page 98 of 542
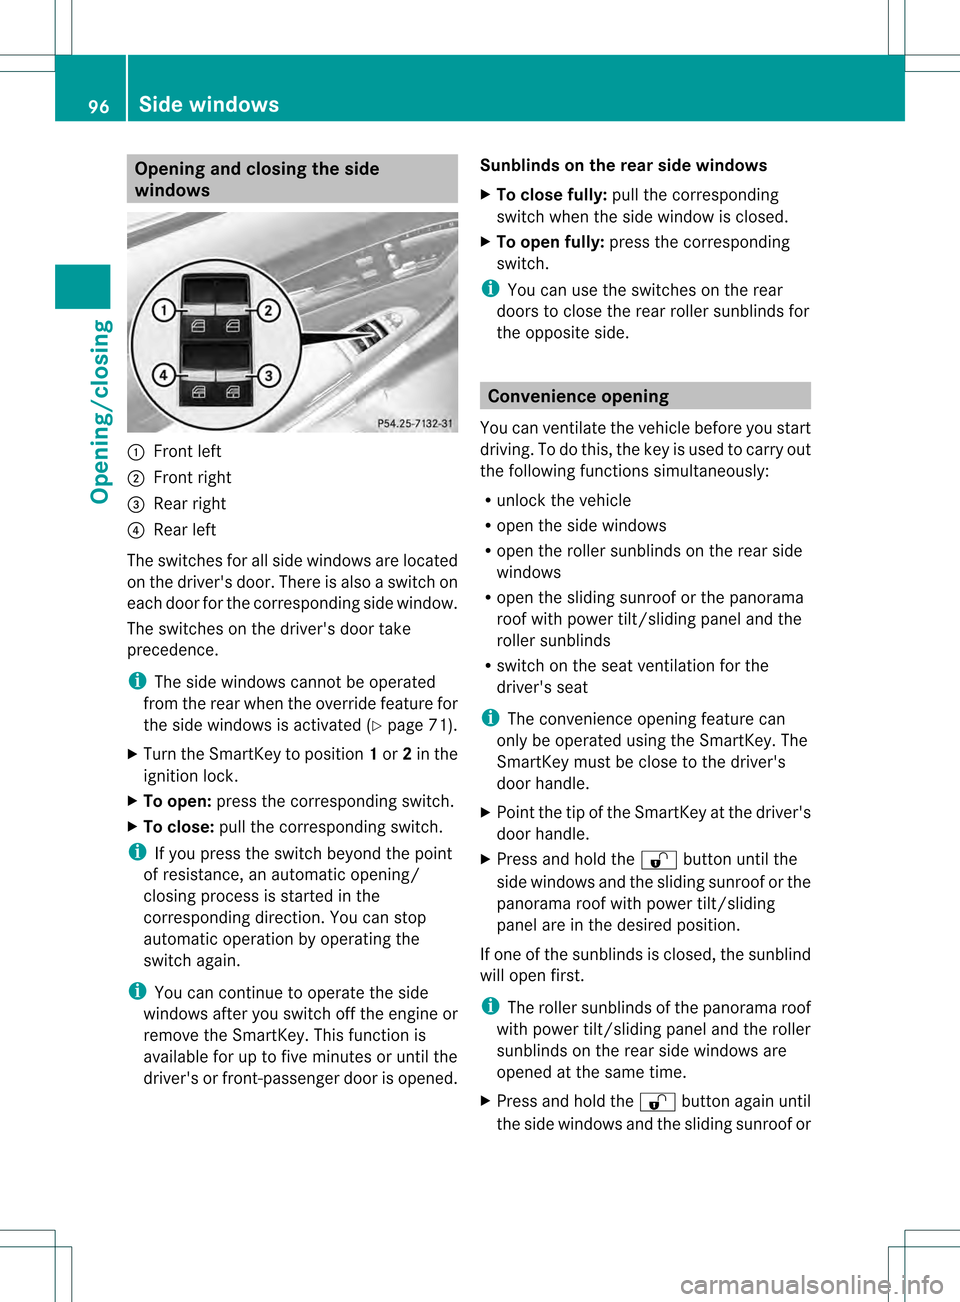
Opening and closing the side
windows
0002
Front left
0003 Front right
0026 Rear right
0025 Rear left
The switches for all side windows are located
on the driver's door. There is also a switch on
each door for the corresponding side window.
The switches on the driver's door take
precedence.
i The side windows cannot be operated
from the rear when the override feature for
the side windows is activated (Y page 71).
X Turn the SmartKey to position 1or 2in the
ignition lock.
X To open: press the corresponding switch.
X To close: pull the corresponding switch.
i If you press the switch beyond the point
of resistance, an automatic opening/
closing process is started in the
corresponding direction. You can stop
automatic operation by operating the
switch again.
i You can continue to operate the side
windows after you switch off the engine or
remove the SmartKey. This function is
available for up to five minutes or until the
driver's or front-passenger door is opened. Sunblinds on the rear side windows
X
To close fully: pull the corresponding
switch when the side window is closed.
X To open fully: press the corresponding
switch.
i You can use the switches on the rear
doors to close the rear roller sunblinds for
the opposite side. Convenience opening
You can ventilate the vehicle before you start
driving. To do this, the key is used to carry out
the following functions simultaneously:
R unlock the vehicle
R open the side windows
R open the roller sunblinds on the rear side
windows
R open the sliding sunroof or the panorama
roof with power tilt/sliding panel and the
roller sunblinds
R switch on the seat ventilation for the
driver's seat
i The convenience opening feature can
only be operated using the SmartKey. The
SmartKey must be close to the driver's
door handle.
X Point the tip of the SmartKey at the driver's
door handle.
X Press and hold the 000Bbutton until the
side windows and the sliding sunroof or the
panorama roof with power tilt/sliding
panel are in the desired position.
If one of the sunblinds is closed, the sunblind
will open first.
i The roller sunblinds of the panorama roof
with power tilt/sliding panel and the roller
sunblinds on the rear side windows are
opened at the same time.
X Press and hold the 000Bbutton again until
the side windows and the sliding sunroof or 96
Side windowsOpening/closing
Page 101 of 542

term "sliding sunroof" refers to both types of
sliding sunroof.
G
WARNING
When opening or closing the sliding sunroof,
make sure that there is no danger of anyone
being harmed by the opening/closing
procedure.
The sliding sunroo fis equipped with
automatic operation and the anti-entrapment
feature. If the movement of the sliding sunroof
is blocked during the closing procedure, the
sliding sunroof will stop and open slightly.
The sliding sunroof operates differently when
the sliding sunroof switch is pressed and held.
See the "Problems with the sliding sunroof"
section for more details.
The opening/closing procedure of the sliding
sunroof can be immediately halted by
releasing the sliding sunroof switch or, if the
sliding sunroof switch was moved past the
resistance point and released,b y moving the
sliding sunroo fswitch in any direction. G
WARNING
The sliding sunroof is made out of glass. In the
even tofana ccident, the glass may shatter.
This may result in an opening in the roof.
In a vehicle rollover, occupants not wearing
thei rseat belts or not wearing them properly
may be thrown out of the opening. Such an
opening also presents a potential for injury for
occupants wearing their seat belts properly,
as entire body parts or portions of them may
protrude from the passenger compartment.
! Only open the sliding sunroof if it is free
of snow and ice. Otherwise, malfunctions
may occur.
Do not allow anything to protrude from the
sliding sunroof .Otherwise, the seals could
be damaged.
! The weather can change abruptly. It could
start to rain or snow. Make sure that the
sliding sunroo fis closed when you leave the
vehicle. The vehicle electronics can be damaged if water enters the vehicle
interior.
i Resonance noises can occur in addition
to the usual airflow noises when the sliding
sunroof is open. They are caused by minor
pressure fluctuations in the vehicle interior.
Change the position of the sliding sunroof
or open a side window slightly to reduce or
eliminate these noises. Operating the sliding sunroof
Opening and closing i
You can continue to operate the sliding
sunroof after switching off the engine or
removing the SmartKey from the ignition
lock. This function remains active for five
minutes or until you open a front door. Overhead control panel
0002
To raise
0003 To open
0026 To close/lower
X Turn the SmartKey to position 1or 2in the
ignition lock.
X Press or pull the 0003switch in the
corresponding direction.
i If you press the 0003switch beyond the
point of resistance, an automatic opening/
closing process is started in the
corresponding direction. You can stop
automatic operation by operating the
switch again. Sliding sunroof
99Opening/closing Z
Page 102 of 542

The automatic raising feature is available
only when the sliding sunroof is closed.
The automatic opening feature is available
only when the sliding sunroof is not raised.
The sun protection cover automatically opens
along with the sliding sunroof. You can open
or close the sun protection cover manually
when the sliding sunroof is raised or closed.
Resetting Reset the sliding sunroof if it does not move
smoothly.
X
Turn the SmartKey to position 2in the
ignition lock.
X Raise the sliding sunroof fully at the rear
(Y page 99).
X Keep the 0003switch pressed for another
second.
X Make sure that the sliding sunroof can be
fully opened and closed again (Y page 99).
X If this is not the case, repeat the steps
above again.
! If the sliding sunroof still cannot be
opened or closed fully after resetting,
contact a qualified specialist workshop. Operating the panorama roof with
power tilt/sliding panel
Opening and closing Overhead control panel
0002
To raise
0003 To open
0026 To close/lower
The panorama roof with power tilt/sliding
panel can only be operated when the roller
sunblind is open.
i If the frontr oller sunblind is closed, it
opens first when the panorama roof with
power tilt/sliding panel is raised.
X Turn the SmartKey to position 1or 2in the
ignition lock.
X Push or pull the 0003switch in the
corresponding direction.
i If you press the 0003switch beyond the
point of resistance, an automatic opening/
closing process is started in the
corresponding direction .You can stop
automatic operation by operating the
switch again. Operating the roller sunblinds for the
panorama roof with power tilt/sliding
panel
General notes The roller sunblinds shield the vehicle interior
from sunlight. The front roller sunblind can
only be opened and closed when the100
Sliding sunroofOpening/closing
Page 103 of 542

panorama roof with power tilt/sliding panel
is closed. The fron tand rea rroller sunblinds
can be operated individually.
Operating the front roller sunblind G
WARNING
When opening or closing the front roller
sunblind, make sure no one is in danger of
being injured by the opening or closing
procedure.
The front roller sunblind is equipped with
automatic operation and the anti-entrapment
feature. If the movement of the front roller
sunblind is blocked during the closing
procedure, the front roller sunblind will stop
and retrac tslightly.
The opening or closing of the front roller
sunblind can be immediately halted by
releasing the roof panel switch or, if the roof
panel switch was moved past the resistance
point and released, by moving the roof panel
switch in any direction. Overhead control panel
0002
To open
0003 To open
0026 To close
X Turn the SmartKey to position 1or 2in the
ignition lock.
X Press or pull the 0003switch in the
corresponding direction.
i If you press the 0003switch beyond the
point of resistance, an automatic opening/
closing process is started in the corresponding direction
.You can stop
automatic operation by operating the
switch again.
Operating the rear roller sunblind Operating from the front
G
WARNING
When opening or closing the rear roller
sunblind, make sure no one is in danger of
being injured by the opening or closing
procedure.
The rear roller sunblind is equipped with
automatic operation and the anti-entrapment
feature. If the movement of the rear roller
sunblind is blocked during the closing
procedure, the rear roller sunblind will stop
and retrac tslightly.
The opening and closing of the rear roller
sunblind can be immediately halted by
pressing the sunblind switch again. Overhead control panel
X
To open or close: press button0002.
The rear roller sunblind open sorcloses
fully.
X To stop: press button 0002again.
i You must firs topen or close the rear roller
sunblind fully before you can move it in the
other direction.
Operating from the rear compartment G
WARNING
When opening or closing the rear roller
sunblind, make sure no one is in danger of Sliding sunroof
101Opening/closing
Z
Page 126 of 542
Assigning the programmable button
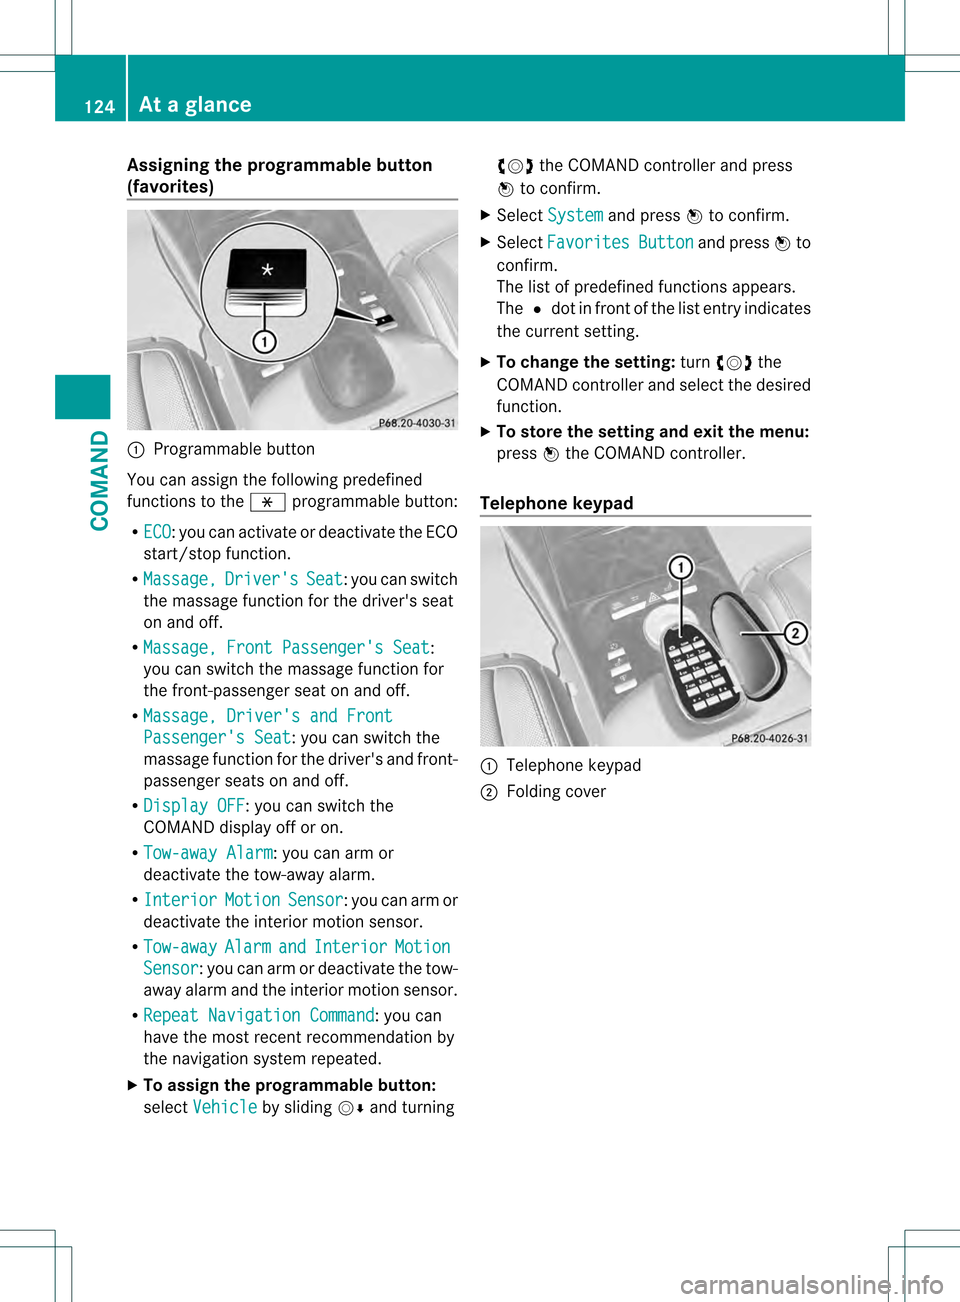
(favorites)
0002
Programmable button
You can assign the following predefined
functions to the 0033programmable button:
R ECO :y
ou can activate or deactivate the ECO
start/stop function.
R Massage, Driver's Seat :y
ou can switch
the massage function for the driver's seat
on and off.
R Massage, Front Passenger's Seat :
you can switch the massage function for
the front-passenger seat on and off.
R Massage, Driver's and Front Passenger's Seat : you can switch the
massage function for the driver's and front-
passenger seats on and off.
R Display OFF : you can switch the
COMAND display off or on.
R Tow-away Alarm : you can arm or
deactivate the tow-away alarm.
R Interior Motion Sensor :y
ou can arm or
deactivate the interior motion sensor.
R Tow-away Alarm and Interior Motion
Sensor :y
ou can arm or deactivate the tow-
away alarm and the interior motion sensor.
R Repeat Navigation Command :y
ou can
have the most recent recommendation by
the navigation system repeated.
X To assign the programmable button:
select Vehicle by sliding
001C0006and turning 0031001C0032
the COMAND controller and press
0021 to confirm.
X Select System and press
0021to confirm.
X Select Favorites Button and press
0021to
confirm.
The list of predefined functions appears.
The 002Cdot in front of the list entry indicates
the current setting.
X To change the setting: turn0031001C0032 the
COMAND controller and select the desired
function.
X To store the setting and exit the menu:
press 0021the COMAND controller.
Telephone keypad 0002
Telephone keypad
0003 Folding cover 124
At
ag lanceCOMAND
Page 156 of 542
change accordingly
.Ifthe selected language
is not supported by the Voice Control System,
"English" will be selected.
X Select Vehicle by turning
0031001C0032the
COMAND controller and press 0021to
confirm.
X Select System and press
0021to confirm.
X Select Language and press
0021to confirm.
The list of languages appears. The 002Cdot
indicates the current setting.
X Select the language by turning 0031001C0032the
COMAND controller and press 0021to
confirm.
COMAND loads the selected language and
sets it. Reset function
You can reset COMAND to the factory
settings. Amongst other things, this will
delete all personal data (e.g. station presets,
address book entries, entries in the
destination memory and in the list of previous
destinations in the navigation system).
Resetting is recommended before selling or
transferring ownership of your vehicle, for
example.
X Select Vehicle in the main function bar by
turning 0031001C0032the COMAND controller and
press 0021to confirm.
X Select System by turning
0031001C0032the
COMAND controller and press 0021to
confirm.
X Select Reset and press
0021to confirm.
Ap rompt appears asking whethe ryou wish
to reset.
X Select Yes or
No and press
0021to confirm.
If you select No , the process will be aborted.
If you select Yes , another prompt appears
asking whether you really wish to reset.
X Select Yes or
No and press
0021to confirm.
If you select Yes , a message will be shown.
COMAND is reset and restarted. If you select
No , the process will be aborted.
Navigation
Introduction
Safety notes G
WARNING
For safety reasons, only enter a destination
when the vehicle is stationary. When the
vehicle is in motion, apassenger should enter
the destination .Study manual and select
route before driving.
Bear in mind that at a speed of just 30 mph
(approximately 50 km/h), your vehicle is
covering a distance of 44 fee t(approximately
14 m) every second.
COMAND calculates the rout eto the
destination without taking account of the
following:
R Traffic lights
R Stop and right-of-way-signs
R Lane merging
R Parking or stopping prohibited areas
R Other road and traffic rules and regulations
R Narrow bridges G
WARNING
COMAND may give incorrect navigation
commands if the data in the digital map does
not correspond with the actual road/traffic
situation. Digital maps do not cover all areas
nor all routes within an area. For example, if
the traffic routing has been changed or the
direction of a one-way road has been
reversed.
For this reason, you must always observe
applicable road and traffic rules and
regulations during your journey. Road and
traffic rules and regulations always have
priority over the navigation commands
generated by the system. 154
NavigationCOMAND