SD card MERCEDES-BENZ S-Class 2014 W222 Owner's Manual
[x] Cancel search | Manufacturer: MERCEDES-BENZ, Model Year: 2014, Model line: S-Class, Model: MERCEDES-BENZ S-Class 2014 W222Pages: 434, PDF Size: 29.51 MB
Page 15 of 434
Vehicle remote malfunction
diagnosis
....................................... 339
Vehicle remote unlocking ..............338
Mechanical key
Function/notes ................................ 86
Inserting .......................................... 87
Locking vehicle ................................ 93
Removing ......................................... 86
Unlocking the driver's door ..............92
Media Interface
see Separate operating instructions
Memory card (audio) .........................256
Memory function In the rear compartment ................134
Seats, steering wheel, exterior
mirrors ........................................... 133
Storing settings (rear
compartment) ................................ 135
Mercedes-Benz Intelligent Drive
360°camera .................................. 230
ABS (Anti-lock Brake System) ..........71
Active Blind Spot Assist .................240
Active Lane Keeping Assist ............243
Active Parking Assist .....................221
Attention Assist ............................. 234
BAS (Brake Assist) ...........................71
BAS PLUS (Brake Assist PLUS)
with Cross-Traffic Assist ..................72
COLLISION PREVENTION ASSIST ....73
Crosswind driving assistance
(vehicles with Magic Body Control )214
Crosswind driving assistance
(vehicles without MAGIC BODY
CONTROL) ....................................... 77
Cruise control ................................ 199
DISTRONIC PLUS ........................... 201
DISTRONIC PLUS with Steering
Assist ............................................. 210
ESP ®
(Electronic Stability Program) .76
General notes ................................ 199
Magic Body Control .......................213
Night View Assist Plus ...................236
PARKTRONIC ................................. 218
PRE-SAFE ®
(anticipatory
occupant protection) .......................56
PRE-SAFE ®
Brake ............................ .78PRE-SAFE
®
PLUS (anticipatory
occupant protection PLUS) ..............56
Rear view camera .......................... 226
ROAD SURFACE SCAN ..................215
Seat belt buckle extender ................61
Message memory (on-board
computer) .......................................... 265
Messages see Display messages
see Warning and indicator lamps
Mirrors
see Exterior mirrors
see Rear-view mirror
see Vanity mirror (in the sun visor)
Mirror turn signal
Cleaning ......................................... 357
Mobile phone
Menu (on-board computer) ............257
Modifying the programming
(SmartKey) ........................................... 86
MOExtended tires .............................. 365
Mounting wheels Lowering the vehicle ......................412
Mounting a new wheel ...................411
Preparing the vehicle .....................408
Raising the vehicle .........................409
Removing a wheel ..........................411
Securing the vehicle against
rolling away ................................... 408
MP3
Operation ....................................... 256
Multicontour seat .............................. 124
Multifunction display Function/notes ............................. 250
Permanent displa y......................... 263
Multifunction steering wheel
Operating the on-board computer .249
Overview .......................................... 35 N
Navigation Menu (on-board computer) ............252
Night View Assist Plus
Activating/deactivating .................238
Cleaning ......................................... 359
Display message ............................ 291
Function/notes ............................. 236 Index
13
Page 257 of 434
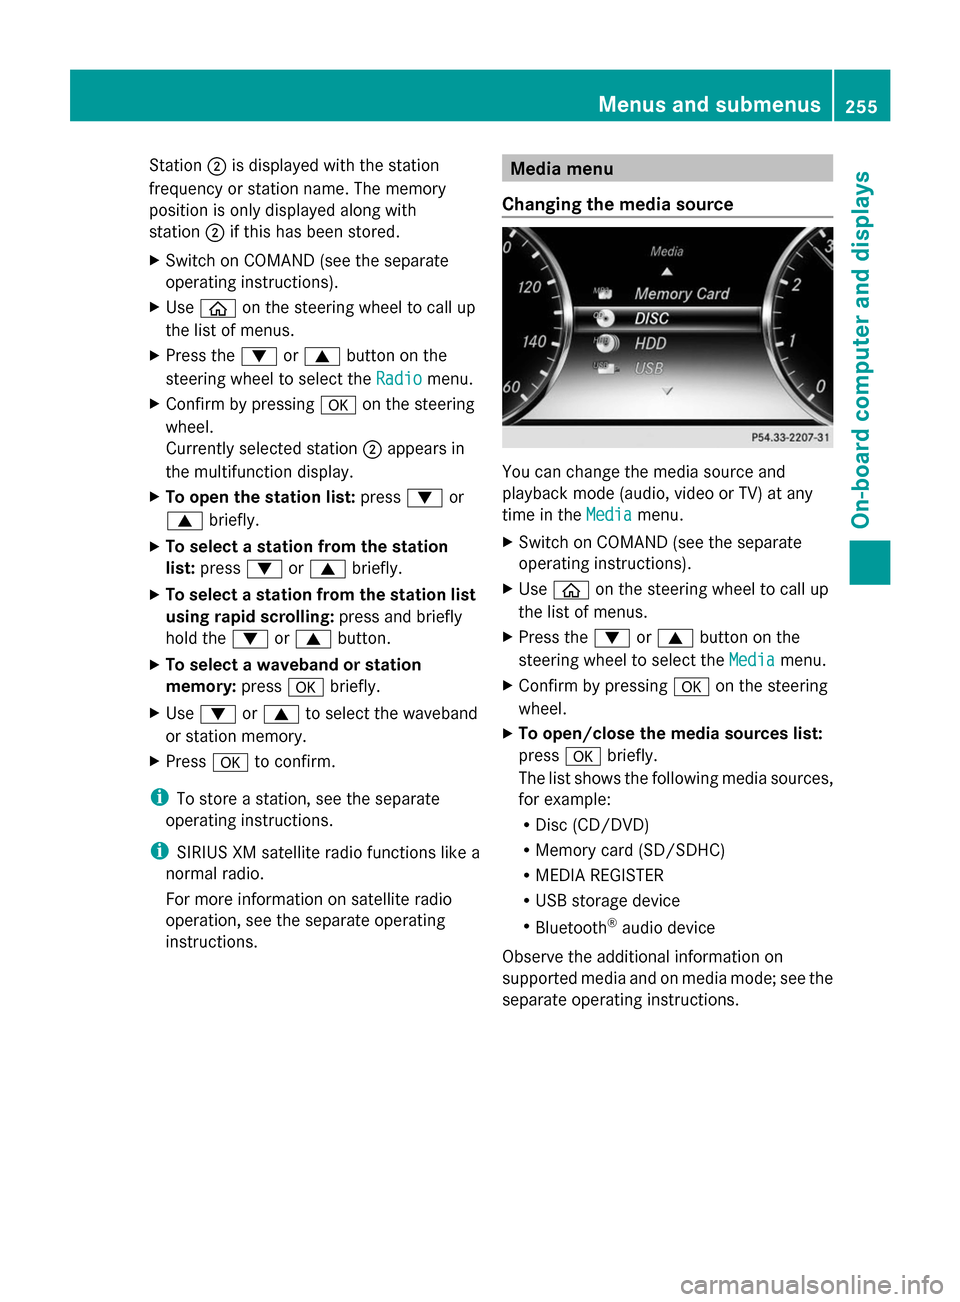
Station
0044is displayed with the station
frequency or station name. The memory
position is only displayed along with
station 0044if this has been stored.
X Switch on COMAND (see the separate
operating instructions).
X Use 00E2 on the steering wheel to call up
the list of menus.
X Press the 0064or0063 button on the
steering wheel to select the Radio
Radio menu.
X Confirm by pressing 0076on the steering
wheel.
Currently selected station 0044appears in
the multifunction display.
X To open the station list: press0064or
0063 briefly.
X To select a station from the station
list: press 0064or0063 briefly.
X To select a station from the station list
using rapid scrolling: press and briefly
hold the 0064or0063 button.
X To select a waveband or station
memory: press0076briefly.
X Use 0064 or0063 to select the waveband
or station memory.
X Press 0076to confirm.
i To store a station, see the separate
operating instructions.
i SIRIUS XM satellite radio functions like a
normal radio.
For more information on satellite radio
operation, see the separate operating
instructions. Media menu
Changing the media source You can change the media source and
playback mode (audio, video or TV) at any
time in the
Media
Media menu.
X Switch on COMAND (see the separate
operating instructions).
X Use 00E2 on the steering wheel to call up
the list of menus.
X Press the 0064or0063 button on the
steering wheel to select the Media Mediamenu.
X Confirm by pressing 0076on the steering
wheel.
X To open/close the media sources list:
press 0076briefly.
The list shows the following media sources,
for example:
R Disc (CD/DVD)
R Memory card (SD/SDHC)
R MEDIA REGISTER
R USB storage device
R Bluetooth ®
audio device
Observe the additional information on
supported media and on media mode; see the
separate operating instructions. Menus and submenus
255On-board computer and displays Z
Page 319 of 434
Observe the loading guidelines (Y
page 316).
Stowage compartments in the front Glove box
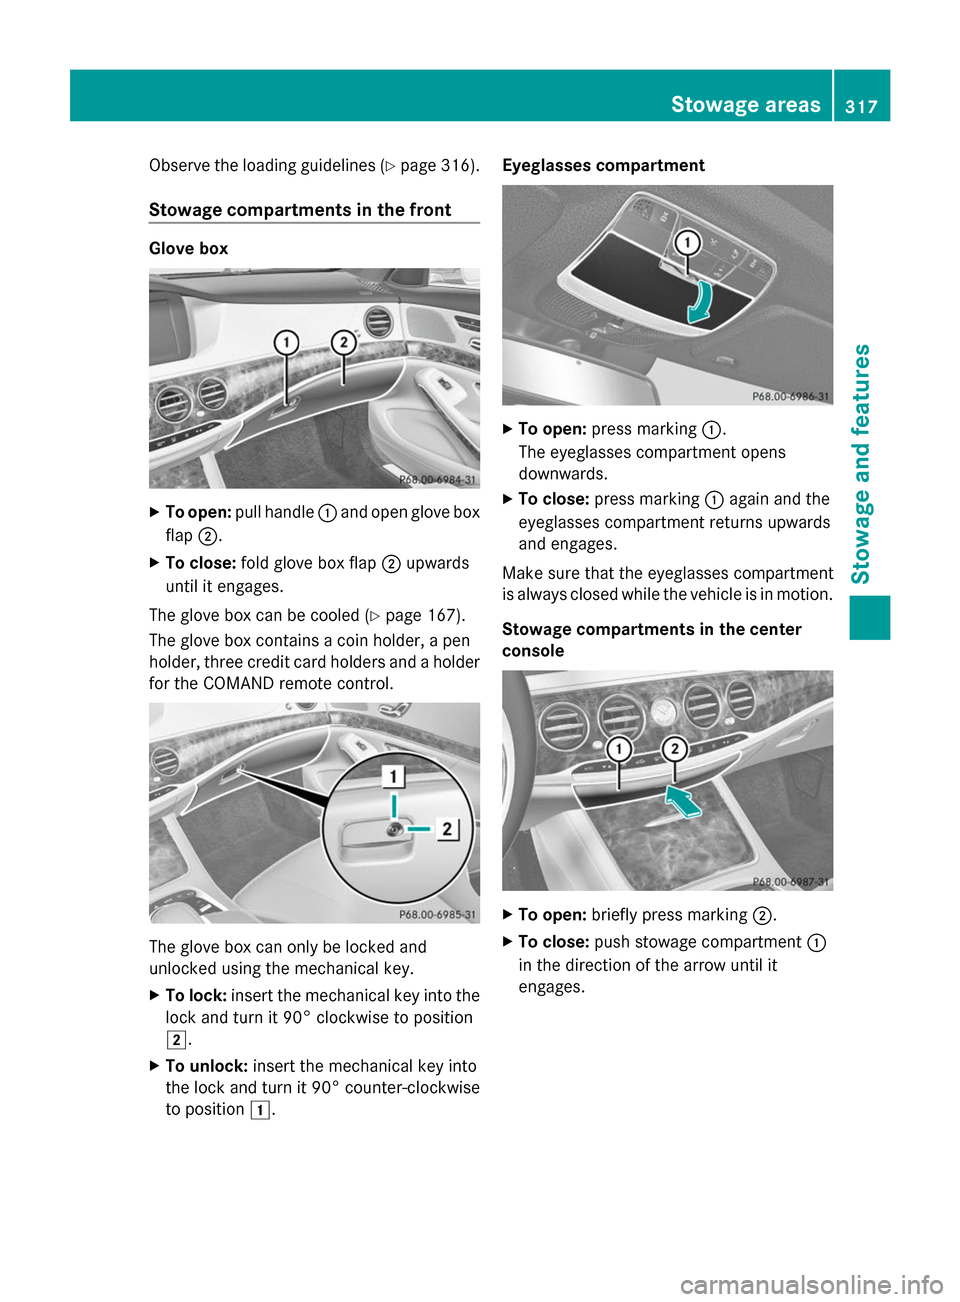
X
To open: pull handle 0043and open glove box
flap 0044.
X To close: fold glove box flap 0044upwards
until it engages.
The glove box can be cooled (Y page 167).
The glove box contains a coin holder, a pen
holder, three credit card holders and a holder
for the COMAND remote control. The glove box can only be locked and
unlocked using the mechanical key.
X To lock: insert the mechanical key into the
lock and turn it 90° clockwise to position
0048.
X To unlock: insert the mechanical key into
the lock and turn it 90° counter-clockwise
to position 0047. Eyeglasses compartment
X
To open: press marking 0043.
The eyeglasses compartment opens
downwards.
X To close: press marking 0043again and the
eyeglasses compartment returns upwards
and engages.
Make sure that the eyeglasses compartment
is always closed while the vehicle is in motion.
Stowage compartments in the center
console X
To open: briefly press marking 0044.
X To close: push stowage compartment 0043
in the direction of the arrow until it
engages. Stowage areas
317Stowage and features Z
Page 371 of 434
the tire in this instance. Damaged tires and a
tire pressure that is too low can significantly
impair the vehicle's braking and driving
characteristics. There is a risk of accident.
Do not continue driving. Contact a qualified
specialist workshop.
i In cases such as the one mentioned
above, contact an authorized Mercedes-
Benz Center. Or call
1-800-FOR-MERCedes (in the USA) or
1-800-387-0100 (in Canada).
X Correct the tire pressure if it is still at least
130 kPa (1.3 ba r/19 psi). See the Tire and
Loading Information placard on the driver's
side B-pillaro r the tire pressure table in the
fuel filler flap for values.
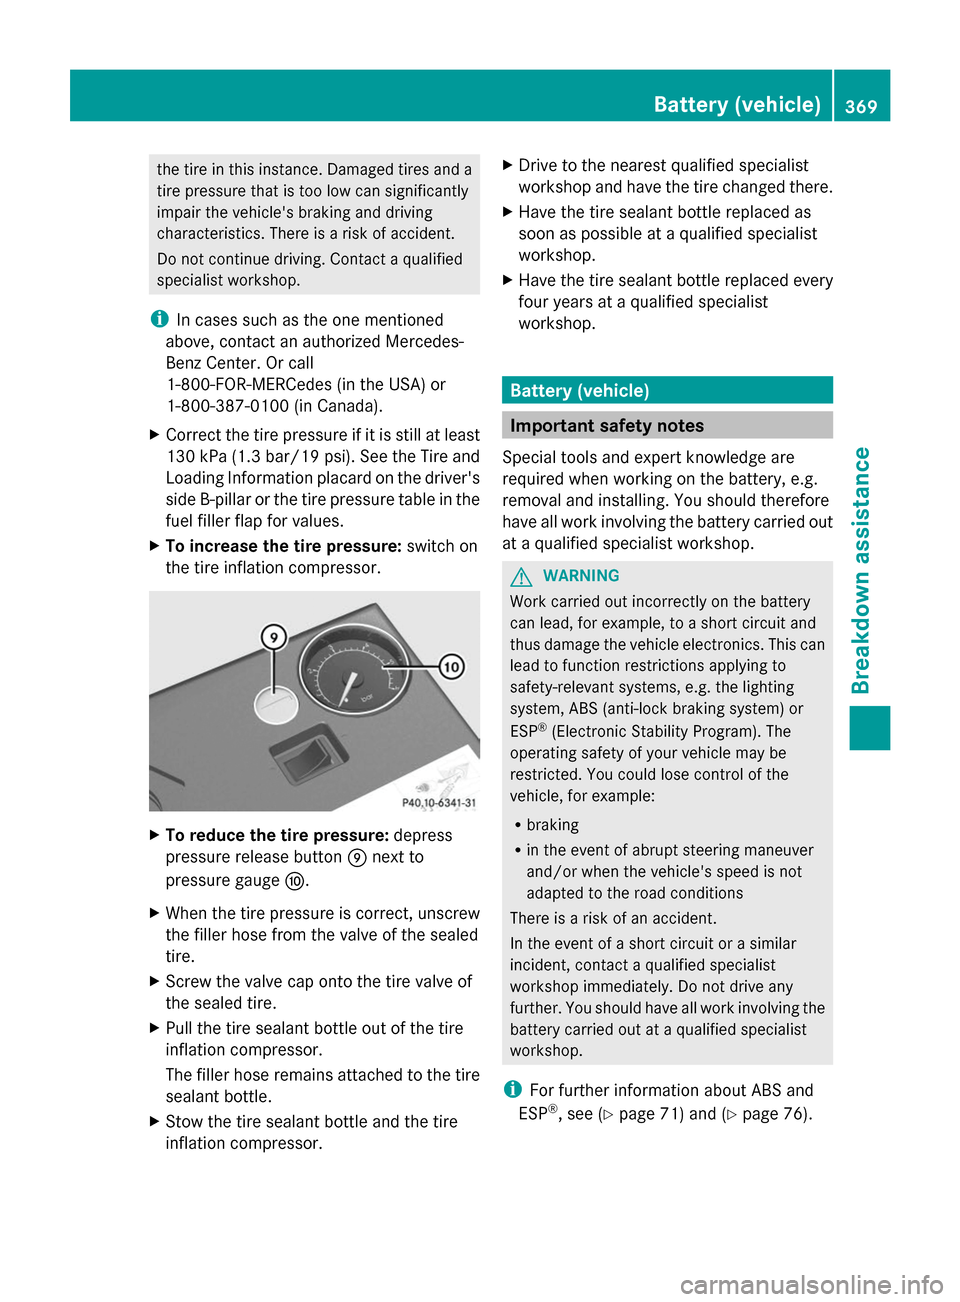
X To increase the tire pressure: switch on
the tire inflation compressor. X
To reduce the tire pressure: depress
pressure release button 006Dnext to
pressure gauge 006E.
X When the tire pressure is correct, unscrew
the filler hose from the valve of the sealed
tire.
X Screw the valve cap onto the tire valve of
the sealed tire.
X Pull the tire sealant bottle out of the tire
inflation compressor.
The filler hose remains attached to the tire
sealant bottle.
X Stow the tire sealant bottle and the tire
inflation compressor. X
Drive to the nearest qualified specialist
workshop and have the tire changed there.
X Have the tire sealant bottle replaced as
soon as possible at a qualified specialist
workshop.
X Have the tire sealant bottle replaced every
four years at a qualified specialist
workshop. Battery (vehicle)
Important safety notes
Special tools and expert knowledge are
required when working on the battery, e.g.
removal and installing. You should therefore
have all work involving the battery carried out
at a qualified specialist workshop. G
WARNING
Work carried out incorrectly on the battery
can lead, for example, to a short circuit and
thus damage the vehicle electronics. This can
lead to function restrictions applying to
safety-relevant systems, e.g. the lighting
system, ABS (anti-lock braking system) or
ESP ®
(Electronic Stability Program). The
operating safety of your vehicle may be
restricted. You could lose control of the
vehicle, for example:
R braking
R in the event of abrupt steering maneuver
and/or when the vehicle's speed is not
adapted to the road conditions
There is a risk of an accident.
In the event of a short circuit or a similar
incident, contact a qualified specialist
workshop immediately. Do not drive any
further. You should have all work involving the
battery carried out at a qualified specialist
workshop.
i For further information about ABS and
ESP ®
, see (Y page 71) and (Y page 76). Battery (vehicle)
369Breakdown assistance Z
Page 386 of 434
Useful information
i This Operator's Manual describes all
models and all standard and optional
equipment of your vehicle available at the
time of publication of the Operator's
Manual. Country-specific differences are
possible. Please note that your vehicle may
not be equipped with all features
described. This also applies to safety-
related systems and functions.
i Read the information on qualified
specialist workshops: (Y page 27).Important safety notes
G
WARNING
If wheels and tires of the wrong size are used,
the wheel brakes or suspension components
may be damaged. There is a risk of an
accident.
Always replace wheels and tires with those
that fulfill the specifications of the original
part.
When replacing wheels, make sure to use the
correct:
R designation
R model
When replacing tires, make sure to use the
correct:
R designation
R manufacturer
R model G
WARNING
A flat tire severely impairs the driving,
steering and braking characteristics of the
vehicle. There is a risk of accident.
Tires without run-flat characteristics:
R do not drive with a flat tire.
R immediately replace the flat tire with your
emergency spare wheel or spare wheel, or
consult a qualified specialist workshop. Tires with run-flat characteristics:
R
pay attention to the information and
warning notices on MOExtended tires (tires
with run-flat characteristics).
Accessories that are not approved for your
vehicle by Mercedes-Benz or that are not
being used correctly can impair operating
safety.
Before purchasing and using non-approved
accessories, visit a qualified specialist
workshop and inquire about:
R suitability
R legal stipulations
R factory recommendations
Information on the dimensions and types of
wheels and tires for your vehicle can be found
in the "Wheel/tire combinations" section
(Y page 413).
Information on air pressure for the tires on
your vehicle can be found:
R on the vehicle's Tire and Loading
Information placard on the B-pillar
(Y page 395)
R on the tire pressure label on the fuel filler
flap (Y page 188)
R under "Tire pressure" (Y page 387) Operation
Information on driving
If the vehicle is heavily loaded, check the tire
pressures and correct them if necessary.
While driving, pay attention to vibrations,
noises and unusual handling characteristics,
e.g. pulling to one side. This may indicate that
the wheels or tires are damaged. If you
suspect that a tire is defective, reduce your
speed immediately. Stop the vehicle as soon
as possible to check the wheels and tires for
damage. Hidden tire damage could also be
causing the unusual handling characteristics.
If you find no signs of damage, have the tires 384
OperationWheels and tires
Page 389 of 434
been developed specifically for driving in
snow.
Use M+S tires of the same make and tread on
all wheels to maintain safe handling
characteristics.
Always observe the maximum permissible
speed specified for the M+S tires you have
mounted.
When you have mounted M+S tires:
X Check the tire pressures (Y page 390).
X Restart the tire pressure monitor
(Y page 393). Snow chains
G
WARNING
If snow chains are installed to the front
wheels, they may drag against the vehicle
body or chassis components. This could
cause damage to the vehicle or the tires.
There is a risk of an accident.
To avoid hazardous situations:
R never install snow chains to the front
wheels
R always install snow chains in pairs to the
rear wheels.
For safety reasons, Mercedes-Benz
recommends that you only use snow chains
that have been specially approved for your
vehicle by Mercedes-Benz, or are of a
corresponding standard of quality.
If you intend to mount snow chains, please
bear the following points in mind:
R Snow chains may not be mounted on all
wheel/tire combinations. Permissible
wheel-tire combinations (Y page 413).
R Only use snow chains when driving on
roads completely covered by snow.
Remove the snow chains as soon as
possible when you come to a road that is
not snow-covered.
R Local regulations may restrict the use of
snow chains. Observe the appropriate regulations if you wish to mount snow
chains.
R Do not exceed the maximum permissible
speed of 30 mph (50 km/h).
R On vehicles with AIRMATIC (Y page 216)or
Active Body Control (ABC) (Y page 214),
you must drive at raised vehicle level if
snow chains have been installed.
i You may wish to deactivate
ESP ®
(Y page 77) when pulling away with
snow chains installed. You can thereby
allow the wheels to spin in a controlled
manner, achieving an increased driving
force (cutting action). Tire pressure
Tire pressure specifications
Important safety notes G
WARNING
Underinflated or overinflated tires pose the
following risks:
R the tires may burst, especially as the load
and vehicle speed increase.
R the tires may wear excessively and/or
unevenly, which may greatly impair tire
traction.
R the driving characteristics, as well as
steering and braking, may be greatly
impaired.
There is a risk of an accident.
Follow recommended tire inflation pressures
and check the pressure of all the tires
including the spare wheel:
R monthly, at least
R if the load changes
R before beginning a long journey
R under different operating conditions, e.g.
off-road driving
If necessary, correct the tire pressure.
i The specifications on the sample Tire and
Loading Information placard and tire Tire pressure
387Wheels and tires Z
Page 390 of 434
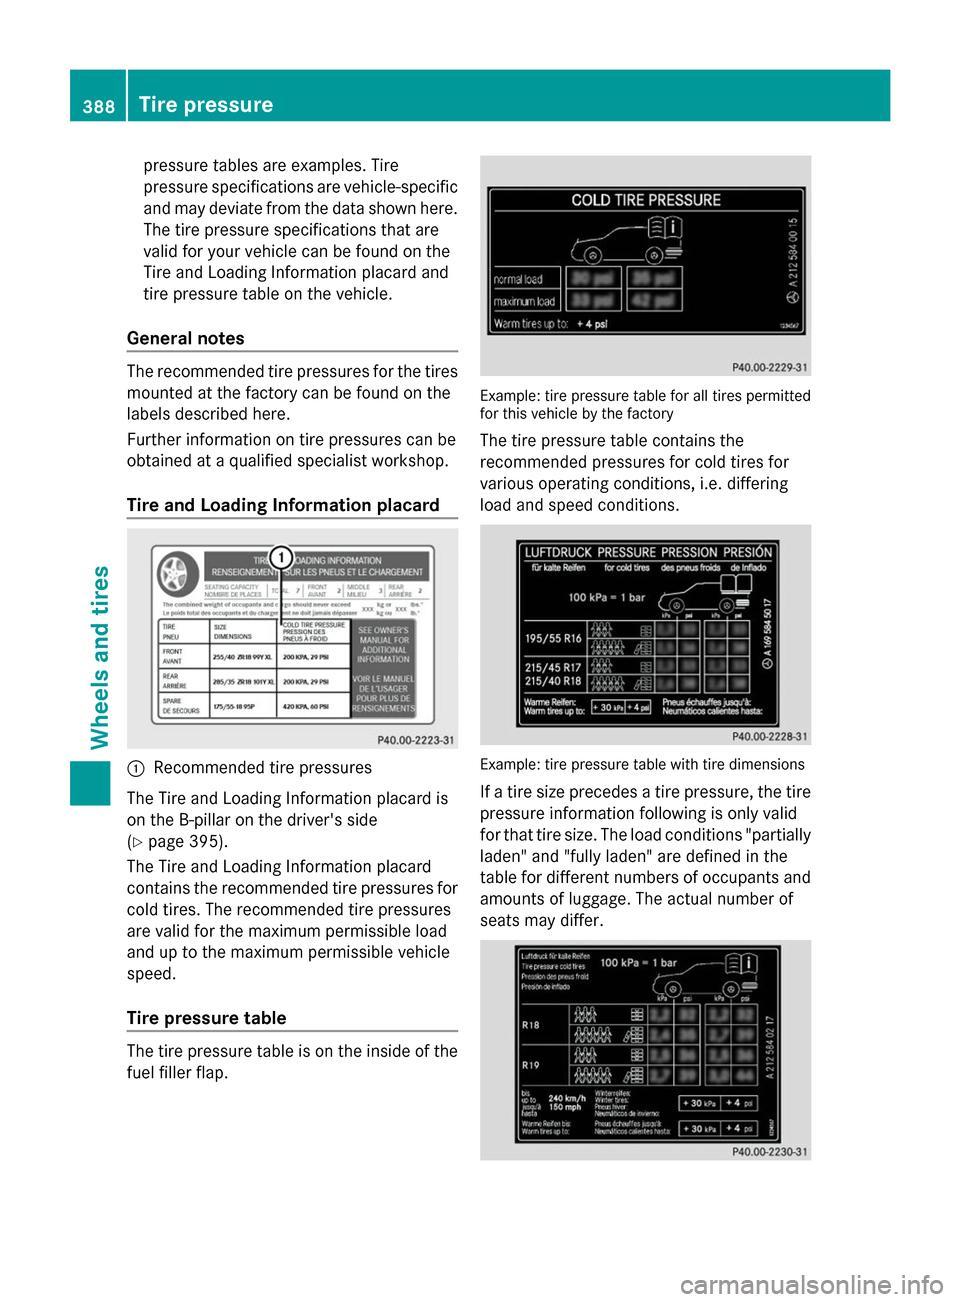
pressure tables are examples. Tire
pressure specifications are vehicle-specific
and may deviate from the data shown here.
The tire pressure specifications that are
valid for your vehicle can be found on the
Tire and Loading Information placard and
tire pressure table on the vehicle.
General notes The recommended tire pressures for the tires
mounted at the factory can be found on the
labels described here.
Further information on tire pressures can be
obtained at a qualified specialist workshop.
Tire and Loading Information placard 0043
Recommended tire pressures
The Tire and Loading Information placard is
on the B-pillar on the driver's side
(Y page 395).
The Tire and Loading Information placard
contains the recommended tire pressures for
cold tires. The recommended tire pressures
are valid for the maximum permissible load
and up to the maximum permissible vehicle
speed.
Tire pressure table The tire pressure table is on the inside of the
fuel filler flap. Example: tire pressure table for all tires permitted
for this vehicle by the factory
The tire pressure table contains the
recommended pressures for cold tires for
various operating conditions, i.e. differing
load and speed conditions.
Example: tire pressure table with tire dimensions
If a tire size precedes a tire pressure, the tire
pressure information following is only valid
for that tire size. The load conditions "partially
laden" and "fully laden" are defined in the
table for different numbers of occupants and
amounts of luggage. The actual number of
seats may differ.388
Tire pressureWheels and tires
Page 391 of 434
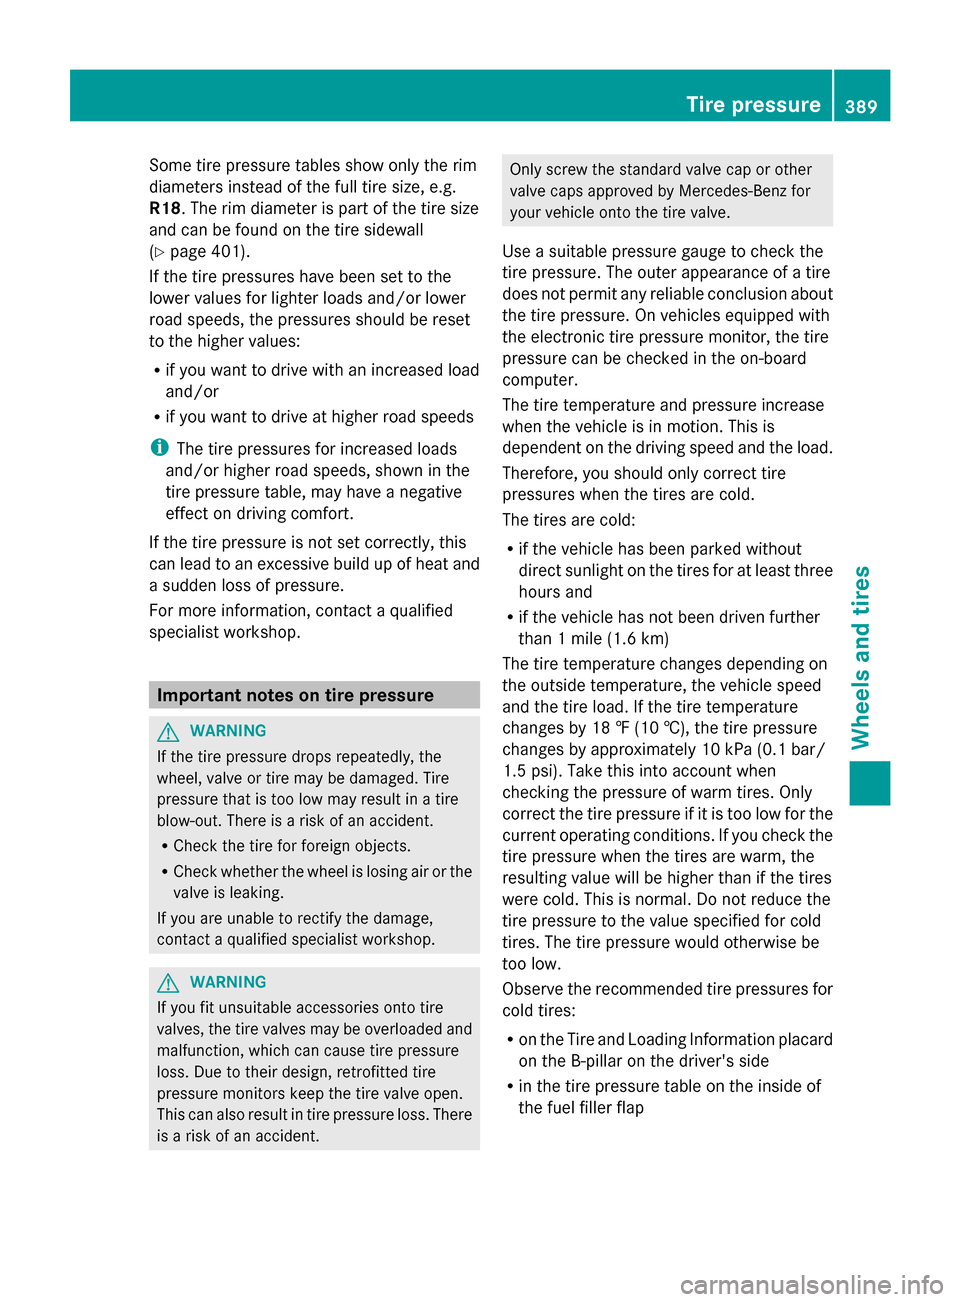
Some tire pressure tables show only the rim
diameters instead of the full tire size, e.g.
R18 . The rim diameter is part of the tire size
and can be found on the tire sidewall
(Y page 401).
If the tire pressures have been set to the
lower values for lighter loads and/or lower
road speeds, the pressures should be reset
to the higher values:
R if you want to drive with an increased load
and/or
R if you want to drive at higher road speeds
i The tire pressures for increased loads
and/or higher road speeds, shown in the
tire pressure table, may have a negative
effect on driving comfort.
If the tire pressure is not set correctly, this
can lead to an excessive build up of heat and
a sudden loss of pressure.
For more information, contact a qualified
specialist workshop. Important notes on tire pressure
G
WARNING
If the tire pressure drops repeatedly, the
wheel, valve or tire may be damaged. Tire
pressure that is too low may result in a tire
blow-out. There is a risk of an accident.
R Check the tire for foreign objects.
R Check whether the wheel is losing air or the
valve is leaking.
If you are unable to rectify the damage,
contact a qualified specialist workshop. G
WARNING
If you fit unsuitable accessories onto tire
valves, the tire valves may be overloaded and
malfunction, which can cause tire pressure
loss. Due to their design, retrofitted tire
pressure monitors keep the tire valve open.
This can also result in tire pressure loss. There
is a risk of an accident. Only screw the standard valve cap or other
valve caps approved by Mercedes-Benz for
your vehicle onto the tire valve.
Use a suitable pressure gauge to check the
tire pressure. The outer appearance of a tire
does not permit any reliable conclusion about
the tire pressure. On vehicles equipped with
the electronic tire pressure monitor, the tire
pressure can be checked in the on-board
computer.
The tire temperature and pressure increase
when the vehicle is in motion. This is
dependent on the driving speed and the load.
Therefore, you should only correct tire
pressures when the tires are cold.
The tires are cold:
R if the vehicle has been parked without
direct sunlight on the tires for at least three
hours and
R if the vehicle has not been driven further
than 1 mile (1.6 km)
The tire temperature changes depending on
the outside temperature, the vehicle speed
and the tire load. If the tire temperature
changes by 18 ‡ (10 †), the tire pressure
changes by approximately 10 kPa (0.1 bar/
1.5 psi). Take this into account when
checking the pressure of warm tires. Only
correct the tire pressure if it is too low for the
current operating conditions. If you check the
tire pressure when the tires are warm, the
resulting value will be higher than if the tires
were cold. This is normal. Do not reduce the
tire pressure to the value specified for cold
tires. The tire pressure would otherwise be
too low.
Observe the recommended tire pressures for
cold tires:
R on the Tire and Loading Information placard
on the B-pillar on the driver's side
R in the tire pressure table on the inside of
the fuel filler flap Tire pressure
389Wheels and tires Z
Page 392 of 434
Underinflated or overinflated tires
Underinflated tires G
WARNING
Tires with pressure that is too low can
overheat and burst as a consequence. In
addition, they also suffer from excessive and/
or irregular wear, which can severely impair
the braking properties and the driving
characteristics. There is a risk of an accident.
Avoid tire pressures that are too low in all the
tires, including the spare wheel.
Underinflated tires may:
R overheat, leading to tire defects
R adversely affect handling
R wear excessively and/or unevenly
R have an adverse effect on fuel consumption
Overinflated tires G
WARNING
Tires with excessively high pressure can burst
because they are damaged more easily by
road debris, potholes etc. In addition, they
also suffer from irregular wear, which can
severely impair the braking properties and the
driving characteristics. There is a risk of an
accident.
Avoid tire pressures that are too high in all the
tires, including the spare wheel.
Overinflated tires may:
R increase the braking distance
R adversely affect handling
R wear excessively and/or unevenly
R have an adverse effect on ride comfort
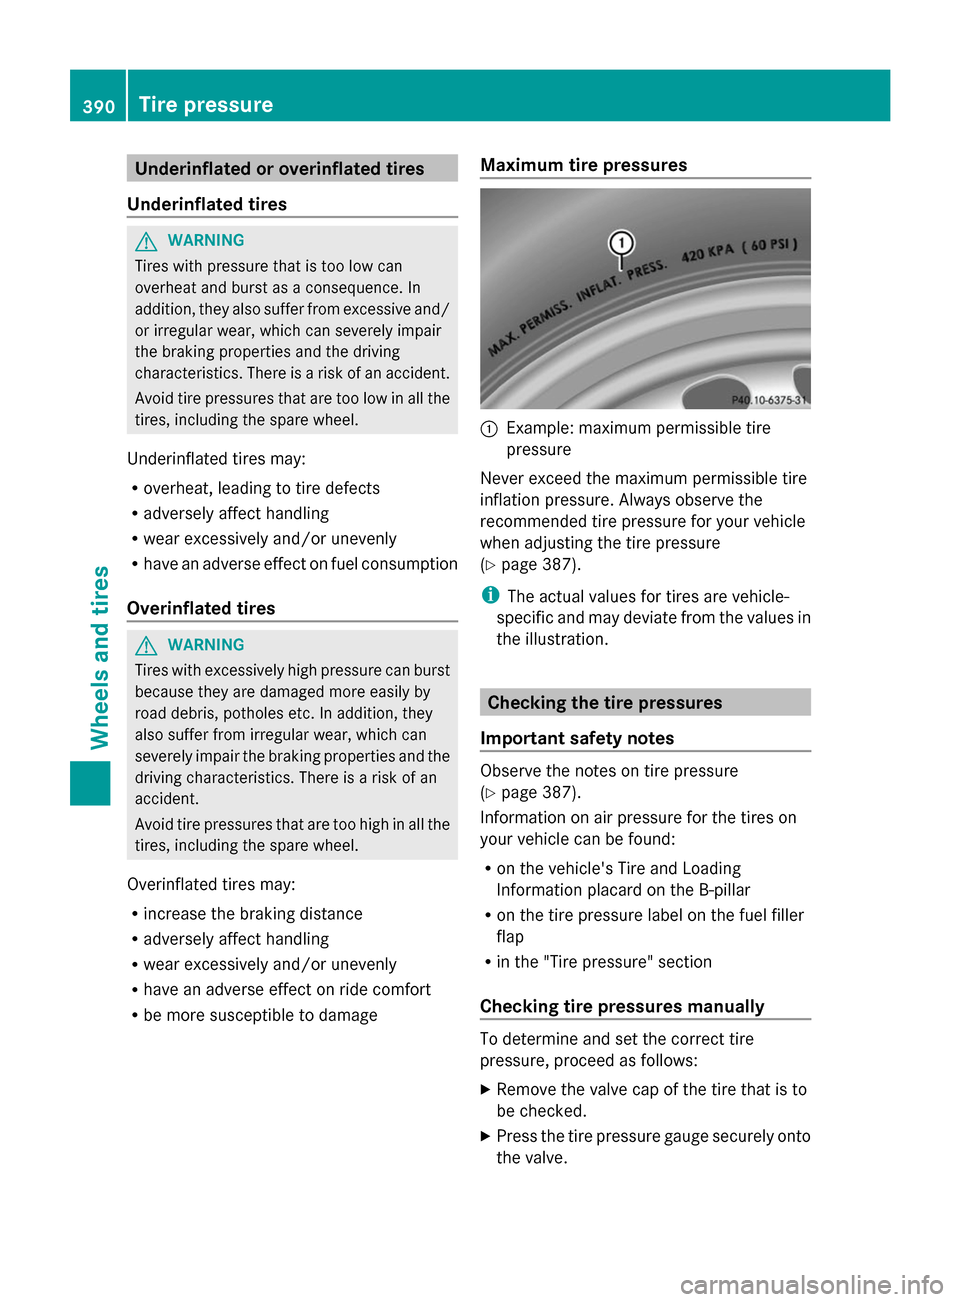
R be more susceptible to damage Maximum tire pressures 0043
Example: maximum permissible tire
pressure
Never exceed the maximum permissible tire
inflation pressure. Always observe the
recommended tire pressure for your vehicle
when adjusting the tire pressure
(Y page 387).
i The actual values for tires are vehicle-
specific and may deviate from the values in
the illustration. Checking the tire pressures
Important safety notes Observe the notes on tire pressure
(Y
page 387).
Information on air pressure for the tires on
your vehicle can be found:
R on the vehicle's Tire and Loading
Information placard on the B-pillar
R on the tire pressure label on the fuel filler
flap
R in the "Tire pressure" section
Checking tire pressures manually To determine and set the correct tire
pressure, proceed as follows:
X
Remove the valve cap of the tire that is to
be checked.
X Press the tire pressure gauge securely onto
the valve. 390
Tire pressureWheels and tires
Page 393 of 434
X
Read the tire pressure and compare it with
the recommended value on the Tire and
Loading Information placard ( Ypage 387).
X If the tire pressure is too low, increase it to
the recommended value.
X If the tire pressure is too high, release air
by pressing down the metal pin in the valve.
Use the tip of a pen, for example. Then,
check the tire pressure again using the tire
pressure gauge.
X Screw the valve cap onto the valve.
X Repeat these steps for the other tires. Tire pressure monitor
General notes If a tire pressure monitor is installed, the
vehicle's wheels have sensors that monitor
the tire pressures in all four tires. The tire
pressure monitor warns you if the pressure
drops in one or more of the tires. The tire
pressure monitor only functions if the correct
sensors are installed on all wheels.
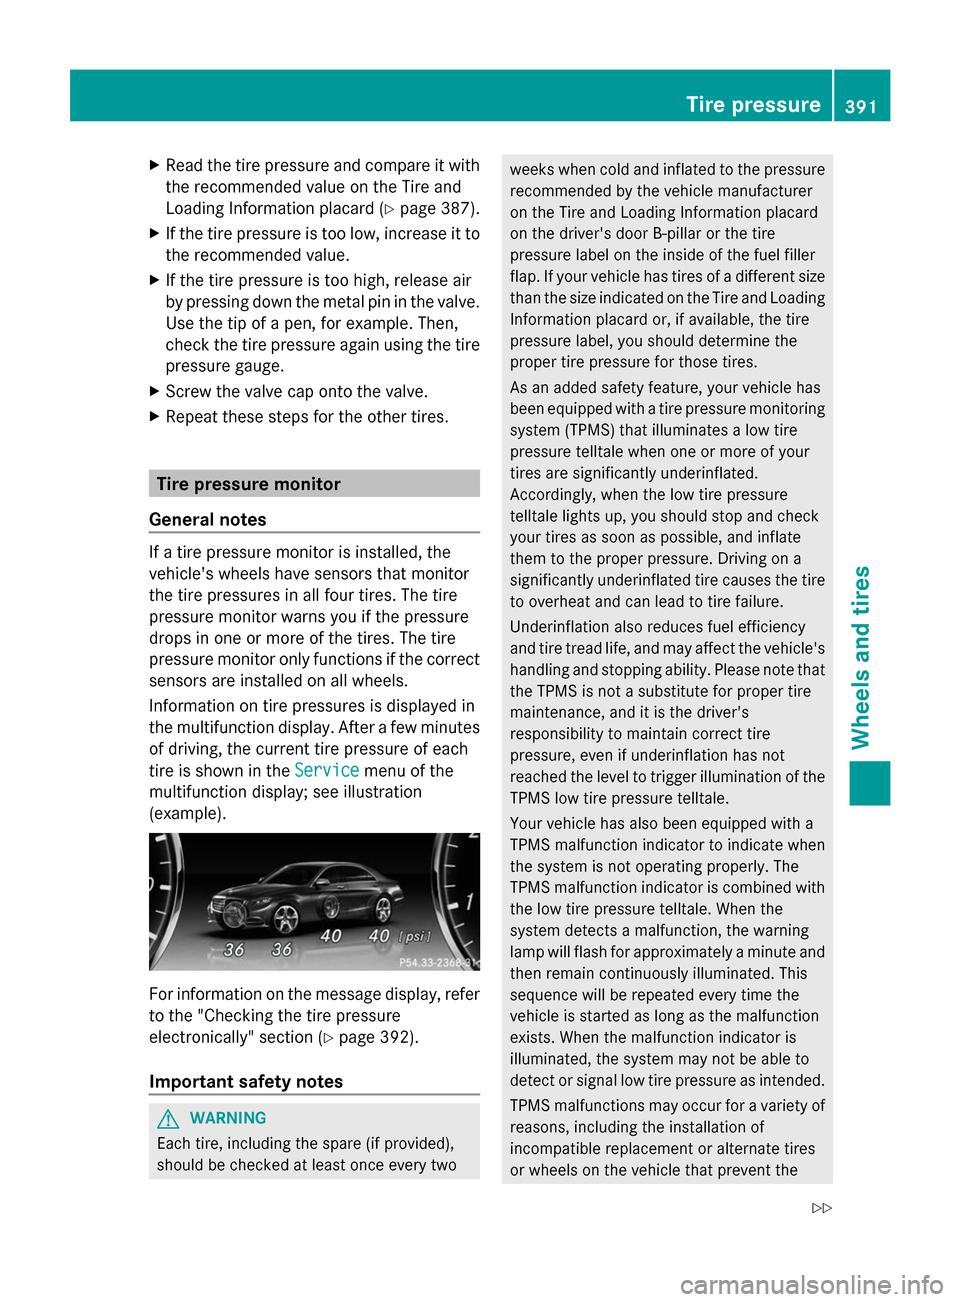
Information on tire pressures is displayed in
the multifunction display. After a few minutes
of driving, the current tire pressure of each
tire is shown in the Service
Service menu of the
multifunction display; see illustration
(example). For information on the message display, refer
to the "Checking the tire pressure
electronically" section ( Ypage 392).
Important safety notes G
WARNING
Each tire, including the spare (if provided),
should be checked at least once every two weeks when cold and inflated to the pressure
recommended by the vehicle manufacturer
on the Tire and Loading Information placard
on the driver's door B-pillar or the tire
pressure label on the inside of the fuel filler
flap. If your vehicle has tires of a different size
than the size indicated on the Tire and Loading
Information placard or, if available, the tire
pressure label, you should determine the
proper tire pressure for those tires.
As an added safety feature, your vehicle has
been equipped with a tire pressure monitoring
system (TPMS) that illuminates a low tire
pressure telltale when one or more of your
tires are significantly underinflated.
Accordingly, when the low tire pressure
telltale lights up, you should stop and check
your tires as soon as possible, and inflate
them to the proper pressure. Driving on a
significantly underinflated tire causes the tire
to overheat and can lead to tire failure.
Underinflation also reduces fuel efficiency
and tire tread life, and may affect the vehicle's
handling and stopping ability. Please note that
the TPMS is not a substitute for proper tire
maintenance, and it is the driver's
responsibility to maintain correct tire
pressure, even if underinflation has not
reached the level to trigger illumination of the
TPMS low tire pressure telltale.
Your vehicle has also been equipped with a
TPMS malfunction indicator to indicate when
the system is not operating properly. The
TPMS malfunction indicator is combined with
the low tire pressure telltale. When the
system detects a malfunction, the warning
lamp will flash for approximately a minute and
then remain continuously illuminated. This
sequence will be repeated every time the
vehicle is started as long as the malfunction
exists. When the malfunction indicator is
illuminated, the system may not be able to
detect or signal low tire pressure as intended.
TPMS malfunctions may occur for a variety of
reasons, including the installation of
incompatible replacement or alternate tires
or wheels on the vehicle that prevent the Ti
re pressure
391Wheels and tires
Z