ECO mode MERCEDES-BENZ S-CLASS COUPE 2014 User Guide
[x] Cancel search | Manufacturer: MERCEDES-BENZ, Model Year: 2014, Model line: S-CLASS COUPE, Model: MERCEDES-BENZ S-CLASS COUPE 2014Pages: 413, PDF Size: 12.76 MB
Page 142 of 413
residual heat function is deactivated when
the ignition is switched on.
ECO start/stop function During automatic engine switch-off, the cli-
mate control only operates at a reduced capa- city. If you require the full climate control out-
put, you can switch off the ECO start/stop
function by pressing the ECO button
(Y page 164). Operating the climate control system
Switching climate control on/off
General notes When the climate control is switched off, the
air supply and air circulation are also
switched off. The windows could mist up.
Therefore, only switch off climate control
briefly.
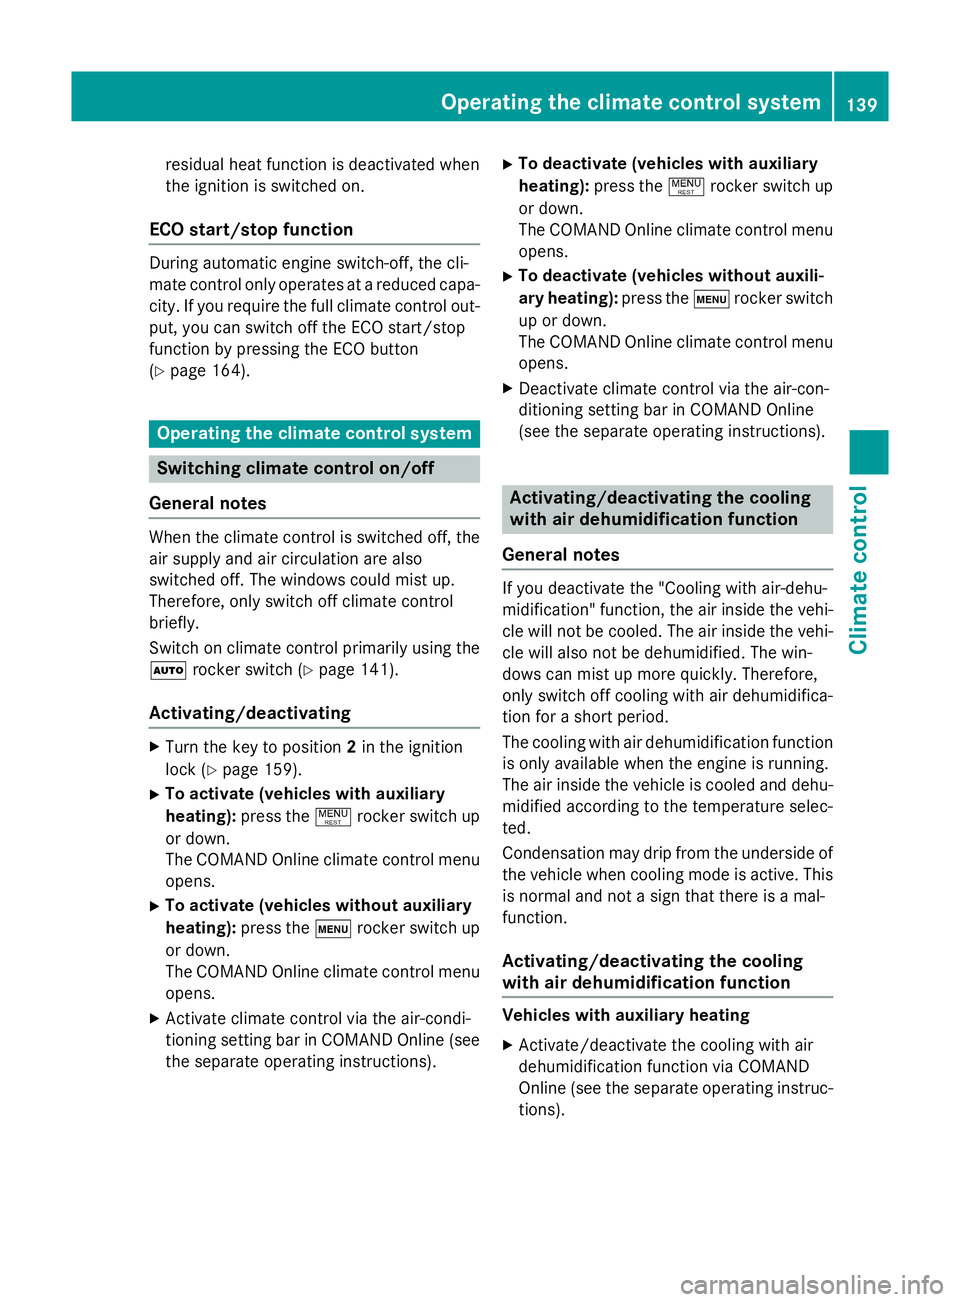
Switch on climate control primarily using theà rocker switch (Y page 141).
Activating/deactivating X
Turn the key to position 2in the ignition
lock (Y page 159).
X To activate (vehicles with auxiliary
heating): press the!rocker switch up
or down.
The COMAND Online climate control menu
opens.
X To activate (vehicles without auxiliary
heating): press thetrocker switch up
or down.
The COMAND Online climate control menu
opens.
X Activate climate control via the air-condi-
tioning setting bar in COMAND Online (see
the separate operating instructions). X
To deactivate (vehicles with auxiliary
heating): press the!rocker switch up
or down.
The COMAND Online climate control menu
opens.
X To deactivate (vehicles without auxili-
ary heating): press thetrocker switch
up or down.
The COMAND Online climate control menu
opens.
X Deactivate climate control via the air-con-
ditioning setting bar in COMAND Online
(see the separate operating instructions). Activating/deactivating the cooling
with air dehumidification function
General notes If you deactivate the "Cooling with air-dehu-
midification" function, the air inside the vehi-
cle will not be cooled. The air inside the vehi-
cle will also not be dehumidified. The win-
dows can mist up more quickly. Therefore,
only switch off cooling with air dehumidifica-
tion for a short period.
The cooling with air dehumidification function is only available when the engine is running.
The air inside the vehicle is cooled and dehu-midified according to the temperature selec-
ted.
Condensation may drip from the underside of
the vehicle when cooling mode is active. This is normal and not a sign that there is a mal-
function.
Activating/deactivating the cooling
with air dehumidification function Vehicles with auxiliary heating
X Activate/deactivate the cooling with air
dehumidification function via COMAND
Online (see the separate operating instruc-
tions). Operating the climate control system
139Climate control
Page 148 of 413
Problems with the rear window heating
Problem
Possible causes/consequences and
M
MSolutions The rear window heat-
ing has switched off
prematurely or cannot
be activated. The battery has not been sufficiently charged.
X Switch off any consumers that are not required, e.g. reading
lamps, interior lighting or the seat heating.
When the battery is sufficiently charged, the rear window heat-
ing can be activated again. Activating/deactivating air-recircula-
tion mode
General notes You can also temporarily deactivate the flow
of fresh air manually if unpleasant odours are
entering the vehicle from outside. The air
already inside the vehicle will then be recir-
culated.
If you switch on air-recirculation mode, the
windows can mist up more quickly, in partic-
ular at low temperatures. Only use air-recir-
culation mode briefly to prevent the windows misting up.
Activating/deactivating X
Turn the key to position 2in the ignition
lock (Y page 159).
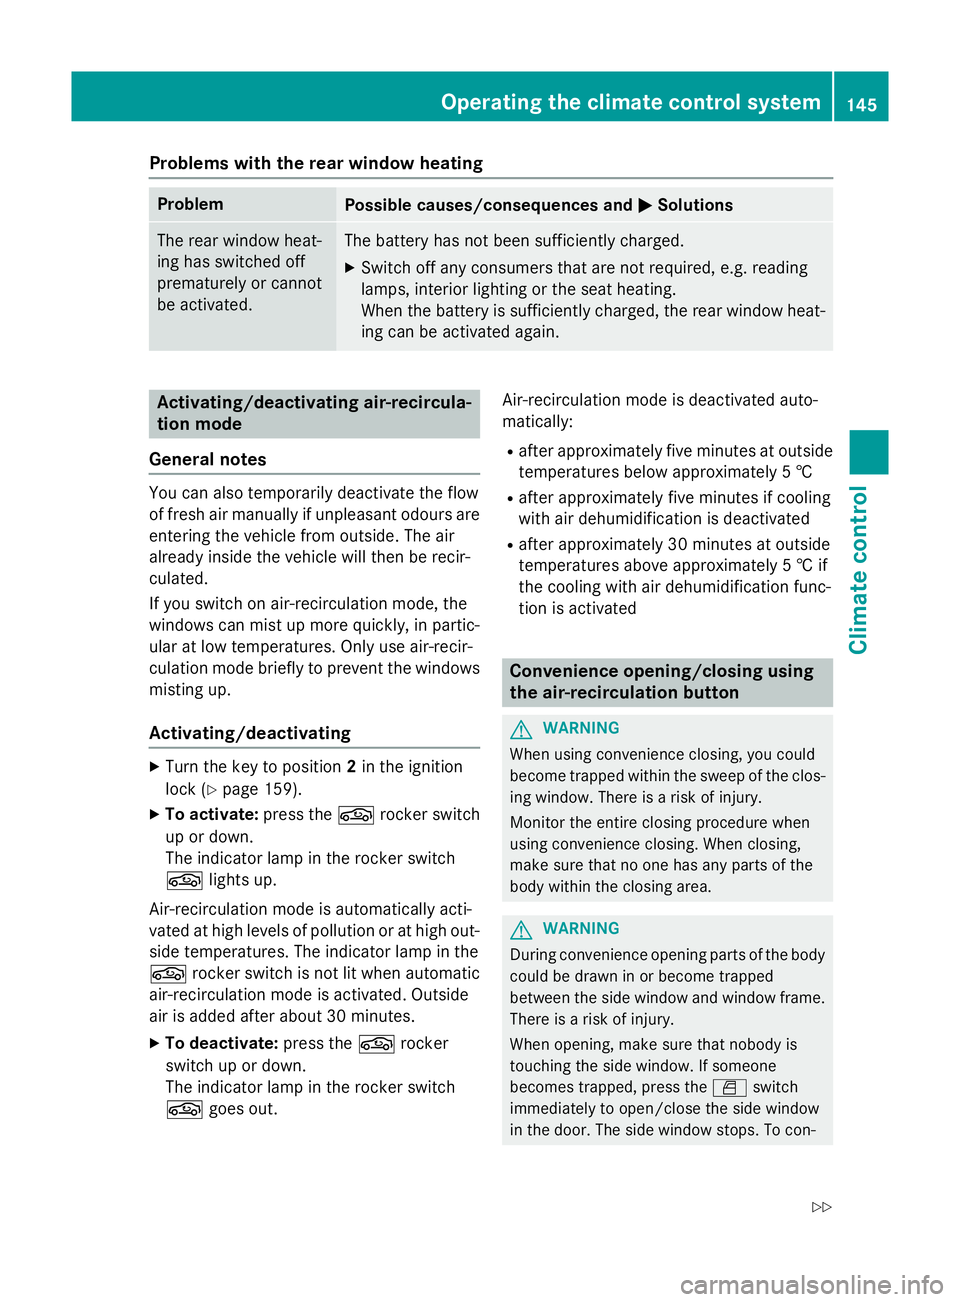
X To activate: press thegrocker switch
up or down.
The indicator lamp in the rocker switch
g lights up.
Air-recirculation mode is automatically acti-
vated at high levels of pollution or at high out- side temperatures. The indicator lamp in the
g rocker switch is not lit when automatic
air-recirculation mode is activated. Outside
air is added after about 30 minutes.
X To deactivate: press thegrocker
switch up or down.
The indicator lamp in the rocker switch
g goes out. Air-recirculation mode is deactivated auto-
matically:
R after approximately five minutes at outside
temperatures below approximately 5 †
R after approximately five minutes if cooling
with air dehumidification is deactivated
R after approximately 30 minutes at outside
temperatures above approximately 5 † if
the cooling with air dehumidification func-
tion is activated Convenience opening/closing using
the air-recirculation button
G
WARNING
When using convenience closing, you could
become trapped within the sweep of the clos- ing window. There is a risk of injury.
Monitor the entire closing procedure when
using convenience closing. When closing,
make sure that no one has any parts of the
body within the closing area. G
WARNING
During convenience opening parts of the body could be drawn in or become trapped
between the side window and window frame.
There is a risk of injury.
When opening, make sure that nobody is
touching the side window. If someone
becomes trapped, press the Wswitch
immediately to open/close the side window
in the door. The side window stops. To con- Operating the climate control system
145Climate control
Z
Page 165 of 413
Starting procedure with the Start/Stop
button The Start/Stop button can be used to start
the vehicle manually without inserting the key
into the ignition lock. The key must be in the
vehicle and the Start/Stop button must be
inserted in the ignition lock. This mode for
starting the engine operates independently of the ECO start/stop automatic engine start
function.
You can start the engine if a valid key is in the vehicle. Always take the key with you when
leaving the vehicle, even if you only leave it for
a short time. Pay attention to the important
safety notes.
X Depress the brake pedal and keep it
depressed.
X Press the Start/Stop button once
(Y page 159).
The engine starts. Pulling away
General notes G
WARNING
If the engine speed is above the idling speed
and you engage transmission position Dor R,
the vehicle could pull away suddenly. There is a risk of an accident.
When engaging transmission position Dor R,
always firmly depress the brake pedal and do not simultaneously accelerate.
Depress the accelerator carefully when pull-
ing away.
The vehicle locks centrally once you have
pulled away. The locking knobs in the doors
drop down.
You can open the doors from the inside at any
time.
You can also deactivate the automatic locking feature (Y page 92).
It is only possible to shift the transmission
from position Pto the desired position if you depress the brake pedal. Only then is the
parking lock released. If the brake pedal is not
depressed, the DIRECT SELECT lever can still be moved but the parking lock remains
engaged.
i Upshifts take place at higher engine
speeds after a cold start. This helps the
catalytic converter to reach its operating
temperature more quickly.
Information on the automatic release of the
electric parking brake (Y page 180).
Hill start assist Hill start assist helps you when pulling away
forwards or in reverse on an uphill gradient. It
holds the vehicle for a short time after you
have removed your foot from the brake pedal.
This gives you enough time to move your foot from the brake pedal to the accelerator pedal and depress it before the vehicle begins to
roll. G
WARNING
After a short time, hill start assist will no lon-
ger brake your vehicle and it could roll away.
There is a risk of an accident and injury.
Therefore, quickly move your foot from the
brake pedal to the accelerator pedal. Never
leave the vehicle when it is held by hill start
assist.
Hill start assist is not active if: R you are pulling away on a level road or a
downhill gradient
R the transmission is in position N
R the electric parking brake is applied
R ESP ®
is malfunctioning ECO start/stop function
Introduction The ECO start/stop function switches the
engine off automatically if the vehicle is stop-
ped under certain conditions. 162
DrivingDriving and parking
Page 178 of 413
Problems with the transmission
Problem
Possible causes/consequences and
M
MSolutions The transmission has
problems shifting gear. The transmission is losing oil.
X Have the transmission checked at a qualified specialist work-
shop immediately. 7G-TRONIC:
The acceleration ability
is deteriorating.
The transmission no
longer changes gear.
The transmission is in emergency mode.
It is only possible to shift into
secondgear and reverse gear.
X Stop.
X Shift the transmission to position P.
X Switch off the engine.
X Wait at least ten seconds before restarting the engine.
X Shift the transmission to position Dor R.
X Have the transmission checked at a qualified specialist work-
shop immediately. 9G-TRONIC:
The acceleration ability
is deteriorating.
The transmission no
longer changes gear.
The transmission is in emergency mode.
It is only partly possible to engage the gears or the transmission is
in position N.
X Stop.
X Shift the transmission to position P.
X Switch off the engine.
X Wait at least ten seconds before restarting the engine.
X Shift the transmission to position Dor R.
X Have the transmission checked at a qualified specialist work-
shop immediately. Refuelling
Important safety notes
G
WARNING
Fuel is highly flammable. If you handle fuel
incorrectly, there is a risk of fire and explo-
sion.
You must avoid fire, naked flames, creating
sparks and smoking. Switch off the engine
and, if applicable, the auxiliary heating before refuelling. G
WARNING
Fuels are poisonous and hazardous to health. There is a danger of injury.
Do not swallow fuel or let it come into contact
with skin, eyes or clothing. Do not inhale fuel
vapours. Keep fuels out of the reach of chil-
dren. Refuelling
175Driving and parking
Z
Page 185 of 413
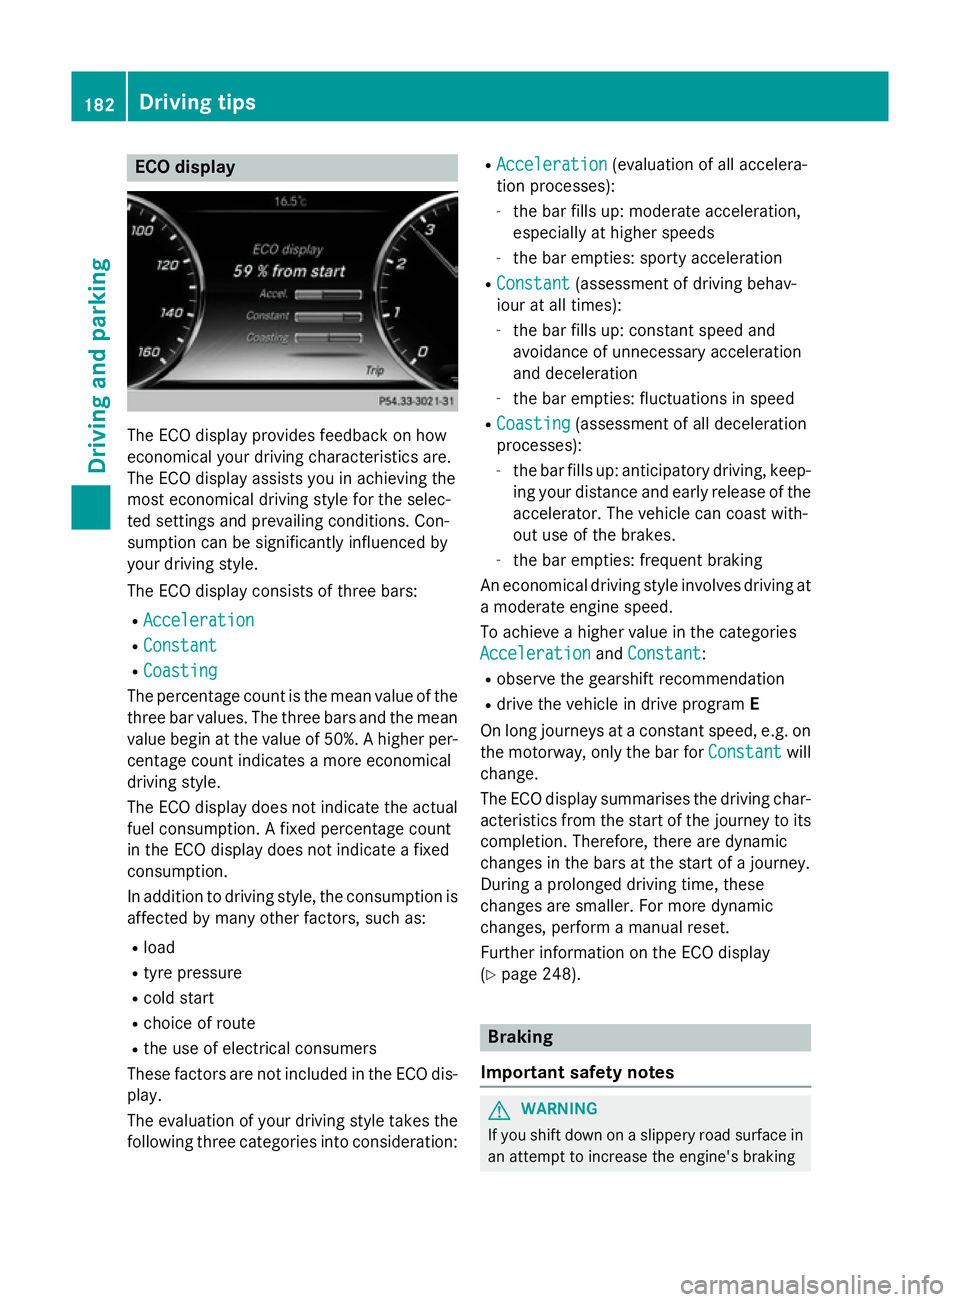
ECO display
The ECO display provides feedback on how
economical your driving characteristics are.
The ECO display assists you in achieving the
most economical driving style for the selec-
ted settings and prevailing conditions. Con-
sumption can be significantly influenced by
your driving style.
The ECO display consists of three bars:
R Acceleration
Acceleration
R Constant Constant
R Coasting
Coasting
The percentage count is the mean value of the three bar values. The three bars and the mean
value begin at the value of 50%. A higher per- centage count indicates a more economical
driving style.
The ECO display does not indicate the actual
fuel consumption. A fixed percentage count
in the ECO display does not indicate a fixed
consumption.
In addition to driving style, the consumption is
affected by many other factors, such as:
R load
R tyre pressure
R cold start
R choice of route
R the use of electrical consumers
These factors are not included in the ECO dis-
play.
The evaluation of your driving style takes the following three categories into consideration: R
Acceleration
Acceleration (evaluation of all accelera-
tion processes):
- the bar fills up: moderate acceleration,
especially at higher speeds
- the bar empties: sporty acceleration
R Constant Constant (assessment of driving behav-
iour at all times):
- the bar fills up: constant speed and
avoidance of unnecessary acceleration
and deceleration
- the bar empties: fluctuations in speed
R Coasting Coasting (assessment of all deceleration
processes):
- the bar fills up: anticipatory driving, keep-
ing your distance and early release of the
accelerator. The vehicle can coast with-
out use of the brakes.
- the bar empties: frequent braking
An economical driving style involves driving at a moderate engine speed.
To achieve a higher value in the categories
Acceleration Acceleration andConstant
Constant:
R observe the gearshift recommendation
R drive the vehicle in drive program E
On long journeys at a constant speed, e.g. on
the motorway, only the bar for Constant
Constantwill
change.
The ECO display summarises the driving char- acteristics from the start of the journey to its
completion. Therefore, there are dynamic
changes in the bars at the start of a journey.
During a prolonged driving time, these
changes are smaller. For more dynamic
changes, perform a manual reset.
Further information on the ECO display
(Y page 248). Braking
Important safety notes G
WARNING
If you shift down on a slippery road surface in an attempt to increase the engine's braking 182
Driving tipsDriving and parking
Page 207 of 413
The electric parking brake secures the vehicle
automatically if the HOLD function is activa-
ted and:
R the driver's door is open and the driver's
seat belt is unfastened
R the engine is switched off, unless it is auto-
matically switched off by the ECO start/
stop function
R a system fault occurs
R the power supply is insufficient
On steep uphill or downhill inclines or if there
is a malfunction, the transmission may also
be automatically shifted into position P.MAGIC BODY CONTROL
General notes Magic Body Control consists of Active Body
Control (ABC), ROAD SURFACE SCAN, the
CURVE cornering function as well as auto-
matic vehicle stabilisation in the event of a
crosswind.
Your vehicle automatically adjusts its ride
height to reduce fuel consumption. The sus-
pension mode is adjusted according to your
selection (SPORT, COMFORT or CURVE), the
road surface conditions and the vehicle load. A multifunction camera detects bumps in the
road surface before the vehicle drives over
them. This reduces chassis movements.
Important safety notes G
WARNING
People's limbs may become trapped if they
are located underneath the vehicle or
between the vehicle body and the tyres when the vehicle is lowering. There is a danger of
injury.
When lowering the vehicle, make sure no one
is underneath the vehicle or in the immediate vicinity of the wheel arches. Crosswind Assist The crosswind stabilisation operates by
changing wheel loads through distortion of
the ABC spring struts. It reduces impairments in handling when driving in a straight line and
assists during countersteering.
Crosswind Assist is active in the speed range
between 80 km/h and 210 km/h when driv-
ing straight ahead or cornering gently.
Active Body Control ABC Vehicle level
All vehicles except AMG vehicles:
depend-
ing on the vehicle level that has been set, the vehicle automatically adjusts its height
dependent on the current speed. The vehicle
is lowered by up to 15 mm as the speed
increases. As the speed is reduced, the vehi-
cle is raised to the set vehicle height.
In the event of poor road surface conditions,
the vehicle automatically raises by up to
10 mm and harder damping is selected.
AMG vehicles: depending on the vehicle
level that has been selected, the vehicle auto- matically adjusts its height dependent on the
current speed. The vehicle is lowered by up to 10 mm below the normal level as the speed
increases. As the speed is reduced, the vehi-
cle is raised to the set vehicle height.
Select the "Normal" setting for normal road
conditions and "Raised" for driving with snow chains or on particularly poor road condi-
tions.
Your selection remains stored even if you
remove the key from the ignition lock.
The "Raised level" setting is cancelled if you:
R are driving faster than approximately
120 km/h.
R drive for approximately three minutes at a
speed over 80 km/h. 204
Driving systemsDriving and parking
Page 251 of 413
X
Use ò on the steering wheel to call up
the list of menus.
X Press the :or9 button on the steer-
ing wheel to select the Trip
Tripmenu.
X Confirm by pressing aon the steering
wheel.
X Press the :or9 button to select
approximate range :and current fuel con-
sumption ;(not for AMG vehicles).
Approximate range :that can be covered is
calculated according to your current driving
style and the amount of fuel in the tank. If
there is only a small amount of fuel left in the fuel tank, the display shows a vehicle being
refuelled Cinstead of range :.
Recuperation display =shows you if energy
is being recuperated from the kinetic energy
in overrun mode and saved in the battery.
Recuperation display =depends on the
engine installed and is therefore not available
in all vehicles.
ECO display The ECO display is not available for AMG vehi-
cles.
X Use ò on the steering wheel to call up
the list of menus.
X Press the :or9 button on the steer-
ing wheel to select the Trip Tripmenu.
X Confirm by pressing aon the steering
wheel.
X Press :or9 to select ECO
ECOdisplay
display. If the ignition remains switched off for longer
than four hours, the ECO display will be auto-
matically reset.
Further information on the ECO display; see
(Y page 182).
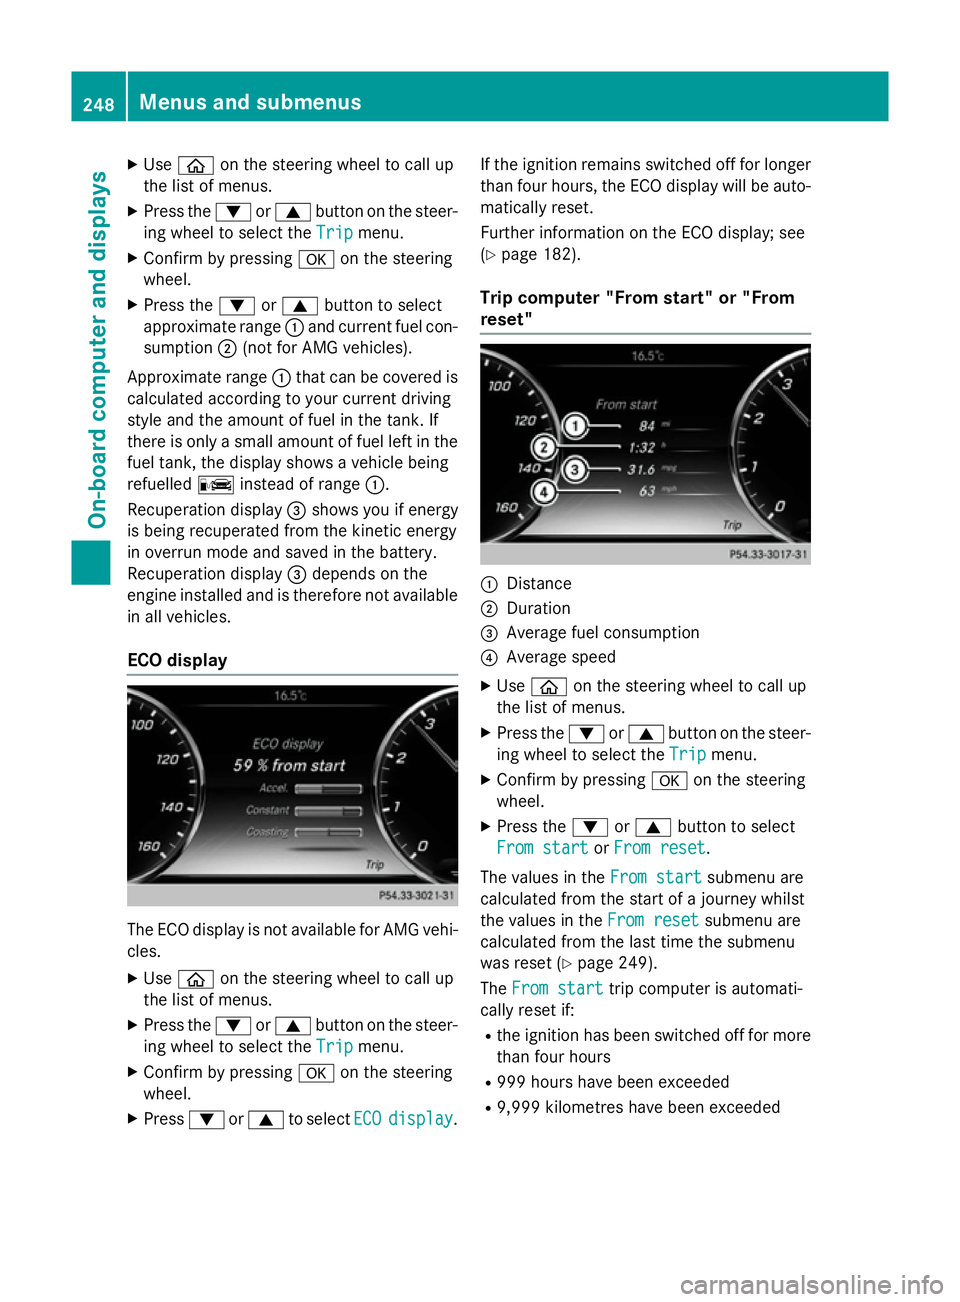
Trip computer "From start" or "From
reset" :
Distance
; Duration
= Average fuel consumption
? Average speed
X Use ò on the steering wheel to call up
the list of menus.
X Press the :or9 button on the steer-
ing wheel to select the Trip Tripmenu.
X Confirm by pressing aon the steering
wheel.
X Press the :or9 button to select
From start From start orFrom reset
From reset.
The values in the From start
From startsubmenu are
calculated from the start of a journey whilst
the values in the From reset From resetsubmenu are
calculated from the last time the submenu
was reset (Y page 249).
The From start From start trip computer is automati-
cally reset if:
R the ignition has been switched off for more
than four hours
R 999 hours have been exceeded
R 9,999 kilometres have been exceeded 248
Menus and submenusOn-board computer and displays
Page 330 of 413
sion surrounding the possible health risk
posed by electromagnetic fields.
Mercedes-Benz recommends the use of an
approved exterior aerial. This ensures:
R optimal mobile phone reception quality in
the vehicle
R that mutual interference between the vehi-
cle electronics and mobile phones is mini-
mised
An exterior aerial has the following advan-
tages:
R it conducts the electromagnetic fields gen-
erated by a wireless device to the exterior
R the field strength in the vehicle interior is
lower than in a vehicle that does not have
an exterior aerial
Information on retrofitting two-way radios
and mobile phones (RF transmitters)
(Y page 400).
General notes Depending on the vehicle equipment, there
are various mobile phone brackets that may
be fitted in your vehicle; in some cases, these
are country-specific.
More information on suitable mobile phones,
mobile phone brackets and on connecting
Bluetooth ®
-capable mobile phones with
COMAND Online can be obtained:
R at your Mercedes-Benz Service Centre
R on the Internet at http://www.mercedes-
benz.com/connect
The functions and services available when
you use the phone depend on your mobile
phone model and service provider.
Using a mobile phone To connect a mobile phone to the exterior
aerial and charge it, insert it into the mobile
phone bracket. X
Open the telephone compartment
(Y page 316).
X Place the mobile phone bracket into the
pre-installed fitting; see the separate instal-
lation instructions for the mobile phone fit-
ting.
X Insert the mobile phone into the mobile
phone bracket; see the separate installa-
tion instructions for the mobile phone fit-
ting.
i The mobile phone can also be operated
without being in the bracket. However, the charging function and aerial function are
not available.
In order to use Bluetooth ®
(SAP profile) on
your telephone module, you must first insert
the telephone module into the pre-installed
fitting. This connects it to the exterior aerial.
If you wish to charge the mobile phone, then
you must connect it to a USB port.
Further information on the telephone module
with Bluetooth ®
(SAP profile) can be found in
the Digital Owner's Manual.
Operating the mobile phone You can operate the telephone using the
6 and~ buttons on the multifunction
steering wheel. You can operate other mobile
phone functions via the on-board computer
(Y page 254).
When you remove the key from the ignition
lock, the mobile phone is disconnected from
the vehicle. You can then no longer make calls using the hands-free system.
If a call is active and you remove the key from the ignition lock, the conversation is trans-
ferred over to the mobile telephone. It is then
possible to continue the conversation on the
mobile telephone. Features
327Stowing and features Z
Page 331 of 413
Garage door opener
General notes The HomeLink
®
garage door opener integra-
ted in the rear-view mirror allows you to oper- ate up to three different door and gate sys-
tems.
Once programmed, the integrated garage
door opener in the rear-view mirror will
assume the function of the garage door sys-
tem's remote control. Please also read the
operating instructions for the garage door
system.
When programming a garage door opener,
park the vehicle outside the garage. Do not
run the engine while programming.
The garage door opener is only available for
certain countries. Observe the legal require-
ments for each individual country.
The HomeLink ®
garage door opener is com-
patible with most European garage and gate
opener drives. More information on Home-
Link ®
and/or compatible products is availa-
ble:
R at a qualified specialised workshop
R via the HomeLink ®
Hotline
(0) 08000 466 354 65 or alternatively
+49 (0) 6838 907-277
R on the Internet at
http://www.homelink.com
Important safety notes G
WARNING
When you operate or program the garage door with the integrated garage door opener, per-
sons in the range of movement of the garage
door can become trapped or struck by the
garage door. There is a risk of injury.
When using the integrated garage door
opener, always make sure that nobody is
within the range of movement of the garage
door. G
WARNING
Combustion engines emit poisonous exhaust
gases such as carbon monoxide. Inhaling
these exhaust gases leads to poisoning. There is a risk of fatal injury. Therefore never leave
the engine running in enclosed spaces with-
out sufficient ventilation.
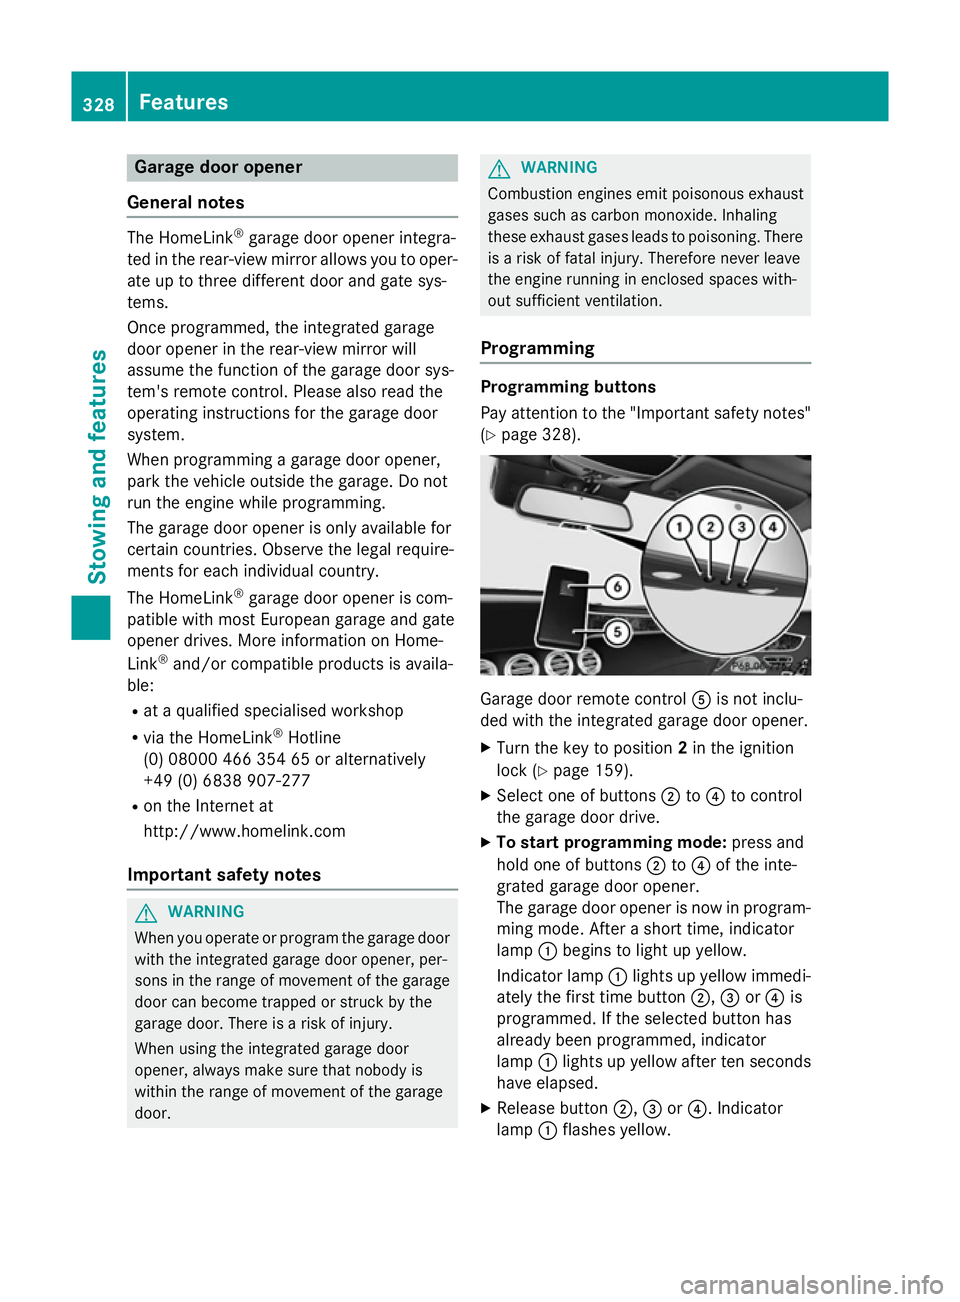
Programming Programming buttons
Pay attention to the "Important safety notes"
(Y page 328). Garage door remote control
Ais not inclu-
ded with the integrated garage door opener.
X Turn the key to position 2in the ignition
lock (Y page 159).
X Select one of buttons ;to? to control
the garage door drive.
X To start programming mode: press and
hold one of buttons ;to? of the inte-
grated garage door opener.
The garage door opener is now in program- ming mode. After a short time, indicator
lamp :begins to light up yellow.
Indicator lamp :lights up yellow immedi-
ately the first time button ;,=or? is
programmed. If the selected button has
already been programmed, indicator
lamp :lights up yellow after ten seconds
have elapsed.
X Release button ;,=or?. Indicator
lamp :flashes yellow. 328
FeaturesStowing and features
Page 360 of 413
In addition to the vehicle load, the driving dis-
tance possible depends upon:
R speed
R road condition
R outside temperature
The driving distance possible in run-flat mode may be reduced by extreme driving condi-
tions/manoeuvres, or it can be increased
through a moderate style of driving.
The maximum permissible distance which
can be driven in run-flat mode is counted from
the moment the tyre pressure loss warning
appears in the multifunction display.
You must not exceed a maximum speed of
80 km/h.
i When replacing one or all tyres, make
sure that you use only:
R the tyre size specified for the vehicle and
R tyre(s) marked "MOExtended"
If a tyre has gone flat and cannot be
replaced with a MOExtended tyre, a stand- ard tyre may be used as a temporary meas-
ure. Make sure that you use the proper size and type (summer or winter tyre).
i Vehicles with MOExtended tyres are not
equipped with a TIREFIT kit at the factory. It
is therefore recommended that you addi-
tionally equip your vehicle with a TIREFIT kit
if you fit tyres that do not feature run-flat
characteristics, e.g. winter tyres. A TIREFIT kit can be obtained from a qualified spe-
cialist workshop.
Important safety notes G
WARNING
When driving in emergency mode, the driving characteristics deteriorate, e.g. when corner-
ing, accelerating quickly and when braking.
There is a risk of accident.
Do not exceed the stated maximum speed.
Avoid abrupt steering and driving manoeu-
vres, and driving over obstacles (kerbs, pot- holes, off-road). This applies in particular to a
laden vehicle.
Stop driving in emergency mode if:
R you hear banging noises.
R the vehicle starts to shake.
R you see smoke and smell rubber.
R ESP ®
is intervening constantly.
R there are tears in the sidewalls of the tyre.
After driving in emergency mode, have the
wheel rims checked at a qualified specialist
workshop with regard to their further use. The faulty tyre must be replaced. TIREFIT kit
Important safety notes TIREFIT is a tyre sealant.
You can use TIREFIT to seal punctures of up to
4 mm, particularly those in the tyre tread. You
can use TIREFIT at outside temperatures
down to Ò20 †. G
WARNING
In the following situations, the tyre sealant is
unable to provide sufficient breakdown assis- tance, as it is unable to seal the tyre properly:
R there are cuts or punctures in the tyre
larger than those mentioned above.
R the wheel rim is damaged.
R you have driven at very low tyre pressures
or on a flat tyre.
There is a risk of an accident.
Do not drive any further. Contact a qualified
specialist workshop. G
WARNING
The tyre sealant is harmful and causes irrita-
tion. It must not come into contact with your
skin, eyes or clothing or be swallowed. Do not inhale TIREFIT fumes. Keep tyre sealant away
from children. There is a risk of injury. Flat tyre
357Breakdown assistance
Z