check engine light MERCEDES-BENZ S-CLASS COUPE 2014 User Guide
[x] Cancel search | Manufacturer: MERCEDES-BENZ, Model Year: 2014, Model line: S-CLASS COUPE, Model: MERCEDES-BENZ S-CLASS COUPE 2014Pages: 413, PDF Size: 12.76 MB
Page 137 of 413
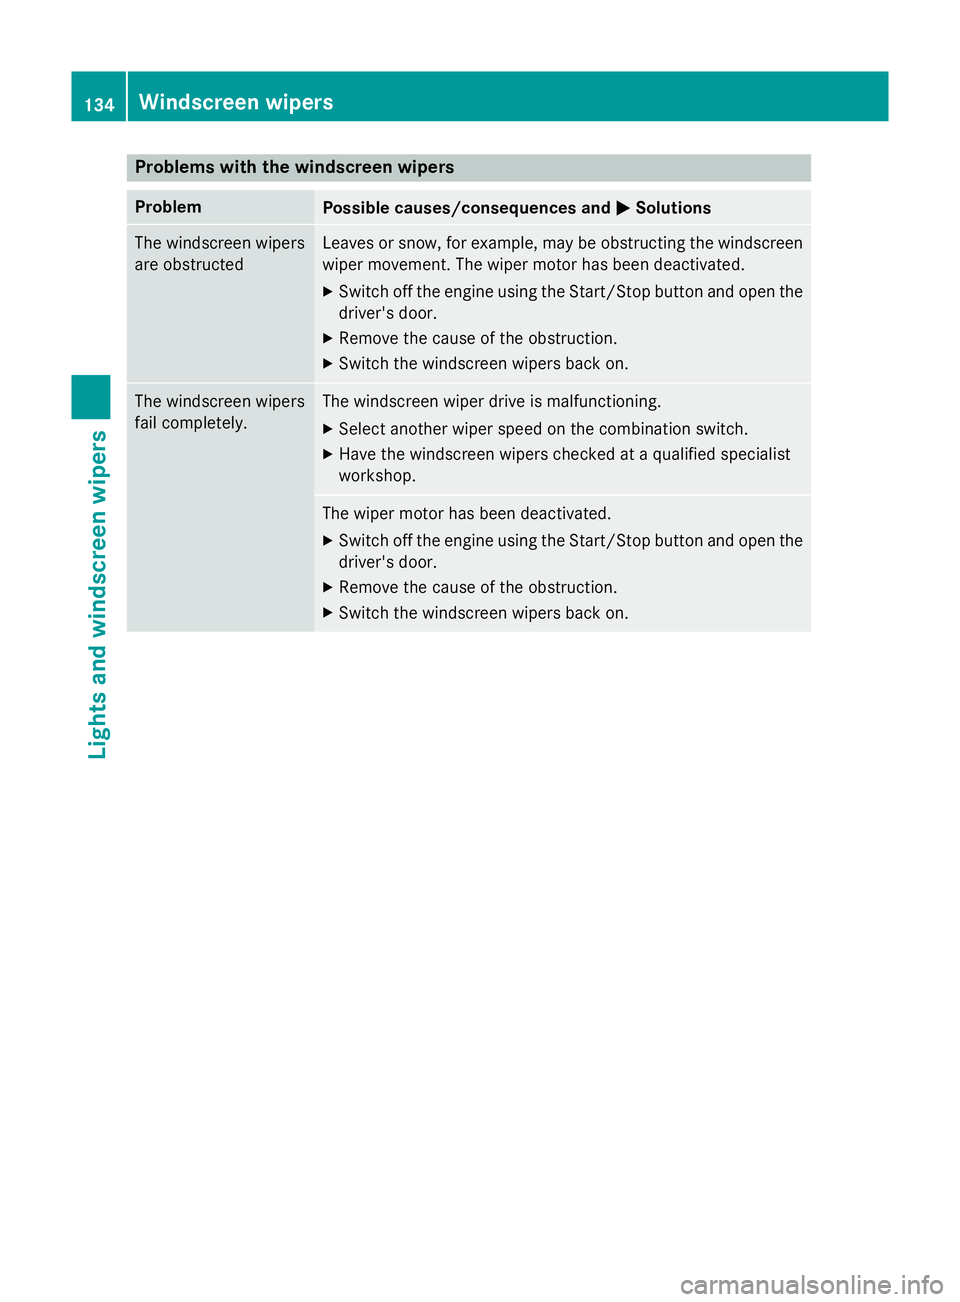
Problems with the windscreen wipers
Problem
Possible causes/consequences and
M
MSolutions The windscreen wipers
are obstructed Leaves or snow, for example, may be obstructing the windscreen
wiper movement. The wiper motor has been deactivated.
X Switch off the engine using the Start/Stop button and open the
driver's door.
X Remove the cause of the obstruction.
X Switch the windscreen wipers back on. The windscreen wipers
fail completely. The windscreen wiper drive is malfunctioning.
X Select another wiper speed on the combination switch.
X Have the windscreen wipers checked at a qualified specialist
workshop. The wiper motor has been deactivated.
X Switch off the engine using the Start/Stop button and open the
driver's door.
X Remove the cause of the obstruction.
X Switch the windscreen wipers back on. 134
Windscreen wipersLights and windscreen wipers
Page 163 of 413
If you depress the brake pedal and press the
Start/Stop button, the engine starts immedi-
ately.
A check which periodically establishes a radio
connection between the vehicle and the key
determines whether a valid key is in the vehi- cle. This occurs, for example, when starting
the engine.
To start the vehicle without actively using the
key:
R the Start/Stop button must be inserted in
the ignition lock
R the key must be in the vehicle
R the vehicle must not be locked with the key
or KEYLESS-GO (Y page 85)
Do not keep the key:
R with electronic devices, e.g. a mobile
phone or another key
R with metallic objects, e.g. coins or metal
film
R inside metallic objects, e.g. a metal case
This can affect the key's functionality.
If you lock the vehicle with the key's remote
control or with KEYLESS-GO, after a short
time:
R you will not be able to switch on the ignition
with the Start/Stop button
R you will not be able to start the engine with
the Start/Stop button until the vehicle is
unlocked again
If you lock the vehicle centrally using the but- ton on the front door (Y page 91), you can
continue to start the engine with the Start/
Stop button.
The engine can be switched off while the vehi-
cle is in motion by pressing and holding the
Start/Stop button for three seconds. This
function operates independently of the ECO
start/stop automatic engine switch-off func-
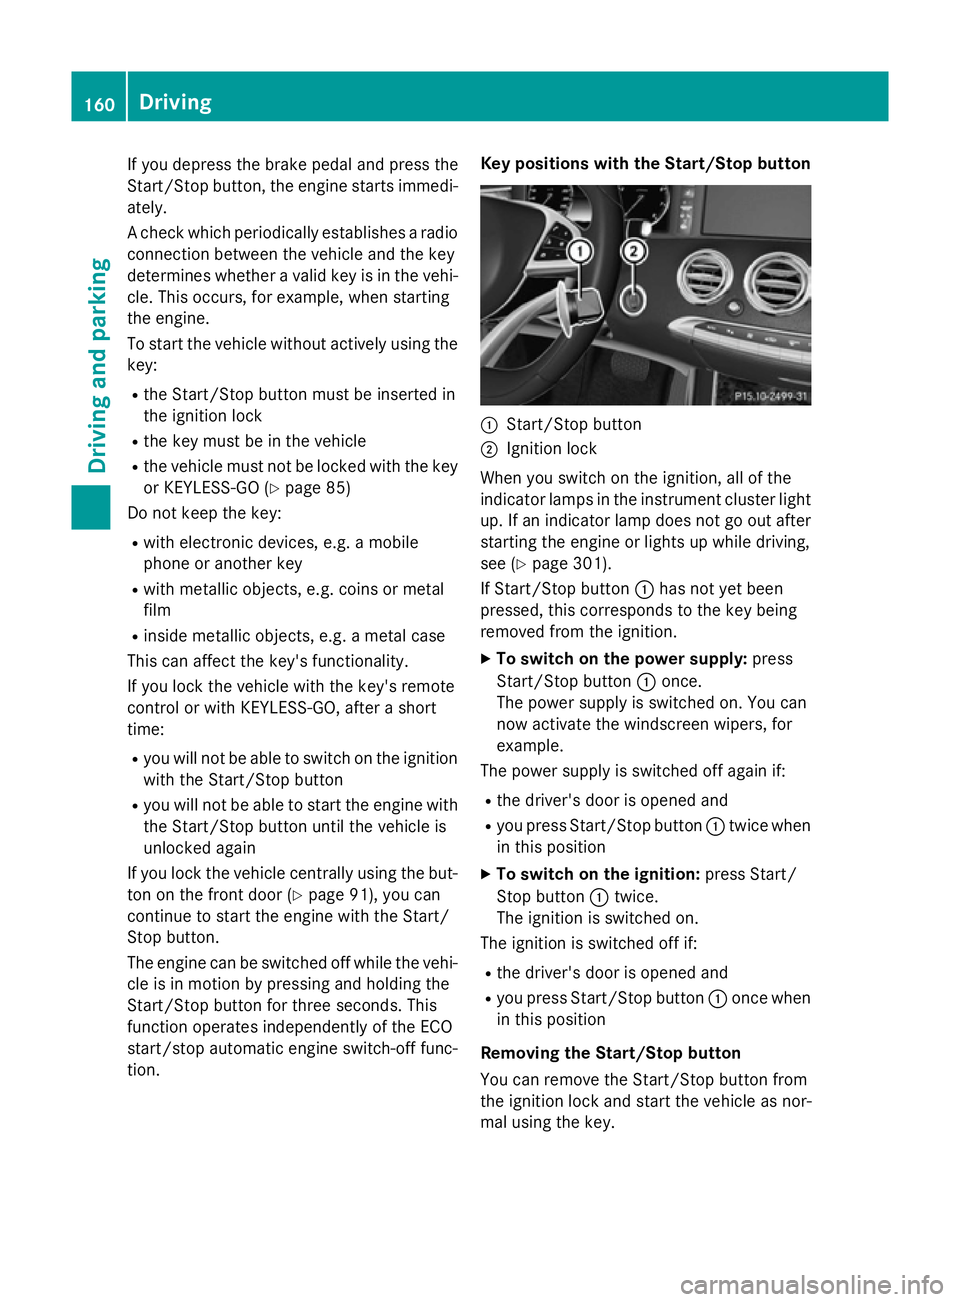
tion. Key positions with the Start/Stop button
:
Start/Stop button
; Ignition lock
When you switch on the ignition, all of the
indicator lamps in the instrument cluster light up. If an indicator lamp does not go out after
starting the engine or lights up while driving,
see (Y page 301).
If Start/Stop button :has not yet been
pressed, this corresponds to the key being
removed from the ignition.
X To switch on the power supply: press
Start/Stop button :once.
The power supply is switched on. You can
now activate the windscreen wipers, for
example.
The power supply is switched off again if:
R the driver's door is opened and
R you press Start/Stop button :twice when
in this position
X To switch on the ignition: press Start/
Stop button :twice.
The ignition is switched on.
The ignition is switched off if:
R the driver's door is opened and
R you press Start/Stop button :once when
in this position
Removing the Start/Stop button
You can remove the Start/Stop button from
the ignition lock and start the vehicle as nor-
mal using the key. 160
DrivingDriving and parking
Page 183 of 413
Electric parking brake
General notes G
WARNING
If you leave children unattended in the vehi-
cle, they may be able to set the vehicle in
motion if, for example, they:
R release the parking brake
R shift the automatic transmission out of park
position P
R start the engine
In addition, they may operate vehicle equip-
ment and become trapped. There is a risk of
an accident and injury.
When leaving the vehicle, always take the key
with you and lock the vehicle. Never leave
children unattended in the vehicle.
The function of the electric parking brake is
dependent on the on-board voltage. If the on-
board voltage is low or if there is a malfunc-
tion in the system, it may not be possible to
apply the released parking brake.
X If this is the case, only park the vehicle on
level ground and secure it to prevent it from
rolling away.
X Shift the automatic transmission to posi-
tion P.
It may not be possible to release an applied
parking brake if the on-board voltage is low or
if there is a malfunction in the system. Con-
tact a qualified specialist workshop.
The electric parking brake carries out a func-
tion check at regular intervals when the
engine is switched off. Noises that occur are
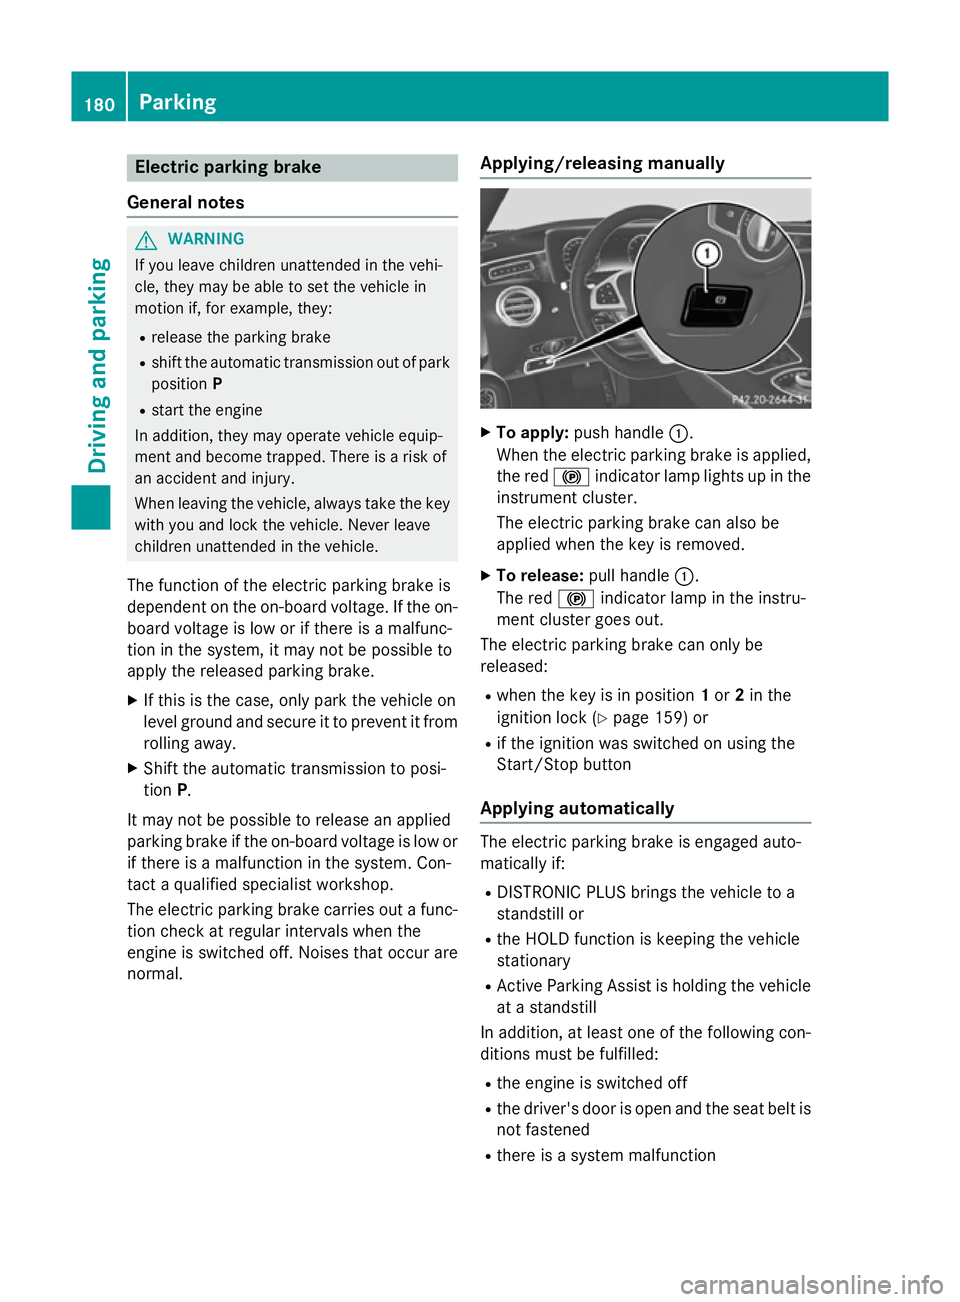
normal. Applying/releasing manually X
To apply: push handle :.
When the electric parking brake is applied, the red !indicator lamp lights up in the
instrument cluster.
The electric parking brake can also be
applied when the key is removed.
X To release: pull handle:.
The red !indicator lamp in the instru-
ment cluster goes out.
The electric parking brake can only be
released:
R when the key is in position 1or 2in the
ignition lock (Y page 159) or
R if the ignition was switched on using the
Start/Stop button
Applying automatically The electric parking brake is engaged auto-
matically if:
R DISTRONIC PLUS brings the vehicle to a
standstill or
R the HOLD function is keeping the vehicle
stationary
R Active Parking Assist is holding the vehicle
at a standstill
In addition, at least one of the following con-
ditions must be fulfilled:
R the engine is switched off
R the driver's door is open and the seat belt is
not fastened
R there is a system malfunction 180
ParkingDriving and parking
Page 220 of 413
shows the
Park Assist cancelled
Park Assist cancelled mes-
sage.
When Active Parking Assist is cancelled, you
must steer and brake again yourself.
If a system malfunction occurs, the vehicle is braked to a standstill. To drive on, depress the
accelerator again. Reversing camera
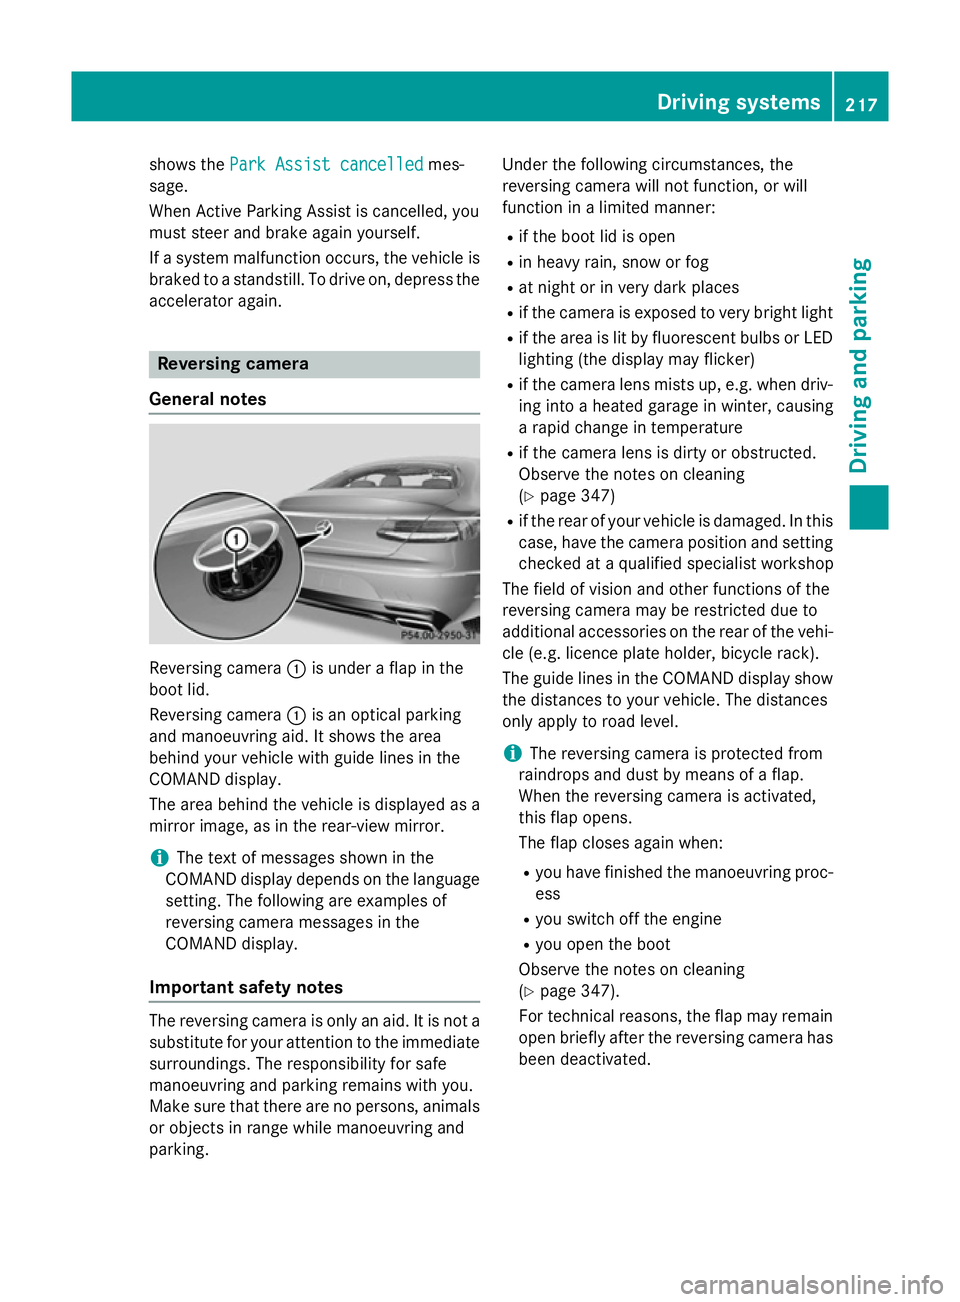
General notes Reversing camera
:is under a flap in the
boot lid.
Reversing camera :is an optical parking
and manoeuvring aid. It shows the area
behind your vehicle with guide lines in the
COMAND display.
The area behind the vehicle is displayed as a
mirror image, as in the rear-view mirror.
i The text of messages shown in the
COMAND display depends on the language setting. The following are examples of
reversing camera messages in the
COMAND display.
Important safety notes The reversing camera is only an aid. It is not a
substitute for your attention to the immediate
surroundings. The responsibility for safe
manoeuvring and parking remains with you.
Make sure that there are no persons, animals
or objects in range while manoeuvring and
parking. Under the following circumstances, the
reversing camera will not function, or will
function in a limited manner:
R if the boot lid is open
R in heavy rain, snow or fog
R at night or in very dark places
R if the camera is exposed to very bright light
R if the area is lit by fluorescent bulbs or LED
lighting (the display may flicker)
R if the camera lens mists up, e.g. when driv-
ing into a heated garage in winter, causing
a rapid change in temperature
R if the camera lens is dirty or obstructed.
Observe the notes on cleaning
(Y page 347)
R if the rear of your vehicle is damaged. In this
case, have the camera position and setting checked at a qualified specialist workshop
The field of vision and other functions of the
reversing camera may be restricted due to
additional accessories on the rear of the vehi-
cle (e.g. licence plate holder, bicycle rack).
The guide lines in the COMAND display show
the distances to your vehicle. The distances
only apply to road level.
i The reversing camera is protected from
raindrops and dust by means of a flap.
When the reversing camera is activated,
this flap opens.
The flap closes again when:
R you have finished the manoeuvring proc-
ess
R you switch off the engine
R you open the boot
Observe the notes on cleaning
(Y page 347).
For technical reasons, the flap may remain
open briefly after the reversing camera has been deactivated. Driving systems
217Driving and parking Z
Page 225 of 413
You are always responsible for safety, and
must always pay attention to your surround-
ings when parking and manoeuvring. This
applies to the areas behind, in front of and
beside the vehicle. You could otherwise
endanger yourself and others.
The 360° camera will not function or will
function only in a limited manner:
R if the doors are open
R if the exterior mirrors are folded in
R if the boot lid is open
R in heavy rain, snow or fog
R at night or in very dark places
R if the cameras are exposed to very bright
light
R if the area is lit by fluorescent bulbs or LED
lighting (the display may flicker)
R if the camera lenses mist up, e.g. when
driving into a heated garage in winter, caus- ing a rapid change in temperature
R if the camera lenses are dirty or covered.
Observe the notes on cleaning
(Y page 347)
R if the vehicle components in which the
cameras are fitted are damaged. In this
event, have the camera position and setting
checked at a qualified specialist workshop.
Do not use the 360° camera in this case. You
could otherwise injure others or damage
objects when parking the vehicle.
The guide lines in the COMAND display show the distances to your vehicle. The distances
only apply to road level.
i The camera in the rear area is protected
from raindrops and dust by means of a flap. This flap opens when the 360° camera is
activated.
The flap closes again when:
R you have finished the manoeuvring proc-
ess
R you switch off the engine
R you open the boot
Observe the notes on cleaning
(Y page 347). For technical reasons, the flap may remain
open briefly after the 360° camera has
been deactivated.
Activation conditions The 360° camera image can be displayed if:
R COMAND Online is switched on (see the
separate operating instructions)
R the 360° camera 360° camera function is switched on.
i If the 360° camera is activated at speeds
above approximately 30 km/h, a warning
message appears.
The warning message disappears if:
R the vehicle's speed falls below approx-
imately 30 km/h. The 360° camera is
then activated.
R the message is confirmed with the %
button.
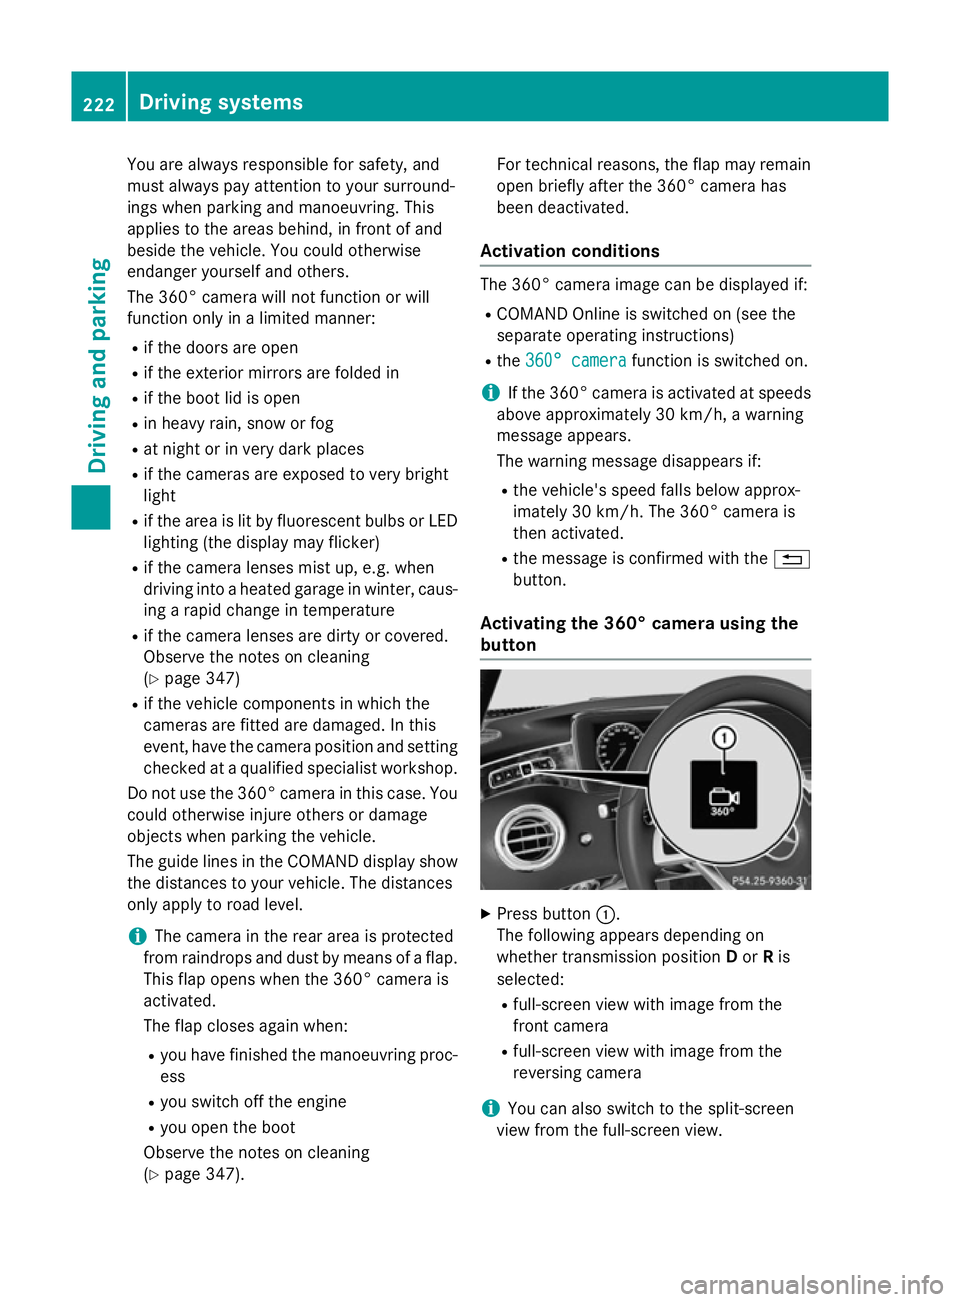
Activating the 360° camera using the
button X
Press button :.
The following appears depending on
whether transmission position Dor Ris
selected:
R full-screen view with image from the
front camera
R full-screen view with image from the
reversing camera
i You can also switch to the split-screen
view from the full-screen view. 222
Driving systemsDriving and parking
Page 234 of 413
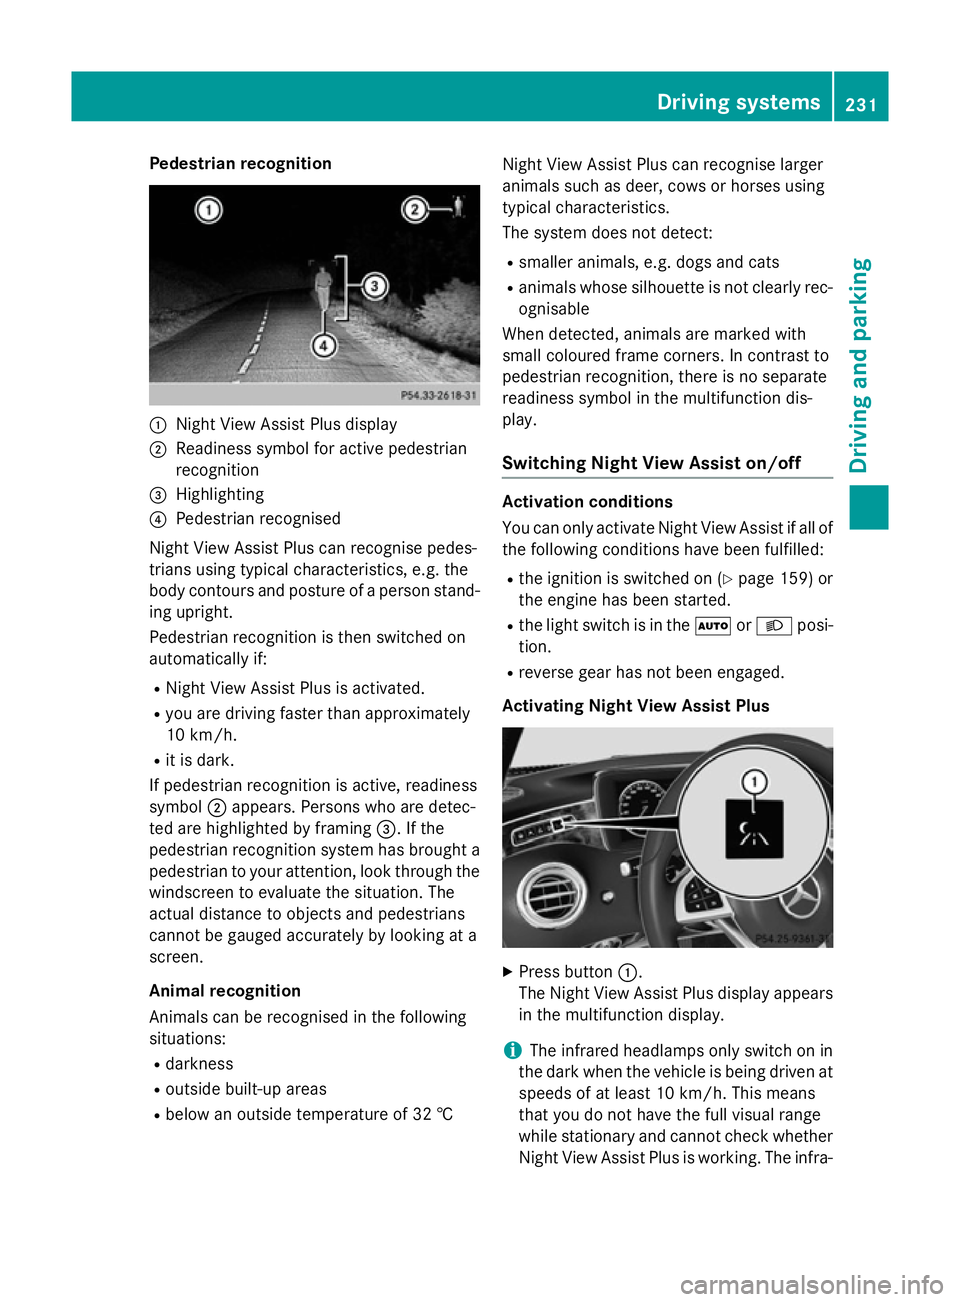
Pedestrian recognition
:
Night View Assist Plus display
; Readiness symbol for active pedestrian
recognition
= Highlighting
? Pedestrian recognised
Night View Assist Plus can recognise pedes-
trians using typical characteristics, e.g. the
body contours and posture of a person stand-
ing upright.
Pedestrian recognition is then switched on
automatically if:
R Night View Assist Plus is activated.
R you are driving faster than approximately
10 km/h.
R it is dark.
If pedestrian recognition is active, readiness
symbol ;appears. Persons who are detec-
ted are highlighted by framing =. If the
pedestrian recognition system has brought a
pedestrian to your attention, look through the windscreen to evaluate the situation. The
actual distance to objects and pedestrians
cannot be gauged accurately by looking at a
screen.
Animal recognition
Animals can be recognised in the following
situations:
R darkness
R outside built-up areas
R below an outside temperature of 32 † Night View Assist Plus can recognise larger
animals such as deer, cows or horses using
typical characteristics.
The system does not detect:
R smaller animals, e.g. dogs and cats
R animals whose silhouette is not clearly rec-
ognisable
When detected, animals are marked with
small coloured frame corners. In contrast to
pedestrian recognition, there is no separate
readiness symbol in the multifunction dis-
play.
Switching Night View Assist on/off Activation conditions
You can only activate Night View Assist if all of
the following conditions have been fulfilled:
R the ignition is switched on (Y page 159) or
the engine has been started.
R the light switch is in the ÃorL posi-
tion.
R reverse gear has not been engaged.
Activating Night View Assist Plus X
Press button :.
The Night View Assist Plus display appears in the multifunction display.
i The infrared headlamps only switch on in
the dark when the vehicle is being driven at speeds of at least 10 km/h. This means
that you do not have the full visual range
while stationary and cannot check whether
Night View Assist Plus is working. The infra- Driving systems
231Driving and parking Z
Page 308 of 413
Warning/
indicator
lamp
N N
Signal type
Possible causes/consequences and M
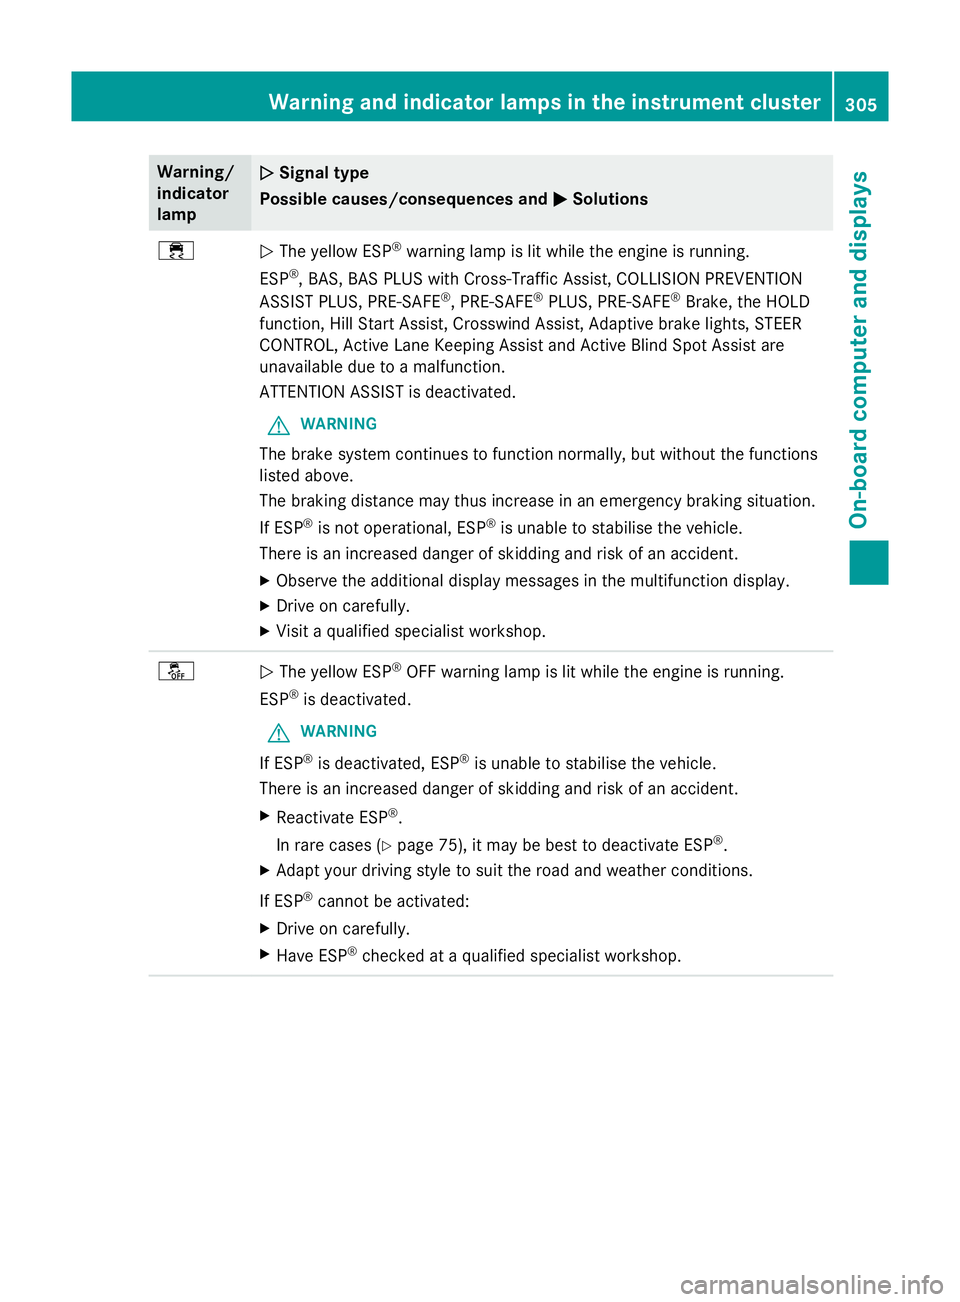
MSolutions ÷
N
The yellow ESP ®
warning lamp is lit while the engine is running.
ESP ®
, BAS, BAS PLUS with Cross-Traffic Assist, COLLISION PREVENTION
ASSIST PLUS, PRE ‑SAFE®
, PRE‑SAFE ®
PLUS, PRE‑SAFE ®
Brake, the HOLD
function, Hill Start Assist, Crosswind Assist, Adaptive brake lights, STEER
CONTROL, Active Lane Keeping Assist and Active Blind Spot Assist are
unavailable due to a malfunction.
ATTENTION ASSIST is deactivated.
G WARNING
The brake system continues to function normally, but without the functions
listed above.
The braking distance may thus increase in an emergency braking situation.
If ESP ®
is not operational, ESP ®
is unable to stabilise the vehicle.
There is an increased danger of skidding and risk of an accident.
X Observe the additional display messages in the multifunction display.
X Drive on carefully.
X Visit a qualified specialist workshop. å
N
The yellow ESP ®
OFF warning lamp is lit while the engine is running.
ESP ®
is deactivated.
G WARNING
If ESP ®
is deactivated, ESP ®
is unable to stabilise the vehicle.
There is an increased danger of skidding and risk of an accident.
X Reactivate ESP ®
.
In rare cases (Y page 75), it may be best to deactivate ESP ®
.
X Adapt your driving style to suit the road and weather conditions.
If ESP ®
cannot be activated:
X Drive on carefully.
X Have ESP ®
checked at a qualified specialist workshop. Warning and indicator lamps in the instrument cluster
305On-board computer and displays Z
Page 310 of 413
Engine
Warning/
indicator
lamp
N N
Signal type
Possible causes/consequences and M
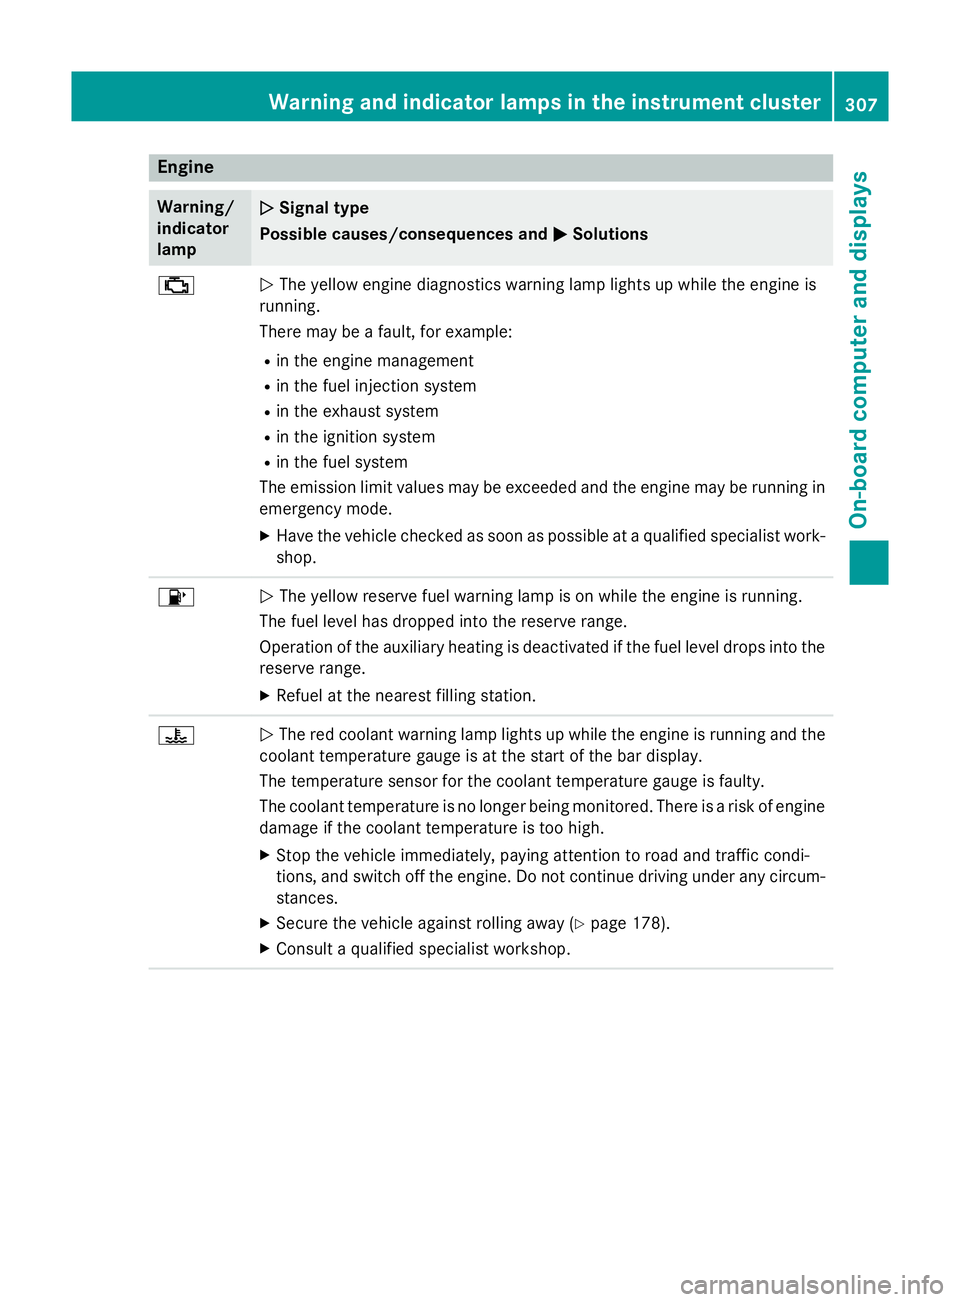
MSolutions ;
N
The yellow engine diagnostics warning lamp lights up while the engine is
running.
There may be a fault, for example:
R in the engine management
R in the fuel injection system
R in the exhaust system
R in the ignition system
R in the fuel system
The emission limit values may be exceeded and the engine may be running in emergency mode.
X Have the vehicle checked as soon as possible at a qualified specialist work-
shop. 8
N
The yellow reserve fuel warning lamp is on while the engine is running.
The fuel level has dropped into the reserve range.
Operation of the auxiliary heating is deactivated if the fuel level drops into the reserve range.
X Refuel at the nearest filling station. ?
N
The red coolant warning lamp lights up while the engine is running and the
coolant temperature gauge is at the start of the bar display.
The temperature sensor for the coolant temperature gauge is faulty.
The coolant temperature is no longer being monitored. There is a risk of engine
damage if the coolant temperature is too high.
X Stop the vehicle immediately, paying attention to road and traffic condi-
tions, and switch off the engine. Do not continue driving under any circum-
stances.
X Secure the vehicle against rolling away (Y page 178).
X Consult a qualified specialist workshop. Warning and indicator lamps in the instrument cluster
307On-board computer and displays Z
Page 312 of 413
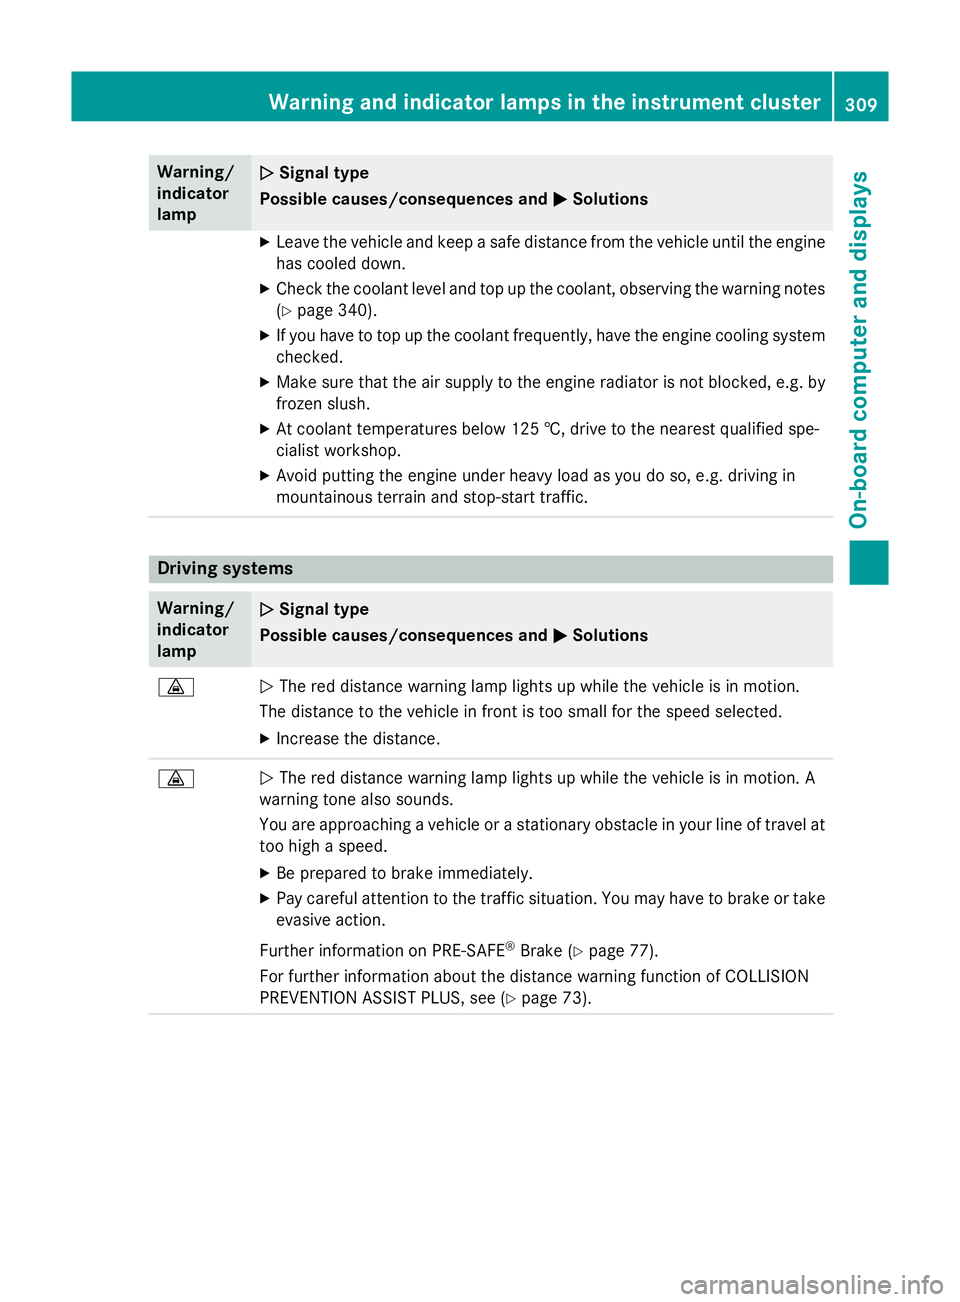
Warning/
indicator
lamp
N N
Signal type
Possible causes/consequences and M
MSolutions X
Leave the vehicle and keep a safe distance from the vehicle until the engine
has cooled down.
X Check the coolant level and top up the coolant, observing the warning notes
(Y page 340).
X If you have to top up the coolant frequently, have the engine cooling system
checked.
X Make sure that the air supply to the engine radiator is not blocked, e.g. by
frozen slush.
X At coolant temperatures below 125 †, drive to the nearest qualified spe-
cialist workshop.
X Avoid putting the engine under heavy load as you do so, e.g. driving in
mountainous terrain and stop-start traffic. Driving systems
Warning/
indicator
lamp
N N
Signal type
Possible causes/consequences and M
MSolutions ·
N
The red distance warning lamp lights up while the vehicle is in motion.
The distance to the vehicle in front is too small for the speed selected.
X Increase the distance. ·
N
The red distance warning lamp lights up while the vehicle is in motion. A
warning tone also sounds.
You are approaching a vehicle or a stationary obstacle in your line of travel at too high a speed.
X Be prepared to brake immediately.
X Pay careful attention to the traffic situation. You may have to brake or take
evasive action.
Further information on PRE ‑SAFE®
Brake (Y page 77).
For further information about the distance warning function of COLLISION
PREVENTION ASSIST PLUS, see (Y page 73). Warning and indicator lamps in the instrument cluster
309On-board computer and displays Z
Page 341 of 413
Closing the bonnet
X
Lower the bonnet and let it fall from a
height of approximately 20 cm.
X Check that the bonnet has engaged prop-
erly.
If the bonnet can be raised slightly, it is not
properly engaged. Open it again and close
it with a little more force. Radiator
Do not cover up the radiator. Do not use ther-
mal mats, insect protection covers or any-
thing similar. Doing so can cause the Onboard Diagnostics System to display inaccurate val-
ues. Some of these values are legally required
and must always be correct. Engine oil
General notes Depending on your driving style, the vehicle
consumes up to 0.8 litres of oil per 1000 km.
The oil consumption may be higher than this
when the vehicle is new or if you frequently
drive at high engine speeds.
Depending on the engine, the oil dipstick may
be installed at a different location.
When checking the oil level:
R park the vehicle on a level surface
R the engine should be switched off for
approximately five minutes if the engine is
at normal operating temperature
R if the engine is not at normal operating
temperature, e.g. if the engine was only
started briefly, wait approximately
30 minutes before carrying out the meas-
urement Checking the oil level using the oil dip-
stick (except S 65 AMG) G
WARNING
Certain components in the engine compart-
ment could be very hot, e.g. the engine, the
radiator and parts of the exhaust system.
There is a risk of injury when accessing the
engine compartment.
As far as possible, allow the engine to cool
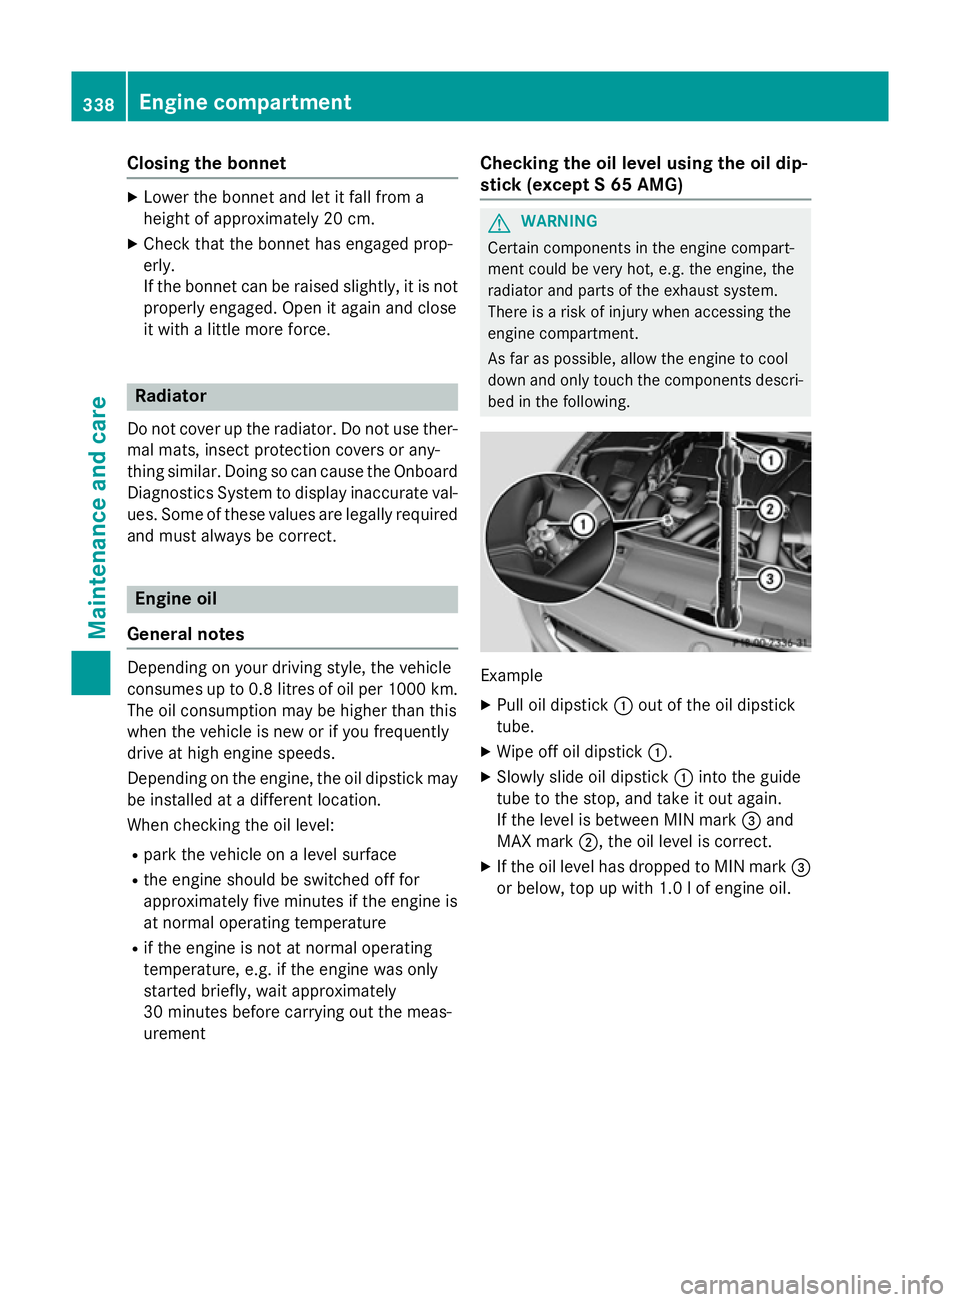
down and only touch the components descri- bed in the following. Example
X Pull oil dipstick :out of the oil dipstick
tube.
X Wipe off oil dipstick :.
X Slowly slide oil dipstick :into the guide
tube to the stop, and take it out again.
If the level is between MIN mark =and
MAX mark ;, the oil level is correct.
X If the oil level has dropped to MIN mark =
or below, top up with 1.0 l of engine oil. 338
Engine compartmentMaintenance and care