ground clearance MERCEDES-BENZ S-CLASS SEDAN 2012 Owners Manual
[x] Cancel search | Manufacturer: MERCEDES-BENZ, Model Year: 2012, Model line: S-CLASS SEDAN, Model: MERCEDES-BENZ S-CLASS SEDAN 2012Pages: 536, PDF Size: 39.39 MB
Page 94 of 536
gases may enter the vehicle interior resulting
in unconsciousness and death.
! The trunk lid swings upwards when
opened. Therefore, make sure that there is
sufficient clearance above the trunk lid.
You can limit the opening angle of the trunk
lid. This could be useful, for example, if there
is insufficient space above the trunk lid. You
can switch the Trunk Opening-height
Restriction function on or off via COMAND
( Y page 269).
To open the trunk lid completely, a minimum
clearance of 5.90 ft (1.80 m) above the
ground is necessary.
Vehicles without trunk lid remote closing
feature: the trunk lid can be:
R opened and closed manually from outside
R opened automatically from outside
R opened automatically from inside
R locked separately
R unlocked with the mechanical key
R opened with the emergency release button
Vehicles with trunk lid remote closing
feature: the trunk lid can be:
R opened and closed manually from outside
R opened and closed automatically from
outside
R opened and closed automatically from
inside
R locked separately
R unlocked with the mechanical key
R opened with the emergency release button
Opening and closing manually
Opening
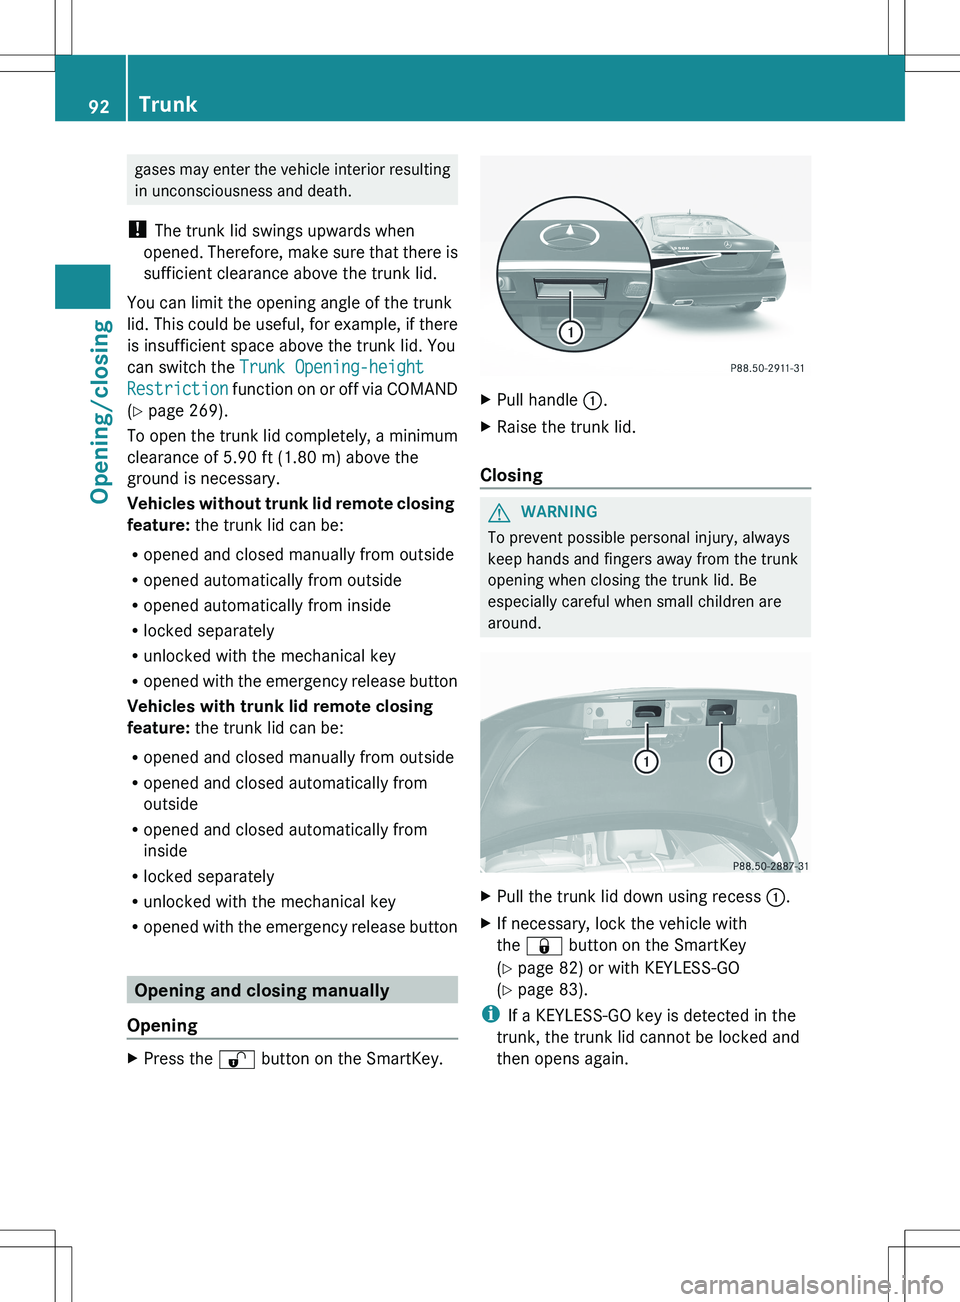
XPress the % button on the SmartKey.XPull handle :.XRaise the trunk lid.
Closing
GWARNING
To prevent possible personal injury, always
keep hands and fingers away from the trunk
opening when closing the trunk lid. Be
especially careful when small children are
around.
XPull the trunk lid down using recess :.XIf necessary, lock the vehicle with
the & button on the SmartKey
( Y page 82) or with KEYLESS-GO
( Y page 83).
i
If a KEYLESS-GO key is detected in the
trunk, the trunk lid cannot be locked and
then opens again.
92TrunkOpening/closing
Page 95 of 536
Opening/closing automatically from
outside
Important safety notesGWARNING
Make sure the trunk lid is closed when the
engine is running and while driving. Among
other dangers, deadly carbon monoxide (CO)
gases may enter the vehicle interior resulting
in unconsciousness and death.
! The trunk lid swings upwards when
opened. Therefore, make sure that there is
sufficient clearance above the trunk lid.
To open the trunk lid completely, a minimum
clearance of 5.90 ft (1.80 m) above the
ground is necessary.
Opening
You can open the trunk lid using the
SmartKey.
XPress and hold the F button on the
SmartKey until the trunk lid opens.
Closing
GWARNING
Monitor the closing procedure carefully to
make sure no one is in danger of being
injured. To prevent possible personal injury,
always keep hands and fingers away from the
trunk opening when closing the trunk lid. Be
especially careful when small children are
around. To stop the closing procedure, do one
of the following:
R Press button F on the SmartKey.
R Press the remote trunk opening/closing
switch (on the driver's door).
R Press the trunk closing switch.
R Press the KEYLESS-GO locking/closing
switch.
R Pull the trunk lid handle.
Even with the SmartKey removed from the
starter switch or the SmartKey with KEYLESS-
GO removed from the vehicle, the remote
trunk opening/closing switch can be
operated. Therefore, do not leave children
unattended in the vehicle, or with access to
an unlocked vehicle. A child's unsupervised
access to a vehicle could result in an accident
and/or serious personal injury.
You can close the trunk lid automatically by
using the closing button 3
or locking button 4
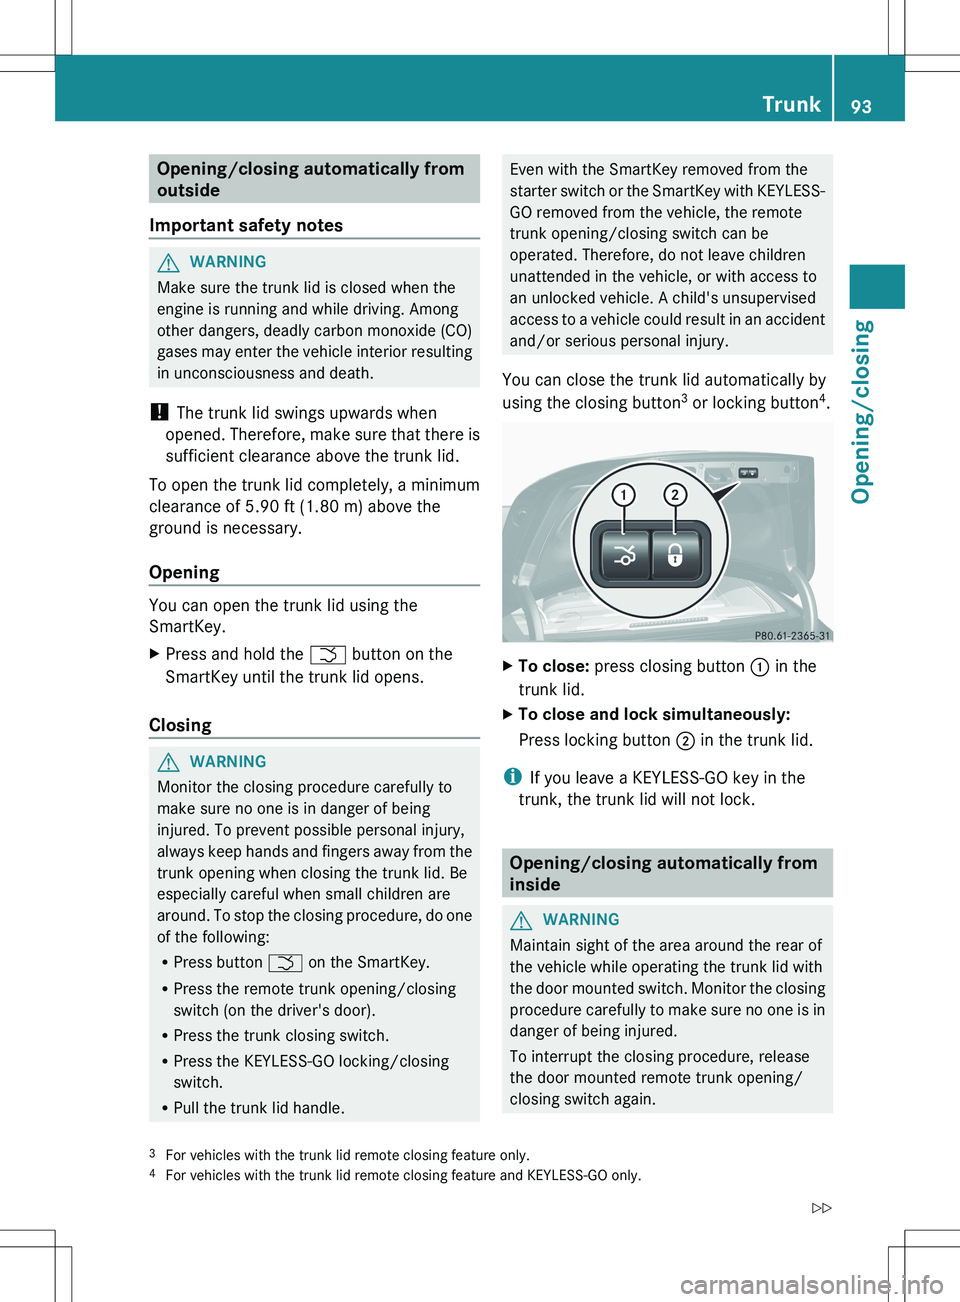
.XTo close: press closing button : in the
trunk lid.XTo close and lock simultaneously:
Press locking button ; in the trunk lid.
i
If you leave a KEYLESS-GO key in the
trunk, the trunk lid will not lock.
Opening/closing automatically from
inside
GWARNING
Maintain sight of the area around the rear of
the vehicle while operating the trunk lid with
the door mounted switch. Monitor the closing
procedure carefully to make sure no one is in
danger of being injured.
To interrupt the closing procedure, release
the door mounted remote trunk opening/
closing switch again.
3 For vehicles with the trunk lid remote closing feature only.
4 For vehicles with the trunk lid remote closing feature and KEYLESS-GO only.Trunk93Opening/closingZ
Page 349 of 536
Rthe electrical system in the engine
compartment, the battery or the fuses are
tampered with.
R the battery is disconnected.
If you leave the vehicle or park it, deactivate
the HOLD function and secure the vehicle
against rolling away.
AIRMATIC
Vehicle level
Important safety notes
Your vehicle regulates its height
automatically. All-round level control ensures
the best possible suspension and constant
ground clearance, even with a laden vehicle.
When you drive fast, the vehicle is lowered
automatically to improve driving safety and to
reduce fuel consumption.
The following vehicle levels are possible on
vehicles without 4MATIC:
R Normal
R raised: the vehicle is raised by about 1 in
(25 mm) when compared with the normal
level
R lowered: the vehicle is lowered by about
0.60 in (15 mm) when compared with the
normal level
The following vehicle levels are possible on
vehicles with 4MATIC:
R normal: in Comfort mode, the vehicle is
raised by about 0.40 in (10 mm) when
compared with Sport mode
R raised: in Comfort mode, the vehicle is
raised by about 0.60 in (15 mm) and in
Sport mode by about 1 in (25 mm) when
compared with normal level
R lowered: the vehicle is lowered by about
0.40 in (10mm) when compared with the
normal level
The "Normal" and "Raised" vehicle levels can
be set manually.
The "Lowered” vehicle level is set
automatically:
R in vehicles without 4MATIC at speeds
above 60 mph (100 km/h)
R in vehicles with 4MATIC at speeds above
50 mph (80 km/h).
Setting the vehicle level
Select the "Normal" setting for normal road
surfaces and "Raised" for driving with snow
chains or on particularly poor road surfaces.
Your selection remains stored even if you
remove the SmartKey from the ignition lock.GWARNING
To help avoid personal injury, keep hands and
feet away from wheel housing area, and stay
away from under the vehicle when lowering
the vehicle chassis.
Setting raised level
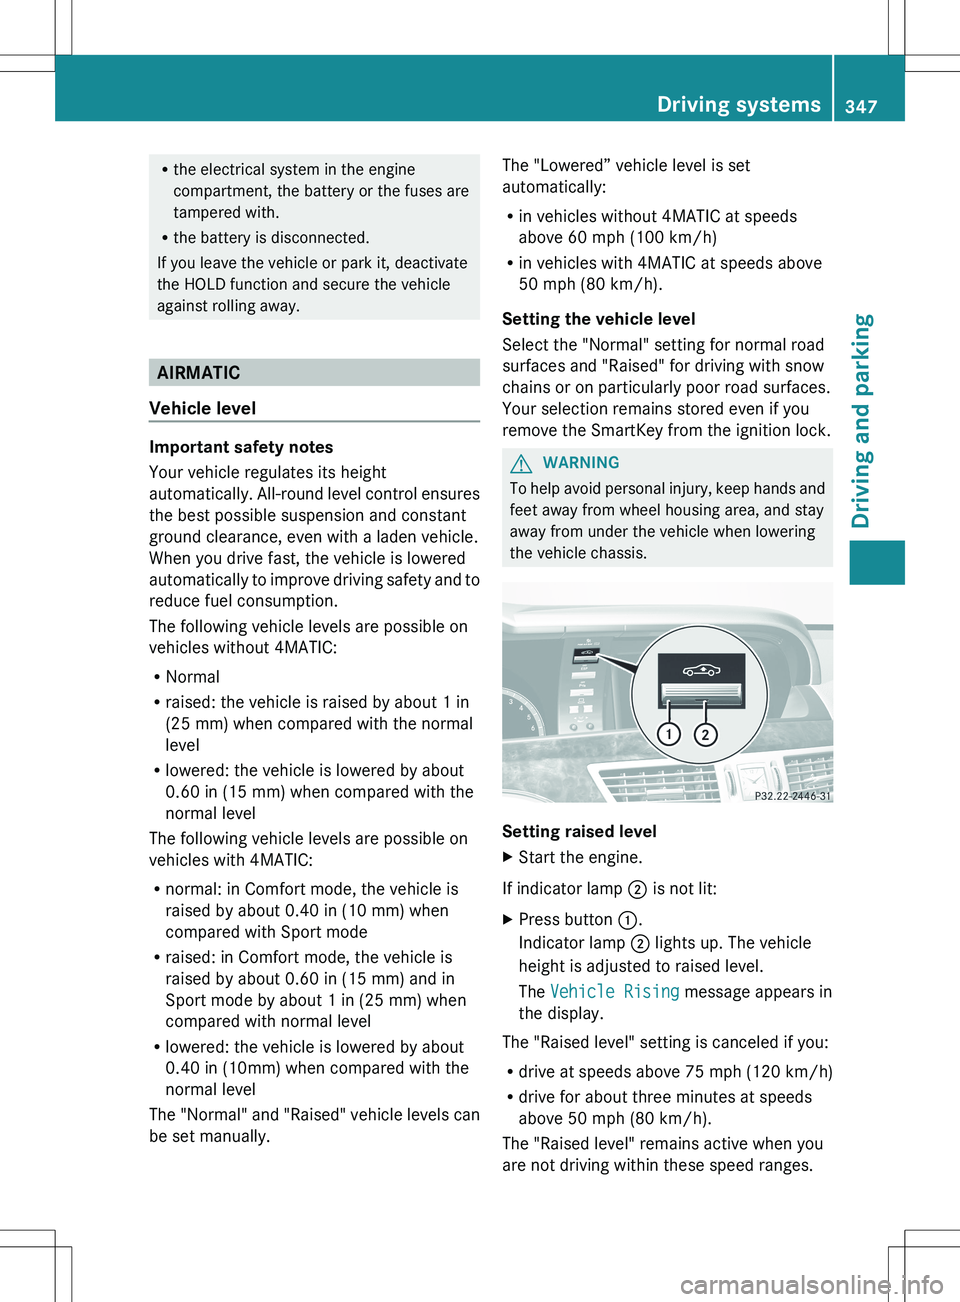
XStart the engine.
If indicator lamp ; is not lit:
XPress button :.
Indicator lamp ; lights up. The vehicle
height is adjusted to raised level.
The Vehicle Rising message appears in
the display.
The "Raised level" setting is canceled if you:
R drive at speeds above 75 mph (120 km/h)
R drive for about three minutes at speeds
above 50 mph (80 km/h).
The "Raised level" remains active when you
are not driving within these speed ranges.
Driving systems347Driving and parkingZ
Page 479 of 536
The following must be observed when raising
the vehicle:
R to raise the vehicle, only use the vehicle-
specific jack that has been tested and
approved by Mercedes-Benz. If used
incorrectly, the jack could tip over with the
vehicle raised.
R the jack is designed only to raise and hold
the vehicle for a short time while a wheel
is being changed. It is not suited for
performing maintenance work under the
vehicle.
R avoid changing the wheel on uphill and
downhill slopes.
R before raising the vehicle, secure it from
rolling away by applying the parking brake
and inserting wheel chocks. Never
disengage the parking brake while the
vehicle is raised.
R the jack must be placed on a firm, flat and
non-slip surface. On a loose surface, a
large, load-bearing underlay must be used.
On a slippery surface, a non-slip underlay
must be used, e.g. rubber mats.
R do not use wooden blocks or similar
objects as a jack underlay. Otherwise, the
jack will not be able to achieve its load-
bearing capacity due to the restricted
height.
R The maximum clearance between the
underside of the tire and the ground must
be 1.2 in (3 cm).
R never place your hands and feet under the
raised vehicle.
R never lie under the raised vehicle.
R never start the engine when the vehicle is
raised.
R never open or close a door or the trunk lid
when the vehicle is raised.
R make sure that no persons are present in
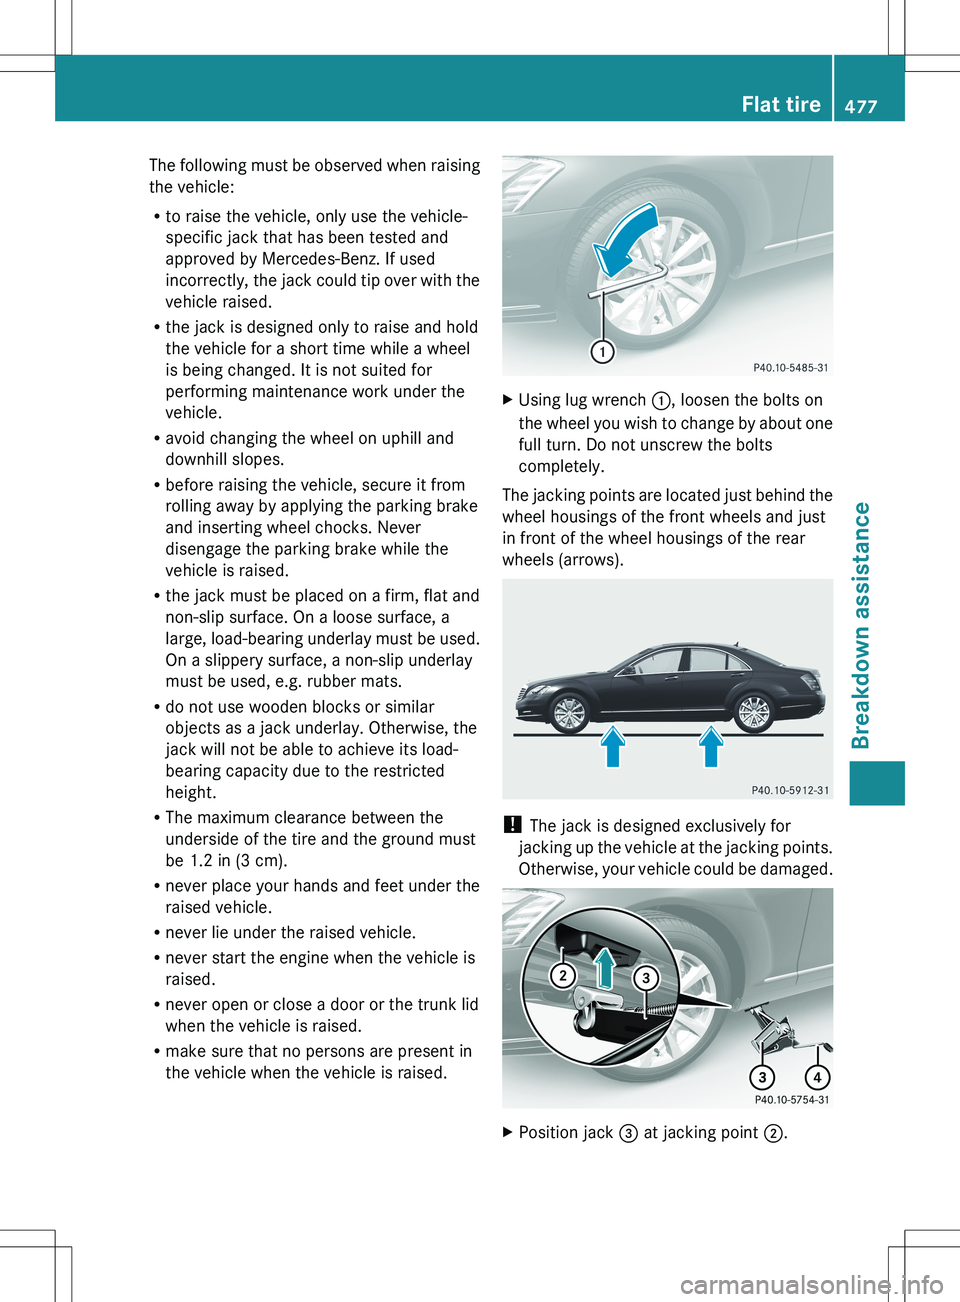
the vehicle when the vehicle is raised.XUsing lug wrench :, loosen the bolts on
the wheel you wish to change by about one
full turn. Do not unscrew the bolts
completely.
The jacking points are located just behind the
wheel housings of the front wheels and just
in front of the wheel housings of the rear
wheels (arrows).
! The jack is designed exclusively for
jacking up the vehicle at the jacking points.
Otherwise, your vehicle could be damaged.
XPosition jack = at jacking point ;.Flat tire477Breakdown assistanceZ