USB MERCEDES-BENZ S-Class SEDAN 2016 W222 Comand Manual
[x] Cancel search | Manufacturer: MERCEDES-BENZ, Model Year: 2016, Model line: S-Class SEDAN, Model: MERCEDES-BENZ S-Class SEDAN 2016 W222Pages: 298, PDF Size: 9.16 MB
Page 15 of 298

Telephone keypad overviewCOMAND ......................................... 26
Telephone number
Entering ......................................... 146
Text messages (SMS)
Calling the sender .......................... 164
Calling up the settings menu ......... 159
Configuring the text messages
displayed ....................................... 159
Deleting ......................................... 165
Displaying details ........................... 161
Downloading manually ................... 160
Editing text templates .................... 164
Inbox .............................................. 161
Reading .......................................... 160
Reading aloud ................................ 161
Settings ......................................... 159
Storing sender in address book ..... 165
Storing the sender as a new
address book entry ........................ 164
Using a phone number in the text .. 164
Using text templates ...................... 163
Writing ........................................... 162
Time
Setting ............................................. 50
Setting the format ............................ 51
Setting the time ............................... 50
Setting the time zone ....................... 49
Setting the time/date format .......... 51
Switching automatic time on/off ..... 49
Touchpad
Calling up quick access for audio
and telephone .................................. 33
Changing the input language for
handwriting recognition ................... 36
Changing the station/music
track ................................................ 37
Character suggestions ..................... 35
Deleting characters ......................... 35
Entering a space .............................. 35
Entering characters ......................... 35
Gesture control ................................ 32
Handwriting recognition ................... 34
Moving the map ............................... 34
Operating the touchpad ................... 32
Overview .......................................... 32
Quick access for audio and tele-
phone .............................................. 37 Switching ......................................... 32
Switching input line ......................... 35
Zooming in on the map .................... 34
Zooming out of the map ................... 34
Tow-away alarm
Arming/deactivating (COMAND) ..... 66
Track information .............................. 288
Traffic jam functi
on
........................... 115
Traffic reports
Calling up a list .............................. 118
Real-time traffic report .................. 119
Trunk lid opening height restric-
tion
Activating/deactivating
(COMAND) ....................................... 67
U
Updating the digital map .................. 133
USB audio mode
Selecting a track ............................ 219
USB devices
Connecting to the Media Inter-
face ............................................... 217
V
Vehicle settingsCalling up ......................................... 62
Video
see Video DVD
Video DVD
Control option ................................ 241
DVD functions ............................... 244
DVD menu ..................................... 244
DVD's control menu ...................... 243
Function restrictions ...................... 241
Menu options ................................. 242
Notes on discs ............................... 240
Operation ....................................... 240
Overview ........................................ 242
Pause function ............................... 245
Picture settings .............................. 243
Playing conditions .......................... 240
Safety notes .................................. 240
Selecting a scene/chapter ............ 245
Stop function ................................. 245
Switching to ................................... 241
Index13
Page 23 of 298
Overview
Components
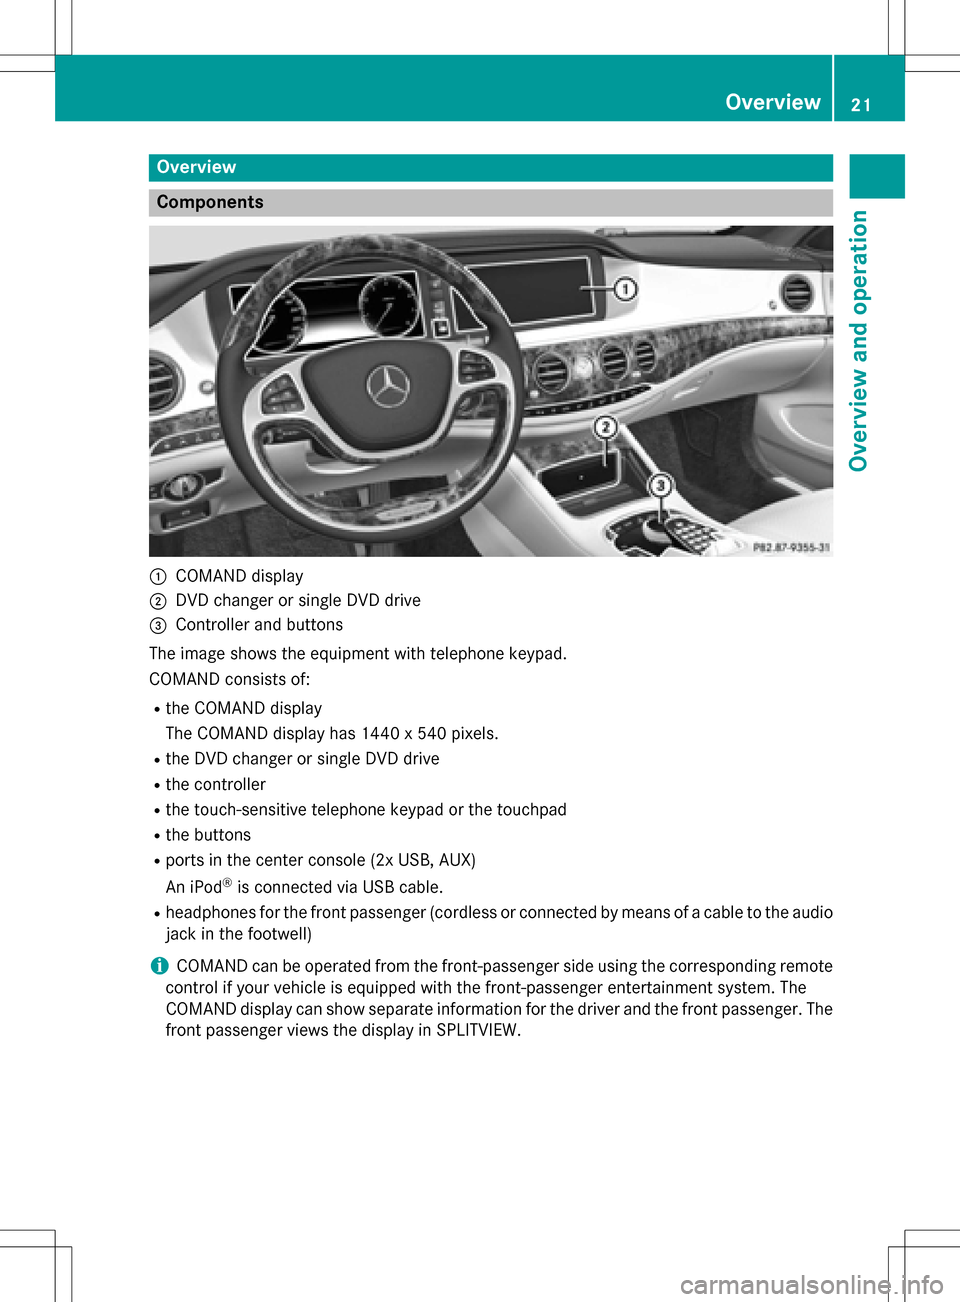
:COMAND display
;DVD changer or single DVD drive
=Controller and buttons
The image shows the equipment with telephone keypad.
COMAND consists of:
Rthe COMAND display
The COMAND display has 1440 x 540 pixels.
Rthe DVD changer or single DVD drive
Rthe controller
Rthe touch-sensitive telephone keypad or the touchpad
Rthe buttons
Rports in the center console (2x USB, AUX)
An iPod
®is connected via USB cable.
Rheadphones for the front passenger (cordless or connected by means of a cable to the audio
jack in the footwell)
iCOMAND can be operated from the front-passenger side using the corresponding remote
control if your vehicle is equipped with the front-passenger entertainment system. The
COMAND display can show separate information for the driver and the front passenger. The
front passenger views the display in SPLITVIEW.
Overview21
Overview and operation
Page 24 of 298
Functions
RHD FMradio and HD AM radio/satellite
ra dio
RMedia
-Media support: audio CD, MP3 CD, DVD
vide o, 2 x USB, SDcard, iPod®, Blue-
tooth®audio, 10 GB Media Register on
the hard drive
-Music search using all med ia
RSound system
You can select from three sound systems:
-Standard sound system
-Burmester®surround sound system
-Burmester high-end 3D surround sound
system for ultimate listening pleasure
RNavigation system
-Destination entry using keyword search
-Realistic 3D mapwith textured city mod-
els
-Personal POIs and routes using SDmem-
ory card
-Navigation functions for passengers,
such as Drive Information and Google
Maps™
-Dynamic route guidance via SIRIUSsat-
ellit e radio
RCommu nication
-Data transmission via NFC
-Messaging functions (text messages,
email)
-Address book
-Internet browser
-Mercedes-Benz Ap ps with Google™
Local Search, Destination Download,
Weather, Facebook, Google Street
View™, stock prices, ne wsand much
more
-WiFi interface for the connection of a
smartphone to COMAND and the option
of remote control for the front passenger (SPLITVIEW) and the Rear
Seat Entertain-
ment System
-Mercedes-Benz Mobile Website
-WiFi hotspot functionality to connect a
tablet PC or laptopinorder to enable
access to the Internet using the custom-
er's mobile phone
RSIRIUS Wea ther
-Weather data as an information chart
(current forecast, 5-day preview,
detailed information)
-Weather data on the weather map, e.g.
rain radar data, storm characteristics
and the track of tropical cyclones (hurri-
canes, typhoons)
RVehicle functions
-Vehicle settings, such as ambient light-
ing, belt adjustment and tow-away alarm
-360° camera
-Rear view camera
-Climate control functions, such as cli-
mate mode, perfume atomizer and aux-
iliary heating
-Setting the multicontour seat with new
massage program
RFav orites but ton
Faster access to up to twelve favorite func-
tions using the favorites button and the
number keys on the telephone keypad or
the favorites button on the touchpad.
RMulti-Seat Entertainment System
-All passengers have access to entertain-
ment options via COMAND
-Digital remote control operation and dig-
it al cordless headphones
COMAND display
General notes
!Do not use the space infront of the dis-
play for storage. Objects placed here could
damage the display or impair its function.
Avoid any direct contact with the display
surface. Pressure on the display surface
22Overview
Overview and operation
Page 31 of 298
XTo show the menu:slide4 the con-
troller.
The menu appears. Depending on the oper-
ation, the marking is shown in the upper or
lower menu bar.
XTo select a menu item: turn and press the
controller.
Once you have selected a menu item in the
upper menu bar, the last menu set for the
selected function appears.
The lower menu bar shows functions within
the current media mode.
Selecting the operating mode for a
main function
You can select the available operating modes
for the main functions, e.g. telephone.
In the telephone menu, you can:
Rswitch to telephone mode
Rcall up the address book
Rcall up the telephone section of the Digital
Operator's Manual
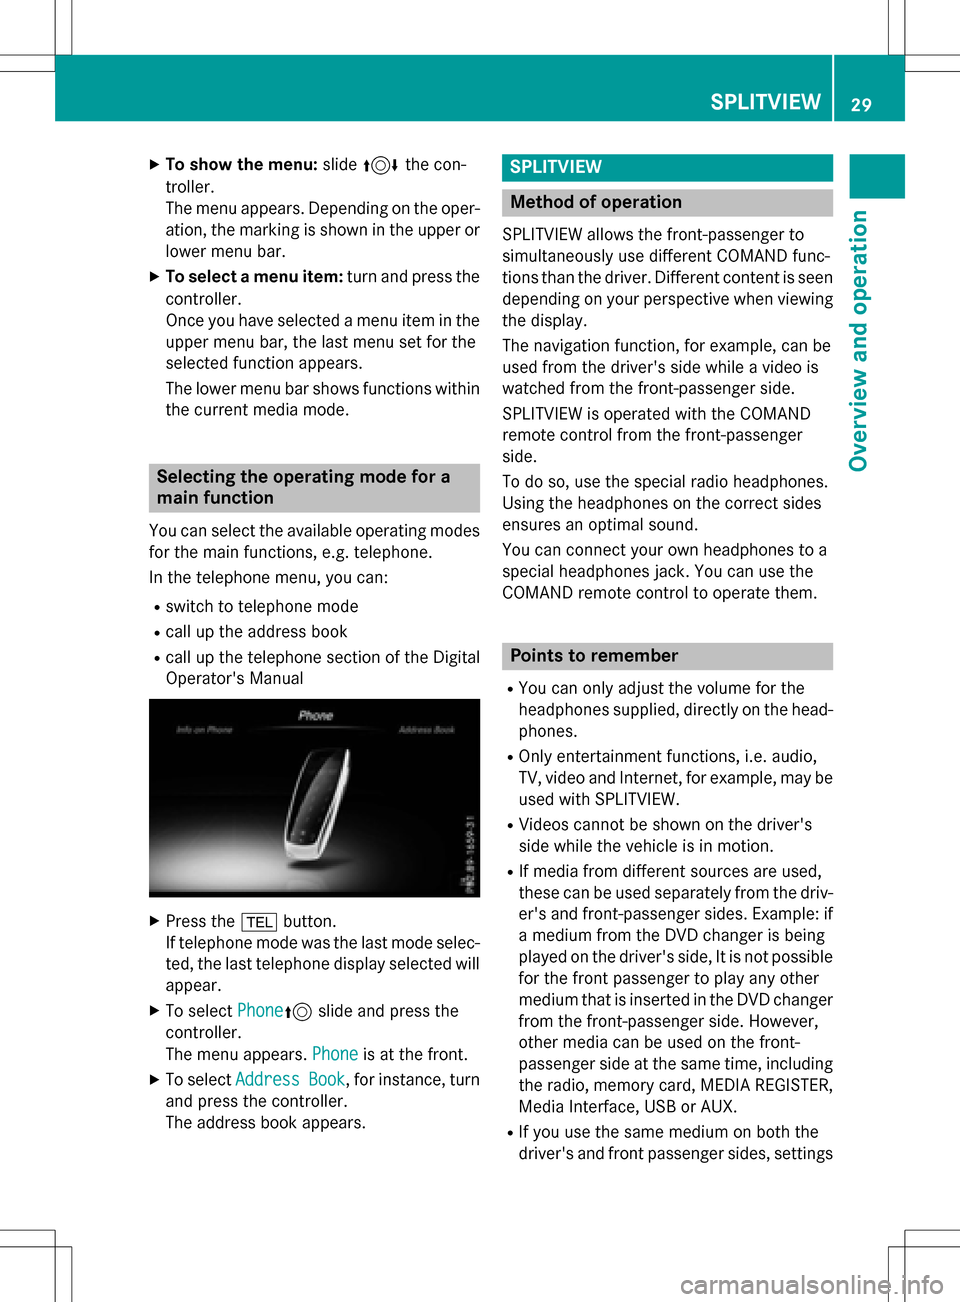
XPress the %button.
If telephone mode was the last mode selec-
ted, the last telephone display selected will
appear.
XTo select Phone5slide and press the
controller.
The menu appears. Phone
is at the front.
XTo selectAddressBook, for instance, turn
and press the controller.
The address book appears.
SPLITVIEW
Method of operation
SPLITVIEW allows the front-passenger to
simultaneously use different COMAND func-
tions than the driver. Different content is seen
depending on your perspective when viewing
the display.
The navigation function, for example, can be
used from the driver's side while a video is
watched from the front-passenger side.
SPLITVIEW is operated with the COMAND
remote control from the front-passenger
side.
To do so, use the special radio headphones.
Using the headphones on the correct sides
ensures an optimal sound.
You can connect your own headphones to a
special headphones jack. You can use the
COMAND remote control to operate them.
Points to remember
RYou can only adjust the volume for the
headphones supplied, directly on the head-
phones.
ROnly entertainment functions, i.e. audio,
TV, video and Internet, for example, may be
used with SPLITVIEW.
RVideos cannot be shown on the driver's
side while the vehicle is in motion.
RIf media from different sources are used,
these can be used separately from the driv-
er's and front-passenger sides. Example: if
a medium from the DVD changer is being
played on the driver's side, It is not possible
for the front passenger to play any other
medium that is inserted in the DVD changer
from the front-passenger side. However,
other media can be used on the front-
passenger side at the same time, including the radio, memory card, MEDIA REGISTER,
Media Interface, USB or AUX.
RIf you use the same medium on both the
driver's and front passenger sides, settings
SPLITVIEW29
Overview and operation
Page 32 of 298
can be made from both sides. In this case,
the last setting made takes precedence.
RRequirement for Internet use (USA):
mbrace must be activated for Internet
access in COMAND on the driver's side
(
Ypage 176).
RRequirement for Internet use (Canada): a
mobile phone must be connected via Blue-
tooth
®or USB to COMAND on the driver's
side (
Ypage 176).
RThe Internet can be separately used by both
the driver and front passenger at the same
time.
RThe multifunction steering wheel can be
used to control the functions which relate
to the driver's side, but not for the front-
passenger side.
RThe driver can lock or unlock the other
screens (override feature) (
Ypage 76).
Switching SPLITVIEW on/off
From the driver's side
XTo activate: press theØbutton.
The Vehicle menu appears.
XSlide 6the controller.
The menu bar is shown.
XTo select ICON_SplitView On, turn and
press the controller.
The ù SPLITVIEW symbol appears in the
status bar. The menu item in the lower
menu bar changes to ù
Off.
The front passenger sees the display of the
function last activated. If the switch-on
time was longer than 30 minutes previ- ously, the display from the driver's side is
shown.
XTo deactivate:
selectùOffby turning
and pressing the controller.
The display changes to ICON_SplitView
On.
ù is hidden in the status bar.
XTo lock/unlock SPLITVIEW: proceed as
described under "Locking/unlocking the
rear-compartment displays" (
Ypage 76).
Instead of selecting a rear-compartment
display, select SplitView
.
From the front-passenger side
Operation takes place via the COMAND
remote control (
Ypage 273).
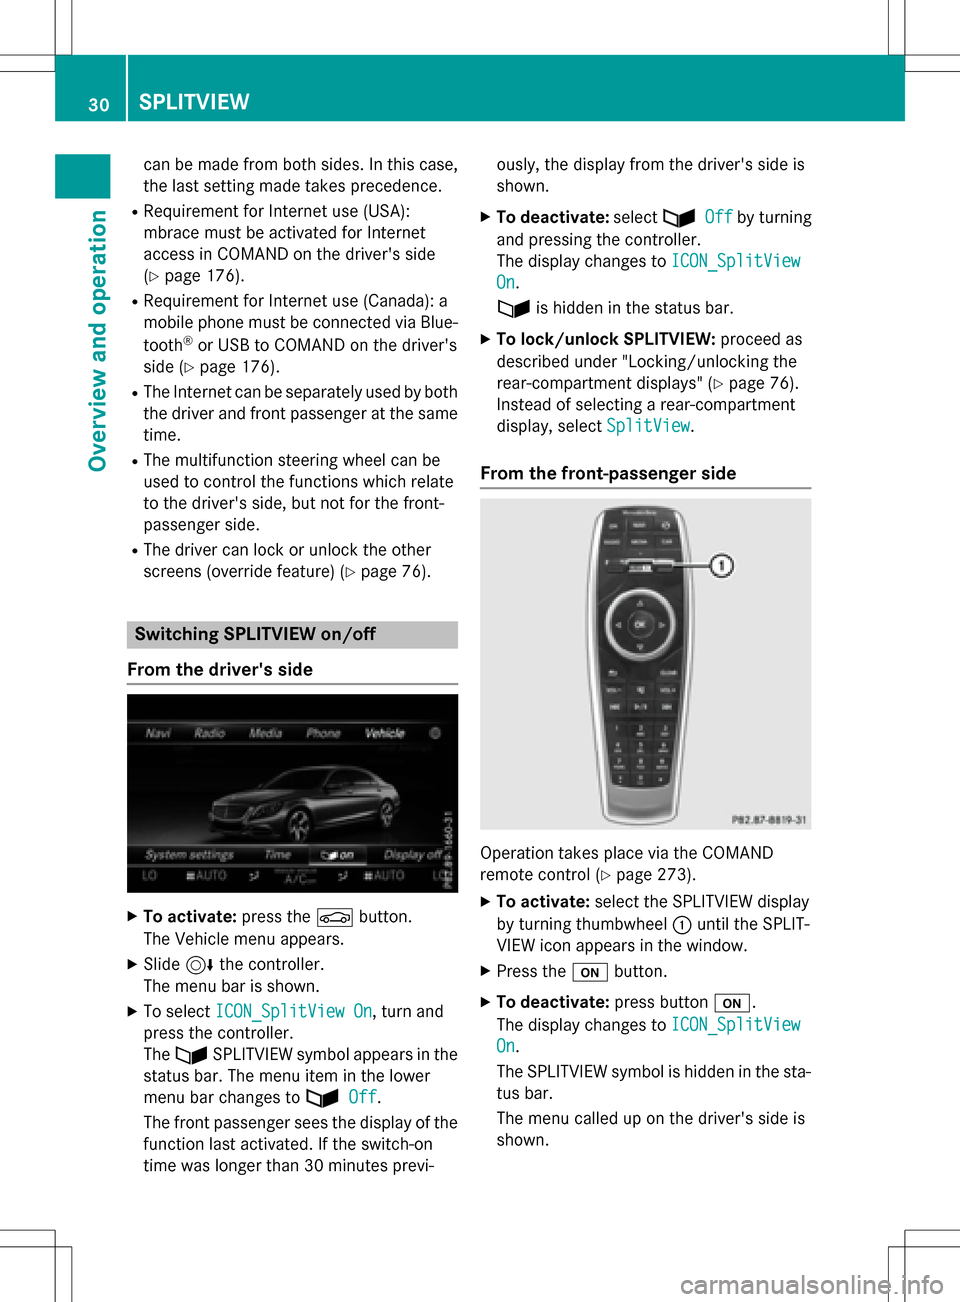
XTo activate:select the SPLITVIEW display
by turning thumbwheel :until the SPLIT-
VIEW icon appears in the window.
XPress the ubutton.
XTo deactivate: press buttonu.
The display changes to ICON_SplitView
On.
The SPLITVIEW symbol is hidden in the sta-
tus bar.
The menu called up on the driver's side is
shown.
30SPLITVIEW
Overview and operation
Page 39 of 298

Quick access for audio and telephone
Changing the station/music track
Depending on the audio source that is cur-
rently activated, you can use this function to
select the next station or music track.
XCall up quick access (Ypage 33).
The current audio source is displayed.
XTo select the previous or next station or the
previous or next music track, swipe to the
left or right.
The selected station or music track is
played.
Sending DTMF tones
The function is not supported by all mobile
phones (see the manufacturer's operating
instructions).
XCall up quick access during a call
(
Ypage 33).
XTo select the required characters: glide
your finger to the left or right and press.
Every character selected will be transmit-
ted immediately.
Rear Seat Entertainment System
Media overview
You can access various types of media from
all operating positions in the vehicle.
The media can be connected to any available
jacks in the vehicle or inserted into the vari-
ous drives.
RIf media from different sources are used,
they can be used separately from each of
the operating positions. Example: a film
from the DVD drive is played on the rear
right-hand operating position. This means
that another film from the same DVD can-
not be played separately on the rear left-
hand operating position. However, it is pos-
sible to use the radio, memory card, MUSIC
REGISTER, Media Interface, USB, online
and Internet functions or AUX.
RIf you use the same medium on both sides, you can both carry out the respective set-
tings. The "last one wins" principle applies
here, i.e. the last setting activated is
favored.
RThe Internet can be used separately at all
operating positions.
RThe Internet can only be used if it is set up
and connected via a telephone
(
Ypage 176).
Rear Seat Entertainment System37
Overview and operation
Page 40 of 298
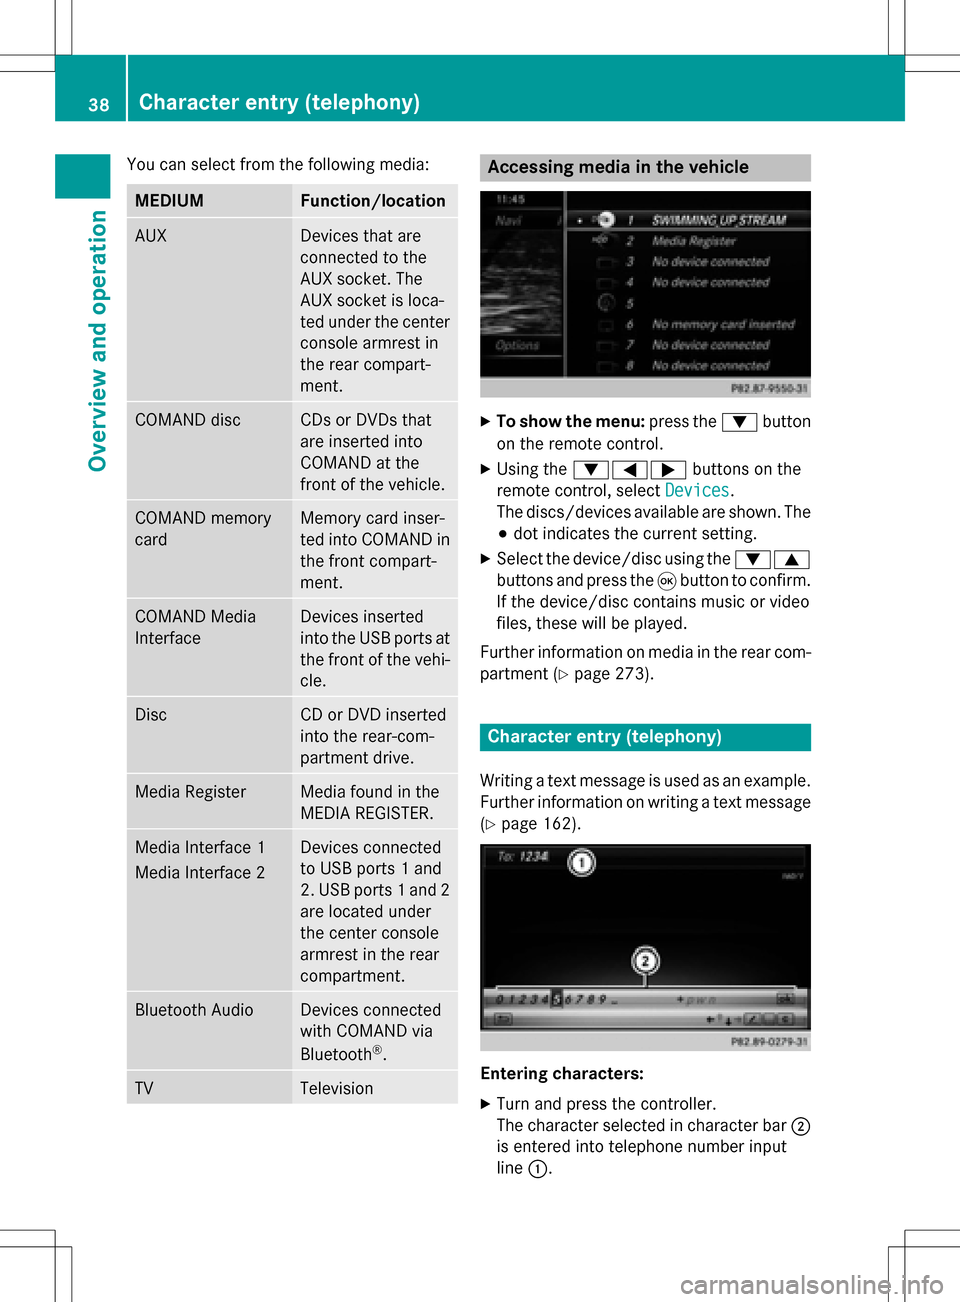
You can select from the following media:
MEDIUMFunction/location
AUXDevices that are
connected to the
AUX socket. The
AUX socket is loca-
ted under the center
console armrest in
the rear compart-
ment.
COMAND discCDs or DVDs that
are inserted into
COMAND at the
front of the vehicle.
COMAND memory
cardMemory card inser-
ted into COMAND in
the front compart-
ment.
COMAND Media
InterfaceDevices inserted
into the USB ports at
the front of the vehi-cle.
DiscCD or DVD inserted
into the rear-com-
partment drive.
Media RegisterMedia found in the
MEDIA REGISTER.
Media Interface 1
Media Interface 2Devices connected
to USB ports 1 and
2. USB ports 1 and 2
are located under
the center console
armrest in the rear
compartment.
Bluetooth AudioDevices connected
with COMAND via
Bluetooth
®.
TVTelevision
Accessing media in the vehicle
XTo show the menu: press the:button
on the remote control.
XUsing the :=; buttons on the
remote control, select Devices
.
The discs/devices available are shown. The
# dot indicates the current setting.
XSelect the device/disc using the :9
buttons and press the 9button to confirm.
If the device/disc contains music or video
files, these will be played.
Further information on media in the rear com- partment (
Ypage 273).
Character entry (telephony)
Writing a text message is used as an example.
Further information on writing a text message
(
Ypage 162).
Entering characters:
XTurn and press the controller.
The character selected in character bar ;
is entered into telephone number input
line :.
38Character entry (telephony)
Overview and operation
Page 54 of 298
Individualization
Using individualization, you can fine-tune the
Voice Control System to your own voice. This
will help improve voice recognition (see the
separate operating instructions).
WiFi
Overview
Condit ions:
To establish a WiFi connection between
COMAND and a WiFi-enabled device, such as
a tablet computer or smartphone:
RWiFi must beactivated at COMAND and at
the device to be connected.
If COMAND isto be used as a WiFi hotspot:
RCOMAND must beconnected to an Inter-
net-enabled mobile phone via Bluetooth®
or USB.
RThe Internet access data for the mobile
phone network provider must beselected
or set for COMAND.
RThere must beanInternet connection to
COMAND.
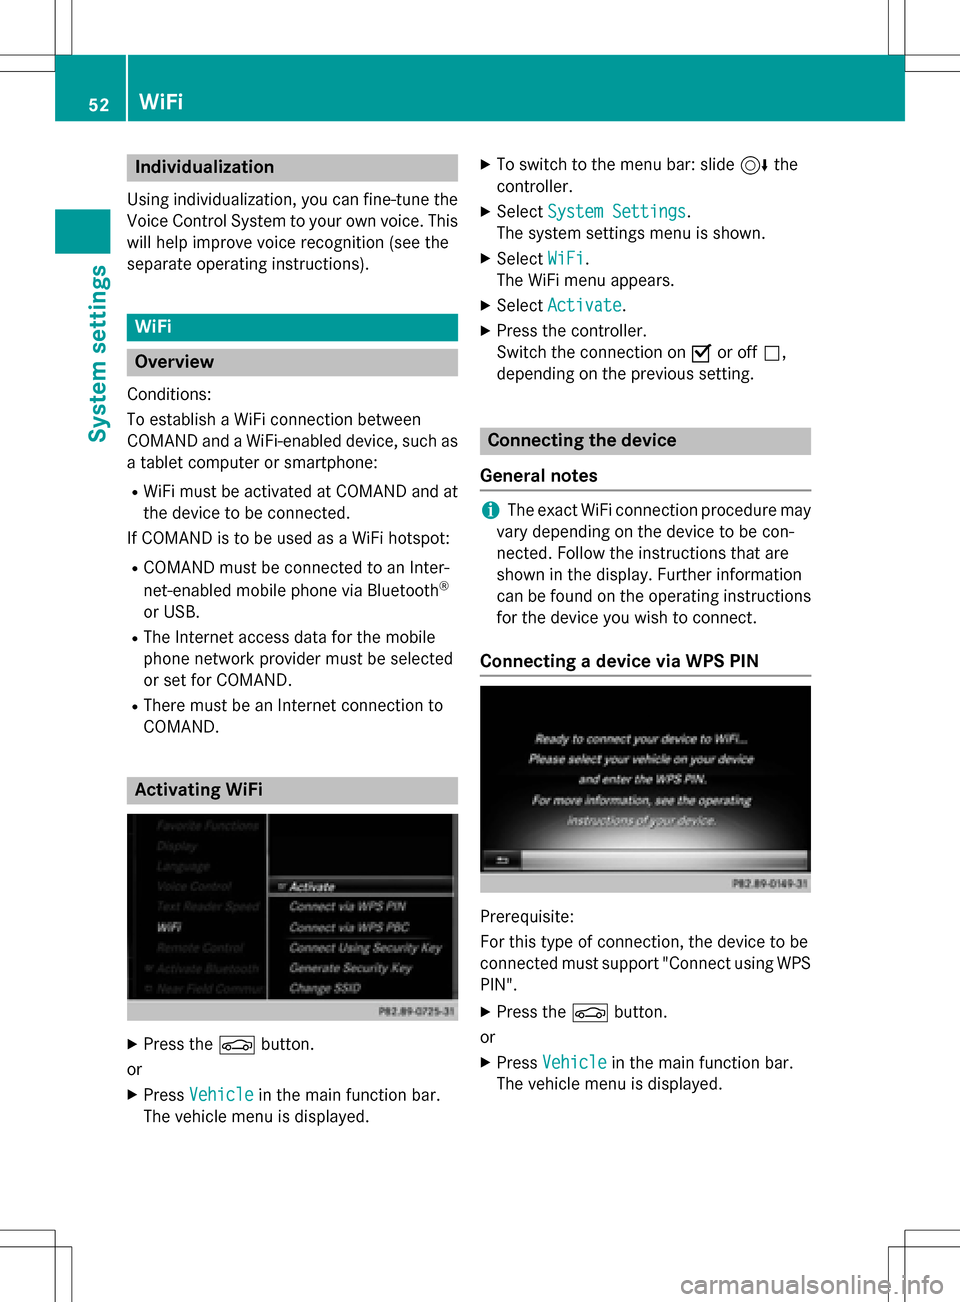
Activating WiFi
XPress the Øbutton.
or
XPress Vehiclein the main function bar.
The vehicle menu isdisplayed.
XTo switch to the menu bar: slide 6the
controller.
XSe lect System Settings.
The system settings menu isshown.
XSe lect WiFi.
The WiFi menu appears.
XSe lect Activate.
XPress the controller.
Switch the connection on Oor off ª,
depending on the previo us setting.
Connecting the device
General notes
iThe exact WiFi connection procedure may
vary depe nding on the device to becon-
nected. Fo llowthe instructions that are
shown in the display. Further information
can befound on the operating instructions
for the device you wishto connect.
Connecting a device via WPS PIN
Prerequisite:
For th istype of connection, the device to be
connected must support "Connect using WPS PIN ".
XPress the Øbutton.
or
XPress Vehicleinthe main function bar.
The vehicle menu is displayed.
52WiFi
System settings
Page 60 of 298
Resetting favorite(s):
XPress theØbutton.
or
XPress Vehiclein the main function bar.
The vehicle menu is displayed.
XTo select SystemSettings: slide6and
press the controller.
A menu appears.
XTo select Favorite Functions: press the
controller.
A menu appears.
XSelect Reset Favorite(s).
A menu appears with the prompt Please
select a favorites button:.
XSelect the desired favorites, e.g.por
Reset All
.
A prompt appears asking whether you wish
to reset.
XSelect YesorNo.
If you select Yes
, the favorite is reset to its
pre-installed favorite function.
If you select No
the process is canceled.
iYou can also assign the Favorites button
directly from a relevant function, such as in
the radio menu (
Ypage 199).
Importing/exporting data
General notes
!
Never remove the stick or card when writ-
ing data to the USB stick or the memory
card. You may otherwise lose data.
Using this function, you can do the following
with your personal COMAND data:
Rtransfer your personal Audio 20 data from
one system/vehicle to another.
Rmake a backup copy of your personal data
(export data) and load it again (import
data).
Rprotect your data from unwanted export by
activating a PIN prompt (presetting: deac-
tivated ª). You can either use an SD memory card or a
USB storage device (e.g. a USB stick) as tem-
porary storage.
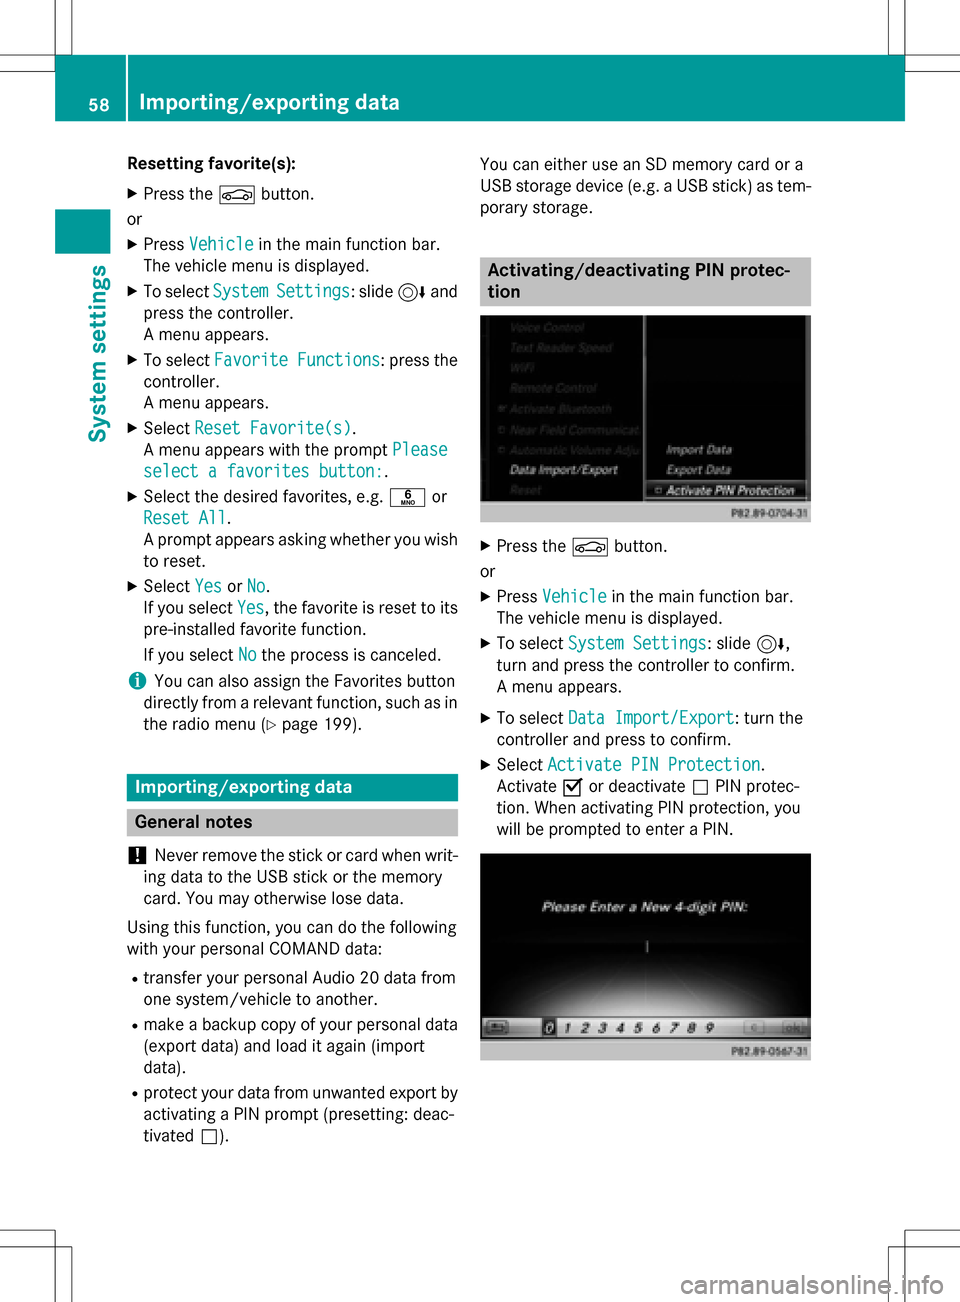
Activating/deactivating PIN protec-
tion
XPress the
Øbutton.
or
XPress Vehiclein the main function bar.
The vehicle menu is displayed.
XTo select System Settings: slide6,
turn and press the controller to confirm.
A menu appears.
XTo select Data Import/Export: turn the
controller and press to confirm.
XSelect Activate PIN Protection.
Activate Oor deactivate ªPIN protec-
tion. When activating PIN protection, you
will be prompted to enter a PIN.
58Importing/exporting data
System settings
Page 61 of 298
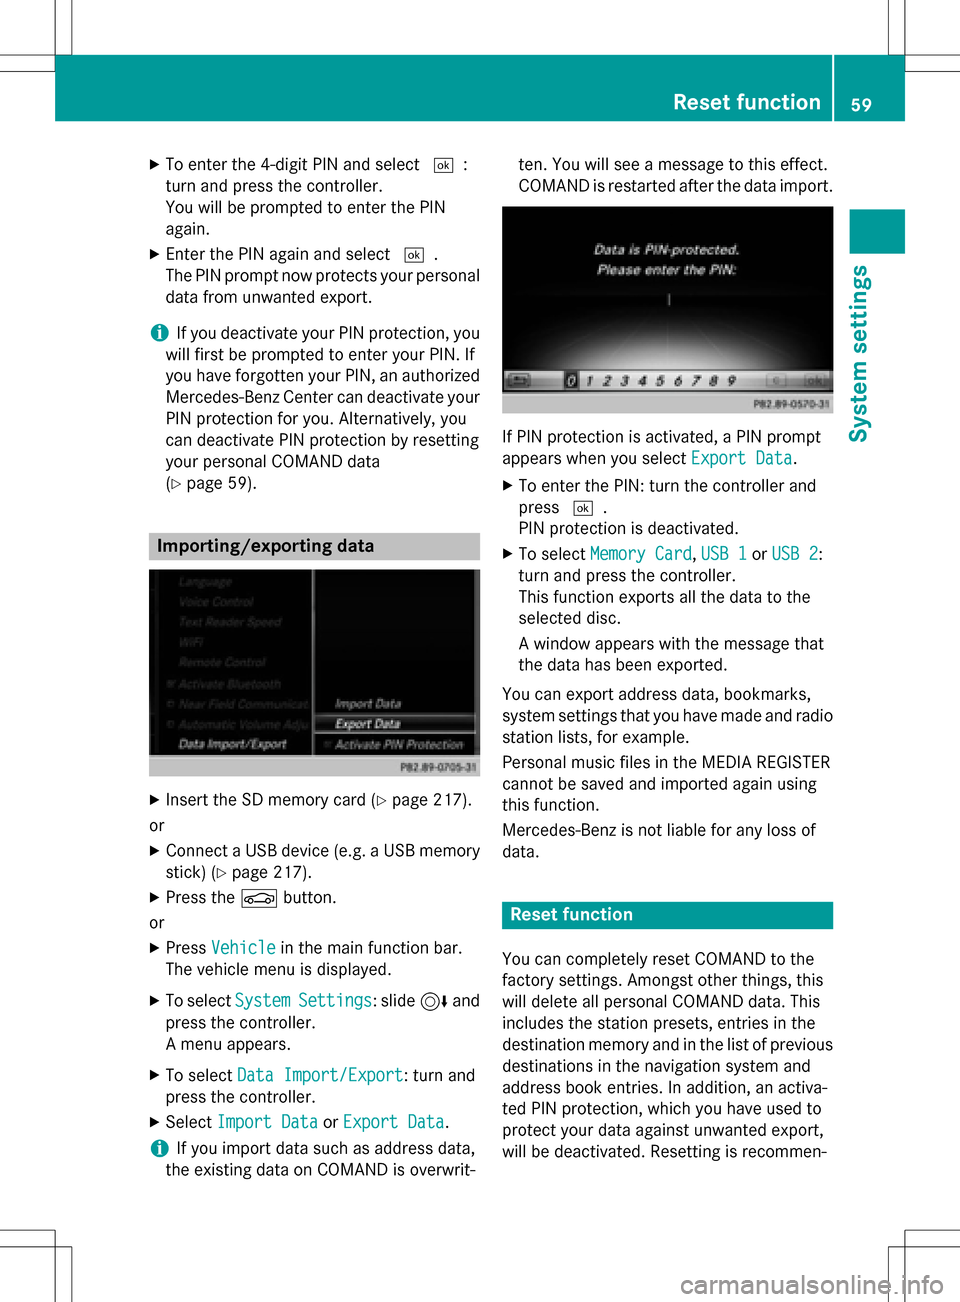
XTo enter the 4-digit PIN and select¬:
turn and press the controller.
You will be prompted to enter the PIN
again.
XEnter the PIN again and select ¬.
The PIN prompt now protects your personal
data from unwanted export.
iIf you deactivate your PIN protection, you
will first be prompted to enter your PIN. If
you have forgotten your PIN, an authorized
Mercedes-Benz Center can deactivate your
PIN protection for you. Alternatively, you
can deactivate PIN protection by resetting
your personal COMAND data
(
Ypage 59).
Importing/exporting data
XInsert the SD memory card (Ypage 217).
or
XConnect a USB device (e.g. a USB memory
stick) (
Ypage 217).
XPress the Øbutton.
or
XPress Vehiclein the main function bar.
The vehicle menu is displayed.
XTo select SystemSettings: slide6and
press the controller.
A menu appears.
XTo select Data Import/Export: turn and
press the controller.
XSelect Import DataorExport Data.
iIf you import data such as address data,
the existing data on COMAND is overwrit- ten. You will see a message to this effect.
COMAND is restarted after the data import.
If PIN protection is activated, a PIN prompt
appears when you select
Export Data
.
XTo enter the PIN: turn the controller and
press¬.
PIN protection is deactivated.
XTo select Memory Card,USB 1or USB 2:
turn and press the controller.
This function exports all the data to the
selected disc.
A window appears with the message that
the data has been exported.
You can export address data, bookmarks,
system settings that you have made and radio
station lists, for example.
Personal music files in the MEDIA REGISTER
cannot be saved and imported again using
this function.
Mercedes-Benz is not liable for any loss of
data.
Reset function
You can completely reset COMAND to the
factory settings. Amongst other things, this
will delete all personal COMAND data. This
includes the station presets, entries in the
destination memory and in the list of previous
destinations in the navigation system and
address book entries. In addition, an activa-
ted PIN protection, which you have used to
protect your data against unwanted export,
will be deactivated. Resetting is recommen-
Reset function59
System settings
Z