Fold MERCEDES-BENZ S430 2002 W220 Owner's Manual
[x] Cancel search | Manufacturer: MERCEDES-BENZ, Model Year: 2002, Model line: S430, Model: MERCEDES-BENZ S430 2002 W220Pages: 430, PDF Size: 20.81 MB
Page 79 of 430
76 Seats
Te ch n i c a l
data Instruments
and controlsOperationDrivingInstrument
cluster displayPractical hints Car care Index
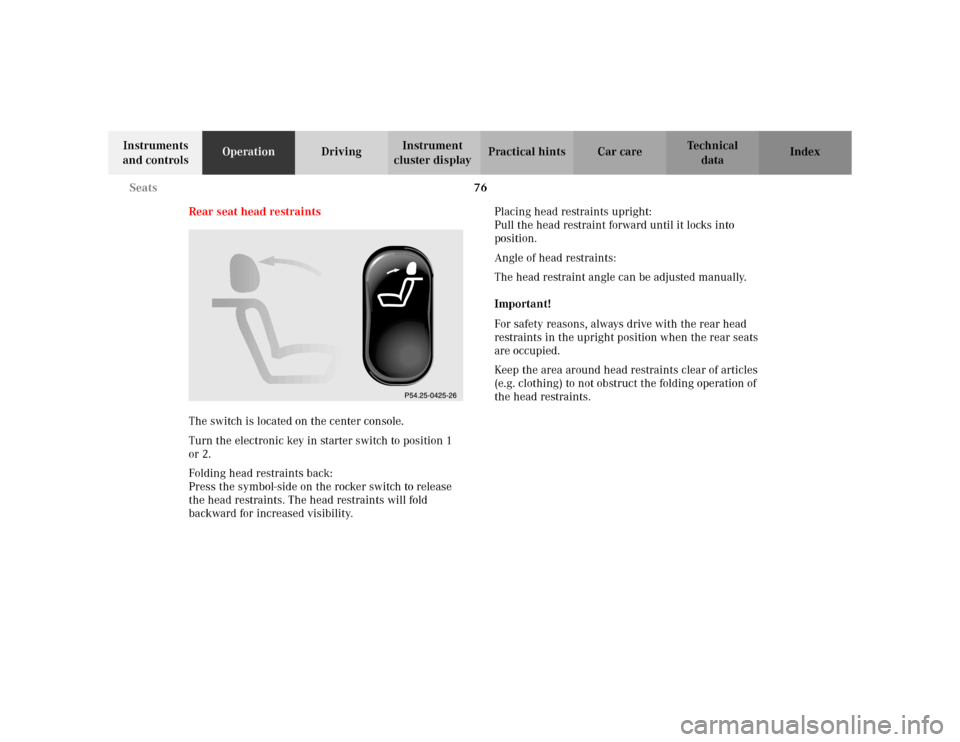
Rear seat head restraints
The switch is located on the center console.
Turn the electronic key in starter switch to position 1
or 2.
Folding head restraints back:
Press the symbol-side on the rocker switch to release
the head restraints. The head restraints will fold
backward for increased visibility.Placing head restraints upright:
Pull the head restraint forward until it locks into
position.
Angle of head restraints:
The head restraint angle can be adjusted manually.
Important!
For safety reasons, always drive with the rear head
restraints in the upright position when the rear seats
are occupied.
Keep the area around head restraints clear of articles
(e.g. clothing) to not obstruct the folding operation of
the head restraints.
Page 80 of 430
77 Seats
Te ch n i c a l
data Instruments
and controlsOperationDrivingInstrument
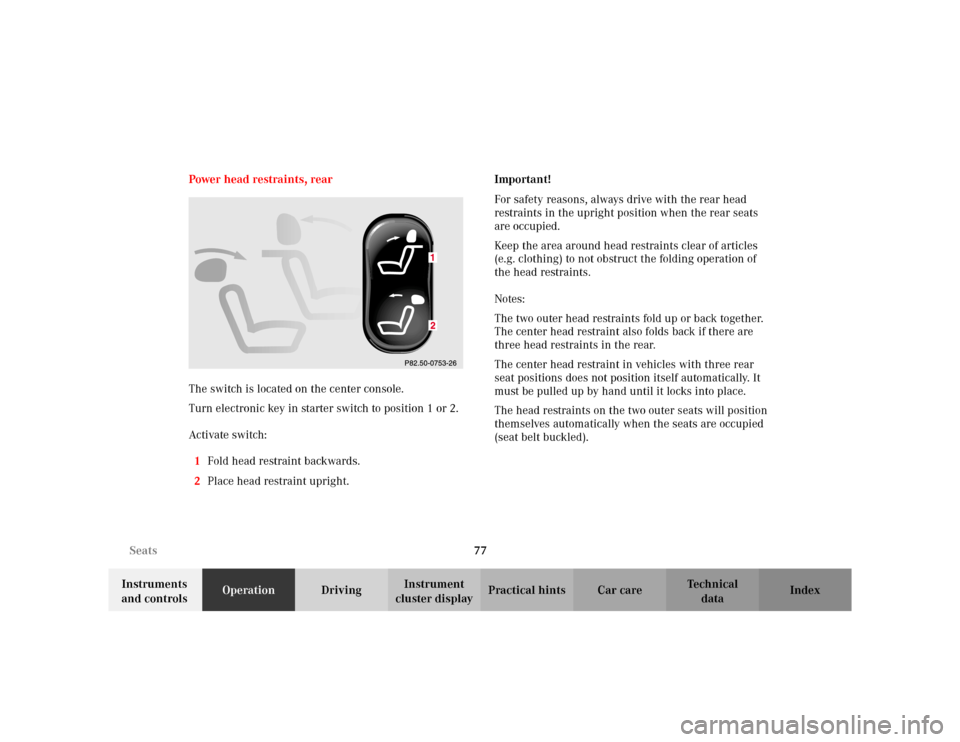
cluster displayPractical hints Car care Index Power head restraints, rear
The switch is located on the center console.
Turn electronic key in starter switch to position 1 or 2.
Activate switch:
1Fold head restraint backwards.
2Place head restraint upright.Important!
For safety reasons, always drive with the rear head
restraints in the upright position when the rear seats
are occupied.
Keep the area around head restraints clear of articles
(e.g. clothing) to not obstruct the folding operation of
the head restraints.
Notes:
The two outer head restraints fold up or back together.
The center head restraint also folds back if there are
three head restraints in the rear.
The center head restraint in vehicles with three rear
seat positions does not position itself automatically. It
must be pulled up by hand until it locks into place.
The head restraints on the two outer seats will position
themselves automatically when the seats are occupied
(seat belt buckled).
Page 81 of 430
78 Seats
Te ch n i c a l
data Instruments
and controlsOperationDrivingInstrument
cluster displayPractical hints Car care Index
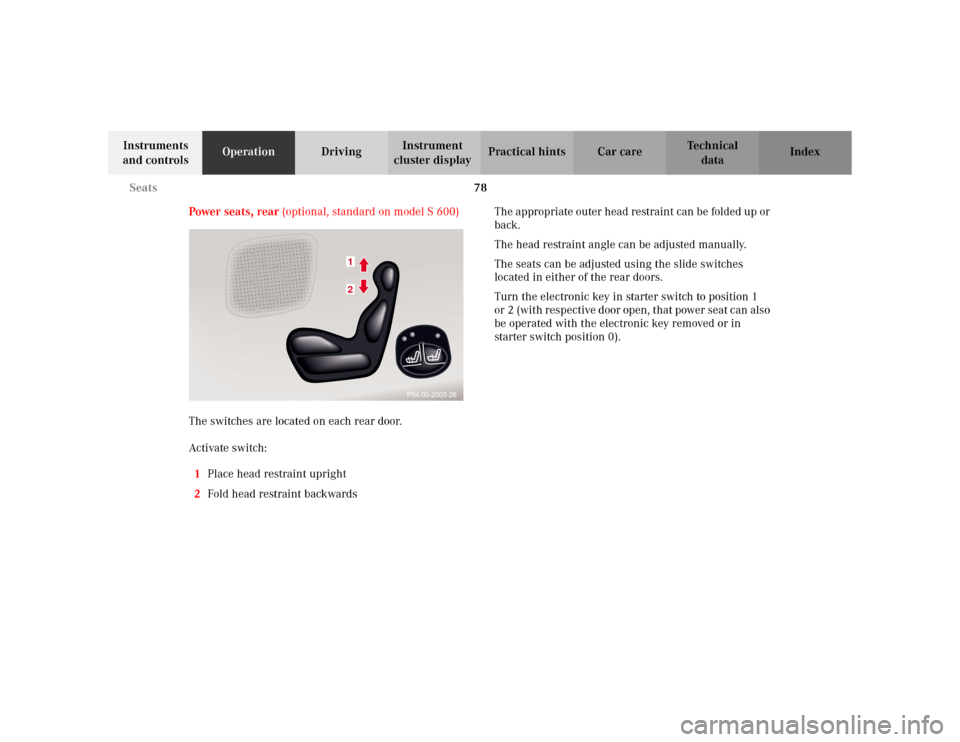
Power seats, rear (optional, standard on model S 600)
The switches are located on each rear door.
Activate switch:
1Place head restraint upright
2Fold head restraint backwardsThe appropriate outer head restraint can be folded up or
back.
The head restraint angle can be adjusted manually.
The seats can be adjusted using the slide switches
located in either of the rear doors.
Turn the electronic key in starter switch to position 1
or 2 (with respective door open, that power seat can also
be operated with the electronic key removed or in
starter switch position 0).
21
P54.00-2003-26
Page 82 of 430
79 Seats
Te ch n i c a l
data Instruments
and controlsOperationDrivingInstrument
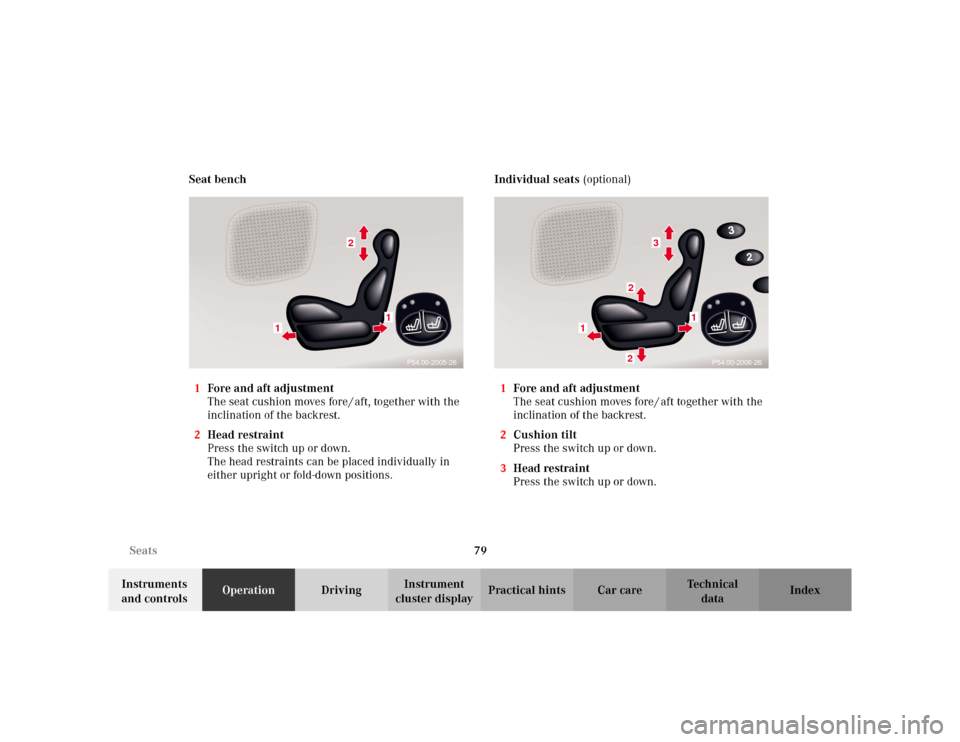
cluster displayPractical hints Car care Index Seat bench
1Fore and aft adjustment
The seat cushion moves fore / aft, together with the
inclination of the backrest.
2Head restraint
Press the switch up or down.
The head restraints can be placed individually in
either upright or fold-down positions. Individual seats (optional)
1Fore and aft adjustment
The seat cushion moves fore / aft together with the
inclination of the backrest.
2Cushion tilt
Press the switch up or down.
3Head restraint
Press the switch up or down.
2
1
1
P54.00-2005-26
3
22
1
1
P54.00-2006-26
Page 109 of 430
106 Rear view mirrors
Te ch n i c a l
data Instruments
and controlsOperationDrivingInstrument
cluster displayPractical hints Car care Index
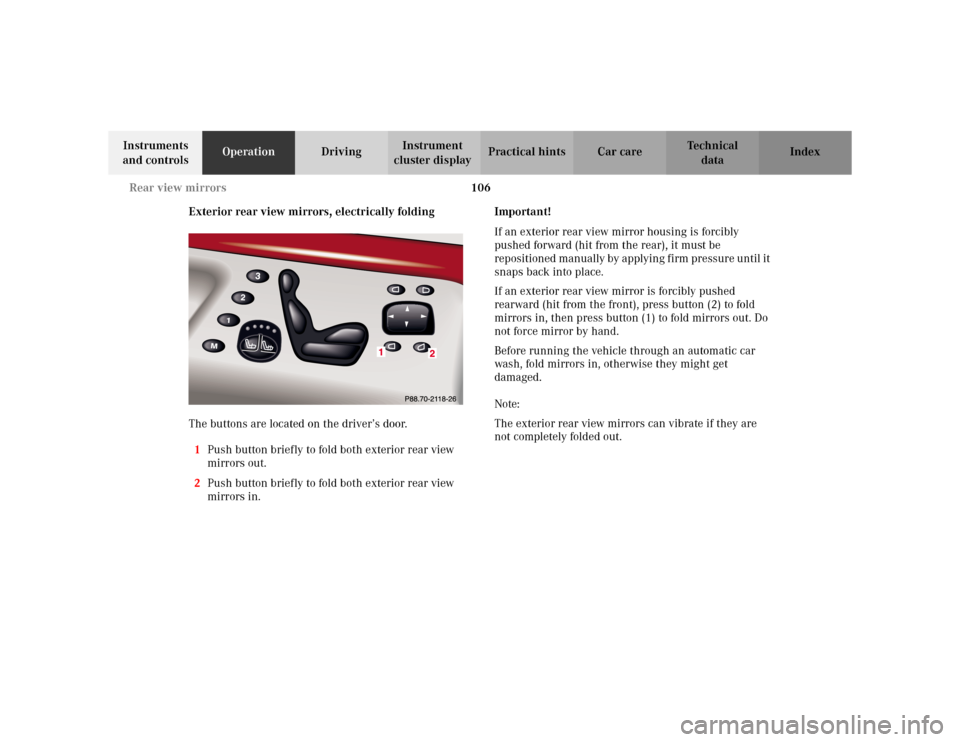
Exterior rear view mirrors, electrically folding
The buttons are located on the driver’s door.
1Push button briefly to fold both exterior rear view
mirrors out.
2Push button briefly to fold both exterior rear view
mirrors in.Important!
If an exterior rear view mirror housing is forcibly
pushed forward (hit from the rear), it must be
rep osition ed man ually by apply in g f irm pr ess ur e until it
snaps back into place.
If an exterior rear view mirror is forcibly pushed
rearward (hit from the front), press button (2) to fold
mirrors in, then press button (1) to fold mirrors out. Do
not force mirror by hand.
Before running the vehicle through an automatic car
wash, fold mirrors in, otherwise they might get
damaged.
Note:
The exterior rear view mirrors can vibrate if they are
not completely folded out.
Page 198 of 430
195 Interior equipment
Te ch n i c a l
data Instruments
and controlsOperationDrivingInstrument
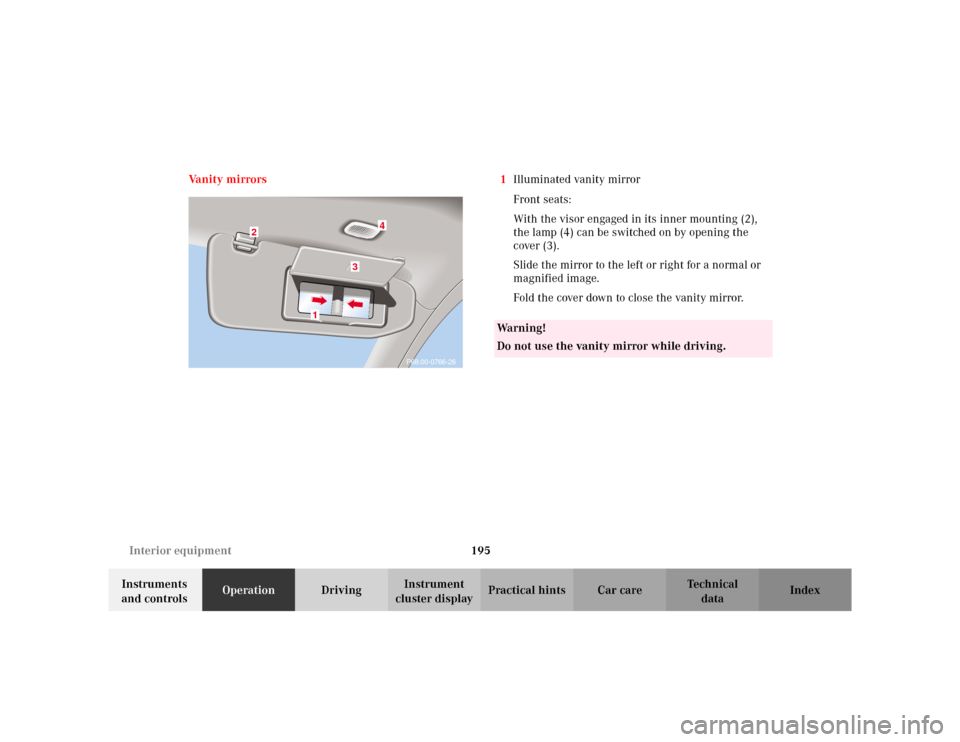
cluster displayPractical hints Car care Index Va n i t y m i r r o r s 1Illuminated vanity mirror
Front seats:
With the visor engaged in its inner mounting (2),
the lamp (4) can be switched on by opening the
cover (3).
Slide the mirror to the left or right for a normal or
magnified image.
Fold the cover down to close the vanity mirror.
P68.00-0766-26
4
3
1
2
Wa r n i n g !
Do not use the vanity mirror while driving.
Page 202 of 430
199 Interior equipment
Te ch n i c a l
data Instruments
and controlsOperationDrivingInstrument
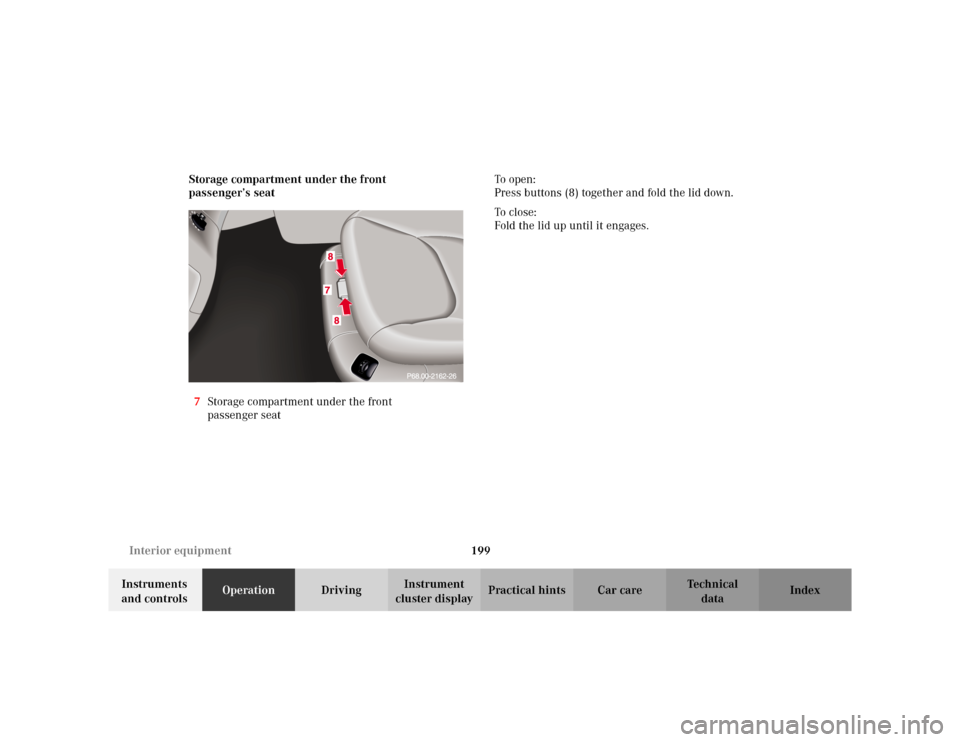
cluster displayPractical hints Car care Index Storage compartment under the front
passenger’s seat
7Storage compartment under the front
passenger seatTo o p e n :
Press buttons (8) together and fold the lid down.
To c l o s e :
Fold the lid up until it engages.
Page 205 of 430
202 Interior equipment
Te ch n i c a l
data Instruments
and controlsOperationDrivingInstrument
cluster displayPractical hints Car care Index
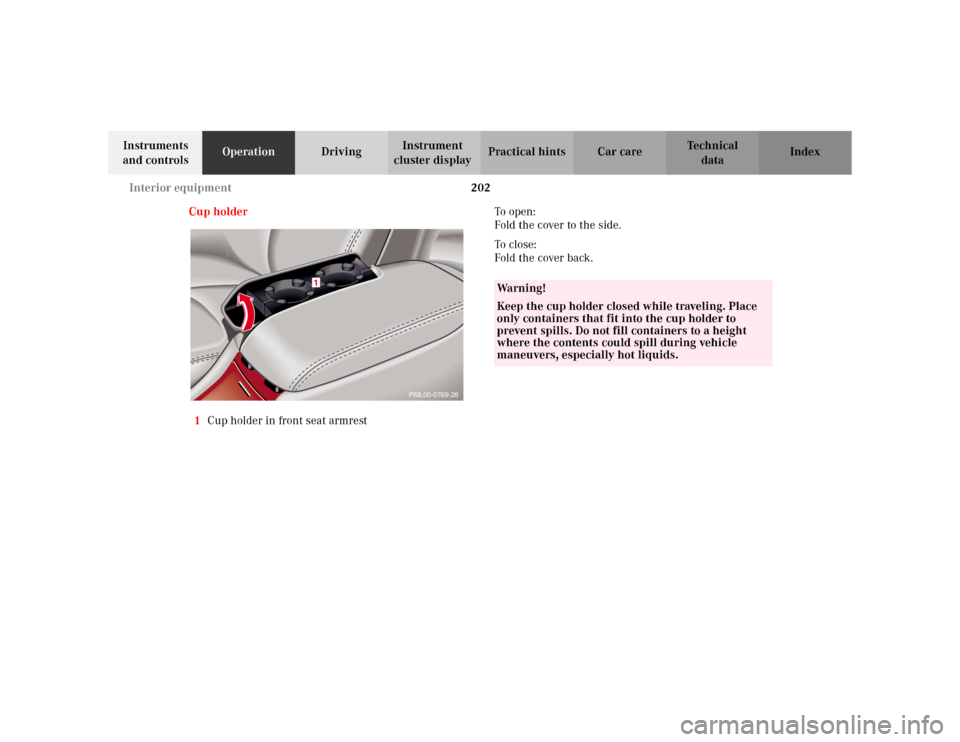
Cup holder
1Cup holder in front seat armrestTo o p e n :
Fold the cover to the side.
To c l o s e :
Fold the cover back.
P68.00-0769-26
1
Wa r n i n g !
Keep the cup holder closed while traveling. Place
only containers that fit into the cup holder to
prevent spills. Do not fill containers to a height
where the contents could spill during vehicle
maneuvers, especially hot liquids.
Page 301 of 430
298 What you should know at the gas station
Te ch n i c a l
data Instruments
and controlsOperationDrivingInstrument
cluster displayPractical hints Car care Index
Tire pressure
For tire pressure, refer to tire pressure label inside the
fuel filler flap. See page 356 for further details.
Air conditioner
R-134a refrigerant and special PAG lubricant, refer to
“Technical Data”.
Spark plugs
Approved spark plugs, refer to “Technical Data”.
Windshield cleaning
To prevent damage to the engine hood, the windshield
wipers must not be folded forward in parked position.
See page 388 for cleaning the windshield.Bulbs
High and low beams: H7 (55 W),
low beam: Xenon (optional)
fog lamps: H1 (55 W),
turn signal lamps,
front 2357 NA (28.5 / 8.3 W [Yellow]),
parking and standing lamps, front: W 5W (5 W)
side marker lamps, front: 5 W / 4 cp,
turn signal lamps, rear: 1156 NA bulb,
tail and parking lamp: P 21 / 4 W,
tail, parking and rear fog lamp, driver’s side: P 21 / 4 W,
tail, parking, standing and
side marker lamp: R 5 W / 4 cp,
backup lamps: 21 W / 32 cp,
license plate lamps: 5 W / 4 cp
Page 339 of 430
336 First aid kit
Te ch n i c a l
data Instruments
and controlsOperation DrivingInstrument
cluster displayPractical hintsCar care Index
First aid kit
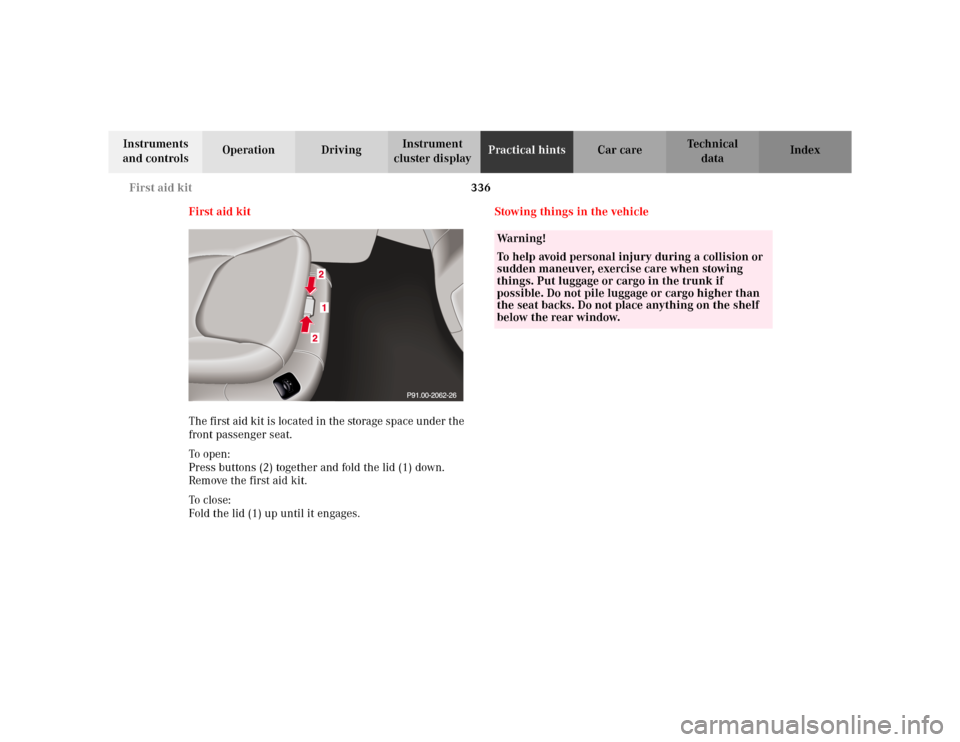
The first aid kit is located in the storage space under the
front passenger seat.
To o pen :
Press buttons (2) together and fold the lid (1) down.
Remove the first aid kit.
To c lo se:
Fold the lid (1) up until it engages.Stowing things in the vehicle
Wa r n i n g !
To help avoid personal injury during a collision or
sudden maneuver, exercise care when stowing
things. Put luggage or cargo in the trunk if
possible. Do not pile luggage or cargo higher than
the seat backs. Do not place anything on the shelf
below the rear window.