Over heat MERCEDES-BENZ S430 2002 W220 Owner's Manual
[x] Cancel search | Manufacturer: MERCEDES-BENZ, Model Year: 2002, Model line: S430, Model: MERCEDES-BENZ S430 2002 W220Pages: 430, PDF Size: 20.81 MB
Page 4 of 430

1 Contents
IntroductionProduct information .......................... 7
Operator’s manual ............................. 8
Where to find it ................................ 13
Reporting Safety Defects ................ 15Instruments and controlsInstruments and controls ............... 18
Door control panel ....................... 20
Overhead control panel ............... 21
Dashboard ..................................... 22
Center console .............................. 24OperationVehicle keys ...................................... 28
Start lock-out .................................... 31
General notes on the
central locking system ............... 32
Central locking system ................... 33
Radio frequency and
infrared remote control ............... 33
KEYLESS-GO ................................. 36Opening and closing windows
and sliding / pop-up roof
from outside ................................. 43
Panic button ................................. 45
Mechanical keys .......................... 45
Doors ................................................. 46
Power closing assist for
doors and trunk lid .................... 48
Central locking switch .................... 48
Automatic central locking .............. 50
Emergency unlocking in
case of accident .......................... 50
Trunk ..................................................51
Trunk lamp ....................................... 54
Trunk lid release switch ................ 55
Trunk lid release/close switch ...... 56
Trunk lid emergency release ........ 59
Antitheft alarm system ................... 60
Tow-away alarm ................................ 61
Easy-entry/exit feature .................. 63
Front seat adjustment ..................... 64
Removal and installation of
front seat head restraints .......... 68
Lumbar support ............................... 69Multicontour backrest ..................... 69
Seat heater ........................................ 71
Seat ventilation system ................... 74
Rear seat head restraints ................ 76
Power head restraints, rear ............ 77
Power seats, rear .............................. 78
Power seats, setting passenger
seat position from rear ............... 80
Seat belts and integrated
restraint system .......................... 81
Seat belts ........................................... 81
Seat belt nonusage
warning system ........................... 82
BabySmart
TM airbag
deactivation system .................... 88
Self-test BabySmart
TM without
special child seat installed ......... 88
Supplemental Restraint
System (SRS) ............................... 89
Emergency tensioning
retractor (ETR) ............................. 90
Airbags .............................................. 91
Page 75 of 430
72 Seats
Te ch n i c a l
data Instruments
and controlsOperationDrivingInstrument
cluster displayPractical hints Car care Index
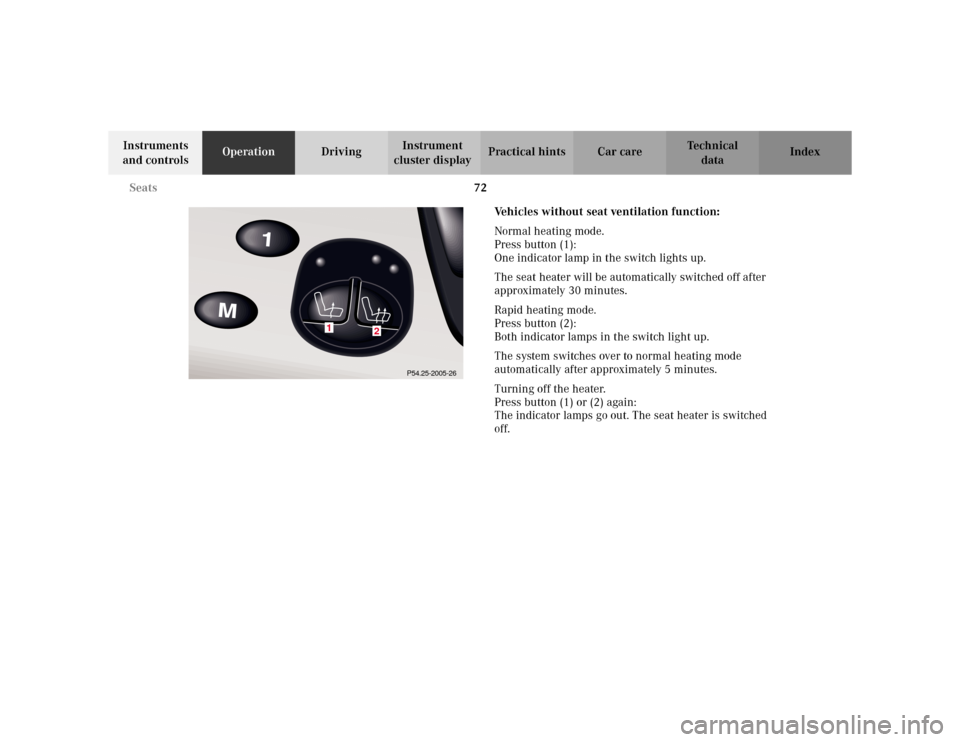
Vehicles without seat ventilation function:
Normal heating mode.
Press button (1):
One indicator lamp in the switch lights up.
The seat heater will be automatically switched off after
approximately 30 minutes.
Rapid heating mode.
Press button (2):
Both indicator lamps in the switch light up.
The system switches over to normal heating mode
automatically after approximately 5 minutes.
Turning off the heater.
Press button (1) or (2) again:
The indicator lamps go out. The seat heater is switched
off.
1
2
P54.25-2005-26
Page 76 of 430
73 Seats
Te ch n i c a l
data Instruments
and controlsOperationDrivingInstrument
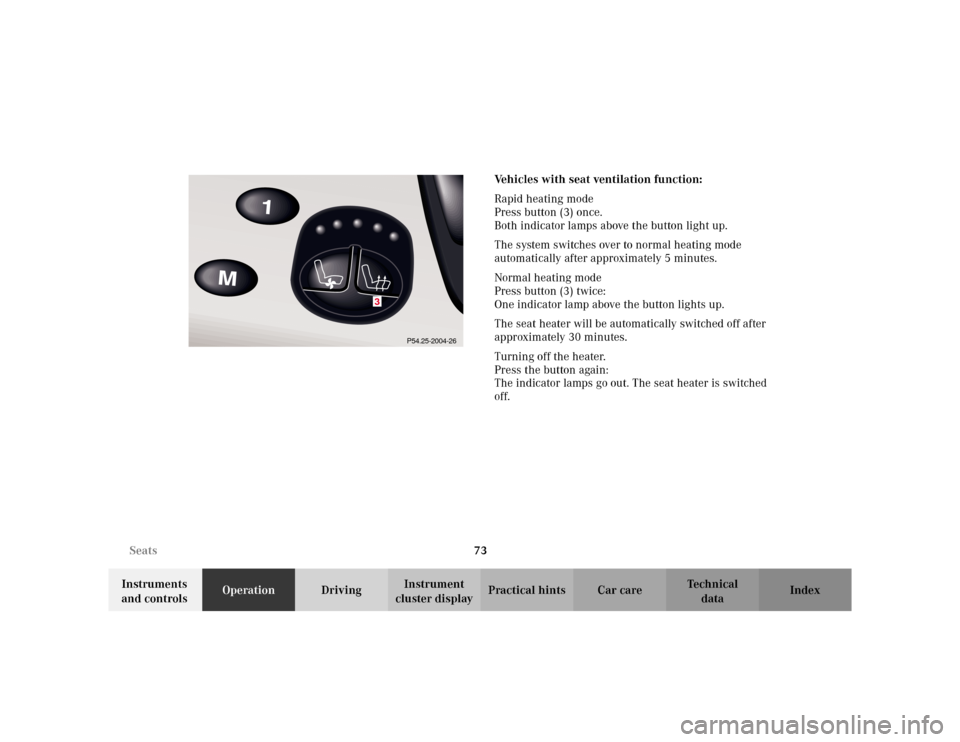
cluster displayPractical hints Car care IndexVehicles with seat ventilation function:
Rapid heating mode
Press button (3) once.
Both indicator lamps above the button light up.
The system switches over to normal heating mode
automatically after approximately 5 minutes.
Normal heating mode
Press button (3) twice:
One indicator lamp above the button lights up.
The seat heater will be automatically switched off after
approximately 30 minutes.
Turning off the heater.
Press the button again:
The indicator lamps go out. The seat heater is switched
off.
3
P54.25-2004-26
Page 107 of 430
104 Rear view mirrors
Te ch n i c a l
data Instruments
and controlsOperationDrivingInstrument
cluster displayPractical hints Car care Index
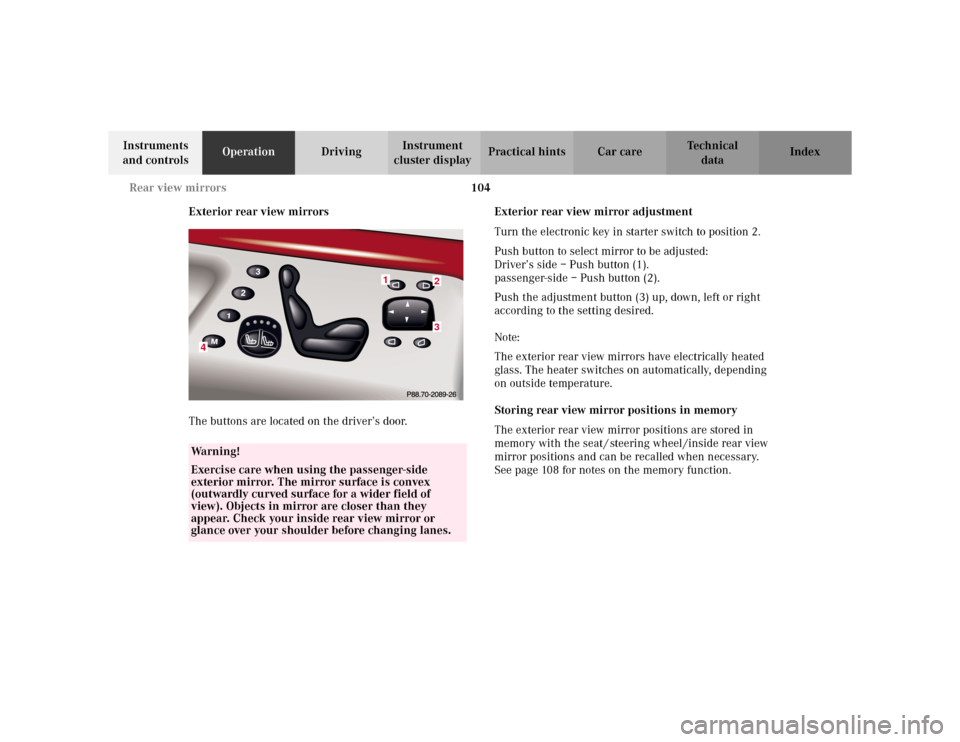
Exterior rear view mirrors
The buttons are located on the driver’s door.Exterior rear view mirror adjustment
Turn the electronic key in starter switch to position 2.
Push button to select mirror to be adjusted:
Driver’s side – Push button (1).
passenger-side – Push button (2).
Push the adjustment button (3) up, down, left or right
according to the setting desired.
Note:
The exterior rear view mirrors have electrically heated
glass. The heater switches on automatically, depending
on outside temperature.
Storing rear view mirror positions in memory
The exterior rear view mirror positions are stored in
memory with the seat / steering wheel /inside rear view
mirror positions and can be recalled when necessary.
See page 108 for notes on the memory function.
Wa r n i n g !
Exercise care when using the passenger-side
exterior mirror. The mirror surface is convex
(outwardly curved surface for a wider field of
view). Objects in mirror are closer than they
appear. Check your inside rear view mirror or
glance over your shoulder before changing lanes.
23
4
1
Page 118 of 430
115 Instrument cluster
Te ch n i c a l
data Instruments
and controlsOperationDrivingInstrument
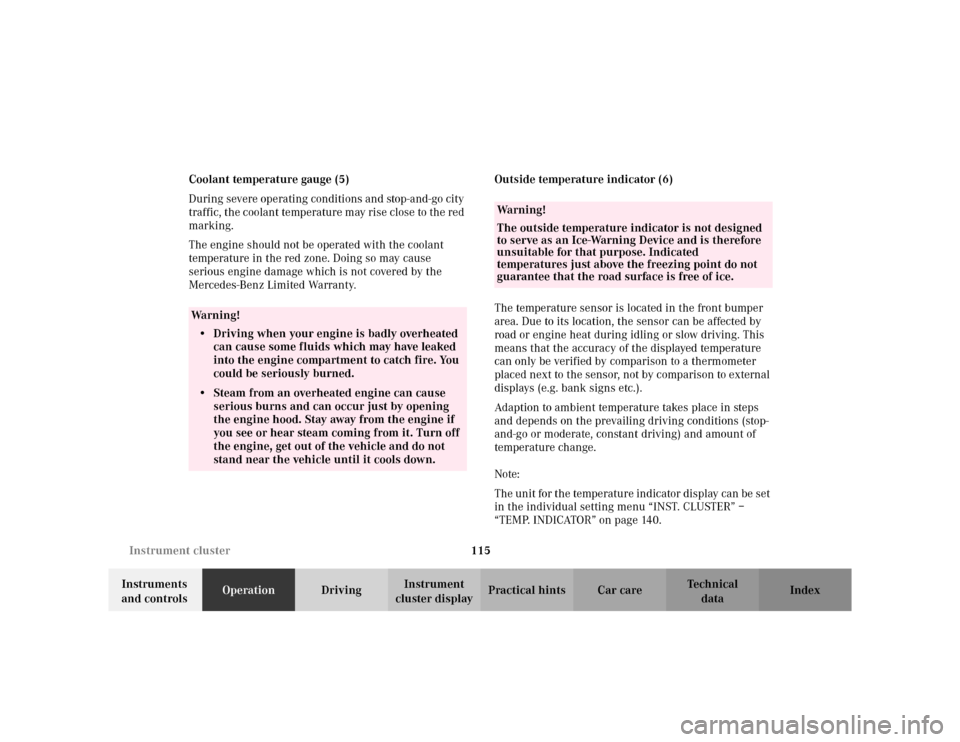
cluster displayPractical hints Car care Index Coolant temperature gauge (5)
During severe operating conditions and stop-and-go city
traffic, the coolant temperature may rise close to the red
marking.
The engine should not be operated with the coolant
temperature in the red zone. Doing so may cause
serious engine damage which is not covered by the
Mercedes-Benz Limited Warranty.Outside temperature indicator (6)
The temperature sensor is located in the front bumper
area. Due to its location, the sensor can be affected by
road or engine heat during idling or slow driving. This
means that the accuracy of the displayed temperature
can only be verified by comparison to a thermometer
placed next to the sensor, not by comparison to external
displays (e.g. bank signs etc.).
Adaption to ambient temperature takes place in steps
and depends on the prevailing driving conditions (stop-
and-go or moderate, constant driving) and amount of
temperature change.
Note:
The unit for the temperature indicator display can be set
in the individual setting menu “INST. CLUSTER” –
“TEMP. INDICATOR” on page 140.
Wa r n i n g !
• Driving when your engine is badly overheated
can cause some fluids which may have leaked
into the engine compartment to catch fire. You
could be seriously burned.• Steam from an overheated engine can cause
serious burns and can occur just by opening
the engine hood. Stay away from the engine if
you see or hear steam coming from it. Turn off
the engine, get out of the vehicle and do not
stand near the vehicle until it cools down.
Wa r n i n g !
The outside temperature indicator is not designed
to serve as an Ice-Warning Device and is therefore
unsuitable for that purpose. Indicated
temperatures just above the freezing point do not
guarantee that the road surface is free of ice.
Page 171 of 430
168 Automatic climate control
Te ch n i c a l
data Instruments
and controlsOperationDrivingInstrument
cluster displayPractical hints Car care Index
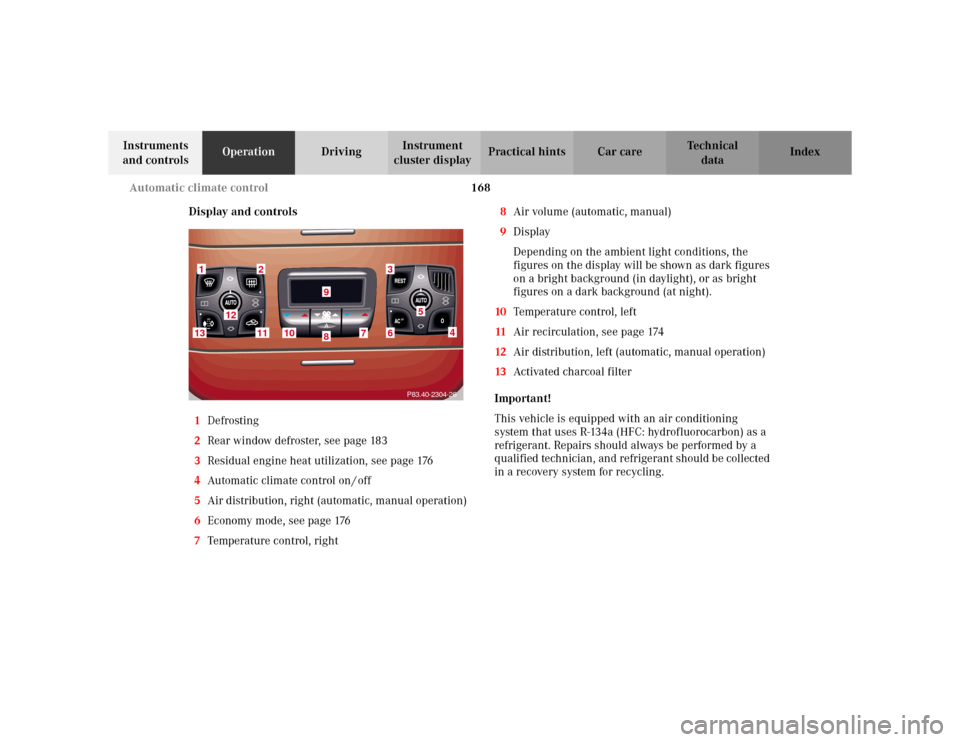
Display and controls
1Defrosting
2Rear window defroster, see page 183
3Residual engine heat utilization, see page 176
4Automatic climate control on / off
5Air distribution, right (automatic, manual operation)
6Economy mode, see page 176
7Temperature control, right8Air volume (automatic, manual)
9Display
Depending on the ambient light conditions, the
figures on the display will be shown as dark figures
on a bright background (in daylight), or as bright
figures on a dark background (at night).
10Temperature control, left
11Air recirculation, see page 174
12Air distribution, left (automatic, manual operation)
13Activated charcoal filter
Important!
This vehicle is equipped with an air conditioning
system that uses R-134a (HFC: hydrofluorocarbon) as a
refrigerant. Repairs should always be performed by a
qualified technician, and refrigerant should be collected
in a recovery system for recycling.
1
2
3
4
6
7
10
11
13
12
98
5P83.40-2304-26
Page 231 of 430
228 Catalytic converter
Te ch n i c a l
data Instruments
and controlsOperationDrivingInstrument
cluster displayPractical hints Car care Index
Catalytic converter
Your Mercedes-Benz is equipped with monolithic type
catalytic converters, an important element in
conjunction with the oxygen sensors to achieve
substantial control of the pollutants in the exhaust
emissions. Keep your vehicle in proper operating
condition by following our recommended maintenance
instructions as outlined in your Service Booklet.
Caution!
To prevent damage to the catalytic converters, use only
premium unleaded gasoline in this vehicle.
Any noticeable irregularities in engine operation should
be repaired promptly. Otherwise, excessive unburned
fuel may reach the catalytic converter causing it to
overheat, which could start a fire.
Wa r n i n g !
As with any vehicle, do not idle, park or operate
this vehicle in areas where combustible materials
such as grass, hay or leaves can come into contact
with the hot exhaust system, as these materials
could be ignited and cause a vehicle fire.
Page 245 of 430
242 Automatic transmission
Te ch n i c a l
data Instruments
and controlsOperationDrivingInstrument
cluster displayPractical hints Car care Index
Briefly press selector lever in the “D +” direction:
The transmission will shift from the current gear range
to the next higher gear range. If the transmission is
already in gear range “D”, an additional upshift of one
gear is possible.
Press and hold selector lever in the “D +” direction:
The transmission will shift from the current gear
directly to gear range “D”.
Important!
With transmission in gear range “D”, “4” or “3”,
upshifting from 1st to 2nd to 3rd gear is delayed
depending on vehicle speed and engine temperature.
This allows the catalytic converter to heat up more
quickly to operating temperatures.
During the brief warm-up period this delayed upshift
and increased engine noise might be perceived as a malfunction. However, neither the engine nor
transmission are negatively affected by this mode of
operation.
The delayed upshift is effective with vehicle speeds
below 31 mph (50 km/h) at partial throttle and engine
temperatures below 95
°F (35
°C).
To avoid overrevving the engine when the selector lever
is m ove d to a lower gear range , t he tran smi ss ion will n ot
shift to a lower gear, if the engine’s revolutions per
minute limit would be exceeded. In this case there will
be no downshift, even when the vehicle speed reaches
the engine’s rpm limit of that gear, e.g. by applying the
service brakes.
To prevent the engine from laboring at low RPM when
driving uphill gradients or with your vehicle heavily
loaded, the automatic transmission will downshift when
necessary to maintain engine RPM within the best
torque range.
Wa r n i n g !
On slippery road surfaces, never downshift in order
to obtain braking action. This could result in drive
wheel slip and reduced vehicle control. Your
vehicle’s ABS will not prevent this type of loss of
control.
Page 251 of 430
248 Driving instructions
Te ch n i c a l
data Instruments
and controlsOperationDrivingInstrument
cluster displayPractical hints Car care Index
Power assistance
BrakesExcessive use of salt and other snow melting chemicals
spread on roads during the winter months may cause a
build up of moisture or residue to form on the braking
components. This build up or residue could cause light
corrosion of the braking components if the vehicle is
parked with the brakes cold. Apply steady and even
braking pressure when stopping the vehicle to warm up
and dry the brake components.
Important!
Please pay attention to the function of the brake assist
system (BAS), see page 277.
The condition of the parking brake system is checked
each time the vehicle is in the shop for the required
maintenance service at an authorized Mercedes-Benz
Center.
Wa r n i n g !
When the engine is not running, the brake and
steering systems are without power assistance.
Under these circumstances, a much greater effort is
necessary to stop or steer the vehicle.Wa r n i n g !
After driving in heavy rain for some time without
applying the brakes or through water deep enough
to wet brake components or salty road conditions,
the first braking action may be somewhat reduced
and increased pedal pressure may be necessary to
obtain expected braking effect. Be sure to maintain
a safe distance from vehicles in front.Resting your foot on the brake pedal will cause
excessive and premature wear of the brake pads.It can also result in the brakes overheating thereby
significantly reducing their effectiveness. It may
not be possible to stop the vehicle in sufficient time
to avoid an accident.
Page 252 of 430
249 Driving instructions
Te ch n i c a l
data Instruments
and controlsOperationDrivingInstrument
cluster displayPractical hints Car care Index If the parking brake is released and the brake warning
lamp in the instrument cluster stays on, the brake fluid
level in the reservoir is too low.
Brake pad wear or a leak in the system may be the
reason for low brake fluid in the reservoir.
Have the brake system inspected at an authorized
Mercedes-Benz Center immediately.
All checks and service work on the brake system should
be carried out by an authorized Mercedes-Benz Center.
Install only brake pads and brake fluid recommended by
Mercedes-Benz.Caution!
When driving down long and steep grades, relieve the
load on the brakes by shifting into a lower gear to use
the engine’s braking power. This helps prevent
overheating of the brakes and reduces brake pad wear.
After hard braking, it is advisable to drive on for some
time, rather than immediately parking, so the air stream
will cool down the brakes faster.
Driving off
Apply the service brakes to test them briefly after
driving off. Perform this procedure only when the road
is clear of other traffic.
Warm up the engine smoothly. Do not place full load on
the engine until the operating temperature has been
reached.
When starting off on a slippery surface, do not allow one
drive wheel to spin for an extended period with the ESP
switched off. Doing so may cause serious damage to the
drive train which is not covered by the Mercedes-Benz
Limited Warranty.
Wa r n i n g !
If other than recommended brake pads are
installed, or other than recommended brake fluid
is used, the braking properties of the vehicle can be
degraded to an extent that safe braking is
substantially impaired. This could result in an
accident.