rear entertainment MERCEDES-BENZ S63AMG 2010 W221 User Guide
[x] Cancel search | Manufacturer: MERCEDES-BENZ, Model Year: 2010, Model line: S63AMG, Model: MERCEDES-BENZ S63AMG 2010 W221Pages: 548, PDF Size: 12.48 MB
Page 182 of 548
XRemoving a disc: Press desired magazine
tray button =.
XRemove the disc from slot :.
If you do not remove the disc from slot :,
the DVD changer will automatically pull it
back in after a short time.
XRemoving all discs: Press button ?.
The DVD changer ejects the disc from the
currently selected magazine tray.
XRemove the disc from slot :.
The DVD changer changes to the next
loaded magazine tray and ejects the disc.
XRepeat the last step until all magazine trays
are empty.
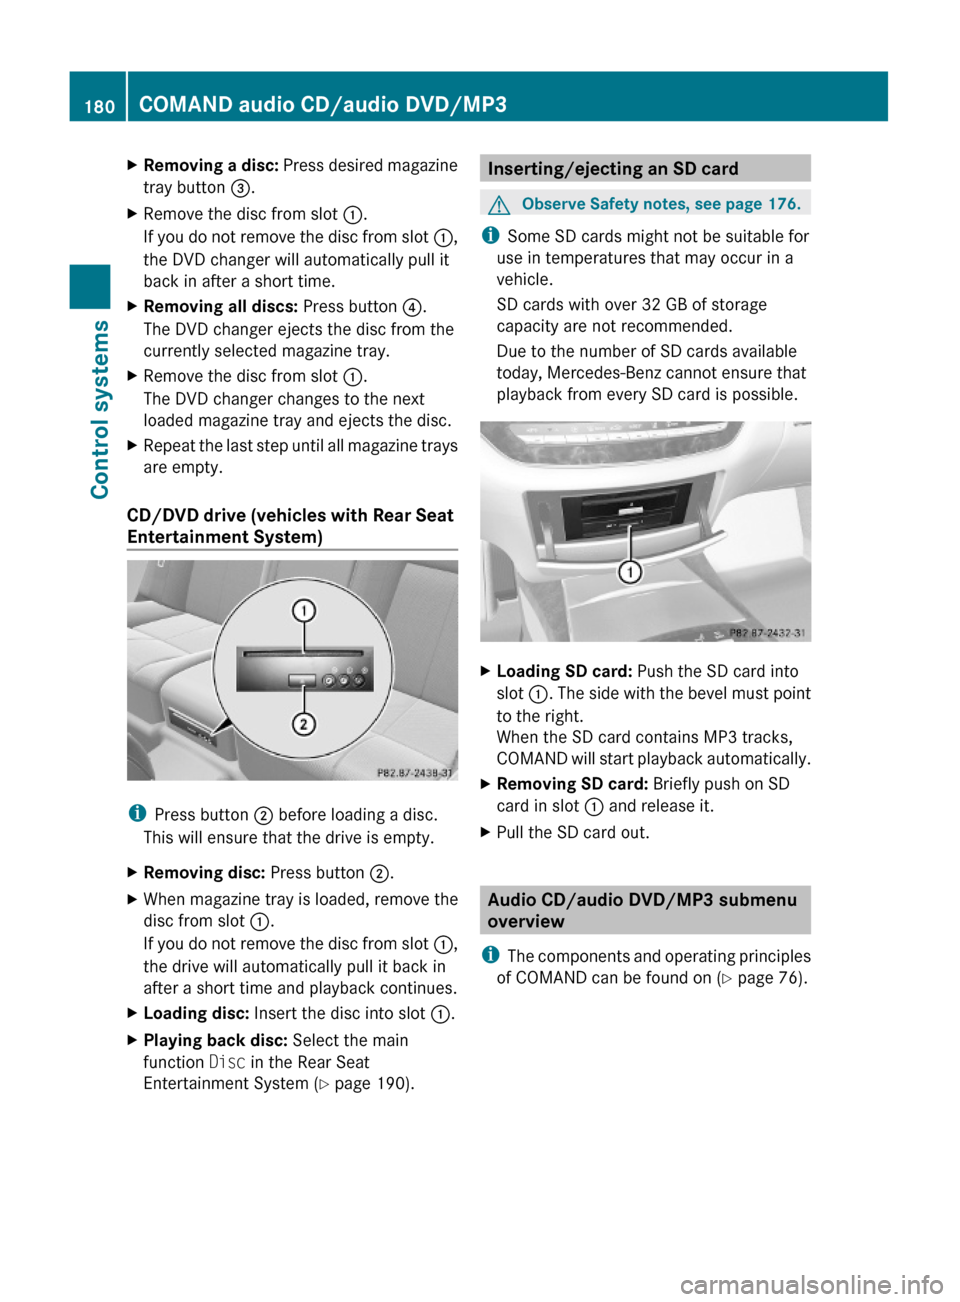
CD/DVD drive (vehicles with Rear Seat
Entertainment System)
iPress button ; before loading a disc.
This will ensure that the drive is empty.
XRemoving disc: Press button ;.XWhen magazine tray is loaded, remove the
disc from slot :.
If you do not remove the disc from slot :,
the drive will automatically pull it back in
after a short time and playback continues.
XLoading disc: Insert the disc into slot :.XPlaying back disc: Select the main
function Disc in the Rear Seat
Entertainment System (Y page 190).
Inserting/ejecting an SD cardGObserve Safety notes, see page 176.
iSome SD cards might not be suitable for
use in temperatures that may occur in a
vehicle.
SD cards with over 32 GB of storage
capacity are not recommended.
Due to the number of SD cards available
today, Mercedes-Benz cannot ensure that
playback from every SD card is possible.
XLoading SD card: Push the SD card into
slot :. The side with the bevel must point
to the right.
When the SD card contains MP3 tracks,
COMAND will start playback automatically.
XRemoving SD card: Briefly push on SD
card in slot : and release it.
XPull the SD card out.
Audio CD/audio DVD/MP3 submenu
overview
iThe components and operating principles
of COMAND can be found on (Y page 76).
180COMAND audio CD/audio DVD/MP3Control systems
221_AKB; 6; 20, en-USd2ugruen,Version: 2.11.8.12009-09-24T13:28:17+02:00 - Seite 180
Page 189 of 548
vehicle or that the usual maximum volume
cannot be achieved. On certain devices the
volume can be set separately. In this case,
start at a moderate volume and increase it
slowly. In this way, you can determine
whether the system is capable of playback
without distortion, even at high volume.
XConnect external audio and video sources
as described in the following sections.
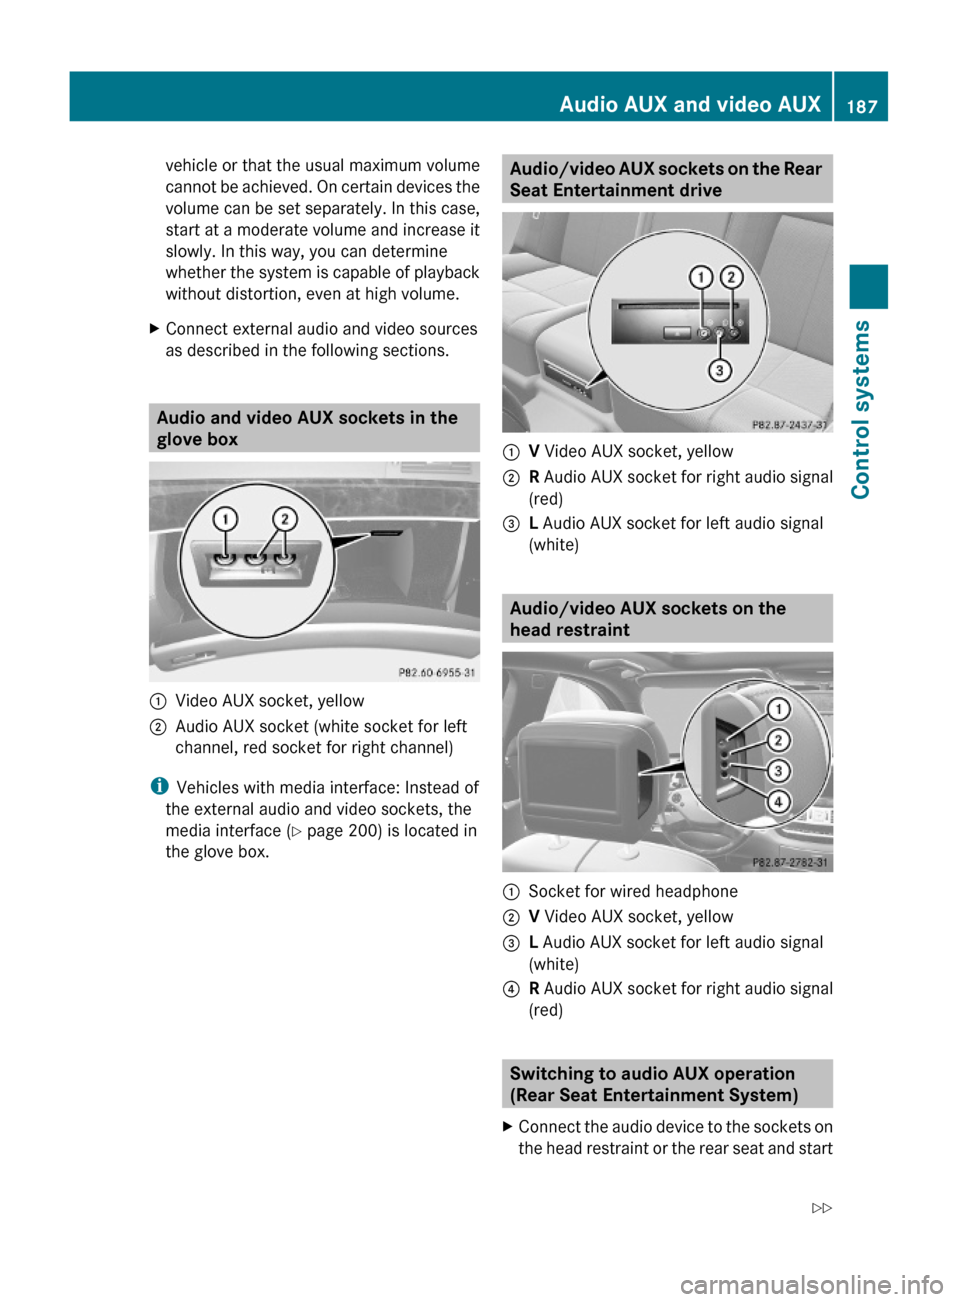
Audio and video AUX sockets in the
glove box
:Video AUX socket, yellow;Audio AUX socket (white socket for left
channel, red socket for right channel)
iVehicles with media interface: Instead of
the external audio and video sockets, the
media interface (Y page 200) is located in
the glove box.
Audio/video AUX sockets on the Rear
Seat Entertainment drive
:V Video AUX socket, yellow;R Audio AUX socket for right audio signal
(red)
=L Audio AUX socket for left audio signal
(white)
Audio/video AUX sockets on the
head restraint
:Socket for wired headphone;V Video AUX socket, yellow=L Audio AUX socket for left audio signal
(white)
?R Audio AUX socket for right audio signal
(red)
Switching to audio AUX operation
(Rear Seat Entertainment System)
XConnect the audio device to the sockets on
the head restraint or the rear seat and start
Audio AUX and video AUX187Control systems221_AKB; 6; 20, en-USd2ugruen,Version: 2.11.8.12009-09-24T13:28:17+02:00 - Seite 187Z
Page 190 of 548
playback. Refer to operating instructions of
the external device.XSelecting main function: Select Aux.XPress button ! on the remote control.XSelect Source .XSelect Display Aux for playback via the
connections in the head restraint.
or
XSelect Disk Drive Aux for playback via
the connections in the rear seat.
Switching to audio AUX operation
(COMAND)
XSelect Audio Q AUX .
The Audio AUX menu appears. You will hear
the medium in the external audio source
provided it is connected and set to
playback.
You can adjust the following during audio AUX
operation:
R Volume ( Y page 88)
R Balance and fader ( Y page 88)
R Treble and Bass (Y page 88)
R 3D Sound (Y page 89)
Switching to video AUX operation
(Rear Seat Entertainment System)
XConnect the video device to the sockets on
the head restraint or the rear seat and start
playback. Refer to operating instructions of
the external device.XSelecting main function: Select Aux.XPress button ! on the remote control.XSelect Source .XSelect Display Aux for playback via the
connections in the head restraint.
or
XSelect Disk Drive Aux for playback via
the connections in the rear seat.XSwitching from full screen to menu
system: Press button ! on the remote
control.XScreen settings: Select Display Aux .
A list appears.XProceed as described in the section
“Screen settings” ( Y page 194).
Switching to video AUX operation
(COMAND)
XSelect Video Q AUX .
The video AUX menu appears. You will hear
and see the medium in the external audio
source provided it is connected and set to
playback.
i For operation of the external video
source, refer to the operating instructions
of the respective device.
You can adjust the following during video AUX
operation:
R Brightness , Contrast and Color
( Y page 194)
R Picture format ( Y page 194)
R Volume ( Y page 88)
R Balance and fader ( Y page 88)
R Treble and Bass (Y page 88)
R 3D Sound (Y page 89)
188Audio AUX and video AUXControl systems
221_AKB; 6; 20, en-USd2ugruen,Version: 2.11.8.12009-09-24T13:28:17+02:00 - Seite 188
Page 191 of 548
Rear Seat Entertainment SystemGObserve Safety notes, see page 76.GWarning!
The driver should not wear a Rear Seat
Entertainment headphone while operating the
vehicle under any circumstances. The use of
a headphone while driving the vehicle could
drastically impair the ability to react to audible
traffic conditions (e.g. emergency sirens from
police/fire/ambulance, another car’s horn,
etc.).
GWarning!
When not in use, headphones or external
video sources should be stored in a safe
location (e.g. one of the vehicle’s storage
compartments) so that they are not loose
within the passenger compartment during
braking, vehicle maneuvers or a traffic
accident. Objects moving within the
passenger compartment could cause serious
personal injury to vehicle occupants.
GWarning!
Due to a potential choking hazard, wired
headphone usage by children should only
occur with adult supervision.
You can operate the Rear Seat Entertainment
System via the remote controls ( Y page 81)
that come with the vehicle.
The playback of audio and video sources with
the Rear Seat Entertainment System is
identical to playback with the COMAND to a
large extent.
The COMAND and the Rear Seat
Entertainment System can be operated
simultaneously almost independent of each
other. However, some menus may cause
conflicts when the systems are used by
multiple users. Conflicts can occur between
the rear screens as well as COMAND and the
Rear Seat Entertainment System.
Remote controls for Rear Seat
Entertainment System
The Rear Seat Entertainment System
contains two remote controls for the rear
passenger compartment.
For information on using the remote controls,
see ( Y page 81).
Headphones for Rear Seat
Entertainment System
The Rear Seat Entertainment System
contains two headphones for the rear
passenger compartment.
For information on using the headphones, see
( Y page 82).
Related topics
R Inserting/ejecting CDs and DVDs
( Y page 180)
R Connecting and playing back external
devices ( Y page 186)
R Remote control ( Y page 81)
R Playing back audio CDs/audio DVDs
( Y page 176)
R Playing back video CDs/audio DVDs
( Y page 191)
CD/DVD drive
GObserve Safety notes, see page 176.
When both screens are used with the CD/
DVD drive, selecting certain menus or
changing certain settings on one screen will
also be applied to the other screen.
The following functions will be applied to both
screens:
R Changing Playback options
R Selecting track
R Using Play, Pause, and Stop
Rear Seat Entertainment System189Control systems221_AKB; 6; 20, en-USd2ugruen,Version: 2.11.8.12009-09-24T13:28:17+02:00 - Seite 189Z
Page 192 of 548
RForward and Rewind as well as Skipping
tracks
RSelecting the DVD menu and moving within
that menu
RChanging language, subtitles and camera
angle
RCalling up interactive DVD contents
The following functions will be applied to one
screen only:
RChanging audio, video and screen settings
RSwitching between full screen, menu
system and control menu
Switching between main functions
By selecting the main functions you set the
playback options of the various audio and
video sources.
Main functionDiscPlayback with rear
CD/DVD drive
COMANDPlayback with
COMAND System
AuxPlayback with an
external device
connected in the
rear
SystemMenu for basic
settings
When exiting a main function, the settings are
saved. When calling up again the function
later the following is possible:
RThe main function is already running on
both screens.
RThe main function does not run on the other
screen.
In the first case, the main function appears
the way it is already displayed on the other
screen.
In the second case, the setting at which you
have exited the main function the last time
appears.
Inserting/ejecting CDs and DVDs
Loading or ejecting a disc is only displayed on
the screen on which the main function Disc
is selected. Storage of the current settings for
both screens are reset to the original settings.
Simultaneous usage of COMAND and
the Rear Seat Entertainment System
Adopting the audio signal from Rear
Seat Entertainment System for front
passenger
You can transmit the audio signal of the CD/
DVD drive of the Rear Seat Entertainment
System to the headphone of the front
passenger. The volume is adjusted on the
headphone. The audio signal is transmitted to
the COMAND when the main function Disc is
selected on either rear screen. When the
main function Disc is not selected on at least
one rear screen, the audio signal is not
transmitted to the COMAND.
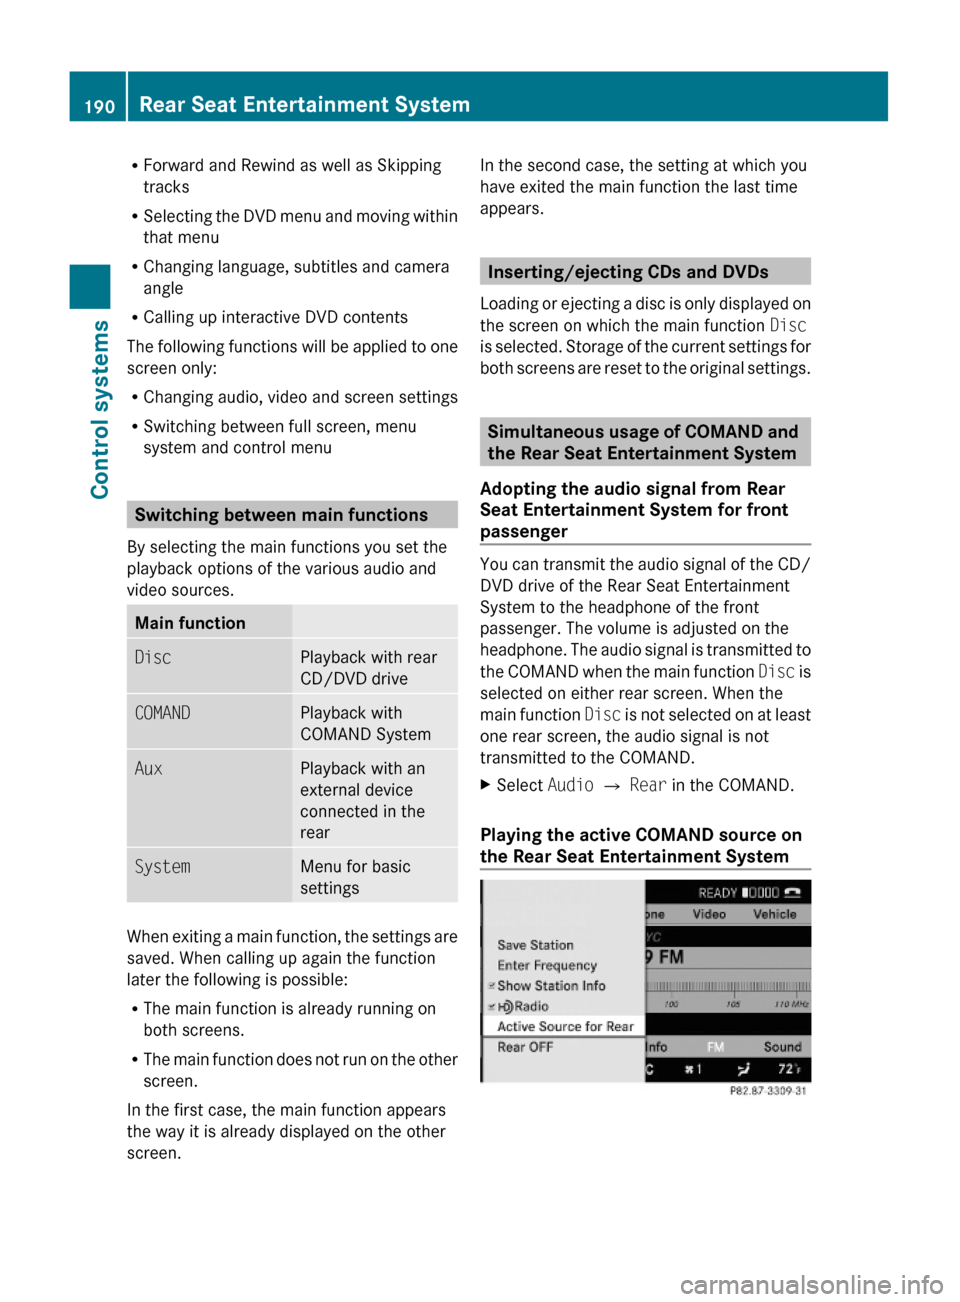
XSelect Audio Q Rear in the COMAND.
Playing the active COMAND source on
the Rear Seat Entertainment System
190Rear Seat Entertainment SystemControl systems
221_AKB; 6; 20, en-USd2ugruen,Version: 2.11.8.12009-09-24T13:28:17+02:00 - Seite 190
Page 193 of 548
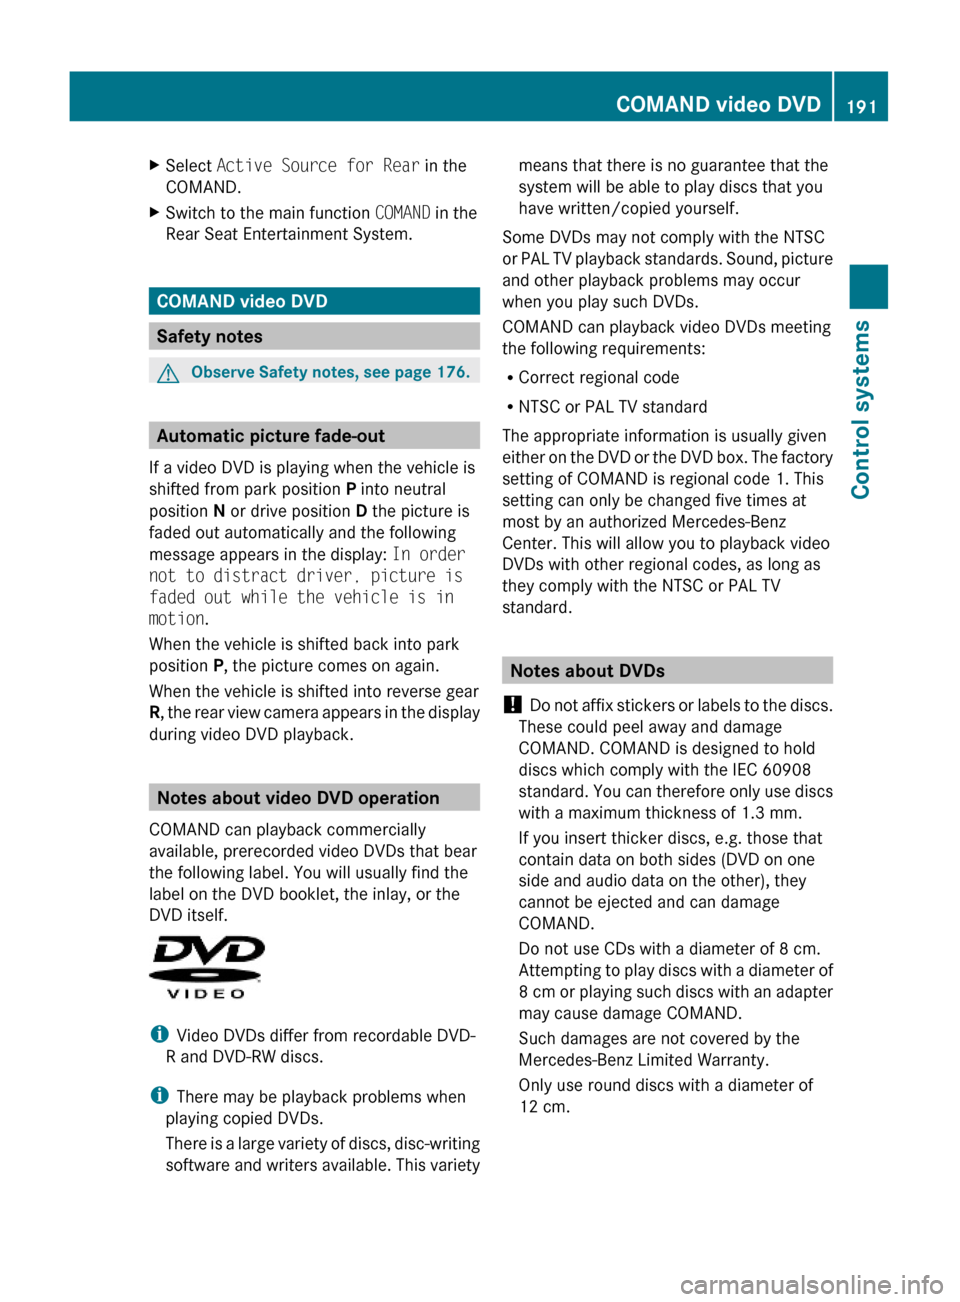
XSelect Active Source for Rear in the
COMAND.
XSwitch to the main function COMAND in the
Rear Seat Entertainment System.
COMAND video DVD
Safety notes
GObserve Safety notes, see page 176.
Automatic picture fade-out
If a video DVD is playing when the vehicle is
shifted from park position P into neutral
position N or drive position D the picture is
faded out automatically and the following
message appears in the display: In order
not to distract driver, picture is
faded out while the vehicle is in
motion.
When the vehicle is shifted back into park
position P, the picture comes on again.
When the vehicle is shifted into reverse gear
R, the rear view camera appears in the display
during video DVD playback.
Notes about video DVD operation
COMAND can playback commercially
available, prerecorded video DVDs that bear
the following label. You will usually find the
label on the DVD booklet, the inlay, or the
DVD itself.
iVideo DVDs differ from recordable DVD-
R and DVD-RW discs.
iThere may be playback problems when
playing copied DVDs.
There is a large variety of discs, disc-writing
software and writers available. This variety
means that there is no guarantee that the
system will be able to play discs that you
have written/copied yourself.
Some DVDs may not comply with the NTSC
or PAL TV playback standards. Sound, picture
and other playback problems may occur
when you play such DVDs.
COMAND can playback video DVDs meeting
the following requirements:
RCorrect regional code
RNTSC or PAL TV standard
The appropriate information is usually given
either on the DVD or the DVD box. The factory
setting of COMAND is regional code 1. This
setting can only be changed five times at
most by an authorized Mercedes-Benz
Center. This will allow you to playback video
DVDs with other regional codes, as long as
they comply with the NTSC or PAL TV
standard.
Notes about DVDs
! Do not affix stickers or labels to the discs.
These could peel away and damage
COMAND. COMAND is designed to hold
discs which comply with the IEC 60908
standard. You can therefore only use discs
with a maximum thickness of 1.3 mm.
If you insert thicker discs, e.g. those that
contain data on both sides (DVD on one
side and audio data on the other), they
cannot be ejected and can damage
COMAND.
Do not use CDs with a diameter of 8 cm.
Attempting to play discs with a diameter of
8 cm or playing such discs with an adapter
may cause damage COMAND.
Such damages are not covered by the
Mercedes-Benz Limited Warranty.
Only use round discs with a diameter of
12 cm.
COMAND video DVD191Control systems221_AKB; 6; 20, en-USd2ugruen,Version: 2.11.8.12009-09-24T13:28:17+02:00 - Seite 191Z
Page 387 of 548
damage not covered by the Mercedes-Benz
Limited Warranty.
When not in use, keep the cup holder closed.
An open cup holder may cause injury to you
or others when contacted during braking,
vehicle maneuvers, or in an accident.
Keep in mind that objects placed in the cup
holder may come loose during braking,
vehicle maneuvers, or in an accident and be
thrown around in the vehicle interior. Objects
thrown around in the vehicle interior may
cause an accident and/or serious personal
injury.
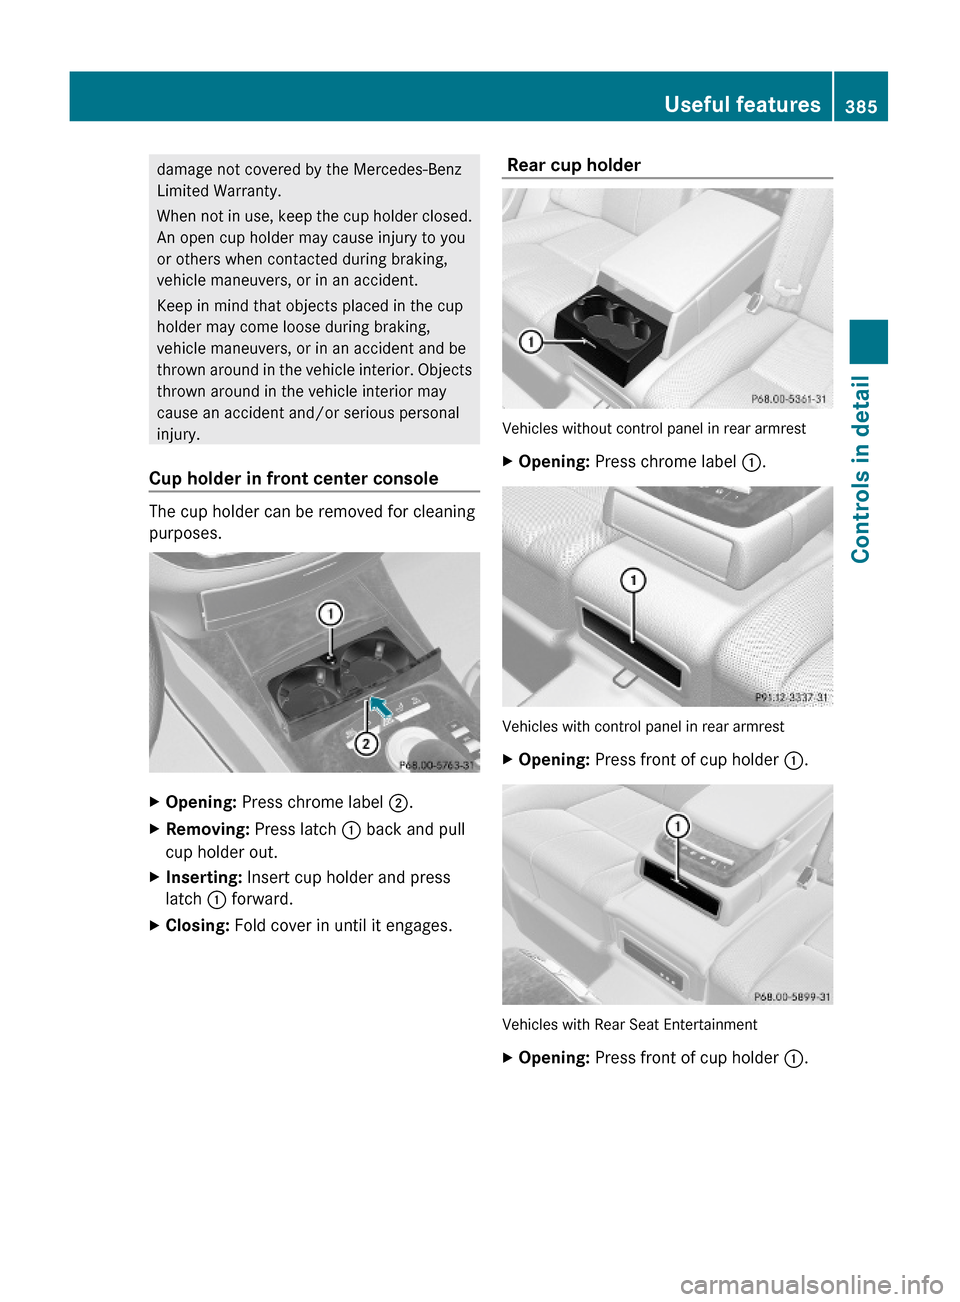
Cup holder in front center console
The cup holder can be removed for cleaning
purposes.
XOpening: Press chrome label ;.XRemoving: Press latch : back and pull
cup holder out.
XInserting: Insert cup holder and press
latch : forward.
XClosing: Fold cover in until it engages. Rear cup holder
Vehicles without control panel in rear armrest
XOpening: Press chrome label :.
Vehicles with control panel in rear armrest
XOpening: Press front of cup holder :.
Vehicles with Rear Seat Entertainment
XOpening: Press front of cup holder :.Useful features385Controls in detail221_AKB; 6; 20, en-USd2ugruen,Version: 2.11.8.12009-09-24T13:28:17+02:00 - Seite 385Z
Page 505 of 548
XInsert the new battery with the positive
terminal (+) facing up. Use a lint-free cloth.
XInsert the tabs of the battery compartment
cover into the housing and press the cover
closed.
XSlide mechanical key : back into the
SmartKey.
XCheck the operation of the SmartKey.
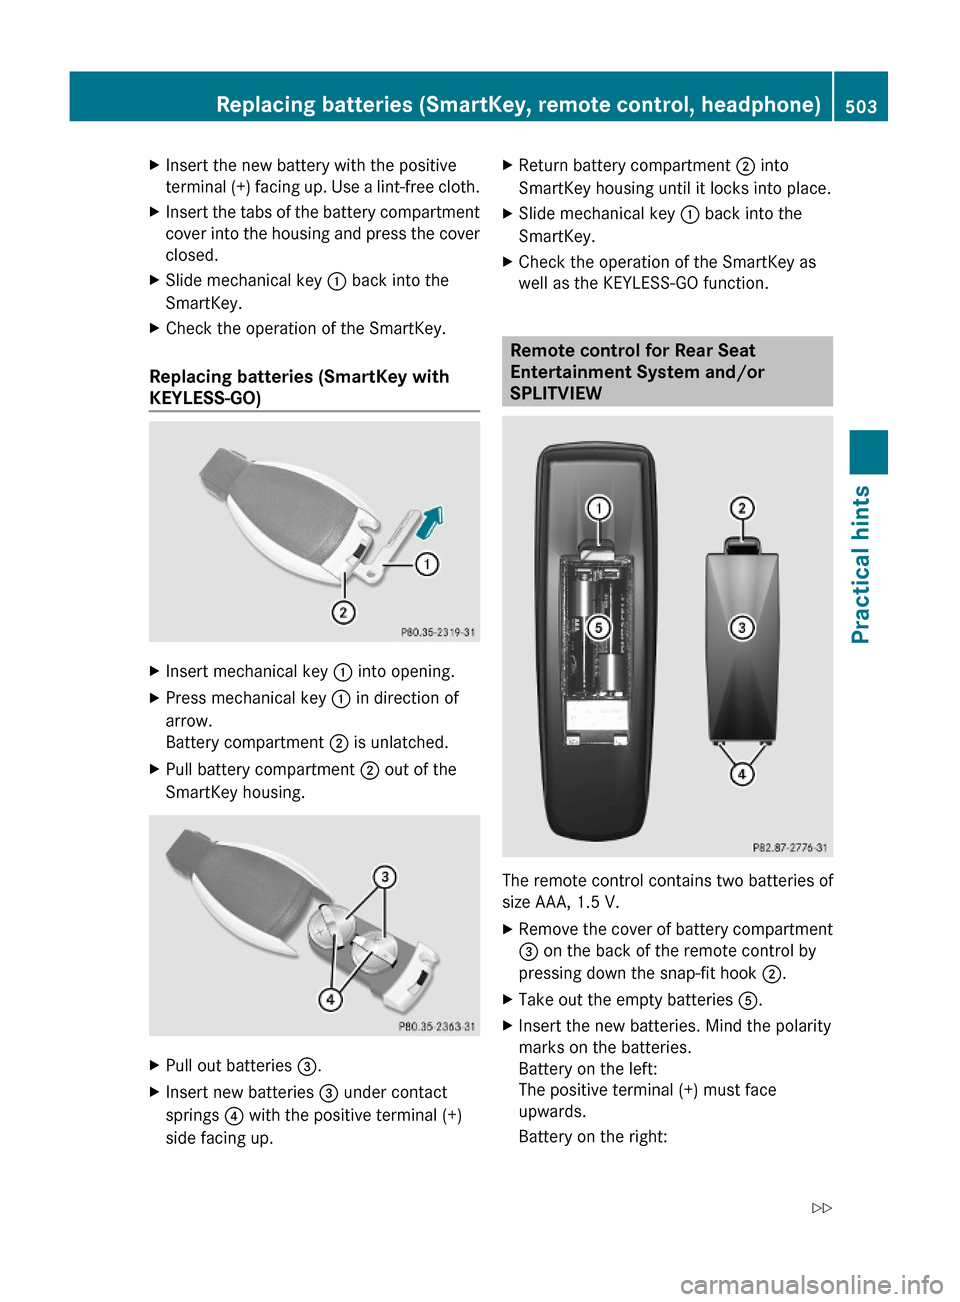
Replacing batteries (SmartKey with
KEYLESS-GO)
XInsert mechanical key : into opening.XPress mechanical key : in direction of
arrow.
Battery compartment ; is unlatched.
XPull battery compartment ; out of the
SmartKey housing.
XPull out batteries =.XInsert new batteries = under contact
springs ? with the positive terminal (+)
side facing up.
XReturn battery compartment ; into
SmartKey housing until it locks into place.
XSlide mechanical key : back into the
SmartKey.
XCheck the operation of the SmartKey as
well as the KEYLESS-GO function.
Remote control for Rear Seat
Entertainment System and/or
SPLITVIEW
The remote control contains two batteries of
size AAA, 1.5 V.
XRemove the cover of battery compartment
3 on the back of the remote control by
pressing down the snap-fit hook 2.
XTake out the empty batteries 5.XInsert the new batteries. Mind the polarity
marks on the batteries.
Battery on the left:
The positive terminal (+) must face
upwards.
Battery on the right:
Replacing batteries (SmartKey, remote control, headphone)503Practical hints221_AKB; 6; 20, en-USd2ugruen,Version: 2.11.8.12009-09-24T13:28:17+02:00 - Seite 503Z