fog light MERCEDES-BENZ S63AMG 2010 W221 Owner's Manual
[x] Cancel search | Manufacturer: MERCEDES-BENZ, Model Year: 2010, Model line: S63AMG, Model: MERCEDES-BENZ S63AMG 2010 W221Pages: 548, PDF Size: 12.48 MB
Page 14 of 548
ESC OFF ........................................ 495
Fog lamps ...................................... 300
Front passenger front air bag
off ............................................ 46, 498
Fuel tank reserve ........................... 496
High-beam headlamps .............32, 301
Instrument cluster .........................489
Low-beam headlamps ....................299
Low tire pressure/TPMS
malfunction telltale ........................497
Seat belt telltale ................32, 52, 493
SRS .......................................... 40, 494
Turn signals ..................................... 32
Lane Keeping Assist .......................... 362
Messages in the multifunction
display ........................................... 462
Switching on or off ......................... 233
Language settings ............................... 94
LATCH-type child seat anchors (ISOFIX) see Children in the vehicle
License plate lamps
Messages in the multifunction
display ........................................... 486
Light alloy wheels, cleaning ............. 445
Lighters see Cigarette lighters
Lighting .............................................. 298
Daytime running lamp mode ..........299
Exterior .......................................... 298
Interior ........................................... 304
Limp-home mode .............................. 325
Load index (tires) ...................... 426, 431
Loading see Vehicle loading
Locking the vehicle
KEYLESS-GO .................................. 275
Manually ........................................ 500
SmartKey ....................................... 274
Loss of
Key ................................................ 277
Service and Warranty Information
booklet .......................................... 524
Low-beam headlamps ....................... 299
Exterior lamp switch ......................298
Switching on .................................. 299
Lubricants .......................................... 537M
Maintenance ........................................ 22
Maintenance Call, automatic (Tele
Aid) ..................................................... 395
Maintenance System
Service indicator display ................439
Service indicator message .............439
Service term exceeded ..................439
Manual headlamp mode (Low-
beam headlamps) .............................. 299
Manual shift program ....................... 324
Maximum engine speed see Vehicle specification
Maximum loaded vehicle weight ..... 431
Maximum load rating (tires) ............. 431
Maximum permissible tire
inflation pressure .............................. 431
Mechanical key see Key, Mechanical
Media interface ................................. 200
Memory function ............................... 297
Menus see Control system menus
Minispare wheel
see Spare wheel
Mirrors ............................................... 294
Auto-dimming rear view mirrors ....295
Exterior rear view mirror parking
position .......................................... 295
Exterior rear view mirrors ..............295
Front vanity mirrors .......................386
Interior rear view mirror .................294
Memory function ........................... 297
Power-folding exterior rear view
mirrors ........................................... 296
Rear vanity mirrors ........................386
MON (Motor Octane Number) .......... 541
Motor Octane Number see MON
MP3 .................................................... 176
Multicontour seats, front ................. 218
Multicontour seats, rear ................... 293
Multifunction display ........................ 222
Symbol messages ..........................466
Text messages ............................... 454
Vehicle status messages ...............45212Index221_AKB; 6; 20, en-USd2ugruen,Version: 2.11.8.12009-09-24T13:28:17+02:00 - Seite 12
Page 15 of 548
Multifunction display messages
ABC (Active Body Control) .............457
ABS ....................................... 467, 468
Active headlamps .......................... 485
Advanced Parking Guidance ..........461
Advanced TPMS ............................. 464
Air bags ......................................... 455
AIRMATIC ...................................... 476
Alternator .............................. 463, 482
ATTENTION ASSIST ........................476
Automatic
transmission .......................... 462, 463
Battery ................................... 463, 482
Blind Spot Assist ............................ 460
Brake fluid ..................................... 472
Brake pads ..................................... 466
Coolant .......................................... 480
Corner-illuminating lamps ..............488
Cruise control ................................ 458
DISTRONIC PLUS ........................... 459
Doors ............................................. 478
EBP ................................................ 468
Engine oil ....................................... 483
ESC ............................... 467, 468, 473
Fog lamps .............................. 485, 487
Front passenger front air bag ........455
Gas cap .......................................... 484
High-beam lamps ........................... 486
Hood .............................................. 478
Lane Keeping Assist ......................462
License plate lamps .......................486
Light sensor ................................... 487
Low-beam lamps ............................ 487
Night View Assist Plus ...................477
Parking lamps ................................ 486
PRE-SAFE ®
.................................... 454
Radar sensors ................................ 461
Reserve fuel ................................... 484
Reverse lamp ................................. 485
Side marker lamps .........................485
SmartKey ....................................... 478
SmartKey with KEYLESS-GO ..........478
SRS ................................................ 474
Tele Aid .......................................... 474
Tire inflation pressure ............464, 489
Tire pressure monitor ....................464
Tires ...................................... 464, 489Trunk ............................................. 478
Turn signals ................................... 488
Multifunction steering wheel
Adjustment .................................... 293
Buttons .......................................... 221
Cleaning ......................................... 446
Gearshift control ............................ 323
Heating .......................................... 294
Memory function ........................... 297
Music Register ................................... 196
N
Navigation ............................................ 95
Alternative route ............................ 138
Compass ........................................ 137
Destination memory ......................145
Entering a destination ....................106
Entering a stopover ........................ 122
Introduction ..................................... 95
Lane recommendation ...................131
Last destinations ........................... 147
Map software version ......................96
Points of interest (POI) ................... 124
Route guidance .............................. 129
Traffic messages ............................ 138
Zagat ®
Rating Service ....................128
“Where am I?” function ..................136
Navi menu .......................................... 225
NECK-PRO active front head
restraints ............................................. 55
Resetting ....................................... 501
Nets, parcel ....................................... 380
Night security illumination .............. 208
Night View Assist Plus ...................... 356
Cleaning the windshield in front of
the camera .................................... 444
Messages in the multifunction
display ........................................... 477
Normal occupant weight .................. 431
Number, vehicle identification
(VIN) ................................................... 525
Index13221_AKB; 6; 20, en-USd2ugruen,Version: 2.11.8.12009-09-24T13:28:17+02:00 - Seite 13
Page 212 of 548
XSelect Vehicle.
The main area is active.
XSelecting Automatic Mirror Folding:
Slide XVY or rotate cVd.
XSwitching automatic fold-in function
on/off: Press W.
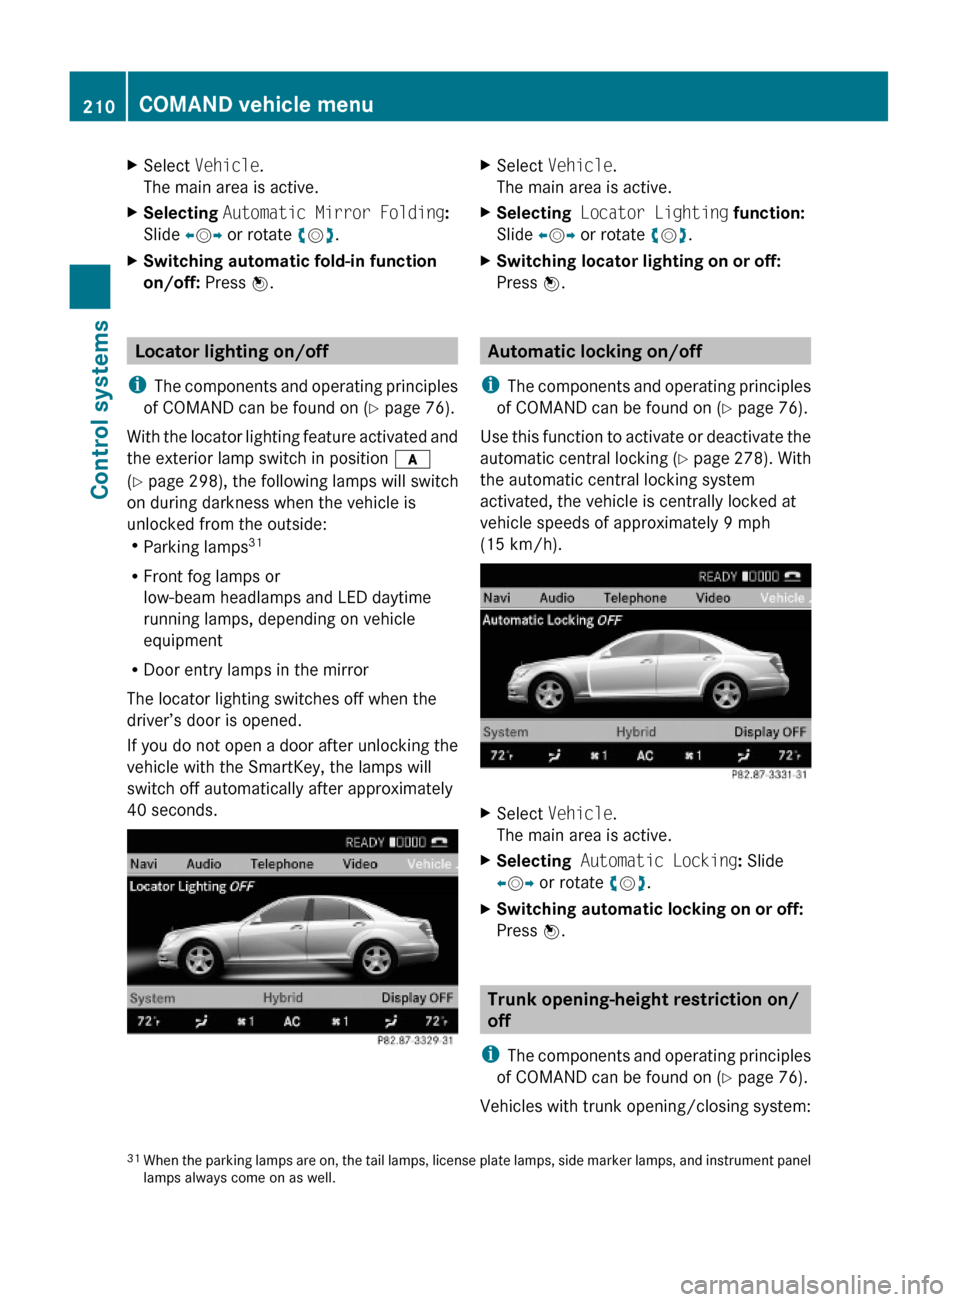
Locator lighting on/off
iThe components and operating principles
of COMAND can be found on (Y page 76).
With the locator lighting feature activated and
the exterior lamp switch in position c
(Y page 298), the following lamps will switch
on during darkness when the vehicle is
unlocked from the outside:RParking lamps31
RFront fog lamps or
low-beam headlamps and LED daytime
running lamps, depending on vehicle
equipment
RDoor entry lamps in the mirror
The locator lighting switches off when the
driver’s door is opened.
If you do not open a door after unlocking the
vehicle with the SmartKey, the lamps will
switch off automatically after approximately
40 seconds.
XSelect Vehicle.
The main area is active.
XSelecting Locator Lighting function:
Slide XVY or rotate cVd.
XSwitching locator lighting on or off:
Press W.
Automatic locking on/off
iThe components and operating principles
of COMAND can be found on (Y page 76).
Use this function to activate or deactivate the
automatic central locking (Y page 278). With
the automatic central locking system
activated, the vehicle is centrally locked at
vehicle speeds of approximately 9 mph
(15 km/h).
XSelect Vehicle.
The main area is active.
XSelecting Automatic Locking: Slide
XVY or rotate cVd.
XSwitching automatic locking on or off:
Press W.
Trunk opening-height restriction on/
off
iThe components and operating principles
of COMAND can be found on (Y page 76).
Vehicles with trunk opening/closing system:
31When the parking lamps are on, the tail lamps, license plate lamps, side marker lamps, and instrument panellamps always come on as well.
210COMAND vehicle menuControl systems
221_AKB; 6; 20, en-USd2ugruen,Version: 2.11.8.12009-09-24T13:28:17+02:00 - Seite 210
Page 300 of 548
Storing positions into memoryXAdjust the seats.XOn the driver’s side, also adjust the
steering wheel and exterior rear view
mirrors to the desired positions.
XPress memory button M once and within
3 seconds press memory position button
1, 2 or 3.
When the settings are stored to the
selected position, an acknowledgement
signal sounds.
Recalling positions from memory
XPress and hold desired memory position
button 1, 2 or 3 until the seat has moved
to the stored position completely. On the
driver’s side, also wait for the steering
wheel and exterior rear view mirrors to
move to the stored position.
iReleasing the memory position button
stops movement to the stored positions
immediately.
Lighting
Notes
iIf you drive in countries with left-hand
driving, you must have the headlamps
modified for symmetrical low beams.
Relevant information can be obtained at
any authorized Mercedes-Benz Center.
iThe active Bi-Xenon headlamps increase
usable illumination over conventional
headlamps because they follow the
curvature of the road ahead. The beams of
the active Bi-Xenon headlamps shift to
either side according to the vehicle’s
steering angle and speed.
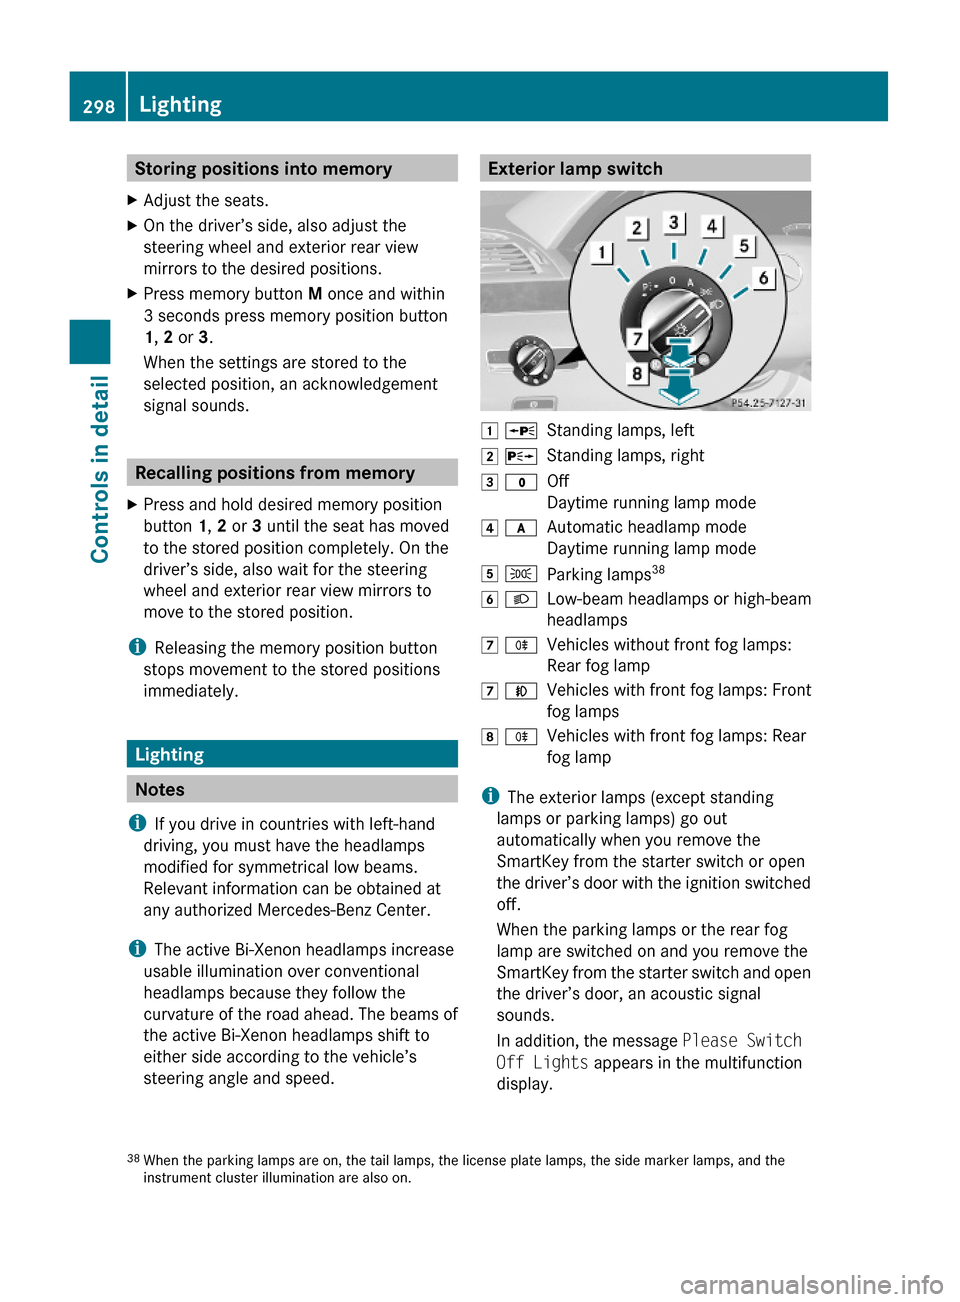
Exterior lamp switch1 WStanding lamps, left2 XStanding lamps, right3 $Off
Daytime running lamp mode
4 cAutomatic headlamp mode
Daytime running lamp mode
5 TParking lamps386 LLow-beam headlamps or high-beam
headlamps
7 RVehicles without front fog lamps:
Rear fog lamp
7 NVehicles with front fog lamps: Front
fog lamps
8 RVehicles with front fog lamps: Rear
fog lamp
iThe exterior lamps (except standing
lamps or parking lamps) go out
automatically when you remove the
SmartKey from the starter switch or open
the driver’s door with the ignition switched
off.
When the parking lamps or the rear fog
lamp are switched on and you remove the
SmartKey from the starter switch and open
the driver’s door, an acoustic signal
sounds.
In addition, the message Please Switch
Off Lights appears in the multifunction
display.
38When the parking lamps are on, the tail lamps, the license plate lamps, the side marker lamps, and theinstrument cluster illumination are also on.
298LightingControls in detail
221_AKB; 6; 20, en-USd2ugruen,Version: 2.11.8.12009-09-24T13:28:17+02:00 - Seite 298
Page 301 of 548
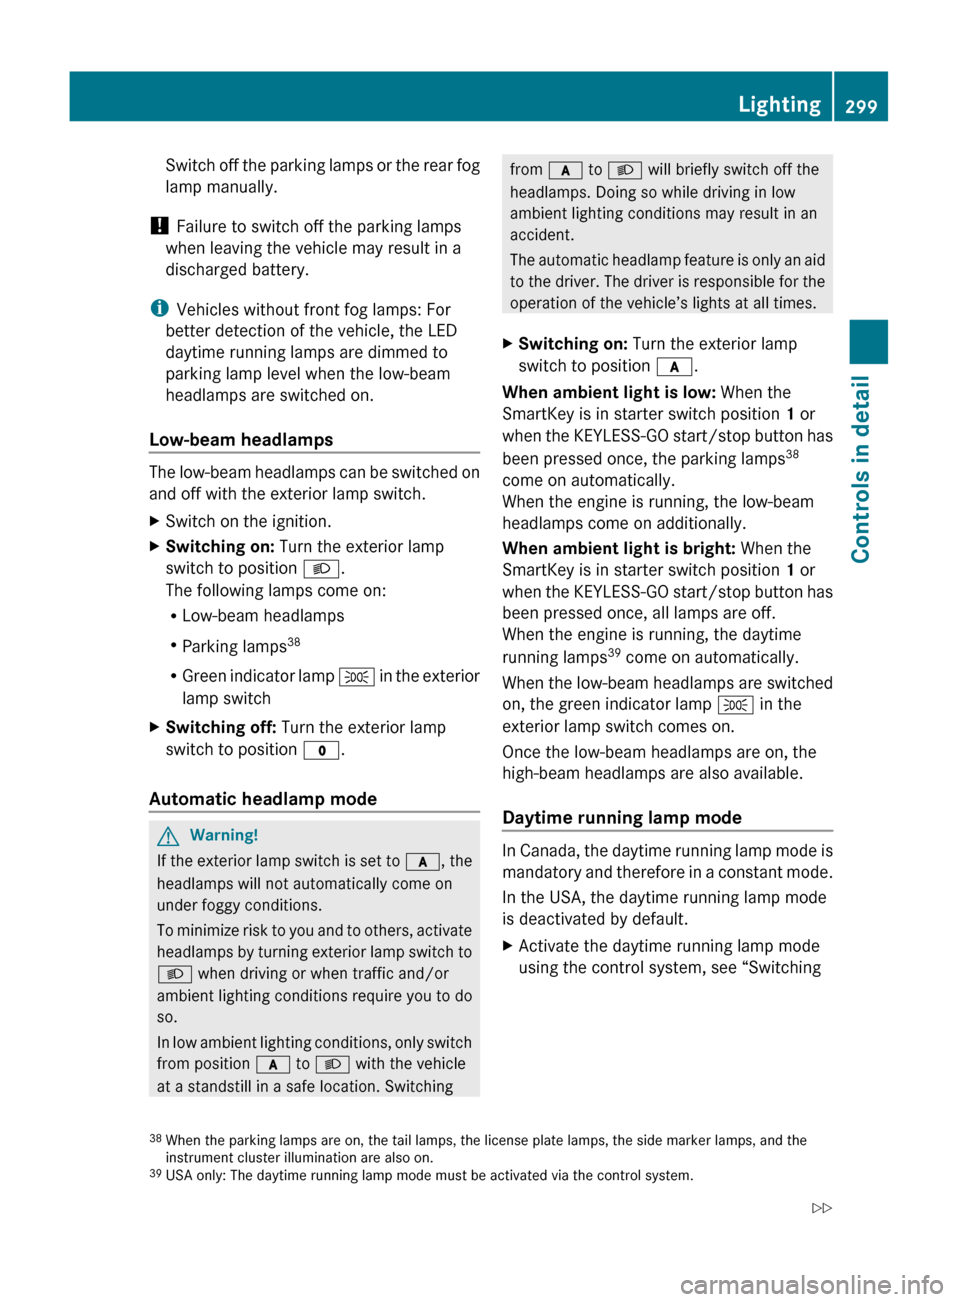
Switch off the parking lamps or the rear fog
lamp manually.
! Failure to switch off the parking lamps
when leaving the vehicle may result in a
discharged battery.
i Vehicles without front fog lamps: For
better detection of the vehicle, the LED
daytime running lamps are dimmed to
parking lamp level when the low-beam
headlamps are switched on.
Low-beam headlamps
The low-beam headlamps can be switched on
and off with the exterior lamp switch.
XSwitch on the ignition.XSwitching on: Turn the exterior lamp
switch to position L.
The following lamps come on:
R Low-beam headlamps
R Parking lamps 38
R Green indicator lamp T in the exterior
lamp switchXSwitching off: Turn the exterior lamp
switch to position $.
Automatic headlamp mode
GWarning!
If the exterior lamp switch is set to c, the
headlamps will not automatically come on
under foggy conditions.
To minimize risk to you and to others, activate
headlamps by turning exterior lamp switch to
L when driving or when traffic and/or
ambient lighting conditions require you to do
so.
In low ambient lighting conditions, only switch
from position c to L with the vehicle
at a standstill in a safe location. Switching
from c to L will briefly switch off the
headlamps. Doing so while driving in low
ambient lighting conditions may result in an
accident.
The automatic headlamp feature is only an aid
to the driver. The driver is responsible for the
operation of the vehicle’s lights at all times.XSwitching on: Turn the exterior lamp
switch to position c.
When ambient light is low: When the
SmartKey is in starter switch position 1 or
when the KEYLESS-GO start/stop button has
been pressed once, the parking lamps 38
come on automatically.
When the engine is running, the low-beam
headlamps come on additionally.
When ambient light is bright: When the
SmartKey is in starter switch position 1 or
when the KEYLESS-GO start/stop button has
been pressed once, all lamps are off.
When the engine is running, the daytime
running lamps 39
come on automatically.
When the low-beam headlamps are switched
on, the green indicator lamp T in the
exterior lamp switch comes on.
Once the low-beam headlamps are on, the
high-beam headlamps are also available.
Daytime running lamp mode
In Canada, the daytime running lamp mode is
mandatory and therefore in a constant mode.
In the USA, the daytime running lamp mode
is deactivated by default.
XActivate the daytime running lamp mode
using the control system, see “Switching38 When the parking lamps are on, the tail lamps, the license plate lamps, the side marker lamps, and the
instrument cluster illumination are also on.
39 USA only: The daytime running lamp mode must be activated via the control system.Lighting299Controls in detail221_AKB; 6; 20, en-USd2ugruen,Version: 2.11.8.12009-09-24T13:28:17+02:00 - Seite 299Z
Page 302 of 548
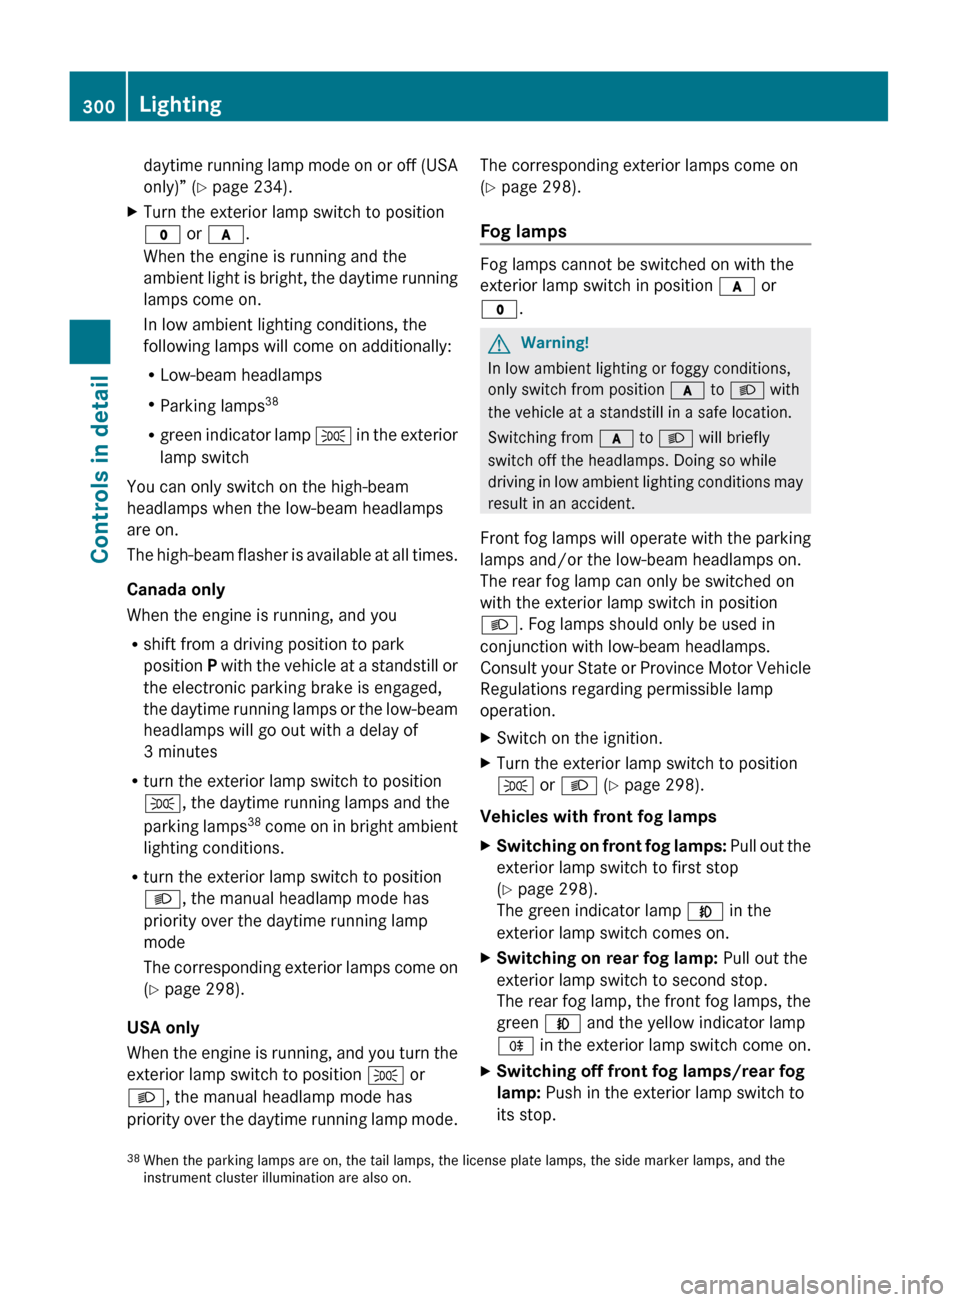
daytime running lamp mode on or off (USA
only)” ( Y page 234).XTurn the exterior lamp switch to position
$ or c .
When the engine is running and the
ambient light is bright, the daytime running
lamps come on.
In low ambient lighting conditions, the
following lamps will come on additionally:
R Low-beam headlamps
R Parking lamps 38
R green indicator lamp T in the exterior
lamp switch
You can only switch on the high-beam
headlamps when the low-beam headlamps
are on.
The high-beam flasher is available at all times.
Canada only
When the engine is running, and you
R shift from a driving position to park
position P with the vehicle at a standstill or
the electronic parking brake is engaged,
the daytime running lamps or the low-beam
headlamps will go out with a delay of
3 minutes
R turn the exterior lamp switch to position
T , the daytime running lamps and the
parking lamps 38
come on in bright ambient
lighting conditions.
R turn the exterior lamp switch to position
L , the manual headlamp mode has
priority over the daytime running lamp
mode
The corresponding exterior lamps come on
( Y page 298).
USA only
When the engine is running, and you turn the
exterior lamp switch to position T or
L , the manual headlamp mode has
priority over the daytime running lamp mode.
The corresponding exterior lamps come on
( Y page 298).
Fog lamps
Fog lamps cannot be switched on with the
exterior lamp switch in position c or
$ .
GWarning!
In low ambient lighting or foggy conditions,
only switch from position c to L with
the vehicle at a standstill in a safe location.
Switching from c to L will briefly
switch off the headlamps. Doing so while
driving in low ambient lighting conditions may
result in an accident.
Front fog lamps will operate with the parking
lamps and/or the low-beam headlamps on.
The rear fog lamp can only be switched on
with the exterior lamp switch in position
L . Fog lamps should only be used in
conjunction with low-beam headlamps.
Consult your State or Province Motor Vehicle
Regulations regarding permissible lamp
operation.
XSwitch on the ignition.XTurn the exterior lamp switch to position
T or L (Y page 298).
Vehicles with front fog lamps
XSwitching on front fog lamps: Pull out the
exterior lamp switch to first stop
( Y page 298).
The green indicator lamp N in the
exterior lamp switch comes on.XSwitching on rear fog lamp: Pull out the
exterior lamp switch to second stop.
The rear fog lamp, the front fog lamps, the
green N and the yellow indicator lamp
R in the exterior lamp switch come on.XSwitching off front fog lamps/rear fog
lamp: Push in the exterior lamp switch to
its stop.38 When the parking lamps are on, the tail lamps, the license plate lamps, the side marker lamps, and the
instrument cluster illumination are also on.300LightingControls in detail
221_AKB; 6; 20, en-USd2ugruen,Version: 2.11.8.12009-09-24T13:28:17+02:00 - Seite 300
Page 303 of 548
Vehicles without front fog lampsXSwitching on rear fog lamp: Pull out the
exterior lamp switch to its stop
(Y page 298).
The rear fog lamp and the yellow indicator
lamp R in the exterior lamp switch
come on.
XSwitching off rear fog lamp: Push in the
exterior lamp switch to its stop.
Locator lighting and night security
illumination
The locator lighting and night security
illumination are described in the COMAND
vehicle menu section under (Y page 208).
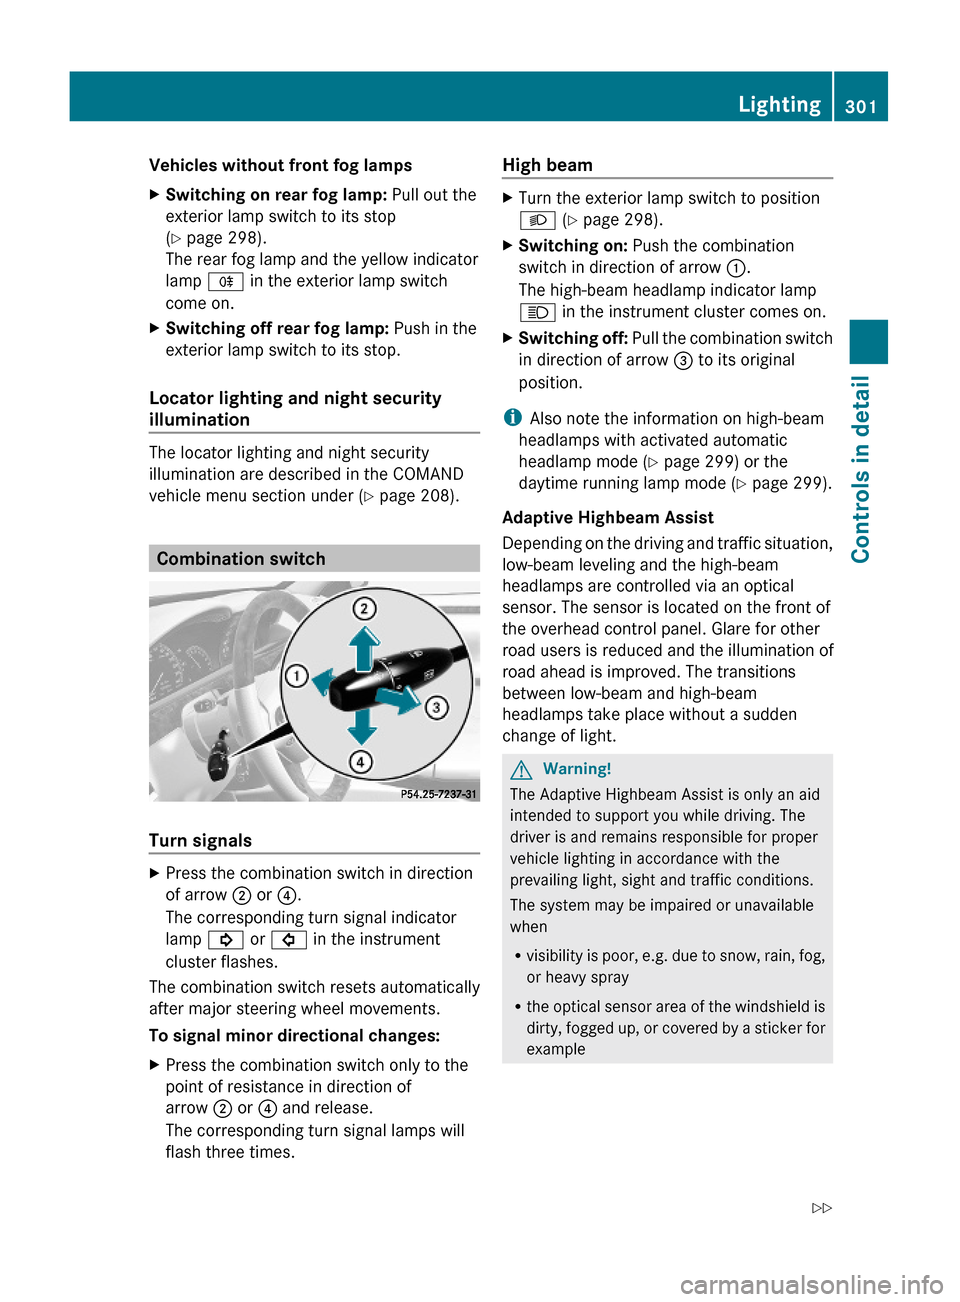
Combination switch
Turn signals
XPress the combination switch in direction
of arrow ; or ?.
The corresponding turn signal indicator
lamp ! or # in the instrument
cluster flashes.
The combination switch resets automatically
after major steering wheel movements.
To signal minor directional changes:
XPress the combination switch only to the
point of resistance in direction of
arrow ; or ? and release.
The corresponding turn signal lamps will
flash three times.
High beam XTurn the exterior lamp switch to position
L (Y page 298).
XSwitching on: Push the combination
switch in direction of arrow :.
The high-beam headlamp indicator lamp
K in the instrument cluster comes on.
XSwitching off: Pull the combination switch
in direction of arrow = to its original
position.
iAlso note the information on high-beam
headlamps with activated automatic
headlamp mode (Y page 299) or the
daytime running lamp mode (Y page 299).
Adaptive Highbeam Assist
Depending on the driving and traffic situation,
low-beam leveling and the high-beam
headlamps are controlled via an optical
sensor. The sensor is located on the front of
the overhead control panel. Glare for other
road users is reduced and the illumination of
road ahead is improved. The transitions
between low-beam and high-beam
headlamps take place without a sudden
change of light.
GWarning!
The Adaptive Highbeam Assist is only an aid
intended to support you while driving. The
driver is and remains responsible for proper
vehicle lighting in accordance with the
prevailing light, sight and traffic conditions.
The system may be impaired or unavailable
when
Rvisibility is poor, e.g. due to snow, rain, fog,
or heavy spray
Rthe optical sensor area of the windshield is
dirty, fogged up, or covered by a sticker for
example
Lighting301Controls in detail221_AKB; 6; 20, en-USd2ugruen,Version: 2.11.8.12009-09-24T13:28:17+02:00 - Seite 301Z
Page 330 of 548
The driving safety systems ABS, Adaptive
Brake, Adaptive Brake Lights, BAS, BAS
PLUS, EBP, ESC and PRE-SAFE® Brake are
described in the “Safety and security” section
(Y page 63).
Cruise control
The cruise control maintains the speed you
set for your vehicle automatically.
The use of the cruise control is recommended
for driving at a constant speed for extended
periods of time.
The currently set speed or last set speed
(“Resume” function) appears in the
multifunction display for approximately
5 seconds. The set speed is shown by a
triangle in the speedometer and the
corresponding speedometer segments from
the selected speed to the vehicle maximum
speed in the multifunction display are
illuminated.
GWarning!
The cruise control is a convenience system
designed to assist the driver during vehicle
operation. The driver is and must always
remain responsible for the vehicle’s speed
and for safe brake operation.
Only use the cruise control if the road, traffic,
and weather conditions make it advisable to
travel at a constant speed.
RThe use of the cruise control can be
dangerous on winding roads or in heavy
traffic because conditions do not allow safe
driving at a constant speed.
RThe use of the cruise control can be
dangerous on slippery roads. Rapid
changes in tire traction can result in wheel
spin and loss of control.
RDeactivate the cruise control when driving
in fog.
The “Resume” function should only be
operated if the driver is fully aware of the
previously set speed and wishes to resume
this particular preset speed.
GWarning!
When the cruise control is braking, the brake
pedal is retracted (i.e. depressed
automatically). The pedals’ range of motion
must not be impeded by any obstacles:
RDo not place any objects in the footwell.
RMake sure that the floormats and carpets
are securely in place.
RDo not rest your foot underneath the brake
pedal, as it could otherwise be trapped.
You could otherwise cause an accident and
injure yourself and/or others.
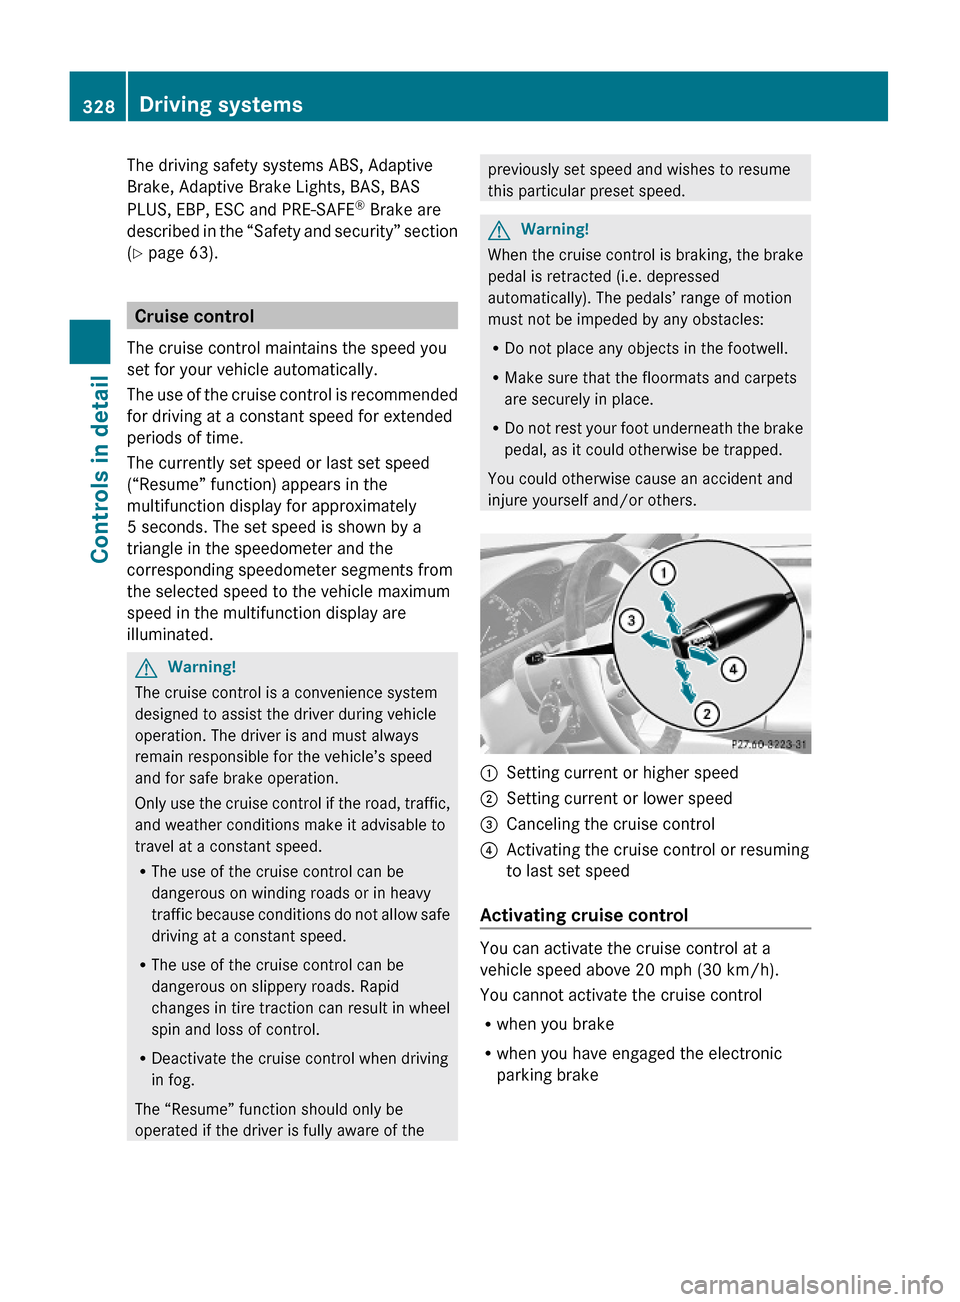
:Setting current or higher speed ;Setting current or lower speed=Canceling the cruise control?Activating the cruise control or resuming
to last set speed
Activating cruise control
You can activate the cruise control at a
vehicle speed above 20 mph (30 km/h).
You cannot activate the cruise control
Rwhen you brake
Rwhen you have engaged the electronic
parking brake
328Driving systemsControls in detail
221_AKB; 6; 20, en-USd2ugruen,Version: 2.11.8.12009-09-24T13:28:17+02:00 - Seite 328
Page 356 of 548
XAdjust the end position by maneuvering as
needed.XObserve the Parktronic system warning
indicator ( Y page 349).
Canceling the Parking Guidance
XPress the Parktronic switch ( Y page 349).
The Parking Guidance is canceled
immediately and the Parktronic system is
deactivated.
The Parking Guidance is canceled
automatically if guidance into the parking
space is no longer possible or if an error
occurs.
The parking space symbol disappears and the
message Parking Guidance Canceled
appears in the multifunction display.
Rear view camera
The rear view camera is an optical parking aid.
The area behind the vehicle appears in the
COMAND system display as a mirror image,
like in the rear view mirror.
In addition, the rear view camera contains
guidelines to help you with driving in reverse.
GWarning!
Make sure no persons or animals are in or
near the area in which you are parking/
maneuvering. Otherwise, they could be
injured.
GWarning!
The rear view camera is only an aid and may
display obstacles
R from a distorted perspective
R inaccurately
R may not display obstacles at all
The rear view camera does not relieve you of
the responsibility to be cautious. Take care
and pay careful attention. The rear view
camera may not show objects which are
R very close to the rear bumper
R under the rear bumper
R above the trunk handle
You are responsible for safety at all times and
must continue to pay attention to the
immediate surroundings when parking and
maneuvering. This includes the area behind,
in front of, and beside the vehicle. Otherwise
you could endanger yourself and/or others.GWarning!
The rear view camera either will not function
or will not function to its full capability if
R the trunk lid is open
R it is raining very hard, snowing or foggy
R it is night or you are parking/maneuvering
your vehicle in an area where it is very dark
R the camera is exposed to a very bright white
light
R the immediate surroundings are
illuminated with fluorescent light (the
COMAND system display can flicker)
R there is a sudden change in temperature,
e.g. if you drive into a heated garage from
the cold (lens condensation)
R the camera lens is dirty or covered
R the rear of your vehicle is damaged
In this case, have the position and setting
of the camera checked by a qualified
specialist workshop. Mercedes-Benz
recommends that you contact a Mercedes-
Benz Center for this purpose.
Do not use the rear view camera in these
situations. Otherwise you could injure
yourself or others and/or damage property
including your vehicle while parking/
maneuvering.
354Driving systemsControls in detail
221_AKB; 6; 20, en-USd2ugruen,Version: 2.11.8.12009-09-24T13:28:17+02:00 - Seite 354
Page 359 of 548
display. The image in the multifunction
display corresponds to a road lit up by high-
beam headlamps.
GWarning!
The Night View Assist Plus is only an aid to
support you while driving and cannot
substitute your careful attention. Do not rely
on the display of the Night View Assist Plus;
instead, continue to look through the
windshield. You are always responsible for
safety and must drive in accordance with
traffic conditions. Otherwise, you could
endanger yourself and others.
The system may be impaired or unavailable
when
Rvisibility is poor, e.g. due to snow, rain, fog,
or heavy spray
Rthe camera area of the windshield is dirty,
fogged up or covered by a sticker for
example
Rdriving through curves or on inclines or
declines
GWarning!
The Night View Assist Plus cannot record
objects immediately in front of or next to the
vehicle. When maneuvering, continue to look
through the windshield. Make sure no
persons or animals are in the area in which
you are maneuvering. You could otherwise
injure them.
The Night View Assist Plus image in the
multifunction display is not impaired by the
headlamps of approaching vehicles.
As a result, you can better follow the course
of the road and detect obstacles earlier on.
iInfrared light is invisible to the human eye
and thus does not blind. The Night View
Assist Plus can remain switched on
permanently even with oncoming traffic
present.
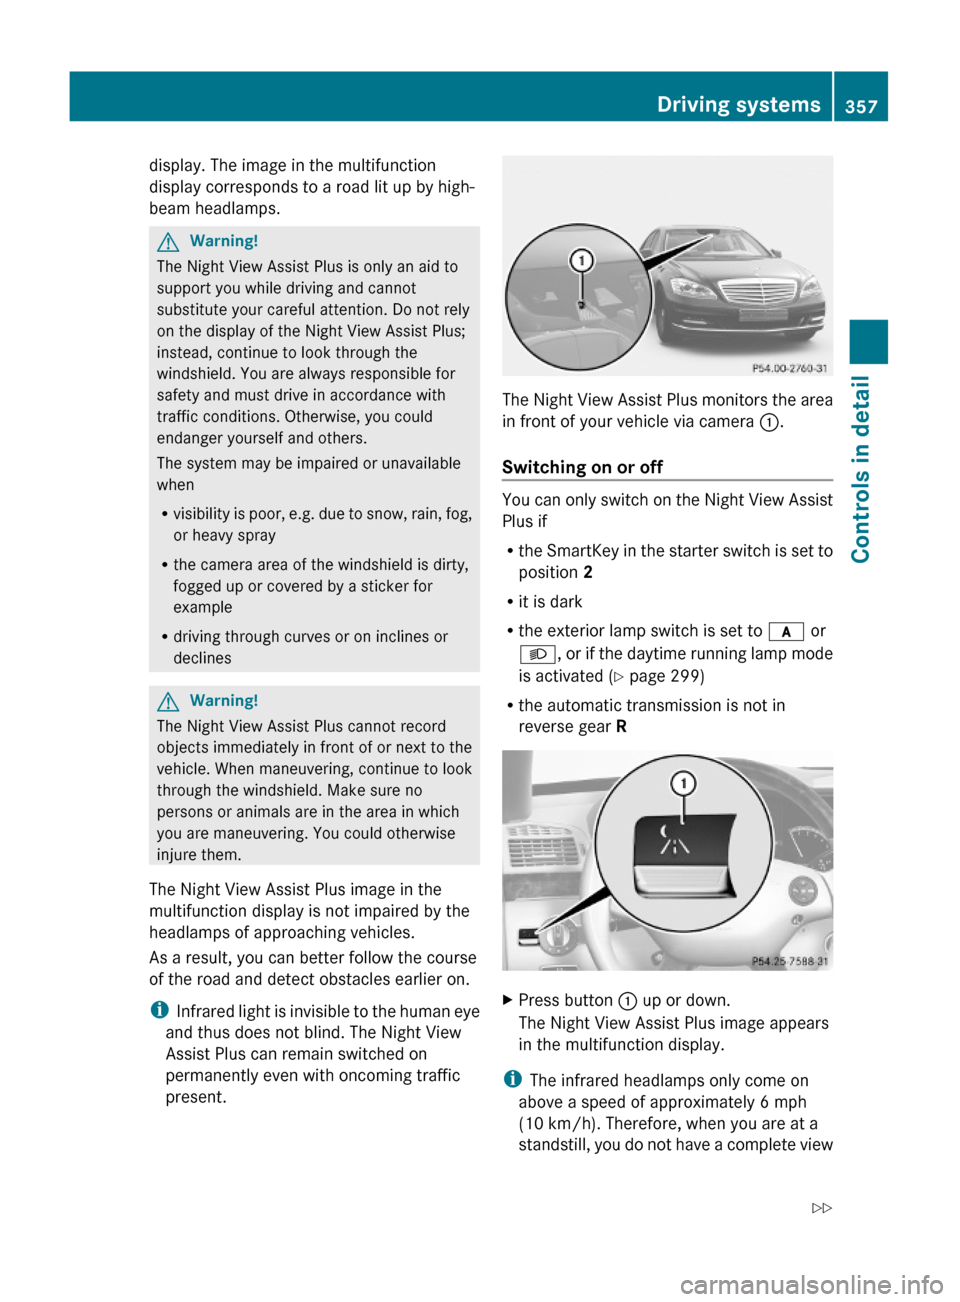
The Night View Assist Plus monitors the area
in front of your vehicle via camera :.
Switching on or off
You can only switch on the Night View Assist
Plus if
Rthe SmartKey in the starter switch is set to
position 2
Rit is dark
Rthe exterior lamp switch is set to c or
L, or if the daytime running lamp mode
is activated (Y page 299)
Rthe automatic transmission is not in
reverse gear R
XPress button : up or down.
The Night View Assist Plus image appears
in the multifunction display.
iThe infrared headlamps only come on
above a speed of approximately 6 mph
(10 km/h). Therefore, when you are at a
standstill, you do not have a complete view
Driving systems357Controls in detail221_AKB; 6; 20, en-USd2ugruen,Version: 2.11.8.12009-09-24T13:28:17+02:00 - Seite 357Z