MERCEDES-BENZ SL-Class 2001 R129 Owner's Manual
Manufacturer: MERCEDES-BENZ, Model Year: 2001, Model line: SL-Class, Model: MERCEDES-BENZ SL-Class 2001 R129Pages: 302, PDF Size: 7.21 MB
Page 141 of 302
137 Hardtop
Te ch n ica l
data Instruments
and controlsOperationDrivingInstrument
cluster displayPractical hints Car care Index Hardtop or
panorama roof (optional)
The removal or attachment of the hardtop can be carried
out by 2 persons.Removing hardtop
1. Engage parking brake.
2. Open doors.
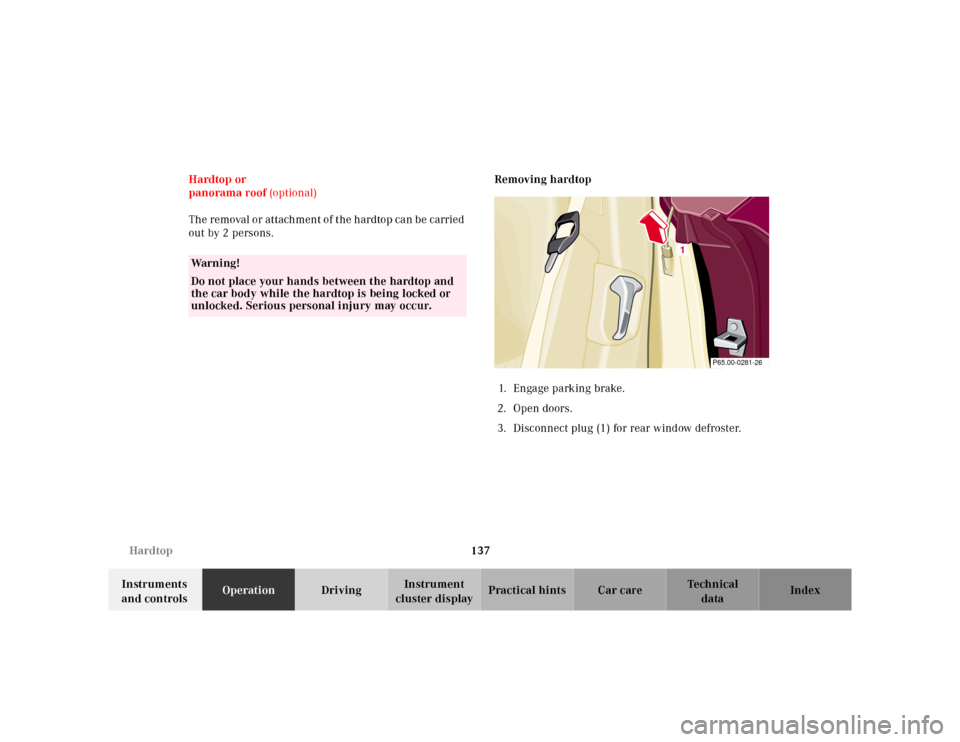
3. Disconnect plug (1) for rear window defroster.
Wa r n i n g !
Do not place your hands between the hardtop and
the car body while the hardtop is being locked or
unlocked. Serious personal injury may occur.
1
P65.00-0281-26
Page 142 of 302
138 Hardtop
Te ch n ica l
data Instruments
and controlsOperationDrivingInstrument
cluster displayPractical hints Car care Index
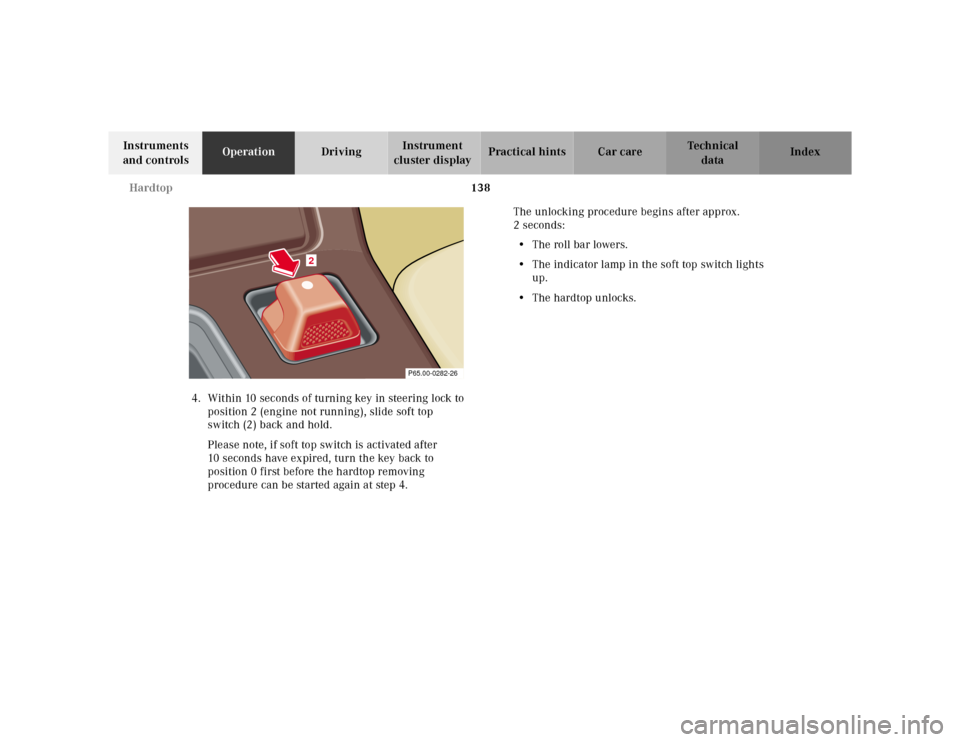
4. Within 10 seconds of turning key in steering lock to
position 2 (engine not running), slide soft top
switch (2) back and hold.
Please note, if soft top switch is activated after
10 seconds have expired, turn the key back to
position 0 first before the hardtop removing
procedure can be started again at step 4.The unlocking procedure begins after approx.
2 seconds:
• The roll bar lowers.
• The indicator lamp in the soft top switch lights
up.
•The hardtop unlocks.
P65.00-0282-26
2
Page 143 of 302
139 Hardtop
Te ch n ica l
data Instruments
and controlsOperationDrivingInstrument
cluster displayPractical hints Car care Index 5. After the hardtop has unlocked, remove the key
from the steering lock and turn radio and telephone
off to lower antenna. The indicator lamp in the soft
top switch should go out.
Important!
Removal of the key from the steering lock is a safety
measure ensuring that the key cannot be turned to
position 2 and the soft top switch is without
function should anybody push the switch forward
causing the roof locking mechanism to work. If
hands are at that moment between roof and car
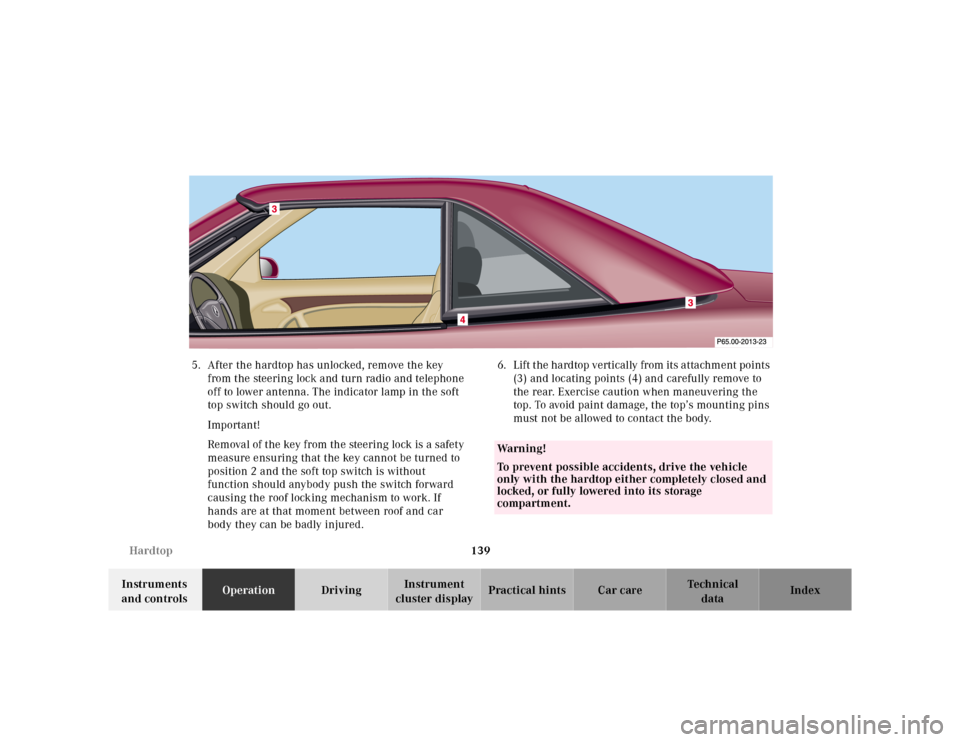
body they can be badly injured.6. Lift the hardtop vertically from its attachment points
(3) and locating points (4) and carefully remove to
the rear. Exercise caution when maneuvering the
top. To avoid paint damage, the top’s mounting pins
must not be allowed to contact the body.
Wa r n i n g !
To prevent possible accidents, drive the vehicle
only with the hardtop either completely closed and
locked, or fully lowered into its storage
compartment.
Page 144 of 302
140 Hardtop
Te ch n ica l
data Instruments
and controlsOperationDrivingInstrument
cluster displayPractical hints Car care Index
Attaching hardtop
1. Engage parking brake and turn key in steering lock
to position 2.
2. Lower roll bar, see page 118.
3. Open doors.
4. Turn radio and telephone off to lower power
antenna, turn key in steering lock to position 0 and
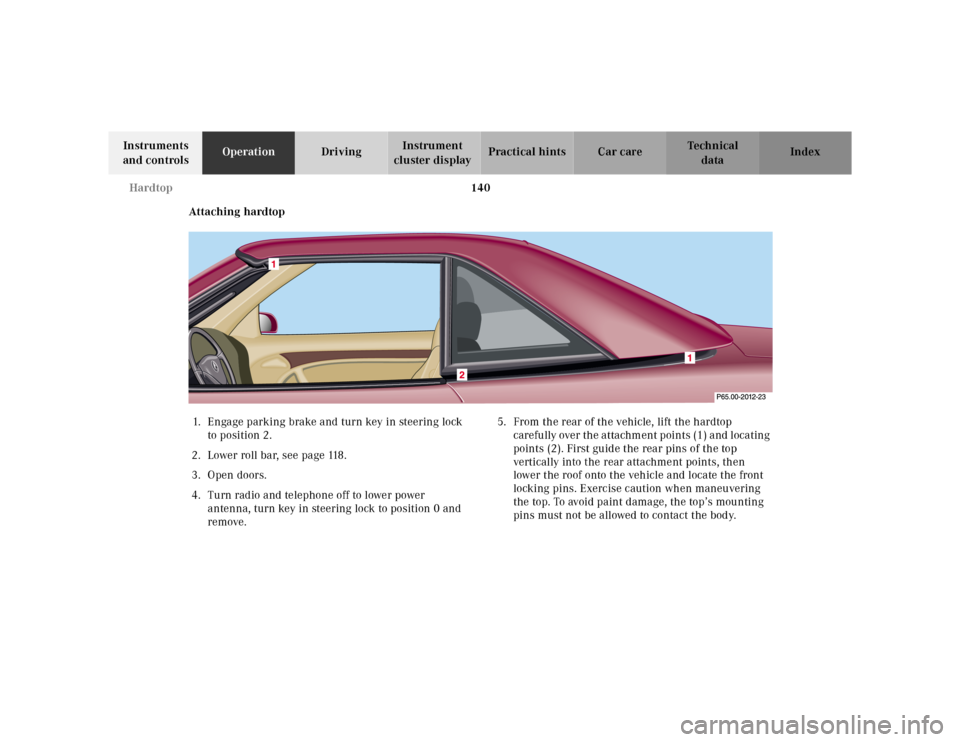
remove.5. From the rear of the vehicle, lift the hardtop
carefully over the attachment points (1) and locating
points (2). First guide the rear pins of the top
vertically into the rear attachment points, then
lower the roof onto the vehicle and locate the front
locking pins. Exercise caution when maneuvering
the top. To avoid paint damage, the top’s mounting
pins must not be allowed to contact the body.
Page 145 of 302
141 Hardtop
Te ch n ica l
data Instruments
and controlsOperationDrivingInstrument
cluster displayPractical hints Car care Index 6. Tu rn key in steering lock to position 2. Th e indica tor
lamp in the soft top switch lights up.
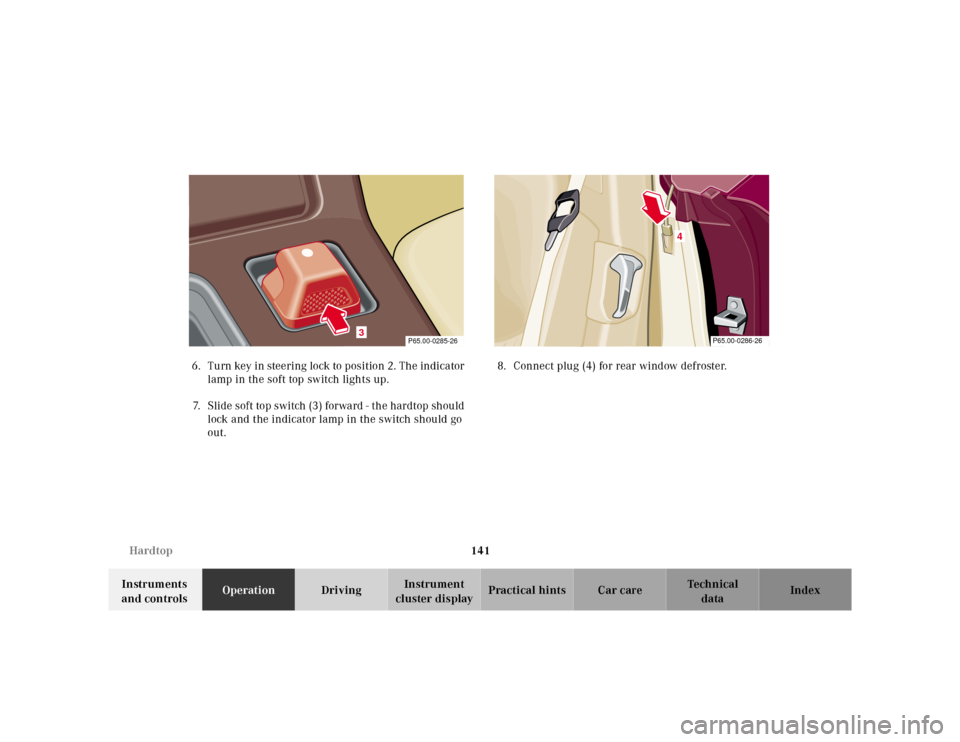
7. Slide soft top switch (3) forward - the hardtop should
lock and the indicator lamp in the switch should go
out.8. Connect plug (4) for rear window defroster.
3
P65.00-0285-26
P65.00-0286-26
4
Page 146 of 302
142 Hardtop
Te ch n ica l
data Instruments
and controlsOperationDrivingInstrument
cluster displayPractical hints Car care Index
Notes:
For safety reasons, the hardtop can only be unlocked
while the vehicle is standing still, and within
10 seconds after turning the key to steering lock
position 2 or beyond.
If the indicator lamp in the soft top switch blinks while
activating the switch, the battery voltage may be
insufficient - start engine to charge battery before
shutting engine off and attempting to unlock the roof
again.
If the indicator lamp continues to blink, remove the
hardtop (see page 137), and have the system checked at
your authorized Mercedes-Benz Center as soon as
possible.
Wa r n i n g !
The raising or lowering procedure of the soft top is
not completed if the indicator lamp in the soft top
switch:
• does not go out (with key in steering lock
position 2),
• blinks when starting to drive and an alarm
sounds.When safe to do so, immediately stop the vehicle
and lock the soft top:
• Turn key in steering lock to position 2,
• Slide soft/hardtop switch forward.Do not drive the car with the hardtop not locked, as
that could cause personal injury to you or your
passenger, or personal injury or property damage
to others.
Page 147 of 302
143 Soft top
Te ch n ica l
data Instruments
and controlsOperationDrivingInstrument
cluster displayPractical hints Car care Index Soft top
A minimum height clearance of 6.5 ft (2 m) is required
to lower or raise the soft top.
Do not lower a frozen soft top until thawed and dry.
Doing so may result in damage not covered by the
Mercedes-Benz Limited Warranty.
To prevent m ildew, t he soft top must be dry before
lowering it into the storage compartment.
The soft top should not be lowered or raised at outside
temperatures below +5°F (-15°C), since the material
becomes less pliable with lower temperatures.
The lowering or raising procedure is immediately
interrupted by releasing the soft top switch.
Wa r n i n g !
Before operating the soft top switch make sure that
no persons due to inattention are injured by the
moving parts (roll bar, soft top frame and soft top
lid).Hands must never be placed near the roll bar, soft
top frame, upper windshield area or soft top storage
compartment while the soft top is being locked or
unlocked. Serious personal injury may occur.
Page 148 of 302
144 Soft top
Te ch n ica l
data Instruments
and controlsOperationDrivingInstrument
cluster displayPractical hints Car care Index
Lowering soft top
1. Engage parking brake.
2. Turn key in steering lock to position 2.
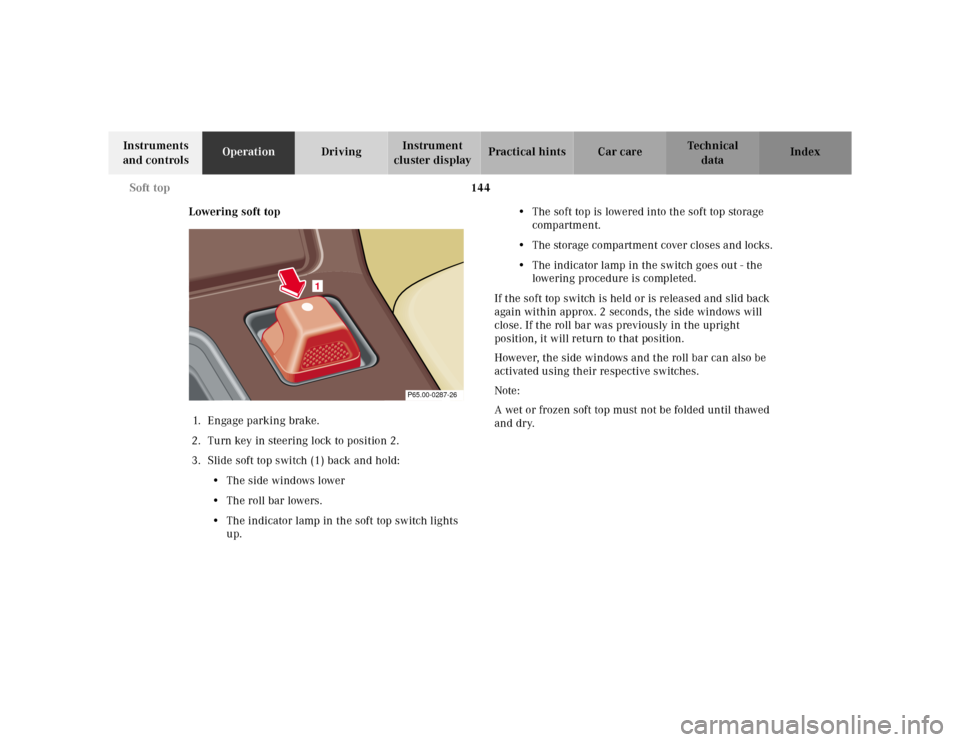
3. Slide soft top switch (1) back and hold:
• The side windows lower
• The roll bar lowers.
• The indicator lamp in the soft top switch lights
up.• The soft top is lowered into the soft top storage
compartment.
• The storage compartment cover closes and locks.
• The indicator lamp in the switch goes out - the
lowering procedure is completed.
If the soft top switch is held or is released and slid back
again within approx. 2 seconds, the side windows will
close. If the roll bar was previously in the upright
position, it will return to that position.
However, the side windows and the roll bar can also be
activated using their respective switches.
Note:
A wet or frozen soft top must not be folded until thawed
and dry.
1
P65.00-0287-26
Page 149 of 302
145 Soft top
Te ch n ica l
data Instruments
and controlsOperationDrivingInstrument
cluster displayPractical hints Car care Index Raising soft top1. Engage parking brake
2. Turn key in steering lock to position 2.
3. Fold down sun visors.
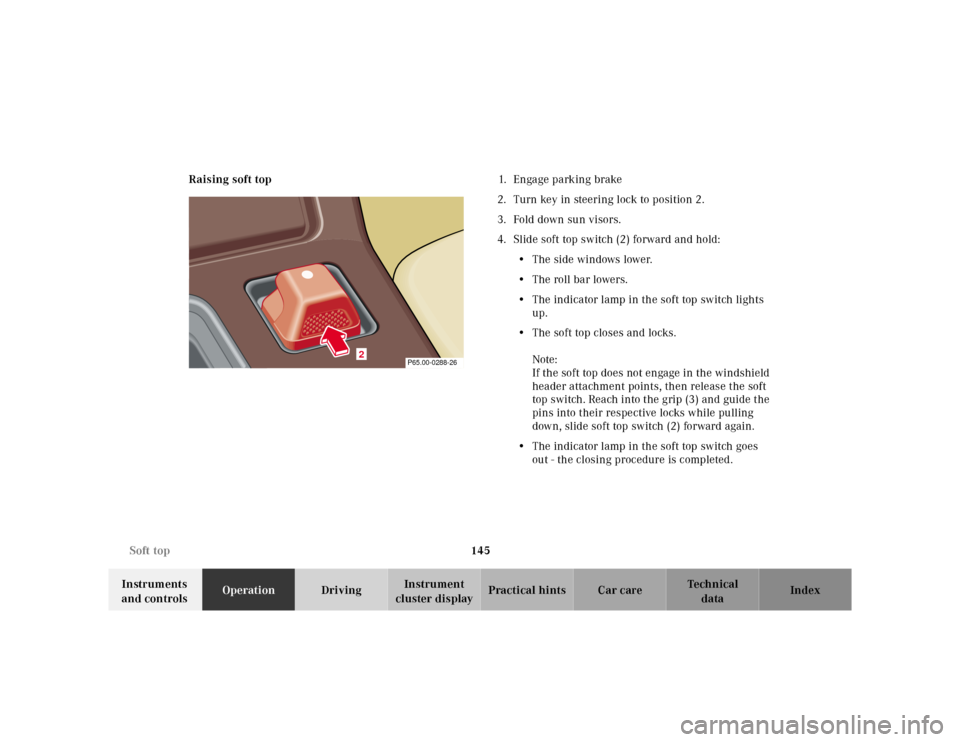
4. Slide soft top switch (2) forward and hold:
• The side windows lower.
• The roll bar lowers.
• The indicator lamp in the soft top switch lights
up.
• The soft top closes and locks.
Note:
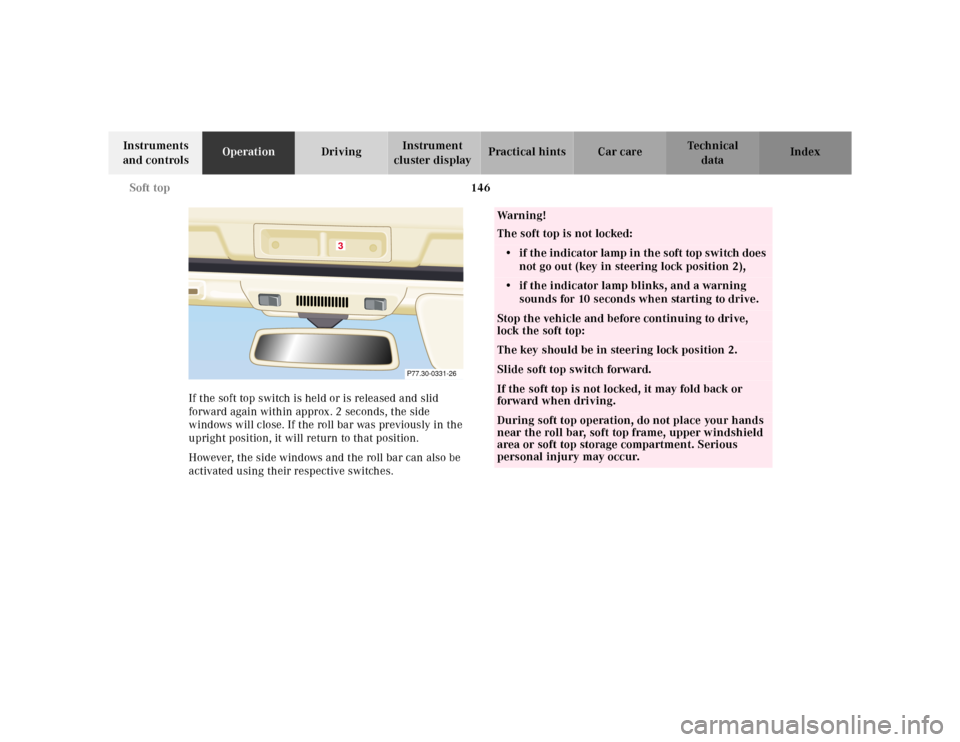
If the soft top does not engage in the windshield
header attachment points, then release the soft
top switch. Reach into the grip (3) and guide the
pins into their respective locks while pulling
down, slide soft top switch (2) forward again.
• The indicator lamp in the soft top switch goes
out - the closing procedure is completed.
2
P65.00-0288-26
Page 150 of 302
146 Soft top
Te ch n ica l
data Instruments
and controlsOperationDrivingInstrument
cluster displayPractical hints Car care Index
If the soft top switch is held or is released and slid
forward again within approx. 2 seconds, the side
windows will close. If the roll bar was previously in the
upright position, it will return to that position.
However, the side windows and the roll bar can also be
activated using their respective switches.
3
P77.30-0331-26
Wa r n i n g !
The soft top is not locked:• if the indicator lamp in the soft top switch does
not go out (key in steering lock position 2),• if the indicator lamp blinks, and a warning
sounds for 10 seconds when starting to drive.Stop the vehicle and before continuing to drive,
lock the soft top:The key should be in steering lock position 2.Slide soft top switch forward.If the soft top is not locked, it may fold back or
forward when driving.During soft top operation, do not place your hands
near the roll bar, soft top frame, upper windshield
area or soft top storage compartment. Serious
personal injury may occur.