odometer MERCEDES-BENZ SL CLASS 2011 Owners Manual
[x] Cancel search | Manufacturer: MERCEDES-BENZ, Model Year: 2011, Model line: SL CLASS, Model: MERCEDES-BENZ SL CLASS 2011Pages: 316, PDF Size: 6.55 MB
Page 14 of 316

ESP®
.............................................. 228
Fog lamps .............................. 250, 252
Gas cap .......................................... 249
Gear selector lever ........................234
High-beam lamps ........................... 251
Hood .............................................. 241
License plate lamps .......................251
Light sensor ................................... 251
Low-beam lamps ............................ 251
Parking brake ................................ 239
Parking lamps ................................ 251
Passenger front air bag ..................229
Reserve fuel ................................... 249
Retractable hardtop .......................241
Reverse lamp ................................. 249
Roll bar .................................... 51, 240
Side marker lamps .........................250
SmartKey ....................................... 242
SmartKey with KEYLESS-GO ..........242
SRS ................................................ 240
Tail lamps ...................................... 252
Tele Aid .......................................... 240
Tire inflation pressure ............234, 253
Tire pressure monitor ....................234
Tires ...................................... 234, 253
Trunk ............................................. 241
Turn signals ................................... 253
Washer fluid ................................... 243
Multifunction steering wheel
Adjustment ...................................... 84
Buttons .......................................... 113
Cleaning ......................................... 220
Easy-entry/exit feature ...........85, 127
Gearshift control ............................ 108
Memory function .............................. 88
Overview .......................................... 27
N
Navigation menu ............................... 120
Navigation system see Separate operating instructions
Nets, parcel ....................................... 161
Night security illumination .............. 125
Normal occupant weight .................. 206
Number, vehicle identification
(VIN) ................................................... 295
O
Occupant Classification System see OCS (Occupant Classification
System)
Occupant distribution ....................... 206
Occupant safety
Air bags ........................................... 39
Children and air bags .......................39
Children in the vehicle .....................51
Fastening the seat belts ................... 48
Infant and child restraint systems .... 52
Introduction ..................................... 38
OCS (Occupant Classification
System) ........................................... 43
Passenger front air bag off
indicator lamp .......................... 43, 266
Roll bar ............................................ 51
Seat belts .................................. 40, 46
OCS (Occupant Classification
System) ................................................ 43
Self-test ........................................... 45
Odometer ........................................... 115
Oil, oil level see Engine oil
On-board computer
see Control system
One-touch gearshifting ..................... 108
Operating safety .................................. 21
Ornamental moldings, cleaning ....... 218
Overhead control panel ...................... 35
P
Paintwork, cleaning .......................... 216
Paintwork code ................................. 295
Panic alarm .......................................... 54
Panorama roof
Sunshade ....................................... 160
Parcel nets ......................................... 161
Parking ............................................... 101
Parktronic system ..........................144
Parking and standing lamp
Replacing bulbs ............................. 272
Parking brake .................................... 102
Messages in the multifunction
display ........................................... 239
12Index230_AKB; 6; 22, en-USd2ureepe,Version: 2.11.8.12009-07-28T18:49:58+02:00 - Seite 12
Page 18 of 316

Tire Identification Numbersee TIN
Tire inflation pressure
Checking ........................................ 189
Important notes on ........................188
Label on the inside of fuel filler
flap ................................................ 188
Placard on driver’s door B-pillar .....193
Tire labeling ....................................... 200
Tire load rating .................................. 206
Tire ply composition and material
used .................................................... 207
Tires ........................................... 186, 299
Advanced Tire Pressure
Monitoring System (Advanced
TPMS) ............................................ 190
Air pressure ................................... 187
Care and maintenance ...................197
Cleaning ......................................... 198
Direction of rotation, spinning .......197
Important notes on tire inflation
pressure ........................................ 188
Inflation pressure ........................... 189
Information placard .......................193
Inspection ...................................... 198
Labeling ......................................... 200
Load index ............................. 201, 206
Load rating .................................... 206
Messages in the multifunction
display ................................... 234, 253
MOExtended .................................. 300
Ply composition and material
used ............................................... 207
Problems under-/overinflation ......189
Retreads ........................................ 186
Rims and tires (technical data) ......299
Rotation ......................................... 200
Service life ..................................... 198
Sizes .............................................. 299
Snow chains .................................. 208
Speed rating .......................... 202, 207
Storing ........................................... 198
Temperature .......................... 188, 200
Terminology ................................... 205
Tire Identification Number .............207
TPMS low tire pressure/
malfunctiontelltale
.......................................... 31, 32, 265
Traction ................................. 199, 207
Tread ............................................. 207
Tread depth ........................... 198, 207
Treadwear ...................................... 199
Treadwear indicators .............198, 207
Vehicle maximum load on ..............207
Wear pattern .................................. 200
Winter tires ............................ 207, 299
Tire speed rating ....................... 202, 207
Total load limit ................................... 207
Tow-away alarm .................................. 64
Towing
Towing eye bolt .............................. 288
Vehicle ........................................... 287
Towing eye bolt ................................. 288
Traction ...................................... 199, 207
Transmission see Automatic transmission
Transmission fluid level .................... 184
Transmission gear selector lever see Gear selector lever
Transmission positions .................... 104
Traveling abroad ............................... 212
Tread (tires) ....................................... 207
Tread depth (tires) .................... 198, 207
Treadwear .......................................... 199
Treadwear indicators (tires) .... 198, 207
Trip computer menu ......................... 128
Trip odometer, resetting ................... 113
Trunk
Closing ............................................. 75
Load assist .................................... 164
Messages in the multifunction
display ........................................... 241
Opening ........................................... 73
Opening/closing system ...........74, 76
Trunk lid emergency release ............77
Unlocking manually .......................268
Valet locking .................................... 77
Turning off the engine ...................... 102
Turn signals ......................................... 92
Cleaning lenses ............................. 218
Indicator lamps ................................ 3016Index230_AKB; 6; 22, en-USd2ureepe,Version: 2.11.8.12009-07-28T18:49:58+02:00 - Seite 16
Page 19 of 316

Messages in the multifunction
display ........................................... 253
Replacing bulbs ............................. 272
U
Uniform Tire Quality Grading
Standards .................................. 199, 207
Units
Selecting digital speedometer
display mode ................................. 123
Selecting speedometer/
odometer display mode .................123
Unleaded gasoline, premium ........... 306
Unlocking the vehicle
KEYLESS-GO .................................... 69
Manually ........................................ 267
SmartKey ......................................... 68
Upholstery, cleaning ......................... 221
Useful features .................................. 164
V
Valet locking ........................................ 77
Vehicle
Battery ........................................... 283
Care ............................................... 215
Control system .............................. 113
Identification Number (VIN) ...........294
Locking/unlocking ........................... 68
Lowering (wheel change) ...............282
Modifications and alterations,
Operating safety .............................. 21
Towing ........................................... 287
Unlocking/locking manually ..........267
Vehicle dimensions
see Vehicle specification
Vehicle Identification Number
(VIN) ................................................... 294
Vehicle jack see Jack
Vehicle lighting .................................... 89
Vehicle loading
Load limit ....................................... 195
Terminology ................................... 205
Vehicle maximum load on the tire ... 207
Vehicle specification
SL 550 ........................................... 296
SL 600 ........................................... 296
SL 63 AMG .................................... 297
SL 65 AMG .................................... 298
Vehicle status message memory .... 120
Vehicle tool kit .................................. 224
Vehicle washing see Vehicle care
Vehicle weights
see Vehicle specification
W
Warning lamps see Lamps, Indicator and warning
Warning sounds
Distance warning function .............140
Distronic ........................................ 135
Driver’s or passenger’s seat belt .....48
Parking brake ................................ 239
Parktronic system ..........................147
Seat belt telltale ............................ 256
Warranty coverage ............................ 294
Washer and headlamp cleaning
system ................................................ 309
Washer fluid
Messages in the multifunction
display ........................................... 243
Mixing ratio .................................... 309
Refilling .......................................... 185
Washing the vehicle .......................... 215
Wear pattern (tires) .......................... 200
Weights (vehicle) see Vehicle specification
Wheel
Changing ....................................... 276
Removing ....................................... 279
Spare ............................................. 276
Tightening torque ........................... 282
Wheels, sizes ..................................... 299
Wheels, Tires and .............................. 186
Windows see Power windows
Windows, cleaning ............................ 219
Wind screen ....................................... 157
Index17230_AKB; 6; 22, en-USd2ureepe,Version: 2.11.8.12009-07-28T18:49:58+02:00 - Seite 17
Page 22 of 316

Rhode Island, and Vermont Emission
Control System Warranty
R State Warranty Enforcement Laws (Lemon
Laws)
Important notice for California retail
buyers and lessees of Mercedes-Benz
automobiles
Under California law you may be entitled to a
replacement of your vehicle or a refund of the
purchase price or lease price, if after a
reasonable number of repair attempts
Mercedes-Benz USA, LLC and/or its
authorized repair or service facilities fail to fix
one or more substantial defects or
malfunctions in the vehicle that are covered
by its express warranty. During the period of
18 months from original delivery of the
vehicle or the accumulation of 18 000 miles
(approximately 29 000 km) on the odometer
of the vehicle, whichever occurs first, a
reasonable number of repair attempts is
presumed for a retail buyer or lessee if one or
more of the following occurs:
(1)the same substantial defect or
malfunction results in a condition that is
likely to cause death or serious bodily
injury if the vehicle is driven, that defect
or malfunction has been subject to repair
two or more times, and you have directly
notified Mercedes-Benz USA, LLC in
writing of the need for its repair,(2)the same substantial defect or
malfunction of a less serious nature than
category (1) has been subject to repair
four or more times and you have directly
notified us in writing of the need for its
repair, or(3)the vehicle is out of service by reason of
repair of the same or different substantial
defects or malfunctions for a cumulative
total of more than 30 calendar days.
Written notification should not be sent to a
dealer, it should be addressed to
Mercedes-Benz USA, LLC
Customer Assistance Center
One Mercedes Drive
Montvale, NJ 07645-0350
Maintenance
The Maintenance Booklet describes all the
necessary maintenance work which should
be performed at regular intervals.
Always have the Maintenance Booklet with
you when you take the vehicle to an
authorized Mercedes-Benz Center for
service. The service advisor will record each
service in the booklet for you.
Roadside Assistance
The Mercedes-Benz Roadside Assistance
Program provides factory-trained technical
help in the event of a breakdown. Calls to the
toll-free Roadside Assistance number
1-800-FOR-MERCedes (1-800-367-6372)
(in the USA) 1-800-387-0100 (in Canada)
will be answered by Mercedes-Benz
Customer Assistance Representatives
24 hours a day, 365 days a year.
For additional information refer to the
Mercedes-Benz Roadside Assistance
Program brochure (in the USA) or the
Roadside Assistance section of the Service
and Warranty Information Booklet (in
Canada) in your vehicle literature portfolio.
Change of address or ownership
If you change your address, be sure to send
in the “Change of Address Notice” found in
the Service and Warranty Information
Booklet, or simply call the Mercedes-Benz
Customer Assistance Center (in the USA) at
1-800-FOR-MERCedes (1-800-367-6372), or
Customer Service (in Canada) at
1-800-387-0100. This will assist us in
20Introduction230_AKB; 6; 22, en-USd2ureepe,Version: 2.11.8.12009-07-28T18:49:58+02:00 - Seite 20
Page 115 of 316

Doing so may cause serious engine damage
which is not covered by the Mercedes-Benz
Limited Warranty.
Resetting trip odometer
XMake sure you are viewing the standard
display (Y page 116) in the multifunction
display.
XPress and hold the reset button in the
instrument cluster (Y page 111) until the
trip odometer is reset.
Tachometer
The red marking on the tachometer
(Y page 30) denotes excessive engine speed.
! Avoid driving at excessive engine speeds,
as it may result in serious engine damage
that is not covered by the Mercedes-Benz
Limited Warranty.
To help protect the engine, the fuel supply is
interrupted if the engine is operated within
the red marking.
Control system
Introduction
The control system is activated as soon as the
starter switch is in position 1.
The control system enables you to call up
information about your vehicle and to change
vehicle settings.
For example, you can use the control system
to find out when your vehicle is next due for
maintenance service, to set the language for
messages in the instrument cluster display,
and much more.
GWarning!
A driver’s attention to the road and traffic
conditions must always be his/her primary
focus when driving.
For your safety and the safety of others,
selecting features through the multifunction
steering wheel should only be done by the
driver when traffic and road conditions permit
it to be done safely.
Bear in mind that at a speed of just 30 mph
(approximately 50 km/h), your vehicle is
covering a distance of 44 feet (approximately
14 m) every second.
The control system relays information to the
multifunction display.
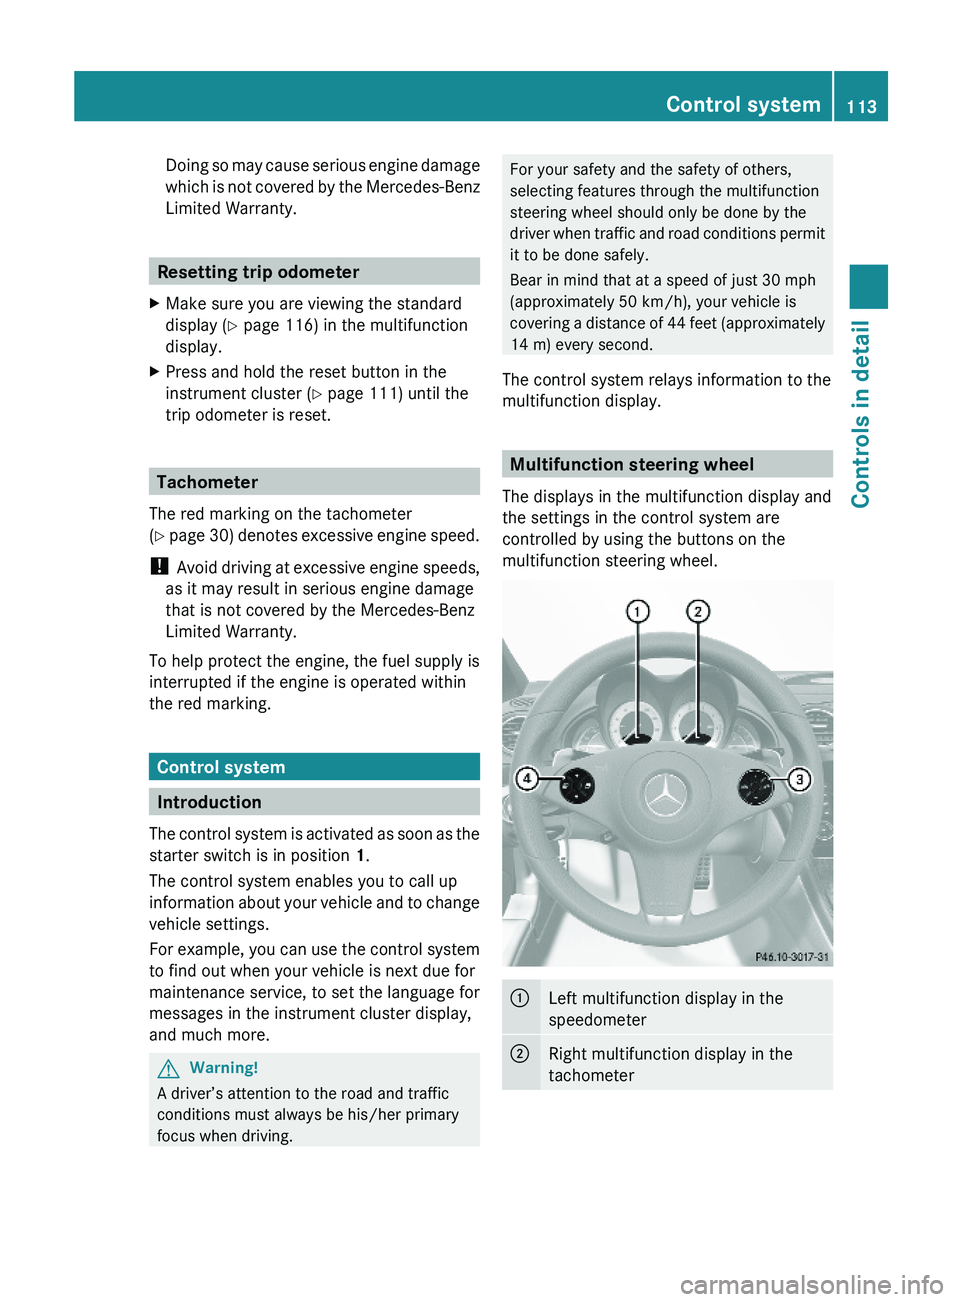
Multifunction steering wheel
The displays in the multifunction display and
the settings in the control system are
controlled by using the buttons on the
multifunction steering wheel.
\000FLeft multifunction display in the
speedometer
\000GRight multifunction display in the
tachometer
Control system113Controls in detail230_AKB; 6; 22, en-USd2ureepe,Version: 2.11.8.12009-07-28T18:49:58+02:00 - Seite 113Z
Page 116 of 316

008APress button007Fto end a call
to reject an incoming call006Ato answer a call
to dial 10
to redial 10Press button005A
005Bto select submenus in the
Settings menu
to set values
to operate the RACETIMER 11
to set the volume0088Press button0059
0058to select next or previous menuPress button briefly0029
002Dto move within a menu
Within Audio/DVD menu to
select previous or next track,
scene or stored station
Within Telephone menu to
switch to the phone book and
select a name or numberPress and hold button0029
002DWithin Audio/DVD menu to
select previous or next track
with quick search or to select
previous or next station in
station list or wave band
Within Telephone menu to
start the quick search in the
phone book
Depending on the selected menu, pressing
the buttons on the multifunction steering
wheel will alter what appears in the
multifunction display.
The information available in the multifunction
display is arranged in menus and
accompanying functions and submenus.
The individual functions are then found within
the relevant menu (radio or CD operations
under Audio/DVD menu, for example).
These functions serve to call up relevant
information or to customize the settings for
your vehicle.
It is helpful to think of the menus, and the
functions within each menu, as being
arranged in a circular pattern.XPress button 0059 or 0058 repeatedly to
pass through each menu one after the
other.XPress button 002D or 0029 repeatedly to
pass through each function display, one
after the other, in the current menu.
In the Settings menu, instead of functions,
you will find a number of submenus for calling
up and changing settings. For instructions on
using these submenus, see “Settings menu”
( Y page 121).
The number of menus available in the system
depends on which optional equipment is
installed in your vehicle.
Multifunction display
The multifunction display consists of the
display fields in the speedometer and the
tachometer. In its default state, the left
multifunction display shows the main
odometer and the outside temperature, while
the trip odometer appears in the right
multifunction display. This default setting is
referred to as the standard display.
10 Function only available in telephone menu.
11 AMG vehicles only.114Control systemControls in detail
230_AKB; 6; 22, en-USd2ureepe,Version: 2.11.8.12009-07-28T18:49:58+02:00 - Seite 114
Page 124 of 316

XPress the reset button in the instrument
cluster (Y page 111) for approximately
3 seconds.
The request to press the reset button once
more to confirm appears in the right
multifunction display.
XPress the reset button once more.
The settings you have changed will not be
reset unless you confirm the action by
pressing the reset button a second time.
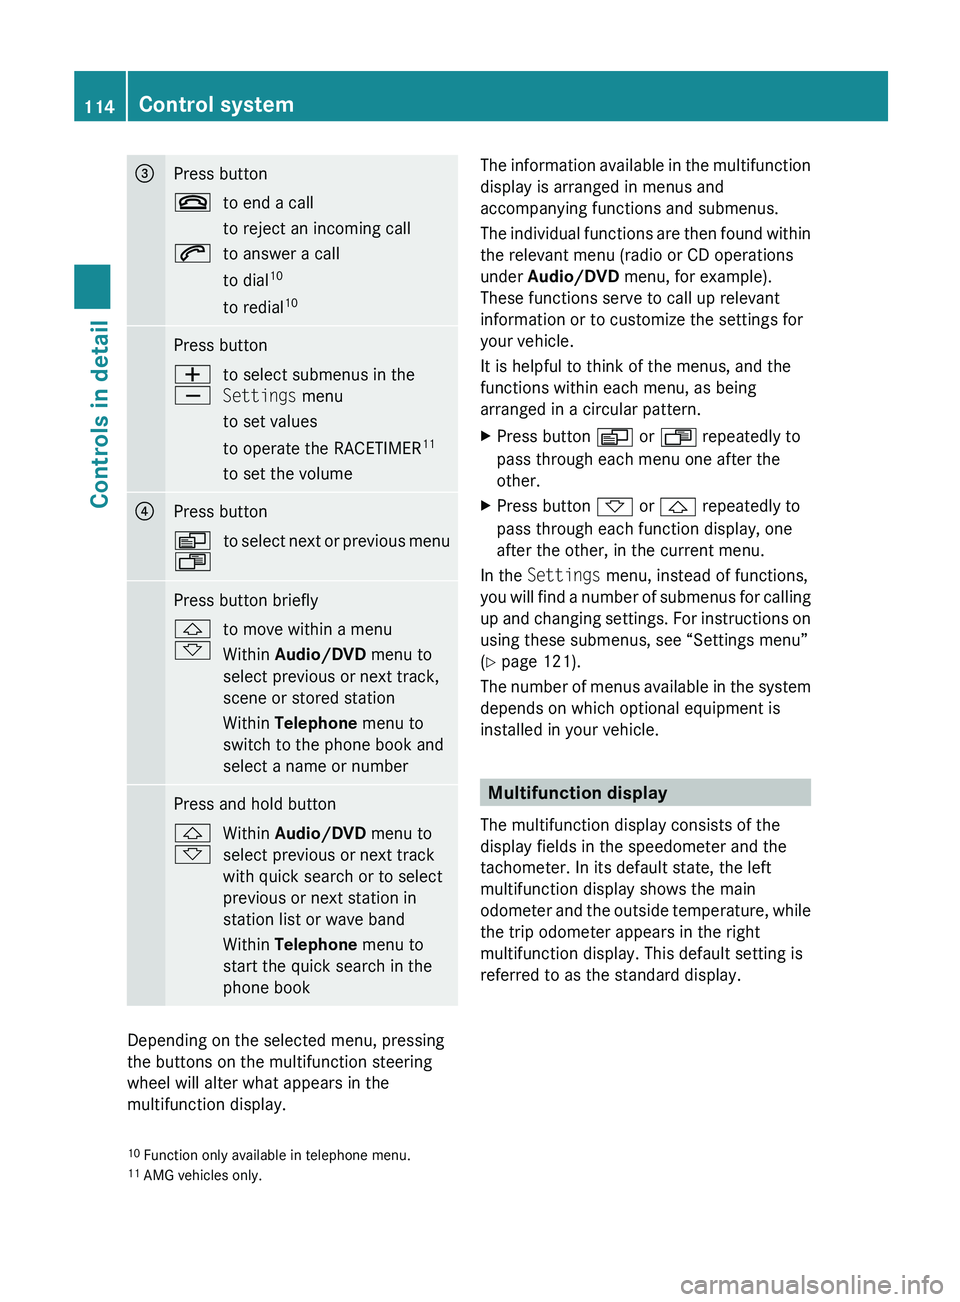
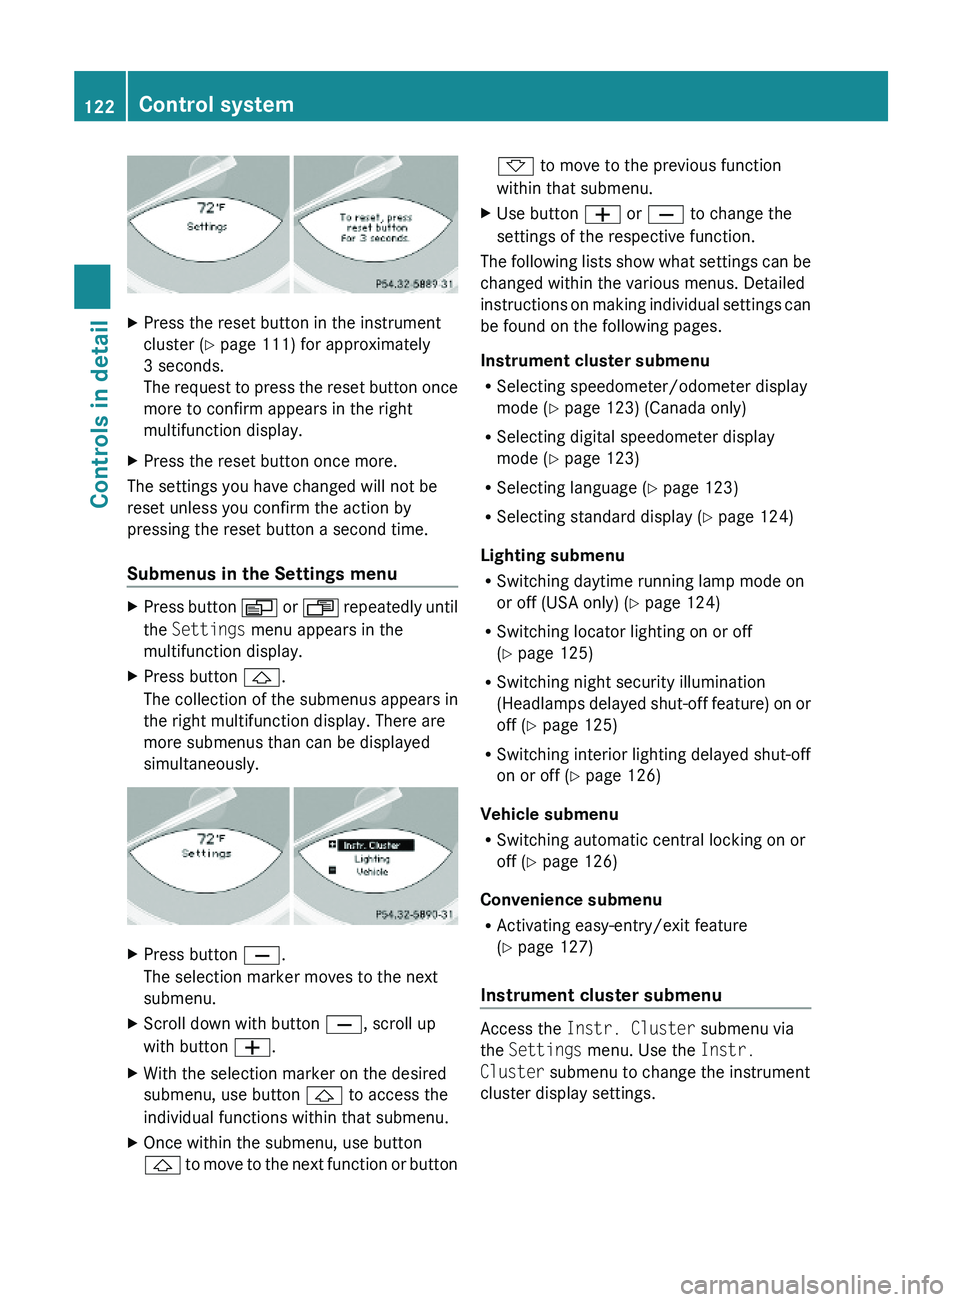
Submenus in the Settings menu
XPress button \000Y or \000X repeatedly until
the Settings menu appears in the
multifunction display.
XPress button \000\).
The collection of the submenus appears in
the right multifunction display. There are
more submenus than can be displayed
simultaneously.
XPress button \000[.
The selection marker moves to the next
submenu.
XScroll down with button \000[, scroll up
with button \000Z.
XWith the selection marker on the desired
submenu, use button \000\) to access the
individual functions within that submenu.
XOnce within the submenu, use button
\000\) to move to the next function or button
\000- to move to the previous function
within that submenu.
XUse button \000Z or \000[ to change the
settings of the respective function.
The following lists show what settings can be
changed within the various menus. Detailed
instructions on making individual settings can
be found on the following pages.
Instrument cluster submenu
RSelecting speedometer/odometer display
mode (Y page 123) (Canada only)
RSelecting digital speedometer display
mode (Y page 123)
RSelecting language (Y page 123)
RSelecting standard display (Y page 124)
Lighting submenu
RSwitching daytime running lamp mode on
or off (USA only) (Y page 124)
RSwitching locator lighting on or off
(Y page 125)
RSwitching night security illumination
(Headlamps delayed shut-off feature) on or
off (Y page 125)
RSwitching interior lighting delayed shut-off
on or off (Y page 126)
Vehicle submenu
RSwitching automatic central locking on or
off (Y page 126)
Convenience submenu
RActivating easy-entry/exit feature
(Y page 127)
Instrument cluster submenu
Access the Instr. Cluster submenu via
the Settings menu. Use the Instr.
Cluster submenu to change the instrument
cluster display settings.
122Control systemControls in detail
230_AKB; 6; 22, en-USd2ureepe,Version: 2.11.8.12009-07-28T18:49:58+02:00 - Seite 122
Page 125 of 316

The following functions are available:
RSelecting speedometer/odometer display
mode (Y page 123) (Canada only)
RSelecting digital speedometer display
mode (Y page 123)
RSelecting language (Y page 123)
RSetting standard display (Y page 124)
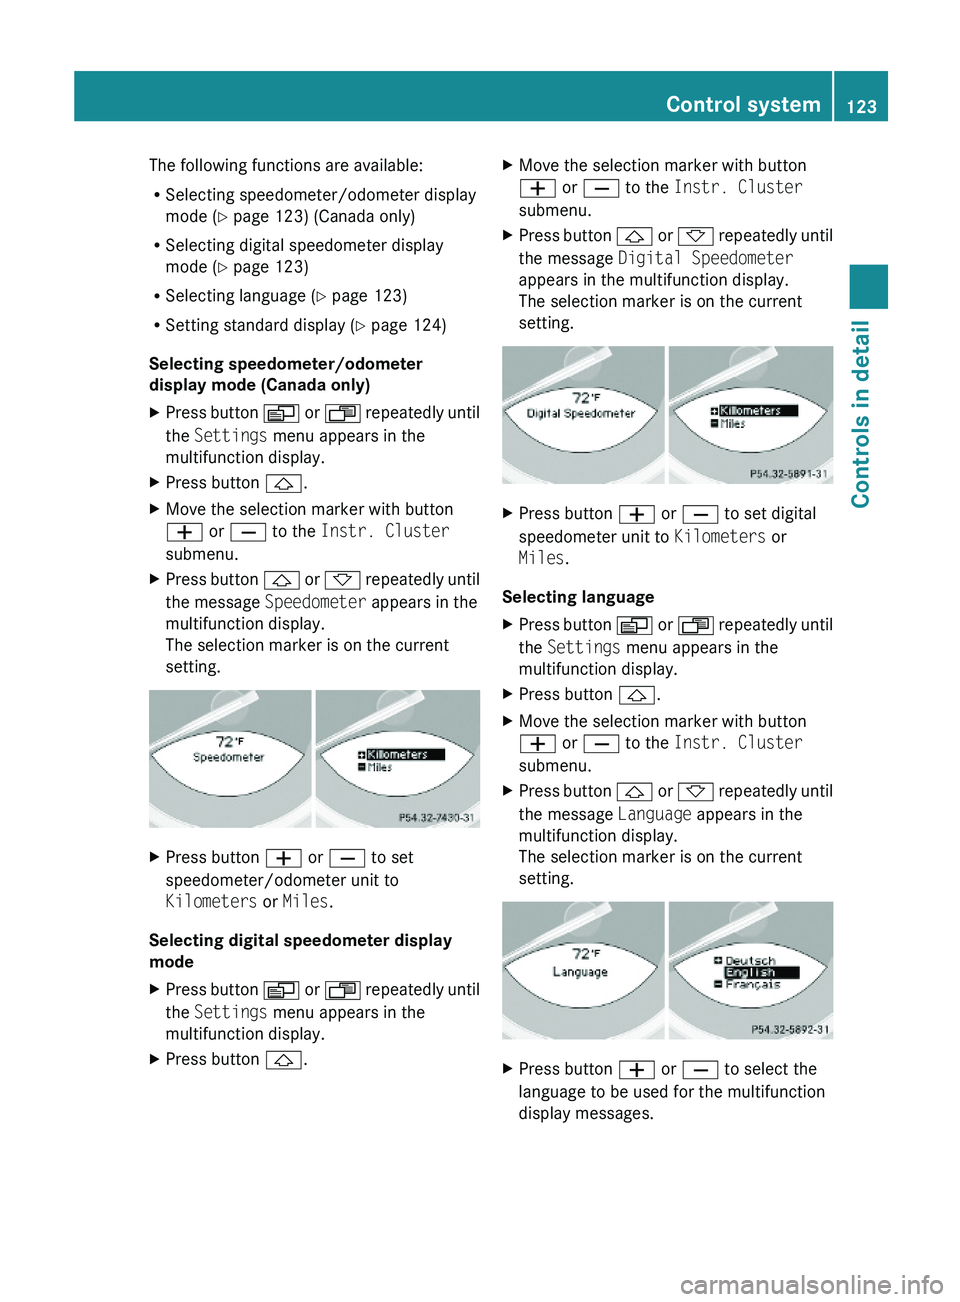
Selecting speedometer/odometer
display mode (Canada only)
XPress button \000Y or \000X repeatedly until
the Settings menu appears in the
multifunction display.
XPress button \000\).XMove the selection marker with button
\000Z or \000[ to the Instr. Cluster
submenu.
XPress button \000\) or \000- repeatedly until
the message Speedometer appears in the
multifunction display.
The selection marker is on the current
setting.
XPress button \000Z or \000[ to set
speedometer/odometer unit to
Kilometers or Miles.
Selecting digital speedometer display
mode
XPress button \000Y or \000X repeatedly until
the Settings menu appears in the
multifunction display.
XPress button \000\).XMove the selection marker with button
\000Z or \000[ to the Instr. Cluster
submenu.
XPress button \000\) or \000- repeatedly until
the message Digital Speedometer
appears in the multifunction display.
The selection marker is on the current
setting.
XPress button \000Z or \000[ to set digital
speedometer unit to Kilometers or
Miles.
Selecting language
XPress button \000Y or \000X repeatedly until
the Settings menu appears in the
multifunction display.
XPress button \000\).XMove the selection marker with button
\000Z or \000[ to the Instr. Cluster
submenu.
XPress button \000\) or \000- repeatedly until
the message Language appears in the
multifunction display.
The selection marker is on the current
setting.
XPress button \000Z or \000[ to select the
language to be used for the multifunction
display messages.
Control system123Controls in detail230_AKB; 6; 22, en-USd2ureepe,Version: 2.11.8.12009-07-28T18:49:58+02:00 - Seite 123Z