wipers MERCEDES-BENZ SL CLASS 2011 Owners Manual
[x] Cancel search | Manufacturer: MERCEDES-BENZ, Model Year: 2011, Model line: SL CLASS, Model: MERCEDES-BENZ SL CLASS 2011Pages: 316, PDF Size: 6.55 MB
Page 15 of 316

Parking position
Exterior rear view mirrors ................87
Transmission position ....................104
Parktronic system
Cleaning system sensors ...............218
Malfunction .................................... 147
Minimum distance .........................146
Sensor range ................................. 145
Switching on/off ........................... 147
System sensors ............................. 145
Warning indicators ...................28, 146
Parts service ...................................... 294
PASS AIR BAG OFF indicator lamp see Passenger front air bag off
indicator lamp
Passenger front air bag ...................... 41
Messages in the multifunction
display ........................................... 229
Passenger front air bag off
indicator lamp ....................... 33, 43, 266
Passenger safety see Occupant safety
Pedals ................................................. 209
Phone see Telephone
Plastic parts, cleaning ...................... 220
Power assistance .............................. 210
Power closing assist for trunk lid ...... 78
Power outlet ...................................... 166
Power seats see Seats
Power washer .................................... 216
Power windows ................................... 96
Cleaning ......................................... 219
Door windows .................................. 97
Operation ......................................... 96
Rear side windows ...........................97
Synchronizing .................................. 98
Practical hints ................................... 224
Problems
While driving .................................. 101
With vehicle ..................................... 22
With wipers ...................................... 96
Product information ............................ 19
Production options weight ............... 206Program mode selector dial
(SL 63 AMG)
Automatic shift program ................107
Manual shift program ..................... 109
Program mode selector switch
Automatic shift
program ................................. 106, 107
Manual shift program ..................... 109
Proximity key
see Key, SmartKey
PSI (air pressure unit) ....................... 206
R
RACE START (SL 63 AMG) ................. 141
RACETIMER ........................................ 117
Radio
Selecting stations ..........................119
Radio transmitters ............................ 213
Rain sensor see Intermittent wiping
Rear axle oil ....................................... 304
Rear fog lamp see Fog lamps
Rear lamps
see Tail lamps
Rear window defroster ..................... 155
Recommended tire inflation
pressure ..................................... 187, 206
Refrigerant, air conditioning ............ 306
Refueling ............................................ 178
Regular checks .................................. 180
Reminder, Seat belt see Seat belts, Telltale
Remote control
see Key, SmartKey
Remote door unlock (Tele Aid) ......... 171
Replacing
Key .................................................. 72
Replacing bulbs ................................. 271
Reporting safety defects .................... 22
Research Octane Number see RON
Reserve fuel
Messages in the multifunction
display ........................................... 249
Warning
lamp .................................. 31, 32, 262
Index13230_AKB; 6; 22, en-USd2ureepe,Version: 2.11.8.12009-07-28T18:49:58+02:00 - Seite 13
Page 20 of 316

Windshield
Cleaning wiper blades .................... 219
Defogging ...................................... 153
Washer fluid ................................... 309
Wipers ............................................. 95
Windshield wipers
Replacing wiper blades ..................275
Winter driving
Instructions .................................... 208
Snow chains .................................. 208
Tires ............................................... 207
Winter tires ................................ 207, 299
Wood trims, cleaning ........................ 22118Index230_AKB; 6; 22, en-USd2ureepe,Version: 2.11.8.12009-07-28T18:49:58+02:00 - Seite 18
Page 69 of 316

Vehicle equipment ..............................68
Locking and unlocking .......................68
Starter switch positions .....................78
Seats ....................................................80
Multifunction steering wheel .............84
Mirrors .................................................86
Memory function .................................88
Lighting ................................................89
Wipers ..................................................95
Power windows ...................................96
Driving and parking ............................98
Automatic transmission ...................103
Instrument cluster ............................111
Control system ..................................113
Driving systems ................................130
Climate control system ....................148
Rear window defroster .....................155
Retractable hardtop .........................155
Loading and storing ..........................161
Useful features .................................164
67Controls in detail230_AKB; 6; 22, en-USd2ureepe,Version: 2.11.8.12009-07-28T18:49:58+02:00 - Seite 67
Page 80 of 316
Power closing assist for trunk lid
It is not necessary to slam the trunk lid
closed. An electrical power-assisted
mechanism draws the trunk lid closed quietly
and automatically once the trunk lid has been
latched. When the electrical power-assisted
mechanism has stopped, the trunk can be
reopened.
GWarning!
To prevent possible personal injury, always
keep hands and fingers away from the trunk
opening when closing the trunk lid. Be
especially careful when small children are
around.
In case of danger, pull the inside or outside
door handle, or press the trunk lid lock.
To prevent personal injury, never actuate the
closing assist mechanism by tampering with
the door or trunk lid latch.
GWarning!
Make sure the trunk is closed when the engine
is running and while driving. Among other
dangers, deadly carbon monoxide (CO) gases
may enter vehicle interior resulting in
unconsciousness and death.
XPress the trunk lid gently into its lock.Starter switch positions
SmartKey
GObserve Safety notes, see page 51.
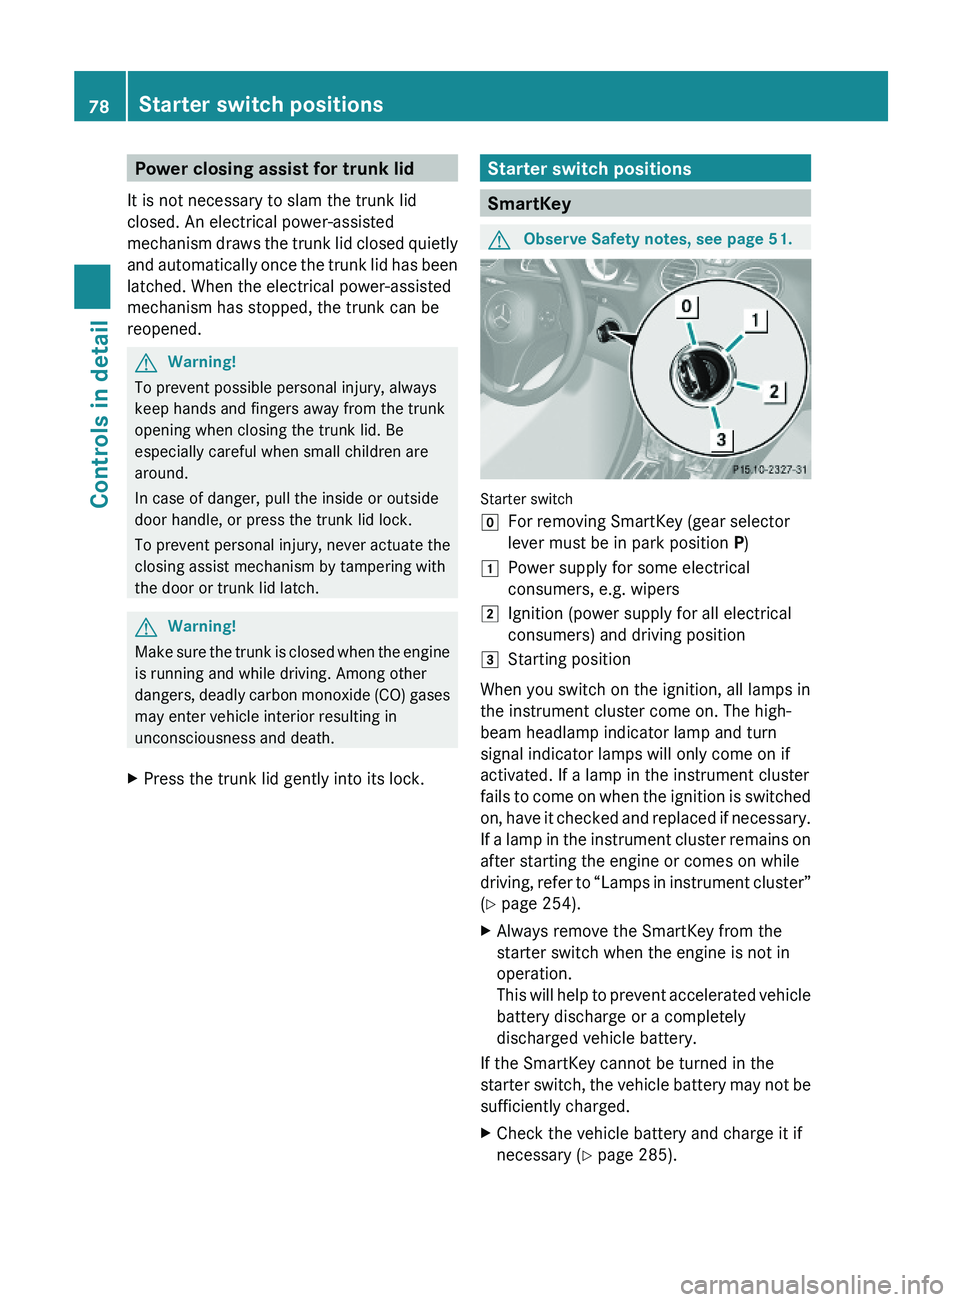
Starter switch
\000]For removing SmartKey (gear selector
lever must be in park position P)
\000JPower supply for some electrical
consumers, e.g. wipers
\000KIgnition (power supply for all electrical
consumers) and driving position
\000LStarting position
When you switch on the ignition, all lamps in
the instrument cluster come on. The high-
beam headlamp indicator lamp and turn
signal indicator lamps will only come on if
activated. If a lamp in the instrument cluster
fails to come on when the ignition is switched
on, have it checked and replaced if necessary.
If a lamp in the instrument cluster remains on
after starting the engine or comes on while
driving, refer to “Lamps in instrument cluster”
(Y page 254).
XAlways remove the SmartKey from the
starter switch when the engine is not in
operation.
This will help to prevent accelerated vehicle
battery discharge or a completely
discharged vehicle battery.
If the SmartKey cannot be turned in the
starter switch, the vehicle battery may not be
sufficiently charged.
XCheck the vehicle battery and charge it if
necessary (Y page 285).
78Starter switch positionsControls in detail
230_AKB; 6; 22, en-USd2ureepe,Version: 2.11.8.12009-07-28T18:49:58+02:00 - Seite 78
Page 81 of 316
orXGet a jump start (Y page 285).
KEYLESS-GO
GObserve Safety notes, see page 51.
Vehicles equipped with the KEYLESS-GO
feature are supplied with a SmartKey with
integrated KEYLESS-GO function.
The SmartKey must be present in the vehicle.
Pressing the KEYLESS-GO start/stop button
without depressing the brake pedal
corresponds to the various starter switch
positions (Y page 78).
Pressing the KEYLESS-GO start/stop button
with the brake pedal firmly depressed will
start the engine (Y page 98).
The function of the SmartKey overrules the
KEYLESS-GO function.
XMake sure the automatic transmission is in
park position P.
XDo not depress the brake pedal.
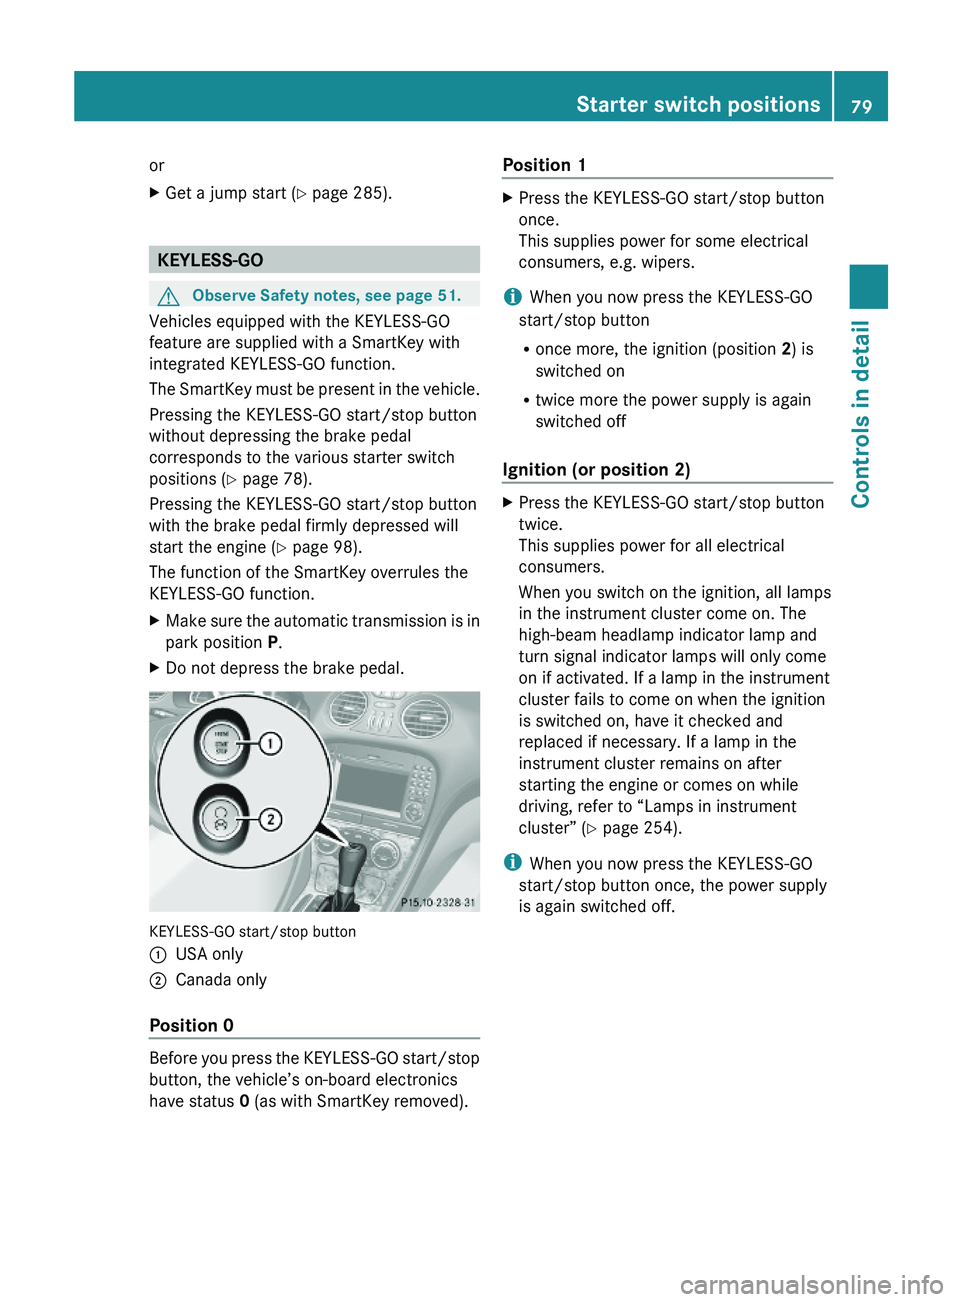
KEYLESS-GO start/stop button
\000FUSA only\000GCanada only
Position 0
Before you press the KEYLESS-GO start/stop
button, the vehicle’s on-board electronics
have status 0 (as with SmartKey removed).
Position 1XPress the KEYLESS-GO start/stop button
once.
This supplies power for some electrical
consumers, e.g. wipers.
iWhen you now press the KEYLESS-GO
start/stop button
Ronce more, the ignition (position 2) is
switched on
Rtwice more the power supply is again
switched off
Ignition (or position 2)
XPress the KEYLESS-GO start/stop button
twice.
This supplies power for all electrical
consumers.
When you switch on the ignition, all lamps
in the instrument cluster come on. The
high-beam headlamp indicator lamp and
turn signal indicator lamps will only come
on if activated. If a lamp in the instrument
cluster fails to come on when the ignition
is switched on, have it checked and
replaced if necessary. If a lamp in the
instrument cluster remains on after
starting the engine or comes on while
driving, refer to “Lamps in instrument
cluster” (Y page 254).
iWhen you now press the KEYLESS-GO
start/stop button once, the power supply
is again switched off.
Starter switch positions79Controls in detail230_AKB; 6; 22, en-USd2ureepe,Version: 2.11.8.12009-07-28T18:49:58+02:00 - Seite 79Z
Page 95 of 316
XSwitching on: Press hazard warning
flasher switch \000F.
All turn signal lamps are flashing.
iWith the hazard warning flasher activated
and the combination switch set for either
left or right turn, only the respective left or
right turn signals will operate when the
ignition is switched on.
XSwitching off: Press hazard warning
flasher switch \000F again.
iIf the hazard warning flasher has been
activated automatically, press hazard
warning flasher switch \000F to switch it off.
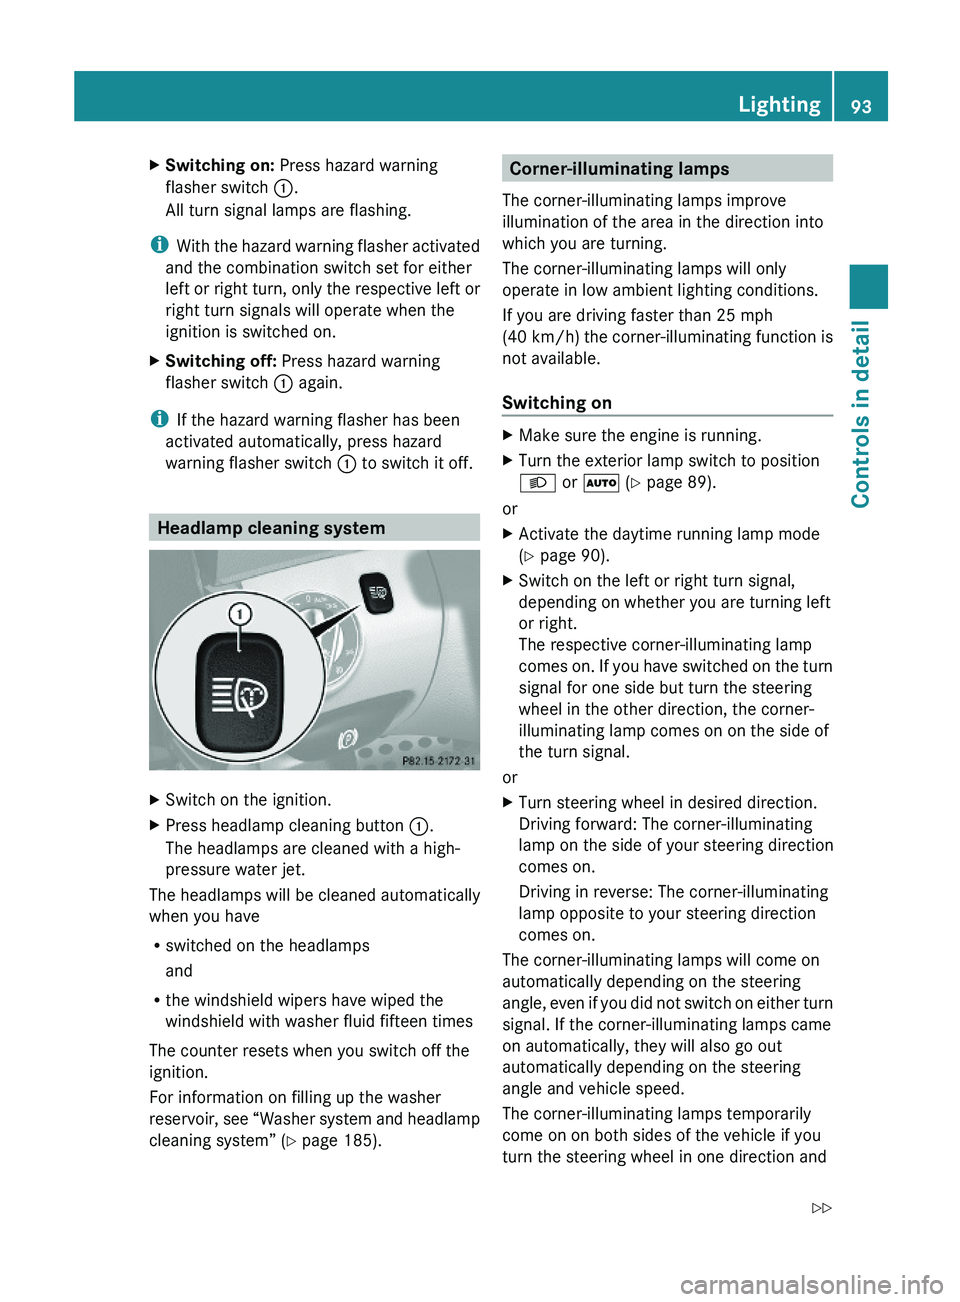
Headlamp cleaning system
XSwitch on the ignition.XPress headlamp cleaning button \000F.
The headlamps are cleaned with a high-
pressure water jet.
The headlamps will be cleaned automatically
when you have
Rswitched on the headlamps
and
Rthe windshield wipers have wiped the
windshield with washer fluid fifteen times
The counter resets when you switch off the
ignition.
For information on filling up the washer
reservoir, see “Washer system and headlamp
cleaning system” (Y page 185).
Corner-illuminating lamps
The corner-illuminating lamps improve
illumination of the area in the direction into
which you are turning.
The corner-illuminating lamps will only
operate in low ambient lighting conditions.
If you are driving faster than 25 mph
(40 km/h) the corner-illuminating function is
not available.
Switching on
XMake sure the engine is running.XTurn the exterior lamp switch to position
\000d or \000Z (Y page 89).
or
XActivate the daytime running lamp mode
(Y page 90).
XSwitch on the left or right turn signal,
depending on whether you are turning left
or right.
The respective corner-illuminating lamp
comes on. If you have switched on the turn
signal for one side but turn the steering
wheel in the other direction, the corner-
illuminating lamp comes on on the side of
the turn signal.
or
XTurn steering wheel in desired direction.
Driving forward: The corner-illuminating
lamp on the side of your steering direction
comes on.
Driving in reverse: The corner-illuminating
lamp opposite to your steering direction
comes on.
The corner-illuminating lamps will come on
automatically depending on the steering
angle, even if you did not switch on either turn
signal. If the corner-illuminating lamps came
on automatically, they will also go out
automatically depending on the steering
angle and vehicle speed.
The corner-illuminating lamps temporarily
come on on both sides of the vehicle if you
turn the steering wheel in one direction and
Lighting93Controls in detail230_AKB; 6; 22, en-USd2ureepe,Version: 2.11.8.12009-07-28T18:49:58+02:00 - Seite 93Z
Page 97 of 316

Wipers
Notes
! Do not operate the wipers when the
windshield is dry. Dust that accumulates on
a windshield might scratch the glass and/
or damage the wiper blades when wiping
occurs on a dry windshield. If it is necessary
to operate the wipers in dry weather
conditions, always operate the wipers with
washer fluid.
Windshield wipers
XObserve notes on page (Y page 95).
Switching on/off
Combination switch
\000J0 Windshield wipers off\000KI Intermittent wiping\000LII Slow continuous wiping\000MIII Fast continuous wiping\000
Page 98 of 316
Wiping with washer fluidXPress the combination switch in direction
of arrow 0086 past the resistance point.
The windshield wipers operate with washer
fluid.
i To prevent smears on the windshield or
noisy/chattering wiper blades, wipe with
washer fluid every now and then even when
it is raining.
For information on filling up the washer
reservoir, see “Washer system and headlamp
cleaning system” ( Y page 185).
For information on cleaning the headlamps
with washer fluid, see “Headlamp cleaning
system” ( Y page 93).
Problems with wipers
! If anything blocks the windshield wipers
(leaves, snow, etc.), switch them off
immediately.
For safety reasons, do the following before
attempting to remove any blockage:
R Stop the vehicle in a safe location.
R Remove the SmartKey from the starter
switch.
or
R Turn off the engine by pressing the
KEYLESS-GO start/stop button and
open the driver’s door (with the driver’s
door open, starter switch is in position
0 , same as with SmartKey removed from
starter switch).
R Engage the parking brake.
R Remove blockage.
R Turn the windshield wipers on again.
If the windshield wipers fail to function at
all with the combination switch in position
I ,
R set the combination switch to the next
higher wiper speed
R have the windshield wipers checked at
the nearest authorized Mercedes-Benz
Center
Power windows
Opening and closing
The windows are opened and closed
electrically. The switches for all windows are
located on the driver’s door. The switch for
operating the passenger-side windows is
located on the passenger door.
GObserve Safety notes, see page 51.GWarning!
When closing the windows, make sure there
is no danger of anyone being harmed by the
closing procedure.
The door windows are equipped with the
express operation and automatic reversal
function. If in express operation mode a door
window encounters an obstruction that
blocks its path, the automatic reversal
function will stop the door window and open
it slightly.
The door windows operate differently when
the switch is pulled and held. See the “Closing
when a door window is blocked” section for
details.
The closing of the door windows can be
immediately halted by releasing the switch or,
if the switch was pulled past the resistance
point and released, by pressing or pulling the
respective switch.
The closing of the rear side windows can be
immediately halted by releasing the switch.
If a window encounters an obstruction that
blocks its path in a circumstance where you
are closing the windows by pressing and
96Power windowsControls in detail
230_AKB; 6; 22, en-USd2ureepe,Version: 2.11.8.12009-07-28T18:49:58+02:00 - Seite 96
Page 155 of 316
Adjusting air distribution
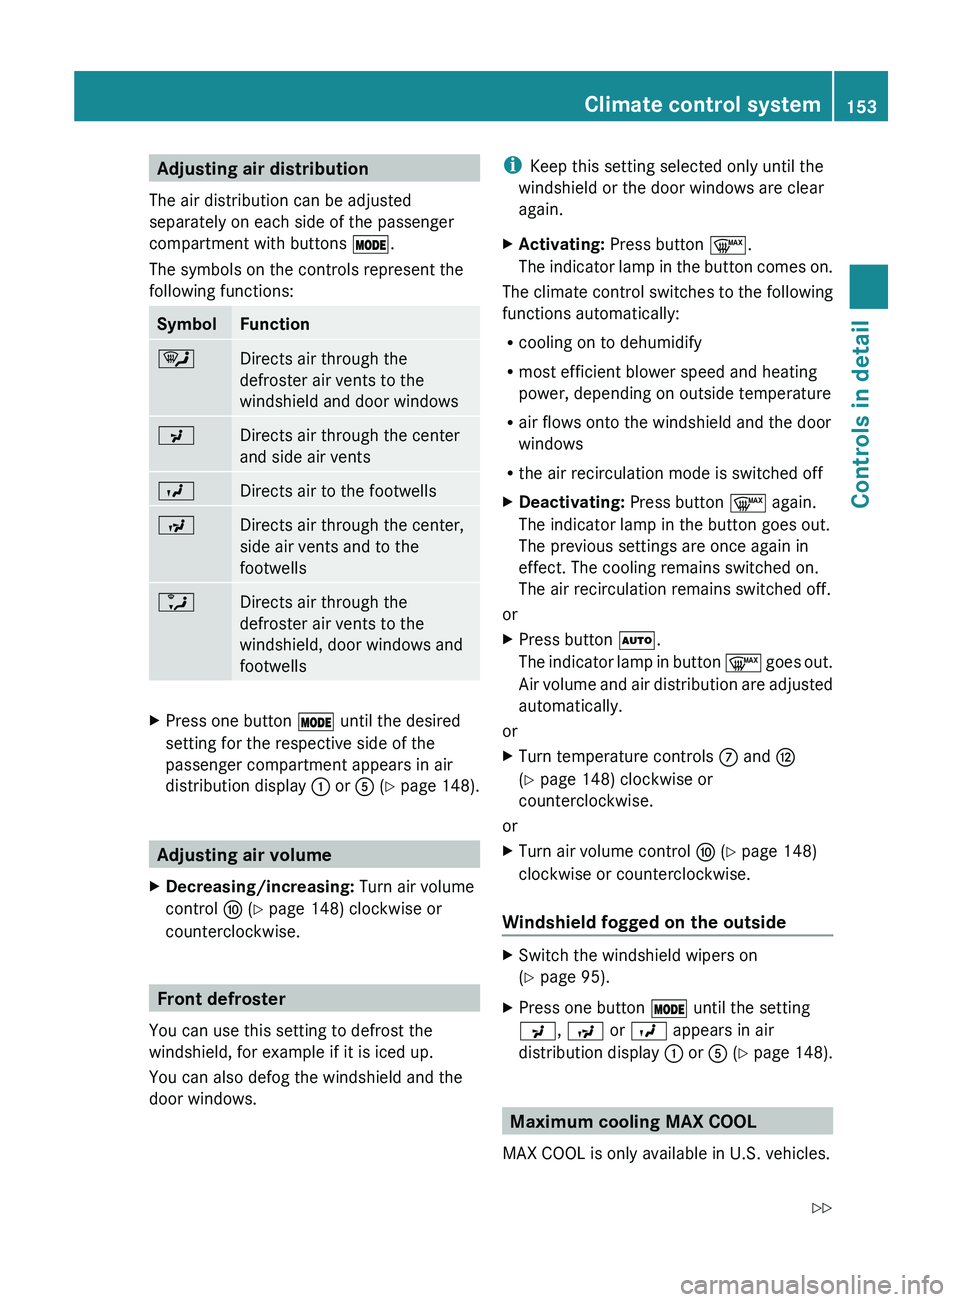
The air distribution can be adjusted
separately on each side of the passenger
compartment with buttons 0056.
The symbols on the controls represent the
following functions:SymbolFunction0063Directs air through the
defroster air vents to the
windshield and door windows009EDirects air through the center
and side air vents009DDirects air to the footwells009CDirects air through the center,
side air vents and to the
footwells0088Directs air through the
defroster air vents to the
windshield, door windows and
footwellsXPress one button 0056 until the desired
setting for the respective side of the
passenger compartment appears in air
distribution display 0046 or 0086 (Y page 148).
Adjusting air volume
XDecreasing/increasing: Turn air volume
control 0071 (Y page 148) clockwise or
counterclockwise.
Front defroster
You can use this setting to defrost the
windshield, for example if it is iced up.
You can also defog the windshield and the
door windows.
i Keep this setting selected only until the
windshield or the door windows are clear
again.XActivating: Press button 0066.
The indicator lamp in the button comes on.
The climate control switches to the following
functions automatically:
R cooling on to dehumidify
R most efficient blower speed and heating
power, depending on outside temperature
R air flows onto the windshield and the door
windows
R the air recirculation mode is switched off
XDeactivating: Press button 0066 again.
The indicator lamp in the button goes out.
The previous settings are once again in
effect. The cooling remains switched on.
The air recirculation remains switched off.
or
XPress button 005A.
The indicator lamp in button 0066 goes out.
Air volume and air distribution are adjusted
automatically.
or
XTurn temperature controls 006E and 0073
( Y page 148) clockwise or
counterclockwise.
or
XTurn air volume control 0071 (Y page 148)
clockwise or counterclockwise.
Windshield fogged on the outside
XSwitch the windshield wipers on
( Y page 95).XPress one button 0056 until the setting
009E , 009C or 009D appears in air
distribution display 0046 or 0086 (Y page 148).
Maximum cooling MAX COOL
MAX COOL is only available in U.S. vehicles.
Climate control system153Controls in detail230_AKB; 6; 22, en-USd2ureepe,Version: 2.11.8.12009-07-28T18:49:58+02:00 - Seite 153Z
Page 182 of 316
Check regularly and before a long trip
For information on quantities and
requirements of operating agents, see “Fuels,
coolants, lubricants, etc.” (Y page 303).
Check the following:
REngine oil level (Y page 181)
RTire inflation pressure (Y page 189)
RCoolant level (Y page 184)
RVehicle lighting (Y page 271)
RWasher system and headlamp cleaning
system (Y page 185)
RBrake fluid (Y page 185)
Engine compartment
Hood
GWarning!
Do not pull the release lever while the vehicle
is in motion. Otherwise the hood could be
forced open by passing air flow.
This could cause the hood to come loose and
injure you and/or others.
Opening
GWarning!
Do not open the hood when the engine is
overheated. You could be seriously injured.
Observe the coolant temperature gauge to
determine whether the engine may be
overheated. If you see flames or smoke
coming from the engine compartment, move
away from the vehicle. Wait until the engine
has cooled. If necessary, call the fire
department.
GWarning!
You could be injured when the hood is open –
even when the engine is turned off.
Parts of the engine can become very hot. To
prevent burns, let the engine cool completely
before touching any components on the
vehicle. Comply with all relevant safety
precautions.
GWarning!
To help prevent personal injury, stay clear of
moving parts when the hood is open and the
engine is running.
The radiator fan may continue to run for
approximately 30 seconds or may even
restart after the engine has been turned off.
Stay clear of fan blades.
GWarning!
The engine is equipped with a transistorized
ignition system. Because of the high voltage
it is dangerous to touch any components
(ignition coils, spark plug sockets, diagnostic
socket) of the ignition system
Rwith the engine running
Rwhile starting the engine
Rwhen the ignition is switched on and the
engine is turned manually
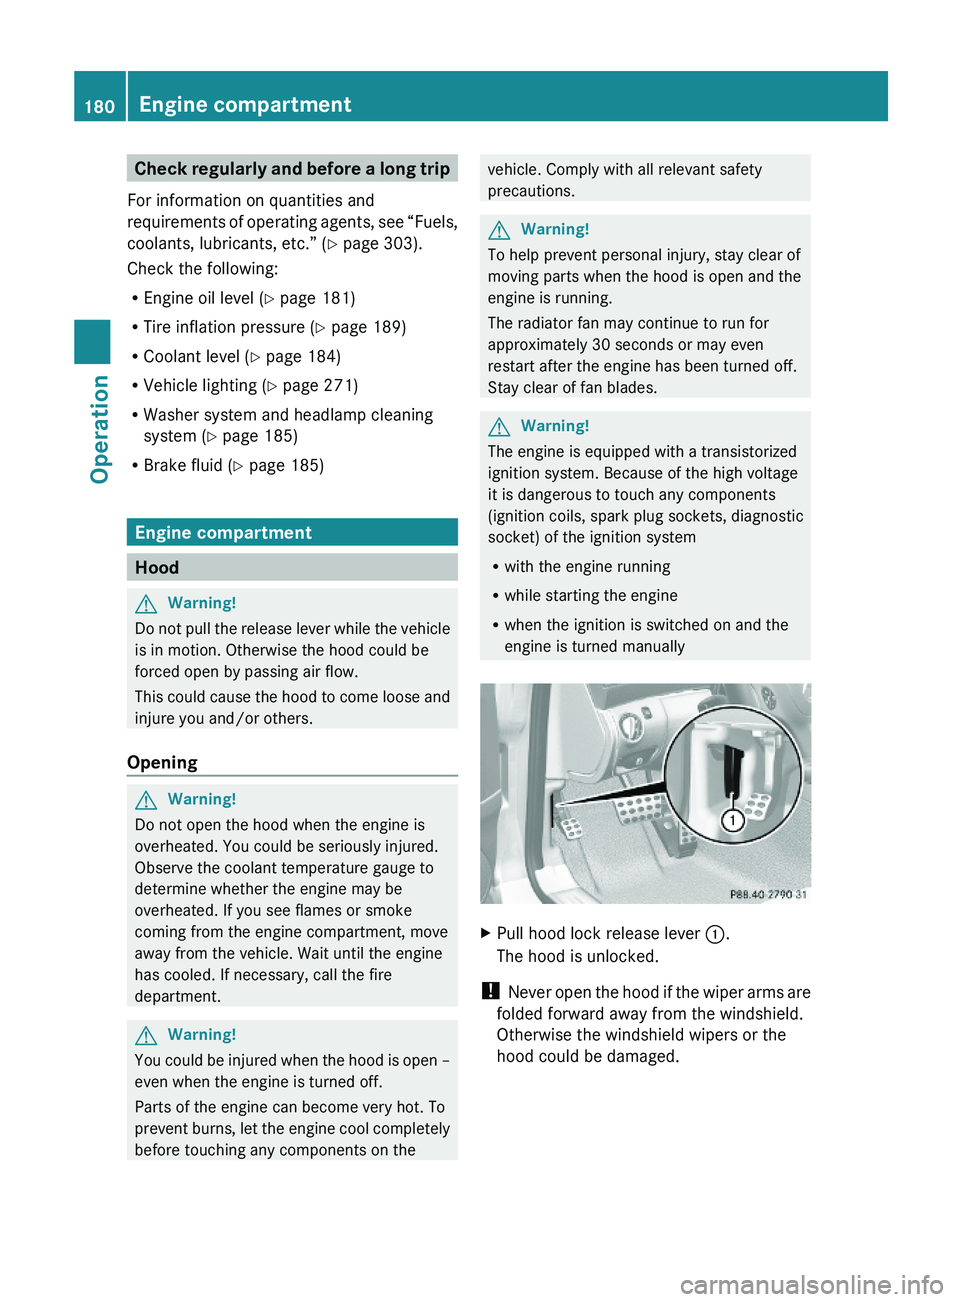
XPull hood lock release lever \000F.
The hood is unlocked.
! Never open the hood if the wiper arms are
folded forward away from the windshield.
Otherwise the windshield wipers or the
hood could be damaged.
180Engine compartmentOperation
230_AKB; 6; 22, en-USd2ureepe,Version: 2.11.8.12009-07-28T18:49:58+02:00 - Seite 180