roof MERCEDES-BENZ SL-Class 2013 R131 Owner's Guide
[x] Cancel search | Manufacturer: MERCEDES-BENZ, Model Year: 2013, Model line: SL-Class, Model: MERCEDES-BENZ SL-Class 2013 R131Pages: 590, PDF Size: 9.73 MB
Page 494 of 590

X
To remove: grab strap0003and pull umbrella
holder 0002outoft he stowage compartment
in the direction of the arrow.
X To insert: push umbrella holder 0002in the
opposite direction from the arrow, into the
stowage compartment, until it engages.
You can remove the umbrella holder to clean
it. Cleanw ith clear, lukewarm water only.
Stowage compartment in the rear
center console X
To open: slide cover 0002in the direction of
the arrow.
On vehicles equipped with a bottle holder, the
bottle holder is located in the stowage
compartment (Y page 495).
Stowage compartment in the rear There is a stowage compartmen
tinthe rear
on the left-hand side only. X
Open the seat belt guide and remove the
seat belt (Y page 117).
X Move the left-hand front seat forwards
(Y page 118) and fold the backrest
forwards.
X To open: press release button 0003.
Cover 0002folds upwards.
X To close: fold down cover 0002and let it
engage.
X Fold the backrest of the left-hand front seat
back and move the seat backwards
(Y page 118).
X Route the seat belt back through the seat
belt guide. Stowage net
There is a stowage net
0002in the front-
passenger footwell. Loading aid in the trunk
Raising/lowering the roof G
WARNING
Body parts can become trapped when the roof
is being raised or lowered. There is a risk of
injury.
When raising or lowering the roof, make sure
that no parts of the body are in the vicinity of
moving parts. Press the switch again if
someone becomes trapped. 492
Stowage areasStowage and features
Page 495 of 590

!
Only close the trunk once the roof is
lowered completely. Otherwise, you could
damage the roof.
If you close the trunk lid before the roof is
lowered completely, the loading aid switch
lights up and a warning tone sounds. To make it easier to load your luggage, you
can raise the stowed roof after you have
opened the trunk lid.
You can only raise roof
0003if trunk partition
0027 is closed and the trunk lid is opened
completely.
X To raise the roof: press switch0002.
The roof is raised slightly.S witch0002lights
up brightly.
X Slide trunk partition 0027back (Y page 106).
You can only lower roof 0003if trunk partition
0027 is closed and the trunk lid is opened
completely.
X To lower the roof: close the trunk partition
(Y page 106).
X Press switch 0002.
The roof is lowered slightly. Switch 0002
lights up dimly.
Vehicles with trunk lid remote closing
feature: when the trunk lid is opened, the
loading aid raises automatically. It lowers
automatically when the trunk lid is closed. Stowage areas
493Stowage and features Z
Page 496 of 590

Problems with the loading aid
Problem Possible causes/consequences and
0003 Solutions
It is no longer possible
to lower the stowed
roof in the trunk using
the loading aid. You cannot close the trunk any more.
X
Call a qualified specialist workshop. Stowage well under the trunk floor
X
To open: open trunk partition
0027 (Ypage 106).
X Swing trunk floor 0026up by loop 0003.
X Pull hook with Velcro attachment 0002off the
underside of trunk floor 0026.
X Attach hook with Velcro attachment 0002to
trunk partition 0027by its handle.
The TIREFIT kit, tire-change tool kit, etc. are
located in the stowage compartment. Features
Cup holder
Important safety notes !
Only use the cup holders for containers of
the right size and which have lids. The
drinks could otherwise spill. Cup holder in the center console
X
To open: open stowage compartment
0027(Y page 491).
X To remove the insert: slide catches0002
inwards in the direction of the arrow.
X Remove the cup holder insert upwards.
X To re-install the insert: place the insert in
stowage compartment 0027.
X Slide catches 0002outwards in the direction
of the arrow until they engage.
You can remove the cup holder's rubber mat
for cleaning. Cleanw ith clear, lukewarm
water only.
Reducer 0003can be removed. Large and small
containers can then be placed in the cup
holder.
X To remove: grasp reducer 0003and pull
upwards in the direction of the arrow.
X To insert: insert reducer 0003into the cup
holder in the opposite direction of the
arrow and press it down firmly. 494
FeaturesStowage and features
Page 520 of 590
After the vehicle has been washed, brake
carefully while paying attentio nto the traffic
conditions until full braking power is restored. G
WARNING
The vehicle is braked when the HOLD function
or DISTRONIC PLUS is activated. Therefore,
deactivate the HOLD function and DISTRONIC
PLUS before the vehicle is washed in an
automatic car wash.
! It is preferable to use car washes with
adjustable high-pressure pre-cleaning that
corresponds to the specification for the
Cabriolet program. In car washes that use
high water pressures, there is a risk that a
small amount of water may leak into the
vehicle.
! Vehicles with HANDS-FREE ACCESS: if a
SmartKey with KEYLESS-GO is within the
detection range of the KEYLESS-GO
antenna, the following situations could lead
to the unintentional opening of the trunk
lid:
R using a car wash
R using a power washer
Make sure that the SmartKey is at least
6.5 ft (2 m) away from the vehicle.
! Never clean your vehicle in a Touchless
Automatic Car Wash as these use special
cleaning agents. These cleaning agents can
damage the paintwork or plastic parts.
! Make sure that the automatic
transmission is in position Nwhen washing
your vehicle in a tow-through car wash. The
vehicle could be damaged if the
transmission is in another position.
! Make sure that: R
the side windows and roof are
completely closed.
R the blower for the ventilation/heating is
switched off (OFF button is depressed/
airflow control is turned to position 0).
R the windshield wiper switch is at position
0.
The vehicle could otherwise be damaged.
You can wash the vehicle in an automatic car
wash from the very start.
If the vehicle is very dirty, pre-wash it before
cleaning it in an automatic car wash.
After using an automatic car wash, wipe off
wax from the windshield and the wiper
blades. This will prevent smears and reduce
wiping noises caused by residue on the
windshield.
Washing by hand In some countries, washing by hand is only
allowed at specially equipped washing bays.
Observe the legal requirements in all
countries concerned.
X
Do not use hot water and do not wash the
vehicle in direct sunlight.
X Use a soft sponge to clean.
X Use a mild cleaning agent, such as a car
shampoo approved by Mercedes-Benz.
X Thoroughly hose down the vehicle with a
gentle jet of water.
X Do not point the water jet directly towards
the air inlet.
X Use plenty of water and rinse out the
sponge frequently.
X Rinse the vehicle with clean water and dry
thoroughly with a chamois.
X Do not let the cleaning agent dry on the
paintwork.
When using the vehicle in winter, remove all
traces of road salt deposits carefully and as
soon as possible. 518
CareMaintenance and care
Page 521 of 590
Powerw
ashers G
WARNING
The water jet from a circular jet nozzle (dirt
blasters) can cause invisibl eexterior damage
to the tires or chassis components.
Components damaged in this way may fail
unexpectedly .There is a risk of an accident.
Do not use power washers with circular jet
nozzles to clean the vehicle. Have damaged
tires or chassis components replaced
immediately.
! Always maintain a distance of at least
11.8 in (30 cm) between the vehicle and the
power washer nozzle. Information about
the correct distance is available from the
equipment manufacturer.
Move the power washer nozzle around
when cleaning your vehicle.
Do not aim directly at any of the following:
R tires
R door gaps, roof gaps, joints, etc.
R electrical components
R battery
R connectors
R lights
R seals
R trim
R ventilation slots
Damaged seals or electrical components
can lead to leaks or failures.
! Vehicles with HANDS-FREE ACCESS: if a
SmartKey with KEYLESS-GO is within the
detection range of the KEYLESS-GO
antenna, the following situations could lead
to the unintentional opening of the trunk
lid:
R using a car wash
R using a power washer
Make sure that the SmartKey is at least
6.5 ft (2 m) away from the vehicle. Cleaning the paintwork !
Do not affix:
R stickers
R films
R magnetic plates or similar items
to painted surfaces. You could otherwise
damage the paintwork.
Scratches, corrosive deposits, areas affected
by corrosion and damage caused by
inadequate care cannot always be completely
repaired. In such cases, visit a qualified
specialist workshop.
X Remove dirt immediately, where possible,
while avoiding rubbing too hard.
X Soak insect remains with insect remover
and rinse off the treated areas afterwards.
X Soak bird droppings with water and rinse
off the treated areas afterwards.
X Remove coolant, brake fluid, tree resin,
oils, fuels and greases by rubbing gently
with a cloth soaked in petroleum ether or
lighter fluid.
X Use tar remover to remove tar stains.
X Use silicone remover to remove wax.
If water no longer forms "beads" on the paint
surface, use the paint care products
recommended and approved by Mercedes-
Benz.T his is the case approximately every
three to five months, depending on the
climate conditions and the care product used.
If dirt has penetrated the paint surface or if
the paint has become dull, the paint cleaner
recommended and approved by Mercedes-
Benz should be used.
Do not use these care products in the sun or
on the hood while the hood is hot.
X Use a suitable touch-up stick, e.g. MB
Touch-Up Stick, to repair slight damage to
the paintwork quickly and provisionally. Care
519Maintenance and care Z
Page 526 of 590
Cleaning the seat belts
G
WARNING
Seat belts can become severely weakened if
bleached or dyed. This could cause the seat
belts to tear or fail, for instance, in the event
of an accident. This pose sanincreased risk
of injury or fatal injury.
Never bleach or dye the sea tbelts.
! Do not clean the seat belts using chemical
cleaning agents .Do not dry the seat belts
by heating at temperatures above 176 ‡
(80 †) or in direct sunlight.
X Use clean, lukewarm water and soap
solution.
Cleaning the roof lining and carpets X
Headliner: if it is very dirty, use a soft brush
or dry shampoo.
X Carpets: use the carpet and textile
cleaning agents recommended and
approved by Mercedes-Benz. 524
CareMaintenance and care
Page 534 of 590
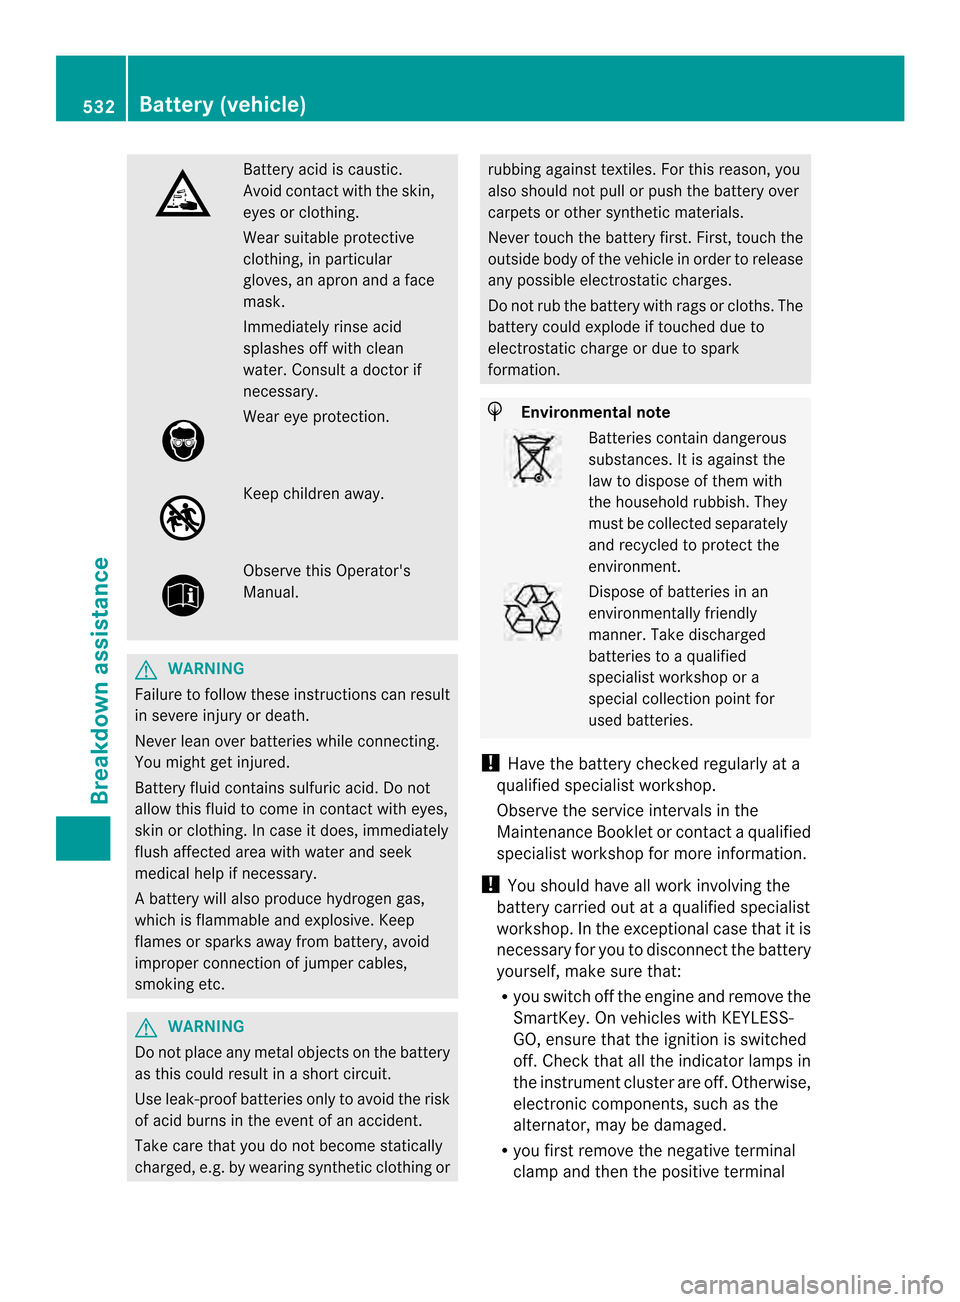
Battery acid is caustic.
Avoid contact with the skin,
eyes or clothing.
Wea
rsuitable protective
clothing, in particular
gloves, an apro nand a face
mask.
Immediately rinse acid
splashes off with clean
water. Consult a doctor if
necessary. Wear eye protection.
Keep children away.
Observe this Operator's
Manual.
G
WARNING
Failure to follow these instructions can result
in severe injury or death.
Never lean ove rbatteries while connecting.
You migh tget injured.
Battery fluid contains sulfuric acid. Do not
allow this fluid to come in contact with eyes,
skin or clothing. In case it does, immediately
flush affected area with water and seek
medical help if necessary.
Ab attery will also produce hydrogen gas,
which is flammable and explosive. Keep
flames or sparks away from battery, avoid
improper connection of jumper cables,
smoking etc. G
WARNING
Do no tplace any metal objects on the battery
as this could result in a shor tcircuit.
Use leak-proof batteries only to avoid the risk
of acid burns in the event of an accident.
Take care that you do not become statically
charged, e.g. by wearin gsynthetic clothing or rubbing against textiles
.For this reason, you
also should not pull or push the battery over
carpets or other synthetic materials.
Never touch the battery first. First, touch the
outside body of the vehicle in order to release
any possible electrostatic charges.
Do not rub the battery with rags or cloths. The
battery could explode if touched due to
electrostatic charge or due to spark
formation. H
Environmental note Batteries contain dangerous
substances. It is against the
law to dispose of them with
the household rubbish. They
must be collected separately
and recycled to protect the
environment.
Dispose of batteries in an
environmentally friendly
manner
.Take discharged
batteries to a qualified
specialist workshop or a
special collectio npoint for
used batteries.
! Have the battery checked regularly at a
qualified specialist workshop.
Observe the service intervals in the
Maintenance Booklet or contact a qualified
specialist workshop for more information.
! You should have all work involving the
battery carried out at aqualified specialist
workshop. In the exceptional case that it is
necessary for you to disconnect the battery
yourself, make sure that:
R you switch off the engine and remove the
SmartKey. On vehicles with KEYLESS-
GO, ensure that the ignition is switched
off .C heck that all the indicator lamps in
the instrumentc luster are off.Otherwise,
electroni ccomponents, such as the
alternator, may be damaged.
R you first remove the negative terminal
clamp and then the positive terminal 532
Battery (vehicle)Breakdown assistance
Page 548 of 590
Selecting, mounting and replacing
tires
R Only mount tires and wheels of the same
type and make.
R Only mount tires of the correct size onto
the wheels.
R Break in new tires at moderate speeds for
the first 60 miles (100 km). They only reach
their full performance after this distance.
R Do not drive with tires which have too little
tread depth. as this significantly reduces
the traction on wet roads (hydroplaning).
R Replace the tires after six years at the
latest, regardless of wear. MOExtended tires (tires with run-flat
properties)
With MOExtended tires (tires with run flat
characteristics), you can continue to drive
your vehicle even if there is a total loss of
pressure in one or more tires.
MOExtended tires may only be used in
conjunction with an active tire pressure loss
warning system or with an active tire pressure
monitor and on wheels specifically tested by
Mercedes-Benz.
Notes on driving with MOExtended tires with
a flat tire (Y page 527).
i Vehicles equipped with MOExtended tires
are not equipped with a TIREFIT kit at the
factory. It is therefore recommended that
you additionally equip your vehicle with a
TIREFIT kit if you mount tires that do not
feature run-flat properties, e.g. winter tires.
A TIREFIT kit can be obtained from a
qualified specialist workshop. Winter operation
General notes
Have your vehicle winterproofed at a qualified
specialist workshop at the onset of winter. Observe the notes in the "Changing a wheel"
section (Y page 565). Driving with summer tires
At temperatures below 45 ‡(+7 †), summer
tires lose elasticity and therefore traction and
braking power. Change the tires on your
vehicle to M+S tires. Using summer tires at
very cold temperatures could cause cracks to
form, thereby damaging the tires
permanently. Mercedes-Benz cannot accept
responsibility for this type of damage. M+S tires
G
WARNING
M+S tires with a tire tread depth of less than
000C in (4 mm) are not suitable for use in winter
and do not provide sufficient traction. There
is a risk of an accident.
M+S tires with a tread depth of less than 000C
in (4 mm) must be replaced immediately.
At temperatures below 45 ‡ (+7 †), use
winter tires or all-season tires. Both types of
tire are identified by the M+S marking.
Only winter tires bearing the 0003snowflake
symbol in addition to the M+S marking
provide the best possible grip in wintry road
conditions.
Only these tires will allow driving safety
systems such as ABS and ESP ®
to function
optimally in winter. These tires have been
developed specifically for driving in snow.
Use M+S tires of the same make and tread on
all wheels to maintain safe handling
characteristics.
Always observe the maximu mpermissible
speed specified for the M+S tires you have
mounted. 546
Winter operationWheels and tires
Page 566 of 590
Maximum loade
dvehicle weight
The maximum weight is the sum of:
R the curb weight of the vehicle
R the weight of the accessories
R the load limit
R the weight of the factory installed optional
equipment
Kilopascal (kPa)
Metric unit for tire pressure. 6.9 kPa
corresponds to 1 psi. Another unit for tire
pressure is bar. There are 10 0kilopascals
(kPa) to 1bar.
Load index
In addition to the load-bearing index, the load
index may also be imprinted on the sidewall
of the tire. This specifie sthe load-bearing
capacity more precisely.
Curb weight
The weight of a vehicle with standard
equipment including the maximum capacity
of fuel, oil and coolant. It also includes the air-
conditioning system and optional equipment
if these are installed in the vehicle, but does
not include passengers or luggage.
Maximum load rating
The maximum tire load is the maximum
permissible weight in kilograms or lbs for
which a tire is approved.
Maximum permissible tire pressure
Maximum permissible tire pressure for one
tire.
Maximum load on one tire
Maximum load on one tire. This is calculated
by dividing the maximum axle load of one axle
by two.
PSI (pounds per square inch)
As tandard uni tofmeasure for tire pressure. Aspect ratio
Relationship between tire height and tire
width in percent.
Tire pressure
This is pressure inside the tire applying an
outward force to each square inch of the tire's
surface. The tire pressure is specified in
pounds per square inch (psi), in kilopascal
(kPa) or in bar. The tire pressure should only
be corrected when the tires are cold.
Cold tire pressure
The tires are cold:
R
if the vehicle has been parked without
direct sunlight on the tires for at least three
hours and
R if the vehicle has been driven for less than
1 mile (1.6 km).
Tread
The part of the tire that comes into contact
with the road.
Bead
The tire bead ensures that the tire sits
securely on the wheel. There are several steel
wires in the bead to prevent the tire from
coming loose from the wheel rim.
Sidewall
The part of the tire between the tread and the
bead.
Weight of optional extras
The combined weight of those optional extras
that weigh more than the replaced standard
parts and more than 2.3 kilograms (5 lbs).
These optional extras, such as high-
performance brakes, level control, a roof rack
or a high-performance battery, are not
included in the curb weight and the weight of
the accessories.
TIN (Tire Identification Number)
This is a unique identifier which can be used
by a tire manufacturer to identify tires, for
example for a product recall, and thus identify 564
All about wheels and tiresWheels and tires
Page 587 of 590

Vehicle data
General notes
Please note tha tfor the specified vehicle
data:
R The heights specified may vary as a result
of:
- Tires
- Load
- Condition of the suspension
- Optional equipment Dimensions and weights
Model 0002 Opening height
All models (except
for AMG vehicles)
75.8 in (1925 mm)
Model 0002 Opening height
AMG vehicles
76.0 in - 76.6 in
(1931 mm -1945 mm) SL 550
Vehicle length
181.6 in (4612 mm)
Vehicle length
when opening/
closing the roof
188.9 in (4797 mm) SL 550
Vehicle width
including exterior
mirrors
82.6 in (2099 mm)
Vehicle height
51.8 in (1316 mm)
Vehicle height,
when opening/
closing the roof
66.8 in (1697 mm)
Wheelbase
101.8 in (2585 mm)
Turning radius
36.2 ft (11.04 m)
Maximum trunk
load
220 lb (100 kg)
SL 63 AMG and
SL 65 AMG V12
Vehicle length
182.4 in (4633 mm)
Vehicle length
when opening/
closing the roof
191.3 in (4858 mm)
Vehicle width
including exterior
mirrors
82.6 in (2099 mm)
Vehicle height
51.2 in - 51.5 in
(1300 mm -1308 mm) Vehicle height,
when opening/
closing the roof
66.5 in - 67.4 in
(1688 mm -1713 mm) Wheelbase
101.8 in (2585 mm)
Turning radius
36.3 ft (11.05 m)
Maximum trunk
load
220 lb (100 kg) Vehicle data
585Technical data Z