tow bar MERCEDES-BENZ SL-Class 2013 R131 Owner's Manual
[x] Cancel search | Manufacturer: MERCEDES-BENZ, Model Year: 2013, Model line: SL-Class, Model: MERCEDES-BENZ SL-Class 2013 R131Pages: 590, PDF Size: 9.73 MB
Page 60 of 590

impac
tair bag deploymen tcan offer
additional protection to that provided by the
seat belt.
Side impac tair bags will not deploy in side
impacts which do not exceed the system's
prese tdeployment thresholds for lateral
acceleration/deceleration .You will then be
protected by the fastened seat belt.
The side impact air bag on the front-
passenger side does not deploy under the
following conditions:
R the OCS system detects that the front-
passenger seat is not occupied, and
R the front-passenger seat belt is not
fastened.
The side impact air bag on the front-
passenger side will deploy if the front-
passenger seat belt is fastened, regardless of
whether the front-passenger seat is occupied
or not.
Head bags Example: head bag on the front-passenger side
Head bags 0002deploy in the area of the side
windows at the front.H ead bags enhance the
level of protection for the head, but not chest
or arms, of the vehicle occupants on the side
of the vehicle on which the impact occurs.
The head bags are deployed:
R at the start of an accident with a high rate
of lateral vehicle deceleration or
acceleration, e.g. in aside impact
R on the side on which an impac toccurs R
on the driver's side and passenger side, in
the event of a vehicle rollover and if the
system determines that ai rbag deployment
can offer the vehicle occupants additional
protection to that provided by the seat belt
R independently of the use of the seat belt
R independently of the fron tair bags
Head bags will not deploy in side impacts
which do not exceed the system's preset
deploymen tthresholds for lateral
acceleration/deceleration. You will then be
protected by the fastened seat belt.
The head bag on the front-passenger side is
not deployed in the following situations:
R the OCS system detects that the front-
passenger seat is not occupied, and
R the front-passenger seat belt is not
fastened.
The head bag on the front-passenger side will
deploy if the front-passenger seat belt is
fastened, regardless of whether the front-
passenger seat is occupied or not. Roll bar
G
DANGER
If the roll bar is malfunctioning, the 0011
Malfunction Service Required message
appears in the multifunction display.T he roll
bars will then possibly not be extended in the
event of an accident. This could result in
severe or even fatal injuries to you and other
occupants. In this case, visit a qualified
specialist workshop immediately and have
the roll bar checked. G
WARNING
If you place objects or clothing on the roll bar
covers, these could impair roll bar extension.
You and others could be injured by objects
being thrown around when the roll bars are
triggered.
Ensure that the area above the roll bar covers
is kept clear. Stow objects or clothing in a
secure place. 58
Occupant safetySafety
Page 106 of 590

Attempting to manually close the roof may
cause damage to the roo fand/o rinjury.
For this reason, the manual closing process
should only be carried ou tataqualified
specialist workshop.
! Never sit on the rear compartment trim or
stow heavy objects there. You will
otherwise damage the roof and rear
compartment trim of the vehicle.
! Do not forget that the weather can
change abruptly. Make certain that the roof
is closed when you leave the vehicle. The
vehicle electronics can be damaged if
water enters the vehicle interior.
! When opening and closing the roof, make
sure that:
R there is sufficien tclearance, as the roof
swings upwards.
R there is sufficien tclearance behind the
vehicle, as the trunk lid swings
backwards beyond the bumper.
R the trunk is only loaded to below the
trunk partition.
R the trunk partition is not pushed up by
the load.
R the trunk partition is closed.
R the trunk lid is closed.
R the outside temperature is above 5‡
( 001C 15 †).
You could otherwise damage the roof,
trunk and other parts of the vehicle.
i Make sure that the roof and rear window
are clea nand dry before opening the roof.
Otherwise, water or dirt could ente rthe
vehicle interior or trunk. Opening and closing using the roof
switch
Important safety notes G
WARNING
Before operating the retractable hardtop
(vario-roof), make sure there is no danger of
anyone being injured by the moving parts
(retractable hardtop, roof frame, and trunk
lid).
Hands must never be placed near the roof
frame, upper windshield area, hardtop, shelf
behind roll bars, or trunk lid while the
retractable hardtop is being raised or
lowered. Serious personal injury may occur.
If potential danger exists, release the
retractable hardtop switch or the 000Eor
000D button on the SmartKey. This
immediately interrupts the raising or lowering
procedure. You can then operate the
retractable hardtop switch or press the
000E or000D button on the SmartKey to raise
or lower the retractable hardtop away from
the danger zone.
Opening/closing X
Secure the vehicle against rolling away
(Y page 175).
X Close the trunk partition (Y page 106).
X Close the trunk lid.
X Turn the SmartKey to position 2in the
ignition lock.
X Open the cover in the lower center console.
Roof switch 0002is located under the cover. 104
RoofOpening and closing
Page 120 of 590
0003
Seat fore-and-aft adjustment
0003 Sea theight
0027 Seat cushion angle
0026 Seat height
0026 seat cushion length
0024 Seat fore-and-aft adjustment
0025 Backrest angle
X To adjust the head restraint height: slide
the switch for head restraint adjustment
(Y page 116)0002 up or down in the direction
of the arrow. Moving the seats forward/back
G
WARNING
Make sure that nobody can become trapped
when moving the seat. If there is a risk of
someone becoming trapped, press the button
again or press the seat adjustment switch on
the door.
Never place hands under the seat or near any
moving parts while a seat is being adjusted.
! Make sure that there are no containers in
the cup holder and no objects in the
footwell or behind the seats when adjusting
the seats. Otherwise, you could damage
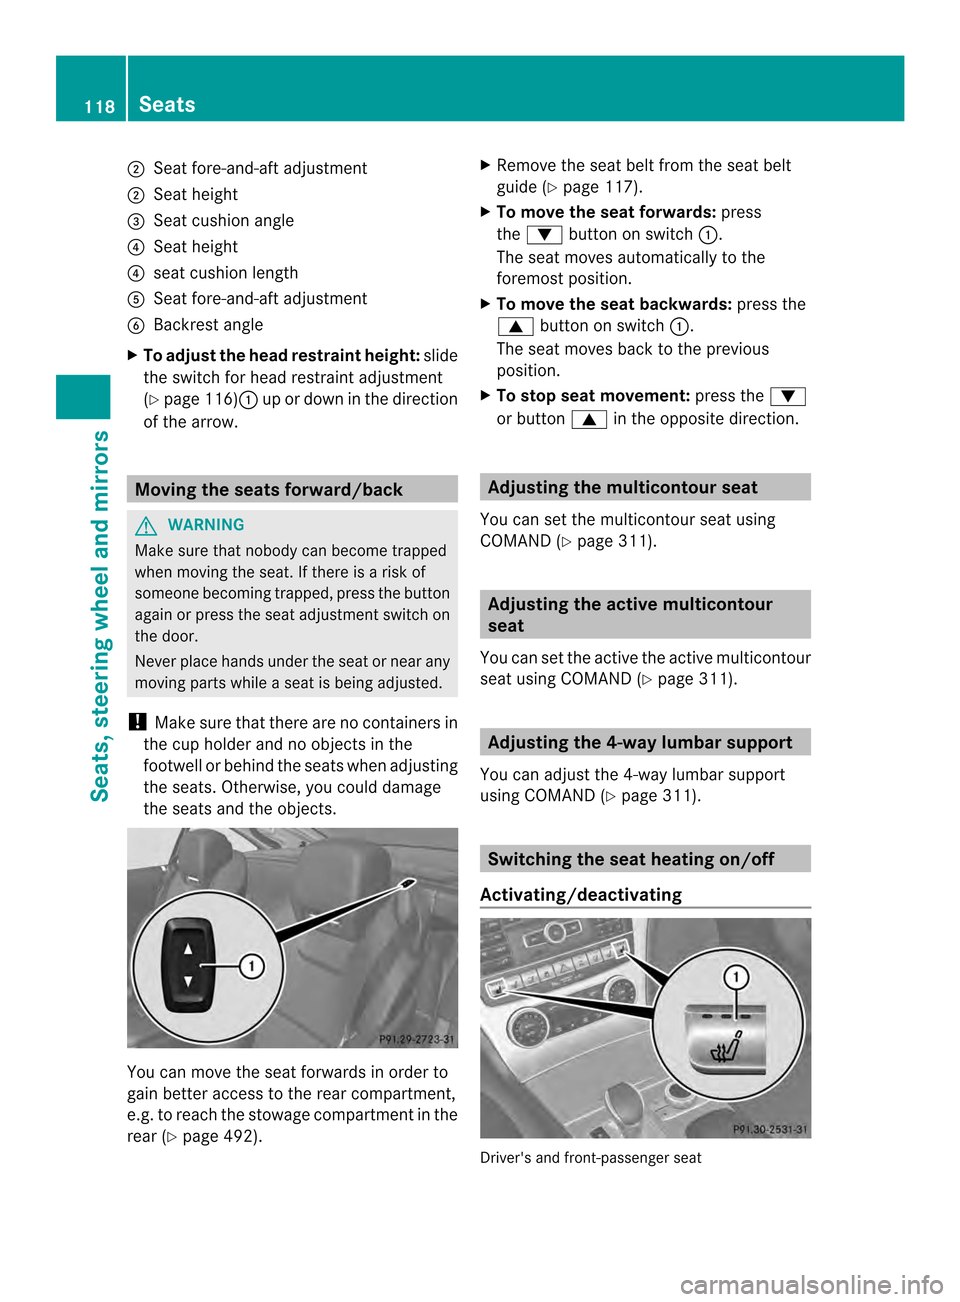
the seats and the objects. You can move the seat forwards in order to
gain better access to the rear compartment,
e.g. to reach the stowage compartment in the
rear (Y
page 492). X
Remove the seat belt from the seat belt
guide (Y page 117).
X To move the seat forwards: press
the 0007 button on switch 0002.
The seat moves automatically to the
foremost position.
X To move the seat backwards: press the
0006 button on switch 0002.
The seat moves back to the previous
position.
X To stop seat movement: press the0007
or button 0006in the opposite direction. Adjusting the multicontour seat
You can set the multicontour seat using
COMAND (Y page 311). Adjusting the active multicontour
seat
You can set the active the active multicontour
seat using COMAND (Y page 311). Adjusting the 4-way lumbar support
You can adjust the 4-way lumbar support
using COMAND (Y page 311). Switching the seat heating on/off
Activating/deactivating Driver's and front-passenger seat118
SeatsSeats, steering wheel and mirrors
Page 213 of 590
Activating/deactivating the rea
rview
camera X
To activate: make sure that the SmartKey
is in position 2in the ignition lock.
X Make sure that the function "show rear
view camera display" is selected in
COMAND (Y page 314).
X Engage reverse gear.
The area behind the vehicle is shown in the
COMAN Ddisplay with guide lines.
To deactivate: the rear view camera is
deactivated if you:
R shift the transmission to position P
R drive forwards 33 ft (10 m)
R shift the transmission from Rto another
position (after 15 seconds)
R drive forwards at a speed of over 5mph
(10km/h)
Displays in the COMAND display The rear view camera may show a distorted
view of obstacles, show them incorrectly or
not at all. The rear view camera does not show
objects in the following positions:
R very close to the rear bumper
R under the rear bumper
R in the area immediately above the tailgate
handle
! Objects not at ground level may appear to
be further away than they actually are, e.g.:
R the bumper of a parked vehicle
R the drawbar of a trailer
R the ball coupling of a trailer tow hitch
R the rear section of an HGV
R a slanted post
Use the guidelines only for orientation.
Approach objects no further than the
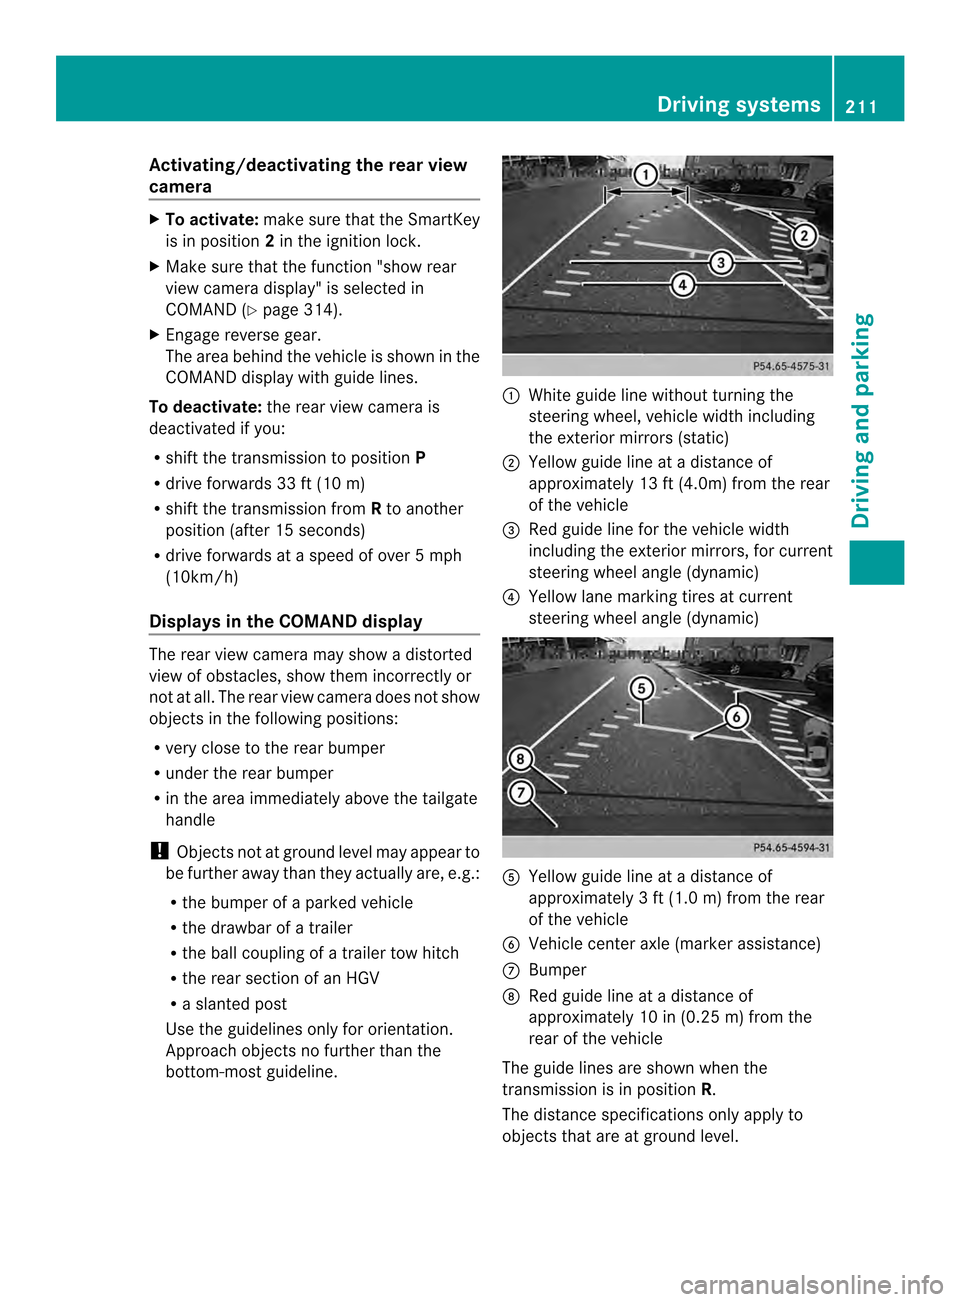
bottom-most guideline. 0002
White guide line without turning the
steering wheel, vehicle width including
the exterior mirrors (static)
0003 Yellow guide line at a distance of
approximately 13 ft (4.0m) from the rear
of the vehicle
0027 Red guide line for the vehicle width
including the exterior mirrors, for current
steering wheel angle (dynamic)
0026 Yellow lane marking tires at current
steering wheel angle (dynamic) 0024
Yellow guide line at a distance of
approximately 3 ft (1.0 m) from the rear
of the vehicle
0025 Vehicle center axle (marker assistance)
0016 Bumper
0017 Red guide line at a distance of
approximately 10 in (0.25 m) from the
rear of the vehicle
The guide lines are shown when the
transmission is in position R.
The distance specifications only apply to
objects that are at ground level. Driving systems
211Driving and parking Z
Page 287 of 590
You can use COMAND to operate the
following main functions:
R the navigation system
R the audio function
R the telephone function
R the video function
R the system settings
R the online and Internet functions
R the Digital Operator's Manual
(available depending on the vehicle model)
You can call up the main functions:
R using the corresponding function buttons
R using the main function bar in the COMAND
display
COMAND display General notes
!
Do not use the space in front of the
display to stow anything .Objects placed
here could damage the display or impair its
function .Avoid touching the surface of the
display.P ressure exerted on the surface of
the display can have an irreversible,
detrimental effect on the display.
Wearing polarized sunglasses may impair
youra bility to read the display.
The display has an automatic temperature-
controlled switch-of ffeature. The brightness
is automatically reduced if the temperature is
too high. The display may temporarily switch
off completely. At
ag lance
285COMAND Z
Page 469 of 590
If COMAND is equipped with the Media
Interface, external audio sources are
connected using the cable set provided. An
AUX socket is not provided. The connections
for the Media Interface are located in the
stowage compartment in the center console.
i You will find further information online at
http://www.mbusa-mobile.com.Orc all
the Mercedes-Ben zCustome rAssistance
Center at
1-800-FOR-MERCedes(1-800-367-6372)
(for the USA) or Customer Relations at
1-800-387-0100 (for Canada).
Activating audio AUX mode Switching modes using the function
button
The external device is connected to the audio
AUX in.
X
Press the 0009function button one or more
times.
By pressing the function button repeatedly,
you can change the operating mode in the
following order:
R audio CD/DVD/MP3 (disc)
R memory card mode
R MUSIC REGISTER
R USB storage device
R Media Interface or audio AUX mode
R Bluetooth ®
audio mode
Switching modes via the audio menu
When you connect an external audio source,
audio AUX is not selected automatically.
X Select Audio in the main function bar by
sliding 00380012and turning 003E0012003Fthe COMAND
controller and press 0039to confirm.
If AUX mode was the last mode selected, it
will now be active. If another audio source is switched on, you
can now switch to audio AUX mode in the
audio menu.
X Select Audio using
00380012and press 0039to
confirm.
The audio menu appears.
X Select Aux using
003E0012003Fand press 0039to
confirm.
The audio AUX menu appears. The medium
in the external audio source is played if the
source is connected and playback
selected. Please see the respective operating
instructions for how to operate the external
audio source.
Information on:
R
volume settings (Y page 294)
R sound settings (Y page 295)
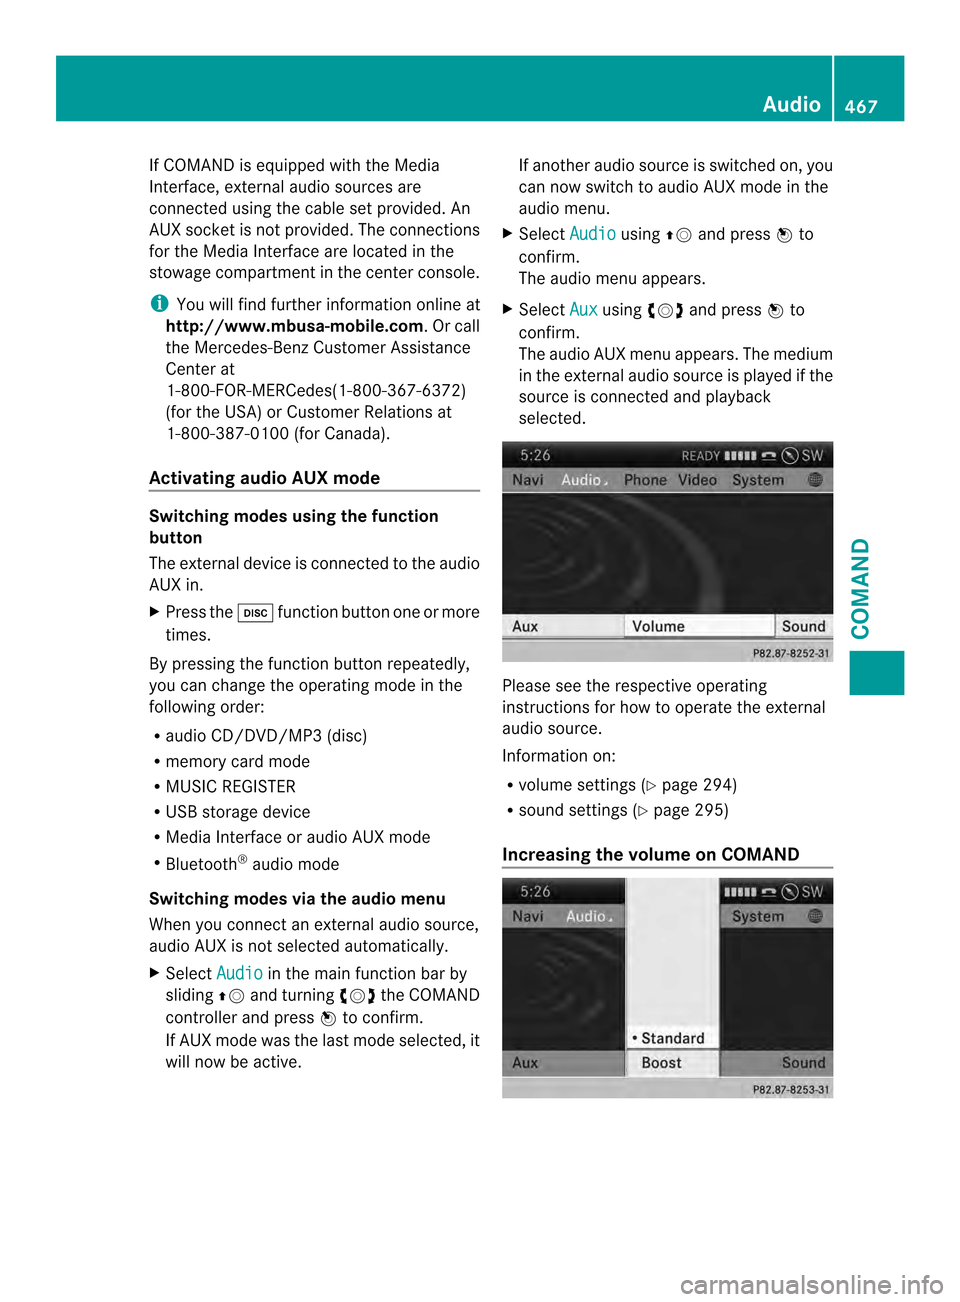
Increasing the volume on COMAND Audio
467COMAND Z
Page 476 of 590
X
Select Subtitles or
Camera Angle and
press 0039to confirm.
In both cases, a menu appears .The 0021dot
in front of an entry indicates the current
setting.
X Select a setting by turning 003E0012003Fthe
COMAND controller and press 0039to
confirm.
Interactive content DVDs can contain interactive content (e.g. a
video game). In a video game, for example,
you may be able to influence events by
selecting and triggering actions. The type and
number of actions depend on the DVD.
X
Select an action by sliding 00380012000Aor003600120037 the
COMAND controller and press 0039to
execute it.
A menu appears and the first entry,
Select , is highlighted.
X Press 0039the COMAND controller. AUX video mode
Connecting external video sources G
WARNING
External video sources may have different
volumes, which can mean that system
messages such as traffic announcements and
navigation system announcements are much
louder. If necessary, please deactivate the
system messages or adjust their volume
manually.
If your vehicle is equipped with Media
Interface, you can connect an external video
source (AUX video) (Y page 460).
The 1/8 inch audio/video jacks are in the
center console stowage compartment.
i In vehicles with a rear view camera, the
AUX video jack cannot be used for external
video sources. Switching to AUX video mode
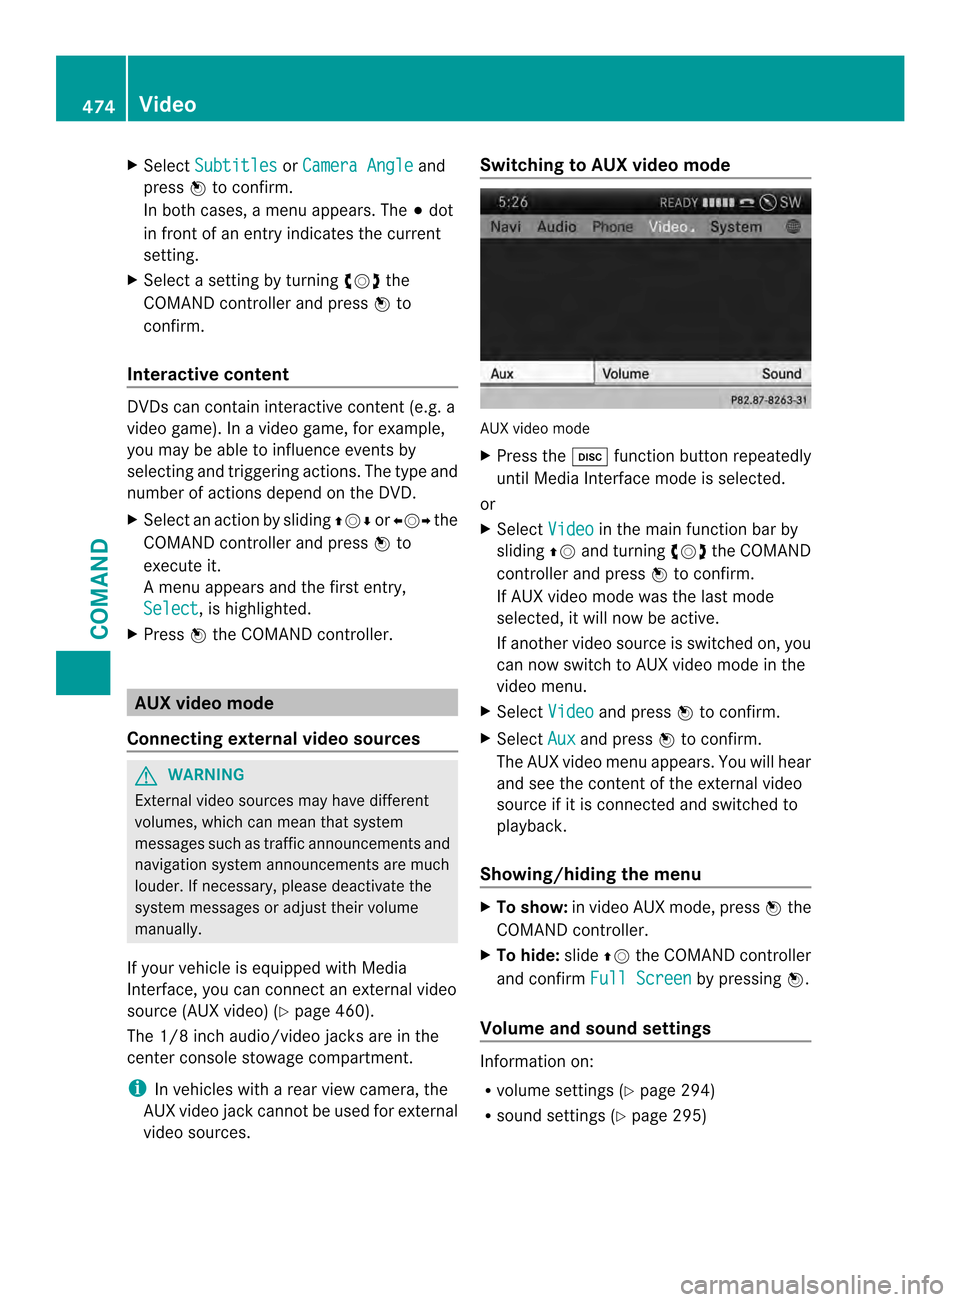
AUX video mode
X Press the 0009function button repeatedly
until Media Interface mode is selected.
or
X Select Video in the main function bar by
sliding 00380012and turning 003E0012003Fthe COMAND
controller and press 0039to confirm.
If AUX video mode was the last mode
selected, it will now be active.
If another video source is switched on, you
can now switch to AUX video mode in the
video menu.
X Select Video and press
0039to confirm.
X Select Aux and press
0039to confirm.
The AUX video menu appears. You will hear
and see the content of the external video
source if it is connected and switched to
playback.
Showing/hiding the menu X
To show: in video AUX mode, press 0039the
COMAND controller.
X To hide: slide00380012the COMAND controller
and confirm Full Screen by pressing
0039.
Volume and sound settings Information on:
R
volume settings (Y page 294)
R sound settings (Y page 295)474
VideoCOMAND
Page 532 of 590
i
First, tire sealant is pumped into the tire.
The pressure can briefly rise to
approximately 500 kPa (5.0 bar/73 psi).
Do no tswitch off the tire inflation
compressor during this phase.
X Allow the tire inflation compressor to run
forf ive minutes. The tire should the nhave
attained a pressure of at least 18 0kPa
(1.8 bar/26 psi).
If at ire pressure of 180 kPa (1.8 ba r/26 psi)
has bee nattained after five minutes:
(Y page 530).
If at ire pressure of 180 kPa (1.8 ba r/26 psi)
has not bee nattained after five minutes:
(Y page 530).
i If tire sealant leaks out, allow it to dry .It
can then be removed like a laye roffilm.
If your clothes are soiled with tire sealant,
have the mcleaned with perchloroethylene
at a dry cleaner as soon as possible.
Tire pressure not reached If
at ire pressure of 180 kPa (1.8 ba r/26 psi)
has not bee nattained after five minutes:
X Switch off the tire inflation compressor.
X Unscrew the filler hose fro mthe valve of
the faulty tire.
X Very slowly drive forwards or reverse
approximately 30 ft (10 m).
X Pump up the tire again.
After a maximum of five minutes the tire
pressure must be at least 180 kPa (1.8 bar/
26 psi). G
WARNING
If the required tire pressure is not reached
after the specified time, the tire is too badly
damaged. The tire sealant cannot repair the
tire in this instance. Damaged tires and a tire
pressure that is too low can significantly
impair the vehicle's braking and driving
characteristics. There is a risk of accident.
Do not continue driving. Contact a qualified
specialist workshop. Tire pressure reached G
WARNING
At ire temporarily sealed with tire sealant
impairs the driving characteristics and is not
suitable for higher speeds. There is a risk of
accident.
You should therefore adapt your driving style
accordingly and drive carefully. Do not exceed
the specified maximum speed with a tire that
has been repaired using tire sealant.
! Residue fro mthe tire sealant may come
out of the filler hose after use. This could
cause stains.
Therefore, place the filler hose in the plastic
bag which contained the TIREFIT kit. H
Environmental note
Have the used tire sealant bottle disposed of
professionally, e.g. at aqualified specialist
workshop.
If ap ressure of 180 kPa (1.8 ba r/26 psi) has
been attained after a maximum of ten
minutes:
X Switch off the tire inflation compressor.
X Unscrew the filler hose from the valve of
the faulty tire.
X Stow the tire sealant bottle and the tire
inflation compressor.
X Pull away immediately.
The maximu mspeed for a tire sealed with
tire sealant is 50 mph (80 km/h). The upper
part of the TIREFIT sticker must be affixed
to the instrument cluster in the driver's
field of vision.
X Stop after driving for approximately ten
minutes and chec kthe tire pressure with
the tire inflation compressor.
The tire pressure must now be at least
130 kPa (1.3 bar/19 psi). G
WARNING
If the required tire pressure is not reached
after driving for a short period, the tire is too 530
Flat tireBreakdown assistance
Page 533 of 590
badly damaged. The tire sealant cannot repair
the tire in this instance. Damaged tires and a
tire pressure that is too low can significantly
impair the vehicle's braking and driving
characteristics. There is a risk of accident.
Do not continue driving. Contact a qualified
specialist workshop.
X Correct the tire pressure if it is still at least
130 kPa (1.3 bar/19 psi) (for the values,
see the Tire and Loading Information
placard on the B-pillar on the driver's side
or tire pressure table on the fuel filler flap).
X To increase the tire pressure: switch on
the tire inflation compressor. X
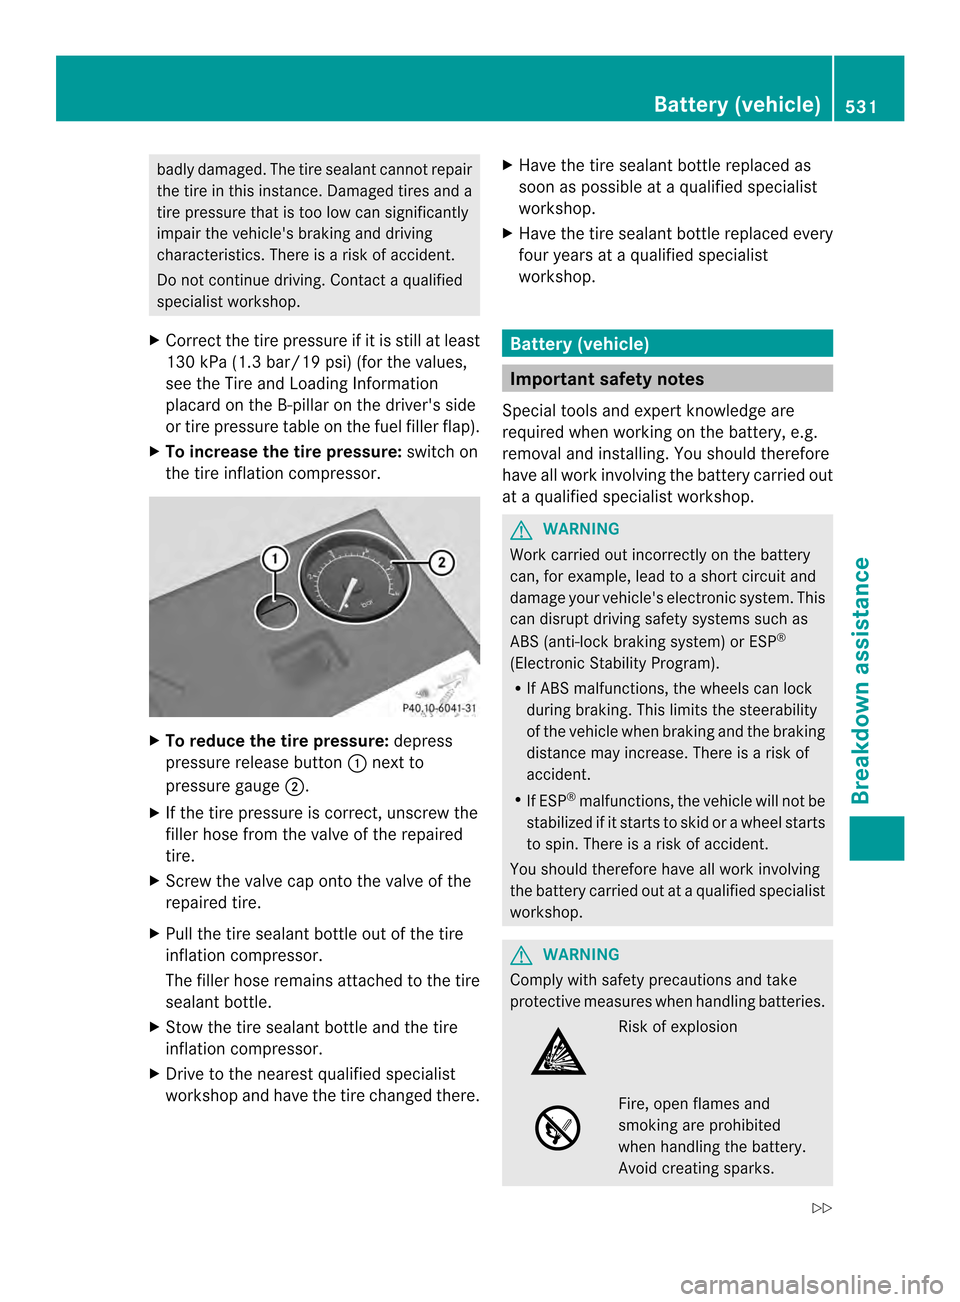
To reduce the tire pressure: depress
pressure release button 0002next to
pressure gauge 0003.
X If the tire pressure is correct, unscrew the
filler hose from the valve of the repaired
tire.
X Screw the valve cap onto the valve of the
repaired tire.
X Pull the tire sealant bottle out of the tire
inflation compressor.
The filler hose remains attached to the tire
sealant bottle.
X Stow the tire sealant bottle and the tire
inflation compressor.
X Drive to the nearest qualified specialist
workshop and have the tire changed there. X
Have the tire sealant bottle replaced as
soon as possible at a qualified specialist
workshop.
X Have the tire sealant bottle replaced every
four years at a qualified specialist
workshop. Batter
y(vehicle) Important safety notes
Special tools and expert knowledge are
required when working on the battery, e.g.
removal and installing. You should therefore
have all work involving the battery carried out
at a qualified specialist workshop. G
WARNING
Work carried out incorrectly on the battery
can, for example, lead to a short circuit and
damage your vehicle's electronic system. This
can disrupt driving safety systems such as
ABS (anti-lock braking system) or ESP ®
(Electronic Stability Program).
R If ABS malfunctions, the wheels can lock
during braking. This limits the steerability
of the vehicle when braking and the braking
distance may increase. There is a risk of
accident.
R If ESP ®
malfunctions, the vehicle will not be
stabilized if it starts to skid or a wheel starts
to spin. There is a risk of accident.
You should therefore have all work involving
the battery carried out at a qualified specialist
workshop. G
WARNING
Comply with safety precautions and take
protective measures when handling batteries. Risk of explosion
Fire, open flames and
smoking are prohibited
when handling the battery.
Avoid creating sparks. Battery (vehicle)
531Breakdown assistance
Z
Page 538 of 590
Towing and tow-starting
Important safety notes
G
WARNING
If you tow the vehicle, you must use a rigid
towing ba rif:
R the engine is not running.
R there is a brake system malfunction.
R there is a malfunction in the power supply
or the vehicle's electrical system.
The power assistance for the steering and the
brake force booster do not work when the
engine is not running. You will need more
force to steer and brake, you may have to
depress the brake pedal with maximu mforce.
Before towing away, make sure that the
steering can be moved and is not locked.
If you tow or tow-start another vehicle, its
weight must not exceed the maximum
permissible gross vehicle weight of your
vehicle. G
WARNING
The vehicle is braked when the HOLD function
or DISTRONIC PLUS is activated. Therefore,
deactivate HOLD and DISTRONIC PLUS if the
vehicle is to be towed.
! Only secure the tow rope or tow bar at the
towing eyes. Otherwise, the vehicle could
be damaged.
! Do not use the towing eye for recovery,
this could damage the vehicle. If in doubt,
recover the vehicle with acrane.
! When towing, pull away slowly and
smoothly .Ifthe tractive power is too high,
the vehicles could be damaged.
! Do not tow with sling-type equipment.
This could damage the vehicle.
! When towing vehicles with KEYLESS-GO,
use the key instead of the Start/Stop
button. Otherwise, the automatic
transmission may shift to position Pwhen
the driver's or front-passenger door are opened, which could lead to damage to the
transmission.
! Make sure that the electric parking brake
is released. If the electric parking brake is
faulty, visit a qualified specialist workshop.
! The vehicle can be towed a maximum of
30 miles (50km). The towing speed of
30 mph (50 km/h) must not be exceeded.
If the vehicle has to be towed more than
30 miles (50km), the entire vehicle must be
raised and transported.
! If you tow or tow-start another vehicle, its
weight must not exceed the maximum
permissible gross vehicle weight of your
vehicle.
Information on your vehicle's gross vehicle
weight rating can be found on the vehicle
identification plate (Y page 577).
It is better to have the vehicle transported
than to have it towed.
The automatic transmission must be in
position Nwhen the vehicle is being towed.
The battery must be connected and charged.
Otherwise, you:
R cannot turn the SmartKey to position 2in
the ignition lock
R cannot shift the automatic transmission to
position N
i Deactivate the automatic locking feature
(Y page 235). You could otherwise be
locked out when pushing or towing the
vehicle. Installing/removing the towing eye
Installing the towing eye G
WARNING
The exhaust tail pipe may be hot. You could
burn yourself if you touch the tail pipe. Be
particularly careful when removing the rear
cover. 536
Towing and tow-startingBreakdown assistance