warning MERCEDES-BENZ SL-Class 2014 R131 Comand Manual
[x] Cancel search | Manufacturer: MERCEDES-BENZ, Model Year: 2014, Model line: SL-Class, Model: MERCEDES-BENZ SL-Class 2014 R131Pages: 274, PDF Size: 5.76 MB
Page 102 of 274

Symbols used in real-time traffic reports
Unimpeded traffic flow
Green line with arrows
The arrows can be seen on a map scale of 200 m (0.25 mi) and smaller.
Heavy/slow-moving traffic
Together with a yellow line
The symbol marks average speeds of 25 – 45 mph(40 – 72 km/h).
Caution, traffic incident
Traffic jam
Together with a red line and arrows
The symbol marks average speeds of 5 - 20 mph(8 - 32 km/h).
The arrows can be seen on a map scale of 200 m (0.25 mi) and smaller. Warning message
Together with a red/white striped line and arrows
The arrows can be seen on a map scale of 200 m (0.25 mi) and smaller.
Blocked route section
Possibly in combination with XXXX
Displaying real-time traffic reports
Starting a search for traffic reports X
To switch to navigation mode: press the
0012 button.
X To show the menu: press0037the COMAND
controller.
X Select Traffic by turning
003C0012003Dthe
COMAND controller and press 0037to
confirm.
Am enu appears.
If No Traffic Messages appears, this
means either:
R no traffic reports have been received yet,
or
R no traffic reports are available.
X To end the search: selectCancel and
press 0037to confirm.
X To close the repor twindow: selectOK and press
0037to confirm. Traffic symbol information
Example display
0001
Affected roads with indication of direction
0002 Symbol for report type, e.g. traffic flow
message
X To switch to navigation mode: press the
0012 button.
X To show the menu: press0037the COMAND
controller. 100
Traffic reportsNavigation
Page 121 of 274
Updating the digital map
Introduction The digital maps generated by the map
software become outdated in the same way
as conventional road maps. Optimal route
guidance can only be provided by
the navigation system in conjunction with the
most up-to-date map software.
Information about new versions of the digital
map can be obtained from an authorized
Mercedes-Benz Center. You can have the
digital map updated there with a DVD, or you
can update it yourself.
Important safety notes G
WARNING
Never leave the engine running in an enclosed
space. The exhaust gases contain carbon
monoxide. Inhaling exhaust gases constitutes
a health hazard and could lead to loss of
consciousness or even death.
Carrying out a manual update i
The update process can tak ealong time
(over an hour), depending on the size of the
digital map. During this time, you will only
be able to switch on radio mode and to
accept incoming calls. The update will be
completed more quickly if the vehicle is
stationary.
If you start the update with the engine
switched off and the starter battery has
insufficient power, COMAND may
automatically switch off .This protects the
battery. If this occurs, restart the update
with the engine running.
X Insert the DVD:
R
in the single DVD drive (Y page 194)
R in the DVD changer (Y page 194)
COMAND checks whether the digital map
on the DVD is compatible with the
navigation system and system software. Ap
rompt then appears asking if you want
to install the database. Versions of the
database currently installed and the
database that is to be installed are
displayed.
X Select Yes or
No and press
0037to confirm.
After selecting Yes , an activation code
must be entered when installing a database
for the first time. You will receive the
activation code when you buy the
navigation DVD.
If you select No , the process will be
canceled.
X Enter the activation code.
After entering the activation code
correctly, COMAND starts updating the
digital map. Once the update is finished,
you will see a message.
X To confirm the message: press0037the
COMAND controller.
X Take the DVD out of the slot.
While the update is running, you will see a
message to this effect and a progress bar.
The navigation system is not operational
until the update is complete.
i You cannot eject the DVD during the
update. If you switch off COMAND during
the update, the update is interrupted. It
then continues from where it was
interrupted when the system is restarted.
COMAND may prompt you to change the DVD
during the update.
X Press the 0009(for DVD changer) or
0007 (for single DVD drive) load/eject
button.
X Take the DVD out of the slot.
X Insert the requested DVD.
Once the update has been successfully
completed, you will see a message to this
effect.
X To confirm the message: press0037the
COMAND controller.
X Take the DVD out of the slot.
The update is complete. Additional settings
119Navigation Z
Page 128 of 274
Your COMAND equipment
These operating instructions describe all the
standard and optional equipmen tfor your
COMAND system, as available at the time of
going to print. Country-specific differences
are possible. Please note that your COMAND
system may not be equipped with all the
features described. General notes
Important safety notes
G
WARNING
If you operate mobile communication
equipment while driving, you will be
distracted from traffic conditions. You could
also lose control of the vehicle. There is a risk
of an accident.
Only operate this equipment when the vehicle
is stationary.
If you make a call on your mobile phone while
driving, always use hands-free mode. Only
use the mobile phone when road, weather
and traffic conditions permit. Some
jurisdictions prohibit the driver from using a
mobile phone while driving a vehicle.
Bear in mind that at a speed of only 30 mph
(approximately 50 km/h), the vehicle covers
a distance of 44 feet (approximately 14 m)
per second.
Excessive levels of electromagnetic radiation
may cause damage to your health and the
health of others.
There is scientific discussion surrounding the
possible health risks posed by
electromagnetic fields. You can reduce this
risk by using an exterior antenna.
Therefore, only use mobile communication
equipment if it is connected to the exterior
antenna of the vehicle. Introduction
COMAND provides telephony via the
Bluetooth ®
interface.
When connecting Bluetooth ®
-capable mobile
phones with PBAP (Phone BookAccess
Profile), the contacts are automatically
downloaded to COMAND.
With a suitable mobile phone, you can use the
hands-free system and receive vCards via the
Bluetooth ®
interface.
You can use the text message function
(receiving and reading) if the mobile phone
supports the MAP (Message AccessProfile)
Bluetooth ®
profile.
You can obtain more detailed information
about suitable mobile phones and about
connecting Bluetooth ®
-capable mobile
phones to COMAND on the Internet at
http://www.mbusa-mobile.com. Or call
the Mercedes-Benz Customer Assistance
center at
1-800-FOR-MERCedes(1-800-367-6372) for
the USA or at 1-800-387-0100 for Canada. Call disconnection while the vehicle is
in motion
Ac all may be disconnected if:
R there is insufficient network coverage in
certain areas.
R you move from one transmitter/receiver
area (cell) into another and no channels are
free.
R you use a SIM card which is no tcompatible
with the network available. Operating options
You can operate the telephone by:
R using the COMAND controller:
turn 003C0012003D
slide 003400120035 or003600120008 126
General notesTelephone
Page 195 of 274
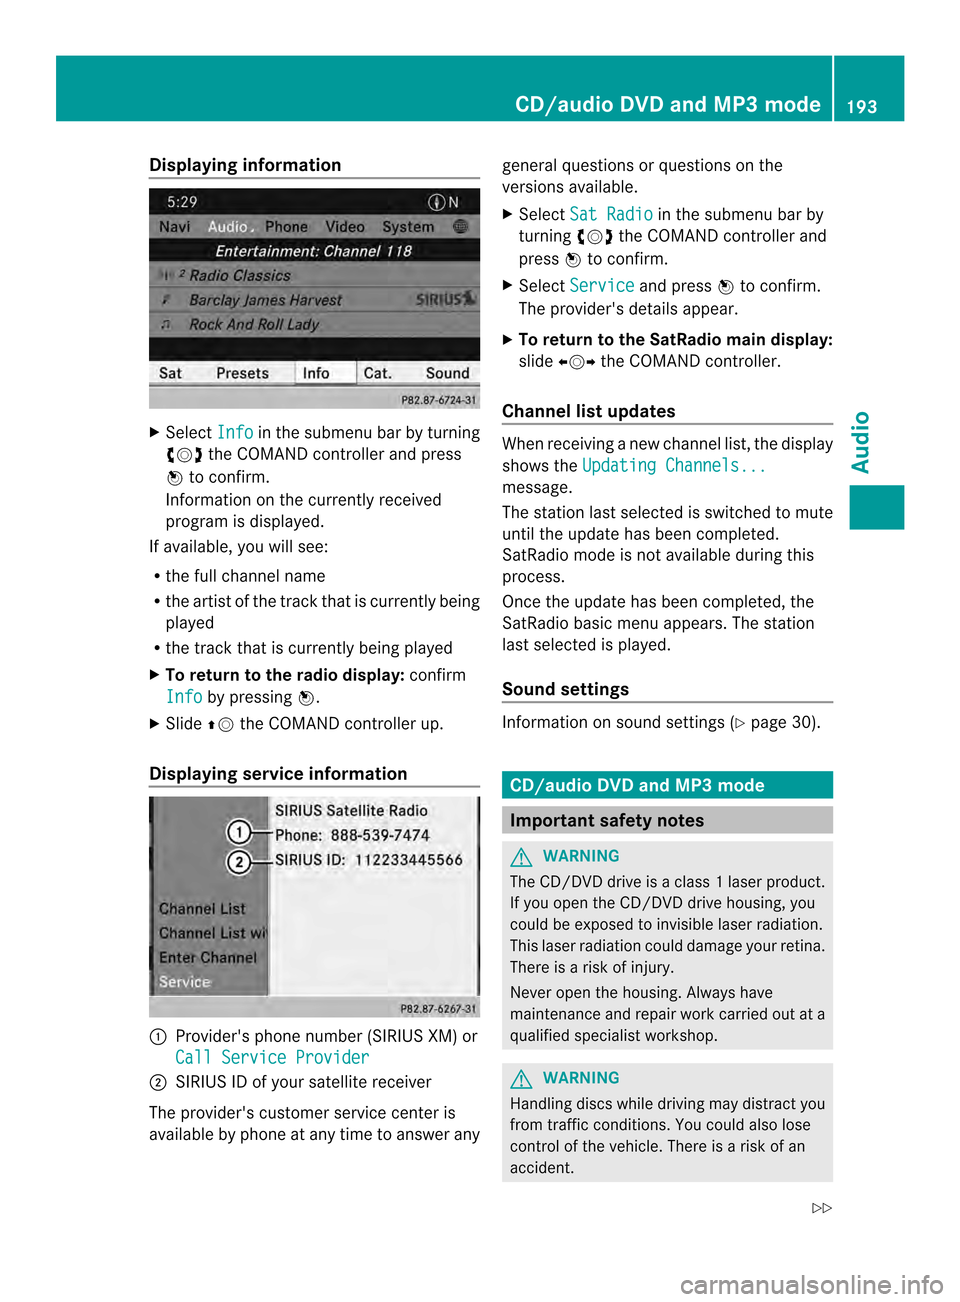
Displaying information
X
Select Info in the submenu bar by turning
003C0012003D the COMAND controller and press
0037 to confirm.
Information on the currently received
program is displayed.
If available, you will see:
R the full channel name
R the artist of the track that is currently being
played
R the track that is currently being played
X To return to the radio display: confirm
Info by pressing
0037.
X Slide 00360012the COMAND controller up.
Displaying service information 0001
Provider's phone number (SIRIUS XM) or
Call Service Provider 0002
SIRIUS ID of your satellite receiver
The provider's customer service center is
available by phone at any time to answer any general questions or questions on the
versions available.
X
Select Sat Radio in the submenu bar by
turning 003C0012003Dthe COMAND controller and
press 0037to confirm.
X Select Service and press
0037to confirm.
The provider's details appear.
X To return to the SatRadio main display:
slide 003400120035 the COMAND controller.
Channel list updates Whe
nreceiving a new channel list, the display
shows the Updating Channels... message.
The station last selected is switched to mute
until the update has been completed.
SatRadio mode is not available during this
process.
Once the update has been completed, the
SatRadio basic menu appears. The station
last selected is played.
Sound settings
Information on sound settings (Y
page 30). CD/audio DVD and MP3 mode
Important safety notes
G
WARNING
The CD/DVD drive is a class 1laser product.
If you open the CD/DV Ddrive housing, you
could be exposed to invisible laser radiation.
This laser radiation could damage yourr etina.
There is a risk of injury.
Never open the housing. Always have
maintenance and repair work carried out at a
qualified specialist workshop. G
WARNING
Handling discs while driving may distrac tyou
from traffic conditions. You could also lose
control of the vehicle. There is a risk of an
accident. CD/audio DVD and MP3 mode
193Audio
Z
Page 230 of 274
Your COMAND equipment
These operating instructions describe all the
standard and optional equipmen tfor your
COMAND system, as available at the time of
going to print. Country-specific differences
are possible. Please note that your COMAND
system may not be equipped with all the
features described. General information
Automatic picture shutoff
The video image is shown only when the
transmission selector lever is in position P.
When the transmission lever is disengaged
from position P, the following message
appears in the display: In order not todistract you from the traffic
situation, the picture is faded out
while the vehicle is in motion.
As soon as the selector lever of the
transmission is returned to position
P, the
video image is shown. Basic settings
Adjusting the brightness, contrast or
color
X In video DVD or video AUX mode, press the
0037 COMAND Controller.
The menu is shown.
X Select DVD-Video or
Aux by turning
003C0012003D
the COMAND controller and press 0037to
confirm.
Am enu appears.
X Select Brightness ,
Contrast or
Color by
turning 003C0012003Dthe COMAND controller and
press 0037to confirm.
X Set the value between -5and+5a nd press
0037 to confirm. Changing the picture format
X Press 0037the COMAND controller.
The menu is shown.
X Select DVD-Video by sliding
00120008and
turning 003C0012003Dthe COMAND controller and
press 0037to confirm.
Am enu appears.
X Select 16:9 Optimized ,
4:3 or
Widescreen and press
0037to confirm.
The dot in front of the entry indicates the
currently selected format.
X Select a setting by turning 003C0012003Dthe
COMAND controller and press 0037to
confirm. Video DVD mode
Important safety notes
G
WARNING
The CD/DVD drive is a class 1laser product.
If you open the CD/DV Ddrive housing, you
could be exposed to invisible laser radiation.
This laser radiation could damage yourr etina.
There is a risk of injury.
Never open the housing. Always have
maintenance and repair work carried out at a
qualified specialist workshop. G
WARNING
Handling discs while driving may distrac tyou
from traffic conditions. You could also lose
control of the vehicle. There is a risk of an
accident.
Handle discs only when the vehicle is
stationary.
Bear in mind that at a speed of just 30 mph
(approximately 50 km/h), your vehicle is
covering a distance of 44 feet (approximately
14 m) every second. 228
Video DVD modeVideo
Page 240 of 274
Your COMAND equipment
These operating instructions describe all the
standard and optional equipmen tfor your
COMAND system, as available at the time of
going to print. Country-specific differences
are possible. Please note that your COMAND
system may not be equipped with all the
features described. Overview
Important safety notes
G
WARNING
The CD/DVD drive is a class 1laser product.
If you open the CD/DV Ddrive housing, you
could be exposed to invisible laser radiation.
This laser radiation could damage yourr etina.
There is a risk of injury.
Never open the housing. Always have
maintenance and repair work carried out at a
qualified specialist workshop. G
WARNING
If objects such as headphones/headsets or
external audio/video sources are not secured
in the passenger compartment, they can be
flung around and hit vehicle occupants. There
is a risk of injury, for example in the event of
sudden braking or a sudden change in
direction.
Always stow these items or similar objects
carefully so that they cannot be flung around,
for example in a lockable vehicle stowage
compartment. Components
The Rear Seat Entertainment System
includes:
R two screens for the rear behind the front-
seat head restraints
R two remote controls
R a CD/DVD drive R
AUX jacks on both screens (AUX display)
and on the CD/DVD drive (AUX drive)
R two sets of cordless headphones 238
OverviewRear Seat Entertainment System
Page 244 of 274
Adjusting the volume of the
headphones
X
Turn volume control 0001until the desired
volume has been set.
i If you have connected cordless
headphones to a rear-compartment
screen, you can adjust the volume using
the remote control (Y page 239).
Selecting ascreen for the headphones X
Move push slider 0001toL(left-hand screen)
or R(right-hand screen). Indicator lamp displays The color of the indicator lamp shows
whether the headphones are switched on or
off and indicates the charge level of the
batteries inserted.
LED
display Status
Green The batteries are fine.
Red The batteries are almost
discharged.
Lit
continuous
ly The headphones are switched
on and connected to
ascreen. Flashing The headphones are
searching for the connection
to a screen.
Off (dark) The headphones are switched
off or the batteries are
discharged.
Connecting additional headphones
You can connect one additional set of corded
headphones to each of the two rea
rscreens
(Y page 239). The socke tis designed for
headphones with a 3.5 mm stereo jack plug
and an impedance of 32 ohms. Replacing batteries
Notes G
WARNING
Batteries contain toxic and corrosive
substances. If batteries are swallowed, it can
result in severe health problems. There is a
risk of fatal injury.
Keep batteries out of the reach of children. If
a battery is swallowed, seek medical attention
immediately. 242
OverviewRear Seat Entertainment System
Page 248 of 274
X
Select Settings using the
0009button
and press 0016to confirm.
X Select Language using the
00080009
buttons and press the 0016button to confirm.
The list of languages appears .A0027dot
indicates the current setting.
X Select a language using the 00080009
buttons and press the 0016button to confirm.
The Rear Seat Entertainment System
activates the selected language. Switching the displa
ydesign
X Select Settings using the
0009button
and press 0016to confirm.
X Select Day Mode ,
Night Mode or
Automatic using the
00080009 buttons
and press the 0016button to confirm.
The dot indicates the curren tsetting. Design Explanation
Day Mode The display is set
permanently to day
design.
Night Mode The display is set
permanently to night
design.
Automatic The display design
changes depending on
the vehicle instrument
cluster illumination.
Setting the brightness
X Select Settings using the
0009button
and press 0016to confirm.
X Select Brightness using the
00080009
buttons and press the 0016button to confirm.
As cale appears. X
Adjust the brightness using the 00080009
buttons and press the 0016button to confirm.
The brightness ba rmoves up or down. The
picture becomes lighter or darker in
accordance with the scale. Showing/hiding the picture
X To hide the picture: selectDisplay Off in the system menu using the
0009000A
buttons on the remote control and press
the 0016button to confirm.
The picture is hidden.
X To display the picture: press the0016
button. CD/audio DVD and MP3 mode
Important safety notes
G
WARNING
The CD/DVD drive is a class 1laser product.
If you open the CD/DV Ddrive housing, you
could be exposed to invisible laser radiation.
This laser radiation could damage yourr etina.
There is a risk of injury.
Never open the housing. Always have
maintenance and repair work carried out at a
qualified specialist workshop. General notes
You will find information on the following
topics in the Audio section:
R notes on CDs/DVDs (Y page 206)
R notes on MP3 mode (Y page 204)
R notes on copyright (Y page 205)246
CD/audio DVD and MP3 modeRear Seat Entertainment System
Page 253 of 274
X
Select CD ,
DVD-A or
MP3 using
the 00090006000A buttons on the remote
control and press the 0016button to confirm.
The options list appears .The 0027 dot
indicates the option currently selected.
X Select Normal Track Sequence ,
Random Tracks or
Random Folder using the
00080009 buttons and press the 0016button
to confirm.
The option is switched on. For all options
except Normal Track Sequence , you will
see a corresponding display in the display/
selection window.
i If you switch the data carrier which you
are currently listening to, the NormalTrack Sequence option is activated
automatically .Ifanoption is selected, it
remains selected after the Rear Seat
Entertainment System is switched on or
off. Switching track information on/off
(MP3 mode only)
If the function is switched on, folder and track
names are displayed.
If the function is switched off, disc and file
names are displayed.
X Select MP3 using the
00090006000A
buttons on the remote control and press
the 0016button to confirm.
X Select Display Track Information using the
00080009 buttons and press the
0016 button to confirm.
The function is switched on 0010or off 0003,
depending on the previous status. Video DVD mode
Important safety notes
G
WARNING
The CD/DVD drive is a class 1laser product.
If you open the CD/DV Ddrive housing, you could be exposed to invisible laser radiation.
This laser radiation could damage yourr
etina.
There is a risk of injury.
Never open the housing. Always have
maintenance and repair work carried out at a
qualified specialist workshop. General notes
DVD playback conditions Playback problems may occur when playing
copied discs. There is a large variety of discs,
DVD authoring software, writing software and
writers available. This variety means that
there is no guarantee that the Rear Seat
Entertainment System will be able to play
video DVDs that you have copied yourself.
Further information can be found under video
(Y
page 229). Information regarding
COMAND also applies to the Rear Seat
Entertainment System.
Function restrictions Depending on the DVD, it is possible that
certain functions or actions described in this
section will be temporarily blocked or may not
function at all. As soon as you try to activate
these functions or actions, you will see the
0005
symbol in the display. Switching to video DVD mode
X Insert a video DVD (Y page 247).
The Rear Seat Entertainment System loads
the disc.
If disc mode was the last mode selected, it
will now be active.
If it was not, switch on video DVD mode as
described in the following instruction.
X Select Disc in the menu using the
00080006000A buttons on the remote Video DVD mode
251Rear Seat Entertainment System Z