clock MERCEDES-BENZ SL-Class 2015 R131 User Guide
[x] Cancel search | Manufacturer: MERCEDES-BENZ, Model Year: 2015, Model line: SL-Class, Model: MERCEDES-BENZ SL-Class 2015 R131Pages: 610, PDF Size: 12.21 MB
Page 224 of 610
Useful information
i This Operator's manual describes all
models and all standard and optional equip- ment of your vehicle available at the time of
publication of the Operator's manual.
Country-specific differences are possible.
Please note that your vehicle may not be
equipped with all features described. This
also applies to safety-related systems and
functions.
i Read the information on qualified special-
ist workshops (Y page 35). Important safety notes
G
WARNING
If you operate information systems and com-
munication equipment integrated in the vehi- cle while driving, you will be distracted from
traffic conditions. You could also lose control of the vehicle. There is a risk of an accident.
Only operate the equipment when the traffic
situation permits. If you are not sure that this
is possible, park the vehicle paying attention
to traffic conditions and operate the equip-
ment when the vehicle is stationary.
You must observe the legal requirements for
the country in which you are currently driving when operating the on-board computer. G
WARNING
If the instrument cluster has failed or mal-
functioned, you may not recognize function
restrictions in systems relevant to safety. The operating safety of your vehicle may be
impaired. There is a risk of an accident.
Drive on carefully. Have the vehicle checked
at a qualified specialist workshop immedi-
ately.
The on-board computer only shows messages
or warnings from certain systems in the mul- tifunction display. You should therefore make
sure your vehicle is operating safely at all times. Otherwise, a vehicle that is not oper-
ating safely may cause an accident.
If the operating safety of your vehicle is
impaired, pull over as soon as it is safe to do
so. Contact a qualified specialist workshop.
For an overview, see the instrument panel
illustration (Y
page 41). Displays and operation
Instrument cluster lighting
The lighting in the instrument cluster, in the
displays and the controls in the vehicle inte-
rior can be adjusted using the brightness con-
trol knob.
The brightness control knob is on the bottom left of the instrument cluster (Y page 41).
X Turn the brightness control knob counter-
clockwise or clockwise.
If the light switch is set to 0058,0060or
0058, the brightness is dependent upon
the brightness of the ambient light.
i The light sensor in the instrument cluster
automatically controls the brightness of
the multifunction display.
In daylight, the displays in the instrument
cluster are not lit. Coolant temperature display
G
WARNING
Opening the hood when the engine is over-
heated or when there is a fire in the engine
compartment could expose you to hot gases
or other service products. There is a risk of
injury.
Let an overheated engine cool down before
opening the hood. If there is a fire in the
engine compartment, keep the hood closed
and contact the fire department.
! A display message is shown if the coolant
temperature is too high. 222
Displays and operationOn-board computer and displays
Page 236 of 610
Delayed switch-off of the exterior lighting is
reactivated the next time you start the
engine.
If you have activated the Surround Light‐
Surround Light‐
ing
ing function and the light switch is set to
0058, the following functions are activated
when it is dark:
R surround lighting: the exterior lighting
remains lit for 40 seconds after unlocking
with the SmartKey. If you start the engine,
the surround lighting is switched off and
automatic headlamp mode is activated
(Y page 122).
R exterior lighting delayed switch-off: the
exterior lighting remains lit for 60 seconds
after the engine is switched off. If you close all the doors and the trunk lid, the exterior
lighting goes off after 15 second s.
i Depending on your vehicle's equipment,
when the surround lighting and delayed
switch-off exterior lighting are on, the fol-
lowing light up:
R Parking lamps
R Low-beam headlamps
R Daytime running lamps
R Side marker lamps
R Surround lighting in the exterior mirrors
Activating/deactivating the interior light-
ing delayed switch-off
If you activate the Interior Lighting
Interior Lighting
Delay
Delay function, the interior lighting remains
on for 20 seconds after you remove the
SmartKey from the ignition lock.
X Press the 0059or0065 button on the steer-
ing wheel to select the Sett Settmenu.
X Press the 0064or0063 button to select the
Lights
Lights submenu.
X Press 0076to confirm.
X Press the 0064or0063 button to select the
Interior Lighting Delay
Interior Lighting Delay function.
If the Interior
Interior Lighting
LightingDelay
Delayfunction
has been switched on, the vehicle interior is displayed in orange in the multifunction
display.
X Press the 0076button to save the setting.
Vehicle Activating/deactivating the automatic
door locking mechanism
X Press the 0059or0065 button on the steer-
ing wheel to select the Sett Settmenu.
X Press the 0064or0063 button to select the
Vehicle
Vehicle submenu.
X Press 0076to confirm.
X Press 0064or0063 to select the Auto‐
Auto‐
matic Door Lock
matic Door Lock function.
When the Automatic
Automatic Door
DoorLock
Lockfunction
is activated, the left-hand vehicle door is
displayed in orange in the multifunction
display.
X Press the 0076button to save the setting.
If you activate the Automatic Door Lock Automatic Door Lock
function, the vehicle is centrally locked above
a speed of around 9 mph (15 km/h).
For further information on the automatic lock- ing feature, see (Y page 89).
Activating/deactivating the acoustic
locking verification signal
If you switch on the Acoustic AcousticLock
Lockfunction,
an acoustic signal sounds when you lock the
vehicle.
X Press the 0059or0065 button on the steer-
ing wheel to select the Sett
Sett menu.
X Press the 0064or0063 button to select the
Vehicle Vehicle submenu.
X Press 0076to confirm.
X Press the 0064or0063 button to select the
Acoustic Lock
Acoustic Lock function.
If the Acoustic
Acoustic Lock
Lockfunction is activated,
the 0037 symbol in the multifunction dis-
play lights up orange.
X Press the 0076button to save the setting. 234
Menus and submenusOn-board computer and displays
Page 294 of 610
Function Page
006E
Number pad
• Selects stations via the
station presets
436
• Stores stations manually 437
• Mobile phone authoriza-
tion 383
• Telephone number entry 387
• Sends DTMF tones 389
• Character entry 301
• Selects a location for the
weather forecast from the
memory 503
0090
Displays the current
track being played 450
007D
Selects stations by
entering the frequency
manually 437
007D
Selects a track 447
006F
Switches COMAND on/off 295
Adjusts the volume 295 Function Page
0070
SD memory card slot 445
0071
Calls up the system menu 306
0072
Accepts a call 387
Dials a number 387
Redials 388
Accepts a waiting call 389
0073
Switches the sound on or
off
295
Switches the microphone
on/off
388
Cancels the text message
read-aloud function
399
Switches off navigation
announcements
295
0074
Rejects a call 387
Ends an active call 390
Rejects a waiting call 389
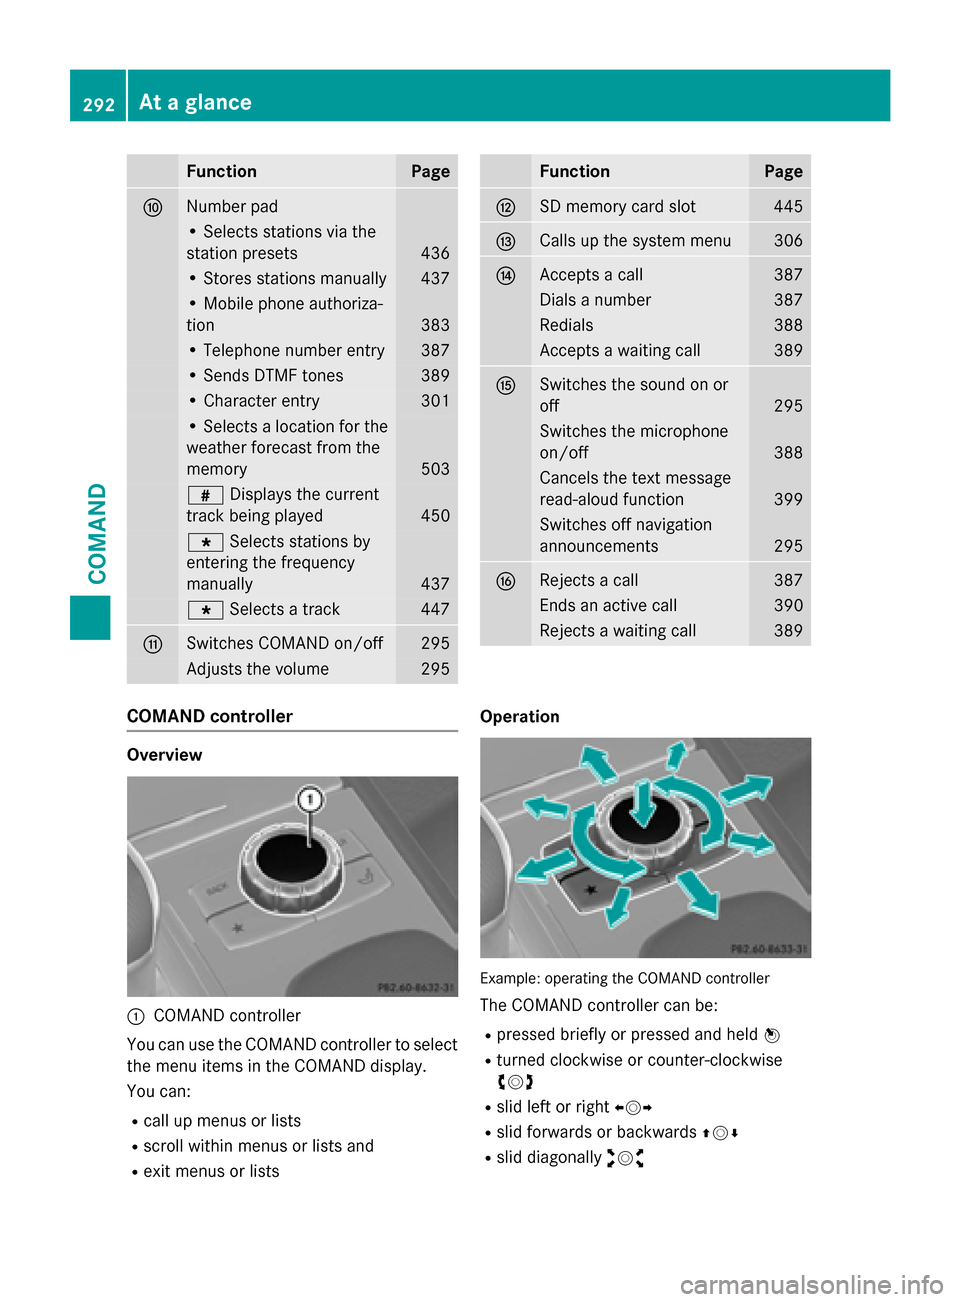
COMAND controller
Overview
0043
COMAND controller
You can use the COMAND controller to select the menu items in the COMAND display.
You can:
R call up menus or lists
R scroll within menus or lists and
R exit menus or lists Operation
Example: operating the COMAND controller
The COMAND controller can be:
R pressed briefly or pressed and held 0098
R turned clockwise or counter-clockwise
00790052007A
R slid left or right 009500520096
R slid forwards or backwards 009700520064
R slid diagonally 009100520078292
At a glanceCOMAND
Page 311 of 610
able, the navigation announcements will be in
English.
When you set the system language, the lan-
guage of the Voice Control System will
change accordingly. If the selected language
is not supported by the Voice Control System,
English will be selected.
X Press the 0066button.
X Select System System by turning 00790052007Athe
COMAND controller and press 0098to con-
firm.
X Select Language
Language and press0098to confirm.
The list of languages appears. The 003Bdot
indicates the current setting.
X Select the language by turning 00790052007Athe
COMAND controller and press 0098to con-
firm.
COMAND loads the selected language and
sets it. Assigning a favorites button
X To assign a favorites button: press the
0066 button.
X Select System
System by turning 00790052007Athe
COMAND controller and press 0098to con-
firm.
X Select Assign
Assign as asFavorite
Favorite and press0098
to confirm.
The list of predefined functions appears.
The dot 003Bindicates the currently selected
function.
X Select the function by turning 00790052007Athe
COMAND controller and press 0098to con-
firm.
The favorites button is assigned the selec-
ted function.
X Example: to call up a favorite: press the
007D favorites button.
This calls up the predefined function. You can select the following predefined func-
tions in a menu:
R SplitView on/off SplitView on/off : you can switch the
screen view for the front passenger on or
off.
R Display On/Off Display On/Off : you can switch the dis-
play off or on.
R Full Screen: 'Clock'
Full Screen: 'Clock': you can call up
the full screen with the clock.
R 00A7 Menu
Menu: you can call up the online and
Internet functions.
R 360°
360° Camera
Camera : you can call up the picture of
the 360° camera.
R Full screen: 'Map'
Full screen: 'Map' : you can call up the
full screen with the map.
R Spoken Driving Tip
Spoken Driving Tip : you can call up the
current driving recommendation.
R Display
Display Traffic
Traffic Messages
Messages: you can call
up traffic reports.
R Navigate Home
Navigate Home: you can start route guid-
ance to your home address if you have
already entered and saved the address
(Y page 327).
R Detour Menu Detour Menu: you can call up the Detour
menu and then block a section of the route
and recalculate the route (Y page 349).
R Compass Compass Screen
Screen: you can call up the com-
pass. Importing/exporting data
General notes !
Never remove the stick or card when writ-
ing data to the USB stick or the memory
card. You may otherwise lose data. System settings
309COMAND Z
Page 316 of 610
Details on the displays:
R for all vehicles except AMG vehicles, see
the separate vehicle Operator's Manual
R for AMG vehicles, see the separate vehicle
Operator's Manual.
Exiting the display X
Slide 009500520096 the COMAND controller until
the desired display (clock or fuel consump-
tion) is shown. Seat functions
Overview Using the
0050button next to the COMAND
controller or the Seat menu item in the sys-
tem menu, you can call up different setting
functions. The following settings depend on
the type of seat and the vehicle model series:
R Seat cushion length
R Backrest side bolsters
R Lumbar
R Balance
R Seat cushion side bolsters
R Dynamics
R Massage
i You can also store and recall the current
seat function settings using the memory
button and the corresponding memory
position switch; see the separate vehicle
Operator's Manual.
The massage function cannot be started or
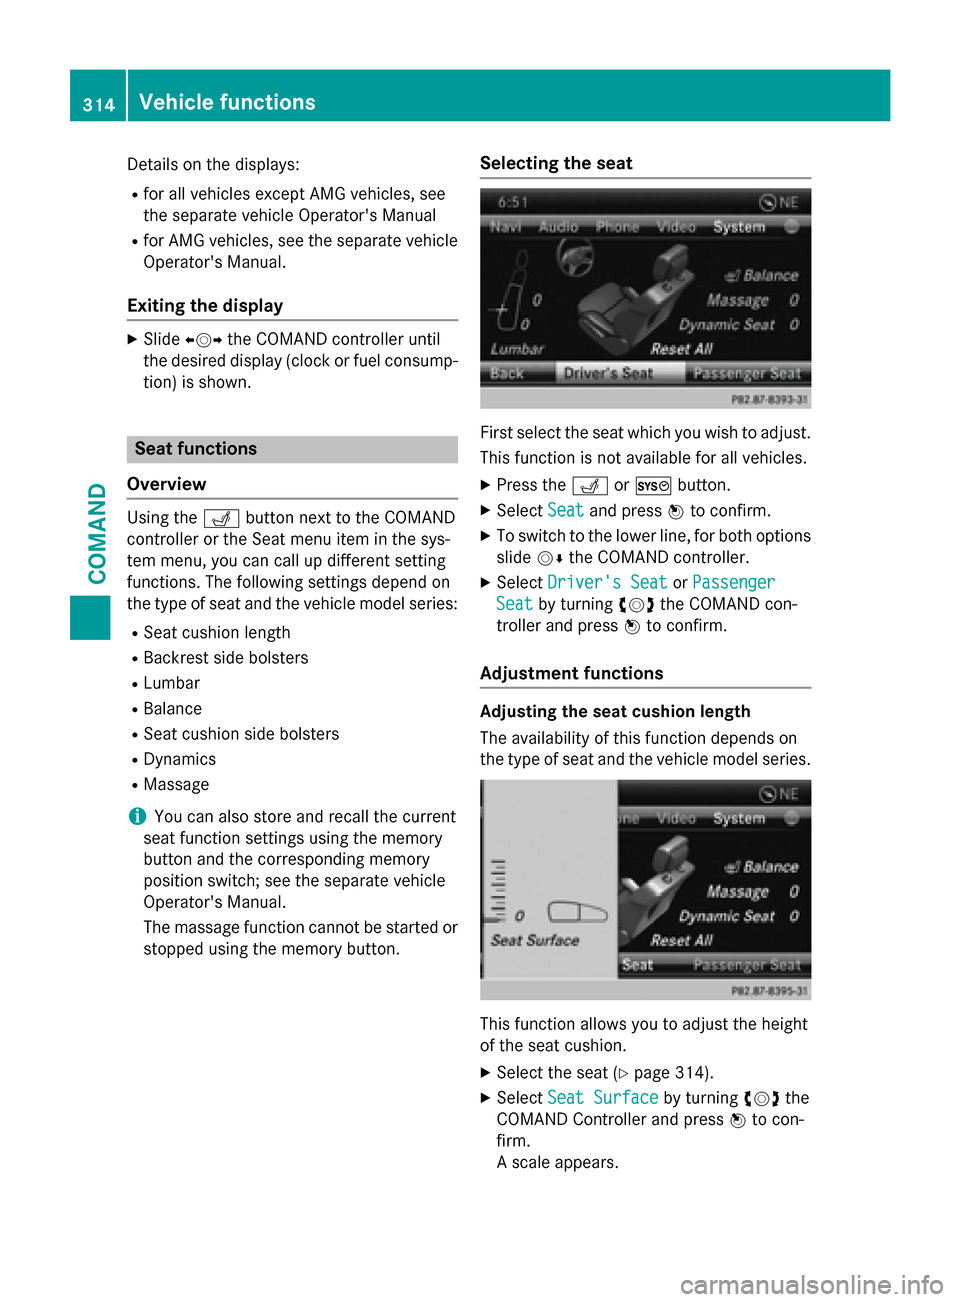
stopped using the memory button. Selecting the seat First select the seat which you wish to adjust.
This function is not available for all vehicles.
X Press the 0050or0066 button.
X Select Seat Seatand press 0098to confirm.
X To switch to the lower line, for both options
slide 00520064the COMAND controller.
X Select Driver's Seat
Driver's Seat orPassenger
Passenger
Seat
Seat by turning 00790052007Athe COMAND con-
troller and press 0098to confirm.
Adjustment functions Adjusting the seat cushion length
The availability of this function depends on
the type of seat and the vehicle model series. This function allows you to adjust the height
of the seat cushion.
X Select the seat (Y page 314).
X Select Seat Surface Seat Surface by turning00790052007Athe
COMAND Controller and press 0098to con-
firm.
A scale appears. 314
Vehicle functionsCOMAND
Page 331 of 610

X
Select Destination
Destination in the navigation sys-
tem menu bar by turning 00790052007Athe
COMAND controller and press 0098to con-
firm. X
Select From Last Destinations
From Last Destinations and
press 0098to confirm.
X Select the desired destination by turning
00790052007A the COMAND controller and press 0098
to confirm.
The address entry menu appears again. The
destination address selected has been
entered.
X To start route calculation: selectStart
Start
and press 0098to confirm.
Once the route has been calculated, route
guidance begins (Y page 327).
i “Last destinations” memory
(Y page 364).
Entering a destination using the map Calling up the map
X To switch to navigation mode: press the
00BE button.
X To show the menu: press0098the COMAND
controller.
X Select Destination
Destination in the navigation sys-
tem menu bar by turning 00790052007Athe
COMAND controller and press 0098to con-
firm. 0043
Current vehicle position
0044 Crosshair
0087 Details of the crosshair position
0085 Map scale selected
X Select Using Using Map
Mapand press 0098to confirm.
You will see the map with a crosshair.
Display 0087depends on the settings selected
in "Map information in the display"
(Y page 368). You can see the current street
name if the digital map contains the neces-
sary data, You can see the coordinates of the
crosshair if the geo-coordinate display is
switched on and the GPS signal is strong
enough.
Moving the map and selecting the desti-
nation
X To scroll the map: slide009500520096,009700520064 or
009100520078 the COMAND controller.
X To set the map scale: as soon as you turn
00790052007A the COMAND controller, the scale bar
appears.
X Turn 00790052007A until the desired scale is set.
Turning clockwise zooms out from the map;
turning counter-clockwise zooms in. Navigation
329COMAND Z
Page 374 of 610
X
To set the map scale: as soon as you turn
00790052007A the COMAND controller, the scale bar
appears. Turning clockwise zooms out from the map; turning counter-clockwise zooms
in.
X Turn 00790052007A until the desired scale is set.
X To apply a block: press0098the COMAND
controller.
A red square appears on the map. X
To adjust the size of the square: turn
00790052007A the COMAND controller.
The square is enlarged or reduced.
X To confirm the settings: press0098.
The list appears. The previously selected
area to be avoided has been added and
activated.
You can also determine additional areas to be avoided (Y page 372).
Defining further areas X To switch to navigation mode: press the
00BE button.
X To show the menu: press0098the COMAND
controller.
X Select Navi
Navi in the main function bar by
sliding 00970052and turning 00790052007Athe COMAND
controller and press 0098to confirm.
X Select Avoid Area Avoid Area and press0098to con-
firm.
If you have already selected one or more
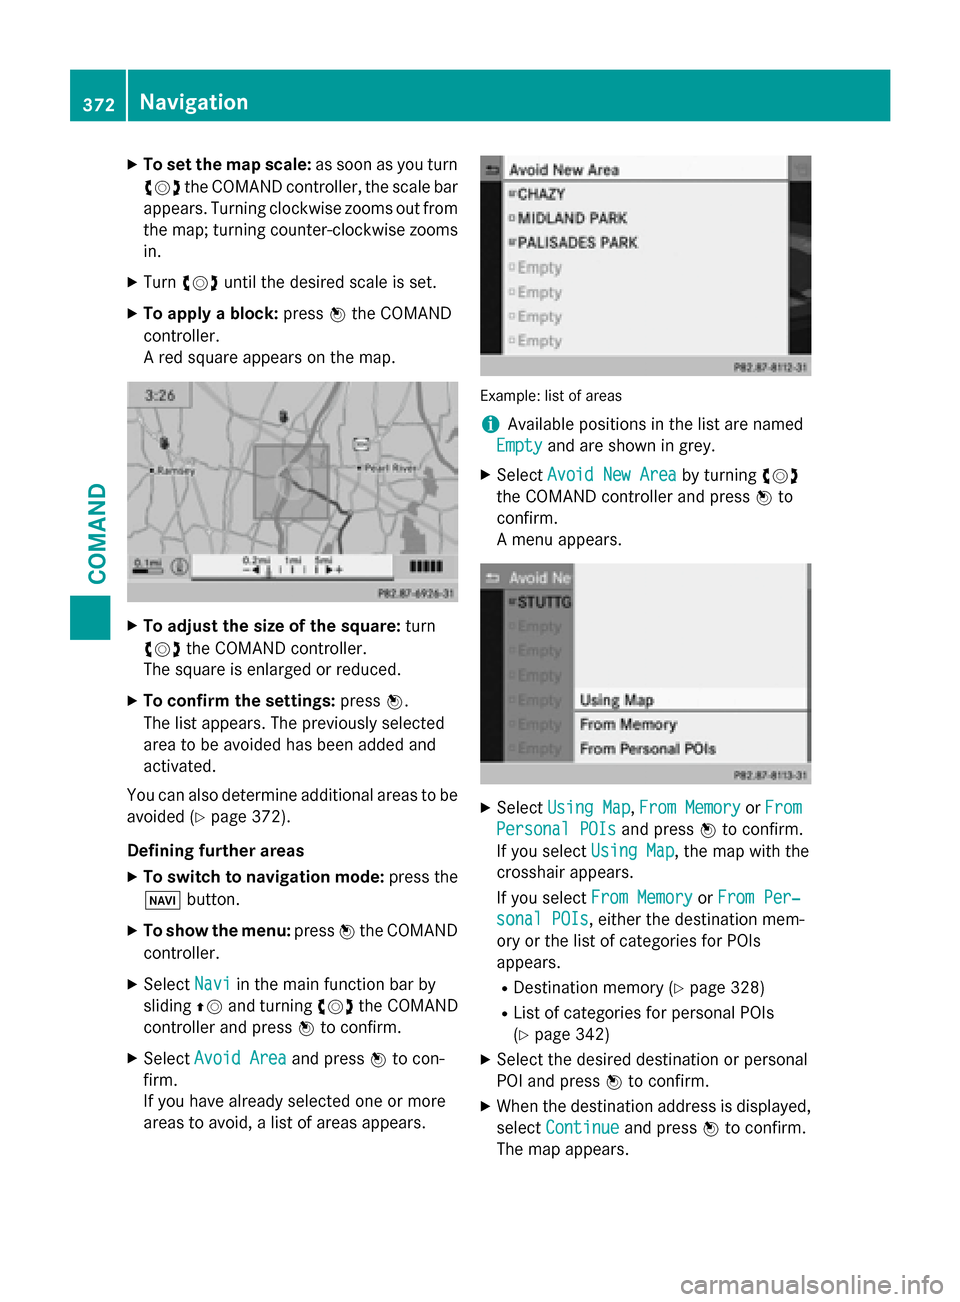
areas to avoid, a list of areas appears. Example: list of areas
i
Available positions in the list are named
Empty Empty and are shown in grey.
X Select Avoid New Area
Avoid New Area by turning00790052007A
the COMAND controller and press 0098to
confirm.
A menu appears. X
Select Using Map Using Map ,From Memory
From Memory orFrom
From
Personal POIs
Personal POIs and press0098to confirm.
If you select Using Map
Using Map, the map with the
crosshair appears.
If you select From Memory From Memory orFrom Per‐
From Per‐
sonal POIs
sonal POIs, either the destination mem-
ory or the list of categories for POIs
appears.
R Destination memory (Y page 328)
R List of categories for personal POIs
(Y page 342)
X Select the desired destination or personal
POI and press 0098to confirm.
X When the destination address is displayed,
select Continue Continue and press0098to confirm.
The map appears. 372
NavigationCOMAND
Page 441 of 610
X
Select Show Station Information
Show Station Information by
sliding 00520064and turning 00790052007Athe COMAND
controller and press 0098to confirm.
Depending on the previous status, you
switch Show Station Information
Show Station Information on
0073 or off 0053.
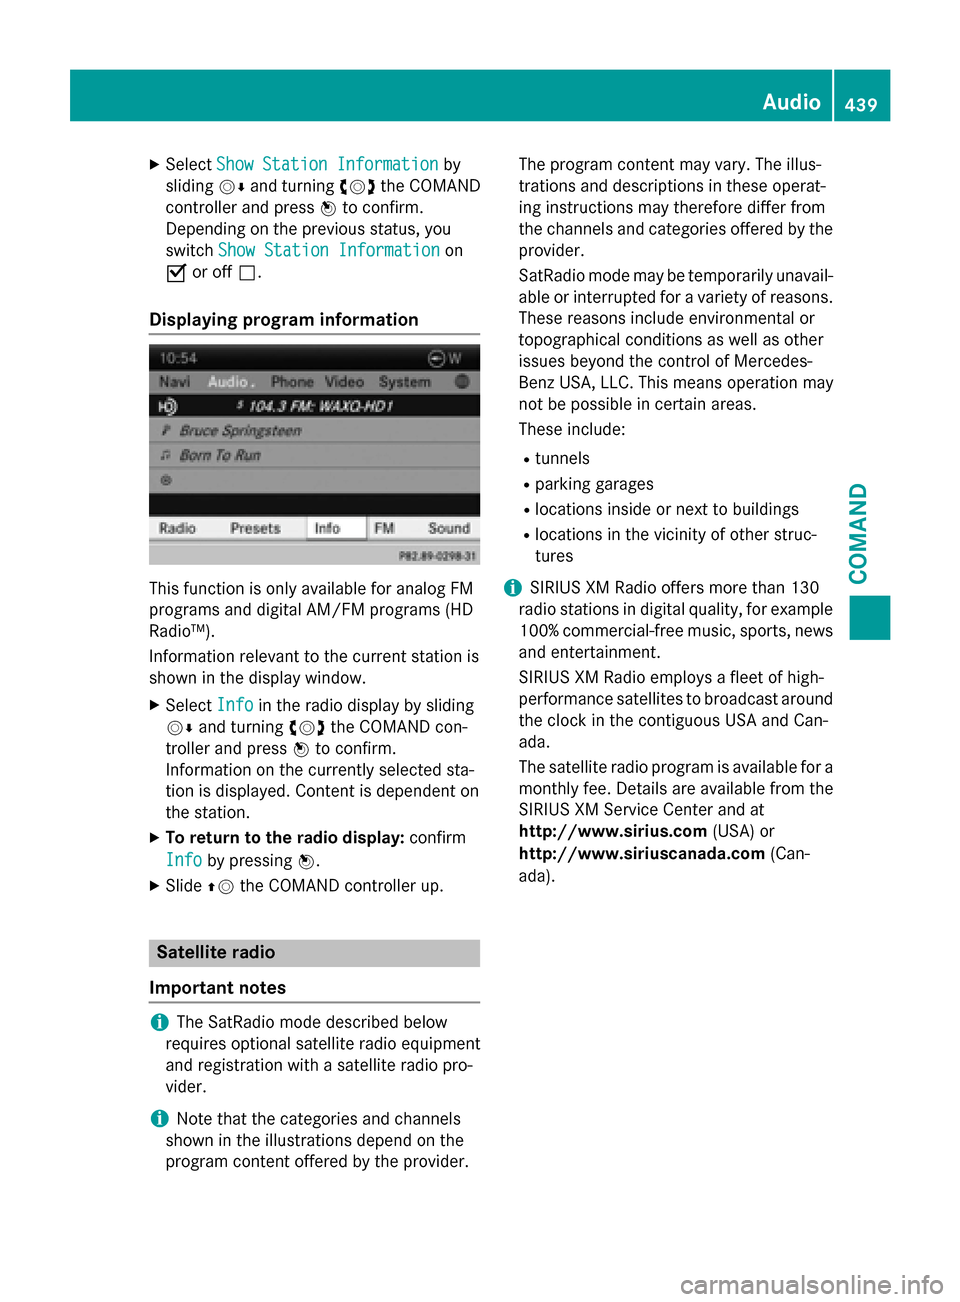
Displaying program information This function is only available for analog FM
programs and digital AM/FM programs (HD
Radio™).
Information relevant to the current station is
shown in the display window.
X Select Info
Info in the radio display by sliding
00520064 and turning 00790052007Athe COMAND con-
troller and press 0098to confirm.
Information on the currently selected sta-
tion is displayed. Content is dependent on
the station.
X To return to the radio display: confirm
Info
Info by pressing 0098.
X Slide 00970052the COMAND controller up. Satellite radio
Important notes i
The SatRadio mode described below
requires optional satellite radio equipment
and registration with a satellite radio pro-
vider.
i Note that the categories and channels
shown in the illustrations depend on the
program content offered by the provider. The program content may vary. The illus-
trations and descriptions in these operat-
ing instructions may therefore differ from
the channels and categories offered by the
provider.
SatRadio mode may be temporarily unavail- able or interrupted for a variety of reasons.These reasons include environmental or
topographical conditions as well as other
issues beyond the control of Mercedes-
Benz USA, LLC. This means operation may
not be possible in certain areas.
These include:
R tunnels
R parking garages
R locations inside or next to buildings
R locations in the vicinity of other struc-
tures
i SIRIUS XM Radio offers more than 130
radio stations in digital quality, for example
100% commercial-free music, sports, news
and entertainment.
SIRIUS XM Radio employs a fleet of high-
performance satellites to broadcast around the clock in the contiguous USA and Can-
ada.
The satellite radio program is available for a
monthly fee. Details are available from the
SIRIUS XM Service Center and at
http://www.sirius.com (USA) or
http://www.siriuscanada.com (Can-
ada). Audio
439COMAND Z
Page 482 of 610
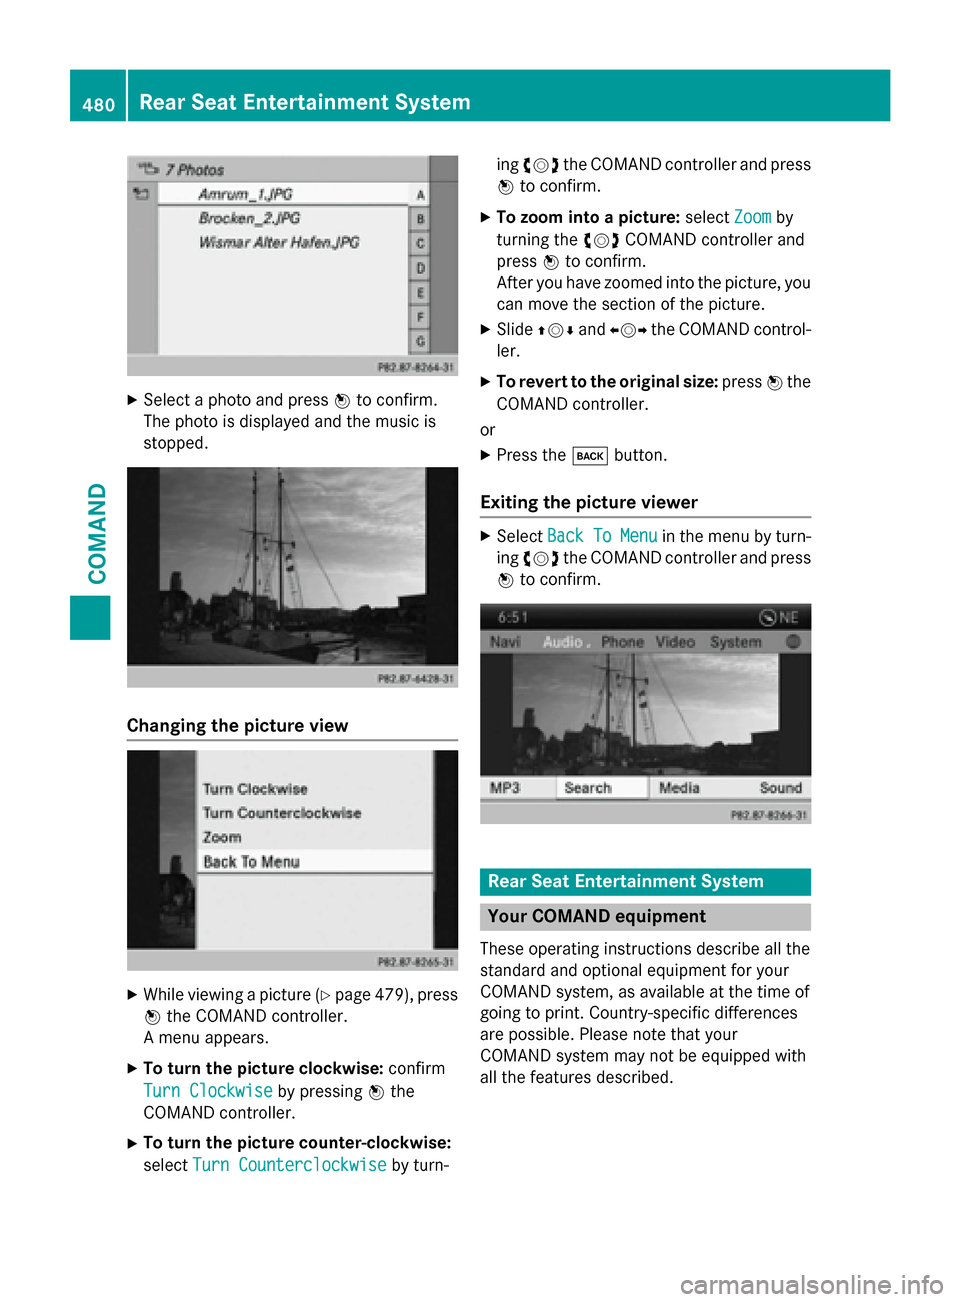
X
Select a photo and press 0098to confirm.
The photo is displayed and the music is
stopped. Changing the picture view
X
While viewing a picture (Y page 479), press
0098 the COMAND controller.
A menu appears.
X To turn the picture clockwise: confirm
Turn Clockwise
Turn Clockwise by pressing0098the
COMAND controller.
X To turn the picture counter-clockwise:
select Turn Counterclockwise
Turn Counterclockwise by turn-ing
00790052007A the COMAND controller and press
0098 to confirm.
X To zoom into a picture: selectZoom Zoomby
turning the 00790052007ACOMAND controller and
press 0098to confirm.
After you have zoomed into the picture, you
can move the section of the picture.
X Slide 009700520064 and009500520096 the COMAND control-
ler.
X To revert to the original size: press0098the
COMAND controller.
or
X Press the 003Dbutton.
Exiting the picture viewer X
Select Back BackTo
ToMenu
Menu in the menu by turn-
ing 00790052007A the COMAND controller and press
0098 to confirm. Rear Seat Entertainment System
Your COMAND equipment
These operating instructions describe all the
standard and optional equipment for your
COMAND system, as available at the time of
going to print. Country-specific differences
are possible. Please note that your
COMAND system may not be equipped with
all the features described. 480
Rear Seat Entertainment SystemCOMAND
Page 488 of 610
X
Remove discharged batteries 0083from the
tray.
X Insert the new batteries. Observe the polar-
ity markings on the batteries and battery
compartment when doing so.
Left-hand battery: the positive pole (+)
must face upwards.
Right-hand battery: the positive pole (+)
must face downwards.
X To close the battery compartment:
insert battery compartment cover 0087start-
ing with retaining lugs 0085into the battery
compartment and allow catch tab 0044to
engage in place.
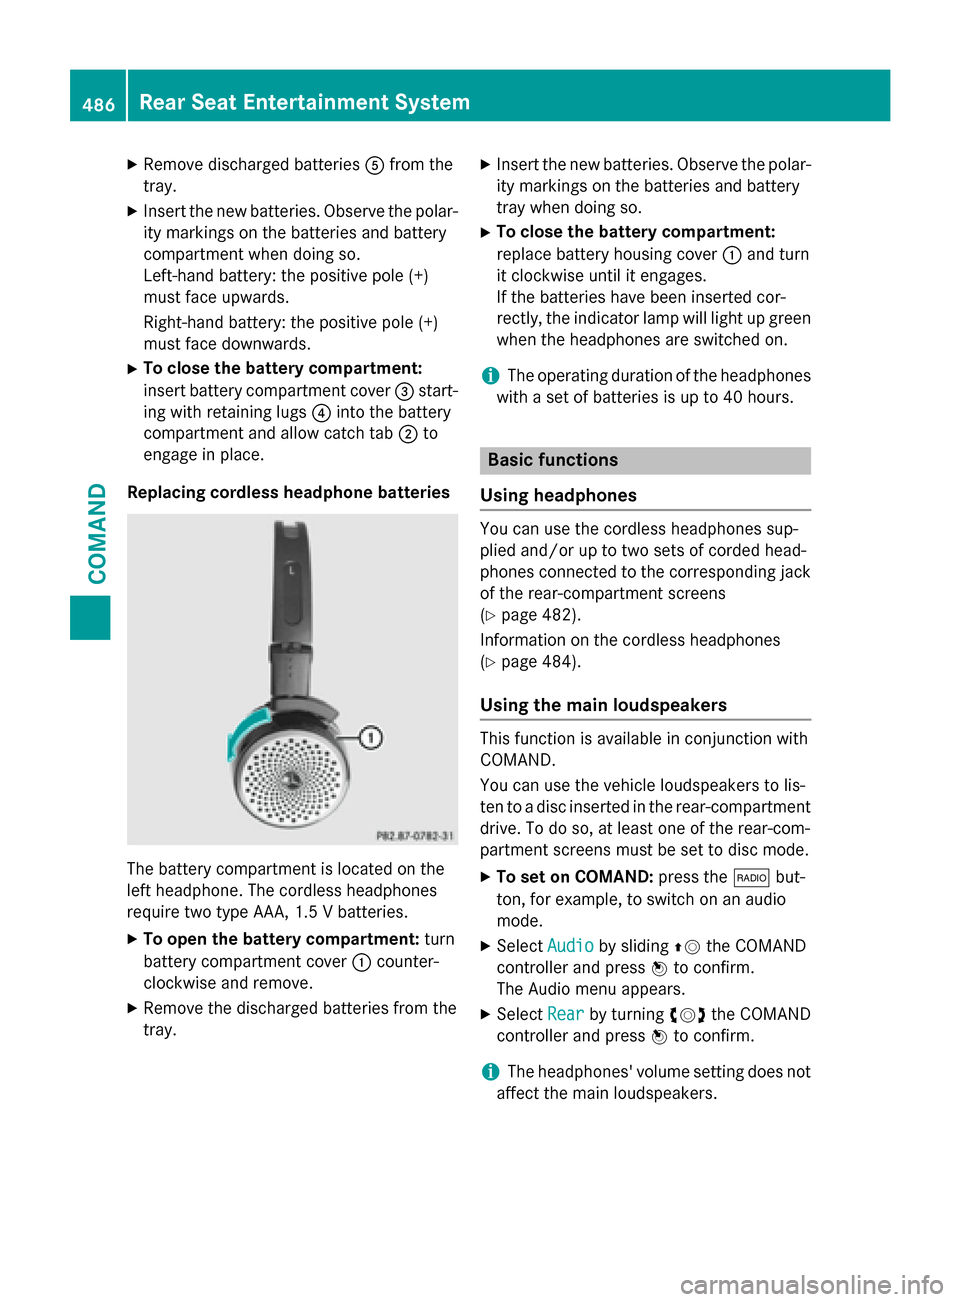
Replacing cordless headphone batteries The battery compartment is located on the
left headphone. The cordless headphones
require two type AAA, 1.5 V batteries.
X To open the battery compartment: turn
battery compartment cover 0043counter-
clockwise and remove.
X Remove the discharged batteries from the
tray. X
Insert the new batteries. Observe the polar-
ity markings on the batteries and battery
tray when doing so.
X To close the battery compartment:
replace battery housing cover 0043and turn
it clockwise until it engages.
If the batteries have been inserted cor-
rectly, the indicator lamp will light up green
when the headphones are switched on.
i The operating duration of the headphones
with a set of batteries is up to 40 hours. Basic functions
Using headphones You can use the cordless headphones sup-
plied and/or up to two sets of corded head-
phones connected to the corresponding jack
of the rear-compartment screens
(Y page 482).
Information on the cordless headphones
(Y page 484).
Using the main loudspeakers This function is available in conjunction with
COMAND.
You can use the vehicle loudspeakers to lis-
ten to a disc inserted in the rear-compartment
drive. To do so, at least one of the rear-com-
partment screens must be set to disc mode.
X To set on COMAND: press the002Abut-
ton, for example, to switch on an audio
mode.
X Select Audio Audioby sliding 00970052the COMAND
controller and press 0098to confirm.
The Audio menu appears.
X Select Rear
Rearby turning 00790052007Athe COMAND
controller and press 0098to confirm.
i The headphones' volume setting does not
affect the main loudspeakers. 486
Rea
r Seat Entertainment SystemCOMAND