warning light MERCEDES-BENZ SL-Class 2015 R131 Service Manual
[x] Cancel search | Manufacturer: MERCEDES-BENZ, Model Year: 2015, Model line: SL-Class, Model: MERCEDES-BENZ SL-Class 2015 R131Pages: 610, PDF Size: 12.21 MB
Page 172 of 610

flashes. The
00B9Check Engine warning
lamp may also light up. A message appears in the multifunction display (Y page 256).
For further information on warning and indi- cator lamps in the instrument cluster, see
(Y page 277). 170
RefuelingDriving and parking
Page 178 of 610
of the accelerator. The vehicle can coast
without use of the brakes.
- The bar empties: frequent braking
i An economical driving style specially
requires driving at moderate engine
speeds.
To achieve a higher value in the categories
Acceleration
Acceleration andConstant Constant:
R observe the gearshift recommendations.
R drive in drive program E.
i On long journeys at a constant speed, e.g.
on the highway, only the bar for Constant
Constant
will change.
i The ECO display summarizes the driving
characteristics from the start of the journey
to its completion. For this reason, the bars
change dynamically at the beginning of the
journey. On longer journeys, there are
fewer changes. For more dynamic changes, carry out a manual reset.
For further information on the ECO display,
see (Y page 226). Brakes
Important safety notes G
WARNING
If you shift down on a slippery road surface in an attempt to increase the engine's braking
effect, the drive wheels could lose their grip.
There is an increased danger of skidding and
accidents.
Do not shift down for additional engine brak-
ing on a slippery road surface.
Downhill gradients !
On long, steep gradients, you must
reduce the load on the brakes. To use
engine braking, shift to a lower gear in good time. This helps you to avoid overheating
the brakes and wearing them out exces-
sively. When making use of the engine braking
effect, it is possible that a drive wheel may
not turn for some time, e.g. in the case of
suddenly changing or slippery road surface conditions. This could cause damage to the
drive train. This type of damage is not cov- ered by the Mercedes-Benz warranty.
Change into a lower gear in good time on long
and steep downhill gradients. This is espe-
cially important if the vehicle is laden.
Heavy and light loads G
WARNING
If you rest your foot on the brake pedal while
driving, the braking system can overheat. This increases the stopping distance and can even
cause the braking system to fail. There is a
risk of an accident.
Never use the brake pedal as a footrest. Never
depress the brake pedal and the accelerator
pedal at the same time.
! Depressing the brake pedal constantly
results in excessive and premature wear to
the brake pads.
If the brakes have been subjected to a heavy load, do not stop the vehicle immediately, but
drive on for a short while. This allows the air- flow to cool the brakes more quickly.
Wet roads If you have driven for a long time in heavy rain
without braking, there may be a delayed reac- tion from the brakes when braking for the first
time. This may also occur after the vehicle has been washed or driven through deep water.
You then have to depress the brake pedal
more firmly. Maintain a greater distance from
the vehicle in front.
After driving on a wet road or having the vehi- cle washed, brake firmly while paying atten-
tion to the traffic conditions. This will warm upthe brake discs, thereby drying them more
quickly and protecting them against corro-
sion. 176
Driving tipsDriving and parking
Page 179 of 610
Limited braking performance on salt-
treated roads If you drive on salted roads, a layer of salt
residue may form on the brake discs and
brake pads. This can result in a significantly
longer braking distance.
R Brake occasionally to remove any possible
salt residue. Make sure that you do not
endanger other road users when doing so.
R Carefully depress the brake pedal and the
beginning and end of a journey.
R Maintain a greater distance to the vehicle
ahead.
Servicing the brakes !
If the brake warning lamp lights up in the
instrument cluster and you hear a warning
tone even though the parking brake has
been released, the brake fluid level may be too low. Observe additional warning mes-
sages in the multifunction display.
The brake fluid level may be too low due to brake pad wear or leaking brake lines.
Have the brake system checked immedi-
ately. This work should be carried out at a
qualified specialist workshop.
! As the ESP ®
system operates automati-
cally, the engine and the ignition system
must be switched off (SmartKey in position
0 or 1in the ignition lock or Start/Stop
button in position 0or 1) when:
R testing the parking brake on a brake
dynamometer.
R you intend to have the vehicle towed with
the front axle raised.
Braking maneuvers triggered automatically
by ESP ®
may seriously damage the brake
system.
All checks and maintenance work on the
brake system must be carried out at a quali-
fied specialist workshop. Have this work car-
ried out at an authorized Mercedes-Benz Cen-
ter. Have the brake pads replaced and the brake
fluid renewed at a qualified specialist work-
shop, e.g. an authorized Mercedes-Benz Cen-
ter.
If the brake system has only been subject to
moderate loads, you should test the function-ality of your brakes at regular intervals. To doso, depress the brake pedal firmly when driv-
ing at a high speed. This improves the grip of
the brake pads.
A description of Brake Assist (BAS):
(Y page 72)
Mercedes-Benz recommends that you only
have brake pads/linings installed on your
vehicle which have been approved for
Mercedes-Benz vehicles or which correspond
to an equivalent quality standard. Brake
pads/linings which have not been approved
for Mercedes-Benz vehicles or which are not
of an equivalent quality could affect your vehi- cle's operating safety.
Mercedes-Benz recommends that you only
use brake fluid that has been specially
approved for your vehicle by Mercedes-Benz,
or which corresponds to an equivalent quality standard. Brake fluid which has not been
approved for Mercedes-Benz vehicles or
which is not of an equivalent quality could
affect your vehicle's operating safety.
High performance and ceramic brake
system for AMG vehicles The AMG brake systems are designed for
heavy loads. This may lead to noise when
braking. This will depend on:
R speed
R braking force
R ambient conditions, e.g. temperature and
humidity
The wear of individual components of the
brake system, such as the brake pads/linings
or brake discs, depends on the individual driv-
ing style and operating conditions.
For this reason, it is impossible to state a
mileage that will be valid under all circum- Driving tips
177Driving and parking Z
Page 184 of 610
X
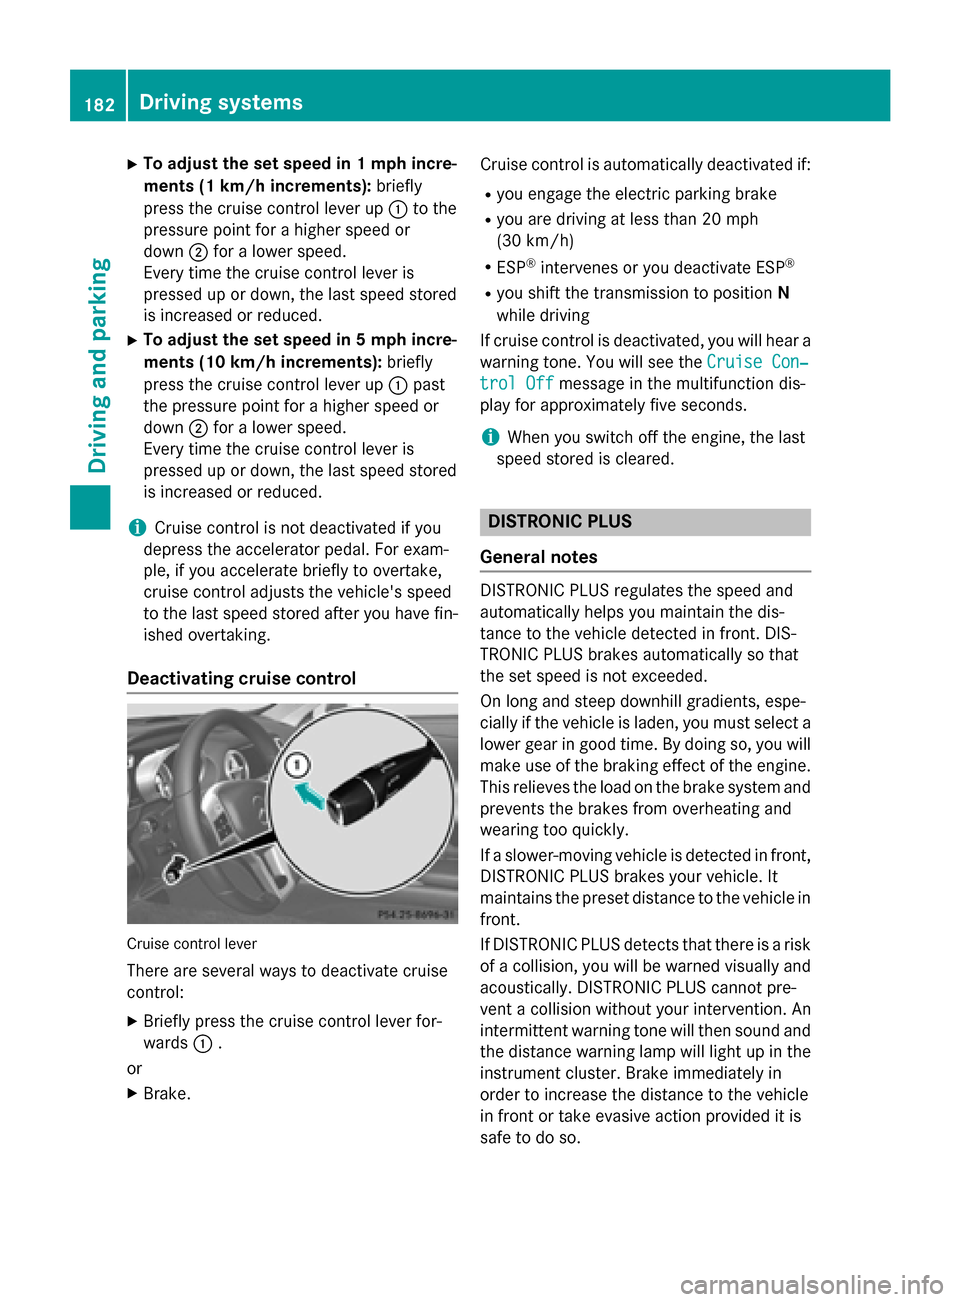
To adjust the set speed in 1 mph incre-
ments (1 km/h increments): briefly
press the cruise control lever up 0043to the
pressure point for a higher speed or
down 0044for a lower speed.
Every time the cruise control lever is
pressed up or down, the last speed stored
is increased or reduced.
X To adjust the set speed in 5 mph incre-
ments (10 km/h increments): briefly
press the cruise control lever up 0043past
the pressure point for a higher speed or
down 0044for a lower speed.
Every time the cruise control lever is
pressed up or down, the last speed stored
is increased or reduced.
i Cruise control is not deactivated if you
depress the accelerator pedal. For exam-
ple, if you accelerate briefly to overtake,
cruise control adjusts the vehicle's speed
to the last speed stored after you have fin- ished overtaking.
Deactivating cruise control Cruise control lever
There are several ways to deactivate cruise
control:
X Briefly press the cruise control lever for-
wards 0043.
or X Brake. Cruise control is automatically deactivated if:
R you engage the electric parking brake
R you are driving at less than 20 mph
(30 km/h)
R ESP ®
intervenes or you deactivate ESP ®
R you shift the transmission to position N
while driving
If cruise control is deactivated, you will hear a
warning tone. You will see the Cruise Con‐
Cruise Con‐
trol Off trol Off message in the multifunction dis-
play for approximately five seconds.
i When you switch off the engine, the last
speed stored is cleared. DISTRONIC PLUS
General notes DISTRONIC PLUS regulates the speed and
automatically helps you maintain the dis-
tance to the vehicle detected in front. DIS-
TRONIC PLUS brakes automatically so that
the set speed is not exceeded.
On long and steep downhill gradients, espe-
cially if the vehicle is laden, you must select a lower gear in good time. By doing so, you will make use of the braking effect of the engine.
This relieves the load on the brake system and prevents the brakes from overheating and
wearing too quickly.
If a slower-moving vehicle is detected in front,
DISTRONIC PLUS brakes your vehicle. It
maintains the preset distance to the vehicle in front.
If DISTRONIC PLUS detects that there is a risk of a collision, you will be warned visually and
acoustically. DISTRONIC PLUS cannot pre-
vent a collision without your intervention. An
intermittent warning tone will then sound and
the distance warning lamp will light up in the instrument cluster. Brake immediately in
order to increase the distance to the vehicle
in front or take evasive action provided it is
safe to do so. 182
Driving systemsDriving an
d parking
Page 188 of 610
Pulling away and driving
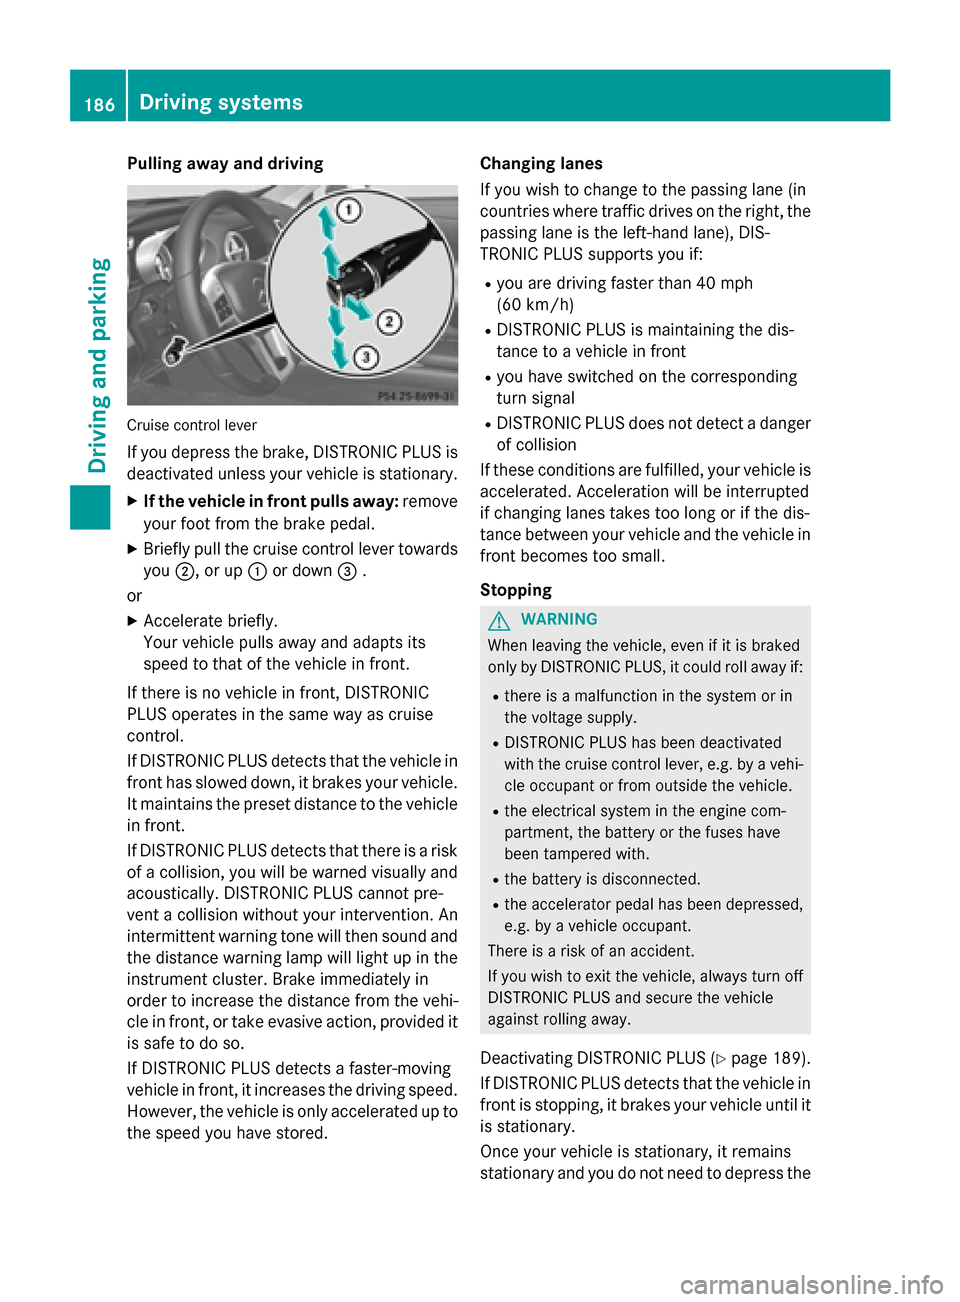
Cruise control lever
If you depress the brake, DISTRONIC PLUS is deactivated unless your vehicle is stationary.
X If the vehicle in front pulls away: remove
your foot from the brake pedal.
X Briefly pull the cruise control lever towards
you 0044, or up 0043or down 0087.
or X Accelerate briefly.
Your vehicle pulls away and adapts its
speed to that of the vehicle in front.
If there is no vehicle in front, DISTRONIC
PLUS operates in the same way as cruise
control.
If DISTRONIC PLUS detects that the vehicle in front has slowed down, it brakes your vehicle.
It maintains the preset distance to the vehicle
in front.
If DISTRONIC PLUS detects that there is a risk of a collision, you will be warned visually and acoustically. DISTRONIC PLUS cannot pre-
vent a collision without your intervention. An
intermittent warning tone will then sound and
the distance warning lamp will light up in the instrument cluster. Brake immediately in
order to increase the distance from the vehi-
cle in front, or take evasive action, provided it
is safe to do so.
If DISTRONIC PLUS detects a faster-moving
vehicle in front, it increases the driving speed.
However, the vehicle is only accelerated up to the speed you have stored. Changing lanes
If you wish to change to the passing lane (in
countries where traffic drives on the right, the passing lane is the left-hand lane), DIS-
TRONIC PLUS supports you if:
R you are driving faster than 40 mph
(60 km/h)
R DISTRONIC PLUS is maintaining the dis-
tance to a vehicle in front
R you have switched on the corresponding
turn signal
R DISTRONIC PLUS does not detect a danger
of collision
If these conditions are fulfilled, your vehicle is
accelerated. Acceleration will be interrupted
if changing lanes takes too long or if the dis-
tance between your vehicle and the vehicle in front becomes too small.
Stopping G
WARNING
When leaving the vehicle, even if it is braked
only by DISTRONIC PLUS, it could roll away if:
R there is a malfunction in the system or in
the voltage supply.
R DISTRONIC PLUS has been deactivated
with the cruise control lever, e.g. by a vehi-
cle occupant or from outside the vehicle.
R the electrical system in the engine com-
partment, the battery or the fuses have
been tampered with.
R the battery is disconnected.
R the accelerator pedal has been depressed,
e.g. by a vehicle occupant.
There is a risk of an accident.
If you wish to exit the vehicle, always turn off
DISTRONIC PLUS and secure the vehicle
against rolling away.
Deactivating DISTRONIC PLUS (Y page 189).
If DISTRONIC PLUS detects that the vehicle in front is stopping, it brakes your vehicle until it
is stationary.
Once your vehicle is stationary, it remains
stationary and you do not need to depress the 186
Driving systemsDriving an
d parking
Page 193 of 610
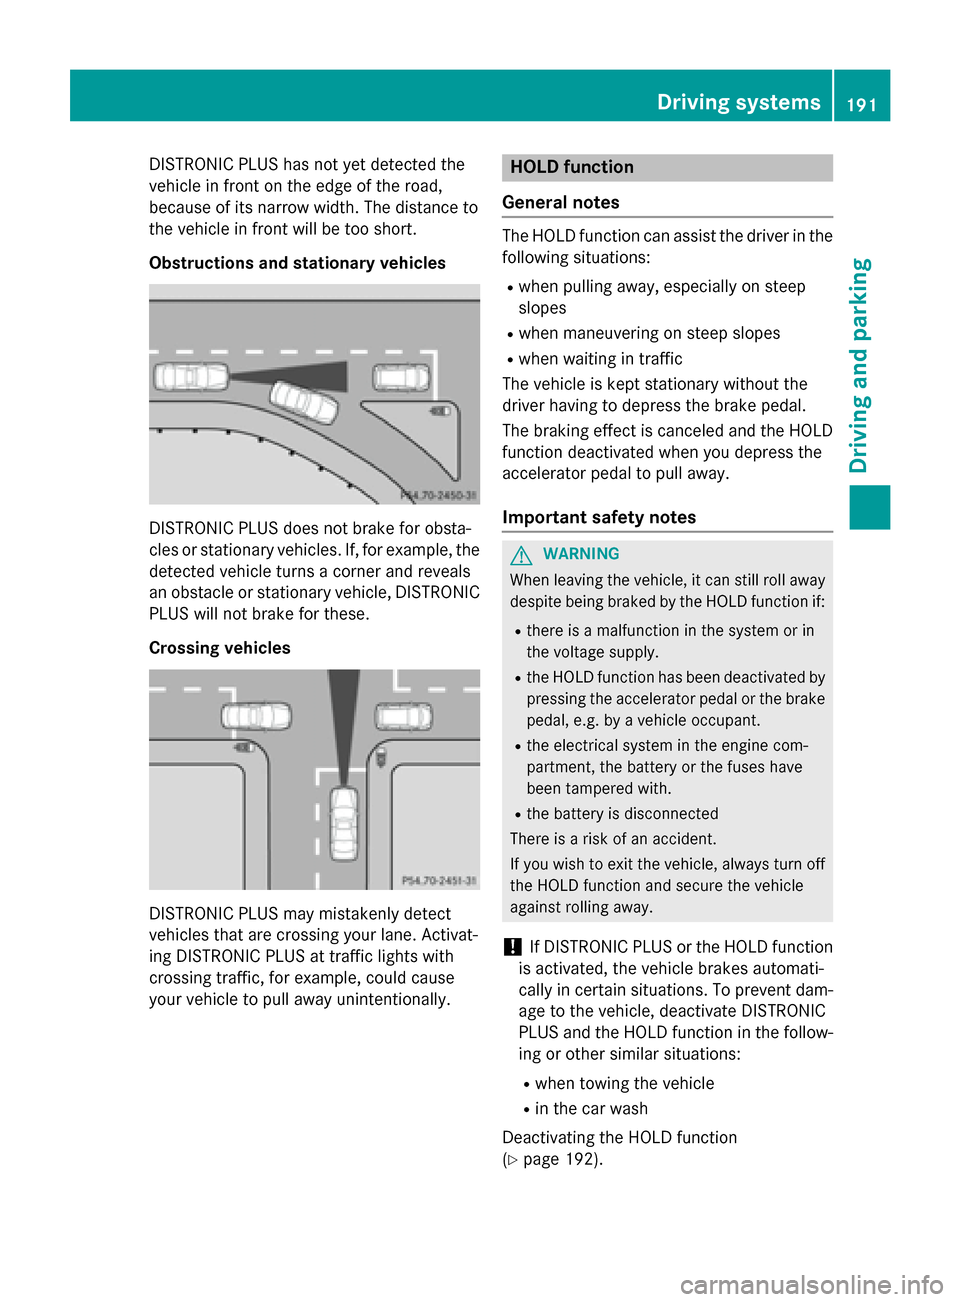
DISTRONIC PLUS has not yet detected the
vehicle in front on the edge of the road,
because of its narrow width. The distance to
the vehicle in front will be too short.
Obstructions and stationary vehicles DISTRONIC PLUS does not brake for obsta-
cles or stationary vehicles. If, for example, the
detected vehicle turns a corner and reveals
an obstacle or stationary vehicle, DISTRONIC PLUS will not brake for these.
Crossing vehicles DISTRONIC PLUS may mistakenly detect
vehicles that are crossing your lane. Activat-
ing DISTRONIC PLUS at traffic lights with
crossing traffic, for example, could cause
your vehicle to pull away unintentionally. HOLD function
General notes The HOLD function can assist the driver in the
following situations:
R when pulling away, especially on steep
slopes
R when maneuvering on steep slopes
R when waiting in traffic
The vehicle is kept stationary without the
driver having to depress the brake pedal.
The braking effect is canceled and the HOLD
function deactivated when you depress the
accelerator pedal to pull away.
Important safety notes G
WARNING
When leaving the vehicle, it can still roll away despite being braked by the HOLD function if:
R there is a malfunction in the system or in
the voltage supply.
R the HOLD function has been deactivated by
pressing the accelerator pedal or the brake
pedal, e.g. by a vehicle occupant.
R the electrical system in the engine com-
partment, the battery or the fuses have
been tampered with.
R the battery is disconnected
There is a risk of an accident.
If you wish to exit the vehicle, always turn off the HOLD function and secure the vehicle
against rolling away.
! If DISTRONIC PLUS or the HOLD function
is activated, the vehicle brakes automati-
cally in certain situations. To prevent dam-
age to the vehicle, deactivate DISTRONIC
PLUS and the HOLD function in the follow-
ing or other similar situations:
R when towing the vehicle
R in the car wash
Deactivating the HOLD function
(Y page 192). Driving systems
191Driving and parking Z
Page 196 of 610
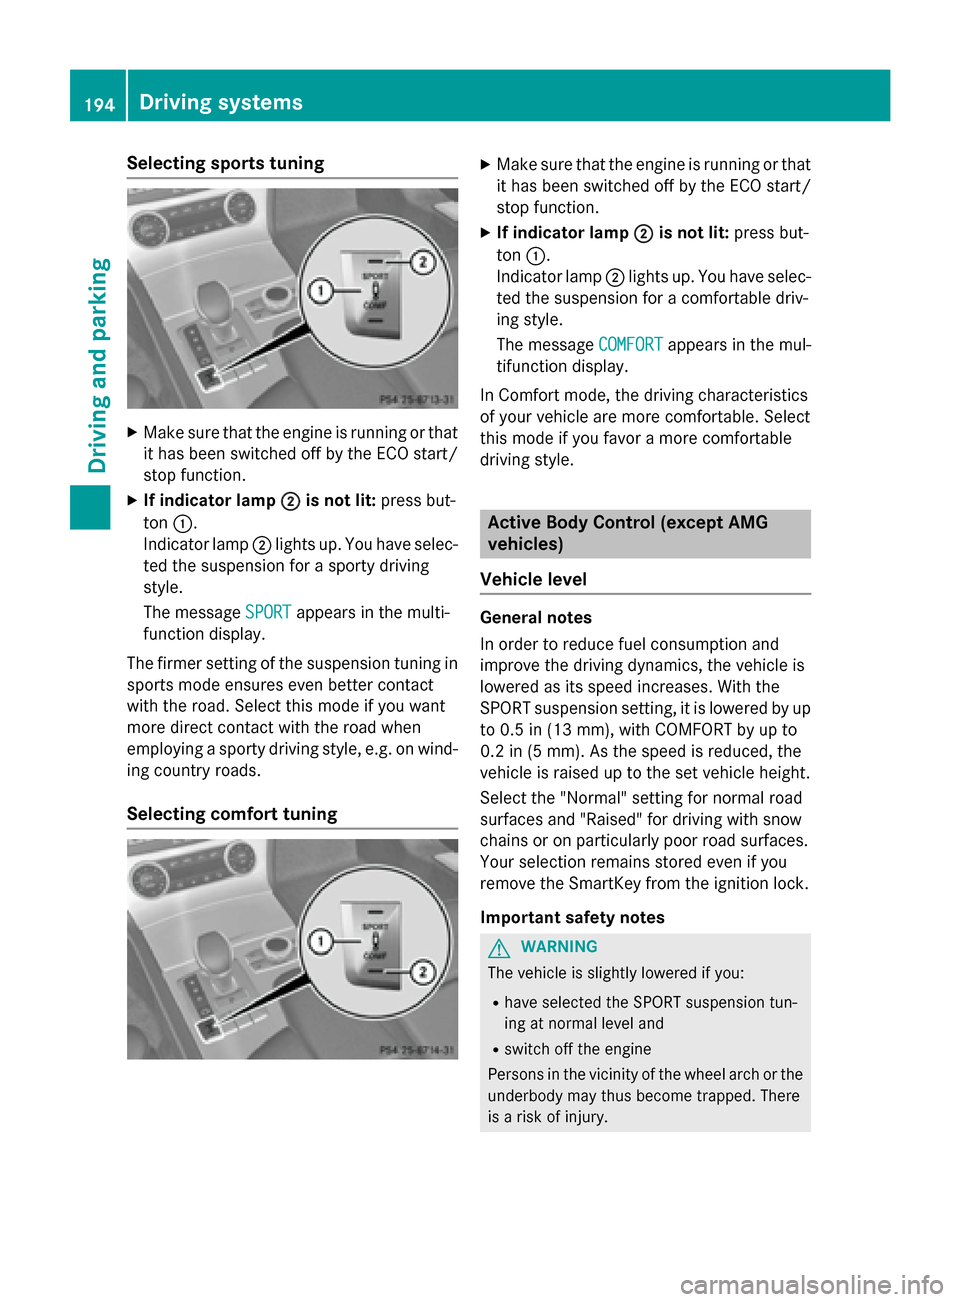
Selecting sports tuning
X
Make sure that the engine is running or that
it has been switched off by the ECO start/
stop function.
X If indicator lamp 0044
0044 is not lit: press but-
ton 0043.
Indicator lamp 0044lights up. You have selec-
ted the suspension for a sporty driving
style.
The message SPORT
SPORT appears in the multi-
function display.
The firmer setting of the suspension tuning in sports mode ensures even better contact
with the road. Select this mode if you want
more direct contact with the road when
employing a sporty driving style, e.g. on wind-
ing country roads.
Selecting comfort tuning X
Make sure that the engine is running or that
it has been switched off by the ECO start/
stop function.
X If indicator lamp 0044 0044is not lit: press but-
ton 0043.
Indicator lamp 0044lights up. You have selec-
ted the suspension for a comfortable driv-
ing style.
The message COMFORT COMFORTappears in the mul-
tifunction display.
In Comfort mode, the driving characteristics
of your vehicle are more comfortable. Select
this mode if you favor a more comfortable
driving style. Active Body Control (except AMG
vehicles)
Vehicle level General notes
In order to reduce fuel consumption and
improve the driving dynamics, the vehicle is
lowered as its speed increases. With the
SPORT suspension setting, it is lowered by up
to 0.5 in (13 mm), with COMFORT by up to
0.2 in (5 mm). As the speed is reduced, the
vehicle is raised up to the set vehicle height.
Select the "Normal" setting for normal road
surfaces and "Raised" for driving with snow
chains or on particularly poor road surfaces.
Your selection remains stored even if you
remove the SmartKey from the ignition lock.
Important safety notes G
WARNING
The vehicle is slightly lowered if you:
R have selected the SPORT suspension tun-
ing at normal level and
R switch off the engine
Persons in the vicinity of the wheel arch or the underbody may thus become trapped. There
is a risk of injury. 194
Driving systemsDriving and parking
Page 199 of 610
Active Body Control (AMG vehicles)
Vehicle level General notes
In order to reduce fuel consumption and
improve the driving dynamics, the vehicle is
lowered as its speed increases. With the
SPORT suspension setting, it is lowered by up
to 0.5 in (13 mm), with COMFORT by up to
0.2 in (5 mm). As the speed is reduced, the
vehicle is raised up to the set vehicle height.
Select the "Normal" setting for normal road
surfaces and "Raised" for driving with snow
chains or on particularly poor road surfaces.
Important safety notes
The vehicle is slightly lowered when the
engine is switched off. G
WARNING
When the vehicle is being lowered, people
could become trapped if their limbs are
between the vehicle body and the wheels or
underneath the vehicle. There is a risk of
injury.
Make sure no one is underneath the vehicle or in the immediate vicinity of the wheel arches
when the vehicle is being lowered.
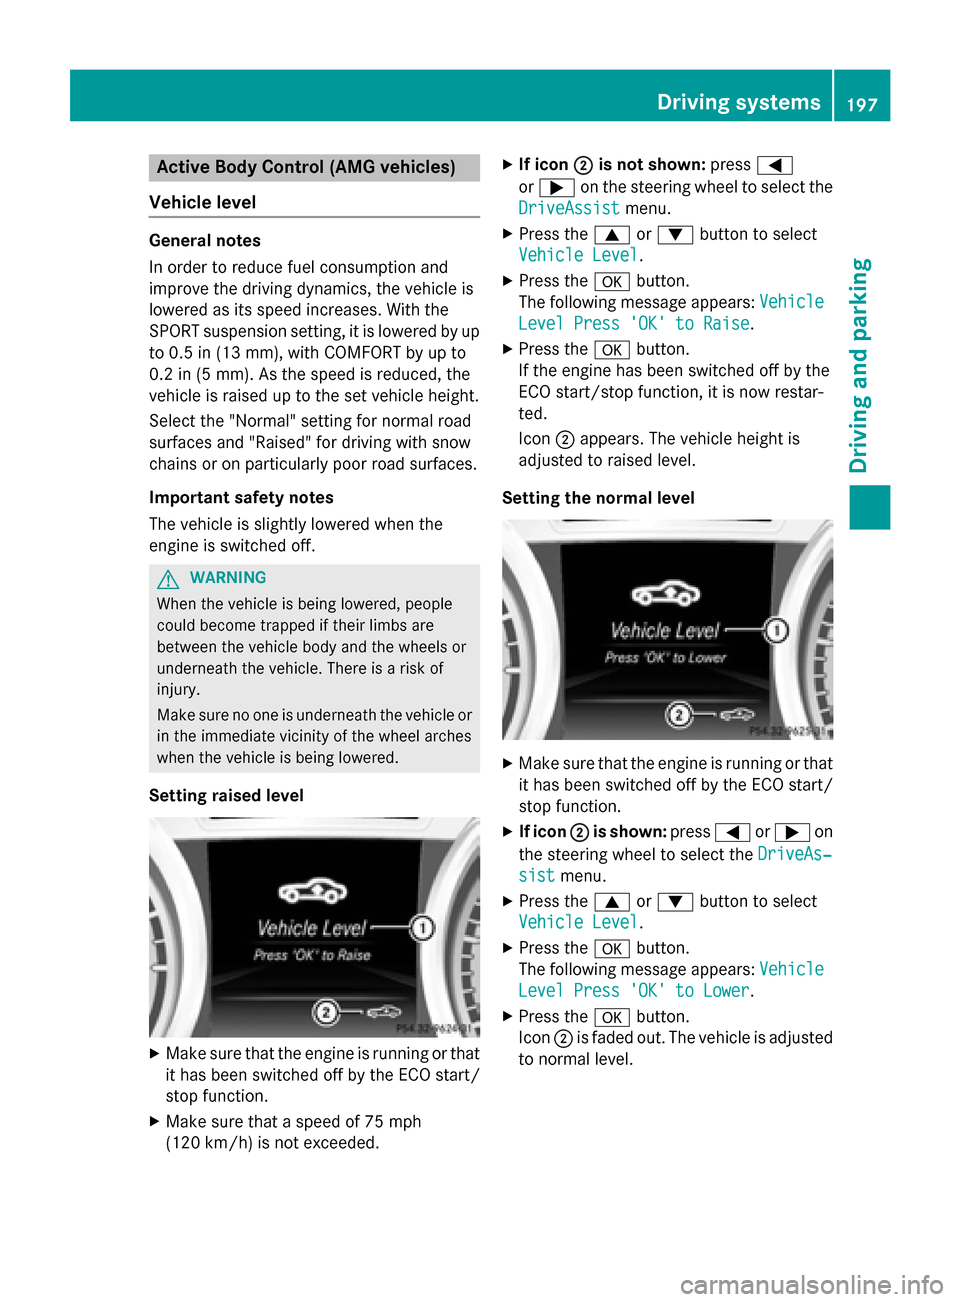
Setting raised level X
Make sure that the engine is running or that
it has been switched off by the ECO start/
stop function.
X Make sure that a speed of 75 mph
(120 km/ h)is not exceeded. X
If icon 0044 0044is not shown: press0059
or 0065 on the steering wheel to select the
DriveAssist
DriveAssist menu.
X Press the 0063or0064 button to select
Vehicle Level
Vehicle Level.
X Press the 0076button.
The following message appears: Vehicle
Vehicle
Level Press 'OK' to Raise
Level Press 'OK' to Raise.
X Press the 0076button.
If the engine has been switched off by the
ECO start/stop function, it is now restar-
ted.
Icon 0044appears. The vehicle height is
adjusted to raised level.
Setting the normal level X
Make sure that the engine is running or that
it has been switched off by the ECO start/
stop function.
X If icon 0044 0044is shown: press0059or0065 on
the steering wheel to select the DriveAs‐
DriveAs‐
sist
sist menu.
X Press the 0063or0064 button to select
Vehicle Level
Vehicle Level.
X Press the 0076button.
The following message appears: Vehicle
Vehicle
Level Press 'OK' to Lower
Level Press 'OK' to Lower.
X Press the 0076button.
Icon 0044is faded out. The vehicle is adjusted
to normal level. Driving systems
197Driving and parking Z
Page 202 of 610
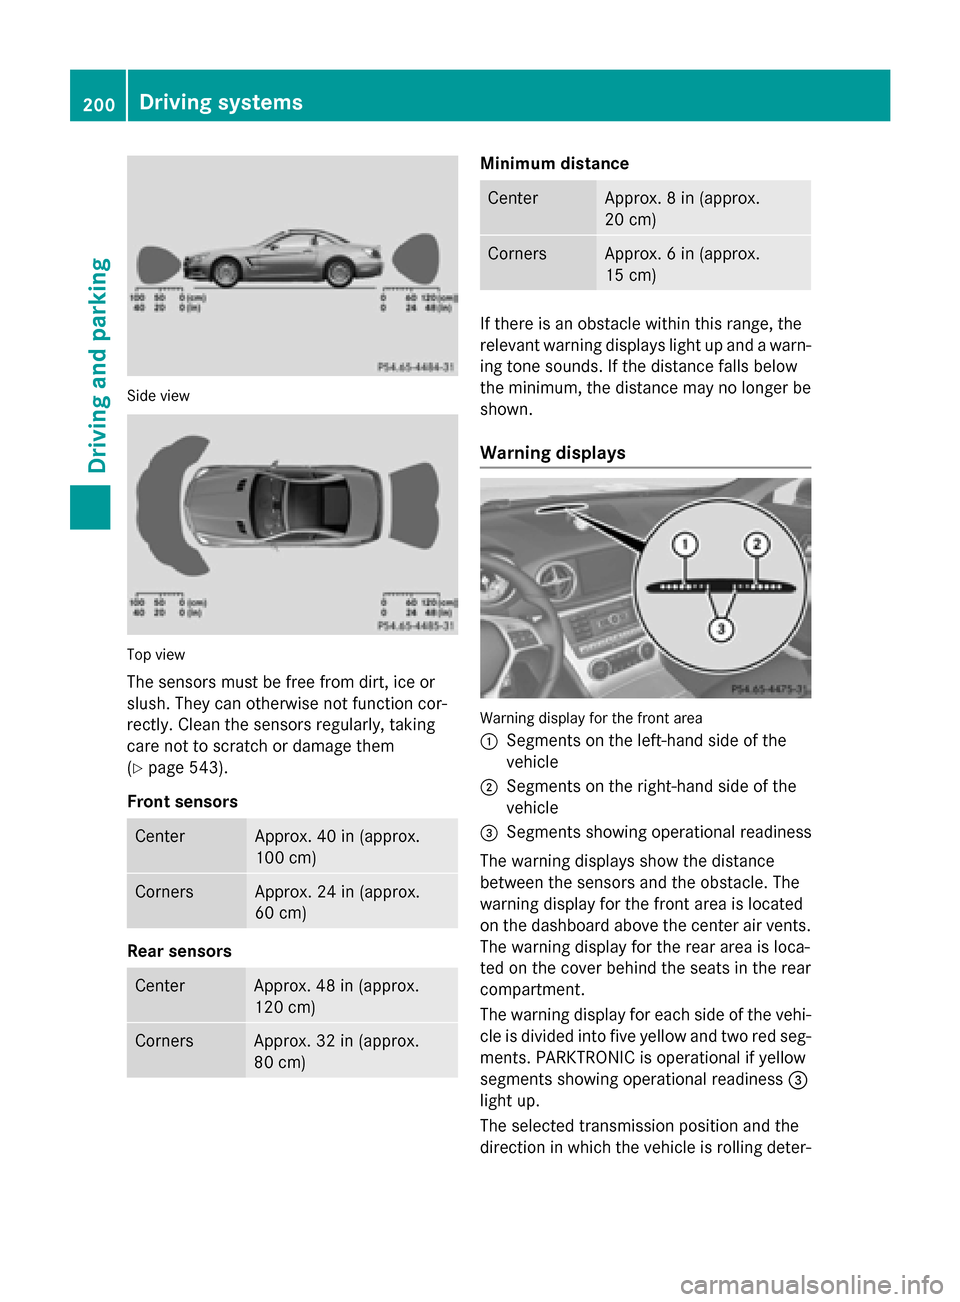
Side view
Top view
The sensors must be free from dirt, ice or
slush. They can otherwise not function cor-
rectly. Clean the sensors regularly, taking
care not to scratch or damage them
(Y page 543).
Front sensors Center Approx. 40 in (approx.
100 cm)
Corners Approx. 24 in (approx.
60 cm)
Rear sensors
Center Approx. 48 in (approx.
120 cm)
Corners Approx. 32 in (approx.
80 cm) Minimum distance
Center Approx. 8 in (approx.
20 cm)
Corners Approx. 6 in (approx.
15 cm)
If there is an obstacle within this range, the
relevant warning displays light up and a warn- ing tone sounds. If the distance falls below
the minimum, the distance may no longer be
shown.
Warning displays Warning display for the front area
0043
Segments on the left-hand side of the
vehicle
0044 Segments on the right-hand side of the
vehicle
0087 Segments showing operational readiness
The warning displays show the distance
between the sensors and the obstacle. The
warning display for the front area is located
on the dashboard above the center air vents.
The warning display for the rear area is loca-
ted on the cover behind the seats in the rear
compartment.
The warning display for each side of the vehi- cle is divided into five yellow and two red seg-ments. PARKTRONIC is operational if yellow
segments showing operational readiness 0087
light up.
The selected transmission position and the
direction in which the vehicle is rolling deter- 200
Driving systemsDriving and parking
Page 203 of 610
mine which warning display is active when the
engine is running. Transmission
position Warning display
D
Front area activated
R,
Nor the vehicle
is rolling back-
wards Rear and front areas
activated
P
No areas activated
One or more segments light up as the vehicle
approaches an obstacle, depending on the
vehicle's distance from the obstacle.
From the:
R sixth segment onwards, you will hear an
intermittent warning tone for approx-
imately two seconds.
R seventh segment onwards, you will hear a
warning tone for approximately two sec-
onds. This indicates that you have now
reached the minimum distance.
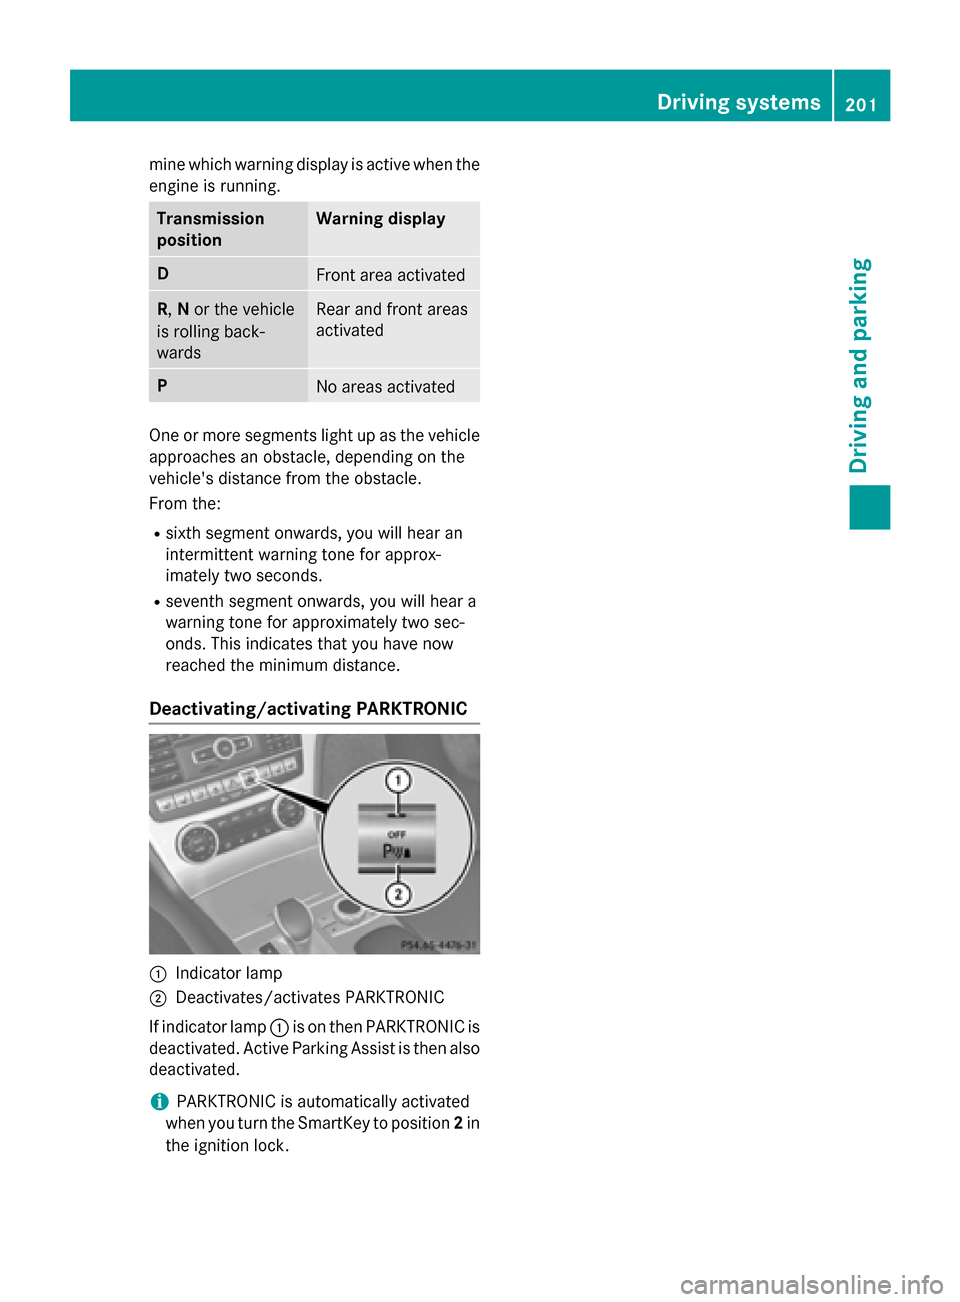
Deactivating/activating PARKTRONIC 0043
Indicator lamp
0044 Deactivates/activates PARKTRONIC
If indicator lamp 0043is on then PARKTRONIC is
deactivated. Active Parking Assist is then also
deactivated.
i PARKTRONIC is automatically activated
when you turn the SmartKey to position 2in
the ignition lock. Driving systems
201Driving and parking Z