length MERCEDES-BENZ SL-Class 2015 R131 Owner's Manual
[x] Cancel search | Manufacturer: MERCEDES-BENZ, Model Year: 2015, Model line: SL-Class, Model: MERCEDES-BENZ SL-Class 2015 R131Pages: 610, PDF Size: 12.21 MB
Page 62 of 610

aware of the status of the front-passenger
front air bag both before and during the jour- ney.
If the PASSENGER AIR BAG OFF indicator
lamp:
R is lit , the front-passenger front air bag is
deactivated. They will then not be deployed
in the event of an accident.
R does not light up : the front-passenger
front air bag is enabled. If, in the event of an
accident, all deployment criteria are met,
the front-passenger front air bag is
deployed. G
WARNING
If the PASSENGER AIR BAG OFF indicator
lamp is lit, the front-passenger front air bag is disabled. It will not be deployed in the event of
an accident and cannot perform its intended
protective function. A person in the front-
passenger seat could then, for example, come
into contact with the vehicle's interior, espe-
cially if the person is sitting too close to the
dashboard. This poses an increased risk of
injury or even fatal injury.
When the front-passenger seat is occupied,
always ensure that:
R the classification of the person in the front-
passenger seat is correct and the front-
passenger front air bag is enabled or disa-
bled in accordance with the person in the
front-passenger seat
R the front-passenger seat has been moved
back as far back as possible.
R the person is seated correctly.
Make sure, both before and during the jour-
ney, that the status of the front-passenger
front air bag is correct. G
WARNING
If you secure a child in a child restraint system on the front-passenger seat and the
PASSENGER AIR BAG OFF indicator lamp is
off, the front-passenger front air bag can
deploy in the event of an accident. The child could be struck by the air bag. This poses an
increased risk of injury or even fatal injury.
Make sure that the front-passenger front air
bag has been disabled. The PASSENGER AIR
BAG OFF indicator lamp must be lit. G
WARNING
If you secure a child in a forward-facing child
restraint system on the front-passenger seat
and you position the front-passenger seat too close to the dashboard, in the event of an
accident, the child could:
R come into contact with the vehicle's inte-
rior if the PASSENGER AIR BAG OFF indi-
cator lamp is lit, for example
R be struck by the air bag if the PASSENGER
AIR BAG OFF indicator lamp is off
This poses an increased risk of injury or even fatal injury.
Always move the front-passenger seat as far
back as possible and fully retract the seat
cushion length. Always make sure that the
shoulder belt strap is correctly routed from
the vehicle seat belt guide to the shoulder belt
guide on the child restraint system. The shoul-
der belt strap must be routed forwards and
downwards from the seat belt guide. Always
observe the child restraint system manufac-
turer's installation instructions.
If OCS determines that: R the front-passenger seat is unoccupied, the
PASSENGER AIR BAG OFF indicator lamp
lights up after the system self-test and
remains lit. This indicates that the front-
passenger front air bag is deactivated.
R the front-passenger seat is occupied by a
child of up to 12 month sold, in a standard
child restraint system, the PASSENGER AIR BAG OFF indicator lamp lights up after the
system self-test and remains lit. This indi-
cates that the front-passenger front air bag
is deactivated.
But in the case of a 12-month-old child, in a standard child restraint system, the
PASSENGER AIR BAG OFF indicator lamp 60
Occupant safetySafety
Page 65 of 610

Problems with the Occupant Classification System (OCS)
Be sure to observe the notes on "System self-test" (Y
page 61).Problem
Possible causes/consequences and
0050
0050Solutions The PASSENGER AIR
BAG OFF indicator
lamp lights up and
remains lit, even
though the front-
passenger seat is occu-
pied by an adult or a
person of a stature cor-
responding to that of an
adult. The classification of the person on the front-passenger seat is
incorrect.
X Make sure the conditions for a correct classification of the per-
son on the front-passenger seat are met (Y page 59).
X If the PASSENGER AIR BAG OFF indicator lamp remains lit, the
front-passenger seat may not be used.
X Have OCS checked as soon as possible at an authorized
Mercedes-Benz Center. The PASSENGER AIR
BAG OFF indicator
lamp does not light up
and/or does not stay
on.
The front-passenger
seat is:
R unoccupied
R occupied by the
weight of a child up
to 12 months old in a
child restraint sys-
tem OCS is malfunctioning.
X Make sure there is nothing between the seat cushion and the
child seat.
X Make sure that the entire base of the child restraint system rests
on the seat cushion of the front-passenger seat. The backrest of
the forwards-facing child restraint system must, as far as pos-
sible, be resting on the backrest of front-passenger seat. If nec- essary, adjust the position of the front-passenger seat.
X Make sure that the seat cushion length is fully retracted.
X When installing the child restraint system, make sure that the
seat belt is tight. Do not pull the seat belt tight with the front-
passenger seat adjustment. This could result in the seat belt and the child restraint system being pulled too tightly.
X Check the installation of the child restraint system.
Make sure that the head restraint does not apply a load to the
child restraint system. If necessary, adjust the head restraint
accordingly.
X Make sure that no objects are applying additional weight onto
the seat.
X If the PASSENGER AIR BAG OFF indicator lamp remains off, do
not install a child restraint system on the front-passenger seat.
X Have OCS checked as soon as possible at an authorized
Mercedes-Benz Center. Roll bar
G
DANGER
If the roll bar has developed a malfunction, it
may not function, e.g. in the event of an acci- dent. The roll bars may then not protect the
vehicle occupants as intended. This poses an
increased risk of injury or even fatal injury.
Have roll bars checked immediately at a quali-
fied specialist workshop. Occupant safety
63Safety Z
Page 72 of 610
sudden change in direction. The child
restraint system could be thrown about, strik- ing vehicle occupants. There is an increased
risk of injury, possibly even fatal.
Always install child restraint systems prop-
erly, even if they are not being used. Make
sure that you observe the child restraint sys-
tem manufacturer's installation instructions.
Further information on stowing objects, lug-
gage and loads securely can be found under
“Stowing options/stowage compartments”
(Y page 512). G
WARNING
Child restraint systems or their securing sys-
tems which have been damaged or subjected to a load in an accident can no longer protect
as intended. The child cannot then be
restrained in the event of an accident, heavy
braking or sudden changes of direction. There is an increased risk of injury, possibly even
fatal.
Replace child restraint systems which have
been damaged or subjected to a load in an
accident as soon as possible. Have the secur-
ing systems on the child restraint system
checked at a qualified specialist workshop,
before you install a child restraint system
again.
If a child is carried on the front-passenger
seat, be sure to observe the information on
the "Occupant Classification System (OCS)"
(Y page 59). There you will also find informa-
tion on deactivating the front-passenger front
air bag.
All child restraint systems must meet the fol- lowing standards:
R U.S. Federal Motor Vehicle Safety Stand-
ards 213 and 225
R Canadian Motor Vehicle Safety Standards
213 and 210.2
Confirmation that the child restraint system
corresponds to the standards can be found
on an instruction label on the child restraint
system. This confirmation can also be found in the installation instructions that are inclu-
ded with the child restraint system.
Observe the warning labels in the vehicle inte-
rior and on the child restraint system. Child restraint system on the front-
passenger seat
General notes If you secure a child in a child restraint system
on the front-passenger seat, be sure to
observe the instructions and safety notes on
the "Occupant Classification System (OCS)"
(Y page 59).
You can thus avoid the risks that could arise
as a result of:
R an incorrectly categorized person in the
front-passenger seat
R the unintentional deactivation of the front-
passenger front air bag
R the unsuitable positioning of the child
restraint system, e.g. too close to the dash-
board
Rearward-facing child restraint system If it is absolutely necessary to install a rear-
ward-facing child restraint system on the
front-passenger seat, always make sure that
the front-passenger front air bag is deactiva-
ted. Only if the PASSENGER AIR BAG OFF
indicator lamp is permanently lit (Y page 51)
is the front-passenger front air bag deactiva-
ted.
Always observe the child restraint system
manufacturer's installation and operating
instructions.
Forward-facing child restraint system If you secure a child in a forward-facing child
restraint system on the front-passenger seat,
always move the front-passenger seat as far
back as possible. Fully retract the seat cush-
ion length. The entire base of the child
restraint system must always rest on the seat 70
Children in the vehicleSafety
Page 112 of 610
R
clean the seat covers as recommended;
see "Interior care".
R do not transport heavy loads on the
seats. Do not place sharp objects on the seat cushions, e.g. knives, nails or tools. The seats should only be occupied by
passengers, if possible.
R when the seat heating is in operation, do
not cover the seats with insulating mate-
rials, e.g. blankets, coats, bags, seat cov- ers, child seats or booster seats.
! Make sure that there are no objects in the
footwell under or behind the seats when
moving the seats back. There is a risk that
the seats and/or the objects could be dam- aged.
i The head restraints cannot be removed.
For more information, contact a qualified
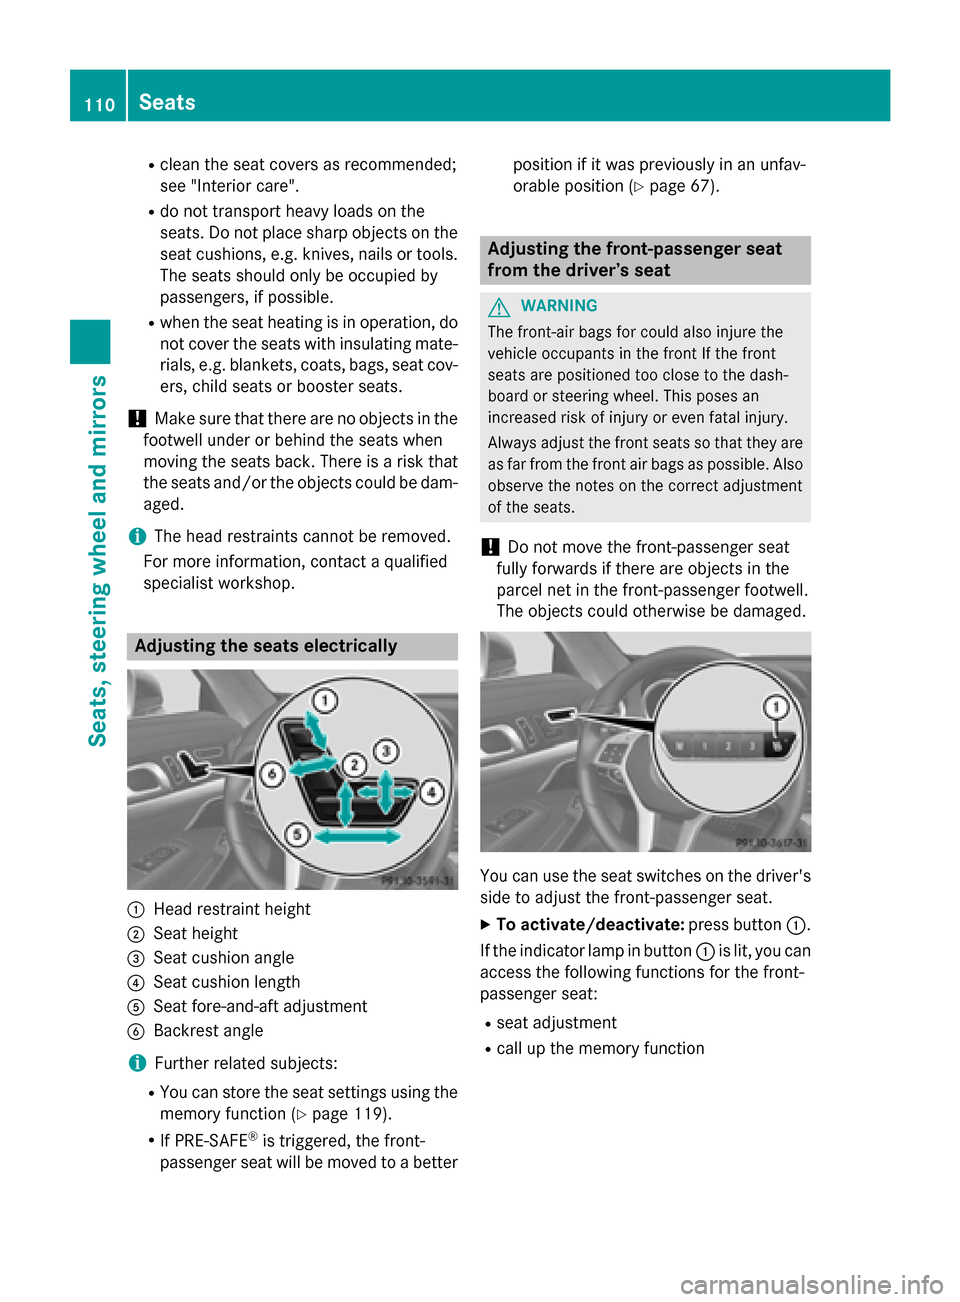
specialist workshop. Adjusting the seats electrically
0043
Head restraint height
0044 Seat height
0087 Seat cushion angle
0085 Seat cushion length
0083 Seat fore-and-aft adjustment
0084 Backrest angle
i Further related subjects:
R You can store the seat settings using the
memory function (Y page 119).
R If PRE-SAFE ®
is triggered, the front-
passenger seat will be moved to a better position if it was previously in an unfav-
orable position (Y
page 67). Adjusting the front-passenger seat
from the driver’s seat
G
WARNING
The front-air bags for could also injure the
vehicle occupants in the front If the front
seats are positioned too close to the dash-
board or steering wheel. This poses an
increased risk of injury or even fatal injury.
Always adjust the front seats so that they are
as far from the front air bags as possible. Also
observe the notes on the correct adjustment
of the seats.
! Do not move the front-passenger seat
fully forwards if there are objects in the
parcel net in the front-passenger footwell.
The objects could otherwise be damaged. You can use the seat switches on the driver's
side to adjust the front-passenger seat.
X To activate/deactivate: press button0043.
If the indicator lamp in button 0043is lit, you can
access the following functions for the front-
passenger seat:
R seat adjustment
R call up the memory function 110
SeatsSeats, steering wheel and mirrors
Page 113 of 610
Removing the seat belt from the belt
guide G
WARNING
When driving off-road, your body is subject to forces from all directions, due to the uneven
surface. You could be thrown from your seat,
for instance. There is a risk of injury.
Always wear a seat belt, even when driving off-
road. Both the driver's seat belt and the front-
passenger seat belt can be removed from the
seat belt guide. This makes it easier to move
the seats forward.
Before you drive off, the seat belt must be
inserted into the seat belt guide.
Observe the safety guidelines for seat belts
(Y page 52).
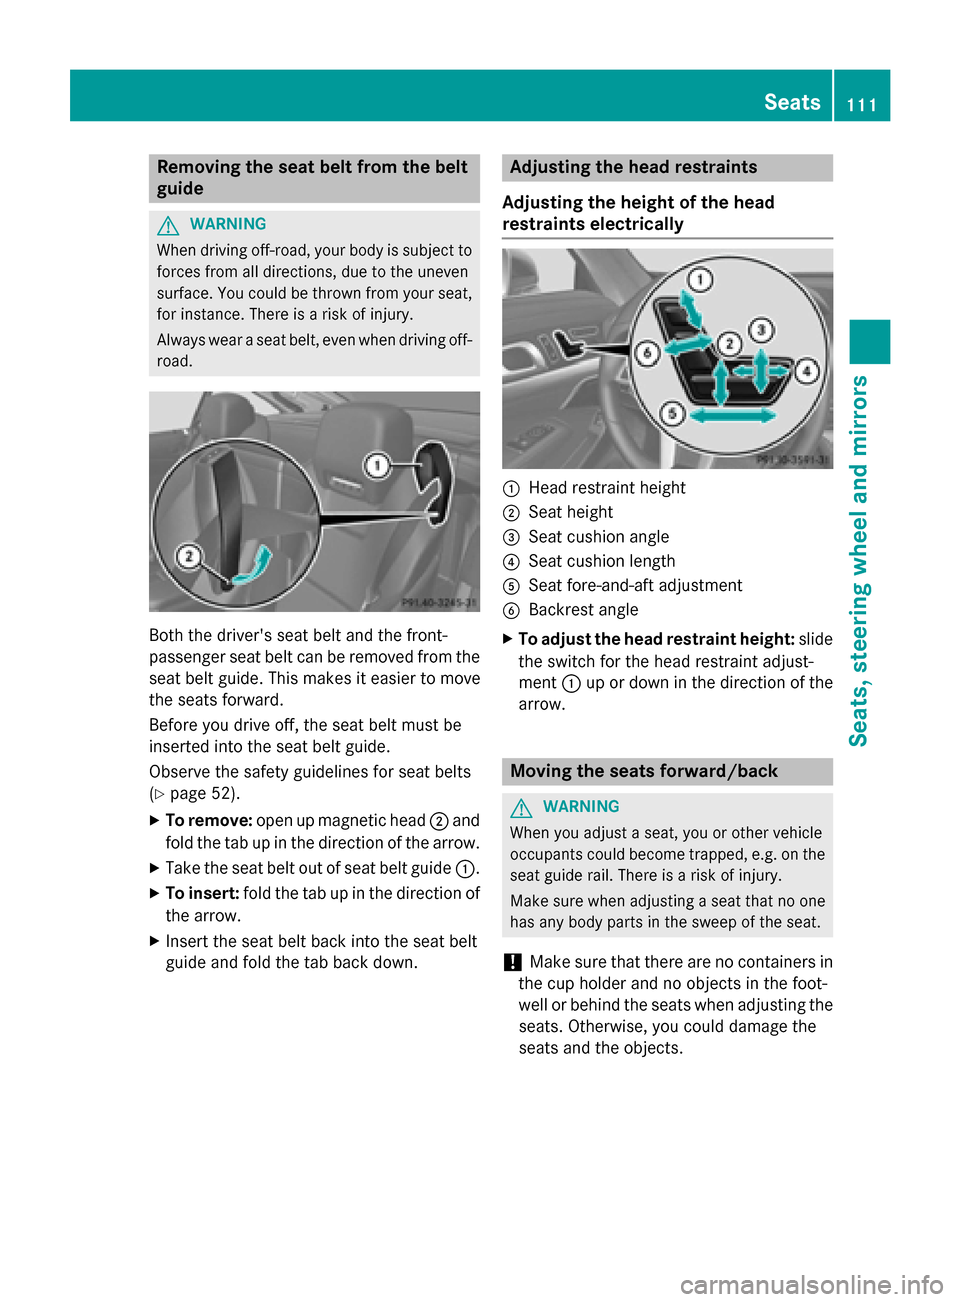
X To remove: open up magnetic head 0044and
fold the tab up in the direction of the arrow.
X Take the seat belt out of seat belt guide 0043.
X To insert: fold the tab up in the direction of
the arrow.
X Insert the seat belt back into the seat belt
guide and fold the tab back down. Adjusting the head restraints
Adjusting the height of the head
restraints electrically 0043
Head restraint height
0044 Seat height
0087 Seat cushion angle
0085 Seat cushion length
0083 Seat fore-and-aft adjustment
0084 Backrest angle
X To adjust the head restraint height: slide
the switch for the head restraint adjust-
ment 0043up or down in the direction of the
arrow. Moving the seats forward/back
G
WARNING
When you adjust a seat, you or other vehicle
occupants could become trapped, e.g. on the seat guide rail. There is a risk of injury.
Make sure when adjusting a seat that no one
has any body parts in the sweep of the seat.
! Make sure that there are no containers in
the cup holder and no objects in the foot-
well or behind the seats when adjusting the seats. Otherwise, you could damage the
seats and the objects. Seats
111Seats, steering wheel and mirrors Z
Page 175 of 610
Applying/releasing manually
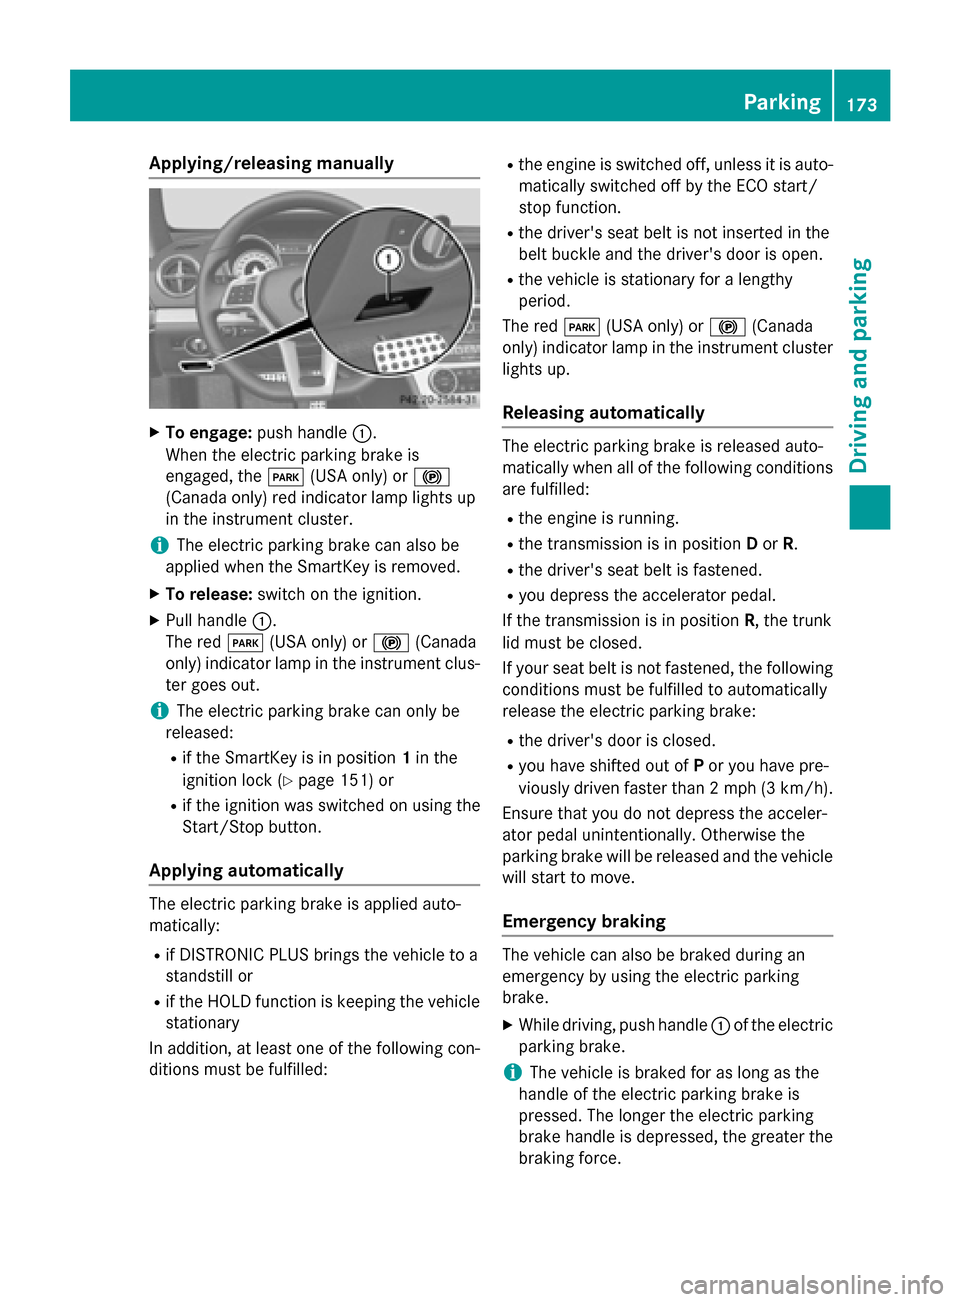
X
To engage: push handle 0043.
When the electric parking brake is
engaged, the 0049(USA only) or 0024
(Canada only) red indicator lamp lights up
in the instrument cluster.
i The electric parking brake can also be
applied when the SmartKey is removed.
X To release: switch on the ignition.
X Pull handle 0043.
The red 0049(USA only) or 0024(Canada
only) indicator lamp in the instrument clus-
ter goes out.
i The electric parking brake can only be
released:
R if the SmartKey is in position 1in the
ignition lock (Y page 151) or
R if the ignition was switched on using the
Start/Stop button.
Applying automatically The electric parking brake is applied auto-
matically:
R if DISTRONIC PLUS brings the vehicle to a
standstill or
R if the HOLD function is keeping the vehicle
stationary
In addition, at least one of the following con-
ditions must be fulfilled: R
the engine is switched off, unless it is auto-
matically switched off by the ECO start/
stop function.
R the driver's seat belt is not inserted in the
belt buckle and the driver's door is open.
R the vehicle is stationary for a lengthy
period.
The red 0049(USA only) or 0024(Canada
only) indicator lamp in the instrument cluster lights up.
Releasing automatically The electric parking brake is released auto-
matically when all of the following conditions
are fulfilled:
R the engine is running.
R the transmission is in position Dor R.
R the driver's seat belt is fastened.
R you depress the accelerator pedal.
If the transmission is in position R, the trunk
lid must be closed.
If your seat belt is not fastened, the following conditions must be fulfilled to automatically
release the electric parking brake:
R the driver's door is closed.
R you have shifted out of Por you have pre-
viously driven faster than 2 mph (3 km/h).
Ensure that you do not depress the acceler-
ator pedal unintentionally. Otherwise the
parking brake will be released and the vehicle will start to move.
Emergency braking The vehicle can also be braked during an
emergency by using the electric parking
brake.
X While driving, push handle 0043of the electric
parking brake.
i The vehicle is braked for as long as the
handle of the electric parking brake is
pressed. The longer the electric parking
brake handle is depressed, the greater the braking force. Parking
173Driving and pa rking Z
Page 211 of 610
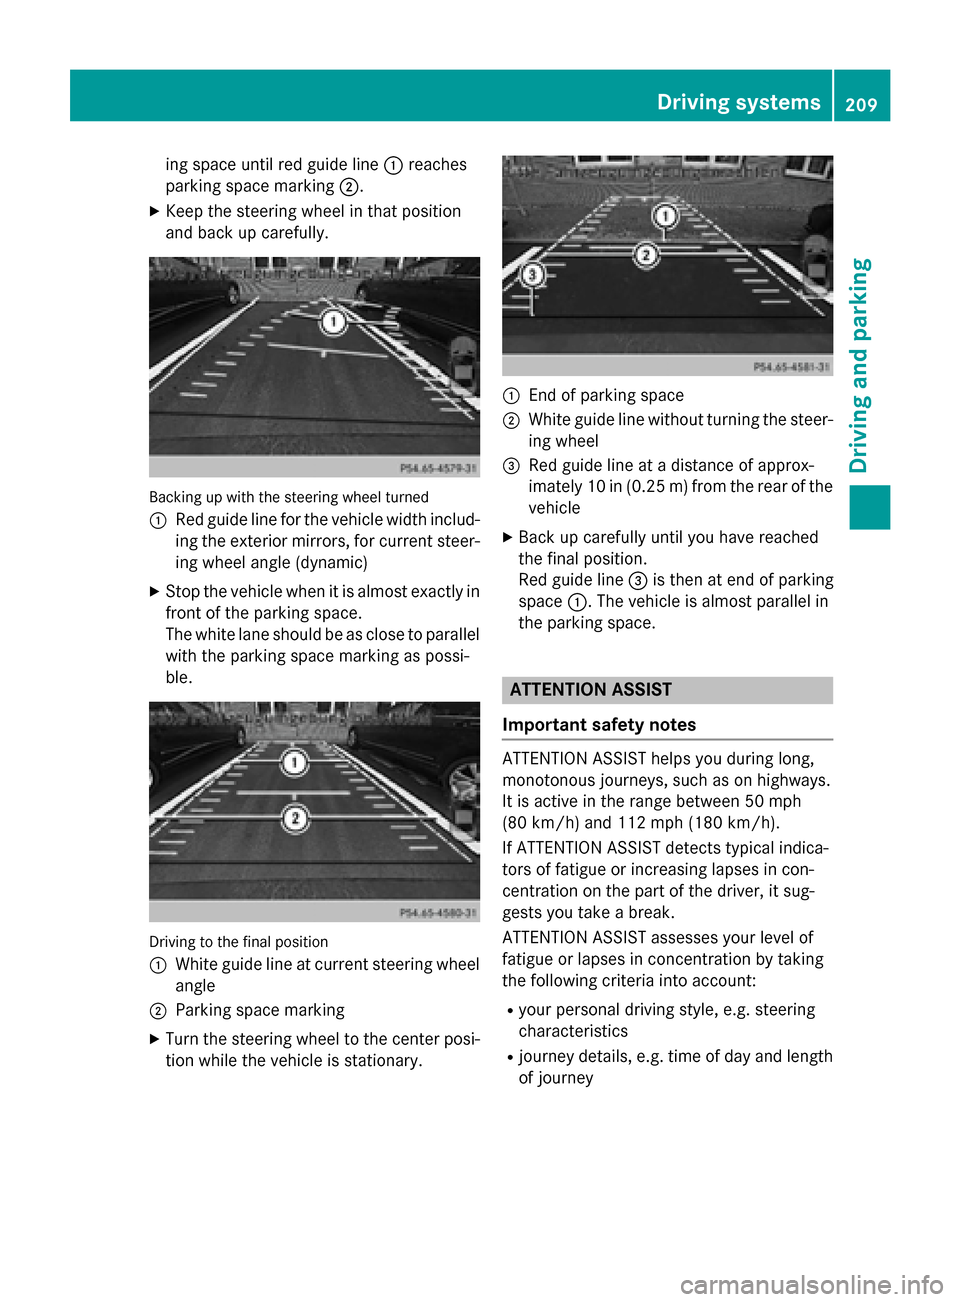
ing space until red guide line
0043reaches
parking space marking 0044.
X Keep the steering wheel in that position
and back up carefully. Backing up with the steering wheel turned
0043
Red guide line for the vehicle width includ-
ing the exterior mirrors, for current steer-
ing wheel angle (dynamic)
X Stop the vehicle when it is almost exactly in
front of the parking space.
The white lane should be as close to parallel with the parking space marking as possi-
ble. Driving to the final position
0043
White guide line at current steering wheel
angle
0044 Parking space marking
X Turn the steering wheel to the center posi-
tion while the vehicle is stationary. 0043
End of parking space
0044 White guide line without turning the steer-
ing wheel
0087 Red guide line at a distance of approx-
imately 10 in (0.25 m) from the rear of the
vehicle
X Back up carefully until you have reached
the final position.
Red guide line 0087is then at end of parking
space 0043. The vehicle is almost parallel in
the parking space. ATTENTION ASSIST
Important safety notes ATTENTION ASSIST helps you during long,
monotonous journeys, such as on highways.
It is active in the range between 50 mph
(80 km/h) and 112 mph (180 km/h).
If ATTENTION ASSIST detects typical indica-
tors of fatigue or increasing lapses in con-
centration on the part of the driver, it sug-
gests you take a break.
ATTENTION ASSIST assesses your level of
fatigue or lapses in concentration by taking
the following criteria into account:
R your personal driving style, e.g. steering
characteristics
R journey details, e.g. time of day and length
of journey Driving systems
209Driving and parking Z
Page 240 of 610
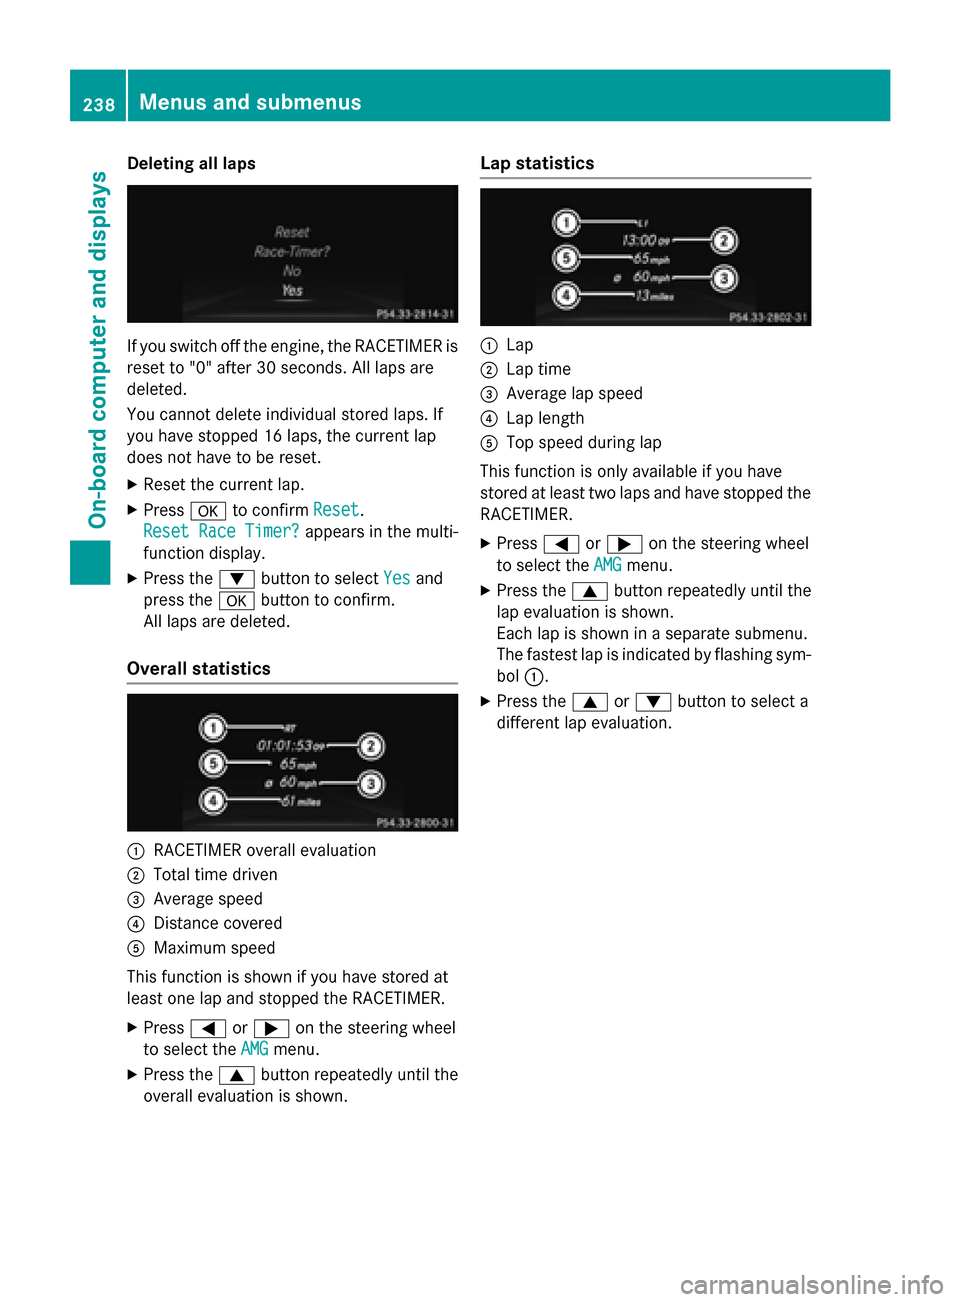
Deleting all laps
If you switch off the engine, the RACETIMER is
reset to "0" after 30 seconds. All laps are
deleted.
You cannot delete individual stored laps. If
you have stopped 16 laps, the current lap
does not have to be reset.
X Reset the current lap.
X Press 0076to confirm Reset Reset.
Reset Race Timer?
Reset Race Timer? appears in the multi-
function display.
X Press the 0064button to select Yes
Yes and
press the 0076button to confirm.
All laps are deleted.
Overall statistics 0043
RACETIMER overall evaluation
0044 Total time driven
0087 Average speed
0085 Distance covered
0083 Maximum speed
This function is shown if you have stored at
least one lap and stopped the RACETIMER.
X Press 0059or0065 on the steering wheel
to select the AMG
AMG menu.
X Press the 0063button repeatedly until the
overall evaluation is shown. Lap statistics 0043
Lap
0044 Lap time
0087 Average lap speed
0085 Lap length
0083 Top speed during lap
This function is only available if you have
stored at least two laps and have stopped the
RACETIMER.
X Press 0059or0065 on the steering wheel
to select the AMG AMGmenu.
X Press the 0063button repeatedly until the
lap evaluation is shown.
Each lap is shown in a separate submenu.
The fastest lap is indicated by flashing sym-
bol 0043.
X Press the 0063or0064 button to select a
different lap evaluation. 238
Menus and sub
menusOn-board computer and displays
Page 316 of 610
Details on the displays:
R for all vehicles except AMG vehicles, see
the separate vehicle Operator's Manual
R for AMG vehicles, see the separate vehicle
Operator's Manual.
Exiting the display X
Slide 009500520096 the COMAND controller until
the desired display (clock or fuel consump-
tion) is shown. Seat functions
Overview Using the
0050button next to the COMAND
controller or the Seat menu item in the sys-
tem menu, you can call up different setting
functions. The following settings depend on
the type of seat and the vehicle model series:
R Seat cushion length
R Backrest side bolsters
R Lumbar
R Balance
R Seat cushion side bolsters
R Dynamics
R Massage
i You can also store and recall the current
seat function settings using the memory
button and the corresponding memory
position switch; see the separate vehicle
Operator's Manual.
The massage function cannot be started or
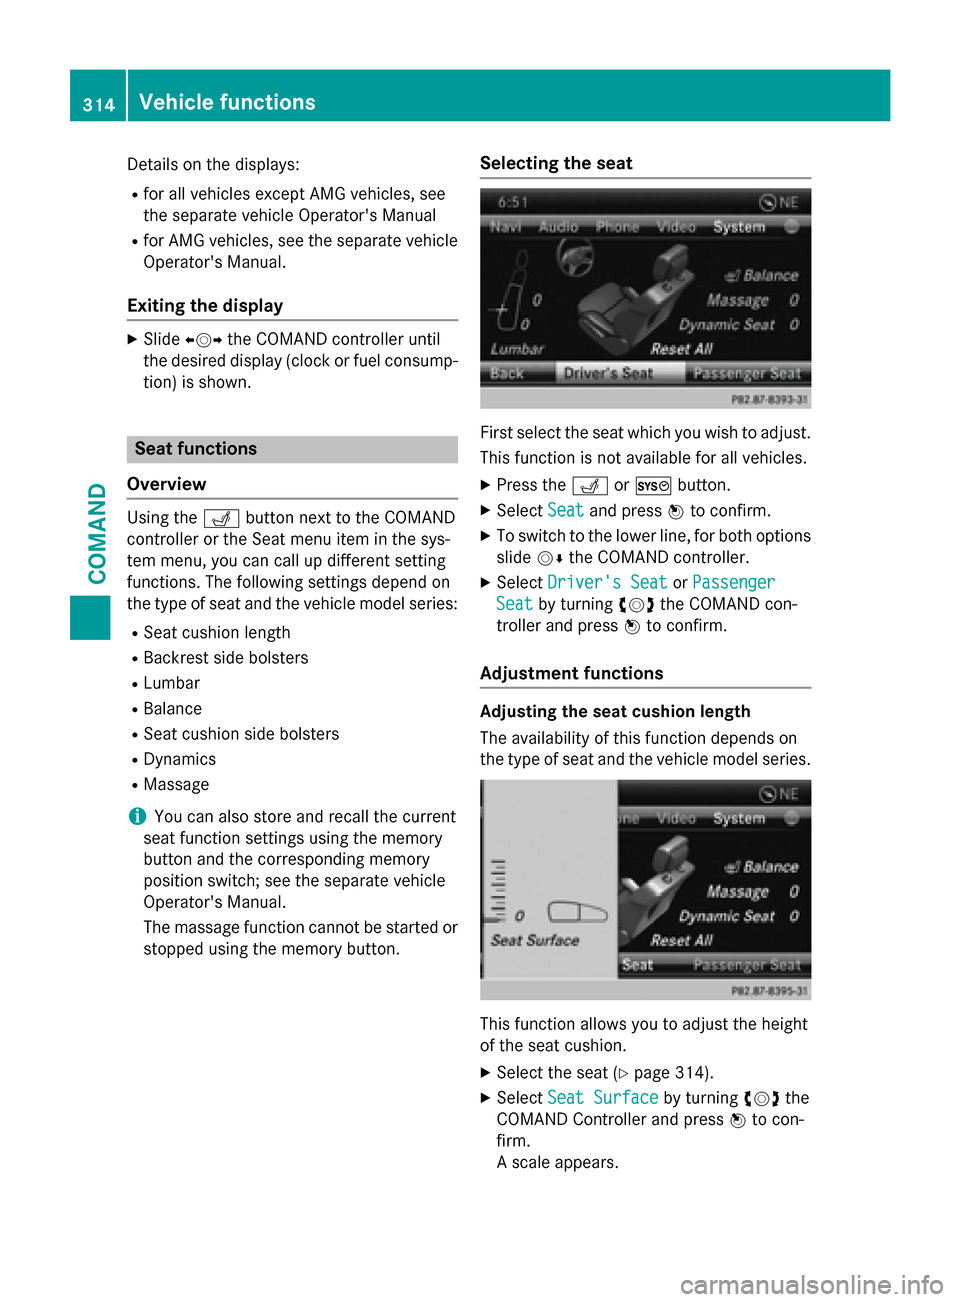
stopped using the memory button. Selecting the seat First select the seat which you wish to adjust.
This function is not available for all vehicles.
X Press the 0050or0066 button.
X Select Seat Seatand press 0098to confirm.
X To switch to the lower line, for both options
slide 00520064the COMAND controller.
X Select Driver's Seat
Driver's Seat orPassenger
Passenger
Seat
Seat by turning 00790052007Athe COMAND con-
troller and press 0098to confirm.
Adjustment functions Adjusting the seat cushion length
The availability of this function depends on
the type of seat and the vehicle model series. This function allows you to adjust the height
of the seat cushion.
X Select the seat (Y page 314).
X Select Seat Surface Seat Surface by turning00790052007Athe
COMAND Controller and press 0098to con-
firm.
A scale appears. 314
Vehicle functionsCOMAND
Page 351 of 610
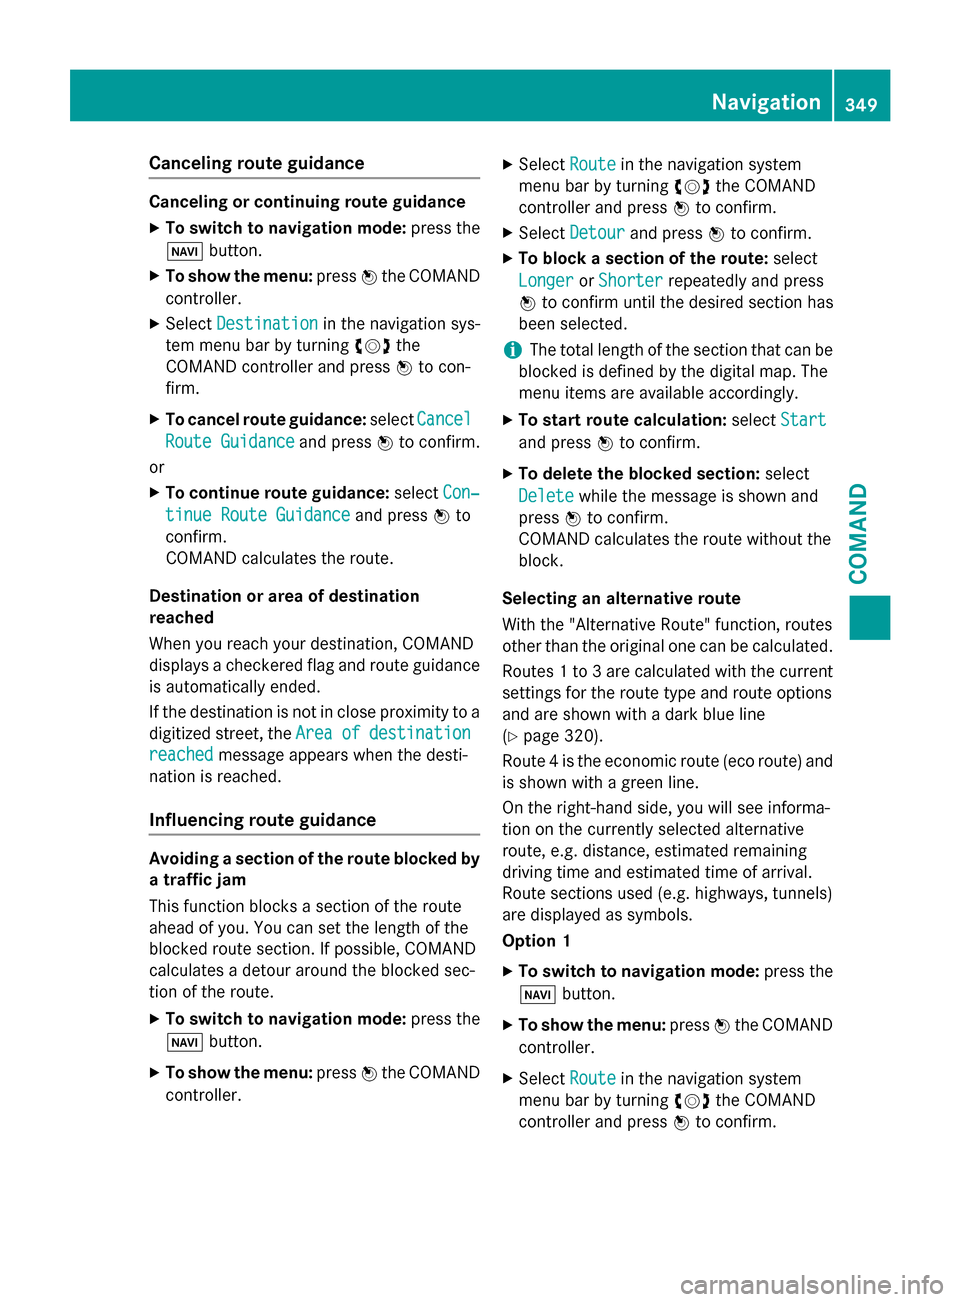
Canceling route guidance
Canceling or continuing route guidance
X To switch to navigation mode: press the
00BE button.
X To show the menu: press0098the COMAND
controller.
X Select Destination
Destination in the navigation sys-
tem menu bar by turning 00790052007Athe
COMAND controller and press 0098to con-
firm.
X To cancel route guidance: selectCancel
Cancel
Route Guidance
Route Guidance and press0098to confirm.
or X To continue route guidance: selectCon‐
Con‐
tinue Route Guidance
tinue Route Guidance and press0098to
confirm.
COMAND calculates the route.
Destination or area of destination
reached
When you reach your destination, COMAND
displays a checkered flag and route guidance is automatically ended.
If the destination is not in close proximity to a
digitized street, the Area
Area of ofdestination
destination
reached
reached message appears when the desti-
nation is reached.
Influencing route guidance Avoiding a section of the route blocked by
a traffic jam
This function blocks a section of the route
ahead of you. You can set the length of the
blocked route section. If possible, COMAND
calculates a detour around the blocked sec-
tion of the route.
X To switch to navigation mode: press the
00BE button.
X To show the menu: press0098the COMAND
controller. X
Select Route
Route in the navigation system
menu bar by turning 00790052007Athe COMAND
controller and press 0098to confirm.
X Select Detour
Detour and press 0098to confirm.
X To block a section of the route: select
Longer
Longer orShorter Shorter repeatedly and press
0098 to confirm until the desired section has
been selected.
i The total length of the section that can be
blocked is defined by the digital map. The
menu items are available accordingly.
X To start route calculation: selectStart Start
and press 0098to confirm.
X To delete the blocked section: select
Delete
Delete while the message is shown and
press 0098to confirm.
COMAND calculates the route without the
block.
Selecting an alternative route
With the "Alternative Route" function, routes
other than the original one can be calculated.
Routes 1 to 3 are calculated with the current settings for the route type and route options
and are shown with a dark blue line
(Y page 320).
Route 4 is the economic route (eco route) and
is shown with a green line.
On the right-hand side, you will see informa-
tion on the currently selected alternative
route, e.g. distance, estimated remaining
driving time and estimated time of arrival.
Route sections used (e.g. highways, tunnels)
are displayed as symbols.
Option 1
X To switch to navigation mode: press the
00BE button.
X To show the menu: press0098the COMAND
controller.
X Select Route
Route in the navigation system
menu bar by turning 00790052007Athe COMAND
controller and press 0098to confirm. Navigation
349COMAND Z