light MERCEDES-BENZ SL-Class 2017 R131 Comand Manual
[x] Cancel search | Manufacturer: MERCEDES-BENZ, Model Year: 2017, Model line: SL-Class, Model: MERCEDES-BENZ SL-Class 2017 R131Pages: 202, PDF Size: 6.35 MB
Page 70 of 202
Personal POIs and routes
General notes
The use of personal POIs for displaying traffic
surveillance equipment is not permitted in everycountry. Please observe the country-specific
regulations and always drive at a suitable speed.
Personal POIs are filed in categories:
RNot Classified
Standard entry for personal POIs
RMercedes-Benz Apps
Personal POIs (destinations, routes) that you
have imported via the online functions
RCategories which you have created yourself,
e.g. on your PC
Personal routes are not categorized.
Settings for personal POIs
Displaying on the map
Requirements: an SD card with personal POIs is
inserted (Ypage 149).
All personal POIs of the selected category are
displayed on the map with a corresponding sym-
bol.
If the "Alert when approaching" function
(
Ypage 68) is activated, the symbols are dis-
played up to a map scale of 2 km (2 mi).
XTo switch to navigation mode: press the
ß button.
XTo show the menu: slide6the controller.
XTo select Options: turn and press the con-
troller.
XSelect Personal POIs.
XSelectDisplay on the Map.
The menu displays the categories available on
the SD card.
XTo select a category: turn the controller and
press to confirm.
All personal POIs in the selected category are
displayed Oor not displayed ª, depending
on the previous status.
Alert when approaching
Requirements: an SD card with personal POIs is
inserted (Ypage 149). If the vehicle is approaching a personal POI and
the functions are enabled, the personal POI is
highlighted on the map and an audible signal
sounds.
For this purpose, both the corresponding func-
tion
Approaching POI Cue
and the category
containing the personal POI must be activated.
XTo switch to navigation mode: press the
ß button.
XTo show the menu: slide6the controller.
XTo select Options: turn and press the con-
troller.
XSelect Personal POIs.
XSelectApproaching POI Cue.
The menu displays the categories available on
the SD card.
XSelect AudibleorOptical.
The function is switched on Oor off ª,
depending on the previous status.
XTo select a category: turn the controller and
press to confirm.
The function is switched on Oor off ª, for
all personal POIs of this category, depending
on the previous setting.
Saving personal POIs and routes
General notes
Personal POIs and routes are geodata which are
saved in open GPX format (GPS Exchange for-
mat) on the SD card.
Personal POI from current vehicle posi-
tion or crosshair position
XInsert the SD memory card (Ypage 149).
XTo switch to navigation mode: press the
ß button.
XWhen the map is displayed, press the con-
troller until a message appears.
The current vehicle position is saved to the
Not Classified
category on the SD card
and also stored in the "Last destinations"
memory (
Ypage 82).
If the "Move map" function is selected
(
Ypage 54), the crosshair position is saved.
iIf no SD card is inserted, the personal POI
will only be stored in the "Last destinations"
memory.
68Personal POIs and routes
Navigation
Page 73 of 202
XTo selectDestination: turn and press the
controller.
XSelect From Memory Card.
XSelectPersonal Routes.
Previously recorded routes are displayed.
XTo select a route: turn and press the control-
ler.
The map appears with a menu. The recorded
route is shown on the map in blue.
XTo start route calculation: selectStart.
XTo change the name and symbol: select
Edit
.
XSelect Change NameorEdit Icon.
XTo change name: enter character (Ypage 30).
XTo change symbol: select a symbol.
The symbol is saved.
Route guidance
General notes
Always observe the traffic regulations when
driving. Road and traffic rules and regulations
always have priority over system driving recom-
mendations.
The multimedia system calculates the route to
the destination without taking account of the
following, for example:
Rtraffic lights
Rstop and yield signs
Rparking or stopping restrictions
Rroad narrowing
Rtemporary traffic rules and regulations
The multimedia system may give differing navi-
gation commands if the actual street/traffic sit-
uation does not correspond with the digital
map's data. For example, if the road layout or
the direction of a one-way street has been
changed.
Route guidance begins once a route has been
calculated (
Ypage 59).
The multimedia system guides you to your des-
tination by means of navigation announcements
in the form of audible navigation announce-
ments and route guidance displays.
Navigation messages guide you during the jour-
ney without distracting you from traffic condi-
tions or driving. Please always use this feature
instead of consulting the map display for direc- tions. The symbols or the map display could dis-
tract you from traffic conditions and driving.
The route guidance displays can be seen if nav-
igation mode is switched on.
If you do not follow the navigation announce-
ments or if you leave the calculated route, the
multimedia system automatically calculates a
new route to the destination.
If the digital map contains the corresponding
information, the following applies:
RDuring route guidance, the multimedia sys-
tem tries to avoid roads with restricted
access. These include, for example, roads
which are closed to through-traffic.
RRoads that have time restrictions (e.g. closed
on Sundays and public holidays) are consid-
ered for route guidance on days when they are
open. For this purpose, the relevant times
must be correctly stored in the database.
Change of direction
Overview
Changes of direction have three phases:
RPreparation phase
RAnnouncement phase
RChange-of-direction phase
Changes in direction are also shown in the mul-
tifunction display of the instrument cluster (see
the vehicle Operator's Manual).
Preparation phase
The multimedia system prepares you for the
upcoming driving maneuver, e.g. with the
announcement "Prepare to turn right". You see
the full-screen map.
Route guidance71
Navigation
Z
Page 74 of 202

Announcement phase
:Pointat whic hth echang eof direction takes
plac e(whit edot )
;Change of direction (turn right here)
=Distanc eto th enext chang eof direction
The multimedia system announce sth eimmi-
nent chang eof direction .The chang eof direc -
tion is announce dahead of time, wit hth e
announcemen t"Turn right in 30 0meters", for
example.
The display is no wspli tint otwo sectors. The
map is shown on th elef tside of th edisplay, and
a detailed imag eof th eintersection or a3D
imag eof th eimminent chang eof direction is
shown on th eright side of th edisplay.
Change-of-directi onphase
The multimedia system announce sth eimmedi-
ate chang eof direction .The chang eof direction
is announce dahead of time, e.g. wit hth e
announcemen t"Now tur nright".
The display is spli tin two lik ein th eannounce -
men tphase.
The chang eof direction is performed when th e
light-colored bar on th eright drops down to 0ft
and th ecurren tvehicl eposition symbol has
reached th ewhit echange-of-direction point. When th
echang eof direction is completed, th e
map will appear in full scree nmod eagain .
Display onhighways
The imag eshows an exampl eof rout eguidance
at ahighway intersection when drivin gon a
highway.
Lane rec ommendations
Display on multi-lane roads
:Lanes no trecommended (dar kgray)
;Possibl elan e(ligh tgray)
=Recommended lanes (white)
If th edigital map contain sth erelevan tdata, th e
multimedia system can display lan erecommen -
dation son multi-lane road sfor th enext chang e
of direction .
Lan eno trecommended ::you will no tbe able
to complete th enext chang eof direction if you
stay in this lane.
Possibl elan e;: you will be able to complete
th enext chang eof direction in this lane.
Recommended lan e=: in this lan eyou will be
able to complete th enext chang eof direction
and th eon eafter that.
72Route guidance
Navigation
Page 75 of 202
Lane recommendations are also shown in the
multifunction display of the instrument cluster
(see the vehicle Operator's Manual).
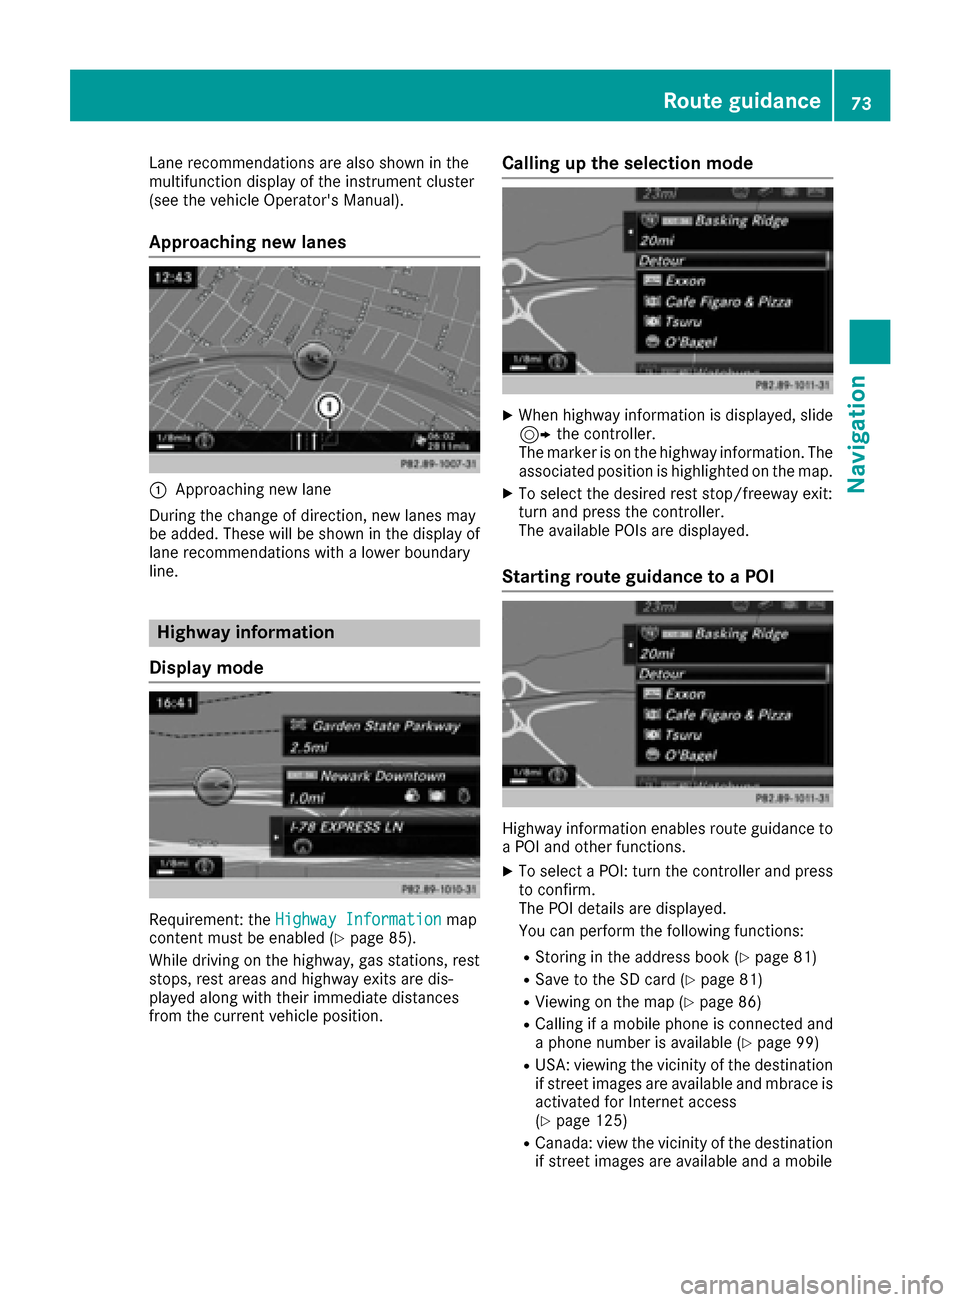
Approaching new lanes
:Approaching new lane
During the change of direction, new lanes may
be added. These will be shown in the display of
lane recommendations with a lower boundary
line.
Highway information
Display mode
Requirement: the Highway Informationmap
content must be enabled (Ypage 85).
While driving on the highway, gas stations, rest
stops, rest areas and highway exits are dis-
played along with their immediate distances
from the current vehicle position.
Calling up the selection mode
XWhen highway information is displayed, slide 9 the controller.
The marker is on the highway information. The
associated position is highlighted on the map.
XTo select the desired rest stop/freeway exit:
turn and press the controller.
The available POIs are displayed.
Starting route guidance to a POI
Highway information enables route guidance to
a POI and other functions.
XTo select a POI: turn the controller and press to confirm.
The POI details are displayed.
You can perform the following functions:
RStoring in the address book (Ypage 81)
RSave to the SD card (Ypage 81)
RViewing on the map (Ypage 86)
RCalling if a mobile phone is connected and
a phone number is available (Ypage 99)
RUSA: viewing the vicinity of the destination
if street images are available and mbrace is
activated for Internet access
(
Ypage 125)
RCanada: view the vicinity of the destination if street images are available and a mobile
Route guidance73
Navigation
Z
Page 81 of 202
XTo selectTraffic Symbol Information:
turn and press the controller.
The map appears and shows the available
traffic information as icons. The first traffic
information is highlighted.
XTo highlight additional traffic symbols, select
Nextor Previous.
XTo move the map: selectMap.
You can move the map to enable further traf-
fic information to be displayed.
You can have the traffic report relevant to a traf-
fic icon shown.
XTo select Details: turn and press the con-
troller.
The report shows the following information:
RState/province, road and display of the affec-
ted direction
RSection of the road to which the traffic report applies
RTraffic icon and traffic report
XTo close the detailed display: press the %
button.
Displaying reports on the route
The function is only available while route guid-
ance is active. It shows the available traffic
reports affecting the current route. If there are no reports for the route or the func-
tion is not supported in the selected language:
the
Messages
OnRoutemenu item is gray and
cannot be selected.
XTo switch to navigation mode: press the Ø
button.
XTo show the menu: slide 6the controller.
XTo select Traffic: turn and press the con-
troller.
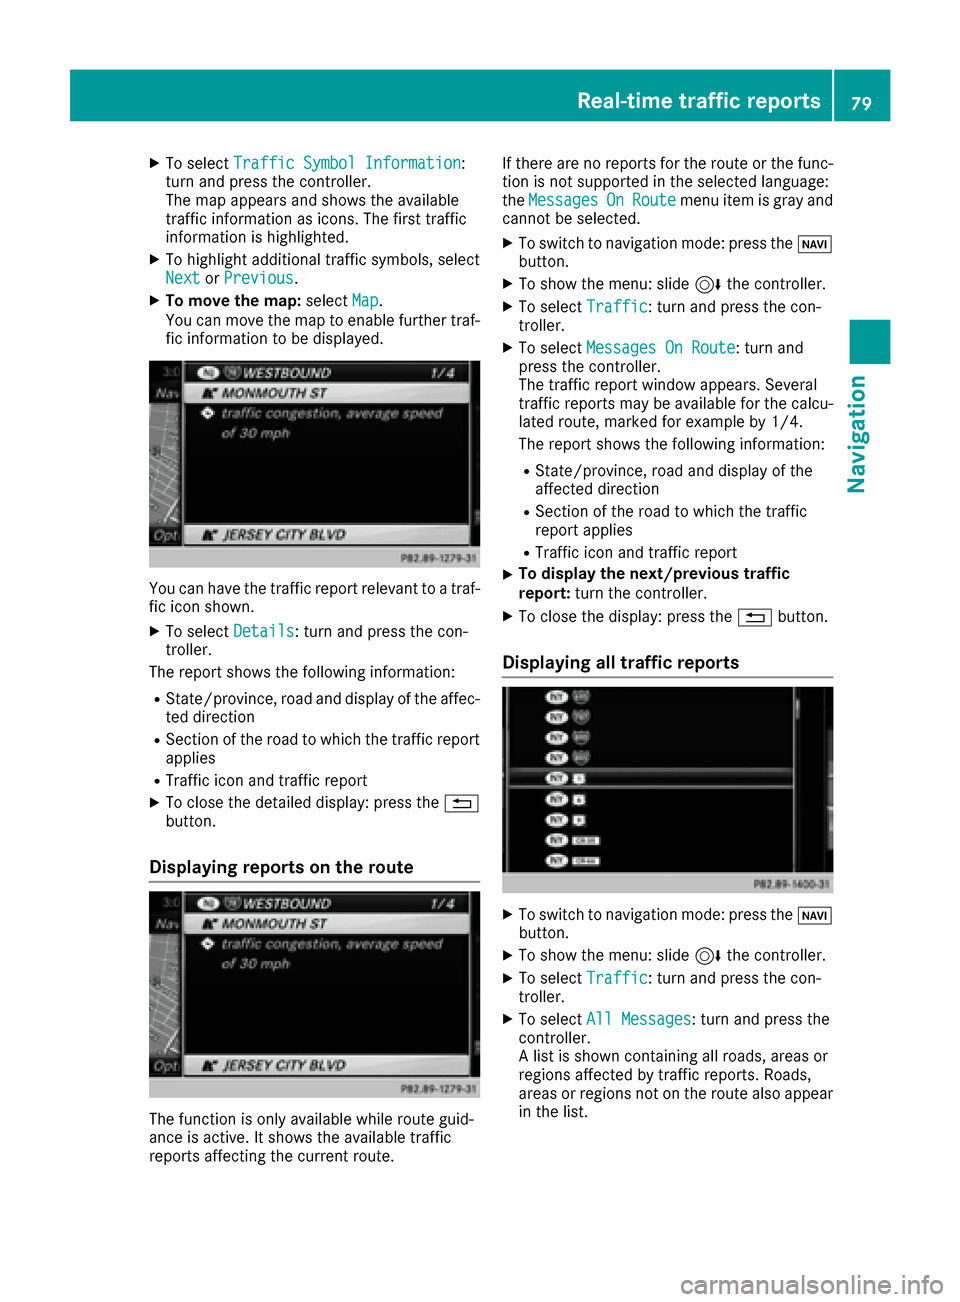
XTo select Messages On Route: turn and
press the controller.
The traffic report window appears. Several
traffic reports may be available for the calcu-
lated route, marked for example by 1/4.
The report shows the following information:
RState/province, road and display of the
affected direction
RSection of the road to which the traffic
report applies
RTraffic icon and traffic report
XTo display the next/previous traffic
report: turn the controller.
XTo close the display: press the %button.
Displaying all traffic reports
XTo switch to navigation mode: press the Ø
button.
XTo show the menu: slide 6the controller.
XTo select Traffic: turn and press the con-
troller.
XTo select All Messages: turn and press the
controller.
A list is shown containing all roads, areas or
regions affected by traffic reports. Roads,
areas or regions not on the route also appear
in the list.
Real-time traffic reports79
Navigation
Z
Page 84 of 202

XEnter a surname and first name. Character
entry (Ypage 30).
XSelectOK.
The Saving Successfulmessage appears.
The destination is saved to the SD card.
Saving the current vehicle position
Using the map
XTo switch to navigation mode: press the
ß button.
XWhen the map is shown, press and hold the
COMAND controller until you hear a tone.
The current vehicle position is saved to the
"Last destinations" memory.
If an SD card is inserted, the current vehicle
position will also be saved in the Not Clas‐
sifiedcategory.
Using the menu
XTo switch to navigation mode: press the
ß button.
XTo show the menu: slide6the controller.
XTo select Position: turn and press the con-
troller.
XSelect Save.
XStore the destination in the address book
(Ypage 81).
XSave the destination to the SD card
(Ypage 81).
Saving the crosshair position
XTo switch to navigation mode: press the
ß button.
XTo display the crosshair: press the control-
ler.
XMove the map to the desired position
(Ypage 54).
XTo show the menu: press the controller.
XTo selectPosition: turn and press the con-
troller.
XSelect Save.
The current crosshair position is saved to the
"Last destinations" memory. If an SD card is inserted, the current crosshair
position will also be saved in the
Not Clas‐
sifiedcategory.
Editing the last destinations
XTo switch to navigation mode: press the
ß button.
XTo show the menu: slide6the controller.
XTo select Destination: turn and press the
controller.
XSelect From Previous Destinations.
The "Last destinations" memory appears.
XTo save the destination: select the destina-
tion.
The destination address appears.
XStore the destination in the address book
(Ypage 81).
XSave the destination to the SD card
(Ypage 81).
XTo view the details: while in the "Last desti-
nations" memory, turn the controller and
highlight the entry.
XSlide 9the controller.
A menu appears.
XTo select Details: press the controller.
iThe destination address can be changed if
desired.
XTo delete one or all destinations: while in
the "Last destinations" memory, turn the con- troller and highlight the entry.
XSlide 9the controller.
A menu appears.
82Storing destinations
Navigation
Page 91 of 202
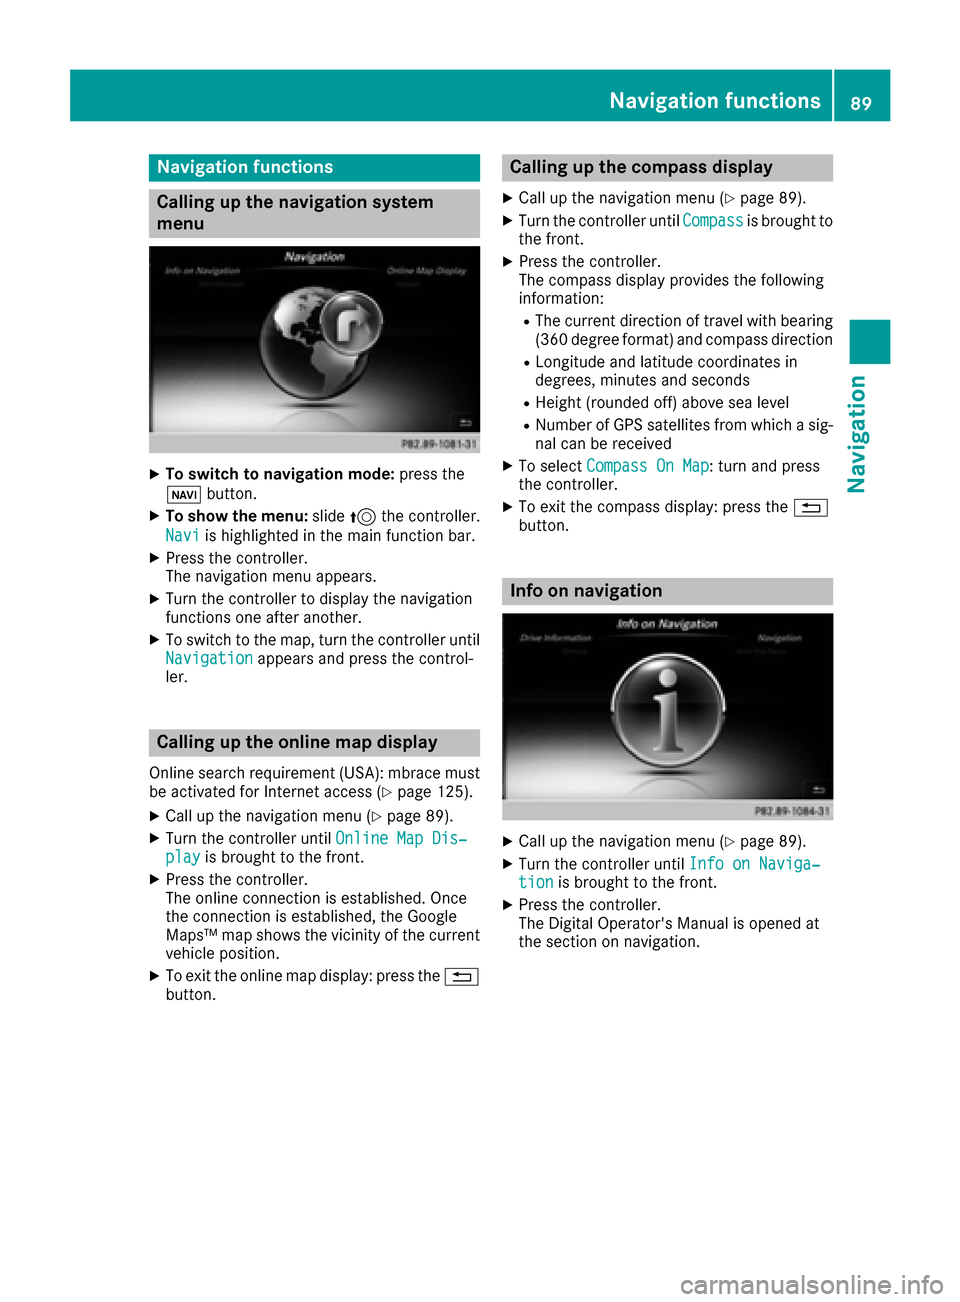
Navigation functions
Calling up the navigation system
menu
XTo switch to navigation mode:press the
ß button.
XTo show the menu: slide5the controller.
Navi
is highlighted in the main function bar.
XPress the controller.
The navigation menu appears.
XTurn the controller to display the navigation
functions one after another.
XTo switch to the map, turn the controller until
Navigationappears and press the control-
ler.
Calling up the online map display
Online search requirement (USA): mbrace must
be activated for Internet access (Ypage 125).
XCall up the navigation menu (Ypage 89).
XTurn the controller until Online Map Dis‐playis brought to the front.
XPress the controller.
The online connection is established. Once
the connection is established, the Google
Maps™ map shows the vicinity of the current
vehicle position.
XTo exit the online map display: press the %
button.
Calling up the compass display
XCall up the navigation menu (Ypage 89).
XTurn the controller until Compassis brought to
the front.
XPress the controller.
The compass display provides the following
information:
RThe current direction of travel with bearing
(360 degree format) and compass direction
RLongitude and latitude coordinates in
degrees, minutes and seconds
RHeight (rounded off) above sea level
RNumber of GPS satellites from which a sig- nal can be received
XTo select Compass On Map: turn and press
the controller.
XTo exit the compass display: press the %
button.
Info on navigation
XCall up the navigation menu (Ypage 89).
XTurn the controller until Info on Naviga‐tionis brought to the front.
XPress the controller.
The Digital Operator's Manual is opened at
the section on navigation.
Navigation functions89
Navigation
Z
Page 99 of 202
Only one mobile phone can be connected at any
one time for telephony. The currently connected
mobile phone is indicated by the#dot in the
device list.
iYou can only switch to another authorized
mobile phone if you are not currently making
a call.
De-authorizing (disconnecting) a
mobile phone
Mercedes-Benz USA, LLC recommends de-
authorization in the multimedia system as well
as on the mobile phone. Subsequent authoriza-
tion may otherwise fail.
XTo call up the telephone menu: press the
% button.
XTo switch to the menu bar: slide 6the con-
troller.
XTo select Conn. Device: turn and press the
controller.
The device list is displayed.
XTo highlight the desired mobile phone in the
device list: turn the controller.
XTo select G: slide 9the controller.
XTo select Deauthorize: turn and press the
controller.
A prompt appears, asking whether you really
wish to de-authorize this device.
XTo select Yes: turn and press the controller.
The mobile phone is de-authorized.
Displaying connection details
XTo call up the telephone menu: press the
% button.
XTo switch to the menu bar: slide 6the con-
troller.
XTo select Conn. Device: turn and press the
controller.
The device list is displayed.
XTo highlight the desired mobile phone: turn
the controller.
XTo select G: slide 9the controller.
XTo select Details: turn and press the con-
troller.
The following information concerning the
selected mobile phone is shown:
RBluetooth®device name
RBluetooth®address
RAuthorization status
Setting the reception and transmis-
sion volume
Once the mobile phone has been authorized,
you can optimize the transmission and recep-
tion volume settings. To find out about the best
possible settings for your mobile phone, visit
http://www.mercedes-benz.com/connect .
You can also obtain more information by calling.
In the USA, you can get in touch with the
Mercedes-Benz Customer Assistance Center on
1-800-FOR-MERCedes (1-800-367-6372).
In Canada, you can get in touch with the Cus-
tomer Relations Center on 1-800-387-0100.
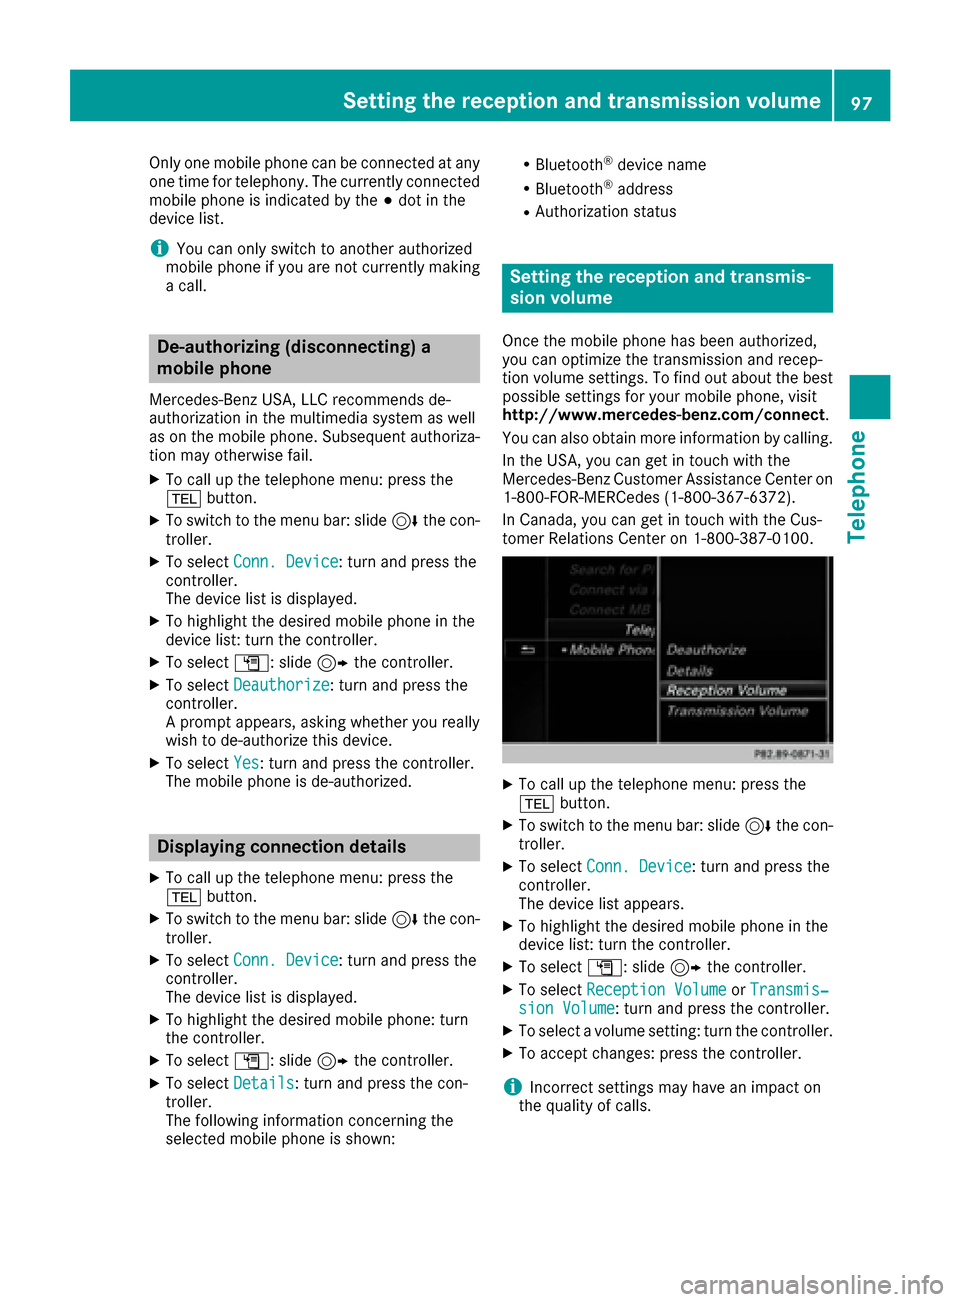
XTo call up the telephone menu: press the
% button.
XTo switch to the menu bar: slide 6the con-
troller.
XTo select Conn. Device: turn and press the
controller.
The device list appears.
XTo highlight the desired mobile phone in the
device list: turn the controller.
XTo select G: slide 9the controller.
XTo select Reception VolumeorTransmis‐sion Volume: turn and press the controller.
XTo select a volume setting: turn the controller.
XTo accept changes: press the controller.
iIncorrect settings may have an impact on
the quality of calls.
Setting the reception and transmission volume97
Telephone
Z
Page 101 of 202
Selecting and placing a call using the multifunc-
tion steering wheel (see vehicle Operator's Man-ual)
Further information about ending a call
(
Ypage 101).
Using speed dial
Option 1
XTo call up the telephone menu: press the
% button.
XTo highlight a number from the character bar:
turn the controller.
XPress the controller for longer than two sec-
onds.
The telephone menu displays the selected
entry. The number is dialed.
Option 2
XTo call up the telephone menu: press the
% button.
XTo switch to the menu bar: slide 6the con-
troller.
XTo select Call Lists: turn and press the
controller.
XTo select Speed Dial Preset List: turn
and press the controller.
The speed dial list is displayed.
XTo select an entry and make a call: turn and
press the controller.
The telephone menu displays the selected
entry. The number is dialed.
Further information on setting up speed dial
(
Ypage 113).
Further information about ending a call
(
Ypage 101).
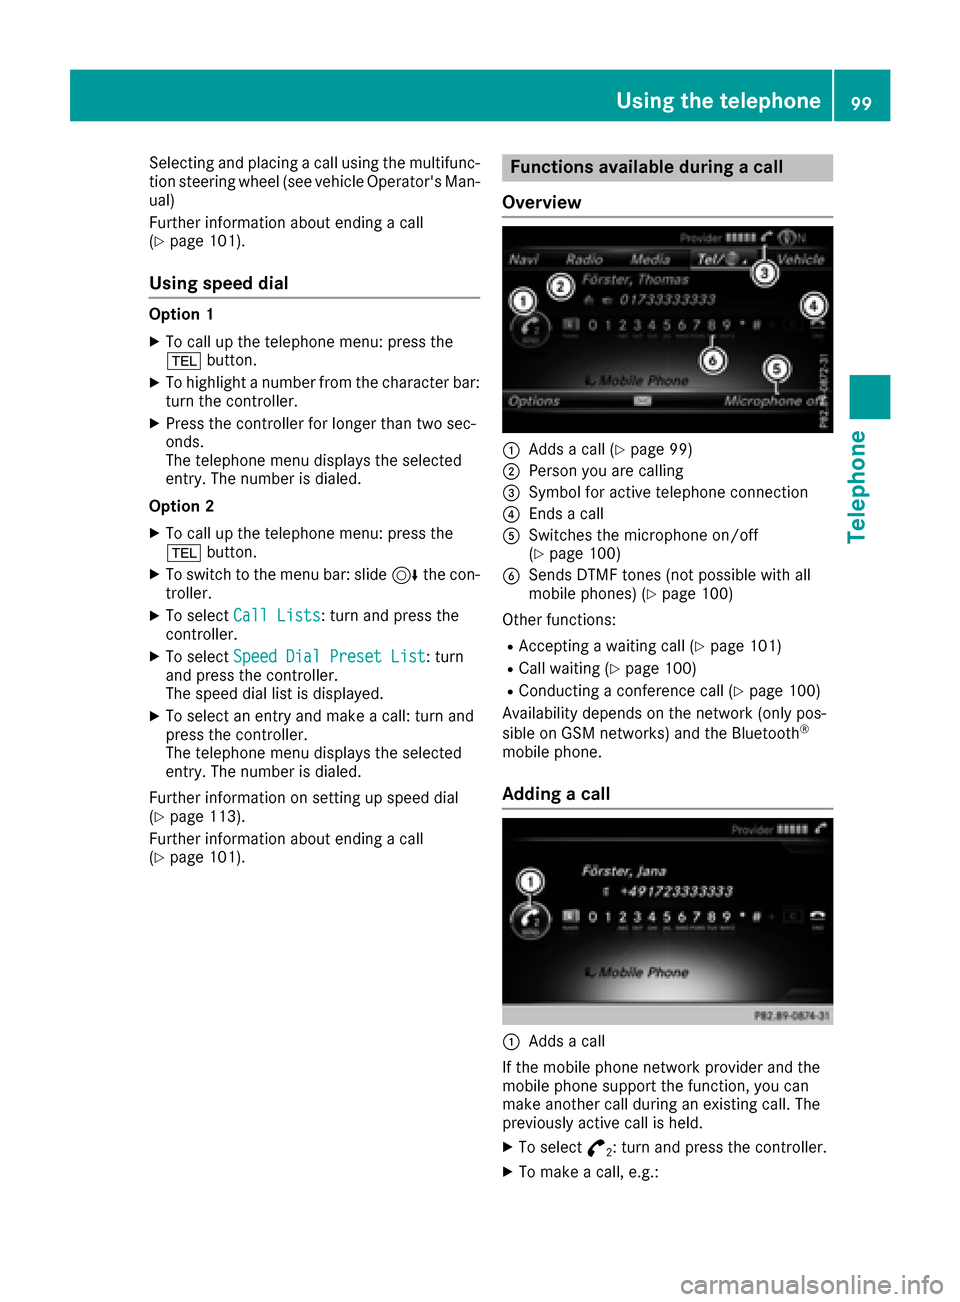
Functions available during a call
Overview
:Adds a call (Ypage 99)
;Person you are calling
=Symbol for active telephone connection
?Ends a call
ASwitches the microphone on/off
(Ypage 100)
BSends DTMF tones (not possible with all
mobile phones) (Ypage 100)
Other functions:
RAccepting a waiting call (Ypage 101)
RCall waiting (Ypage 100)
RConducting a conference call (Ypage 100)
Availability depends on the network (only pos-
sible on GSM networks) and the Bluetooth
®
mobile phone.
Adding a call
:Adds a call
If the mobile phone network provider and the
mobile phone support the function, you can
make another call during an existing call. The
previously active call is held.
XTo select °2: turn and press the controller.
XTo make a call, e.g.:
Using the telephone99
Telephone
Z
Page 102 of 202
RUsing the telephone menu (Ypage 98)
RUsing redial (Ypage 98)
RUsing the call lists (Ypage 98)
RUsing the phone book (Ypage 98)
RUsing speed dial (Ypage 99)
Switching the microphone on or off
This function is available in the telephone menu
during an active phone call.
Switching off the microphone:
XTo switch to the menu bar: slide6the con-
troller.
XTo select Microphone Off: turn and press
the controller.
If the microphone is switched off, the Q
symbol and the The microphone is off.
message are displayed.
Switching on the microphone:
XSelect Microphone On.
The Qsymbol disappears. The The micro‐
phone is on.message is shown.
Sending DTMF tones
This function is not supported by all mobile
phones.
Answering machines or other devices can be
controlled by DTMF tones, e.g. for remote query
functions.
XIf you would like to listen to the messages on
your answering machine, for example, dial the
corresponding number.
Transmitting individual characters
XOnce a connection has been established to
the answer phone, select the desired charac-
ters in the telephone menu: turn and press the
controller each time.
or
XPress the corresponding key on the number
keypad.
Every character selected will be transmitted
immediately.
Calls with several participants
Switching between calls (call waiting)
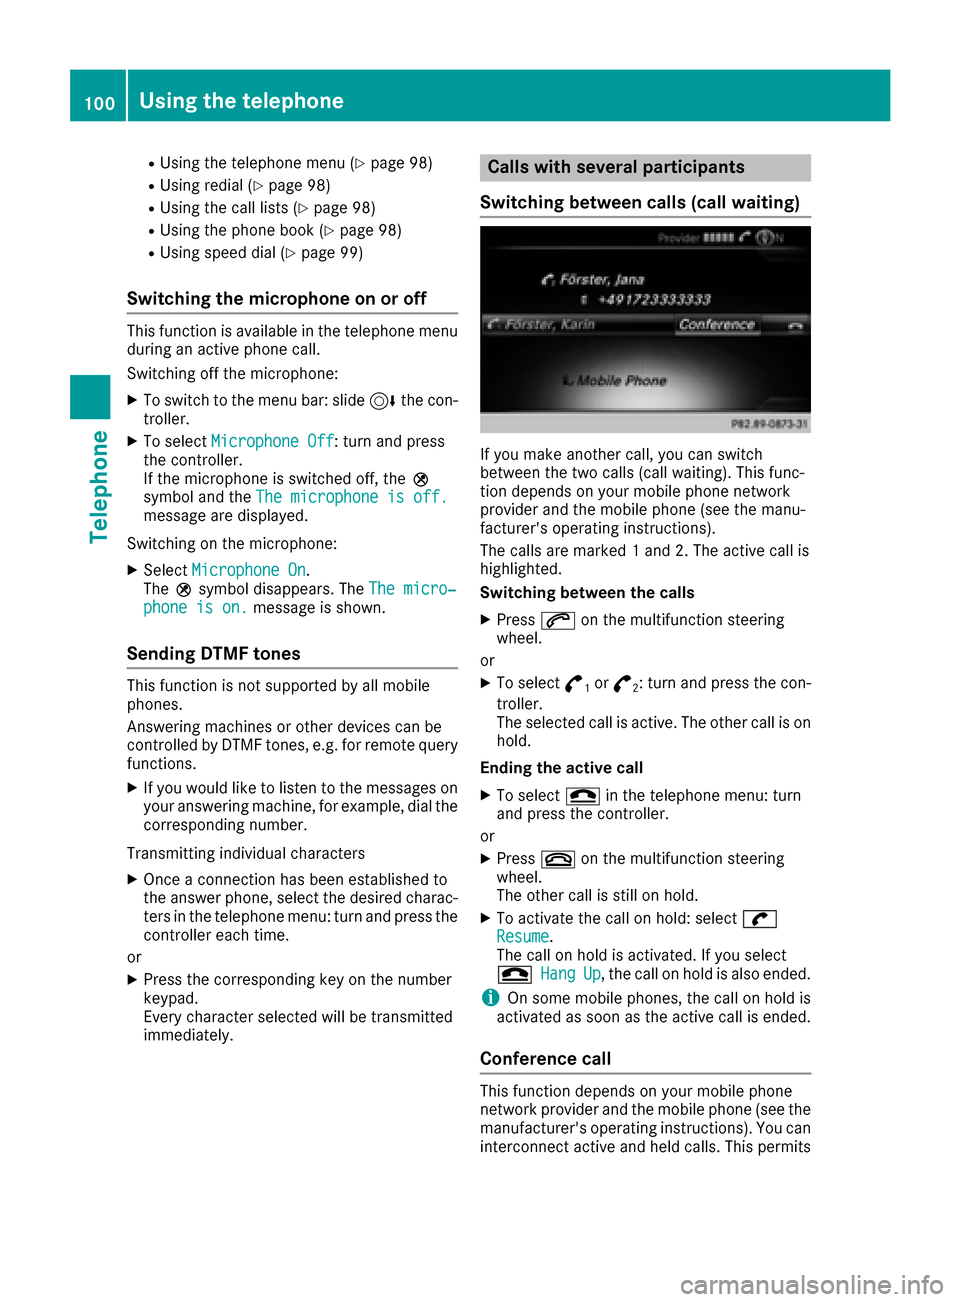
If you make another call, you can switch
between the two calls (call waiting). This func-
tion depends on your mobile phone network
provider and the mobile phone (see the manu-
facturer's operating instructions).
The calls are marked 1 and 2. The active call is
highlighted.
Switching between the calls
XPress 6on the multifunction steering
wheel.
or
XTo select °1or°2: turn and press the con-
troller.
The selected call is active. The other call is on
hold.
Ending the active call
XTo select =in the telephone menu: turn
and press the controller.
or
XPress ~on the multifunction steering
wheel.
The other call is still on hold.
XTo activate the call on hold: select wResume.
The call on hold is activated. If you select
=
HangUp, the call on hold is also ended.
iOn some mobile phones, the call on hold is
activated as soon as the active call is ended.
Conference call
This function depends on your mobile phone
network provider and the mobile phone (see the
manufacturer's operating instructions). You can
interconnect active and held calls. This permits
100Using the telephone
Telephone