maintenance MERCEDES-BENZ SL CLASS 2018 User Guide
[x] Cancel search | Manufacturer: MERCEDES-BENZ, Model Year: 2018, Model line: SL CLASS, Model: MERCEDES-BENZ SL CLASS 2018Pages: 298, PDF Size: 4.54 MB
Page 241 of 298
! Lock the car if you wash it in an automatic
car wash. Otherwise, the vehicle might be
damaged.
! Never clean your vehicle in aT ouchless
Automatic Car Wash as these use special
cleaning agents. These cleaning agents can
damage the paintwork or plastic parts.
If you have your vehicle cleaned in ah igh-
pressure automatic car wash, small amounts
of water may enter the vehicle.
! Make sure that the automatic transmission
is in position N when washing your vehicle in
at ow-through car wash. The vehicle could be
damage dift he transmission is in another
position.
! Make sure that: R
the side windows and the roof are com-
pletely closed R
the climate control blower is switched off R
the windshiel dw iper switch is at position 0
The vehicle could otherwise be damaged.
You can clean the vehicle at an automatic car
wash from the very start.
Preferably clean the vehicle at automatic car
washes that use textile washing elements with-
out brushes. This prevents fine scratches from
forming on the paintwork and film.
If the vehicle is very dirty, pre-wash it before
cleaning it in an automatic car wash.
After using an automatic car wash, wipe off wax
from the windshiel da nd the wiper blades. This
will prevent smears and reduce wiping noises
caused by residue on the windshield.
i Vehicles with decorative film: select aw ash
program without hot wax at the automatic car
wash.
Washing by hand In some countries, washing by hand is only
allowed at speciall ye quipped washing bays.
Observe the legal requirements in each country. X
Do not use hot water and do not wash the
vehicle in direct sunlight. X
Use as oft sponge to clean.X
Use am ild cleaning agent, such as ac ar
shampoo approved by Mercedes-Benz. X
Thoroughly hose down the vehicle with ag en-
tle jet of water. X
Do not point the water jet directly towards the
air inlet or the edges of decorative foils. X
Use plenty of water and rinse out the sponge
frequently. X
Rinse the vehicle with clean water and dry
thoroughly with ac hamois.X
Do not let the cleaning agent dry on the paint-
work or the decorative foils.
Carefully remove all deposits of road salt as
soon as possible when driving in winter.
Powe rw ashers
G WARNING
The water jet from ac ircular jet nozzle (dirt
blasters) can cause invisible exterior damage
to the tires or chassis components. Compo-
nent sd amage dint his way may fail unexpect-
edly .T here is ar isk of an accident.
Do not use power washers with circular jet
nozzles to clean the vehicle. Have damaged
tires or chassis component sr eplaced imme-
diately.
! Vehicles with decorative foil: parts of your
vehicle are covered with decorative foil. Main-
tain ad istance of at least 27.5 in (70 cm)
between the foil-wrappe dp arts of the vehicle
and the nozzle of the high pressure cleaner.
Information abou tt he correct distance is
available from the equipment manufacturer.
Move the power washer nozzle around when
cleaning your vehicle.
The water temperature of the high-pressure
cleaner must not exceed 140 °F (60 °C).
! Alway sm aintain ad istance of at least
11.8 in (30 cm) between the vehicle and the
power washer nozzle. Information abou tt he
correct distance is available from the equip-
ment manufacturer.
Move the power washer nozzle around when
cleaning your vehicle.
Do not aim directly at any of the following: R
tires R
door gaps, roof gaps, joints, etc. R
electrical components R
battery R
plug-type couplings R
lights Care 239
Maintenance and care Z
Page 242 of 298
R
seals R
trim R
ventilation slots
Damaged seals or electrical component sc an
lead to leaks or failures.
! Do not use high-pressure cleaners if the
tank recess is open while you clean it. This
can cause damage to the seals or other com-
ponents.
Cleaning the paintwork
! Do not affix: R
stickers R
films R
magnetic plates or similar items
to painted surfaces. You could otherwise
damage the paintwork.
Scratches, corrosive deposits, areas affected by
corrosion and damage caused by inadequate
care cannot always be completely repaired. In
such cases, visit aq ualified specialist workshop.X
Remove dirt immediately ,w here possible,
while avoiding rubbing too hard. X
Soak insect remains with insect remover and
rinse off the treated areas afterwards. X
Soak bird droppings with water and rinse off
the treated areas afterwards. X
Remove coolant, brake fluid, tree resin, oils,
fuels and greases by rubbing gently with a
cloth soaked in petroleum ether or lighter
fluid. X
Use tar remover to remove tar stains. X
Use silicone remover to remove wax.
If water no longer forms "beads" on the paint
surface, use the paint care products recommen-
ded and approved by Mercedes-Benz .T his is the
case approximately every three to five months,
depending on the climate conditions and the
care product used.
If dirt has penetrated the paint surface or if the
paint has become dull ,t he paint cleaner recom-
mended and approved by Mercedes-Benz
should be used.
Do not use these care products in the sun or on
the hood while the hood is hot. X
Use as uitable touch-up stick, e.g. MB Touch-
Up Stick ,tor epair slight damage to the paint-
work quickly and provisionally. Matt ef inish care
! Never polish the vehicle or the light alloy
wheels. Polishing causes the finish to shine.
! The following can give the paint ag lossy
appearance and thus reduce the matt effect: R
Rubbing hard with unsuitable agents R
Washing the vehicle in direct sunlight
! Never use paint cleaner, buffing or polishing
products, or gloss preserver, e.g. wax, for the
purpose of paintwork care. These products
are only suitable for high-gloss surfaces. Their
use on vehicles with matte paintwork leads to
considerable surface damage or, more spe-
cifically ,tos hiny, spotted areas.
Always have paintwork repairs carried out at a
qualified specialist workshop.
! Only use automatic car washes which cor-
respond to the latest technological stand-
ards. Never use wash programs which finish
by treating the vehicle with hot wax.
Observe these notes if your vehicle has ac lear
matte finish. This will help you to avoid damage
to the paintwork due to incorrect treatment.
These notes also apply to light alloy wheels with
ac lear matte finish.
i Use only insect remover and car shampoo
from the range of recommended and
approved Mercedes-Benz care products.
Cleaning the decorative film
! The following may have an effect on the ser-
vice life and coloring of decorative film: R
sunlight R
temperature, e.g. hot-air fan R
weather conditions R
stone impacts and dirt R
chemical cleaning agents R
greasy substances
! Do not use any types of polish on matt dec-
orative film. Polishing surfaces covered with
film gives it as hiny finish.
! Do not treat matt or structured decorative
film with wax. This may lead to marks that
cannot be removed.240
Care
Maintenance and care
Page 243 of 298
Observe the notes in the section on the care and
treatment of matt paintwork ( Y
page 240);
these notes also apply to decorative film.
To clean, use plenty of water and am ild cleaning
agent without additional or abrasive products,
e.g. ac ar shampoo approved by Mercedes-
Benz. X
Remove bird droppings, tree resin or fuel as
soon as possible.
The decorative film may be irreparably dam-
aged. X
Dry vehicles covered with film using as oft,
absorbent cloth after every wash.
Water marks could otherwise form.
Scratches, corrosive deposits, areas affected by
corrosion and damage caused by inadequate
care cannot always be completely repaired. In
such cases, visit aq ualified specialist workshop.
The cleaning product Paint Cleaner, which has
been approved and recommended by
Mercedes-Benz ,s hould be used when dirt has
penetrated the decorative film surface or the
decorative film has become dull.
The manufacturer can provide you with infor-
mation on special care and cleaning products.
Surfaces covered with film may appea rs hinier
after the decorative film has been removed.
i Have work or repairs on decorative film car-
ried out at aq ualified specialist workshop.
Mercedes-Benz recommends that you use an
authorized Mercedes-Benz Center for this
purpose.
Cleaning the vehicl ep arts
Cleaning the wheels
G WARNING
The water jet from ac ircular jet nozzle (dirt
blasters) can cause invisible exterior damage
to the tires or chassis components. Compo-
nent sd amaged in this way may fail unexpect-
edly .T here is ar isk of an accident.
Do not use power washers with circular jet
nozzles to clean the vehicle. Have damaged
tires or chassis component sr eplaced imme-
diately. ! Do not use acidic wheel cleaning products
to remove brake dust. This could damage
wheel bolts and brake components.
! Do not park your vehicle for al ong period of
time directly after cleaning, particularl ya fter
cleaning the wheel rim with wheel cleaner.
Wheel cleaner can lead to the increased cor-
rosion of the brake discs and pads. Therefore,
drive for af ew minutes after cleaning. By
heating up the brakes, the brake discs and
pads dry. The vehicle can then be parked for a
long period of time.
Cleaning the windows
G WARNING
You could become trapped by the windshield
wipers if they start moving while cleaning the
windshiel dorw iper blades. There is ar isk of
injury.
Alway ss witch off the windshiel dw ipers and
the ignition before cleaning the windshiel do r
wiper blades.
! Do not use dry cloths, abrasive products,
solvents or cleaning agents containing sol-
vents to clean the inside of the windows. Do
not touch the insides of the windows with
hard objects, e.g. an ice scraper or ring. There
is otherwise ar isk of damaging the windows.
! Clea nt he water drainage channels of the
windshiel da nd the rear window at regular
intervals. Deposits such as leaves, petals and
pollen may under certain circumstances pre-
vent water from draining away. This can lead
to corrosion damage and damage to elec-
tronic components. X
Clea nt he inside and outside of the windows
with ad amp cloth and ac leaning product that
is recommended and approved by Mercedes-
Benz.
Cleaning wiper blades
G WARNING
If the windshiel dw ipers are set in motion
while you are cleaning the windshield, you can
be trapped by the wiper arm. There is ar isk of
injury. Care 241
Maintenance and care Z
Page 244 of 298
Alway ss wi tch off the windshield wipers and
the ignition before cleaning the windshield.
! Do not pull the wipe rb lade .O therwise, the
wipe rb lade could be damaged.
! Do not clean wipe rb lade st oo ofte na nd do
not ru bt hem too hard. Otherwise, the graph-
ite coating could be damaged .T hi sc ould
cause wipe rn oise.
! Hol dt he wipe ra rm securel yw he nf olding
back. The windshield could be damaged if the
wipe ra rm smacks against it suddenly.X
Fol dt he windshield wipe ra rm sa wa yf rom the
windshield. X
Carefully clean the wipe rb lade sw it had am p
cloth. X
Fol dt he windshield wipe ra rm sb ac ka gain
before switching on the ignition.
Cleanin gt he exterior lighting
! Onl yu se cleaning agents or cleaning cloths
which ar es ui tabl ef or plastic light lenses.
Unsuitabl ec leaning agents or cleaning cloths
could scratch or damage the plastic light len-
ses. X
Clea nt he plastic lenses of the exterio rl ig hts
with aw et sponge and am il dc leaning agent,
e.g .M ercedes-Benz car shampo oorc leaning
cloths.
Cleanin gt he mirro rt urn signals
! Onl yu se cleaning agents or cleaning cloths
tha ta re suitabl ef or plastic lenses .U nsuitable
cleaning agents or cleaning cloths could
scratch or damage the plastic lenses of the
mirror turn signals. X
Clea nt he plastic lenses of the mirror turn sig-
nal sint he exterio rm irror housing using aw et
sponge and mil dc leaning agent, e.g.
Mercedes-Benz car shampo oorw it hc leaning
cloths.
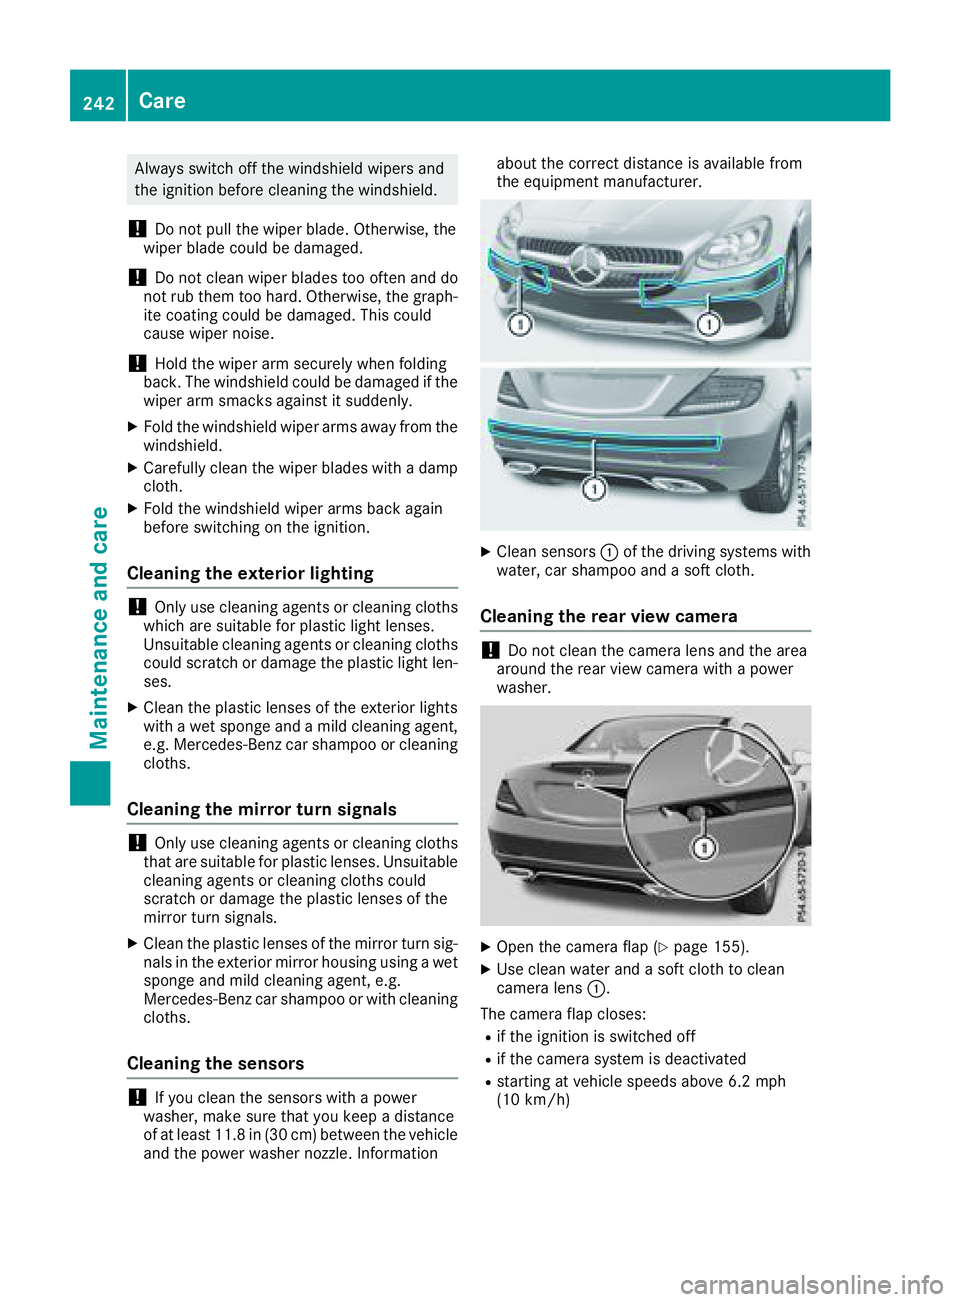
Cleanin gt he sensors
! If yo uc lean the sensors with ap ower
washer, make sure tha ty ou kee pad is tance
of at leas t1 1.8 in (30 cm )b et ween the vehicle
and the powe rw as he rn ozzle. Information abou tt he correct distance is availabl ef rom
the equipment manufacturer.
X
Clea ns ensors �C of the driving system sw it h
water, car shampo oa nd as of tc loth.
Cleanin gt he rear view camera
! Do not clean the camera lens and the area
around the rea rv ie wc amera with ap ower
washer.
X
Ope nt he camera fla p( Y
page 155).X
Use clean water and as of tc loth to clean
camera lens �C .
The camera fla pc loses: R
if the ignition is switched off R
if the camera system is deactivated R
starting at vehicl es peed sa bo ve 6.2 mph
(10 km/h)242
Care
Maintenance and care
Page 245 of 298
Cleaning th ee xhaust pipe
G WARNING
The exhaust tail pipe and tail pipe trim can
become ver yh ot .Ify ou com ei nt oc ontact
wit ht he se part soft he vehicle ,y ou coul db urn
yourself. Ther eisar is kofi njury.
Always be particularly careful aroun dt he
exhaust tail pipe and th et ail pipe trim. Allow
these components to coo ld own before touch-
ing them.
! Do no tc lean th ee xh aust pipe wit ha cid-
based cleanin ga gents ,s uc hasb athroom
cleane rorw heel cleaner.X
Clean th ee xh aust pipe wit hac hr om ec are
product tested and approved by Mercedes-
Benz.
Impurities combined wit ht he effect sofr oad grit
and corrosive environmental factors may cause
flas hr ust to for mont he surface. You can
restore th eo riginal shin eoft he exhaust pipe by
cleanin gitr egularly, especiall yinw inter and
after washing. Care 243
Maintenance and care Z
Page 284 of 298
must be positioned vertically, directly under
the jacking point of the vehicle.
! Only position the jack at the appropriate
jacking point of the vehicle. Otherwise, you
could damage the vehicle.
Observe the following when raising the vehicle: R
To rais et he vehicle, only use the vehicle-spe-
cific jack that has been tested and approved
by Mercedes-Benz. If used incorrectly, the
jack could tip over with the vehicl er aised.R
The jack is designed only to rais ea nd hold the
vehicl ef or as hort time while aw hee lisb eing
changed. It must not be used for performing
maintenance work under the vehicle. R
Avoid changing the whee lonu phill and down-
hill slopes. R
Before raising the vehicle, secure it from roll-
ing awa ybya pplying the parking brake and
inserting whee lc hocks. Do not disengage the
parking brake whil et he vehicl eisr aised.R
The jack must be placed on af irm, flat and
non-slip surface. On al oose surface, al arge,
flat, load-bearing underlay must be used .Ona
slippery surface, an on-slip underlay must be
used ,e .g. rubber mats.R
Do not use wooden blocks or similar objects
as aj ack underlay .O therwise, the jack wil ln ot
be abl etoa chieve its load-bearing capacity
due to the restricted height. R
Make sure that the distance betwee nt he
underside of the tires and the ground does not
exceed 1.2 in (3 cm). R
Never place you rh ands and feet under the
raised vehicle. R
Do not lie under the vehicle. R
Do not start the engine when the vehicl ei s
raised. R
Do not open or close ad oor or the trunk lid
when the vehicl eisr aised.R
Make sure that no persons are present in the
vehicl ew hen the vehicl eisr aised. X
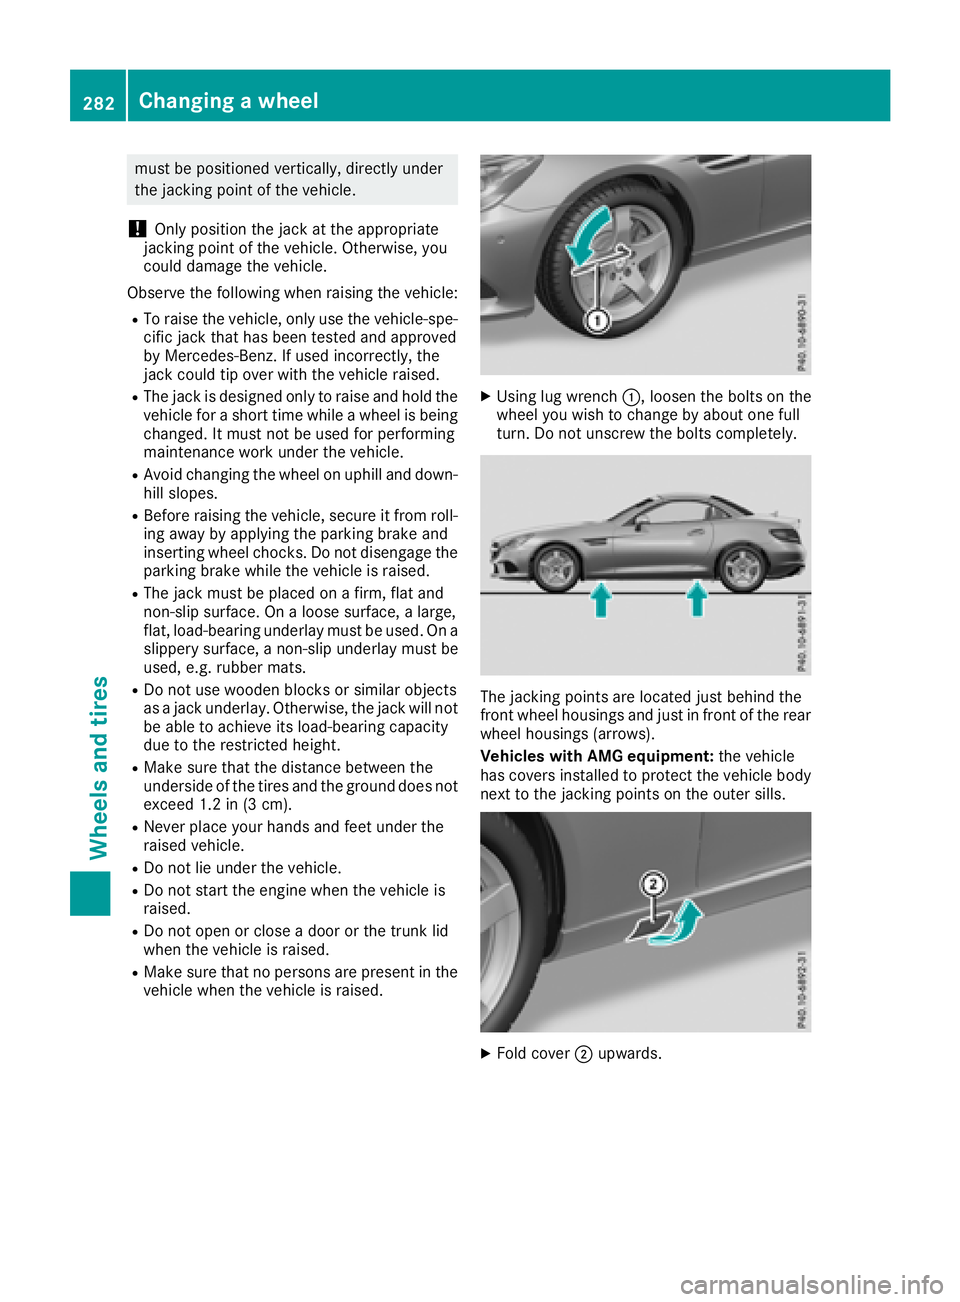
Using lug wrench �C ,l oose nt he bolts on the
whee ly ou wish to change by abou to ne full
turn. Do not unscrew the bolts completely.
The jacking points are located just behind the
front whee lh ousings and just in front of the rear
whee lh ousings (arrows).
Vehicles with AMG equipment: the vehicle
has covers installed to protect the vehicl eb ody
next to the jacking points on the outer sills.
X
Fold cover �D upwards.282
Changing aw heel
Wheel sa nd tires
Page 287 of 298
These tires have been specially adapted for
use with the control systems, such as ABS or
ESP ®
,a nd are marked as follows:R
MO = M ercedes-Benz OriginalR
MOE = M ercedes-Benz Original Extended
(tires featuring run-flat characteristics) R
MO1 = M ercedes-Benz Original (only cer-
tain AMG tires)
Mercedes-Benz Original Extended tires may
only be used on wheels that have been spe-
cifically approved by Mercedes-Benz.
Only use tires, wheels or accessories tested
and approved by Mercedes-Benz .C ertain
characteristics, e.g. handling, vehicle noise
emissions or fuel consumption, may other-
wise be adversely affected. In addition, when
driving with al oad, tire dimension variations
could cause the tires to come into contact
with the bodywork and axle components .T his
could result in damage to the tires or the vehi-
cle.
Mercedes-Benz accepts no liability for dam-
age resulting from the use of tires, wheels or
accessories other than those tested and
approved.
Information on tires, wheels and approved
combinations can be obtained from any quali-
fied specialist workshop.
! Retreaded tires are neither tested nor rec-
ommended by Mercedes-Benz ,s ince previ-
ous damage cannot alway sbed etected on
retreaded tires. As ar esult, Mercedes-Benz
cannot guarantee vehicle safety if retreaded
tires are mounted. Do not mount used tires if
you have no information about their previous
usage.
The recommended pressures for various oper-
ating conditions can be found: R
on the Tire and Loading Information placard
on the B-pillar on the driver's side R
in the tire pressure table on the fuel filler flap
Observe the notes on recommended tire pres-
sures under various operating conditions
( Y
page 263).
Check tire pressures regularly, and only when
the tires are cold. Comply with the maintenance
recommendations of the tire manufacturer in
the vehicle document wallet. Notes on the vehicle equipment –a lway se quip
the vehicle: R
with tires of the same size on ag iven axle (left
and right) R
with the same type of tires at ag iven time
(summer tires, winter tires, MOExtended
tires)
Exception: it is permissible to mount ad iffer-
ent type or make in the event of af lat tire.
Observe t he
"MOExtended tires (tires with
run-flat characteristics)" section
( Y
page 247).
Vehicles equipped with MOExtended tires are
not equipped with aT IREFIT kit at the factory. It
is therefor er ecommended that you additionally
equip your vehicle with aT IREFIT kit if you mount
tires that do not feature run-flat characteristics,
e.g. winter tires. AT IREFIT kit may be obtained
from aq ualified specialist workshop.
Emergency spar ew heel
Important safety notes
G WARNING
The wheel or tire size as well as the tire type of
the spare wheel or emergenc ys pare wheel
and the wheel to be replaced may differ.
Mountin gane mergenc ys pare wheel may
severely impair the driving characteristics.
There is ar isk of an accident.
To avoid hazardous situations: R
adapt your driving style accordingly and
drive carefully. R
never mount more than one spare wheel or
emergenc ys pare wheel that differs in size. R
only use as pare wheel or emergenc ys pare
wheel of ad ifferent size briefly. R
do not switch ESP ®
off.R
have as pare wheel or emergenc ys pare
wheel of ad ifferent size replaced at the
nearest qualified specialist workshop.
Observe that the wheel and tire dimensions
as well as the tire type must be correct.
When using an emergenc ys pare wheel or spare
wheel of ad ifferent size, you must not exceed
the maximum speed of 50 mph (80 km/h).Emergency spar ew heel 285
Wheels and tires Z
Page 295 of 298

Model MB-Freigabe or
MB-Approval
All models
229.5
i MB approval is indicated on the oil contain-
ers.
Fillin gc apacitiesThe following values refer to an oil change
including the oil filter.
Model Capacity
SLC 300
6.7 US qt (6.3 l)
Mercedes-AMG
SLC 43 6.9 US qt (6.5 l)
Ad ditives
! Do not us ea ny additive sint he engine oil.
Thi sc ould damag et he engine.
Brake fluid
G WARNING
The brake fluid constantly absorb sm oisture
from the air. Thi sl owers the boiling point of
the brake fluid .Ift he boiling point of the brake
fluid is too low, vapor pockets may form in the
brake system when the brakes are applied
hard. Thi sw ould impai rb raking efficiency.
There is ar is kofana ccident.
Yo us houl dh av et he brake fluid renewe da t
the specified intervals.
Whe nh an dling brake fluid ,o bserve the impor-
tant safety notes on service products
( Y
page 290).
The brake fluid change interval sc an be found in
the Maintenance Booklet.
Only us eb rake fluid approved by Mercedes-
Benz in accordance with MB-Freigab eorM B-
Approva l3 31.0.
Information abou ta pp roved brake fluid can be
obtaine data ny qualified specialist worksho po r
on the Interne ta t
http://bevo.mercedes-benz.co m. i Have the brake fluid regularly replaced at a
qualified specialist workshop and the replace-
ment confirmed in the Maintenance Booklet.
Coolant
Importan ts afety notes
G WARNING
If antifreeze comes into contact with hot com-
ponents in the engine compartment, it may
ignite. There is ar isk of fire and injury.
Let the engine cool dow nb efore yo ua dd anti-
freeze .M ake sur et hat antifreeze is not spilled
next to the filler neck. Thoroughly clea nt he
antifreeze from components before starting
the engine.
! Only ad dc oolant that has bee np remixed
with the desire da ntifreeze protection. You
coul do therwise damag et he engine.
Furthe ri nformatio nonc oolants can be found
in the Mercedes-Benz Specifications for Ser-
vice Products, MB BeVo 310.1, e.g. on the
Internet at
http://bevo.mercedes-benz.com .Orc on-
tact aq ualifie ds pecialist workshop.
! Always use as uitabl ec oolant mixture, even
in countries where hig ht emperatures prevail.
Otherwise ,t he engine cooling system is not
sufficiently protected from corrosion and
overheating.
i Have the coolant regularly replaced at a
qualified specialist workshop and the replace-
ment confirmed in the Maintenance Booklet.
Comply with the important safety precautions
for service products whe nh andling coolant
( Y
page 290).
The coolant is am ixture of water and anti-
freeze/corrosion inhibitor. It is responsible for
the following: R
anti-corrosion protection R
antifreeze protection R
raising the boiling point
If the coolant has antifreeze protection dow nt o
-35 ‡( -3 7† ), the boiling point of the coolant
during operation is approximatel y2 66 ‡
(130 †).Service products and filling capacities 293
Technical data Z