low oil pressure MERCEDES-BENZ SL-CLASS ROADSTER 2013 Owners Manual
[x] Cancel search | Manufacturer: MERCEDES-BENZ, Model Year: 2013, Model line: SL-CLASS ROADSTER, Model: MERCEDES-BENZ SL-CLASS ROADSTER 2013Pages: 572, PDF Size: 9.23 MB
Page 6 of 572
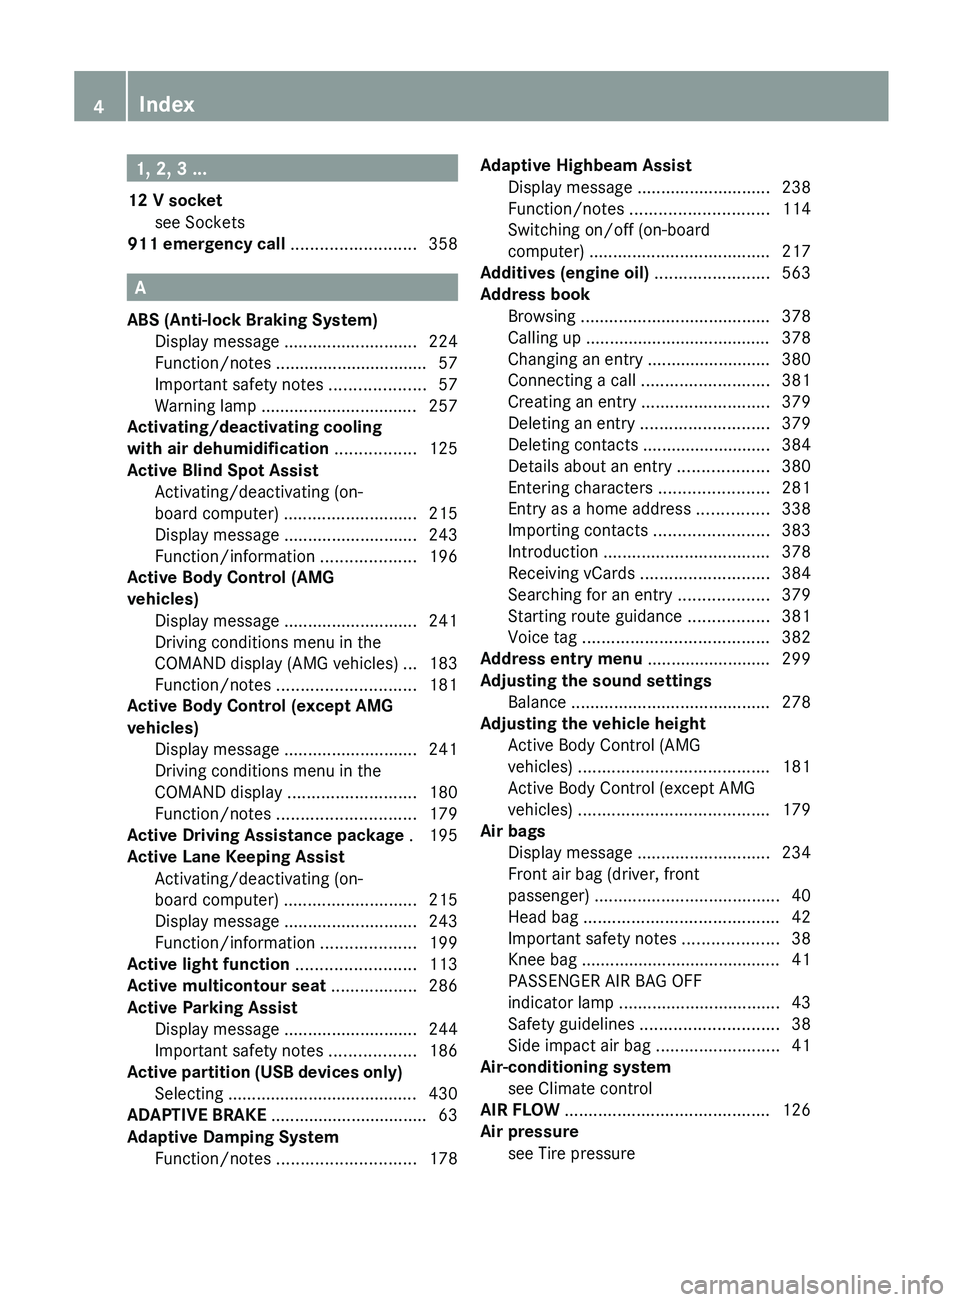
1, 2, 3 ...
12 V socket see Sockets
911 emergency call
..........................358A
ABS (Anti-lock Braking System) Display message ............................ 224
Function/notes
................................ 57
Important safety notes .................... 57
Warning lamp ................................. 257
Activating/deactivating cooling
with air dehumidification ................. 125
Active Blind Spot Assist Activating/deactivating (on-
board computer) ............................ 215
Display message ............................ 243
Function/information .................... 196
Active Body Control (AMG
vehicles)
Display message ............................ 241
Driving conditions menu in the
COMAND display (AMG vehicles) ... 183
Function/notes ............................. 181
Active Body Control (except AMG
vehicles)
Display message ............................ 241
Driving conditions menu in the
COMAND display ........................... 180
Function/notes ............................. 179
Active Driving Assistance package . 195
Active Lane Keeping Assist Activating/deactivating (on-
board computer) ............................ 215
Display message ............................ 243
Function/information .................... 199
Active light function .........................113
Active multicontour seat ..................286
Active Parking Assist Display message ............................ 244
Important safety notes .................. 186
Active partition (USB devices only)
Selecting ........................................ 430
ADAPTIVE BRAKE ................................. 63
Adaptive Damping System Function/notes ............................. 178Adaptive Highbeam Assist
Display message ............................ 238
Function/notes
............................. 114
Switching on/off (on-board
computer) ...................................... 217
Additives (engine oil) ........................563
Address book Browsing ........................................ 378
Calling up ....................................... 378
Changing an entry .......................... 380
Connecting a call ........................... 381
Creating an entry ........................... 379
Deleting an entry ........................... 379
Deleting contacts ........................... 384
Details about an entry ...................380
Entering characters .......................281
Entry as a home address ...............338
Importing contacts ........................ 383
Introduction ................................... 378
Receiving vCards ........................... 384
Searching for an entry ...................379
Starting route guidance ................. 381
Voice tag ....................................... 382
Address entry menu .......................... 299
Adjusting the sound settings Balance .......................................... 278
Adjusting the vehicle height
Active Body Control (AMG
vehicles) ........................................ 181
Active Body Control (except AMG
vehicles) ........................................ 179
Air bags
Display message ............................ 234
Front air bag (driver, front
passenger) ....................................... 40
Head bag ......................................... 42
Important safety notes .................... 38
Knee bag .......................................... 41
PASSENGER AIR BAG OFF
indicator lamp .................................. 43
Safety guidelines ............................. 38
Side impact air bag .......................... 41
Air-conditioning system
see Climate control
AIR FLOW ........................................... 126
Air pressure see Tire pressure 4
Index
Page 154 of 572
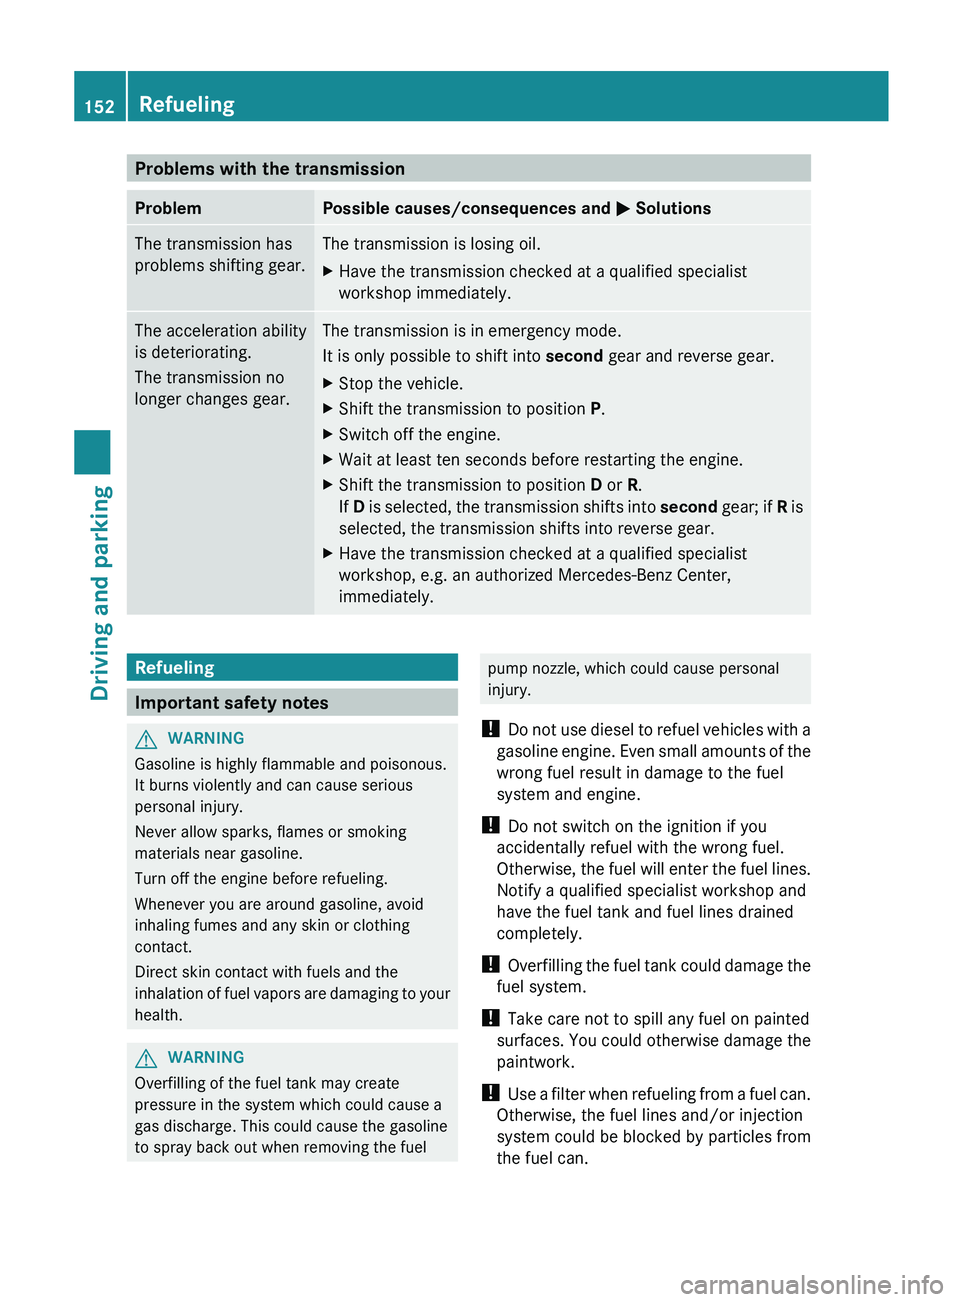
Problems with the transmission
Problem Possible causes/consequences and
M Solutions
The transmission has
problems shifting gear. The transmission is losing oil.
X
Have the transmission checked at a qualified specialist
workshop immediately. The acceleration ability
is deteriorating.
The transmission no
longer changes gear. The transmission is in emergency mode.
It is only possible to shift into
second
gear and reverse gear.
X Stop the vehicle.
X Shift the transmission to position P.
X Switch off the engine.
X Wait at least ten seconds before restarting the engine.
X Shift the transmission to position D or R.
If D
is
selected, the transmission shifts into second gear; if R is
selected, the transmission shifts into reverse gear.
X Have the transmission checked at a qualified specialist
workshop, e.g. an authorized Mercedes-Benz Center,
immediately. Refueling
Important safety notes
G
WARNING
Gasoline is highly flammable and poisonous.
It burns violently and can cause serious
personal injury.
Never allow sparks, flames or smoking
materials near gasoline.
Turn off the engine before refueling.
Whenever you are around gasoline, avoid
inhaling fumes and any skin or clothing
contact.
Direct skin contact with fuels and the
inhalation of
fuel vapors are damaging to your
health. G
WARNING
Overfilling of the fuel tank may create
pressure in the system which could cause a
gas discharge. This could cause the gasoline
to spray back out when removing the fuel pump nozzle, which could cause personal
injury.
! Do not
use diesel to refuel vehicles with a
gasoline engine. Even small amounts of the
wrong fuel result in damage to the fuel
system and engine.
! Do not switch on the ignition if you
accidentally refuel with the wrong fuel.
Otherwise, the fuel will enter the fuel lines.
Notify a qualified specialist workshop and
have the fuel tank and fuel lines drained
completely.
! Overfilling the fuel tank could damage the
fuel system.
! Take care not to spill any fuel on painted
surfaces. You could otherwise damage the
paintwork.
! Use a filter when refueling from a fuel can.
Otherwise, the fuel lines and/or injection
system could be blocked by particles from
the fuel can. 152
Refueling
Driving and parking
Page 243 of 572
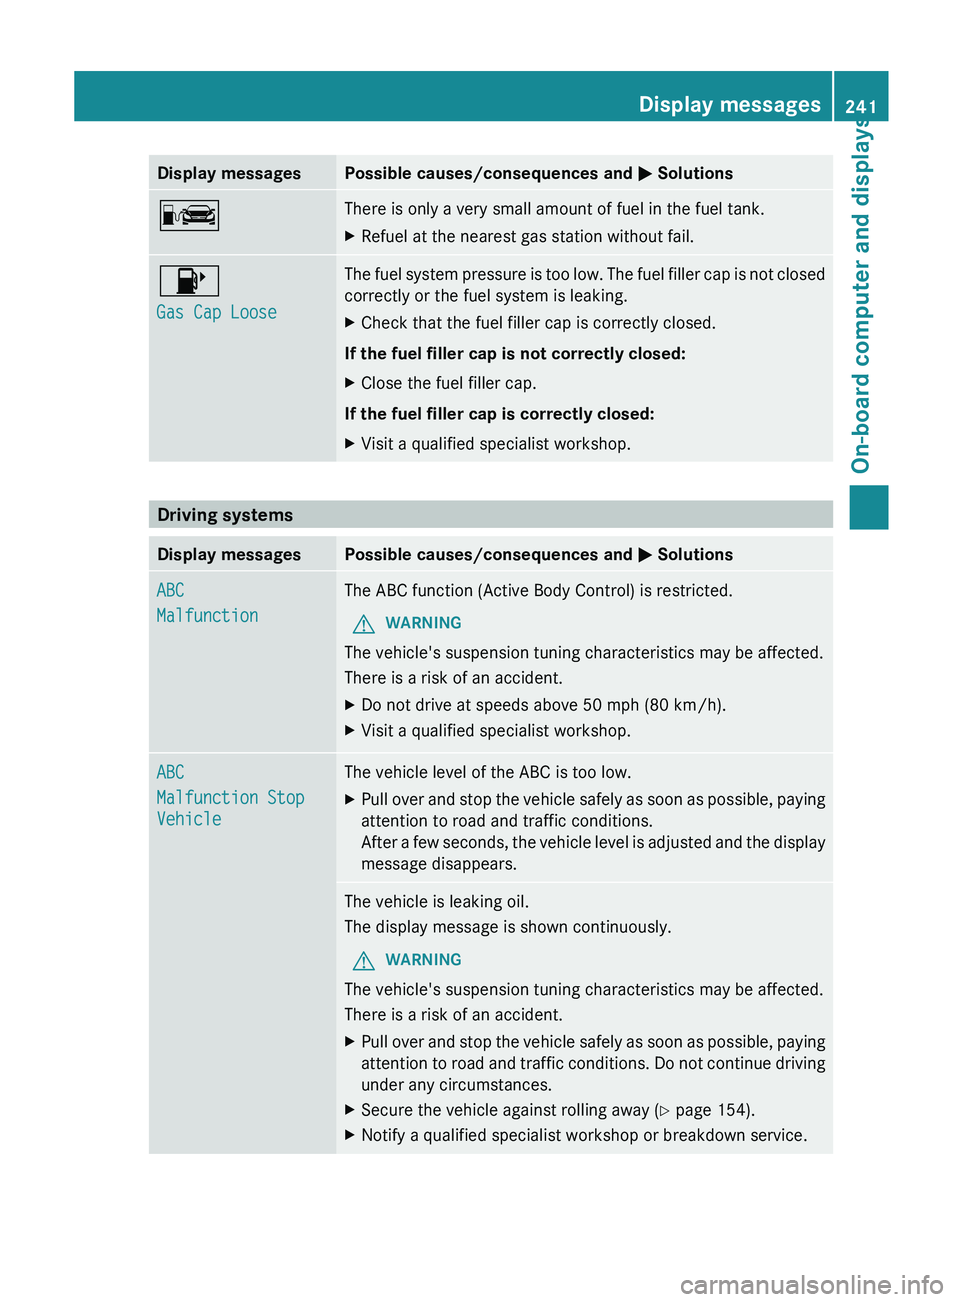
Display messages Possible causes/consequences and
M SolutionsC There is only a very small amount of fuel in the fuel tank.
X
Refuel at the nearest gas station without fail. 8
Gas Cap Loose The fuel system pressure is too low. The fuel filler cap is not closed
correctly or the fuel system is leaking.
X
Check that the fuel filler cap is correctly closed.
If the fuel filler cap is not correctly closed:
X Close the fuel filler cap.
If the fuel filler cap is correctly closed:
X Visit a qualified specialist workshop. Driving systems
Display messages Possible causes/consequences and
M SolutionsABC
Malfunction The ABC function (Active Body Control) is restricted.
G WARNING
The vehicle's suspension tuning characteristics may be affected.
There is a risk of an accident.
X Do not drive at speeds above 50 mph (80 km/h).
X Visit a qualified specialist workshop. ABC
Malfunction Stop
Vehicle The vehicle level of the ABC is too low.
X
Pull over and stop the vehicle safely as soon as possible, paying
attention to road and traffic conditions.
After a
few seconds, the vehicle level is adjusted and the display
message disappears. The vehicle is leaking oil.
The display message is shown continuously.
G WARNING
The vehicle's suspension tuning characteristics may be affected.
There is a risk of an accident.
X Pull over and stop the vehicle safely as soon as possible, paying
attention to
road and traffic conditions. Do not continue driving
under any circumstances.
X Secure the vehicle against rolling away ( Y page 154).
X Notify a qualified specialist workshop or breakdown service. Display messages
241
On-board computer and displays Z
Page 494 of 572
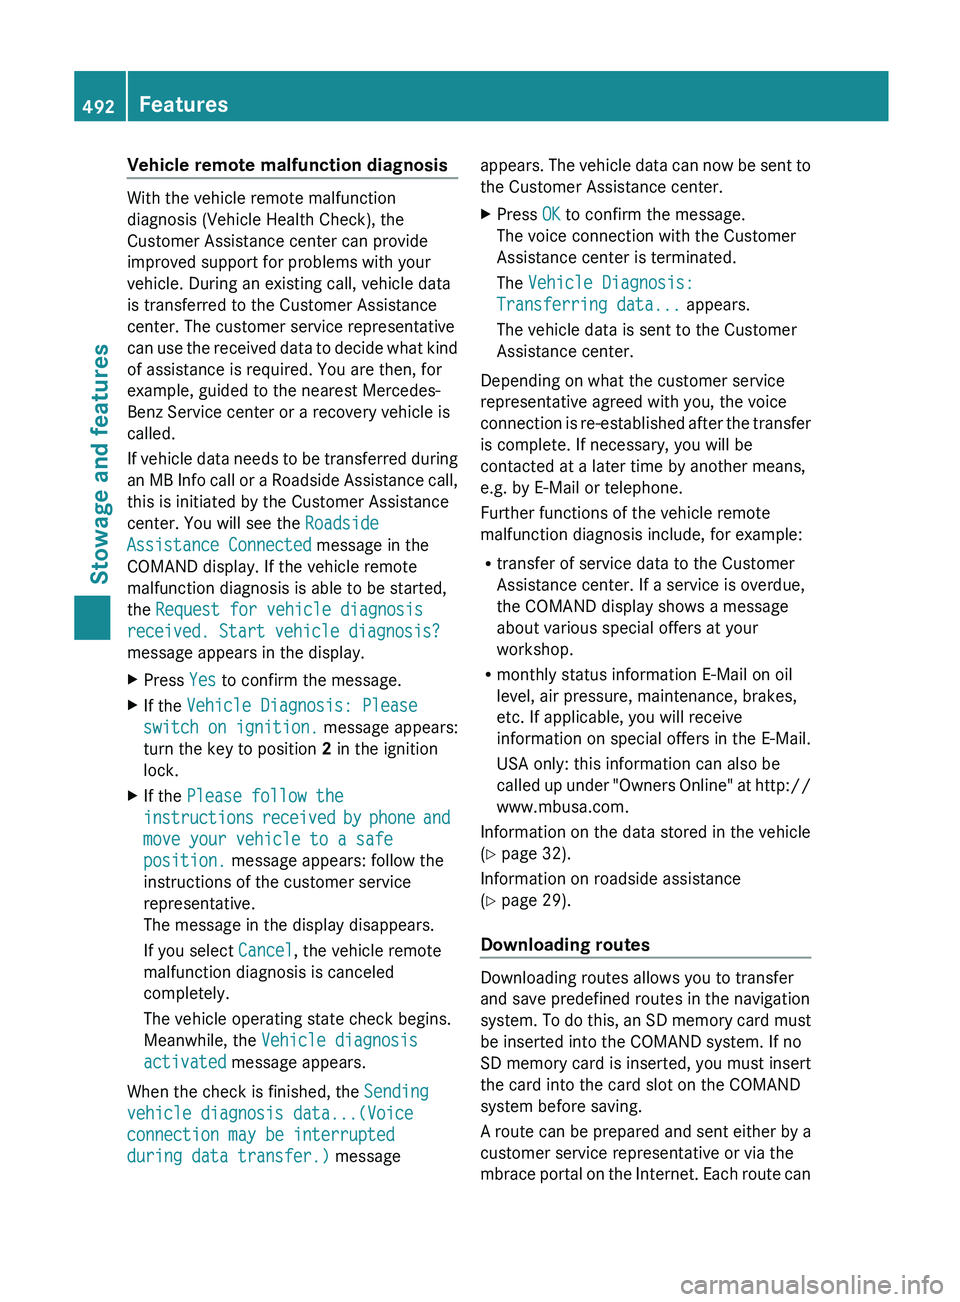
Vehicle remote malfunction diagnosis
With the vehicle remote malfunction
diagnosis (Vehicle Health Check), the
Customer Assistance center can provide
improved support for problems with your
vehicle. During an existing call, vehicle data
is transferred to the Customer Assistance
center. The customer service representative
can
use
the received data to decide what kind
of assistance is required. You are then, for
example, guided to the nearest Mercedes-
Benz Service center or a recovery vehicle is
called.
If vehicle data needs to be transferred during
an MB Info call or a Roadside Assistance call,
this is initiated by the Customer Assistance
center. You will see the Roadside
Assistance Connected message in the
COMAND display. If the vehicle remote
malfunction diagnosis is able to be started,
the Request for vehicle diagnosis
received. Start vehicle diagnosis?
message appears in the display.
X Press Yes to confirm the message.
X If the Vehicle Diagnosis: Please
switch on ignition. message appears:
turn the key to position 2 in the ignition
lock.
X If the Please follow the
instructions received
by phone and
move your vehicle to a safe
position. message appears: follow the
instructions of the customer service
representative.
The message in the display disappears.
If you select Cancel, the vehicle remote
malfunction diagnosis is canceled
completely.
The vehicle operating state check begins.
Meanwhile, the Vehicle diagnosis
activated message appears.
When the check is finished, the Sending
vehicle diagnosis data...(Voice
connection may be interrupted
during data transfer.) message appears. The vehicle data can now be sent to
the Customer Assistance center.
X
Press OK to confirm the message.
The voice connection with the Customer
Assistance center is terminated.
The Vehicle Diagnosis:
Transferring data... appears.
The vehicle data is sent to the Customer
Assistance center.
Depending on what the customer service
representative agreed with you, the voice
connection is
re-established after the transfer
is complete. If necessary, you will be
contacted at a later time by another means,
e.g. by E-Mail or telephone.
Further functions of the vehicle remote
malfunction diagnosis include, for example:
R transfer of service data to the Customer
Assistance center. If a service is overdue,
the COMAND display shows a message
about various special offers at your
workshop.
R monthly status information E-Mail on oil
level, air pressure, maintenance, brakes,
etc. If applicable, you will receive
information on special offers in the E-Mail.
USA only: this information can also be
called up under "Owners Online" at http://
www.mbusa.com.
Information on the data stored in the vehicle
(Y page 32).
Information on roadside assistance
(Y page 29).
Downloading routes Downloading routes allows you to transfer
and save predefined routes in the navigation
system.
To
do this, an SD memory card must
be inserted into the COMAND system. If no
SD memory card is inserted, you must insert
the card into the card slot on the COMAND
system before saving.
A route can be prepared and sent either by a
customer service representative or via the
mbrace portal on the Internet. Each route can 492
Features
Stowage and features
Page 500 of 572
Adding engine oil
G
WARNING
If engine oil comes into contact with hot
engine parts,
it may ignite and you could burn
yourself. Do not spill any engine oil on hot
engine parts. H
Environmental note
When adding oil, take care not to spill any. If
oil enters the soil or waterways, it is harmful
to the environment.
! Use only engine oils and oil filters that
have been approved for vehicles equipped
with a service system. A list of the engine
oils and oil filters tested and approved in
accordance with the Mercedes-Benz
Specifications for Service Products can be
called up by visiting http://
www.mbusa.com (USA only). More
information about tested and approved
engine oils and oil filters is available from
any authorized Mercedes-Benz Center.
Damage to
the engine or exhaust system is
caused by the following:
R using engine oils and oil filters which
have not been specifically approved for
the service system.
R replacing the engine oil or oil filter after
the replacement interval required by the
service system has elapsed
R using engine oil additives.
! Do not add too much oil. If the oil level is
above the "max" mark on the dipstick, too
much oil has been added. This can lead to
damage to the engine or the catalytic
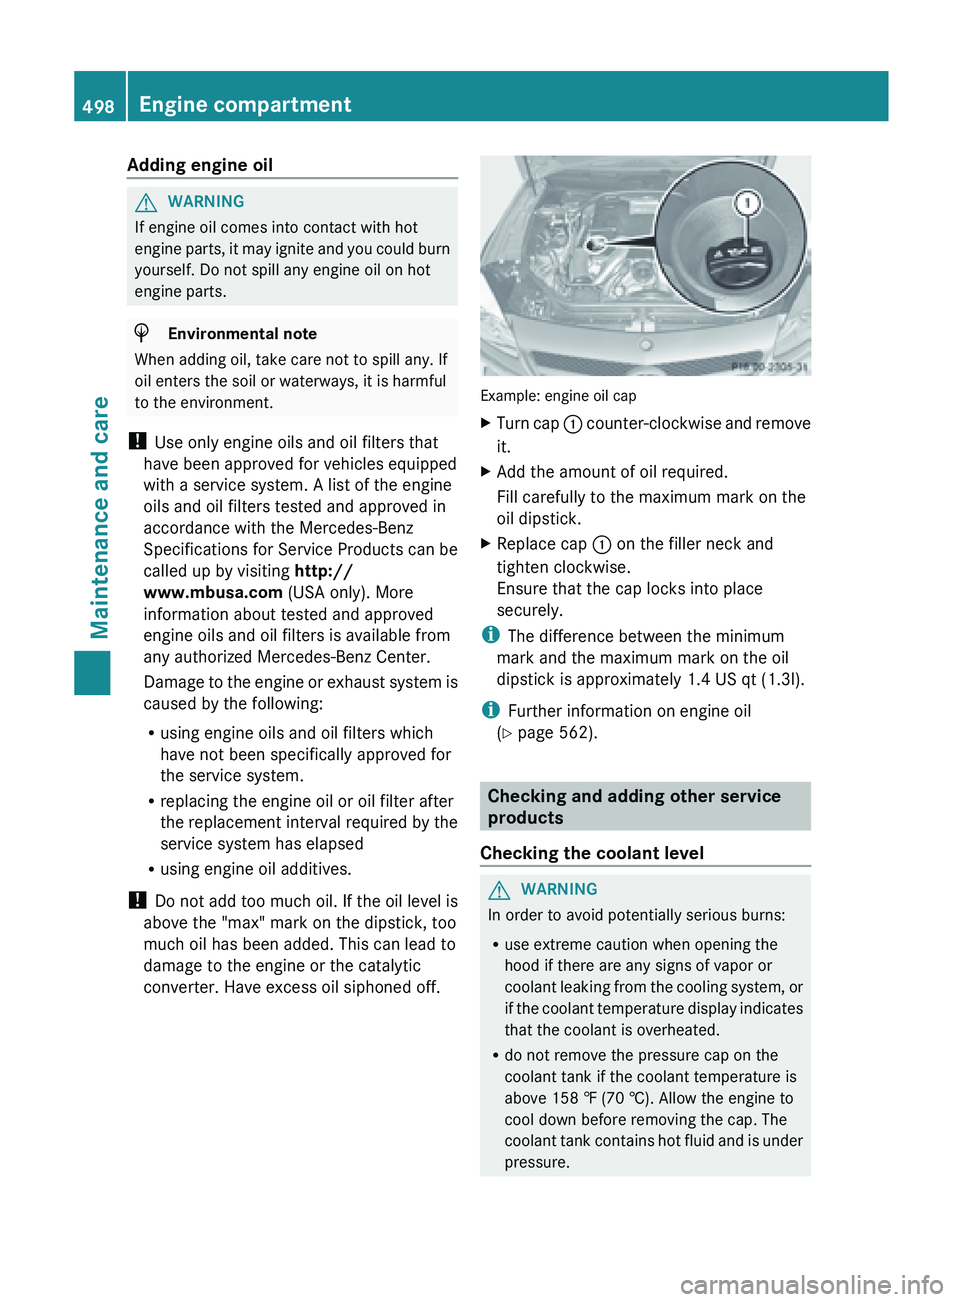
converter. Have excess oil siphoned off. Example: engine oil cap
X
Turn cap : counter-clockwise and remove
it.
X Add the amount of oil required.
Fill carefully to the maximum mark on the
oil dipstick.
X Replace cap :
on the filler neck and
tighten clockwise.
Ensure that the cap locks into place
securely.
i The difference between the minimum
mark and the maximum mark on the oil
dipstick is approximately 1.4 US qt (
1.3l).
i Further information on engine oil
(Y page 562). Checking and adding other service
products
Checking the coolant level G
WARNING
In order to avoid potentially serious burns:
R use extreme caution when opening the
hood if there are any signs of vapor or
coolant leaking
from the cooling system, or
if the coolant temperature display indicates
that the coolant is overheated.
R do not remove the pressure cap on the
coolant tank if the coolant temperature is
above 158 ‡ (70 †). Allow the engine to
cool down before removing the cap. The
coolant tank contains hot fluid and is under
pressure.498
Engine compartment
Maintenance and care
Page 502 of 572
ASSYST PLUS
The ASSYST PLUS service interval display
informs you of the next service due date.
Information on
the type of service and service
intervals (see separate Maintenance
Booklet).
You can obtain further information from an
authorized Mercedes-Benz Center or at
http://www.mbusa.com (USA only).
i The ASSYST PLUS service interval display
does not show any information on the
engine oil level. Observe the notes on the
engine oil level ( Y page 497).Care
Notes on care
G
WARNING
Many cleaning products can be hazardous.
Some are poisonous, others are flammable.
Always follow the instructions on the
particular container. Always open your
vehicle's doors
or windows when cleaning the
inside.
Never use fluids or solvents that are not
designed for cleaning your vehicle.
Always lock away cleaning products and keep
them out of reach of children. H
Environmental note
Dispose of empty packaging and cleaning
cloths in an environmentally responsible
manner.
! For cleaning your vehicle, do not use any
of the following:
R dry, rough or hard cloths
R abrasive cleaning agents
R solvents
R cleaning agents containing solvents
Do not scrub.
Do not touch the surfaces or protective
films with hard objects, e.g. a ring or ice scraper. You could otherwise scratch or
damage the surfaces and protective film.
! Do not park the vehicle for an extended
period straight
after cleaning it, particularly
after having cleaned the wheels with wheel
cleaner. Wheel cleaners could cause
increased corrosion of the brake discs and
brake pads/linings. For this reason, you
should drive for a few minutes after
cleaning. Braking heats the brake discs and
the brake pads/linings, thus drying them.
The vehicle can then be parked.
Regular care of your vehicle is a condition for
retaining the quality in the long term.
Use care products and cleaning agents
recommended and approved by Mercedes-
Benz. Washing
the vehicle and cleaning the
paintwork
Automatic car wash G
WARNING
Braking efficiency is reduced after washing
the vehicle.
This could cause an accident. For
this reason, you must drive particularly
carefully after washing the vehicle until the
brakes have dried. G
WARNING
The
vehicle is braked when the HOLD function
or DISTRONIC PLUS is activated. Therefore,
deactivate the
HOLD function and DISTRONIC
PLUS before the vehicle is washed in an
automatic car wash.
! It is preferable to use car washes with
adjustable high-pressure pre-cleaning that
corresponds to the specification for the
Cabriolet program. In car washes that use
high water pressures, there is a risk that a
small amount of water may leak into the
vehicle.
! Never clean your vehicle in a Touchless
Automatic Car Wash as these use special 500
Care
Maintenance and care
Page 514 of 572
Observe the notes on the cigarette lighter
(Y page 480). Observe the notes on
sockets (
Y page 480).
X Turn the SmartKey to position 1 in the
ignition lock (Y page 135).
X Press on/off switch = on the tire inflation
compressor to I.
The tire inflation compressor is switched
on. The tire is inflated.
i First, tire sealant is pumped into the tire.
The pressure can briefly rise to
approximately 500 kPa (5.0 bar/73 psi).
Do not switch off the tire inflation
compressor during this phase.
X Allow the tire inflation compressor to run
for five minutes. The tire should then have
attained a pressure of at least 180 kPa
(1.8 bar/26 psi).
If
a tire pressure of 180 kPa (
1.8 bar/26 psi)
has been attained after five minutes:
(Y page 512).
If a tire pressure of 180 kPa (1.8 bar/26 psi)
has not been attained after five minutes:
(Y page 512).
i If tire sealant leaks out, allow it to dry. It
can then be removed like a layer of film.
If your clothes are soiled with tire sealant,
have them cleaned with perchloroethylene
at a dry cleaner as soon as possible.
Tire pressure of at least 180 kPa
(1.8 bar/26 psi) is not reached If a pressure of 180 kPa
(
1.8 bar/26 psi) has
not been achieved after five minutes:
X Switch off the tire inflation compressor.
X Unscrew the filler hose from the valve of
the faulty tire.
X Very slowly drive forwards or reverse
approximately 30 ft
(10 m).
X Pump up the tire again.
After a maximum of five minutes the tire
pressure must
be at least 180 kPa (1.8 bar/
26 psi). G
WARNING
If the required tire pressure is not reached
after the specified time, the tire is too badly
damaged. The tire sealant cannot repair the
tire in
this instance. Damaged tires and a tire
pressure that is too low can significantly
impair the vehicle's braking and driving
characteristics. There is a risk of accident.
Do not continue driving. Contact a qualified
specialist workshop.
Tire pressure of 180 kPa (1.8 bar/
26 psi) is reached G
WARNING
A tire temporarily sealed with tire sealant
impairs the driving characteristics and is not
suitable for higher speeds. There is a risk of
accident.
You should therefore adapt your driving style
accordingly and
drive carefully. Do not exceed
the specified maximum speed with a tire that
has been repaired using tire sealant.
! Residue from the tire sealant may come
out of the filler hose after use. This could
cause stains.
Therefore, place the filler hose in the plastic
bag which contained the TIREFIT kit. H
Environmental note
Have the used tire sealant bottle disposed of
professionally, e.g. at a qualified specialist
workshop.
X Switch off the tire inflation compressor.
X Unscrew the filler hose from the valve of
the faulty tire.
X Stow the tire sealant bottle and the tire
inflation compressor.
X Pull away immediately.
The maximum speed for a tire sealed with
tire sealant
is 50 mph (80 km/h). The "max.
80 km/h" sticker must be affixed to the 512
Flat tire
Roadside Assistance
Page 550 of 572
Rotate front and rear wheels only if the wheels
and tires are of the same dimensions.
! On vehicles
equipped with a tire pressure
monitor, electronic components are
located in the wheel.
Tire-mounting tools should not be used
near the valve. This could damage the
electronic components.
Only have tires changed at a qualified
specialist workshop.
Always pay attention to the instructions and
safety notes when changing a wheel
(Y page 548).
The wear patterns on the front and rear tires
differ, depending on the operating conditions.
Rotate the wheels before a clear wear pattern
has formed on the tires. Front tires typically
wear more on the shoulders and the rear tires
in the center.
If your vehicle's tire configuration allows, you
can rotate the wheels according to the
intervals in the tire manufacturer's warranty
book in your vehicle documents. If this is not
available, the tires should then be replaced
every 3000 to 6000 miles (5000 to
10,000 km), or earlier if the tire wear requires
this. Do not change the direction of wheel
rotation.
Clean the contact surfaces of the wheel and
the brake disc thoroughly every time a wheel
is interchanged. Check the tire pressure and,
if necessary, restart the tire pressure loss
warning system or the tire pressure monitor. Direction of rotation
Tires with a specified direction of rotation
have additional
benefits, e.g. if there is a risk
of hydroplaning. You will only gain these
benefits if the correct direction of rotation is
maintained.
An arrow on the sidewall of the tire indicates
its correct direction of rotation. Storing wheels
Store wheels
that are not being used in a cool,
dry and preferably dark place. Protect the
tires from oil, grease, gasoline and diesel. Cleaning the wheels
G
WARNING
Do not use power washers with circular-jet
nozzles (dirt
grinders) to clean your vehicle, in
particular the tires. You could otherwise
damage the tires and cause an accident. Mounting a wheel
Preparing the vehicle X
Stop the vehicle on solid, non-slippery and
level ground.
X Unload the vehicle. The jack can only be
used when the vehicle is unladen.
X Apply the electric parking brake manually.
X Bring the front wheels into the straight-
ahead position.
X Shift the transmission to position P
.
X Switch off the engine.
X Vehicles without KEYLESS-GO: remove
the SmartKey from the ignition lock.
X Vehicles with KEYLESS-GO: open the
driver's door.
The on-board electronics have status 0,
which is the same as the SmartKey having
been removed.
X Vehicles with KEYLESS-GO: remove the
Start/Stop button from the ignition lock
(Y page 135).
X If included in the vehicle equipment,
remove the tire-change tool kit from the
vehicle.
X Secure the vehicle to prevent it from rolling
away.548
Changing a wheel
Wheels and tires
Page 564 of 572
All of these mix fuels must fulfill the fuel
requirements, e.g.:
R
knock resistance
R boiling point
R vapor pressure
You will
usually find information about the fuel
grade on the pump. If you cannot find the
label on the pump, ask the staff for
assistance.
i For further information, consult an
authorized Mercedes-Benz Center or on
the Internet at http://www.mbusa.com
(USA only).
Information on refueling (Y page 152).
Additives in gasoline
! Do not refuel with low-grade fuel and do
not use fuel additives that are not tested
and approved for Mercedes-Benz vehicles.
Damage to or malfunctions of the fuel
system may otherwise occur.
One of the main problems of poor fuel quality
is the forming of deposits that are created
during the gasoline combustion process.
Mercedes-Benz recommends that you use
branded fuels that have additives.
If you use fuels without these additives over
a longer period of time, carbon deposits may
build up. These deposits form at the inlet
valves and in the combustion chamber in
particular.
This could lead to engine problems, e.g.:
R longer engine warm-up phase
R uneven idle
R engine noise
R misfiring
R loss of power
Carbon deposits may form if the availability
of gasoline with relevant additives is
insufficient (in certain regions). In this case,
Mercedes-Benz recommends additives
approved for use in Mercedes-Benz vehicles;
see http://bevo.mercedes-benz.com. For a list of approved products, consult an
authorized Mercedes-Benz Center. Comply
with the instructions for use on the product
label.
Do not
mix other fuel additives with fuel. This
causes unnecessary costs and could damage
the engine. Engine oil
General notes !
Never use engine oil or an oil filter of a
specification other than is necessary to
fulfill the prescribed service intervals. Do
not change the engine oil or oil filter in
order to achieve longer replacement
intervals than those prescribed. You could
otherwise cause
engine damage or damage
to the exhaust gas aftertreatment.
Follow the instructions in the service
interval display regarding the oil change.
Otherwise, you may damage the engine and
the exhaust gas aftertreatment.
The engine oils are matched to the
performance of Mercedes-Benz engines and
service intervals. You should therefore only
use engine oils and oil filters that are
approved for vehicles with maintenance
systems.
For a list of approved engine oils and oil filters,
consult an authorized Mercedes-Benz
Center. Or visit the website
http://bevo.mercedes-benz.com.
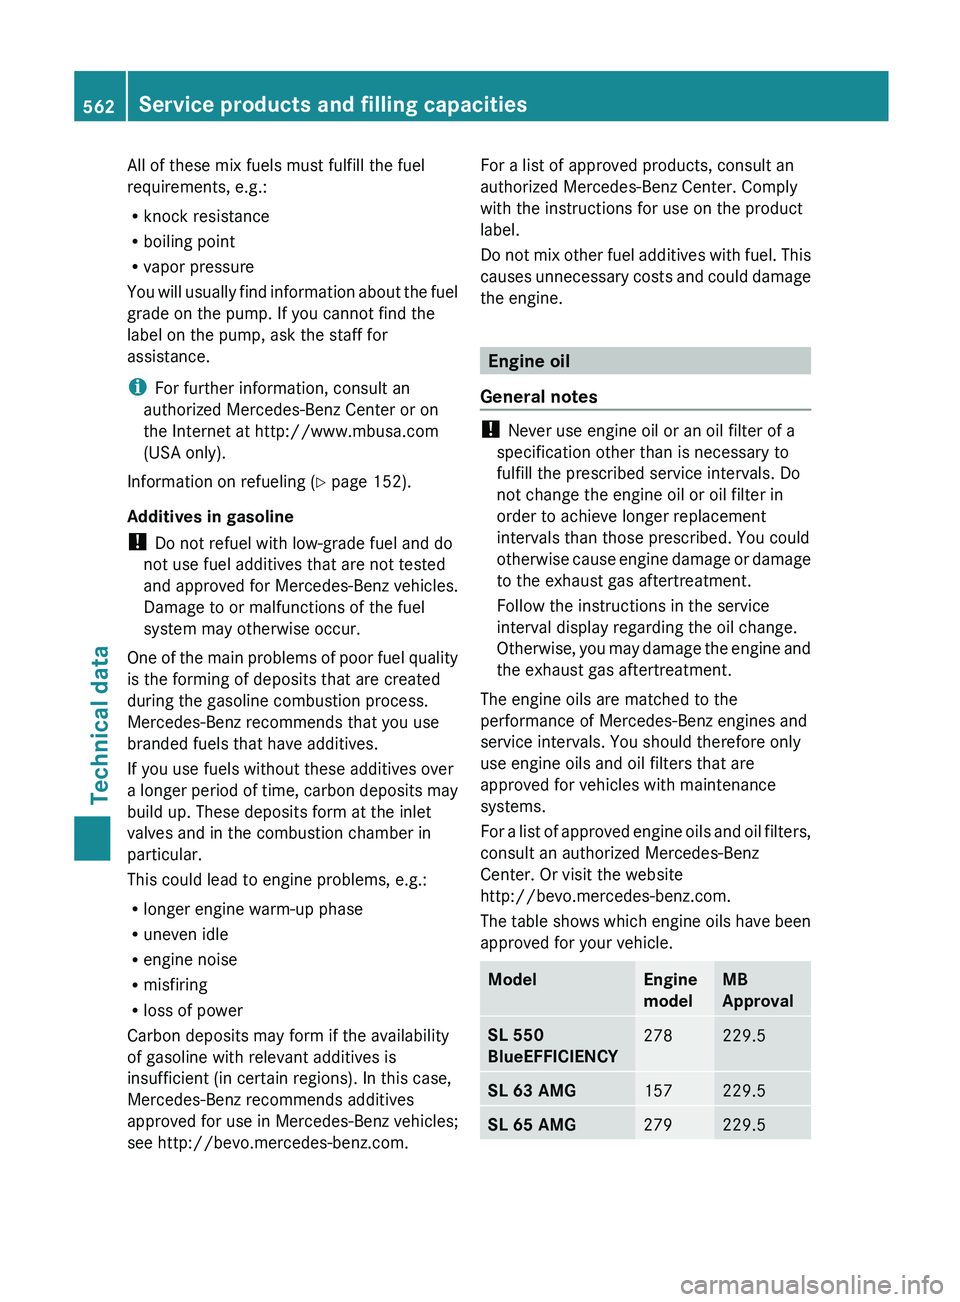
The table shows which engine oils have been
approved for your vehicle. Model Engine
model MB
Approval
SL 550
BlueEFFICIENCY
278 229.5
SL 63 AMG
157 229.5
SL 65 AMG
279 229.5562
Service products and filling capacities
Technical data