service reset MERCEDES-BENZ SL-CLASS ROADSTER 2016 Owners Manual
[x] Cancel search | Manufacturer: MERCEDES-BENZ, Model Year: 2016, Model line: SL-CLASS ROADSTER, Model: MERCEDES-BENZ SL-CLASS ROADSTER 2016Pages: 614, PDF Size: 15.67 MB
Page 7 of 614

Occupant Classification System
(OCS) ............................................... 59
PASSENGER AIR BAG OFF indica-
tor lamp ...........................................51
Side impact air bag .......................... 58
AIR FLOW ........................................... 141
Air vents
Glove box ....................................... 148
Important safety notes .................. 147
Setting ........................................... 147
Setting the blower output of the
AIRSCARF vents ............................. 148
Setting the center air vents ........... 147
Setting the side air vents ............... 148
Switching AIRSCARF on/off .......... 114
Air-conditioning system
see Climate control
AIRSCARF
Switching on/off ........................... 114
AIRSCARF vents
Setting the blower output .............. 148
Alarm
ATA (Anti-Theft Alarm system) ......... 80
Switching off (ATA) .......................... 80
Switching the function on/off
(ATA) ................................................ 80
Alarm system
see ATA (Anti-Theft Alarm system)
Alternative Route .............................. 351
Ambient lighting
Setting the brightness (on-board
computer) ...................................... 233
Setting the color (on-board com-
puter) ............................................. 233
AMG
Button for AMG menu .................... 164
SETUP ............................................ 164
AMG menu (on-board computer) ..... 236
Anti-lock braking system
see ABS (Anti-lock Braking System)
Anti-Theft Alarm system
see ATA (Anti-Theft Alarm system)
Ashtray ............................................... 520
Assistance display (on-board com-
puter) .................................................. 231
Assistance menu (on-board com-
puter) .................................................. 230 ASSYST PLUS
Displaying a service message ........ 541
Hiding a service message .............. 540
Resetting the service interval dis-
play ................................................ 541
Service message ............................ 540
Special service requirements ......... 541
ATA (Anti-Theft Alarm system)
Activating/deactivating ................... 80
Fu
nction ........................................... 80
Switching off the alarm .................... 80
ATTENTION ASSIST
Activating/deactivating ................. 231
Display message ............................ 259
Function/notes ............................. 209
Audio
Radio mode ................................... 437
Audio CD/DVD and MP3 mode
Switching to (Rear Seat Entertain-
ment System) ................................ 491
Audio format, setting
Video DVD ..................................... 479
Audio menu (on-board computer) .... 228
Authorized Mercedes-Benz Center
see Qualified specialist workshop
Authorized workshop
see Qualified specialist workshop
AUTO lights
Display message ............................ 254
see Lights
Automatic car wash (care) ............... 542
Automatic engine start (ECO start/
stop function) .................................... 156
Automatic engine switch-off (ECO
start/stop function) .......................... 155
Automatic headlamp mode .............. 122
Automatic transmission
Accelerator pedal position ............. 162
Automatic drive program ............... 164
Changing gear ............................... 162
Display message ............................ 266
Driving tips .................................... 162
Emergency running mode .............. 168
Engaging the park position ............ 160
Kickdown ....................................... 163
Manual drive program .................... 165
Index5
Page 20 of 614
Introduction to the restraint sys-
tem .................................................. 50
Occupant Classification System
(OCS) ............................................... 59
PASSENGER AIR BAG indicator
lamps ............................................... 51
Pets in the vehicle ........................... 71
PRE-SAFE
®(anticipatory occu-
pant protection) ............................... 67
Restraint system warning lamp ........ 51
OCS
Conditions ....................................... 59
Faults ............................................... 63
Operation .........................................5 9
System self-test ............................... 61
Odometer ........................................... 225
Off-map .............................................. 357
Oil
see Engine oil
On-board computer
AMG menu ..................................... 236
Assistance menu ........................... 230
Audio menu ................................... 228
Convenience submenu .................. 235
Display messages .......................... 239
Displaying a service message ........ 541
DISTRONIC PLUS ........................... 189
Factory settings submenu ............. 236
Important safety notes .................. 222
Instrument cluster submenu .......... 232
Lighting submenu .......................... 233
Menu overview .............................. 225
Message memory .......................... 239
Navigation menu ............................ 227
Operation ....................................... 223
RACETIMER ................................... 237
Service menu ................................. 232
Settings menu ............................... 232
Standard display ............................ 225
Telephone menu ............................ 229
Trip menu ...................................... 225
Vehicle submenu ........................... 234
Video DVD operation ..................... 229
Online and Internet functions
Ending the connection ................... 419
Establishing/ending the connec-
tion ................................................ 419
Further Mercedes-Benz Apps ......... 427 Manually setting the access data
of the mobile phone network pro-
vider .............................................. 415
Mercedes-Benz Mobile Website ..... 427
Options menu ................................ 425
Resetting settings
.......................... 427
Se
lecting options for the local
search ............................................ 425
Selecting the access data of the
mobile phone network provider ..... 414
Setting options for destination/
route download .............................. 426
Operating safety
Declaration of conformity ................ 34
Important safety notes .................... 33
Operating system
see On-board computer
Operator's Manual
Vehicle equipment ........................... 31
Outside temperature display ........... 223
Overhead control panel ...................... 47
Own address ...................................... 362
P
Paint code number ............................ 601
Paintwork (cleaning instructions) ... 543
Panic alarm .......................................... 50
Parking
Engaging park position .................. 160
Important safety notes .................. 171
Parking brake ................................ 172
Position of exterior mirror, front-
passenger side ............................... 118
Rear view camera .......................... 206
see PARKTRONIC
Parking aid
Active Parking Assist ..................... 202
see Exterior mirrors
see PARKTRONIC
Parking assistance
see PARKTRONIC
Parking brake
Display message ............................ 243
Electric parking brake .................... 172
Warning lamp ................................. 277
Parking lamps
Switching on/off ........................... 124
18Index
Page 24 of 614
Seat functions (COMAND) ............. 316
Seat heating problem .................... 113
Seat ventilation problem ................ 113
Selecting for adjustment
(COMAND) ..................................... 316
Sliding forward/back ..................... 112
Storing settings (memory func-
tion) ............................................... 119
Switching AIRSCARF on/off .......... 114
Switching seat heating on/off ....... 112
Switching seat ventilation on/off .. 113
Selecting a province ......................... 325
Selecting a state ............................... 325
Selecting stations
Radio ............................................. 438
Selector lever
Cleaning ......................................... 547
Positions ........................................ 159
Sending DTMF tones ......................... 391
Sensors (cleaning instructions) ....... 546
Service menu (on-board com-
puter) .................................................. 232
Service message
see ASSYST PLUS
Service products
Brake fluid ..................................... 606
Coolant (engine) ............................ 606
Engine oil ....................................... 605
Fuel ................................................ 603
Important safety notes .................. 603
Refrigerant (air-conditioning sys-
tem) ............................................... 608
Washer fluid ................................... 607
Setting the air distribution ............... 142
Setting the airflow ............................ 143
Setting the audio format
Rear Seat Entertainment System ... 498
Setting the language
COMAND ....................................... 310
Rear Seat Entertainment System ... 498
Setting the night design ................... 308
Setting the text reader speed .......... 310
Setting the volume
Telephone calls .............................. 298
Video AUX ..................................... 481
Settings
Factory (on-board computer) ......... 236 Menu overview .............................. 290
On-board computer ....................... 232
Picture (COMAND) ......................... 475
Sound settings ............................... 298
SETUP (on-board computer) ............. 236
Side impact air bag ............................. 58
Side windows
Cleaning ......................................... 545
Convenience closing feature ............ 99
Imp
ortant safety information ........... 96
Opening/closing (all) ....................... 98
Opening/closing (front) ................... 97
Opening/closing (rear) .................... 98
Overview .......................................... 96
Problem (malfunction) ................... 100
Resetting ......................................... 99
Reversing feature ............................. 97
SIRIUS weather display
5-day forecast ................................ 503
Daily forecast ................................. 502
Detail information .......................... 503
Information chart ........................... 502
Selecting a location for the
weather forecast ............................ 503
Switching on/off ........................... 502
Weather map ................................. 505
SmartKey
Changing the battery ....................... 86
Changing the programming ............. 84
Checking the battery ....................... 85
Convenience opening feature .......... 98
Display message ............................ 269
Door central locking/unlocking ....... 82
Important safety notes .................... 82
Loss ................................................. 87
Mechanical key ................................ 84
Opening/closing the roof .............. 102
Overview .......................................... 82
Positions (ignition lock) ................. 151
Problem (malfunction) ..................... 87
Starting the engine ........................ 154
Snow chains ...................................... 571
Sockets
Front-passenger footwell ............... 521
General notes ................................ 520
Trunk ............................................. 521
Under the armrest ......................... 521
22Index
Page 28 of 614
Service life ..................................... 570
Sidewall (definition) ....................... 588
Speed rating (definition) ................ 587
Storing ........................................... 589
Structure and characteristics
(definition) ..................................... 586
Summer tires ................................. 570
Temperature .................................. 582
TIN (Tire Identification Number)
(definition) ..................................... 588
Tire bead (definition) ...................... 588
Tire pressure (definition) ................ 587
Tire pressures (recommended) ...... 586
Tire size (data) ............................... 593
Tire size designation, load-bearing
capacity, speed rating .................... 582
Tire tread ....................................... 569
Tire tread (definition) ..................... 588
Total load limit (definition) ............. 588
Traction ......................................... 581
Traction (definition) ....................... 588
Tread wear ..................................... 581
Uniform Tire Quality Grading
Standards ...................................... 581
Uniform Tire Quality Grading
Standards (definition) .................... 586
Wear indicator (definition) ............. 588
Wheel and tire combination ........... 595
Wheel rim (definition) .................... 587
see Flat tire
Tone settings
Balance and fader .......................... 298
Tow-starting
Emergency engine starting ............ 564
Important safety notes .................. 561
Towing away
Important safety guidelines ........... 561
Installing the towing eye ................ 562
Removing the towing eye ............... 563
Transporting the vehicle ................ 564
With both axles on the ground ....... 563
With the rear axle raised ................ 563
Track
Selecting (CD, MP3) ....................... 449
Selecting using the number key-
pad ................................................ 450
Track information .............................. 494
Traffic jam function ........................... 351 Traffic reports
Calling up a list .............................. 359
Real-time traf fic re
port .................. 360
Transmission
Selector lever ................................ 159
see Automatic transmission
Transporting the vehicle .................. 564
Treble, adjusting (sound) .................. 298
Trim pieces (cleaning instruc-
tions) .................................................. 547
Trip computer (on-board com-
puter) .................................................. 225
Trip odometer
Calling up ....................................... 225
Resetting (on-board computer) ...... 227
True Image™ ...................................... 300
Trunk
Emergency release .......................... 96
Important safety notes .................... 91
Locking separately ........................... 95
Opening/closing (automatically
from inside) ...................................... 95
Opening/closing (automatically
from outside) ................................... 92
Opening/closing (from outside,
HANDS-FREE ACCESS) .................... 93
Opening/closing (manually from
outside) ............................................ 92
Overview .......................................... 91
Power closing .................................. 90
Trunk lid
Display message ............................ 267
Opening dimensions ...................... 608
Opening/closing .............................. 91
Trunk load (maximum) ...................... 608
Trunk partition
Display message ............................ 267
General notes ................................ 102
Installing ........................................ 103
Opening/closing ............................ 103
Removing ....................................... 103
Turn signals
Display message ............................ 253
Switching on/off ........................... 125
TV
Automatic picture shutoff .............. 474
Picture settings .............................. 475
26Index
Page 314 of 614
Using this function, you can:
Rtransfer your personal COMAND data from
one system/vehicle to another.
Rmake a backup copy of your personal data
(export data) and load it again (import
data).
Rprotect your data from unwanted export by
activating a pin prompt (presetting: deacti-
vated ª).
You can either use an SD memory card or a
USB storage device (e.g. a USB stick) as tem-
porary storage.
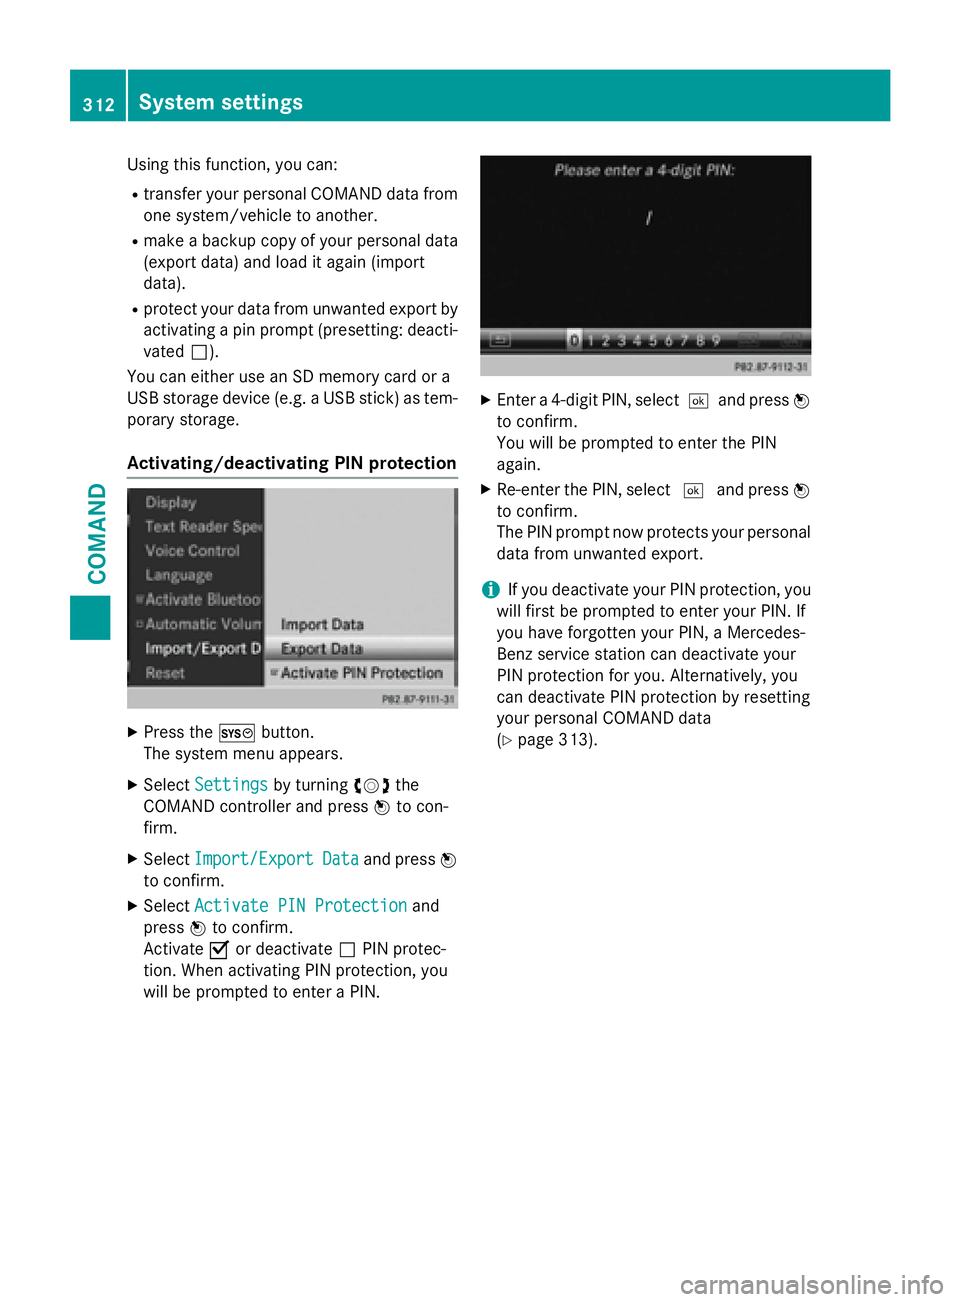
Activating/deactivating PIN protection
XPress the Wbutton.
The system menu appears.
XSelect Settingsby turning cVdthe
COMAND controller and press Wto con-
firm.
XSelect Import/ExportDataand press W
to confirm.
XSelect Activate PIN Protectionand
press Wto confirm.
Activate Oor deactivate ªPIN protec-
tion. When activating PIN protection, you
will be prompted to enter a PIN.
XEnter a 4-digit PIN, select ¬and pressW
to confirm.
You will be prompted to enter the PIN
again.
XRe-enter the PIN, select ¬and press W
to confirm.
The PIN prompt now protects your personal
data from unwanted export.
iIf you deactivate your PIN protection, you
will first be prompted to enter your PIN. If
you have forgotten your PIN, a Mercedes-
Benz service station can deactivate your
PIN protection for you. Alternatively, you
can deactivate PIN protection by resetting
your personal COMAND data
(
Ypage 313).
312System settings
COMAND
Page 429 of 614
Resetting adjustments
With the reset function, all Mercedes-Benz
Apps settings are reset to the factory set-
tings.
XSelect the®symbol in the main function
bar by turning cVdthe COMAND con-
troller and press Wto confirm.
The carousel view appears.
XBring the Mercedes-Benz Appspanel to
the front by turning cVdthe COMAND
controller and press Wto confirm.
XSelect Optionsby sliding VÆand turning
cVd the COMAND controller and press W
to confirm.
XSelect Resetand press Wto confirm.
A prompt appears asking whether you
really wish to reset.
XSelect YesorNoand press Wto confirm.
Other services
Mercedes-Benz Mobile Website
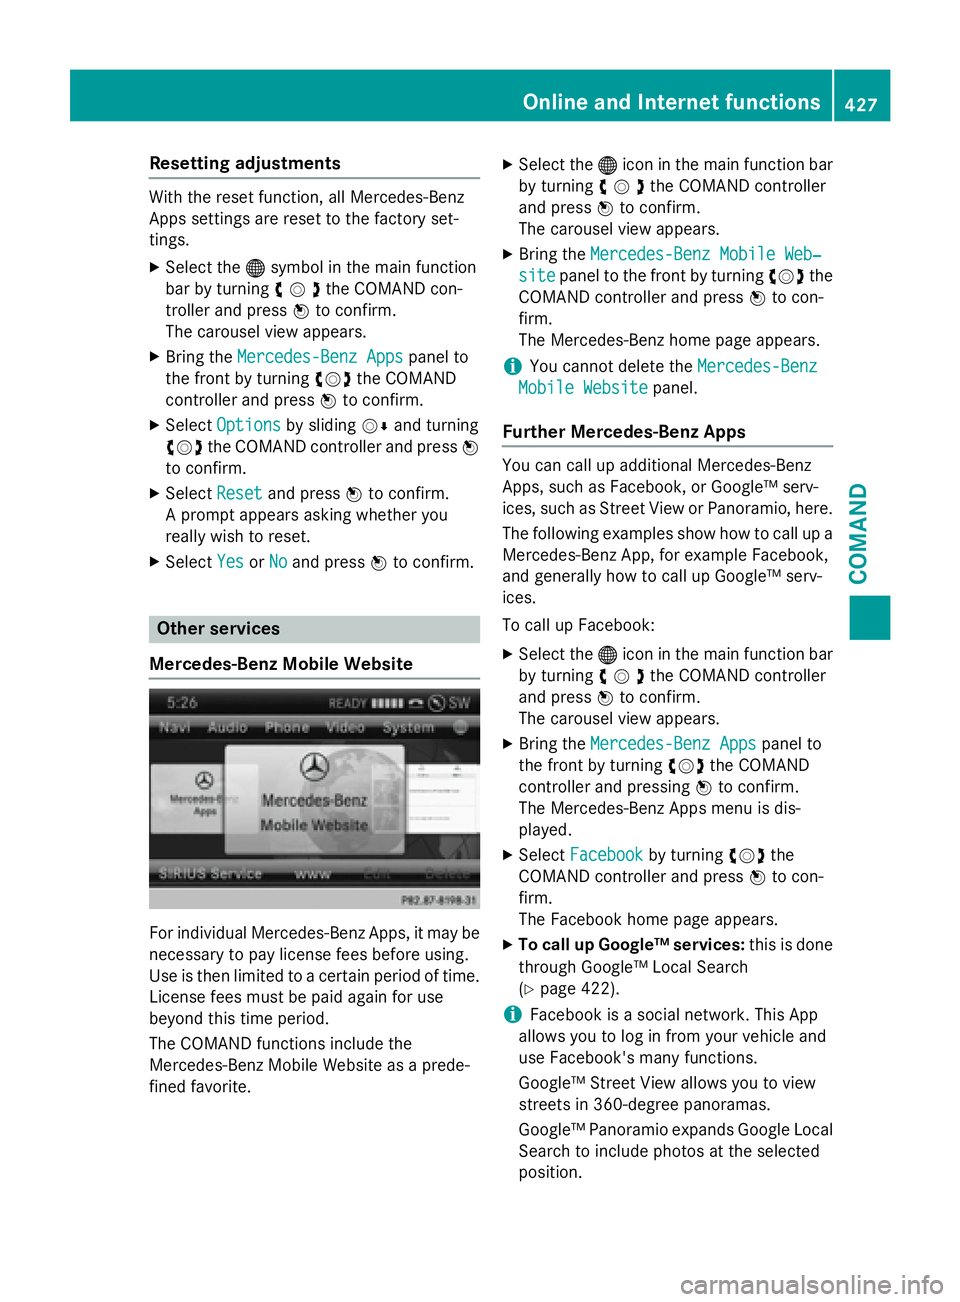
For individual Mercedes-Benz Apps, it may be
necessary to pay license fees before using.
Use is then limited to a certain period of time.
License fees must be paid again for use
beyond this time period.
The COMAND functions include the
Mercedes-Benz Mobile Website as a prede-
fined favorite.
XSelect the ®icon in the main function bar
by turning cVdthe COMAND controller
and press Wto confirm.
The carousel view appears.
XBring the Mercedes-Benz Mobile Web‐
sitepanel to the front by turning cVdthe
COMAND controller and press Wto con-
firm.
The Mercedes-Benz home page appears.
iYou cannot delete the Mercedes-Benz
Mobile Websitepanel.
Further Mercedes-Benz Apps
You can call up additional Mercedes-Benz
Apps, such as Facebook, or Google™ serv-
ices, such as Street View or Panoramio, here.
The following examples show how to call up a
Mercedes-Benz App, for example Facebook,
and generally how to call up Google™ serv-
ices.
To call up Facebook:
XSelect the®icon in the main function bar
by turning cVdthe COMAND controller
and press Wto confirm.
The carousel view appears.
XBring the Mercedes-Benz Appspanel to
the front by turning cVdthe COMAND
controller and pressing Wto confirm.
The Mercedes-Benz Apps menu is dis-
played.
XSelect Facebookby turning cVdthe
COMAND controller and press Wto con-
firm.
The Facebook home page appears.
XTo call up Google™ services: this is done
through Google™ Local Search
(
Ypage 422).
iFacebook is a social network. This App
allows you to log in from your vehicle and
use Facebook's many functions.
Google™ Street View allows you to view
streets in 360-degree panoramas.
Google™ Panoramio expands Google Local
Search to include photos at the selected
position.
Online and Internet functions427
COMAND
Z
Page 444 of 614
Registering SatRadio
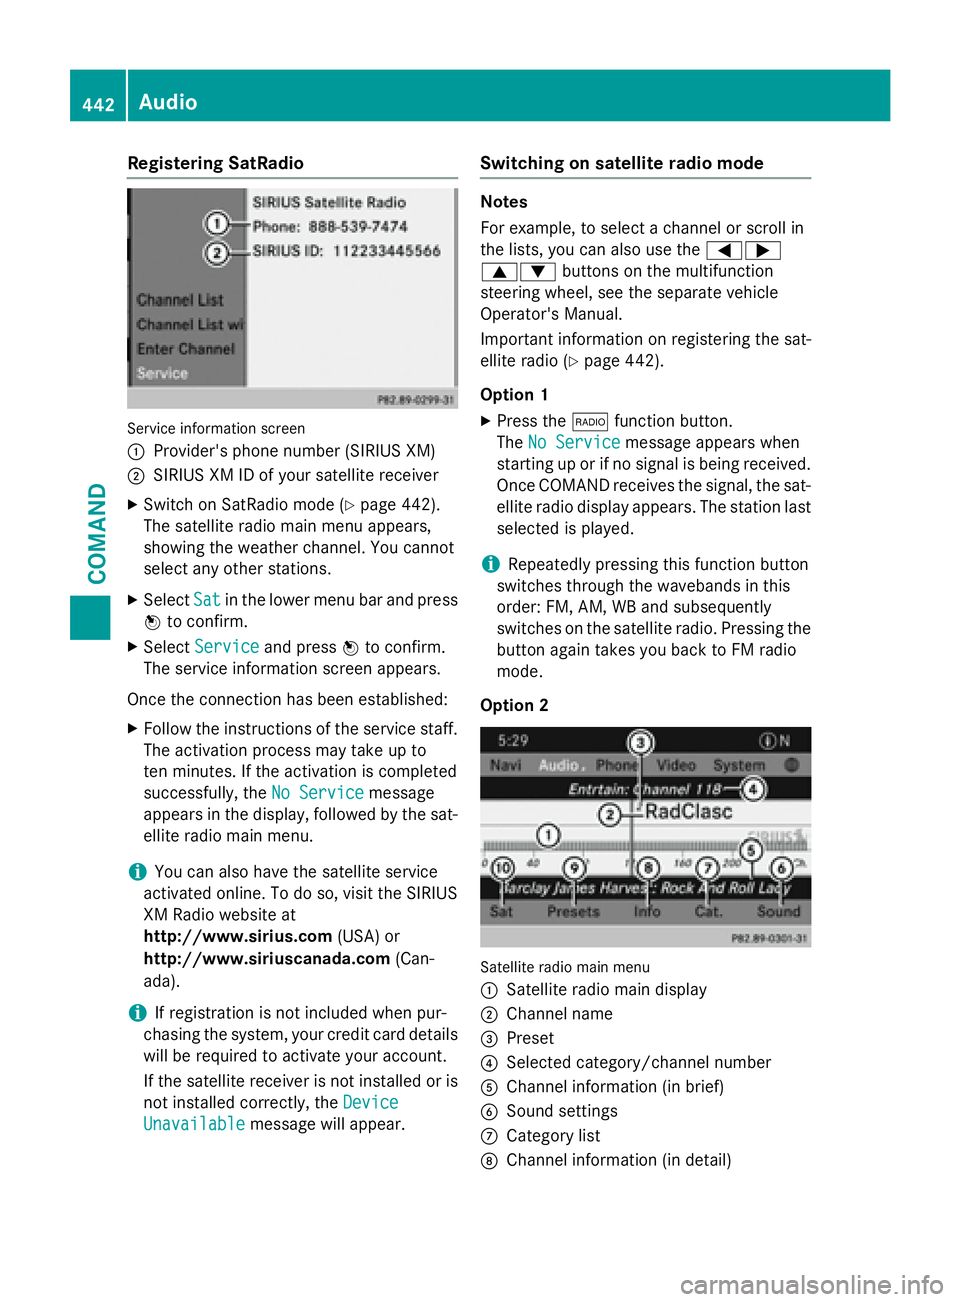
Service information screen
:
Provider's phone number (SIRIUS XM)
;SIRIUS XM ID of your satellite receiver
XSwitch on SatRadio mode (Ypage 442).
The satellite radio main menu appears,
showing the weather channel. You cannot
select any other stations.
XSelect Satin the lower menu bar and press
W to confirm.
XSelect Serviceand press Wto confirm.
The service information screen appears.
Once the connection has been established:
XFollow the instructions of the service staff.
The activation process may take up to
ten minutes. If the activation is completed
successfully, the No Service
message
appears in the display, followed by the sat-
ellite radio main menu.
iYou can also have the satellite service
activated online. To do so, visit the SIRIUS
XM Radio website at
http://www.sirius.com (USA) or
http://www.siriuscanada.com (Can-
ada).
iIf registration is not included when pur-
chasing the system, your credit card details
will be required to activate your account.
If the satellite receiver is not installed or is
not installed correctly, the Device
Unavailablemessage will appear.
Switching on satellite radio mode
Notes
For example, to select a channel or scroll in
the lists, you can also use the =;
9: buttons on the multifunction
steering wheel, see the separate vehicle
Operator's Manual.
Important information on registering the sat-
ellite radio (
Ypage 442).
Option 1
XPress the $function button.
The No Service
message appears when
starting up or if no signal is being received. Once COMAND receives the signal, the sat-
ellite radio display appears. The station last
selected is played.
iRepeatedly pressing this function button
switches through the wavebands in this
order: FM, AM, WB and subsequently
switches on the satellite radio. Pressing the
button again takes you back to FM radio
mode.
Option 2
Satellite radio main menu
:
Satellite radio main display
;Channel name
=Preset
?Selected category/channel number
AChannel information (in brief)
BSound settings
CCategory list
DChannel information (in detail)
442Audio
COMAND
Page 445 of 614
EChannel preset list
FSatellit e radio menu
Channel information Acan beviewed in
detail (
Ypage 445).
XSe lect Audiointhe main function bar by
slidi ngZV and turning cVdthe COMAND
controller and press Wto confirm.
If satellit e radio mode was the last mode
selected, itwill now beactive.
If another audio mode isswitched on, you
can now switch to satellite radio mode in
the audio menu.
XSe lect Audiobysliding ZVthe COMAND
controller and press Wto confirm.
The audio menu appears.
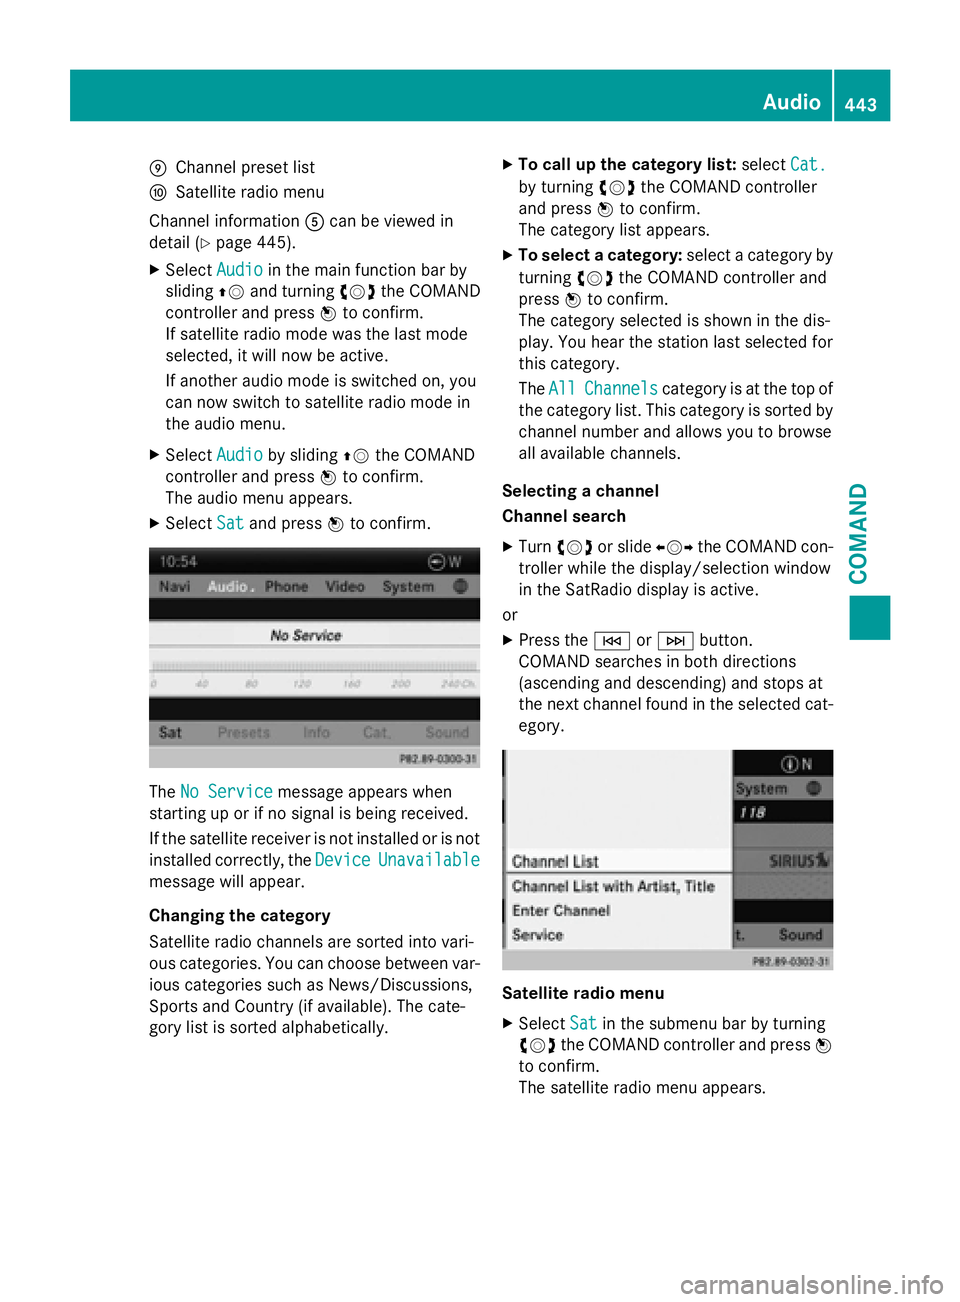
XSe lect Satand press Wto confirm.
The No Servicemessage appears when
starting up or ifno signal isbeing rec eived.
If the satellit e receiveris not installed or isnot
installed correctly, the Device
Unavailable
messagewillappear.
Changing the category
Sat ellit e radio channels are sorted into vari-
ous categories. You can choose between var-
ious categories such as News/Discussions,
Spo rts and Country (if available). The cate-
gory list is sorted alphabetically.
XTo call up the category list: selectCat.
byturning cVdthe COMAND controller
and press Wto confirm.
The category listappears.
XTo select a category: select a categoryby
turning cVdthe COMAND controller and
press Wto confirm.
The category selected isshown in thedis-
play. You hear the station last selected for
th is category.
The All
Channelscategory isat the top of
the category list. This category issorted by
channel number and allows you to browse
all availab lechannels.
Selecting a channel
Channel search
XTurn cVd or slide XVYthe COMAND con-
troller whilethedisp lay/selection window
in the SatRadio displayisact ive.
or
XPress the EorF button.
COMAND searches inboth directions
(ascending and descending) and stops at
the next channel found inthe selected cat-
egory.
Satellite radio menu
XSe lect Satinthe submenu bar byturning
cVd the COMAND controller and press W
to confirm.
The satellite radio menu appears.
Audio443
COMAND
Z
Page 543 of 614

Displaying service messages
XSwitchon th eignition .
XPress th e= or; buttonon th esteer -
in g whee lto selec tth eServ.
menu.
XPress th e9 or: buttonto selec tth e
ASSYST PLU S
submenuand confirm by
pressing th ea button.
The servic edue dat eappears in th emulti-
function display.
Information about Service
Resetting th eASSYS TPLUS service
interva ldisplay
!If th eASSYST PLU Sservic einterval dis -
play has been inadvertentl yreset ,this set -
ting can be correcte dat aqualified special-
ist workshop .
Hav eservic ewor kcarrie dout as described
in th eMaintenance Booklet .Thi smay oth-
erwise lead to increase dwear and damage
to th emajor assemblies or th evehicle.
A qualified specialis tworkshop ,e.g. an
authorized Mercedes-Ben zCenter, will reset
th eASSYST PLU Sservic einterval display
after th eservic ewor khas been carrie dout .
You can also obtain further information on
maintenance work, fo rexample.
Specia lservice requirement s
The specifiedmaintenance interval take sonly
th enormal operation of th evehicle into
account. Under arduous operatin gcondition s
or increase dload on th evehicle, mainte -
nance wor kmus tbe carrie dout more fre-
quently, fo rexample:
Rregular city drivin gwit hfrequent intermedi-
at estops
Rif th evehicle is primarily used to trave l
short distances
Ruse in mountainous terrain or on poo rroad
surfaces
Rif th eengin eis ofte nlef tidlin gfo rlon gperi-
ods
Under these or similar conditions, have, fo r
example, th eair filter, engin eoil and oil filte r
replaced or changed more frequently. Under
arduous operatin gconditions, th etires mus t
be checke dmore often. Further information
can be obtained at aqualified specialist work-
shop, e.g. an authorized Mercedes-Ben zCen -
ter.
Drivin gabroad
An extensive Mercedes-Ben zServic enetwor k
is also available in other countries. You can
obtain further information from any author -
ized Mercedes-Ben zCenter.
Car e
Note son car e
HEnvironmental not e
Dispose of empty packagin gand cleanin g
cloths in an environmentally responsible man -
ner.
!Fo rcleanin gyour vehicle, do no tuse any
of th efollowing :
Rdry, rough or har dcloths
Rabrasiv ecleanin gagents
Rsolvents
Rcleanin gagents containin gsolvents
Do no tscrub .
Do no ttouch th esurfaces or protective
films wit hhar dobjects ,e.g. arin gor ic e
scraper. You could otherwise scratch or
damage th esurfaces and protective film.
!Do no tpar kth evehicle fo ran extended
period straight after cleanin git,particularly
after havin gcleaned th ewheels wit hwhee l
cleaner. Wheel cleaners could caus e
increase dcorrosion of th ebrake discs and
brake pads/linings. Fo rthis reason ,you
Care541
Maintenance and care
Z
Page 559 of 614
The battery and the cover of the positive
terminal clamp must be installed securely
during operation.
In order for the battery to achieve the maxi-
mum possible service life, it must always be
sufficiently charged.
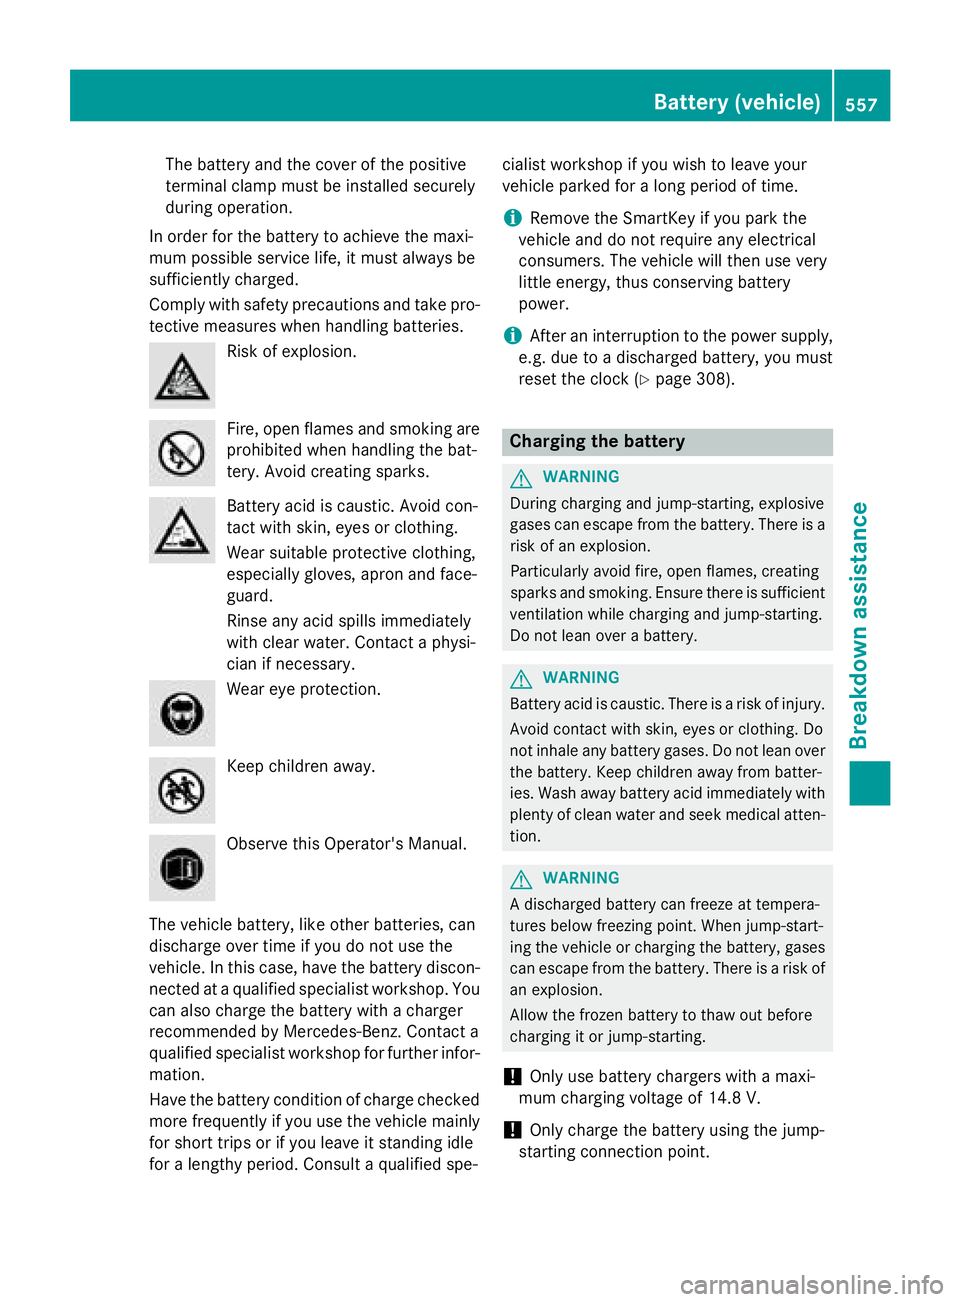
Comply with safety precautions and take pro-
tective measures when handling batteries.
Risk of explosion.
Fire, open flames and smoking are
prohibited when handling the bat-
tery. Avoid creating sparks.
Battery acid is caustic. Avoid con-
tact with skin, eyes or clothing.
Wear suitable protective clothing,
especially gloves, apron and face-
guard.
Rinse any acid spills immediately
with clear water. Contact a physi-
cian if necessary.
Wear eye protection.
Keep children away.
Observe this Operator's Manual.
The vehicle battery, like other batteries, can
discharge over time if you do not use the
vehicle. In this case, have the battery discon-
nected at a qualified specialist workshop. You
can also charge the battery with a charger
recommended by Mercedes-Benz. Contact a
qualified specialist workshop for further infor-
mation.
Have the battery condition of charge checked
more frequently if you use the vehicle mainly
for short trips or if you leave it standing idle
for a lengthy period. Consult a qualified spe- cialist workshop if you wish to leave your
vehicle parked for a long period of time.
iRemove the SmartKey if you park the
vehicle and do not require any electrical
consumers. The vehicle will then use very
little energy, thus conserving battery
power.
iAfter an interruption to the power supply,
e.g. due to a discharged battery, you must
reset the clock (
Ypage 308).
Charging the battery
GWARNING
During charging and jump-starting, explosive
gases can escape from the battery. There is a risk of an explosion.
Particularly avoid fire, open flames, creating
sparks and smoking. Ensure there is sufficient
ventilation while charging and jump-starting.
Do not lean over a battery.
GWARNING
Battery acid is caustic. There is a risk of injury.
Avoid contact with skin, eyes or clothing. Do
not inhale any battery gases. Do not lean over
the battery. Keep children away from batter-
ies. Wash away battery acid immediately with
plenty of clean water and seek medical atten-
tion.
GWARNING
A discharged battery can freeze at tempera-
tures below freezing point. When jump-start-
ing the vehicle or charging the battery, gases can escape from the battery. There is a risk of
an explosion.
Allow the frozen battery to thaw out before
charging it or jump-starting.
!Only use battery chargers with a maxi-
mum charging voltage of 14.8 V.
!Only charge the battery using the jump-
starting connection point.
Battery (vehicle)557
Breakdown assistance
Z