change wheel MERCEDES-BENZ SL ROADSTER 2012 Owners Manual
[x] Cancel search | Manufacturer: MERCEDES-BENZ, Model Year: 2012, Model line: SL ROADSTER, Model: MERCEDES-BENZ SL ROADSTER 2012Pages: 637, PDF Size: 20.68 MB
Page 11 of 637
Seat cove
r..................................... 573
Sensors ......................................... 571
Steering wheel ............................... 573
Trim pieces .................................... 573
Washing by hand ........................... 569
Wheels ........................................... 570
Windows ........................................ 570
Wiper blades .................................. 571
Wooden trim .................................. 573
Category list (music search) ............ 481
CD
Copy protection ............................. 480
Fast forward/fast rewind ............... 476
General information ....................... 480
Inserting ........................................ 469
Inserting/loading (Rear Seat
Entertainment System) .................. 528
Multisession .................................. 479
Notes on compact discs ................ 480
Pause function ............................... 474
Player/changer operation
(COMAND) ..................................... 469
Removing/ejecting (Rear Seat
Entertainment System) .................. 528
Safety notes .................................. 468
Selecting a media type .................. 474
Selecting a track ............................ 475
Sound settings (balance, bass,
treble) ............................................ 299
Switching to ................................... 472
CD mode
Playback options ........................... 478
CD player/CD changer(on-board
computer) .......................................... 234
CD/DVD ..................................... 469, 470
Ejecting (DVD drive) ....................... 470
Ejecting (DVD single drive) ............ 469
Inserting (DVD changer )................ 469
Inserting (DVD single drive) ........... 469
Central locking
Automatic locking (on-board com-
puter) ............................................. 242
Locking/unlocking (key) .................. 85
Centre console
Lower section .................................. 45
Lower section (AMG vehicles) .......... 46
Upper section .................................. 44 Changing direction
............................ 352
Announcement phase .................... 352
Change of direction phase ............. 352
Preparation phase ......................... 352
Changing the character set .............. 307
Changing the picture format (TV,
video) .................................................. 502
Character ........................................... 305
Changing the character set ............ 305
Changing the languag e.................. 304
Deleting ......................................... 305
Moving the cursor .......................... 305
Switching to letters ........................ 304
Characters ......................................... 305
Entering ......................................... 305
Entering (address book, phone
book) ............................................. 303
Entering (navigation) ...................... 305
Charge maintenance socket ............ 552
Child seat
Automatic recognition ..................... 63
ISOFIX .............................................. 64
On the front-passenger sea t............ 62
Problem (malfunction) ..................... 70
Recommendations ........................... 67
Suitable positions ............................ 65
Children
In the vehicle ................................... 61
Restraint systems ............................ 61
Cigarette lighter ................................ 550
Cleaning
Mirror turn signal ........................... 571
Climate control
Adjusting airflow (AIR FLOW) ......... 144
Controlling automaticall y............... 144
Convenience opening/closing
(air-recirculation mode) ................. 148
Cooling with air dehumidification .. 142
Demisting the windows .................. 147
Demisting the windscreen ............. 146
Important safety notes .................. 140
Indicator lamp ................................ 144
Information on using
THERMOTRONIC automatic cli-
mate control .................................. 141
Overview of systems ...................... 140 8
Index
Page 35 of 637
Do not install accessories such as audio
systems in these areas. Do not carry out
repairs or welding. You could impair the
operating efficiency of the restraint sys-
tems.
Have accessories retrofitted at a qualified
specialist workshop.
You could jeopardise the operating safety of
your vehicle if you use parts, tyres and wheels
as well as accessories relevant to safety
which have not been approved by Mercedes. This could lead to malfunctions in safety-rel-
evant systems, e.g. the brake system. Use
only genuine Mercedes-Benz parts or parts of
equal quality. Only use tyres, wheels and
accessories that have been specifically
approved for your vehicle.
Mercedes-Benz tests genuine parts and con-
version parts and accessories that have been specifically approved for your vehicle for their
reliability, safety and suitability. Despite
ongoing market research, Mercedes-Benz is
unable to assess other parts. Mercedes-Benz therefore accepts no responsibility for the
use of such parts in Mercedes-Benz vehicles, even if they have been officially approved or
independently approved by a testing centre.
In Germany, certain parts are only officially
approved for installation or modification if
they comply with legal requirements. This
also applies to some other countries. All gen-
uine Mercedes-Benz parts meet the approval
requirements. The use of non-approved parts may invalidate the vehicle's general operating
permit.
This is the case:
R if they cause a change of the vehicle type
from that for which the vehicle's general
operating permit was granted
R if other road users could be endangered
R if the emission or noise levels are adversely
affected
Always specify the vehicle identification num- ber (VIN) when ordering genuine Mercedes-
Benz parts (Y page 622). Owner's Manual
Vehicle equipment
This Owner's Manual describes all models
and all standard and optional equipment
available for your vehicle at the time of pub-
lication of the Owner's Manual. Country-spe- cific differences are possible. Note that your
vehicle may not be fitted with all features
described. This is also the case for systems
and functions relevant to safety. Therefore,
the equipment on your vehicle may differ from
that in the descriptions and illustrations.
The original purchase contract documenta-
tion for your vehicle contains a list of all of the
systems in your vehicle.
Should you have any questions concerning
equipment and operation, please consult a
Mercedes-Benz Service Centre.
The Owner's Manual and Service Booklet are important documents and should kept in the
vehicle. Operating safety
Important safety notes
G
WARNING
If you do not have the prescribed service/
maintenance work or necessary repairs car-
ried out, this could result in malfunctions or
system failures. There is a risk of an accident.
Always have the prescribed service/mainte-
nance work as well as necessary repairs car-
ried out at a qualified specialist workshop. G
WARNING
If you switch off the ignition while driving,
safety-relevant functions are only available
with limitations, or not at all. This could affect, for example, the power steering and the brake
boosting effect. You will require considerably
more effort to steer and brake. There is a risk of an accident.
Do not switch off the ignition while driving. 32
Introduction
Page 36 of 637
G
WARNING
Flammable material such as leaves, grass or
twigs may ignite if they come into contact with hot parts of the exhaust system. There is a risk of fire.
When driving off road or on unpaved roads,
check the vehicle's underside regularly. In
particular, remove parts of plants or other
flammable materials which have become
trapped. In the case of damage, contact a
qualified specialist workshop. G
WARNING
Modifications to electronic components, their software as well as wiring could effect their
function and/or the operation of other net-
worked components. This could in particular
also be the case for systems relevant to
safety. They might not function properly any
more and/or jeopardise the operational
safety of the vehicle. There is an increased
risk of an accident and injury.
Do not attempt to modify the wiring as well as
electronic components or their software.
Always have work on electrical and electronic components carried out at a qualified special-
ist workshop.
If you make any changes to the vehicle elec-
tronics, the general operating permit is ren-
dered invalid.
! There is a risk of damage to the vehicle if:
R the vehicle becomes stuck, e.g. on a high
kerb or an unpaved road
R you drive too fast over an obstacle, e.g. a
kerb or a pothole in the road
R a heavy object strikes the underbody or
parts of the chassis
In situations like this, the body, the under-
body, chassis parts, wheels or tyres could
be damaged without the damage being visi-
ble. Components damaged in this way can
unexpectedly fail or, in the case of an acci-
dent, no longer withstand the strain they
are designed for. If the underbody panelling is damaged,
combustible materials such as leaves,
grass or twigs can gather between the
underbody and the underbody panelling. If
these materials come in contact with hot
parts of the exhaust system, they can catch
fire.
In such situations, have the vehicle
checked and repaired immediately at a
qualified specialist workshop. If, upon con-
tinuing your journey, you notice that driving
safety is impaired, pull over and stop the
vehicle immediately, paying attention to
road and traffic conditions. In such cases,
visit a qualified specialist workshop. Declarations of conformity
Wireless vehicle components The following information applies to all com-
ponents of the vehicle and the information
systems and communication devices integra-
ted into the vehicle which receive and/or
transmit radio waves:
The components of this vehicle that receive
and/or transmit radio waves are compliant
with the basic requirements and all other rel-
evant conditions of Directive 1999/5/EC.
You can obtain further information from any
Mercedes-Benz Service Centre.
Electromagnetic compatibility The electromagnetic compatibility of the vehi-
cle components has been checked and certi- fied according to the currently valid version of Regulation ECE-R 10. Diagnostics connection
The diagnostics connection is only intended
for the connection of diagnostic equipment at a qualified specialist workshop. Introduction
33 Z
Page 135 of 637

Not active:
if you are driving at speeds above
40 km/h or switch off the turn signal or turn
the steering wheel to the straight-ahead posi- tion
The cornering lamp may remain lit for a short
time, but is automatically switched off after
no more than three minutes.
Motorway mode Motorway mode increases the range of the
beam.
Active:
R if you are driving at speeds above
110 km/h and do not make any large steer-
ing movements for at least 1,000 m
R if you are driving at speeds above
130 km/h
Not active: if you are driving at speeds below
80 km/h following activation
Extended range foglamps The extended range foglamps reduce the
glare experienced by the driver and improve the illumination of the edge of the carriage-
way.
Active:
if you are driving at speeds below
70 km/h and you switch on the rear foglamp
Not active: if, following activation, you are
driving at speeds above 100 km/h or if you
switch off the rear foglamp Adaptive Highbeam Assist
General notes You can use this function to set the head-
lamps to change between dipped beam and
main beam automatically. The system recog-
nises vehicles with their lights on, either
approaching from the opposite direction or
travelling in front of your vehicle, and conse-
quently switches the headlamps from main
beam to dipped beam.
The system automatically adapts the dipped-
beam headlamp range depending on the dis-
tance to the other vehicle. Once the system
no longer detects any other vehicles, it
switches on the main-beam headlamps again.
The system's optical sensor is located behind
the windscreen near the overhead control
panel. 132
Exterior lightingLights and
windscreen wipers
Page 170 of 637
A Neutral
Do not shift the transmission to
N
while driving. Otherwise, the auto-
matic transmission could be dam-
aged.
No power is transmitted from the
engine to the drive wheels.
Releasing the brakes will allow you
to move the vehicle freely, e.g. to
push it or tow it.
If ESP ®
is deactivated or faulty:
only shift the transmission to posi-
tion Nif the vehicle is in danger of
skidding, e.g. on icy roads.
! Rolling in neutral
Ncan lead to
damage to the transmission. 7 Drive
The automatic transmission
changes gear automatically. All
forward gears are available.
Changing gear
The automatic transmission shifts to the indi- vidual gears automatically when it is in trans-
mission position D. Gearshifting is deter-
mined by:
R the selected drive program (Y page 167)
R the position of the accelerator pedal
R the road speed Driving tips
Accelerator pedal position Your style of driving influences how the auto-
matic transmission shifts gear:
R little throttle: early upshifts
R more throttle: late upshifts Double-clutch function When shifting down, the double-clutch func-
tion is active regardless of the currently selec-
ted drive program. The double-clutch functionreduces load change reactions and is condu-cive to a sporty driving style. The sound gen-
erated by the double-clutch function depends
on the drive program selected.
Kickdown Use kickdown for maximum acceleration.
X Depress the accelerator pedal beyond the
pressure point.
The transmission shifts to a lower gear
depending on the engine speed.
X Ease off the accelerator pedal once the
desired speed is reached.
The automatic transmission shifts back up. Program selector button
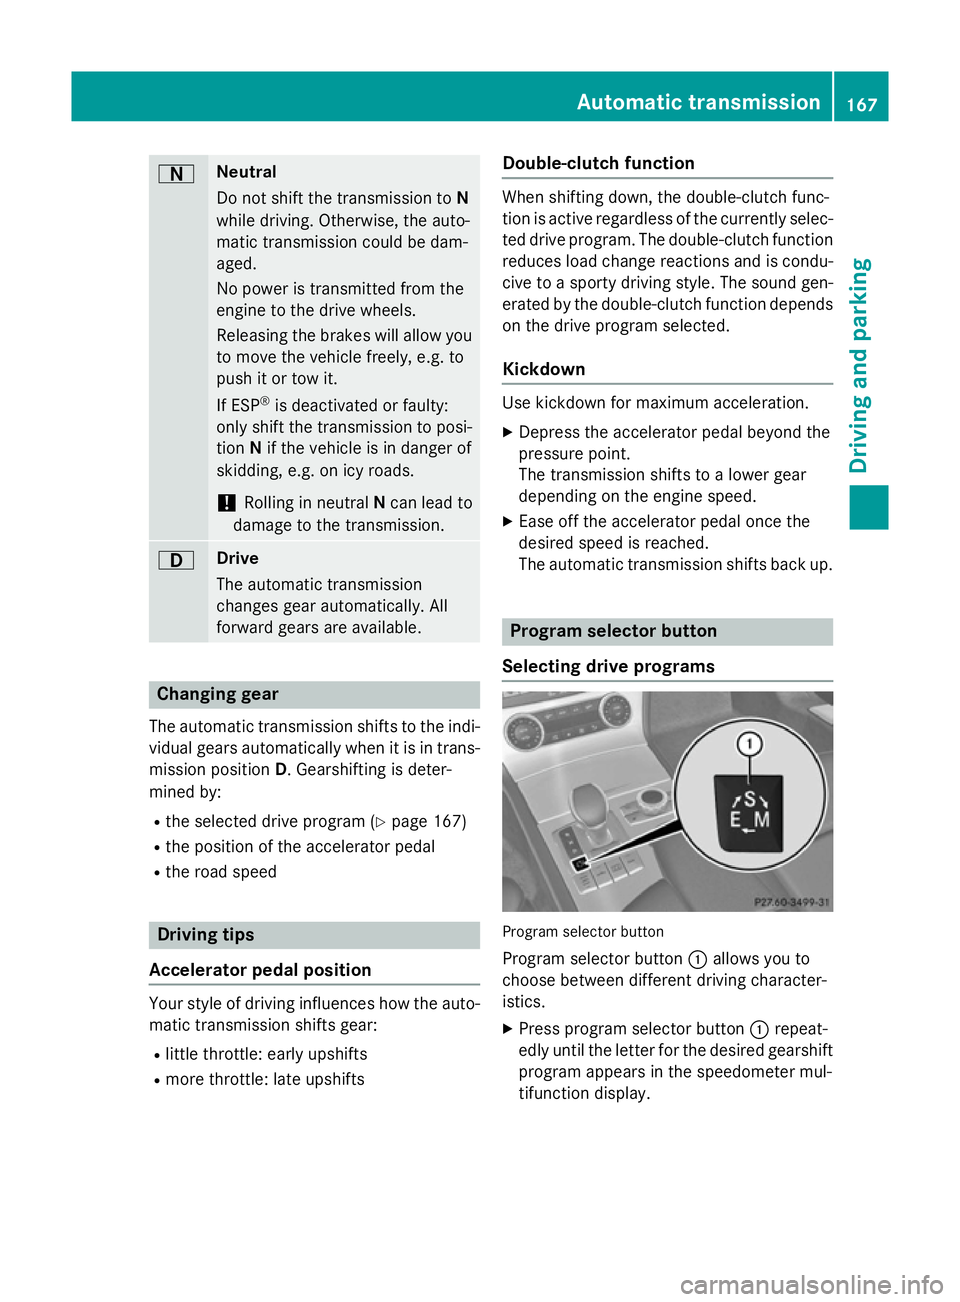
Selecting drive programs Program selector button
Program selector button :allows you to
choose between different driving character-
istics.
X Press program selector button :repeat-
edly until the letter for the desired gearshift
program appears in the speedometer mul-
tifunction display. Automatic transmission
167Driving and parking Z
Page 172 of 637
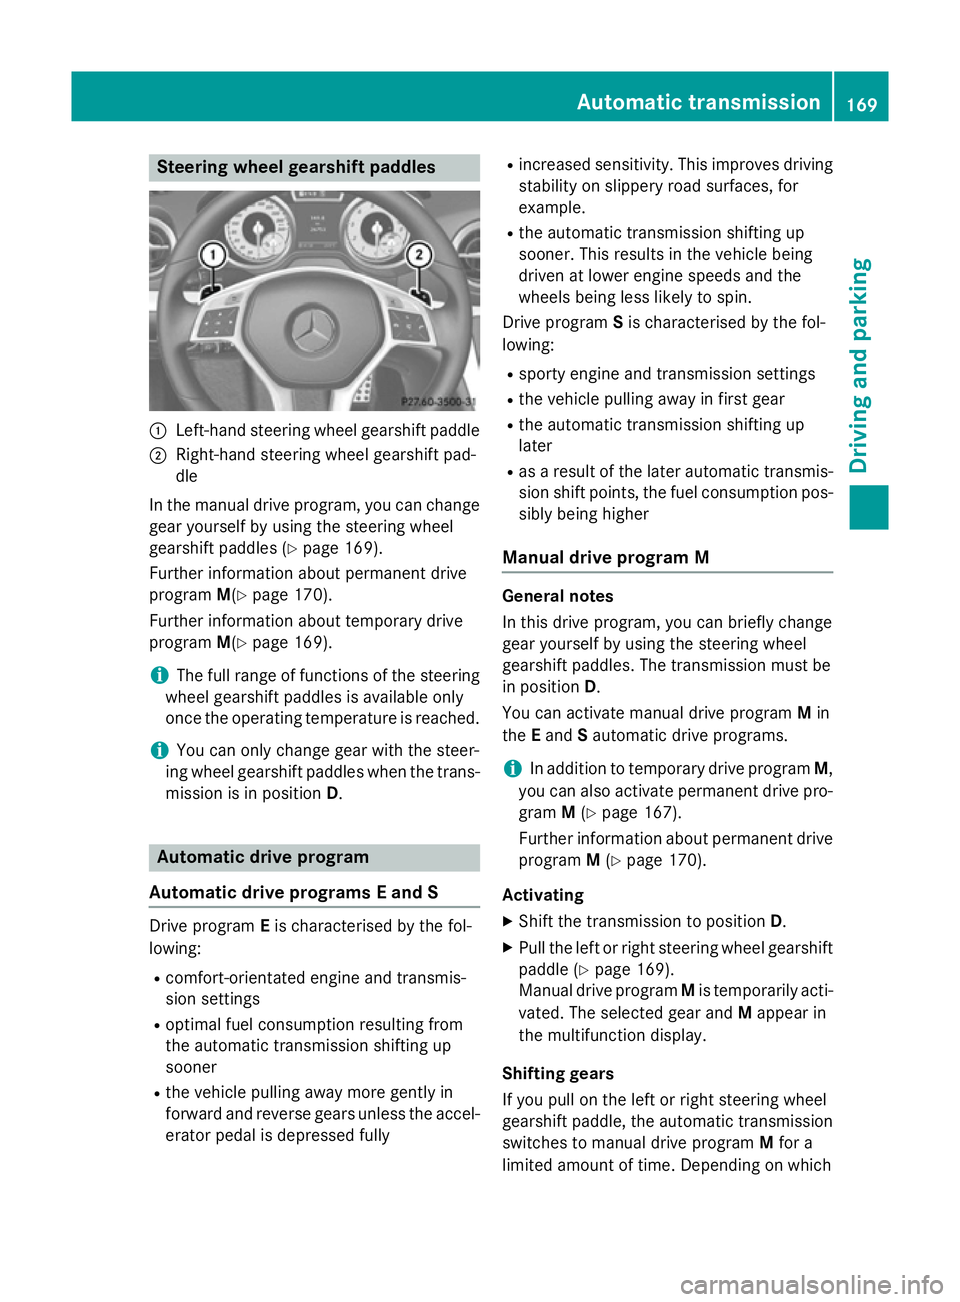
Steering wheel gearshift paddles
:
Left-hand steering wheel gearshift paddle
; Right-hand steering wheel gearshift pad-
dle
In the manual drive program, you can change
gear yourself by using the steering wheel
gearshift paddles (Y page 169).
Further information about permanent drive
program M(Ypage 170).
Further information about temporary drive
program M(Ypage 169).
i The full range of functions of the steering
wheel gearshift paddles is available only
once the operating temperature is reached.
i You can only change gear with the steer-
ing wheel gearshift paddles when the trans-
mission is in position D.Automatic drive program
Automatic drive programs E and S Drive program
Eis characterised by the fol-
lowing:
R comfort-orientated engine and transmis-
sion settings
R optimal fuel consumption resulting from
the automatic transmission shifting up
sooner
R the vehicle pulling away more gently in
forward and reverse gears unless the accel-
erator pedal is depressed fully R
increased sensitivity. This improves driving
stability on slippery road surfaces, for
example.
R the automatic transmission shifting up
sooner. This results in the vehicle being
driven at lower engine speeds and the
wheels being less likely to spin.
Drive program Sis characterised by the fol-
lowing:
R sporty engine and transmission settings
R the vehicle pulling away in first gear
R the automatic transmission shifting up
later
R as a result of the later automatic transmis-
sion shift points, the fuel consumption pos-sibly being higher
Manual drive program M General notes
In this drive program, you can briefly change
gear yourself by using the steering wheel
gearshift paddles. The transmission must be
in position D.
You can activate manual drive program Min
the Eand Sautomatic drive programs.
i In addition to temporary drive program
M,
you can also activate permanent drive pro- gram M(Y page 167).
Further information about permanent drive program M(Y page 170).
Activating
X Shift the transmission to position D.
X Pull the left or right steering wheel gearshift
paddle (Y page 169).
Manual drive program Mis temporarily acti-
vated. The selected gear and Mappear in
the multifunction display.
Shifting gears
If you pull on the left or right steering wheel
gearshift paddle, the automatic transmission switches to manual drive program Mfor a
limited amount of time. Depending on which Automatic transmission
169Driving and parking Z
Page 173 of 637
gearshift paddle is pulled, the automatic
transmission immediately shifts into the next
gear up or down, if permitted.
X To shift up: pull the right-hand steering
wheel gearshift paddle (Y page 169).
The automatic transmission shifts up to the next gear.
i If the maximum engine speed on the cur-
rently engaged gear is reached and you
continue to accelerate, the automatic
transmission automatically shifts up in
order to prevent engine damage.
X To shift down: pull on the left-hand steer-
ing wheel gearshift paddle (Y page 169).
The automatic transmission shifts down to
the next gear.
i If the engine exceeds the maximum
engine speed when shifting down, the auto- matic transmission protects against engine
damage by not shifting down.
i Automatic downshifting occurs when
coasting.
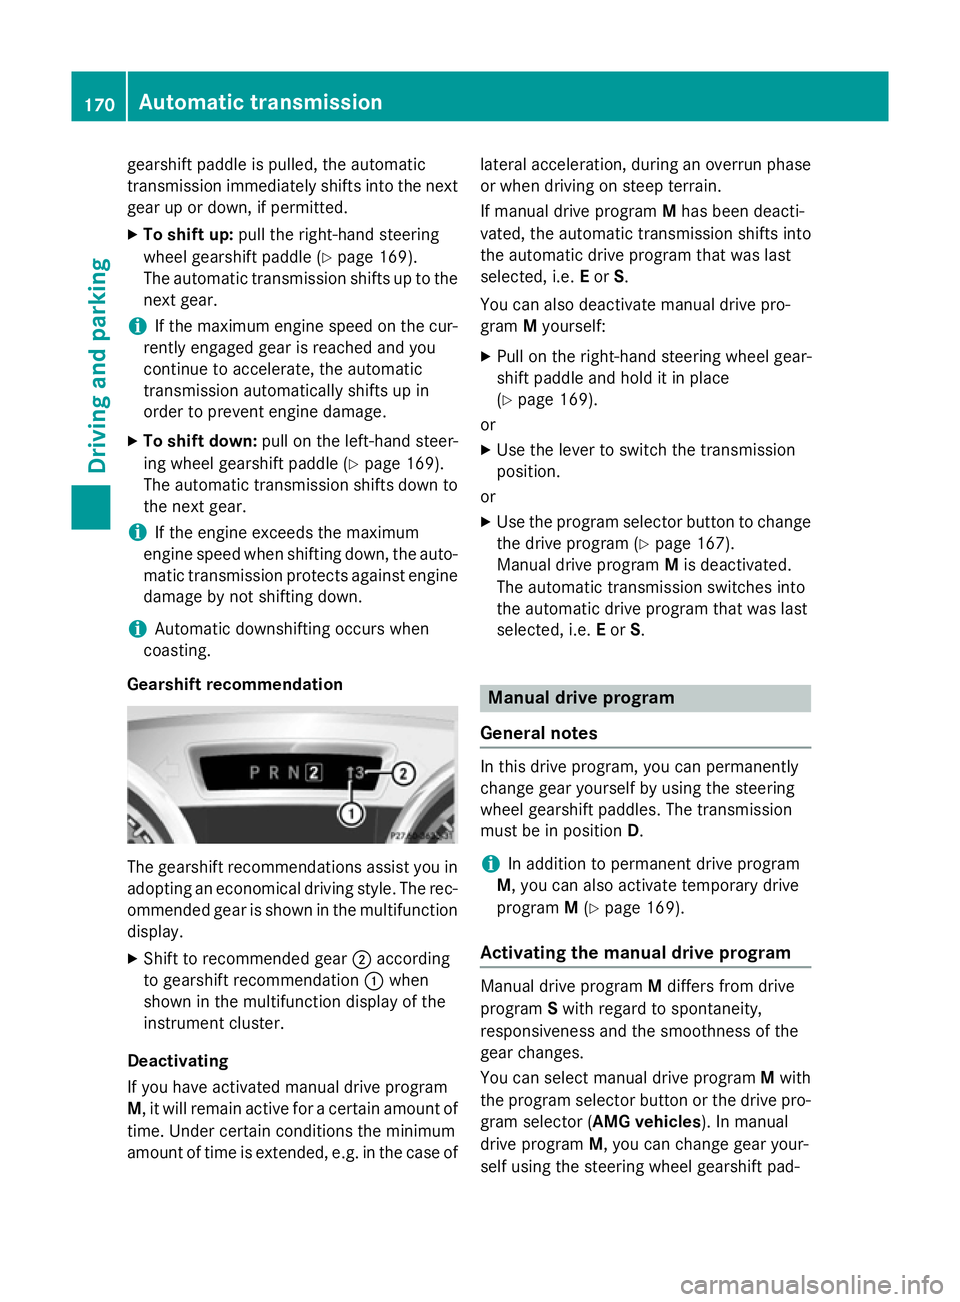
Gearshift recommendation The gearshift recommendations assist you in
adopting an economical driving style. The rec- ommended gear is shown in the multifunction
display.
X Shift to recommended gear ;according
to gearshift recommendation :when
shown in the multifunction display of the
instrument cluster.
Deactivating
If you have activated manual drive program
M, it will remain active for a certain amount of time. Under certain conditions the minimum
amount of time is extended, e.g. in the case of lateral acceleration, during an overrun phase
or when driving on steep terrain.
If manual drive program Mhas been deacti-
vated, the automatic transmission shifts into
the automatic drive program that was last
selected, i.e. Eor S.
You can also deactivate manual drive pro-
gram Myourself:
X Pull on the right-hand steering wheel gear-
shift paddle and hold it in place
(Y page 169).
or
X Use the lever to switch the transmission
position.
or X Use the program selector button to change
the drive program (Y page 167).
Manual drive program Mis deactivated.
The automatic transmission switches into
the automatic drive program that was last
selected, i.e. Eor S. Manual drive program
General notes In this drive program, you can permanently
change gear yourself by using the steering
wheel gearshift paddles. The transmission
must be in position D.
i In addition to permanent drive program
M, you can also activate temporary drive
program M(Y page 169).
Activating the manual drive program Manual drive program
Mdiffers from drive
program Swith regard to spontaneity,
responsiveness and the smoothness of the
gear changes.
You can select manual drive program Mwith
the program selector button or the drive pro-
gram selector (AMG vehicles ). In manual
drive program M, you can change gear your-
self using the steering wheel gearshift pad- 170
Automatic transmissionDriving and parking
Page 174 of 637
dles if the transmission is in position
D. The
selected gear appears in the multifunction
display.
X Press the program selector button until M
(Y page 167) appears in the multifunction
display.
X AMG vehicles: turn the drive program
selector until Mappears in the multifunc-
tion display (Y page 168).
Shifting up X
Pull the right-hand steering wheel gearshift
paddle (Y page 169).
The automatic transmission shifts up to the next gear.
Before the engine speed reaches the red
area, an upshift indicator will be shown in
the multifunction display.
Gearshift recommendation The gearshift recommendations assist you in
adopting an economical driving style. The rec- ommended gear is shown in the multifunction
display.
X Shift to recommended gear ;according
to gearshift recommendation :when
shown in the multifunction display of the
instrument cluster.
AMG vehicles !
In manual gearshift program
M, the auto-
matic transmission does not shift up auto-
matically even when the engine limiting
speed for the current gear is reached.
When the engine limiting speed is reached, the fuel supply is cut to prevent the engine
from overrevving. You must make sure that the engine speed does not reach the red
area of the rev counter. Otherwise, there is
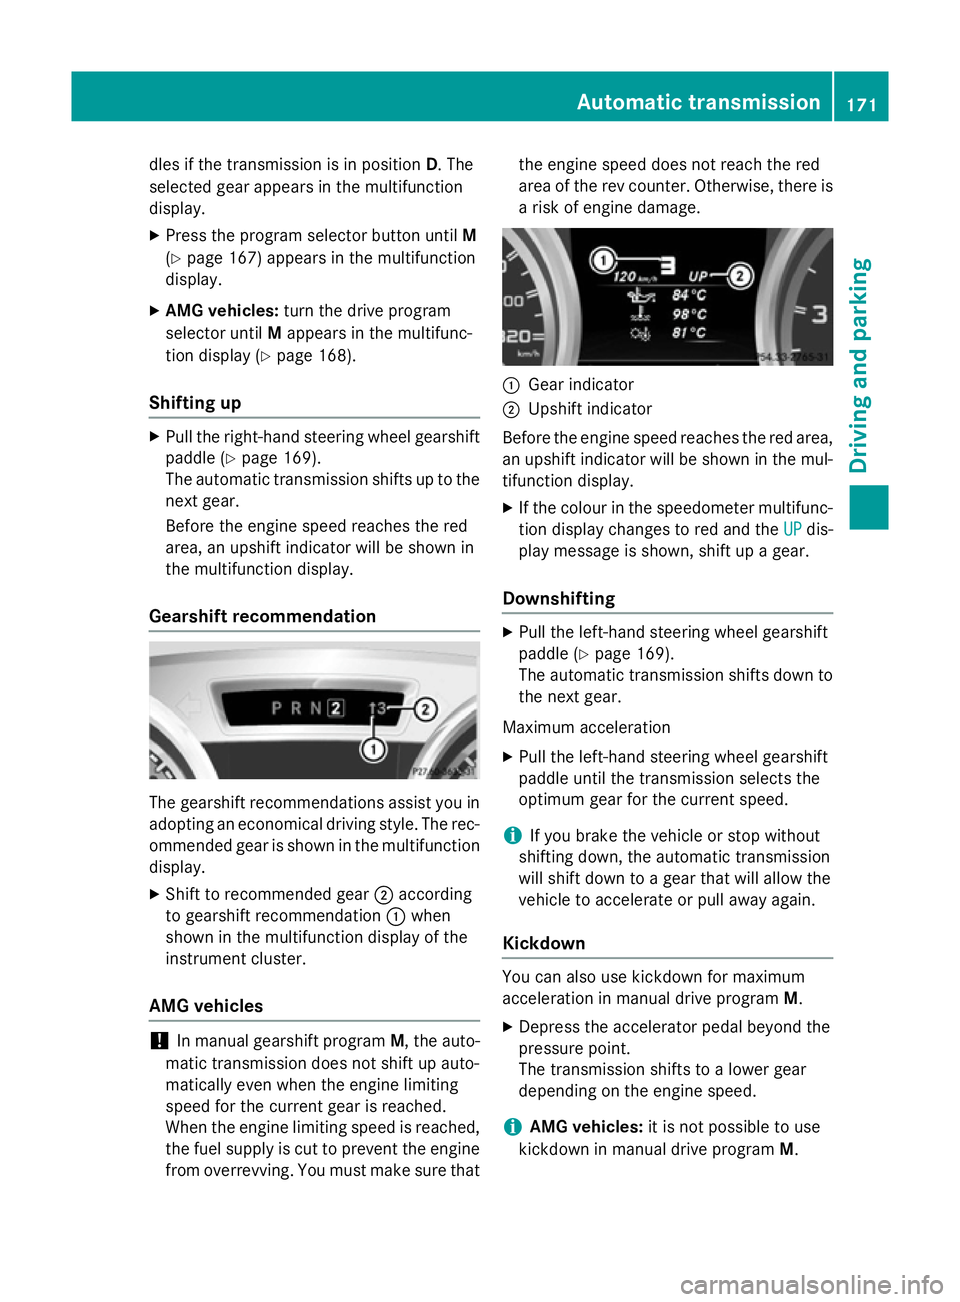
a risk of engine damage. :
Gear indicator
; Upshift indicator
Before the engine speed reaches the red area, an upshift indicator will be shown in the mul-
tifunction display.
X If the colour in the speedometer multifunc-
tion display changes to red and the UP UPdis-
play message is shown, shift up a gear.
Downshifting X
Pull the left-hand steering wheel gearshift
paddle (Y page 169).
The automatic transmission shifts down to
the next gear.
Maximum acceleration X Pull the left-hand steering wheel gearshift
paddle until the transmission selects the
optimum gear for the current speed.
i If you brake the vehicle or stop without
shifting down, the automatic transmission
will shift down to a gear that will allow the
vehicle to accelerate or pull away again.
Kickdown You can also use kickdown for maximum
acceleration in manual drive program M.
X Depress the accelerator pedal beyond the
pressure point.
The transmission shifts to a lower gear
depending on the engine speed.
i AMG vehicles:
it is not possible to use
kickdown in manual drive program M. Automatic transmission
171Driving and parking Z
Page 182 of 637
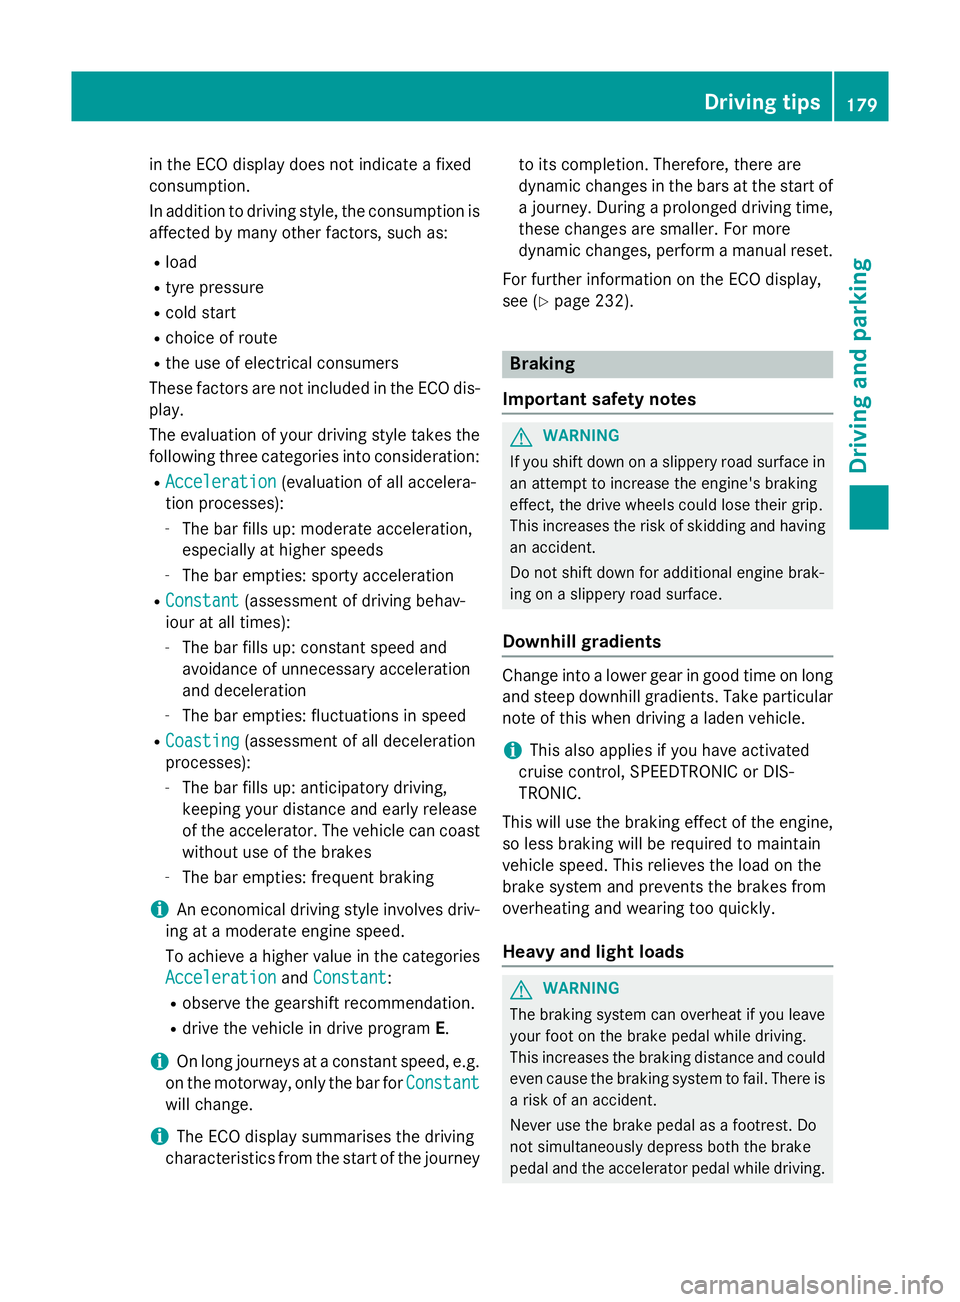
in the ECO display does not indicate a fixed
consumption.
In addition to driving style, the consumption is
affected by many other factors, such as:
R load
R tyre pressure
R cold start
R choice of route
R the use of electrical consumers
These factors are not included in the ECO dis-
play.
The evaluation of your driving style takes the following three categories into consideration:
R Acceleration
Acceleration (evaluation of all accelera-
tion processes):
- The bar fills up: moderate acceleration,
especially at higher speeds
- The bar empties: sporty acceleration
R Constant Constant (assessment of driving behav-
iour at all times):
- The bar fills up: constant speed and
avoidance of unnecessary acceleration
and deceleration
- The bar empties: fluctuations in speed
R Coasting
Coasting (assessment of all deceleration
processes):
- The bar fills up: anticipatory driving,
keeping your distance and early release
of the accelerator. The vehicle can coast
without use of the brakes
- The bar empties: frequent braking
i An economical driving style involves driv-
ing at a moderate engine speed.
To achieve a higher value in the categories
Acceleration
Acceleration andConstant Constant :
R observe the gearshift recommendation.
R drive the vehicle in drive program E.
i On long journeys at a constant speed, e.g.
on the motorway, only the bar for Constant
Constant
will change.
i The ECO display summarises the driving
characteristics from the start of the journey to its completion. Therefore, there are
dynamic changes in the bars at the start of
a journey. During a prolonged driving time, these changes are smaller. For more
dynamic changes, perform a manual reset.
For further information on the ECO display,
see (Y page 232). Braking
Important safety notes G
WARNING
If you shift down on a slippery road surface in an attempt to increase the engine's braking
effect, the drive wheels could lose their grip.
This increases the risk of skidding and having
an accident.
Do not shift down for additional engine brak-
ing on a slippery road surface.
Downhill gradients Change into a lower gear in good time on long
and steep downhill gradients. Take particular note of this when driving a laden vehicle.
i This also applies if you have activated
cruise control, SPEEDTRONIC or DIS-
TRONIC.
This will use the braking effect of the engine,
so less braking will be required to maintain
vehicle speed. This relieves the load on the
brake system and prevents the brakes from
overheating and wearing too quickly.
Heavy and light loads G
WARNING
The braking system can overheat if you leave your foot on the brake pedal while driving.
This increases the braking distance and could
even cause the braking system to fail. There is
a risk of an accident.
Never use the brake pedal as a footrest. Do
not simultaneously depress both the brake
pedal and the accelerator pedal while driving. Driving tips
179Driving and parking Z
Page 184 of 637
brake system warning lamp in the instrument
cluster and note any brake status messages
in the multifunction display. If you regularly
drive at high speeds, it is particularly impor-
tant to have the brake system checked and
maintained regularly. Driving on wet roads
Aquaplaning If water has accumulated to a certain depth
on the road surface, there is a danger of aqua-
planing occurring, even if:
R you are driving at low speeds
R the tyres have adequate tread depth
For this reason, do not drive in tyre ruts, and
brake carefully.
Driving on flooded roads !
Bear in mind that vehicles travelling in
front or in the opposite direction create
waves. This may cause the maximum per-
missible water depth to be exceeded.
These notes must be observed under all
circumstances. You could otherwise dam-
age the engine, the electronics or the trans- mission.
If you have to drive on stretches of road on
which water has collected, please bear in
mind that:
R the maximum permissible fording depth in
still water is 12 cm
R you should drive no faster than walking
pace Winter driving
G
WARNING
If you shift down on a slippery road surface in an attempt to increase the engine's braking
effect, the drive wheels could lose their grip.
This increases the risk of skidding and having
an accident. Do not shift down for additional engine brak-
ing on a slippery road surface.
G
DANGER
If the exhaust pipe is blocked or adequate
ventilation is not possible, poisonous gases
such as carbon monoxide (CO) may enter the vehicle. This is the case, e.g. if the vehicle
becomes trapped in snow. There is a risk of
fatal injury.
If you leave the engine or the auxiliary heating
running, make sure the exhaust pipe and area
around the vehicle are clear of snow. To
ensure an adequate supply of fresh air, open a window on the side of the vehicle that is not
facing into the wind.
! Take care not to damage the sealing strip
and the moulding on the side of the rear
window when scraping ice off the rear win-
dow.
Have your vehicle winterproofed at a qualified specialist workshop at the onset of winter.
You should drive particularly carefully on slip-
pery road surfaces. Avoid sudden accelera-
tion, steering and braking manoeuvres. Do
not use cruise control.
If the vehicle threatens to skid or cannot be
stopped when moving at low speed:
X Move the transmission to position N.
X Try to bring the vehicle under control by
using corrective steering.
The outside temperature indicator is not
designed to serve as an ice-warning device
and is therefore unsuitable for that purpose.
Changes in the outside temperature are dis-
played after a short delay.
Indicated temperatures just above the freez-
ing point do not guarantee that the road sur-
face is free of ice. The road may still be icy,
especially in wooded areas or on bridges. The vehicle could skid if you fail to adapt your
driving style. Always adapt your driving style
and drive at a speed to suit the prevailing
weather conditions. Driving tips
181Driving and parking Z