key MERCEDES-BENZ SL ROADSTER 2018 COMAND Manual
[x] Cancel search | Manufacturer: MERCEDES-BENZ, Model Year: 2018, Model line: SL ROADSTER, Model: MERCEDES-BENZ SL ROADSTER 2018Pages: 190, PDF Size: 4.42 MB
Page 98 of 190
Further information about ending a call
(Ypage 99).
iIf the phone number of the caller is trans-
ferred, it appears in the display. If the phone
number is saved in the phone book, the con-
tact's name and picture are also displayed. If
the phone number is not transferred,
Unknown
is shown in the display.
Rejecting a call
XTo select =Reject: turn and press the
controller.
or
XPress ~on the multifunction steering
wheel.
Making a call
Using the telephone menu
XTo call up the telephone menu: press the
% button.
XTo select the sequence of numbers: turn and
press the controller for each number.
XTo select win the telephone menu: turn
and press the controller.
The call is made.
Further information about ending a call
(
Ypage 99).
Using the number keypad
XTo call up the telephone menu: press the
% button.
XEnter the number sequence using the number
keypad.
XTo select win the telephone menu: turn
and press the controller.
The call is made.
Redial number
XTo call up the telephone menu: press the
% button.
XTo select win the telephone menu: turn
and press the controller.
The list of outgoing calls is displayed. The
most recently dialed number is at the top.
XTo select an entry and make a call: turn and
press the controller.
For redialing using the multifunction steering
wheel (see the vehicle Operator's Manual).
Further information about ending a call
(
Ypage 99).
Using call lists
XTo call up the telephone menu: press the
% button.
XTo switch to the menu bar: slide 6the con-
troller.
XTo select Call Lists: turn and press the
controller.
XTo select CallsReceivedorCallsDialed:
turn and press the controller.
The relevant list is displayed.
XTo select an entry and make a call: turn and
press the controller.
Selecting and placing a call using the multifunc- tion steering wheel (see vehicle Operator's Man-
ual)
Further information about ending a call
(
Ypage 99).
Using the phone book
XTo call up the telephone menu: press the
% button.
XTo select thesymbol in the telephone
menu: turn and press the controller.
XSearch for and call a contact (Ypage 100).
Selecting and placing a call using the multifunc- tion steering wheel (see vehicle Operator's Man-
ual)
Further information about ending a call
(
Ypage 99).
96Using the telephone
Telephone
Page 100 of 190
Switching off the microphone:
XTo switch to the menu bar: slide6the con-
troller.
XTo select Microphone Off: turn and press
the controller.
If the microphone is switched off, the Q
symbol and the The microphone is off.
message are displayed.
Switching on the microphone:
XSelect Microphone On.
The Qsymbol disappears. The The micro‐
phone is on.message is shown.
Sending DTMF tones
This function is not supported by all mobile
phones.
Answering machines or other devices can be
controlled by DTMF tones, e.g. for remote query
functions.
XIf you would like to listen to the messages on
your answering machine, for example, dial the
corresponding number.
Transmitting individual characters
XOnce a connection has been established to
the answer phone, select the desired charac-
ters in the telephone menu: turn and press the
controller each time.
or
XPress the corresponding key on the number
keypad.
Every character selected will be transmitted
immediately.
Calls with several participants
Switching between calls (call waiting)
If you make another call, you can switch
between the two calls (call waiting). This func-
tion depends on your mobile phone network
provider and the mobile phone (see the manu-
facturer's operating instructions).
The calls are marked 1 and 2. The active call is
highlighted. Switching between the calls
XPress
6on the multifunction steering
wheel.
or
XTo select °1or°2: turn and press the con-
troller.
The selected call is active. The other call is on
hold.
Ending the active call
XTo select =in the telephone menu: turn
and press the controller.
or
XPress ~on the multifunction steering
wheel.
The other call is still on hold.
XTo activate the call on hold: select wResume.
The call on hold is activated. If you select
=
HangUp, the call on hold is also ended.
iOn some mobile phones, the call on hold is
activated as soon as the active call is ended.
Conference call
This function depends on your mobile phone
network provider and the mobile phone (see the
manufacturer's operating instructions). You can
interconnect active and held calls. This permits several parties to hear one another and speak
with one another.
XAdd a call (Ypage 97).
or
XAnswer an incoming call (Ypage 98).
XTo select Conferencein the telephone menu:
turn and press the controller.
The new participant is included in the confer-
ence call. Conference Call
is displayed in
the telephone menu.
Incoming call during an existing call
(call waiting)
The call waiting function depends on your
mobile phone network provider and your mobile
phone. Depending on the mobile phone used,
behavior when answering a call may vary (see
the manufacturer's operating instructions).
Call waiting: if you receive a call while already
in a call, a message is shown. You also hear a
98Using the telephone
Telephone
Page 102 of 190
You can now search for a contact
(Ypage 100).
Further information on the symbols shown
(
Ypage 100).
iYou can also call up the phone book with the
multifunction steering wheel; see the vehicle
Operator's Manual.
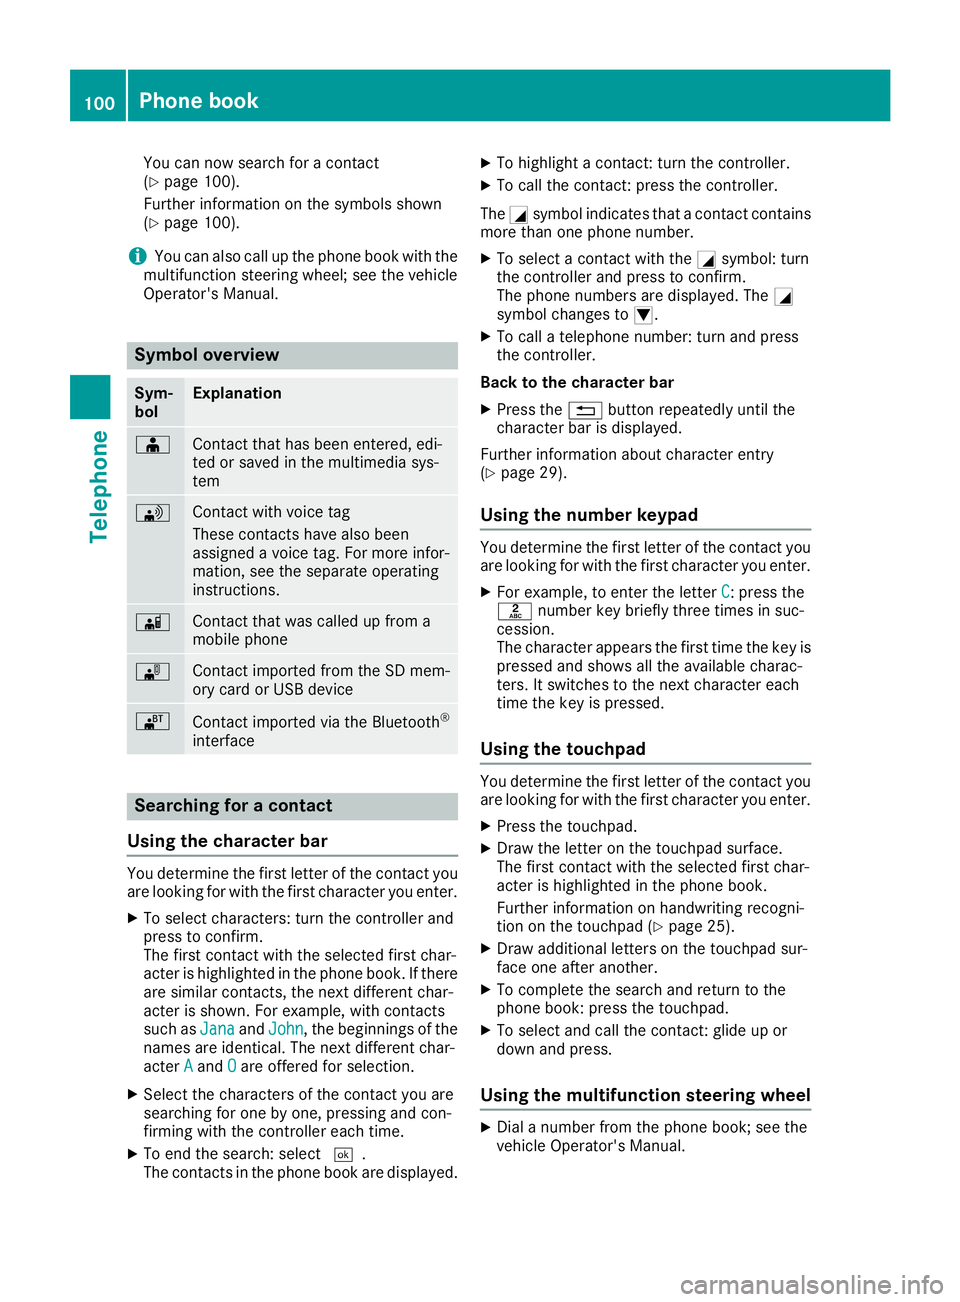
Symbol overview
Sym-
bolExplanation
ÆContact that has been entered, edi-
ted or saved in the multimedia sys-
tem
\Contact with voice tag
These contacts have also been
assigned a voice tag. For more infor-
mation, see the separate operating
instructions.
ÃContact that was called up from a
mobile phone
¯Contact imported from the SD mem-
ory card or USB device
®Contact imported via the Bluetooth®
interface
Searching for a contact
Using the character bar
You determine the first letter of the contact you
are looking for with the first character you enter.
XTo select characters: turn the controller and
press to confirm.
The first contact with the selected first char-
acter is highlighted in the phone book. If there
are similar contacts, the next different char-
acter is shown. For example, with contacts
such as Jana
andJohn, the beginnings of the
names are identical. The next different char-
acter A
andOare offered for selection.
XSelect the characters of the contact you are
searching for one by one, pressing and con-
firming with the controller each time.
XTo end the search: select ¬.
The contacts in the phone book are displayed.
XTo highlight a contact: turn the controller.
XTo call the contact: press the controller.
The Gsymbol indicates that a contact contains
more than one phone number.
XTo select a contact with the Gsymbol: turn
the controller and press to confirm.
The phone numbers are displayed. The G
symbol changes to I.
XTo call a telephone number: turn and press
the controller.
Back to the character bar
XPress the %button repeatedly until the
character bar is displayed.
Further information about character entry
(
Ypage 29).
Using the number keypad
You determine the first letter of the contact you
are looking for with the first character you enter.
XFor example, to enter the letter C: press the
l number key briefly three times in suc-
cession.
The character appears the first time the key is
pressed and shows all the available charac-
ters. It switches to the next character each
time the key is pressed.
Using the touchpad
You determine the first letter of the contact you
are looking for with the first character you enter.
XPress the touchpad.
XDraw the letter on the touchpad surface.
The first contact with the selected first char-
acter is highlighted in the phone book.
Further information on handwriting recogni-
tion on the touchpad (
Ypage 25).
XDraw additional letters on the touchpad sur-
face one after another.
XTo complete the search and return to the
phone book: press the touchpad.
XTo select and call the contact: glide up or
down and press.
Using the multifunction steering wheel
XDial a number from the phone book; see the
vehicle Operator's Manual.
100Phone book
Telephone
Page 103 of 190
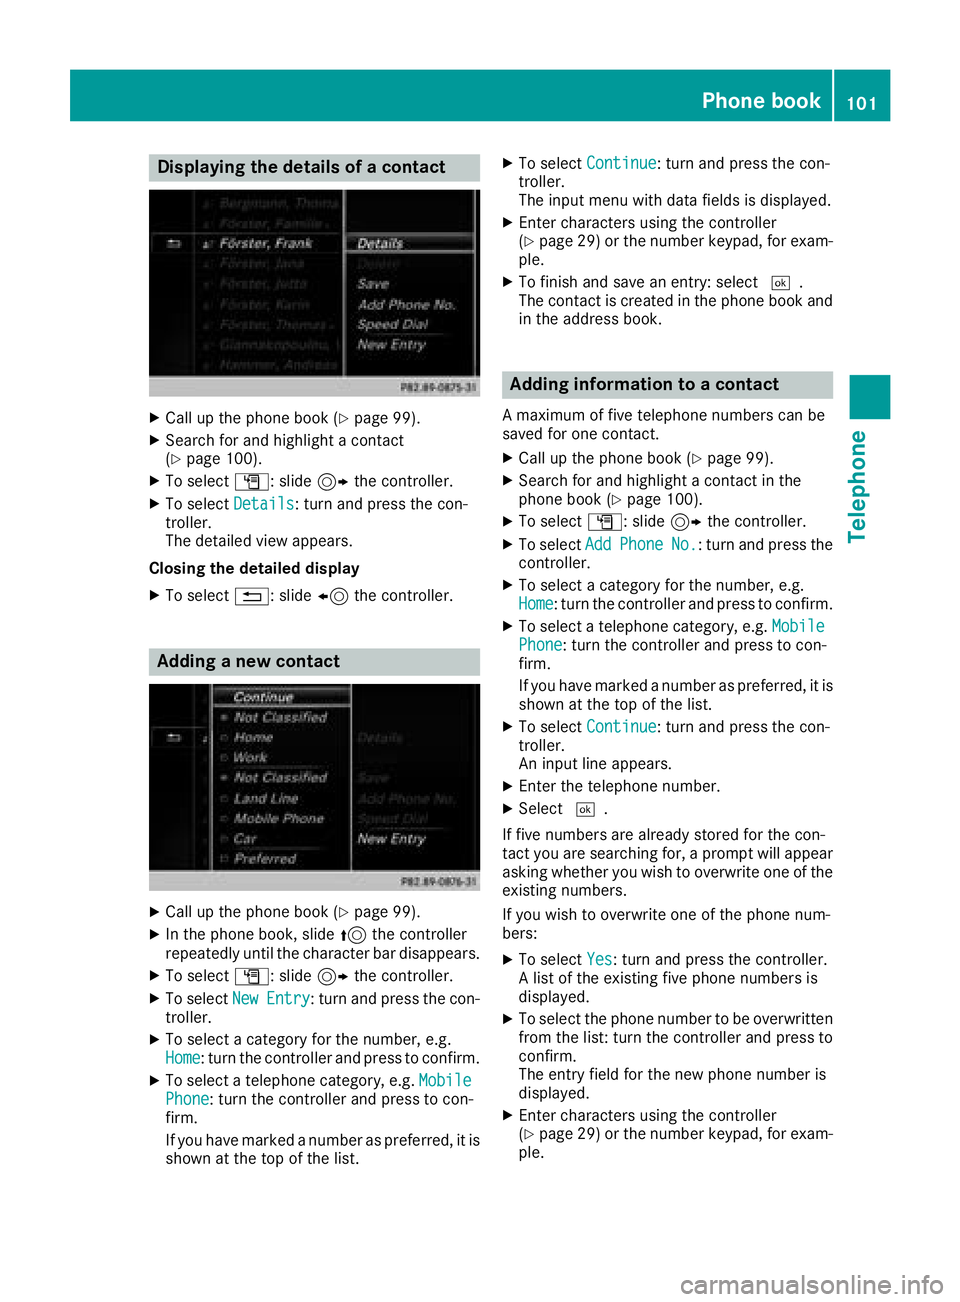
Displaying thedetail sof acontact
XCall up th ephone boo k (Ypage 99).
XSearchfo rand highlight acontact
(Ypage 100).
XTo selec tG: slide9 thecontroller .
XTo selectDetail s:turn and press th econ-
troller.
The detailed vie wappears .
Closing th edetailed display
XTo selec t%: slide8 thecontroller .
Addinganew contact
XCall up th ephone boo k (Ypage 99).
XIn thephone book, slid e5 thecontroller
repeatedly until th echaracte rbar disappears .
XTo selectG: slide9 thecontroller .
XTo selectNewEntry:turn and press th econ-
troller.
XTo selec t acategory fo rth enumber ,e.g.
Hom e:turn th econtroller and press to confirm .
XTo select atelephon ecategory, e.g. MobilePhone:turn th econtroller and press to con-
firm.
If you hav emarke d anumber as preferred, it is
shown at th eto pof th elist .
XTo selec tContinue:turn and press th econ-
troller.
The input men uwit hdat afields is displayed.
XEnte rcharacters usin gth econtroller
(Ypage 29) or th enumber keypad, fo rexam-
ple.
XTo finish and sav ean entry: selec t¬.
The contact is created in th ephone boo kand
in th eaddress book.
Adding information to acontact
A maximum of fiv etelephon enumber scan be
saved fo ron econtact .
XCall up th ephone boo k (Ypage 99).
XSearchfo rand highlight acontact in th e
phone boo k (Ypage 100).
XTo selectG: slide9 thecontroller .
XTo selectAddPhoneNo.:turn and press th e
controller .
XTo select acategory fo rth enumber ,e.g.
Hom e:turn th econtroller and press to confirm .
XTo select atelephon ecategory, e.g. MobilePhone:turn th econtroller and press to con-
firm.
If you hav emarke d anumber as preferred, it is
shown at th eto pof th elist .
XTo selec tContinue:turn and press th econ-
troller.
An input lin eappears .
XEnterth etelephon enumber .
XSelect¬.
If fiv enumber sare already stored fo rth econ-
tact you are searchin gfor, aprompt will appear
askin gwhether you wish to overwrit eon eof th e
existin gnumbers.
If you wish to overwrit eon eof th ephone num -
bers:
XTo selec tYes:turn and press th econtroller .
A list of th eexistin gfiv ephone number sis
displayed.
XTo selec tth ephone number to be overwritte n
from th elist :turn th econtroller and press to
confirm .
The entr yfield fo rth ene wphone number is
displayed.
XEnte rcharacters usin gth econtroller
(Ypage 29) or th enumber keypad, fo rexam-
ple.
Phone book101
Telephone
Z
Page 106 of 190
Using the number keypad
You determine the first letter of the contact you
are looking for with the first character you enter.
XFor example, to enter the letterC: press the
l number key briefly three times in suc-
cession.
The character appears the first time the key is
pressed and shows all the available charac-
ters. It switches to the next character each
time the key is pressed.
Using the touchpad
You determine the first letter of the contact you
are looking for with the first character you enter.
XDraw the letter on the touchpad surface.
The first contact with the selected first char-
acter is highlighted in the address book.
Further information on handwriting recogni-
tion on the touchpad (
Ypage 25).
XDraw additional letters on the touchpad sur-
face one after another.
XTo complete the search and return to the
address book: press the touchpad.
XTo select and call the contact: glide up or
down and press.
Adding a new contact
You can enter address data directly into the
address book. If you store telephone numbers in the phone book of the multimedia system, these
are also saved in the address book. If you store
a navigation destination, the multimedia system
creates an address book entry that includes the
complete navigable address data.
XCall up the address book (Ypage 103).
XTo switch to the menu bar: slide 6the con-
troller.
XTo select New: turn and press the controller.
The surname and first name input lines are
displayed.
XEnter characters using the controller
(Ypage 29) or the number keypad, for exam-
ple.
XTo save the surname and first name: select
b.
The details for the contact are displayed.
XTo add a desired entry: turn and press the
controller.
Depending on the type of entry, the corre-
sponding input menu appears.
XEnter characters using the controller
(Ypage 29) or the number keypad, for exam-
ple.
XTo finish and save an entry: select b.
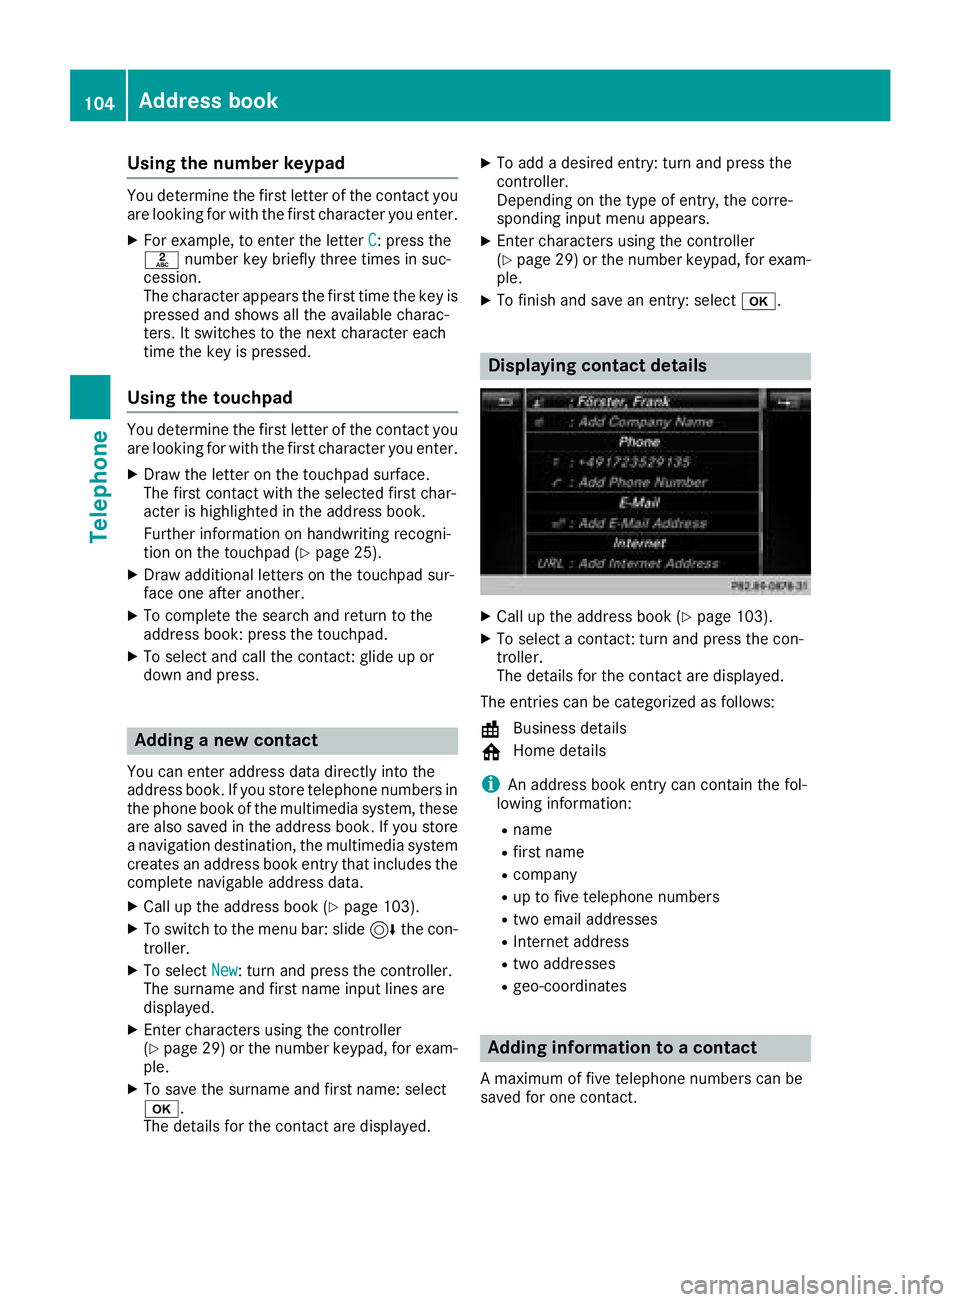
Displaying contact details
XCall up the address book (Ypage 103).
XTo select a contact: turn and press the con-
troller.
The details for the contact are displayed.
The entries can be categorized as follows:
\ Business details
6 Home details
iAn address book entry can contain the fol-
lowing information:
Rname
Rfirst name
Rcompany
Rup to five telephone numbers
Rtwo email addresses
RInternet address
Rtwo addresses
Rgeo-coordinates
Adding information to a contact
A maximum of five telephone numbers can be
saved for one contact.
104Address book
Telephone
Page 107 of 190
XCallup the address book (Ypage 103).
XTo select a contact: turn and press the con-
troller.
The details for the contact are displayed.
XTo select the desired entry: turn and press the
controller.
Dependin g on the type of entry, the corre-
spondin g input menu appears.
XEnter characters using the controller or the
number keypad, for example (Ypage 29).
XTo finish and save an entry: select b.
Starting route guidance to an address
or geo-coordinates
Ifan address with a ZIP co de issaved,the
address can beused for route guidance. Ifthe
ZIP co decannot beassigned to an exact
address, you can adjust the destination subse-
quently using the controller.
XCall up the address book (Ypage 103).
XTo select a contact: turn and press the con-
troller.
The details for the contact are displayed.
XTo select the address or geo-coordinates:
turn and press the controller.
The navigation menu is displayed.
XTo select StartRouteGuidance:slide 6
and press the controller.
The route to the destination addressiscalcu-
lated and route guidance starts.
Making a call
XCall up the address book (Ypage 103).
XTo select a contact: turn and press the con-
troller.
The details for the contact are displayed.
XTo select a telephone number: turn and press
the controller.
The number is dialed.Further information
about the functions during a call (
Ypage 97).
Sending text messages
XCall up the address book (Ypage 103).
XTo select a contact: turn and press the con-
troller.
The details for the contact are displayed.
XTo highlight the telephone number: turn the
controller.
XTo select G: slide 9the controller.
XTo select Send Text Message: turn and
press the controller.
The entry fields for a text message are dis-
played (
Ypage 115).
Observe the requirements for the message func-
tion (
Ypage 111).
Sending an e-mail
XCall up the address book (Ypage 103).
XSelect an entry: turn and press the controller.
The details for the contact are displayed.
XTo select an e-mail address: turn and press
the controller.
The entry fields for an e-mail are displayed
(
Ypage 115).
Observe the requirements for the message func-
tion (
Ypage 111).
Displaying sub-entry information
XCall up the address book (Ypage 103).
XSelect an entry: turn and press the controller.
The details for the contact are displayed.
XTo highlight the desired entry: turn the con-
troller.
XTo selectG: slide 9the controller.
XTo select Details: turn and press the con-
troller.
The display is shown in full.
XTo close the detailed display: press the
% button.
Editing a contact
XCall up the address book (Ypage 103).
XTo select a contact: turn and press the con-
troller.
The details for the contact are displayed.
XTo highlight the desired entry: turn the con-
troller.
XTo selectG: slide 9the controller.
XTo select Edit: turn and press the controller.
The entry field for the selected entry isdis-
played.
Address book105
Telephone
Z
Page 112 of 190
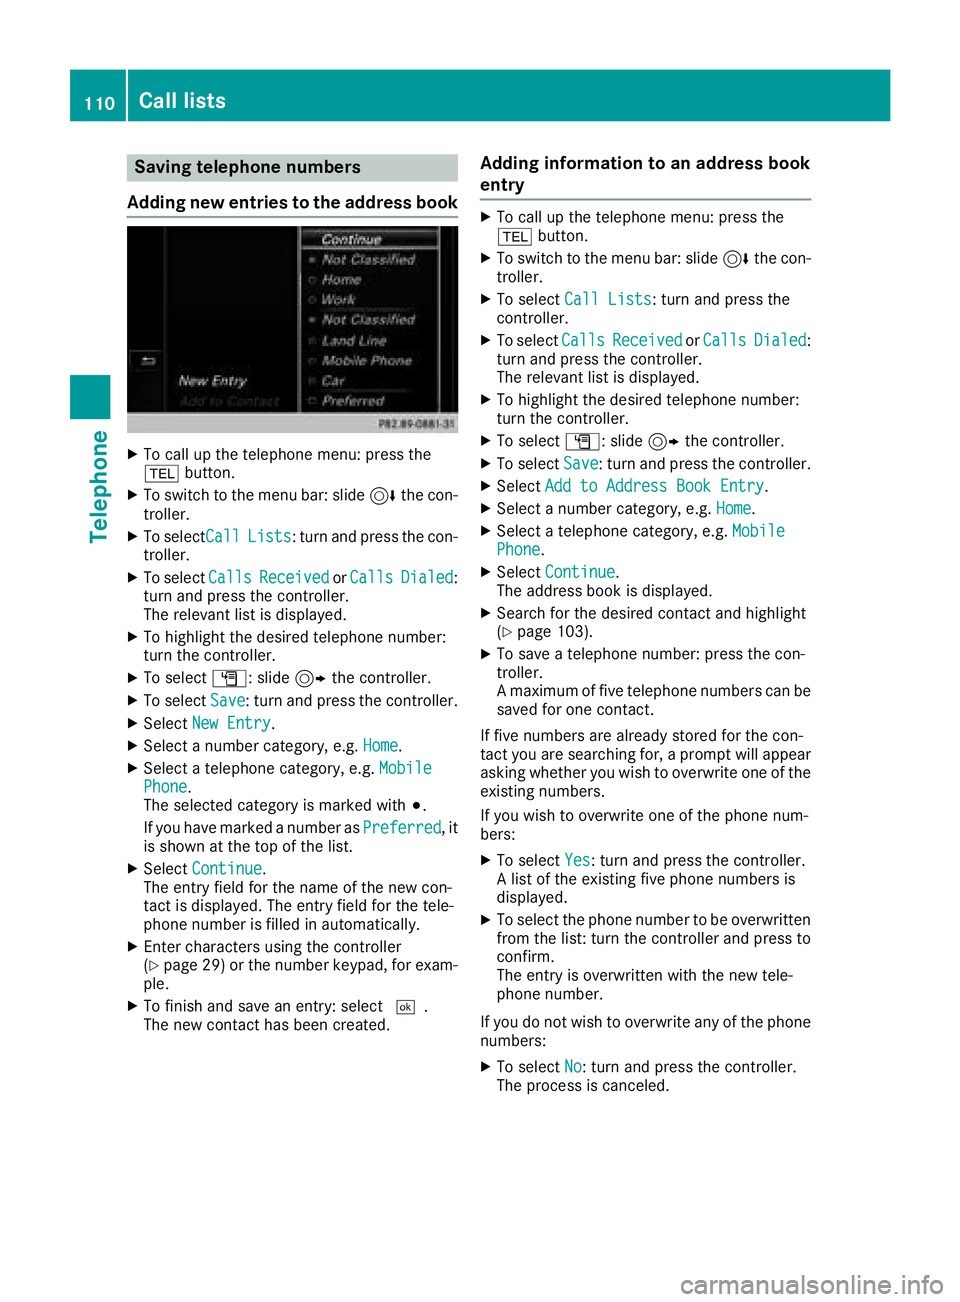
Saving telephone numbers
Adding new entries to the address book
XTo call up the telephone menu: press the
% button.
XTo switch to the menu bar: slide 6the con-
troller.
XTo select CallLists: turn and press the con-
troller.
XTo select CallsReceivedorCallsDialed:
turn and press the controller.
The relevant list is displayed.
XTo highlight the desired telephone number:
turn the controller.
XTo select G: slide 9the controller.
XTo select Save: turn and press the controller.
XSelectNew Entry.
XSelect a number category, e.g. Home.
XSelect a telephone category, e.g. MobilePhone.
The selected category is marked with #.
If you have marked a number as Preferred
, it
is shown at the top of the list.
XSelect Continue.
The entry field for the name of the new con-
tact is displayed. The entry field for the tele-
phone number is filled in automatically.
XEnter characters using the controller
(Ypage 29) or the number keypad, for exam-
ple.
XTo finish and save an entry: select ¬.
The new contact has been created.
Adding information to an address book
entry
XTo call up the telephone menu: press the
% button.
XTo switch to the menu bar: slide 6the con-
troller.
XTo select Call Lists: turn and press the
controller.
XTo select CallsReceivedorCallsDialed:
turn and press the controller.
The relevant list is displayed.
XTo highlight the desired telephone number:
turn the controller.
XTo select G: slide 9the controller.
XTo select Save: turn and press the controller.
XSelectAdd to Address Book Entry.
XSelect a number category, e.g. Home.
XSelect a telephone category, e.g. MobilePhone.
XSelectContinue.
The address book is displayed.
XSearch for the desired contact and highlight
(Ypage 103).
XTo save a telephone number: press the con-
troller.
A maximum of five telephone numbers can be
saved for one contact.
If five numbers are already stored for the con-
tact you are searching for, a prompt will appear
asking whether you wish to overwrite one of the
existing numbers.
If you wish to overwrite one of the phone num-
bers:
XTo select Yes: turn and press the controller.
A list of the existing five phone numbers is
displayed.
XTo select the phone number to be overwritten
from the list: turn the controller and press to
confirm.
The entry is overwritten with the new tele-
phone number.
If you do not wish to overwrite any of the phone
numbers:
XTo select No: turn and press the controller.
The process is canceled.
110Call lists
Telephone
Page 117 of 190
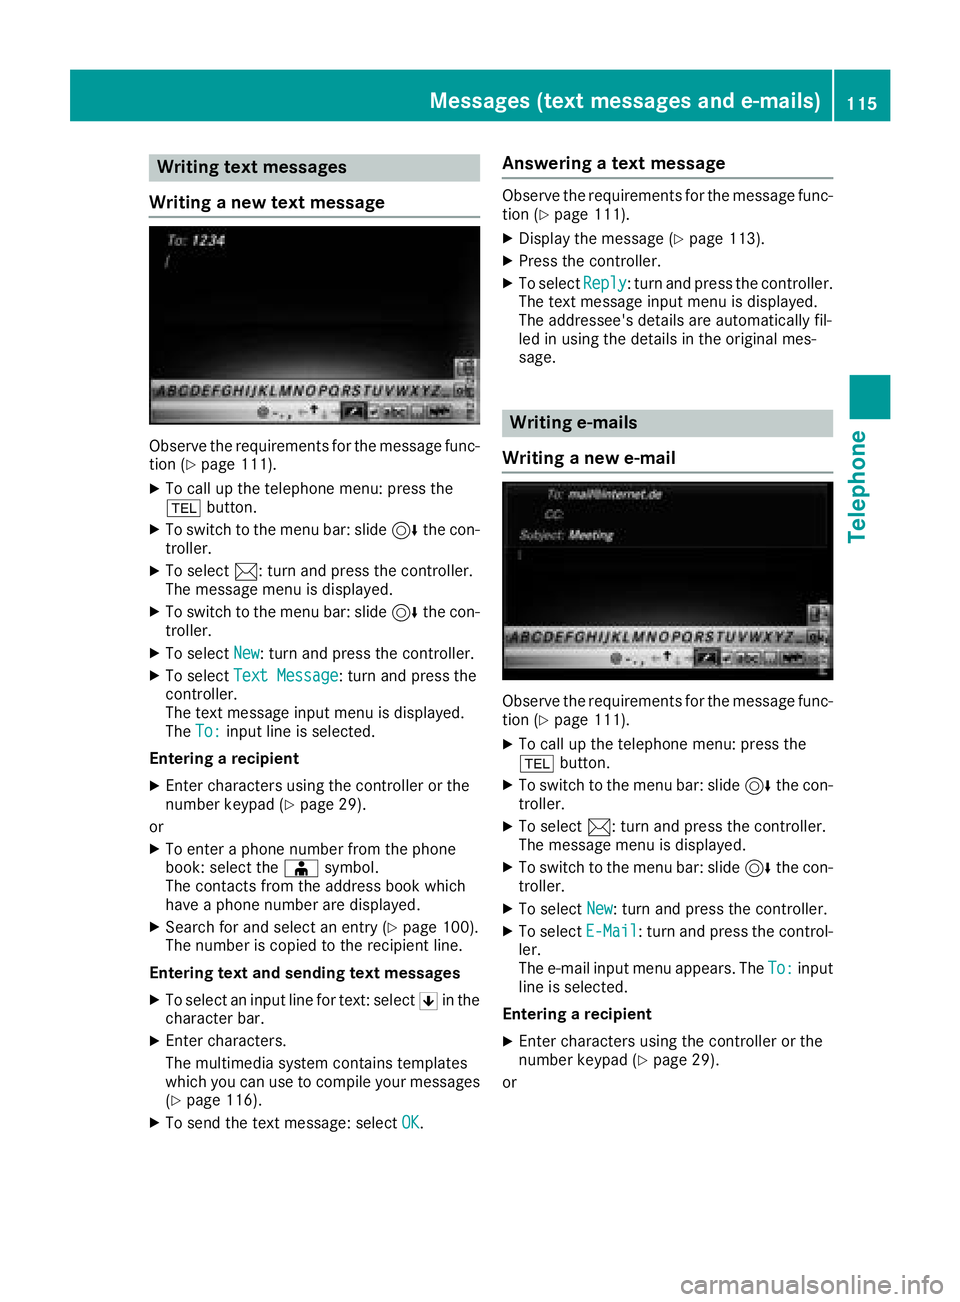
Writing text messages
Writing a new text message
Observe the requirements for the message func-
tion (Ypage 111).
XTo call up the telephone menu: press the
% button.
XTo switch to the menu bar: slide 6the con-
troller.
XTo select 1: turn and press the controller.
The message menu is displayed.
XTo switch to the menu bar: slide 6the con-
troller.
XTo select New: turn and press the controller.
XTo selectText Message: turn and press the
controller.
The text message input menu is displayed.
The To:
input line is selected.
Entering a recipient
XEnter characters using the controller or the
number keypad (Ypage 29).
or
XTo enter a phone number from the phone
book: select the Æsymbol.
The contacts from the address book which
have a phone number are displayed.
XSearch for and select an entry (Ypage 100).
The number is copied to the recipient line.
Entering text and sending text messages
XTo select an input line for text: select 5in the
character bar.
XEnter characters.
The multimedia system contains templates
which you can use to compile your messages
(
Ypage 116).
XTo send the text message: select OK.
Answering a text message
Observe the requirements for the message func-
tion (Ypage 111).
XDisplay the message (Ypage 113).
XPress the controller.
XTo selectReply: turn and press the controller.
The text message input menu is displayed.
The addressee's details are automatically fil-
led in using the details in the original mes-
sage.
Writing e-mails
Writing a new e-mail
Observe the requirements for the message func-
tion (Ypage 111).
XTo call up the telephone menu: press the
% button.
XTo switch to the menu bar: slide 6the con-
troller.
XTo select 1: turn and press the controller.
The message menu is displayed.
XTo switch to the menu bar: slide 6the con-
troller.
XTo select New: turn and press the controller.
XTo selectE-Mail: turn and press the control-
ler.
The e-mail input menu appears. The To:
input
line is selected.
Entering a recipient
XEnter characters using the controller or the
number keypad (Ypage 29).
or
Messages (text messages and e-mails)115
Telephone
Z
Page 118 of 190
XTo insert an e-mail address from the address
book: select theÆsymbol.
The contacts from the address book which
have an e-mail address are displayed.
XSearch for and select an entry (Ypage 100).
The e-mail address is copied to the addressee
line.
Entering the subject
XTo select the Subject:input line: select 5in
the character bar.
XEnter characters.
Entering text and sending e-mails
XTo select an input line for text: select 5in the
character bar.
XEnter characters.
The multimedia system contains templates
which you can use to compile your messages
(
Ypage 116).
XTo send the e-mail: select OK.
Answering an e-mail
Observe the requirements for the message func-
tion (Ypage 111).
XDisplay the message (Ypage 113).
XTo call up a menu: press the controller.
XTo selectReply: turn and press the controller.
The e-mail input menu appears. The addres-
see's details are automatically filled in using
the details in the original message.
When replying to an e-mail, you can also select
Reply to All
instead of Reply. In this case,
the reply is sent not just to the sender but to all
those who received the original message.
Forwarding an e-mail
Observe the requirements for the message func-
tion (Ypage 111).
XDisplay the message (Ypage 113).
XTo call up a menu: press the controller.
XTo select Forward: turn and press the con-
troller.
The input menu appears. The subject line is
automatically filled in with the same details as
those in the original message.
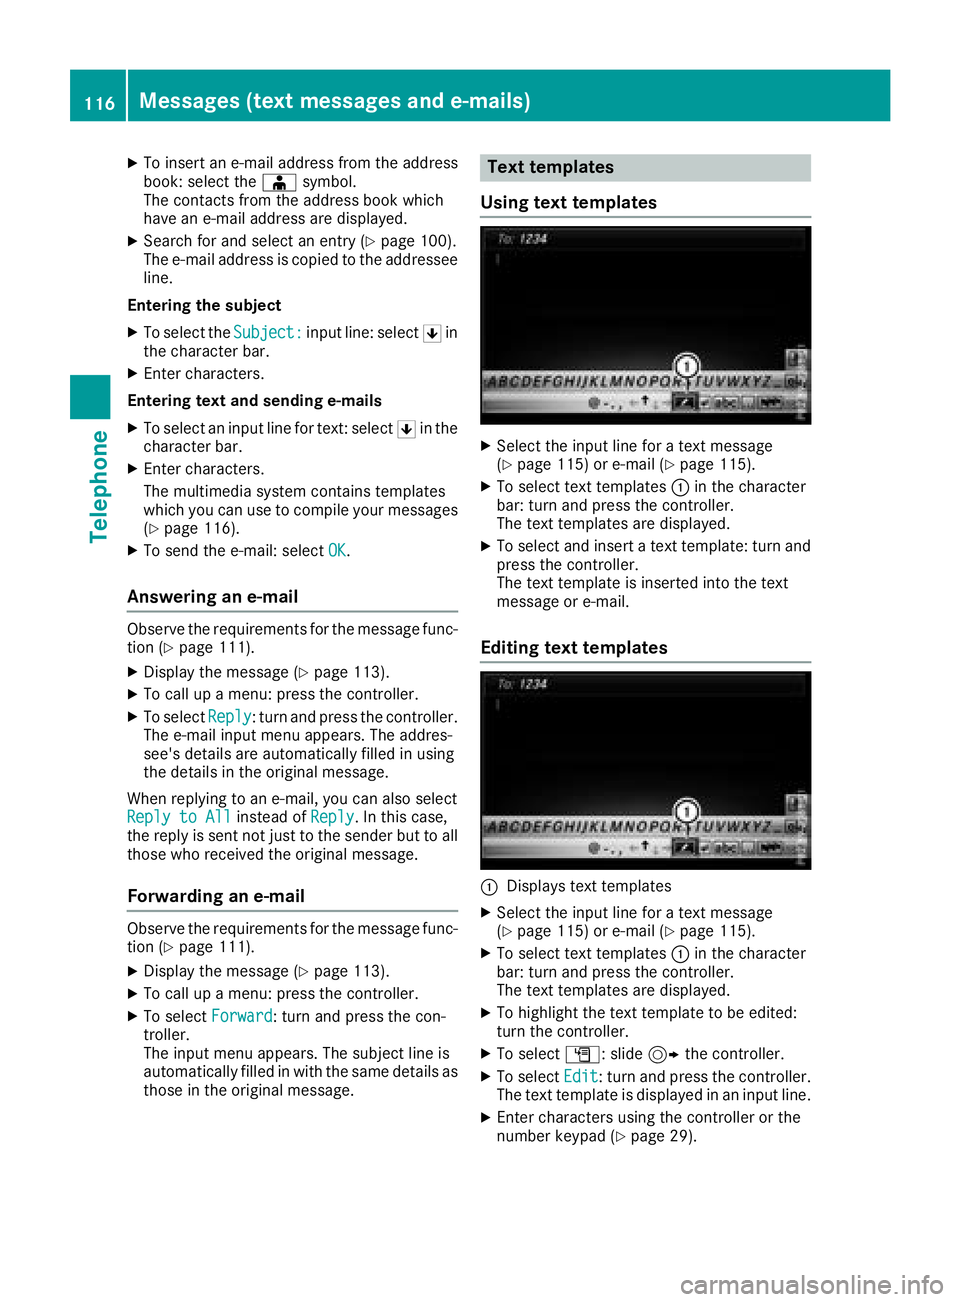
Text templates
Using text templates
XSelect the input line for a text message
(Ypage 115) or e-mail (Ypage 115).
XTo select text templates :in the character
bar: turn and press the controller.
The text templates are displayed.
XTo select and insert a text template: turn and
press the controller.
The text template is inserted into the text
message or e-mail.
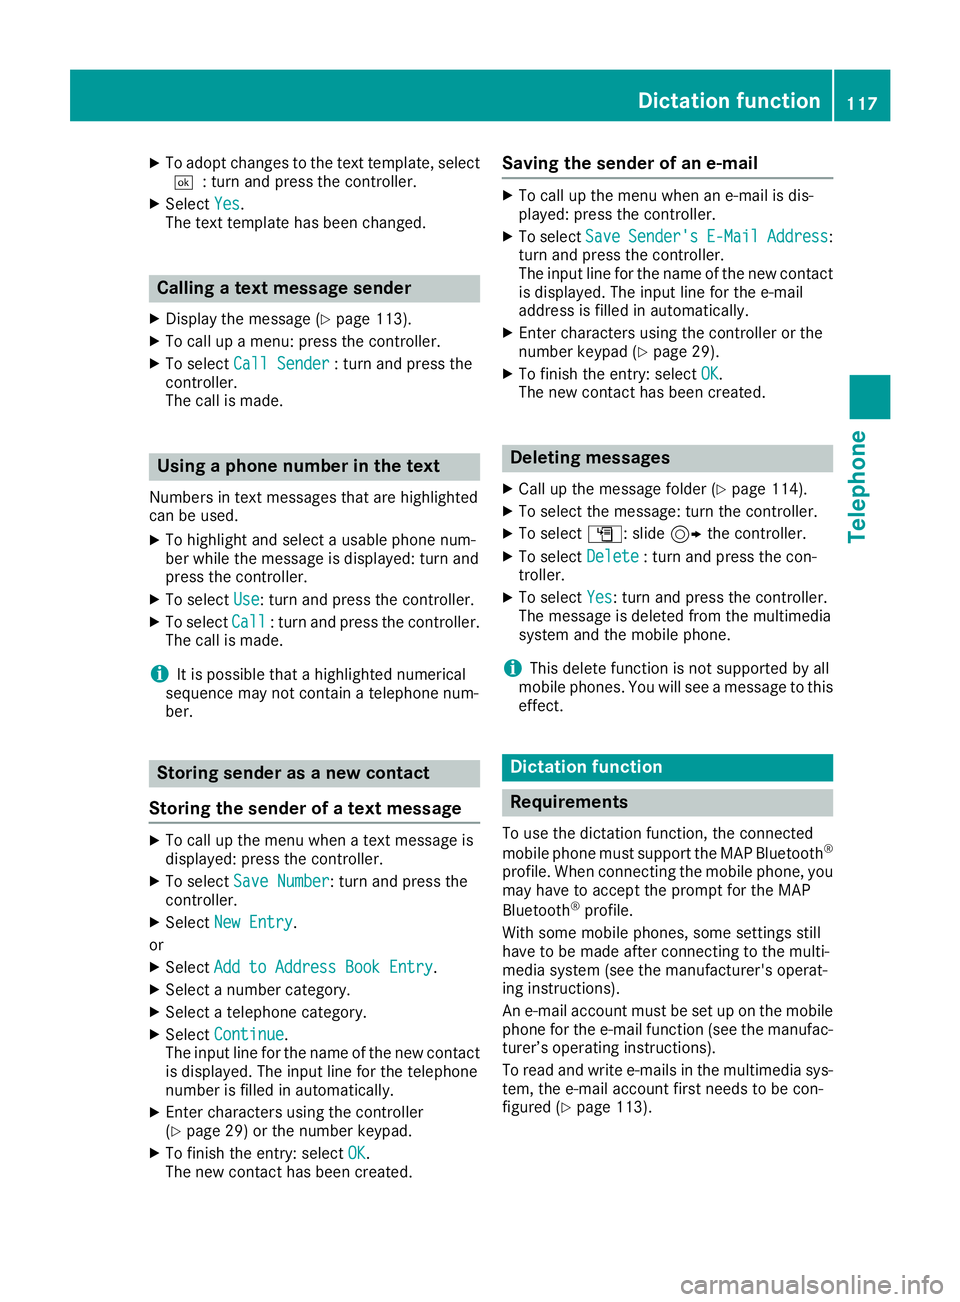
Editing text templates
:Displays text templates
XSelect the input line for a text message
(Ypage 115) or e-mail (Ypage 115).
XTo select text templates :in the character
bar: turn and press the controller.
The text templates are displayed.
XTo highlight the text template to be edited:
turn the controller.
XTo select G: slide 9the controller.
XTo select Edit: turn and press the controller.
The text template is displayed in an input line.
XEnter characters using the controller or the
number keypad (Ypage 29).
116Messages (text messages and e-mails)
Telephone
Page 119 of 190
XTo adopt changes to the text template, select¬: turn and press the controller.
XSelect Yes.
The text template has been changed.
Calling a text message sender
XDisplay the message (Ypage 113).
XTo call up a menu: press the controller.
XTo select Call Sender: turn and press the
controller.
The call is made.
Using a phone number in the text
Numbers in text messages that are highlighted
can be used.
XTo highlight and select a usable phone num-
ber while the message is displayed: turn and
press the controller.
XTo select Use: turn and press the controller.
XTo selectCall: turn and press the controller.
The call is made.
iIt is possible that a highlighted numerical
sequence may not contain a telephone num-
ber.
Storing sender as a new contact
Storing the sender of a text message
XTo call up the menu when a text message is
displayed: press the controller.
XTo select Save Number: turn and press the
controller.
XSelect New Entry.
or
XSelect Add to Address Book Entry.
XSelect a number category.
XSelect a telephone category.
XSelectContinue.
The input line for the name of the new contact
is displayed. The input line for the telephone
number is filled in automatically.
XEnter characters using the controller
(Ypage 29) or the number keypad.
XTo finish the entry: select OK.
The new contact has been created.
Saving the sender of an e-mail
XTo call up the menu when an e-mail is dis-
played: press the controller.
XTo select SaveSender'sE-MailAddress:
turn and press the controller.
The input line for the name of the new contact
is displayed. The input line for the e-mail
address is filled in automatically.
XEnter characters using the controller or the
number keypad (Ypage 29).
XTo finish the entry: select OK.
The new contact has been created.
Deleting messages
XCall up the message folder (Ypage 114).
XTo select the message: turn the controller.
XTo select G: slide 9the controller.
XTo select Delete: turn and press the con-
troller.
XTo select Yes: turn and press the controller.
The message is deleted from the multimedia
system and the mobile phone.
iThis delete function is not supported by all
mobile phones. You will see a message to this
effect.
Dictation function
Requirements
To use the dictation function, the connected
mobile phone must support the MAP Bluetooth®
profile. When connecting the mobile phone, you
may have to accept the prompt for the MAP
Bluetooth
®profile.
With some mobile phones, some settings still
have to be made after connecting to the multi-
media system (see the manufacturer's operat-
ing instructions).
An e-mail account must be set up on the mobile
phone for the e-mail function (see the manufac-
turer’s operating instructions).
To read and write e-mails in the multimedia sys-
tem, the e-mail account first needs to be con-
figured (
Ypage 113).
Dictation function117
Telephone
Z