Page 89 MERCEDES-BENZ SL500 2000 R129 Owner's Manual
[x] Cancel search | Manufacturer: MERCEDES-BENZ, Model Year: 2000, Model line: SL500, Model: MERCEDES-BENZ SL500 2000 R129Pages: 297, PDF Size: 8.33 MB
Page 22 of 297
19 Instruments and controls
Technical
data Instruments
and controlsOperation DrivingInstrument
cluster displayPractical hints Car care Index 1Door control panel, see page 20
2Overhead control panel, see page 213Dashboard, see page 22
4Center console, see page 24
Page 23 of 297
20 Instruments and controls
Technical
data Instruments
and controlsOperation DrivingInstrument
cluster displayPractical hints Car care Index
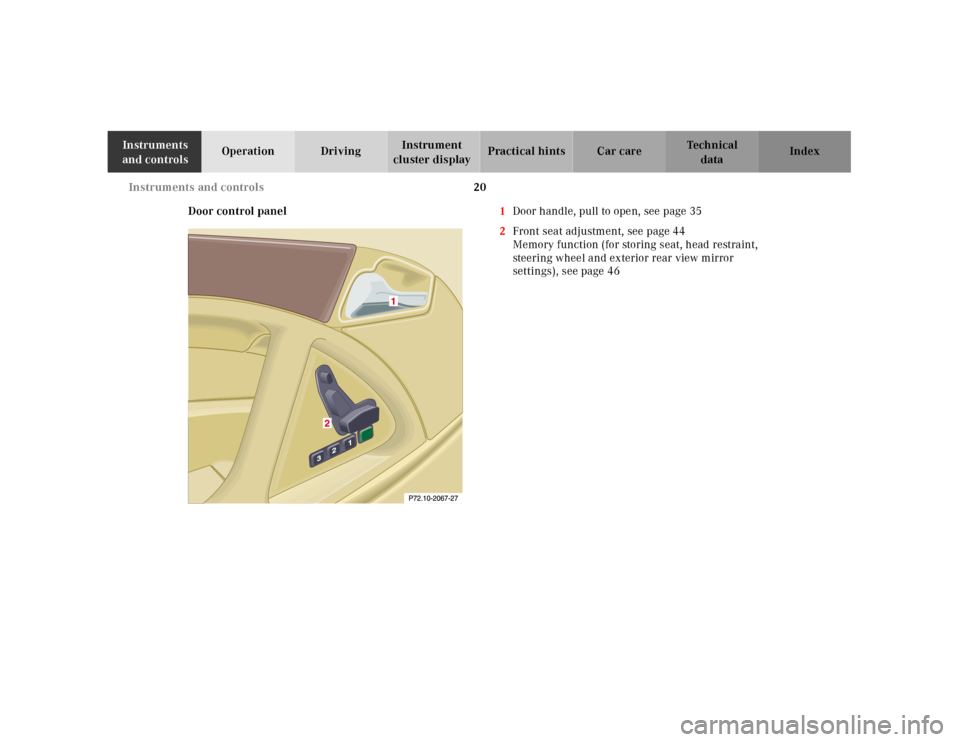
Door control panel1Door handle, pull to open, see page 35
2Front seat adjustment, see page 44
Memory function (for storing seat, head restraint,
steering wheel and exterior rear view mirror
settings), see page 46
Page 24 of 297
21 Instruments and controls
Technical
data Instruments
and controlsOperation DrivingInstrument
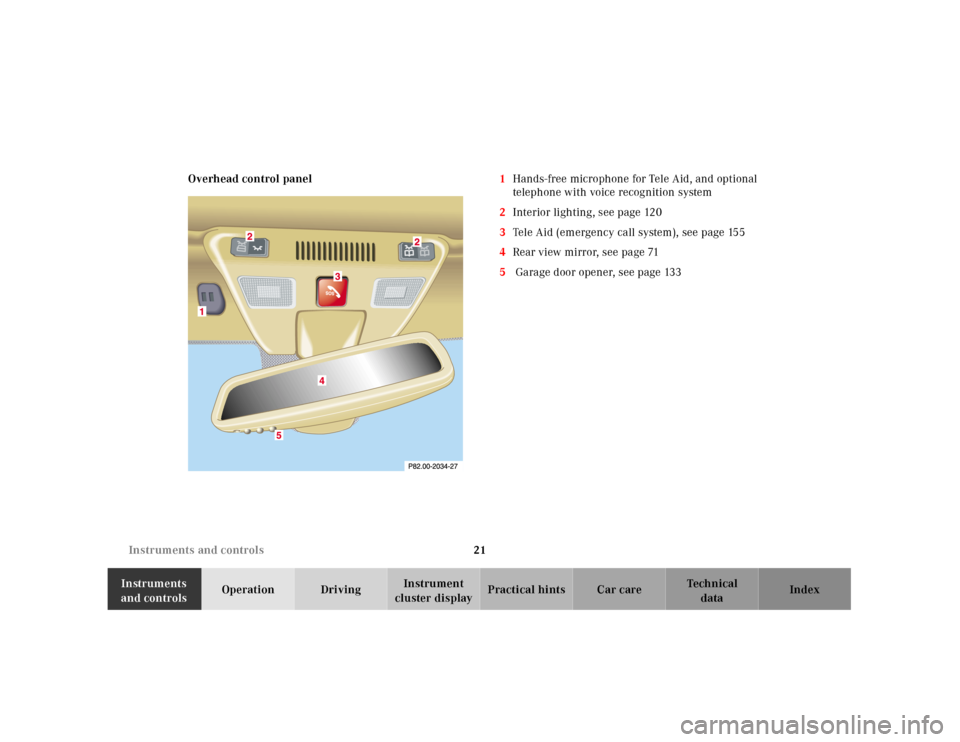
cluster displayPractical hints Car care Index Overhead control panel1Hands-free microphone for Tele Aid, and optional
telephone with voice recognition system
2Interior lighting, see page 120
3Tele Aid (emergency call system), see page 155
4Rear view mirror, see page 71
5 Garage door opener, see page 133
Page 26 of 297
23 Instruments and controls
Technical
data Instruments
and controlsOperation DrivingInstrument
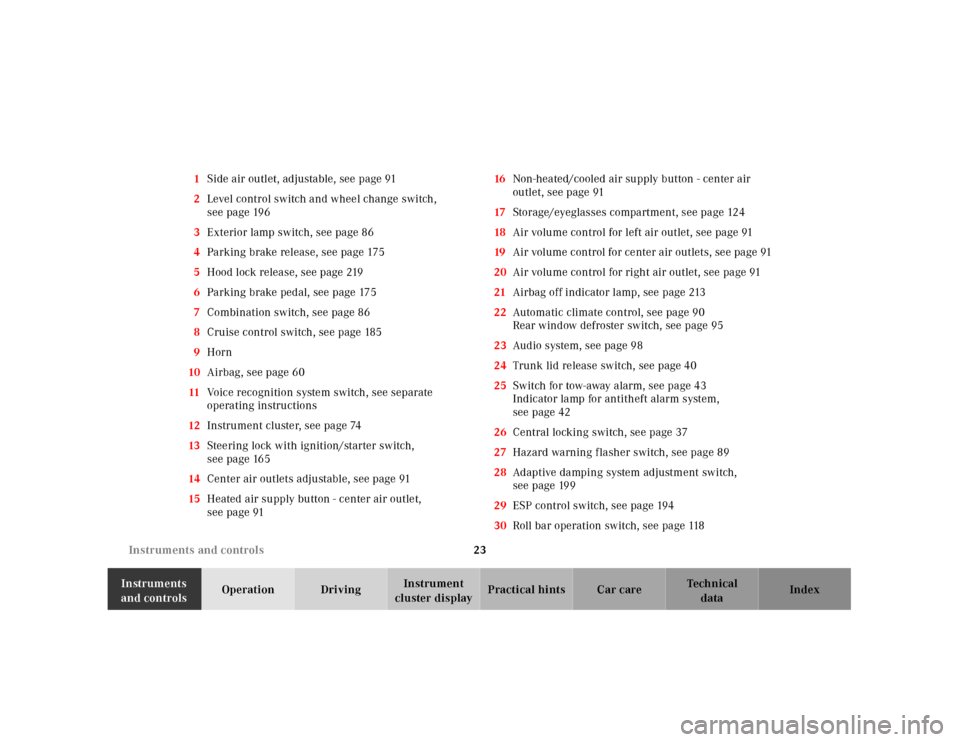
cluster displayPractical hints Car care Index 1Side air outlet, adjustable, see page 91
2Level control switch and wheel change switch,
see page 196
3Exterior lamp switch, see page 86
4Parking brake release, see page 175
5Hood lock release, see page 219
6Parking brake pedal, see page 175
7Combination switch, see page 86
8Cruise control switch, see page 185
9Horn
10Airbag, see page 60
11Voice recognition system switch, see separate
operating instructions
12Instrument cluster, see page 74
13Steering lock with ignition/starter switch,
see page 165
14Center air outlets adjustable, see page 91
15Heated air supply button - center air outlet,
see page 9116Non-heated/cooled air supply button - center air
outlet, see page 91
17Storage/eyeglasses compartment, see page 124
18Air volume control for left air outlet, see page 91
19Air volume control for center air outlets, see page 91
20Air volume control for right air outlet, see page 91
21Airbag off indicator lamp, see page 213
22Automatic climate control, see page 90
Rear window defroster switch, see page 95
23Audio system, see page 98
24Trunk lid release switch, see page 40
25Switch for tow-away alarm, see page 43
Indicator lamp for antitheft alarm system,
see page 42
26Central locking switch, see page 37
27Hazard warning f lasher switch, see page 89
28Adaptive damping system adjustment switch,
see page 199
29ESP control switch, see page 194
30Roll bar operation switch, see page 118
Page 27 of 297
24 Instruments and controls
Technical
data Instruments
and controlsOperation DrivingInstrument
cluster displayPractical hints Car care Index
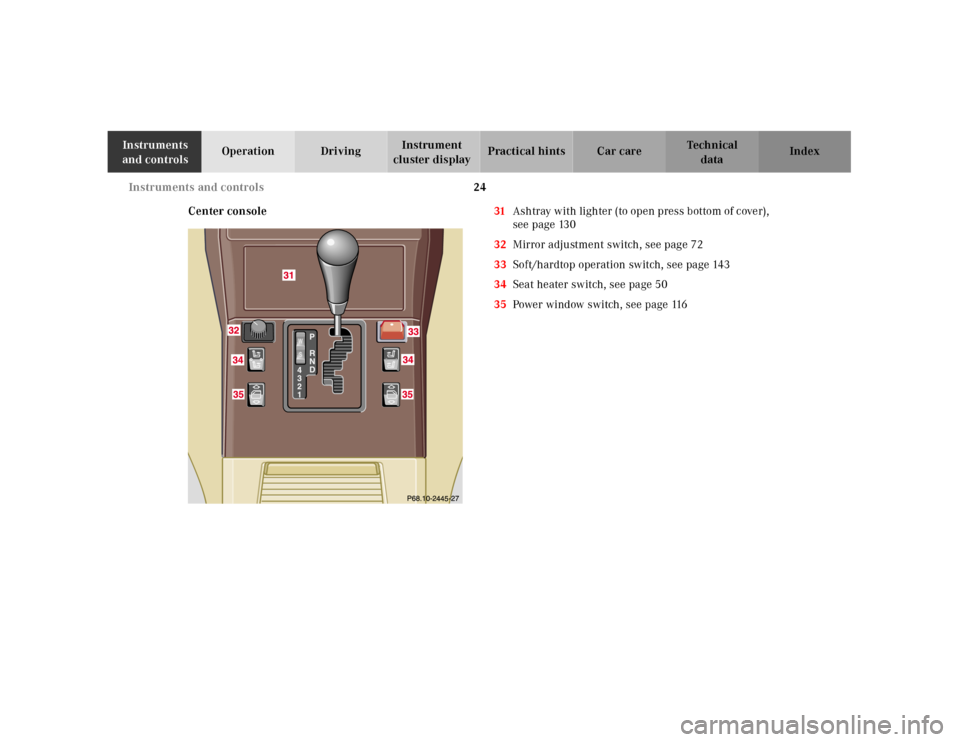
Center console31Ash tray w ith ligh ter (to open press b ottom of c ove r),
see page 130
32Mirror adjustment switch, see page 72
33Soft/hardtop operation switch, see page 143
34Seat heater switch, see page 50
35Power window switch, see page 116
Page 35 of 297
31 Central locking system
Technical
data Instruments
and controlsOperationDrivingInstrument
cluster displayPractical hints Car care Index Locking and unlocking with remote control
Unlocking:
Press transmit button Œ. All turn signal lamps blink
once to indicate that the vehicle is unlocked.
The remote control can be programmed for two kinds of
unlocking modes (see below):
Selective unlocking mode –
Press transmit button Œ once to unlock driver’s door,
storage compartment in armrest, and fuel filler flap.
Press transmit button Πtwice to unlock both doors,
storage compartment in armrest, fuel filler flap, and
trunk.
Global unlocking mode –
Press transmit button Πonce to unlock both doors,
storage compartment in armrest, fuel filler flap, and
trunk.
Notes:
If the trunk was previously locked separately, it will
remain locked, see page 39.
The presently active unlocking mode (selective or
global) can only be determined by unlocking the vehicle
with the remote control (see below for changing mode).If within 40 seconds of unlocking with the remote
control, neither door is opened, the key is not inserted
in the steering lock, or the central locking switch is not
activated, the vehicle will automatically lock.
Locking:
Press transmit button ‹ once. All turn signal lamps
blink three times to indicate that the vehicle is locked.
Note:
If the vehicle cannot be locked or unlocked by pressing
the transmit button, then it may be necessary to change
the batteries in the remote control (if ok, battery check
lamp in transmitter will light briefly when transmitting)
or to synchronize the remote control, see page 251 and
page 252.
Page 36 of 297
32 Central locking system
Technical
data Instruments
and controlsOperationDrivingInstrument
cluster displayPractical hints Car care Index
Choosing global or selective mode on remote control
Press and hold transmit buttons ‹ and Œ
simultaneously for five seconds to reprogram the
remote control. Battery check lamp will blink two times
indicating the completed mode change.Opening the trunk
Press the transmit button Š until the trunk lid is
open.
Important!
Do not place remote control in trunk since trunk is
locked when the lid is closed if the vehicle is centrally
locked.
Note:
If the trunk was previously locked separately, it will
remain locked. See page 39.
Page 38 of 297
34 Central locking system
Technical
data Instruments
and controlsOperationDrivingInstrument
cluster displayPractical hints Car care Index
Start lock-out
Important!
Removing the key from the steering lock activates the
start lock-out. The engine cannot be started.
Turning the key in the steering lock to position 2
deactivates the start lock-out.
Note:
In case the engine cannot be started (vehicle’s battery is
in order), and Á and î are shown in the
odometer display field, the system is not operational.
Contact an authorized Mercedes-Benz Center or call 1-
800-FOR-MERCedes (in the USA), or 1-800-387-0100 (in
Canada).General notes on the central locking system
• If the key in the steering lock is in position 2, the
vehicle cannot be locked or unlocked with the
remote control.
If the vehicle cannot be locked or unlocked:
• Aim transmitter eye at a receiver of either door
handle and press button‹ orŒ.
• Check the batteries of the remote control,
see page 251.
• Synchronize the central locking system,
see page 252.
Page 39 of 297
35 Central locking system
Technical
data Instruments
and controlsOperationDrivingInstrument
cluster displayPractical hints Car care Index Doors
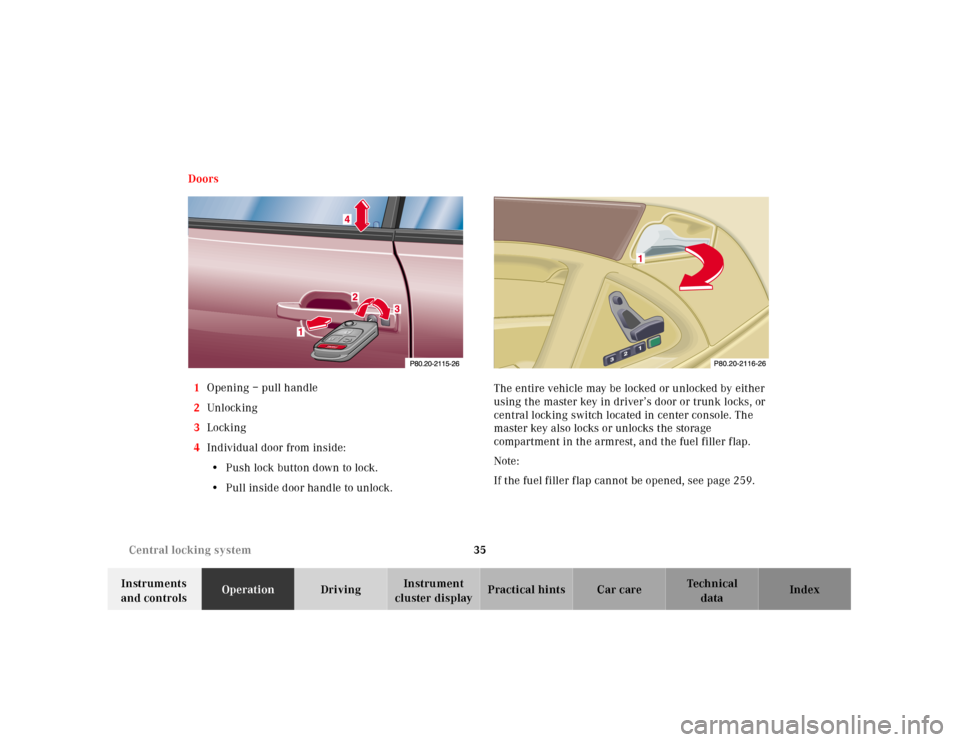
1Opening – pull handle
2Unl ock ing
3Locking
4Individual door from inside:
• Push lock button down to lock.
• Pull inside door handle to unlock.The entire vehicle may be locked or unlocked by either
using the master key in driver’s door or trunk locks, or
central locking switch located in center console. The
master key also locks or unlocks the storage
compartment in the armrest, and the fuel filler flap.
Note:
If the fuel filler f lap cannot be opened, see page 259.
Page 43 of 297
39 Central locking system
Technical
data Instruments
and controlsOperationDrivingInstrument
cluster displayPractical hints Car care Index Trunk
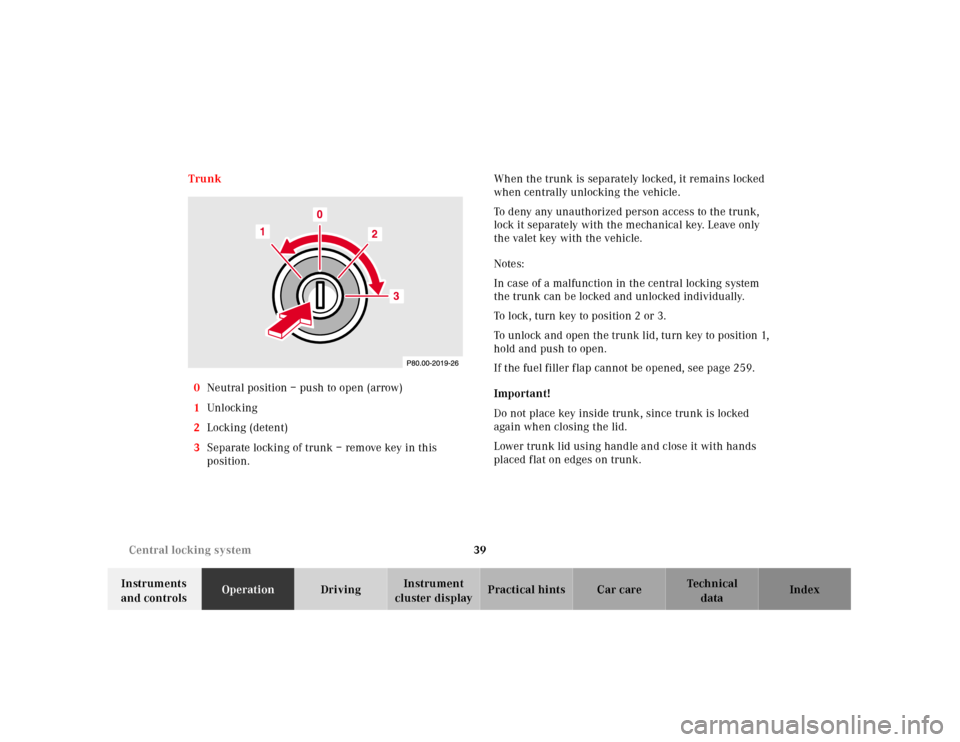
0Neutral position – push to open (arrow)
1Unl ock ing
2Locking (detent)
3Separate locking of trunk – remove key in this
position.When the trunk is separately locked, it remains locked
when centrally unlocking the vehicle.
To deny any unauthorized person access to the trunk,
lock it separately with the mechanical key. Leave only
the valet key with the vehicle.
Notes:
In case of a malfunction in the central locking system
the trunk can be locked and unlocked individually.
To lock, turn key to position 2 or 3.
To unlock and open the trunk lid, turn key to position 1,
hold and push to open.
If the fuel filler f lap cannot be opened, see page 259.
Important!
Do not place key inside trunk, since trunk is locked
again when closing the lid.
Lower trunk lid using handle and close it with hands
placed flat on edges on trunk.