steering MERCEDES-BENZ SL500 2002 R129 Repair Manual
[x] Cancel search | Manufacturer: MERCEDES-BENZ, Model Year: 2002, Model line: SL500, Model: MERCEDES-BENZ SL500 2002 R129Pages: 302, PDF Size: 7.21 MB
Page 160 of 302
156 Tele Aid
Te ch n ica l
data Instruments
and controlsOperationDrivingInstrument
cluster displayPractical hints Car care Index
Tele Aid
Important!
The initial activation of the Tele Aid system may only be
performed by completing the subscriber agreement and
placing an acquaintance call using the “SOS” button.
Failure to complete either of these steps will result in a
system that is not activated. If the system is not
activated, the indicator lamp in the “SOS” button stays
on after turning electronic key in starter switch to
position 2.
If you have any questions regarding activation, please
call the Response Center at 1-800-756-9018 (in the USA)
or 1-888-923-8367 (in Canada).
(Telematic Alarm Identification on Demand)
The Tele Aid system consists of three types of response;
automatic and manual emergency, roadside assistance
and information.
The Tele Aid system is operational, providing that the
vehicle’s battery is charged and properly connected, not
damaged and the cellular and GPS coverage is available.
To activate, press the “SOS” button, the Roadside
Assistance button• or the Information button¡,
depending on the type of response required.Shortly after the completion of your Acquaintance Call,
you will receive a user ID and password via first call
mail. By visiting www.mbusa.com and selecting
“Tele Aid” (USA only), you will have access to account
information and more.
System self-check
Initially, after turning the key in steering lock to
position 2, malfunctions are detected and indicated (the
indicator lamps in the “SOS” button, the Roadside
Assistance button• and the Information
button¡ stay on longer than 10 seconds or do not
come on).
Important!
Always make sure that the indicator lamps in the
“SOS” button, in the “Roadside Assistance” button and
in the “Information” button do not remain illuminated
constantly in red after the system self check.
If a malfunction is indicated as outlined above, have the
system checked at the nearest Mercedes-Benz Center as
soon as possible.
Page 164 of 302
160 Tele Aid
Te ch n ica l
data Instruments
and controlsOperationDrivingInstrument
cluster displayPractical hints Car care Index
Notes:
The indicator lamp in the Roadside Assistance
button• remains illuminated in red for approx.
10 seconds during the system self-check after turning
key in steering lock to position 2 (together with the
“SOS” button and the Information button¡).
See system self-check on page 156 when the indicator
lamp does not light up in red or stays on longer than
approximately 10 seconds.
If the indicator lamp in the Roadside Assistance
button• is illuminated continuously and there was
no voice connection to the Response Center established,
then the Tele Aid system could not initiate an Roadside
Assistance call (e.g. the relevant cellular phone network
is not available).
Information button ¡
Located below the center armrest cover is the
Information button¡. Pressing and holding the
button (for longer than 2 seconds), will initiate a call to
the Client Assistance Center. The button will flash while
the call is in progress.The Tele Aid system will transmit data generating the
vehicle identification number, model, color and location
(subject to availability of cellular and GPS signals).
A voice connection between the Client Assistance
Center representative and the occupants of the vehicle
will be established. When a voice connection is
established the audio system mutes. Information
regarding the operation of your vehicle, the nearest
Mercedes-Benz Center or Mercedes-Benz USA products
and services is available to you.
For more details concerning Tele Aid, please visit
www.mbusa.com and use your ID and password, sent to
you separately, to learn more (USA only).
Notes:
The indicator lamp in the Information button¡
remains illuminated in red for approx. 10 seconds
during the system self-check after turning key in
steering lock to position 2 (together with the “SOS”
button and the Roadside Assistance button•).
See system self-check on page 156 when the indicator
lamp does not light up in red or stays on longer than
approximately 10 seconds.
Page 169 of 302
165 Steering lock
Te ch n ica l
data Instruments
and controlsOperationDrivingInstrument
cluster displayPractical hints Car care Index Steering lock
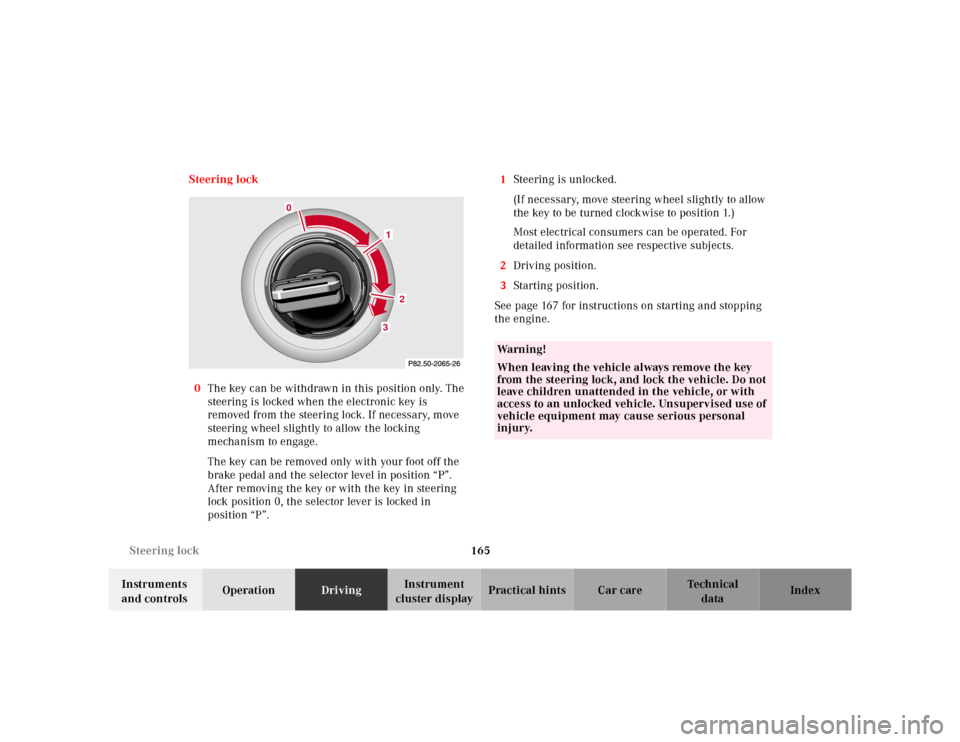
0The key can be withdrawn in this position only. The
steering is locked when the electronic key is
removed from the steering lock. If necessary, move
steering wheel slightly to allow the locking
mechanism to engage.
The key can be removed only with your foot off the
brake pedal and the selector level in position “P”.
After removing the key or with the key in steering
lock position 0, the selector lever is locked in
position “P”.1Steering is unlocked.
(If necessary, move steering wheel slightly to allow
the key to be turned clockwise to position 1.)
Most electrical consumers can be operated. For
detailed information see respective subjects.
2Driving position.
3Starting position.
See page 167 for instructions on starting and stopping
the engine.
2
3
0
1
Wa r n i n g !
When leaving the vehicle always remove the key
from the steering lock, and lock the vehicle. Do not
leave children unattended in the vehicle, or with
access to an unlocked vehicle. Unsupervised use of
vehicle equipment may cause serious personal
injury.
Page 170 of 302
166 Steering lock
Te ch n ica l
data Instruments
and controlsOperationDrivingInstrument
cluster displayPractical hints Car care Index
Notes:
A warning sounds when the driver’s door is opened
while the key is in steering lock position 1 or 0.
With the engine at idle speed, the charging rate of the
alternator (output) is limited.
It is therefore recommended that you turn off
unnecessary electrical consumers while driving in stop-
and-go traffic. This precaution helps to avoid draining of
the battery.
Unnecessary strain on the battery and charging system
may be minimized by turning off the following power
consumers, for example: Heated seats, rear window
defroster.Caution!
To prevent accelerated battery discharge and a possible
dead battery, always remove the key from the steering
lock. Do not leave the key in steering lock position 0.
Page 171 of 302
167 Starting and turning off the enging
Te ch n ica l
data Instruments
and controlsOperationDrivingInstrument
cluster displayPractical hints Car care Index Starting and turning off the engine
Before starting
Ensure that parking brake is engaged and that selector
lever is in position “P” or “N”. Turn key in steering lock
to position 2.
Starting
Do not depress accelerator. Briefly turn key in steering
lock clockwise to the stop and release. The starter will
engage until the engine is running.
If engine will not run, and the starting procedure stops,
turn key completely to the left and repeat starting the
engine.
After several unsuccessful attempts, have the system
checked at the nearest authorized Mercedes-Benz
Center.Important!
Due to the installed starter nonrepeat feature, the key
must be turned completely to the left before attempting
to start the engine again.
In areas where temperatures frequently drop below
-4°F (-20°C) we recommend that an engine block heater
be installed. Your authorized Mercedes-Benz Center will
advise you on this subject.
Turning off
Turn the key in the steering lock to position 0 to stop the
engine.
Vehicles with automatic transmission:
The key can only be removed with your foot off the
brake pedal and the selector lever in position “P”.
Page 174 of 302
170 Automatic transmission
Te ch n ica l
data Instruments
and controlsOperationDrivingInstrument
cluster displayPractical hints Car care Index
Park position
The park position is to be used when parking the
vehicle. Engage only with the vehicle stopped.
The park position is not intended to serve as a
brake when the vehicle is parked. Rather, the
driver should always use the parking brake in
addition to placing the selector lever in park to
secure the vehicle.
Note:
The key can be removed from the steering lock
only with the foot off the brake pedal and the
selector lever in position “P”. With the key
removed, the selector lever is locked in
position “P”.
Reverse gear
Shift to reverse gear only with the vehicle
sto pp ed.
Depending on the program mode selector switch
position “S” or “W” the maximum speed in the
reverse gear is different. However, it is not
possible to change the program mode while in
reverse.Neutral
No power is transmitted from the engine to the
drive axle. When the brakes are released, the
vehicle can be moved freely (pushed or towed). Do
not engage “N” while driving except to coast
when the vehicle is in danger of skidding (e.g. on
icy roads, see page 182).
Important!
Coasting the vehicle, or driving for any other
reason with selector lever in “N” can result in
transmission damage that is not covered by the
Mercedes-Benz Limited Warranty.
The transmission automatically upshifts through
5th gear. Position “D” provides optimum driving
characteristics under all normal operating
conditions.
Upshift through 4th gear only. Suitable for
performance driving. To shift from position “D”
to “4”, push selector lever to the left.
Upshift through 3rd gear only. Suitable for
moderately steep hills. Since the transmission
does not shift higher than 3rd gear, this gear
selection will allow use of the engine’s braking
power downhill.
Page 176 of 302
172 Automatic transmission
Te ch n ica l
data Instruments
and controlsOperationDrivingInstrument
cluster displayPractical hints Car care Index
Maneuvering
To maneuver in tight areas, e.g. when pulling into a
parking space, control the vehicle speed by gradually
releasing the brakes. Accelerate gently and never
abruptly step on the accelerator.
To rock a vehicle out of soft ground (mud or snow),
alternately shift from forward to reverse, while applying
only slight partial throttle.
Rocking a vehicle free in this manner may cause the
ABS malfunction indicator lamp to come on. Turn off
and restart the engine to clear the malfunction
indication.
Stopping
For brief stops, e.g. at traffic lights, leave the
transmission in gear and hold vehicle with the service
brake.
For longer stops with the engine idling, shift into “N”
or “P” and hold the vehicle with the service brake.
When stopping the vehicle on an uphill gradient, do not
hold it with the accelerator, use the brake. This avoids
unnecessary transmission heat build up.
Wa r n i n g !
Getting out of your vehicle with the selector lever
not fully engaged in position “P” is dangerous.
Also, when parked on an incline, position “P” alone
may not prevent your vehicle from moving,
possibly hitting people or objects.Always set the parking brake in addition to shifting
to position “P”.When parked on an incline, also turn front wheel
towards the road curb.When leaving the vehicle always remove the key
from the steering lock, and lock the vehicle. Do not
leave children unattended in the vehicle, or with
access to an unlocked vehicle. Children could move
the selector lever from position “P”, which could
result in an accident or serious injury.
Page 179 of 302
175 Parking brake
Te ch n ica l
data Instruments
and controlsOperationDrivingInstrument
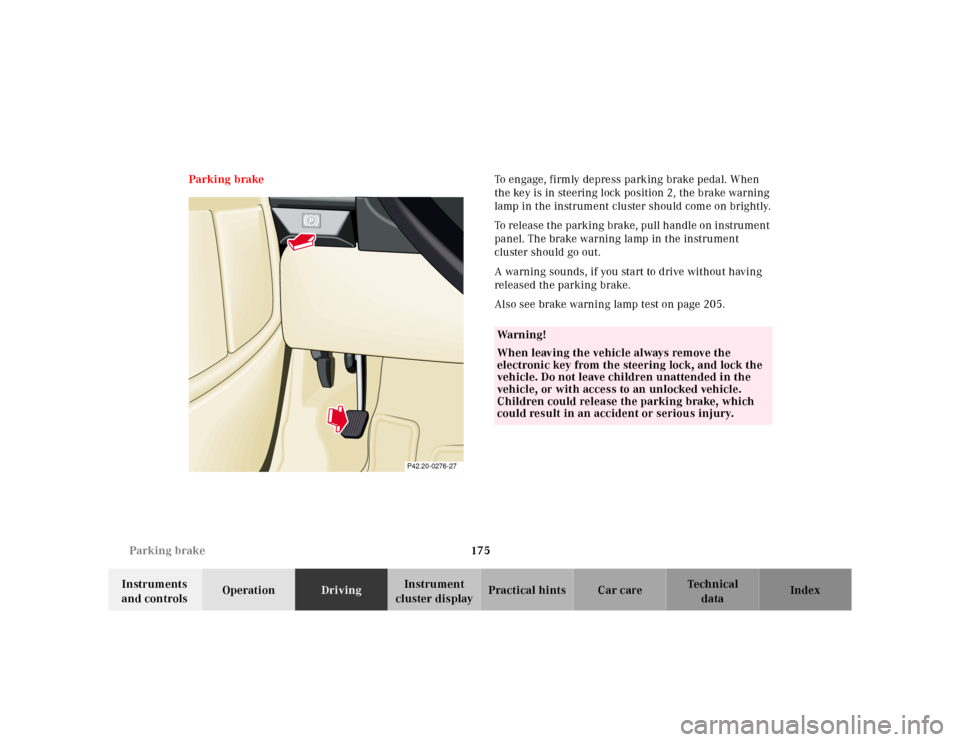
cluster displayPractical hints Car care Index Parking brakeTo engage, firmly depress parking brake pedal. When
the key is in steering lock position 2, the brake warning
lamp in the instrument cluster should come on brightly.
To release the parking brake, pull handle on instrument
panel. The brake warning lamp in the instrument
cluster should go out.
A warning sounds, if you start to drive without having
released the parking brake.
Also see brake warning lamp test on page 205.
P
P42.20-0276-27
Wa r n i n g !
When leaving the vehicle always remove the
electronic key from the steering lock, and lock the
vehicle. Do not leave children unattended in the
vehicle, or with access to an unlocked vehicle.
Children could release the parking brake, which
could result in an accident or serious injury.
Page 181 of 302
177 Driving instructions
Te ch n ica l
data Instruments
and controlsOperationDrivingInstrument
cluster displayPractical hints Car care Index Power assistance
BrakesThe condition of the parking brake system is checked
each time the vehicle is in the shop for the required
maintenance service.
If the parking brake is released and the brake warning
lamp in the instrument cluster stays on, the brake fluid
level in the reservoir is too low.
Brake pad wear or a leak in the system may be the
reason for low brake f luid in the reservoir.
Have the brake system inspected at an authorized
Mercedes-Benz Center immediately.
All checks and service work on the brake system should
be carried out by an authorized Mercedes-Benz Center.
Install only brake pads and brake fluid recommended by
Mercedes-Benz.
Wa r n i n g !
When the engine is not running, the brake and
steering systems are without power assistance.
Under these circumstances, a much greater effort is
necessary to stop or steer the vehicle.Wa r n i n g !
After driving in heavy rain for some time without
applying the brakes or through water deep enough
to wet brake components, the first braking action
may be somewhat reduced and increased pedal
pressure may be necessary to obtain expected
braking effect. Be sure to maintain a safe distance
from vehicles in front.Resting your foot on the brake pedal will cause
excessive and premature wear of the brake pads.It can also result in the brakes overheating thereby
significantly reducing their effectiveness. It may
not be possible to stop the vehicle in sufficient time
to avoid an accident.
Wa r n i n g !
If other than recommended brake pads are
installed, or other than recommended brake fluid
is used, the braking properties of the vehicle can be
degraded to an extent that safe braking is
substantially impaired. This could result in an
accident.The trunk is the preferred place to carry objects.
Page 182 of 302
178 Driving instructions
Te ch n ica l
data Instruments
and controlsOperationDrivingInstrument
cluster displayPractical hints Car care Index
Caution!
When driving down long and steep grades, relieve the
load on the brakes by shifting into a lower gear to use
the engine’s braking power. This helps prevent
overheating of the brakes and reduces brake pad wear.
After hard braking, it is advisable to drive on for some
time, rather than immediately parking, so the air stream
will cool down the brakes faster.
Driving off
Apply the service brakes to test them briefly after
driving off. Perform this procedure only when the road
is clear of other traffic.
Warm up the engine smoothly. Do not place full load on
the engine until the operating temperature has been
reached.
When starting off on a slippery surface, do not allow one
drive wheel to spin for an extended period with the ESP
switched off. Doing so may cause serious damage to the
drive train which is not covered by the Mercedes-Benz
Limited Warranty.Parking
Important!
Always engage the parking brake whenever parking or
leaving the vehicle. In addition, move selector lever to
position “P”.
When parking on hills, always set the parking brake.
Wa r n i n g !
To reduce the risk of personal injury as a result of
vehicle movement, before
turning off the engine
and leaving the vehicle, always:
1. Keep right foot on the service brake pedal.
2. Firmly engage parking brake.
3. Move the selector lever to position “P”
4. Slowly release the service brake pedal.
5. Turn front wheels towards the road curb.
6. Turn the key to steering lock position 0 and
remove.
7. Take the key and lock vehicle when leaving.