set clock MERCEDES-BENZ SLC ROADSTER 2018 Owner's Manual
[x] Cancel search | Manufacturer: MERCEDES-BENZ, Model Year: 2018, Model line: SLC ROADSTER, Model: MERCEDES-BENZ SLC ROADSTER 2018Pages: 298, PDF Size: 5.26 MB
Page 74 of 298
XTo deactivate:press and holdbutton :for
aboutf ives econds unti latone sounds.
XTo activate: press and hol dbutton ;for
aboutf ives econds unti latone sounds.
If yo upress one of the two buttons and do not
hea rat one, the relevant setting hasa lready
been selected.
The vehicl eislocked automaticall ywhent he
ignition is switched on and the wheels are turn-
ing.
Yo uc ould therefore lock yoursel fout if:
Rthe vehicl eisbeing pushed.
Rthe vehicl eisbeing towed.
Rthe vehicl eisonar ollerdynamometer.
Yo uc an also switch the automatic locking func-
tio nona nd off using the on-board computer
(
Ypage 173).
Unlocking/lockin gthe driver's door
using the mechanical key
i
If yo uwanttoc entrall yloc kthe vehicl eusing
the mechanical key,b eginby pressing the
locking button for the interio rloc king mech-
anism whil ethe driver's door is open. Then
lock the driver's door using the mechanical
key.
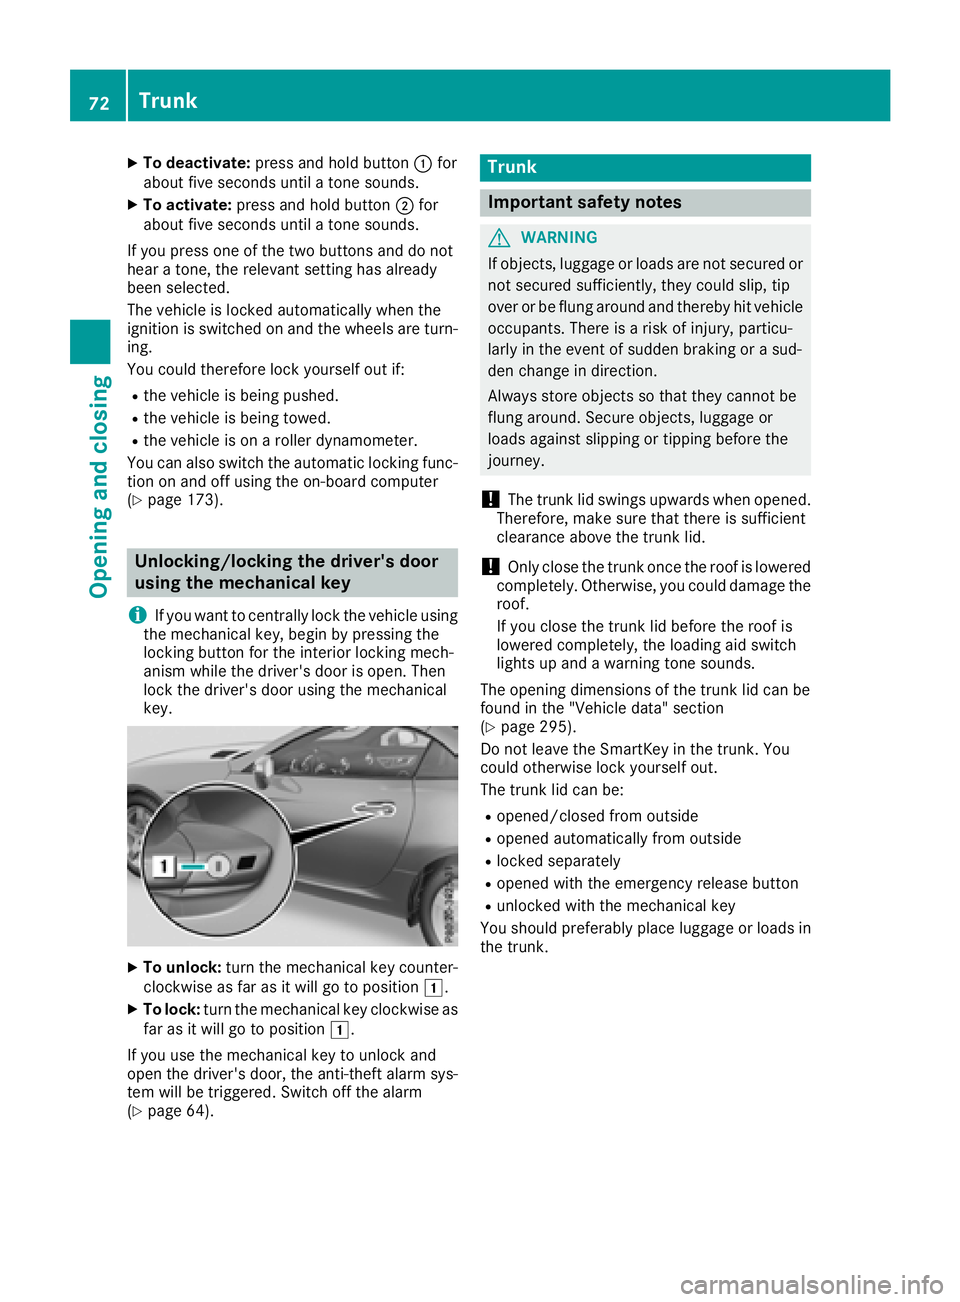
XTo unlock: turn the mechanical key counter-
clockwise as far as it will go to position 1.
XTo lock:turn the mechanical key clockwise as
far as it will go to position 1.
If yo uusethe mechanical key to unlock and
open the driver's door, the anti-thef talarm sys-
tem will be triggered .Switch off the alarm
(
Ypage 64).
Trunk
Important safety notes
GWARNING
If objects, luggage or load sare not secured or
not secured sufficiently ,they could slip ,tip
overorbef lung around and thereb yhitvehicle
occupants. There is ariskofi njury,p articu-
larly in the event of sudden braking or asud-
de nc hange in direction.
Alway sstoreo bjects so thatt hey cannotbe
flung around .Secure objects, luggage or
load sagain st slipping or tipping before the
journey.
!The trunk li dswing su pwar ds when opened.
Therefore, make sure thatt hereiss ufficient
clearance above the trunk lid.
!Onlyc lose the trunk once the roofisl owered
completely. Otherwise, yo ucould damag ethe
roof.
If yo uclose the trunk li dbefore the roofi s
lowered completely, the loading ai dswitch
lights up and awarning tone sounds.
The opening dimensions of the trunk li dcan be
found in the "Vehicle data" section
(
Ypage 295).
Do not leave the SmartKey in the trunk. You
could otherwise lock yoursel fout.
The trunk li dcan be:
Ropened/closedf rom outside
Ropenedautomaticall yfrom outside
Rlocked separately
Ropene dwitht he emergency release button
Runlockedw itht he mechanical key
Yo us houl dpreferabl yplace luggage or load sin
the trunk.
72Trunk
Opening and closing
Page 103 of 298
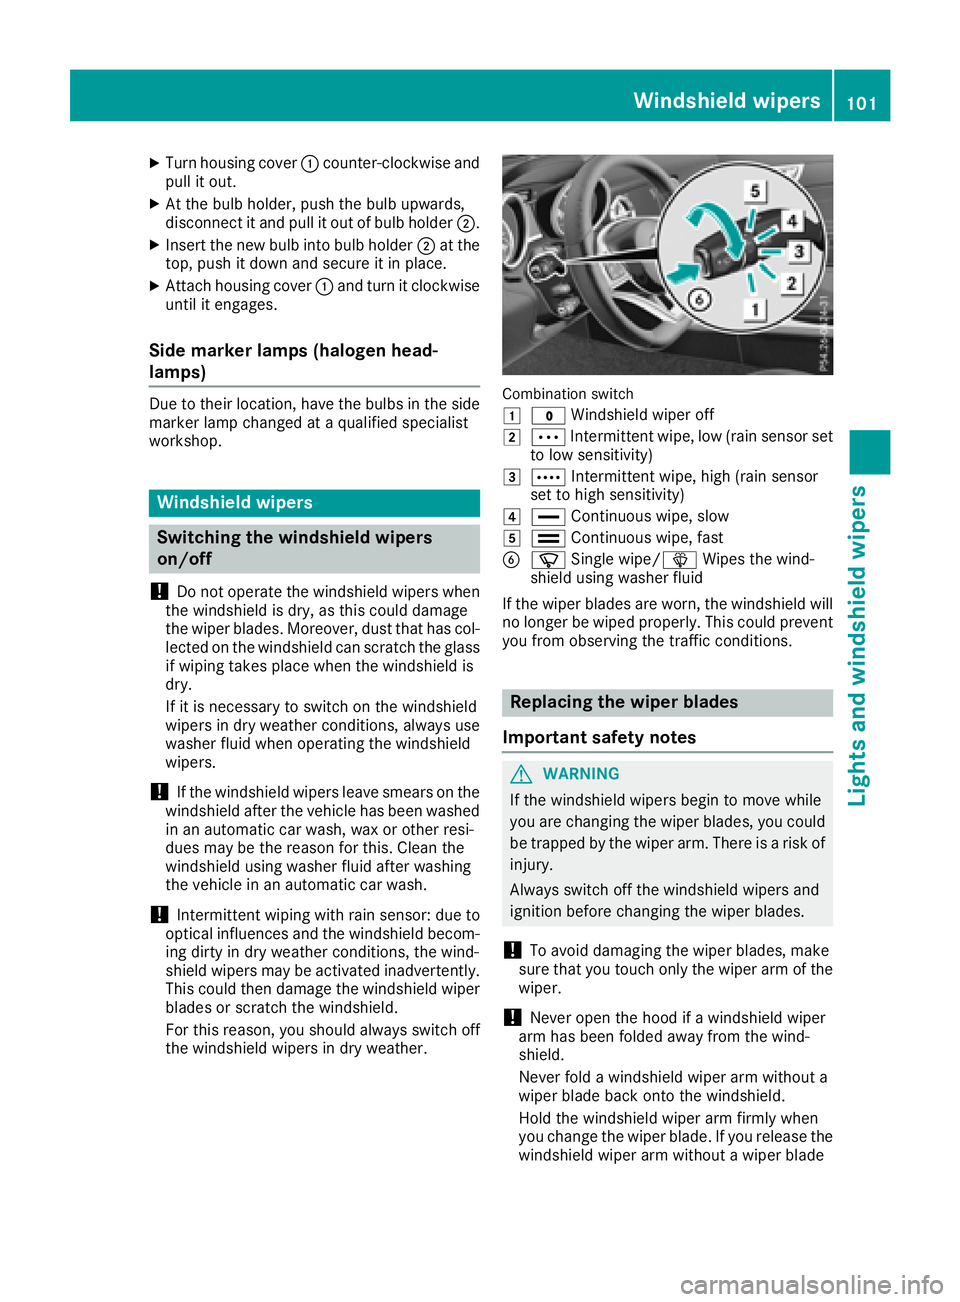
XTurn housing cover:counter-clockwise and
pull it out.
XAt the bulb holder, push the bulb upwards,
disconnect it and pull it out of bulb holder ;.
XInsert the new bulb into bulb holder;at the
top, push it down and secure it in place.
XAttach housing cover :and turn it clockwise
until it engages.
Side marker lamp s(halogen head-
lamps)
Due to their location, have the bulbs in the side
marker lamp changed at aqualified specialist
workshop.
Windshield wipers
Switching the windshield wipers
on/off
!
Do not operate the windshield wipers when
the windshield is dry, as this could damage
the wiper blades. Moreover, dust that has col-
lected on the windshield can scratc hthe glass
if wiping takes place when the windshield is
dry.
If it is necessary to switch on the windshield
wipers in dry weather conditions, alwaysu se
washer fluid when operating the windshield
wipers.
!If the windshield wipers leave smears on the
windshield after the vehicle has been washed
in an automatic car wash, wax or other resi-
dues may be the reason for this. Clean the
windshield using washer fluid after washing
the vehicle in an automatic car wash.
!Intermittent wiping with rain sensor: due to
optical influences and the windshield becom-
ing dirty in dry weather conditions, the wind-
shield wipers may be activated inadvertently.
This could then damage the windshield wiper
blades or scratc hthe windshield.
For this reason, you should alwayss witch off
the windshield wipers in dry weather.
Combination switch
1
$ Windshield wiper off
2ÄIntermittent wipe, low (rain sensor set
to low sensitivity)
3Å Intermittent wipe, high (rain sensor
set to high sensitivity)
4° Continuous wipe, slow
5¯Continuous wipe, fast
BíSingle wipe/î Wipes the wind-
shield using washer fluid
If the wiper blades are worn, the windshield will
no longer be wiped properly. This could prevent
you from observing the traffic conditions.
Replacing the wiper blades
Important safety notes
GWARNING
If the windshield wipers begin to move while
you are changing the wiper blades, you could be trapped by the wiper arm. There is arisk of
injury.
Always switch off the windshield wipers and
ignition before changing the wiper blades.
!To avoid damaging the wiper blades, make
sure that you touch only the wiper arm of the
wiper.
!Never open the hood if awindshield wiper
arm has been folded away from the wind-
shield.
Never fold awindshield wiper arm without a
wiper blade back ontot he windshield.
Hold the windshield wiper arm firmly when
you change the wiper blade. If you release the
windshield wiper arm without awiper blade
Windshield wipers101
Lights and windshield wipers
Z
Page 110 of 298
ECO start/stop function
During automatic engine switch-off,the climate
control system only operate satareduced capa-
city. If you require full climate control capacity,
th eE CO start/sto pfunction can be deactivated
by pressingt heECO button (
Ypage 120).
Operating th eclimat econtrol sys-
tems
Activating/deactivatin gclimat econ-
trol
General notes
When th eclimate control is switched off ,the air
supply and air circulation are also switched off.
The windows coul dfog up. Therefore, switch off
climate control only briefly
iActivate climate control primarily usingt he
à button(Ypage 109).
Air-conditioning system
XTurn th eSmartKey to position 2in th eigni-
tio nlock(Ypage 116).
XTo switch on: turna irflow control Cclock-
wise to th edesired position (excep tposition
0)(
Ypage 104).
XTo switch off: turna irflow control Ccoun-
ter-clockwise to position 0(Ypage 104).
3-zone automatic climat econtrol
XTurn th eSmartKey to position 2in th eigni-
tio nlock(Ypage 116).
XTo switch on: pressthe à button.
The indicator lamp in the Ãbutton lights
up. Airflow and air distribution are set to auto-
matic mode.
or
XPress the ^button.
The indicator lamp in the ^button goes
out.T he previously selecte dsettings are
restored.
XTo switch off: pressthe ^ button.
The indicator lamp in the ^button lights
up.
Switching cooling with air dehumidi-
fication on/off
General notes
If you deactivate th e"Coolingw ith air-dehumid-
ification" function,t heair inside th evehicle will
no tbec ooled. The air inside th evehicle will also
no tbed ehumidified. The windows can fog up
mor equickly. Therefore, deactivate th ecooling
with air-dehumidification function only briefly.
The "Coolingw ith air dehumidification"f unction
is only availabl ewhen th eengine is running. The
air inside th evehicle is cooled and dehumidified
according to th etem peratur eselected.
Condensation may drip from th eundersid eof
th ev ehicle when it is in cooling mode. This is
normal and no tasign that there is amalfunc-
tion.
Activating/deactivating
XTo activate: pressthe ¿ orÁ button.
The indicator lamp in the ¿orÁ button
lightsu p.
XTo deactivate: pressthe ¿ orÁ but-
ton.
The indicator lamp in the ¿orÁ button
goes out.T he "Coolingw ith air dehumidifica-
tion" function has adelayed switch-off fea-
ture.
108Operating th eclimate control systems
Climate control
Page 111 of 298
Problems with the "Cooling with air dehumidification" function
ProblemPossible causes/consequences andMSolutions
The indicator lamp in the
¿orÁ button
flashes three times or
remains off. The "Cool-
ing with air dehumidifi-
cation" function cannot
be switched on.Cooling with air dehumidification has been deactivated due to amal-
function.
XVisit aqualified specialist workshop.
Setting climate control to automatic
General notes
Automatic mode is only available with 3-zone
automatic climate control.
In automatic mode, the set temperature is main-
tained automatically at aconstant level. The
system automatically regulates the temperature
of the dispensed air, the airflow and the air dis-
tribution.
The automatic mode functions optimally when
the "Cooling with air dehumidification" function
is activated. If necessary, cooling with air dehu-
midification can be deactivated.
If you deactivate the "Cooling with air-dehumid- ification" function, the air inside the vehicle will
not be cooled. The air inside the vehicle will also
not be dehumidified.T he windows can fog up
more quickly. Therefore, deactivate the cooling
with air-dehumidification function only briefly.
Automatic control
XTurn the SmartKey to position 2in the igni-
tion lock (Ypage 116).
XSet the desired temperature.
XTo activate: press theÃbutton.
The indicator lamp in the Ãbutton lights
up. Automatic air distribution and airflow are
activated.
XTo switch to manualm ode:press the _
button.
or
XPress the IorK button.
The indicator lamp in the Ãbutton goes
out.
Setting the temperature
Air-conditioning system
XTurn the SmartKey to position 2in the igni-
tion lock (Ypage 116).
XTo increase or reduce: turn control:
clockwise or counter-clockwise (Ypage 104).
Only change the temperature settingins mall
increments. Start at 72 ‡(22 †).
iIf you turn control :counter-clockwise to
the lowest temperature setting, air-recircula-
tion mode may activate automatically,
depending on the outside temperature.
3-zone automatic climate control
Differentt emperatures can be set for the driv-
er's and front-passenger sides.
XTurn the SmartKey to position 2in the igni-
tion lock (Ypage 116).
XTo increase or decrease: turn control:or
B clockwise or counter-clockwise
(
Ypage 106).
Only change the temperature settingins mall
increments. Start at 72 ‡(22 †).
iIf you turn controls :and Bcounter-
clockwise to the lowest temperature setting,
air-recirculation mode may activate automat-
ically, depending on the outside temperature.
Operating the climate control systems109
Climatec ontrol
Page 112 of 298
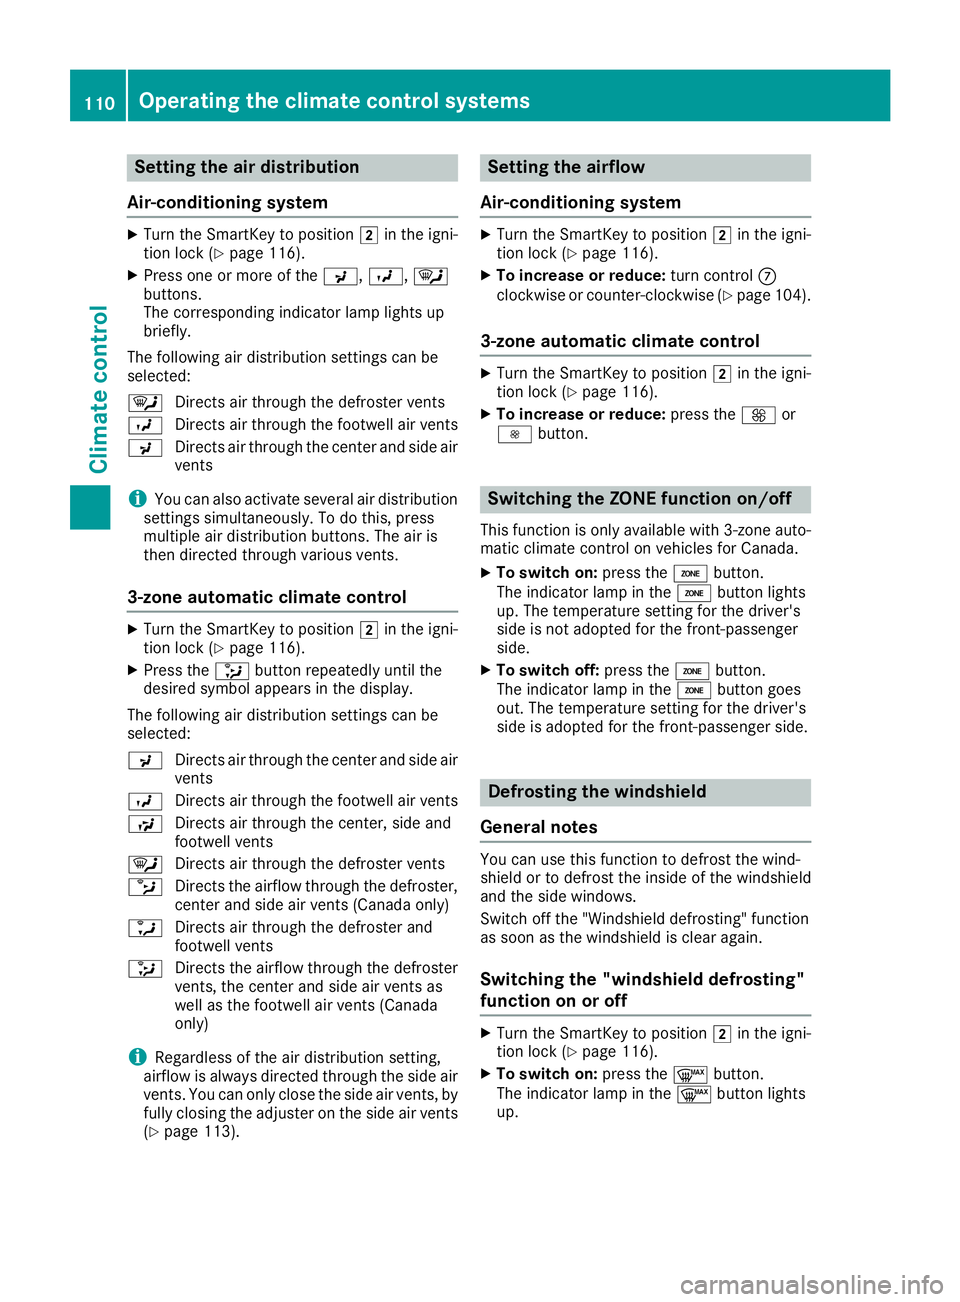
Setting the air distribution
Air-conditioning system
XTurn the SmartKey to position 2in the igni-
tion lock (Ypage 116).
XPress one or more of the P,O,¯
buttons.
The correspondingi ndicator lamp lights up
briefly.
The following air distribution settings can be
selected:
¯ Directsa ir through the defroster vents
O Directsa ir through the footwell air vents
P Directsa ir through the center and side air
vents
iYou can also activate several air distribution
settings simultaneously. To do this, press
multiple air distribution buttons. The air is
then directed through various vents.
3-zone automatic climate control
XTurn the SmartKey to position 2in the igni-
tion lock (Ypage 116).
XPress the _button repeatedly until the
desired symbol appears in the display.
The following air distribution settings can be
selected:
P Directsa ir through the center and side air
vents
O Directsa ir through the footwell air vents
S Directsa ir through the center, side and
footwell vents
¯ Directsa ir through the defroster vents
b Directst he airflow through the defroster,
center and side air vents( Canada only)
a Directsa ir through the defroster and
footwell vents
_ Directst he airflow through the defroster
vents, the center and side air ventsa s
well as the footwell air vents( Canada
only)
iRegardless of the air distribution setting,
airflow is always directed through the side air
vents. You can only close the side air vents, by fully closing the adjuster on the side air vents
(
Ypage 113).
Setting the airflow
Air-conditioning system
XTurn the SmartKey to position 2in the igni-
tion lock (Ypage 116).
XTo increase or reduce: turn controlC
clockwise or counter-clockwise (Ypage 104).
3-zone automatic climate control
XTurn the SmartKey to position 2in the igni-
tion lock (Ypage 116).
XTo increase or reduce: press theKor
I button.
Switching the ZONE function on/off
This function is only available with 3-zone auto-
matic climate control on vehicles for Canada.
XTo switch on: press theábutton.
The indicator lamp in the ábutton lights
up. The temperature settingf or the driver's
side is not adopted for the front-passenger
side.
XTo switch off: press theábutton.
The indicator lamp in the ábutton goes
out. The temperature settingf or the driver's
side is adopted for the front-passenger side.
Defrosting the windshield
General notes
You can use this function to defrost the wind-
shield or to defrost the inside of the windshield
and the side windows.
Switch off the "Windshield defrosting" function
as soon as the windshield is clear again.
Switching the "windshield defrosting"
function on or off
XTurn the SmartKey to position 2in the igni-
tion lock (Ypage 116).
XTo switch on: press the¬button.
The indicator lamp in the ¬button lights
up.
110Operating the climate control systems
Climatec ontrol
Page 115 of 298
iIf you activate the residual heat function at
high temperatures, only the ventilation willb e
activated. The blower runs at mediums peed.
XTo deactivate:press theÌorÁ but-
ton.
The indicator lamp in the ÌorÁ button
goes out.
Residualh eat is deactivated automatically:
Rafter approximately 30 minutes
Rwhen the ignition is switched on
Rif the battery voltage drops
Setting the air vents
Important safety notes
GWARNING
Very hot or very cold air can flow from the air
vents. This could resultinb urns or frostbite in
the immediate vicinity of the air vents. There
is ar isk of injury.
Make sure that all vehicle occupants always
maintain asufficient distance to the air out-
lets. If necessary,r edirect the airflow to
another area of the vehicle interior.
GWARNING
When AIRSCARF is switched on, very hot air
can flow from the vents in the head restraints. This could resultinb urns in the immediate
vicinity of the air vents. There is arisk of injury.
Reduce the heater outputb efore it becomes
too hot.
In order to ensure the direct flow of fresh air
through the air vents into the vehicle interior,
please observe the following notes:
Rkeep the air inlet grilleont he hood and in the
engine compartment on the front-passenger
side free of blockages, such as ice, snow or
leaves.
Rnever cover the air vents or air intake grilles in
the vehicle interior.
iYou can move the adjusters for the air vents
verticallyorh orizontally to set the direction of
the airflow.
iFor optimal climate control in the vehicle,
open the air vents completely and set the
adjusters to the central position.
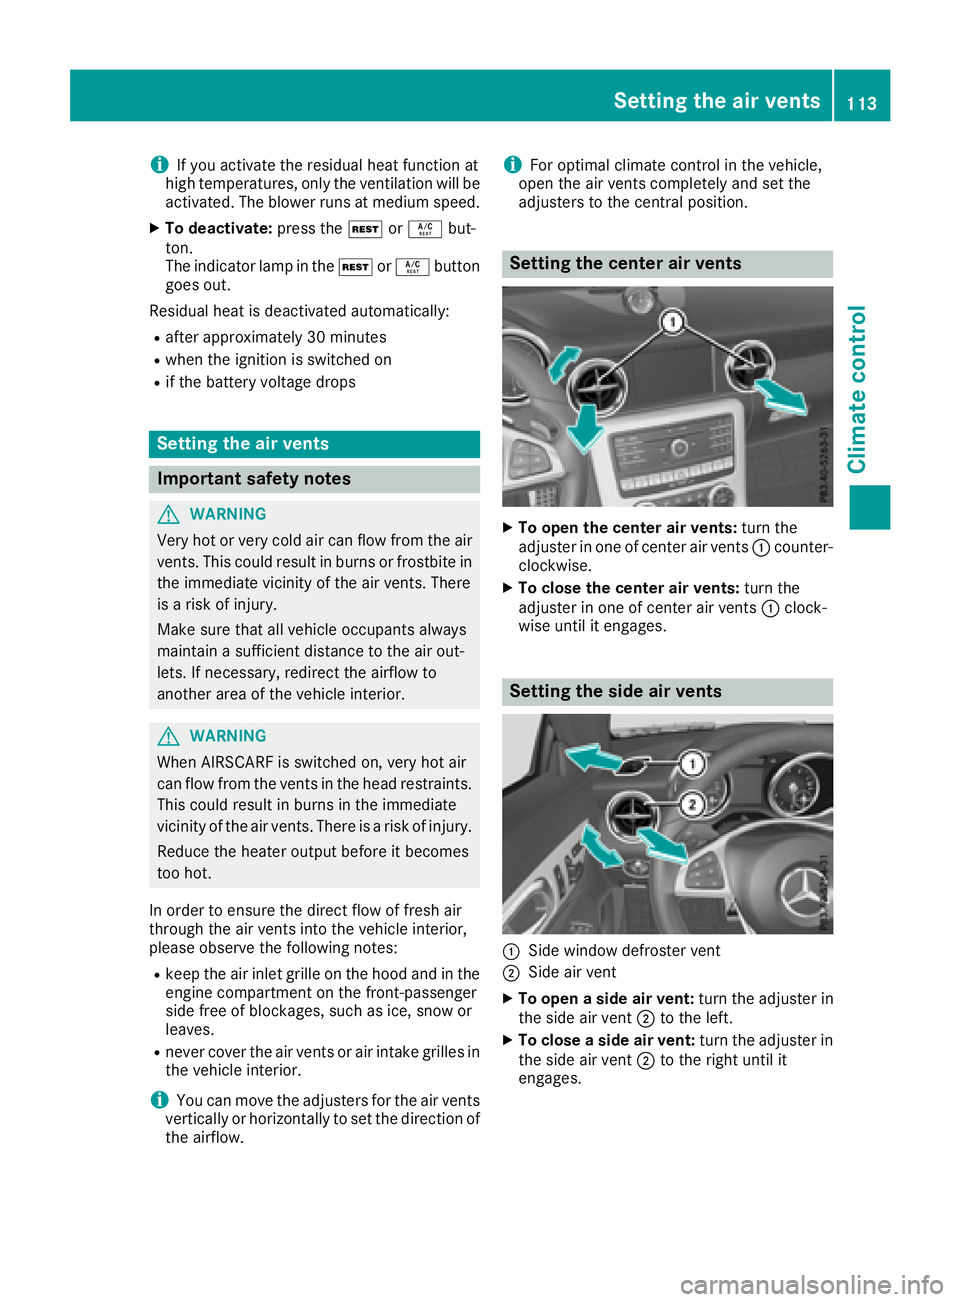
Setting the center air vents
XTo open the center air vents: turn the
adjuster in one of center air vents :counter-
clockwise.
XTo close the center air vents: turn the
adjuster in one of center air vents :clock-
wise until it engages.
Setting the side air vents
:Side window defroster vent
;Side air vent
XTo open aside air vent: turn the adjuster in
the side air vent ;to the left.
XTo close aside air vent: turn the adjuster in
the side air vent ;to the right until it
engages.
Setting the air vents113
Climate control
Z
Page 165 of 298
Important safety notes
GWARNING
If you operate information systems and com-
munication equipmen tintegrate dinthevehi-
cle when driving ,you may be distracte dfrom
th et raffic situation .You could also lose con-
trol of th evehicle. Ther eisariskofana cci-
dent.
Only operate this equipmen twhen th etraffic
situation permits. If you are no tsuret hatthis
is possible ,park th evehicl epayin gattention
to traffic condition sand operate th eequip-
men twhen th evehicl eiss tationary.
You must observ ethe legal requirements for th e
country in whic hyou are currentl ydriving when
operating th eon-bo ard computer.
GWARNIN G
If th einstrumen tcluste rhas faile dormal-
functioned, you may no trecognize function
restriction sinsystems relevan ttosafety. The
operating safet yofyour vehicl emay be
impaired .Ther eisar iskofana ccident.
Drive on carefully. Hav ethe vehicl echecked
at aq ualified specialist workshop immedi-
ately.
The on-board computer only shows message sor
warning sfromc ertai nsystems in th emultifunc-
tion display. You should therefor emakes ure
your vehicl eisoperating safely at all times .
If th eoperating safet yofyour vehicl eis
impaired ,pull ove rassoonasitiss afetodos o.
Contac taqualified specialist workshop.
Fo rano verview, see th einstrumen tpanel illus-
tration (
Ypage 32).
Display sand operation
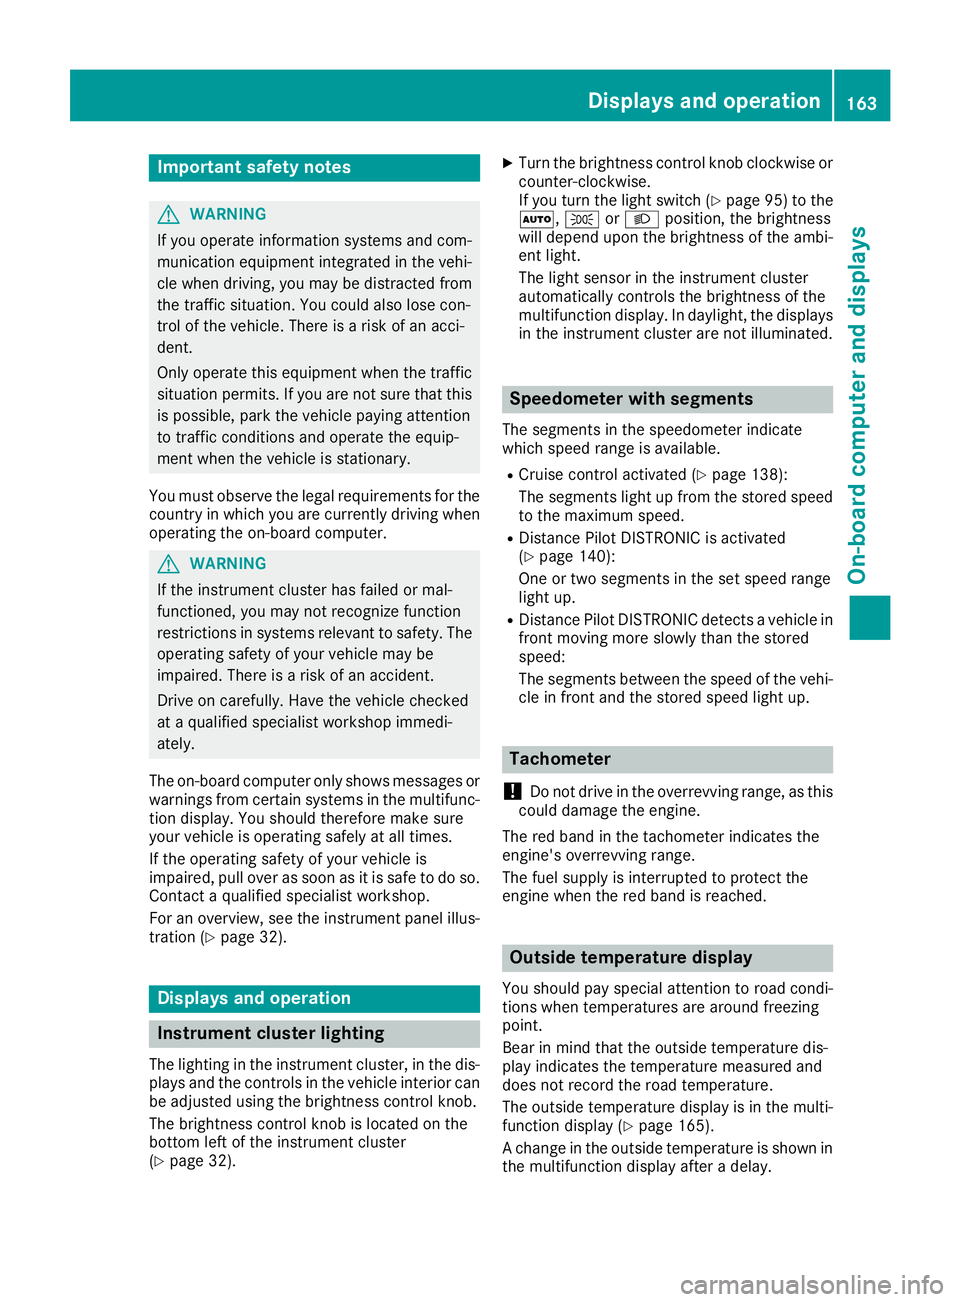
Instrumen tcluster lighting
The lighting in th einstrumen tcluster, in th edis-
plays and th econtrols in thevehicl einterior can
be adjusted usin gthe brightness control knob.
The brightness control knob is locate donthe
botto mleftoft heinstrumen tcluste r
(
Ypage 32).
XTurn th ebrightness control knob clockwise or
counter-clockwise.
If you tur nthe ligh tswitch (
Ypage 95 )tot he
Ã, TorL position ,the brightness
will depend upon th ebrightness of th eambi -
en tlight.
The ligh tsensor in th einstrumen tcluste r
automatically control sthe brightness of th e
multifunction display. In daylight, th edisplays
in th einstrumen tcluste rare no tilluminated.
Speedometer with segments
The segments in th espeedometer indicat e
whic hspee drange is available.
RCruis econtro lactivated (Ypage 138):
The segments ligh tupfromt hestore dspee d
to th emaximum speed.
RDistanc ePilot DISTRONI Cisactivated
(Ypage 140):
On eort wo segments in th eset spee drange
ligh tup.
RDistanc ePilot DISTRONI Cdetects avehicl ein
fron tmoving mor eslowly than th estored
speed:
The segments between th espee doft hevehi-
cle in fron tand th estoreds pee dligh tup.
Tachometer
!
Do no tdriveint heoverrevving range, as this
could damag ethe engine.
The red ban dinthetachometer indicates th e
engine's overrevving range.
The fuel suppl yisinterrupted to protect th e
engin ewhen th ered ban disreached.
Outsidet emperatur edisplay
You should pay special attention to road condi-
tion swhen temperatures are aroun dfreezing
point.
Bea rinm indt hatthe outside temperature dis-
play indicates th etem perature measured and
does no trecord th eroad temperature.
The outside temperature display is in th emulti-
function display (
Ypage 165).
Ac hang eint heoutside temperature is shown in
th em ultifunction display after adelay.
Display sand operation163
On-boardc omputer and displays
Z
Page 176 of 298
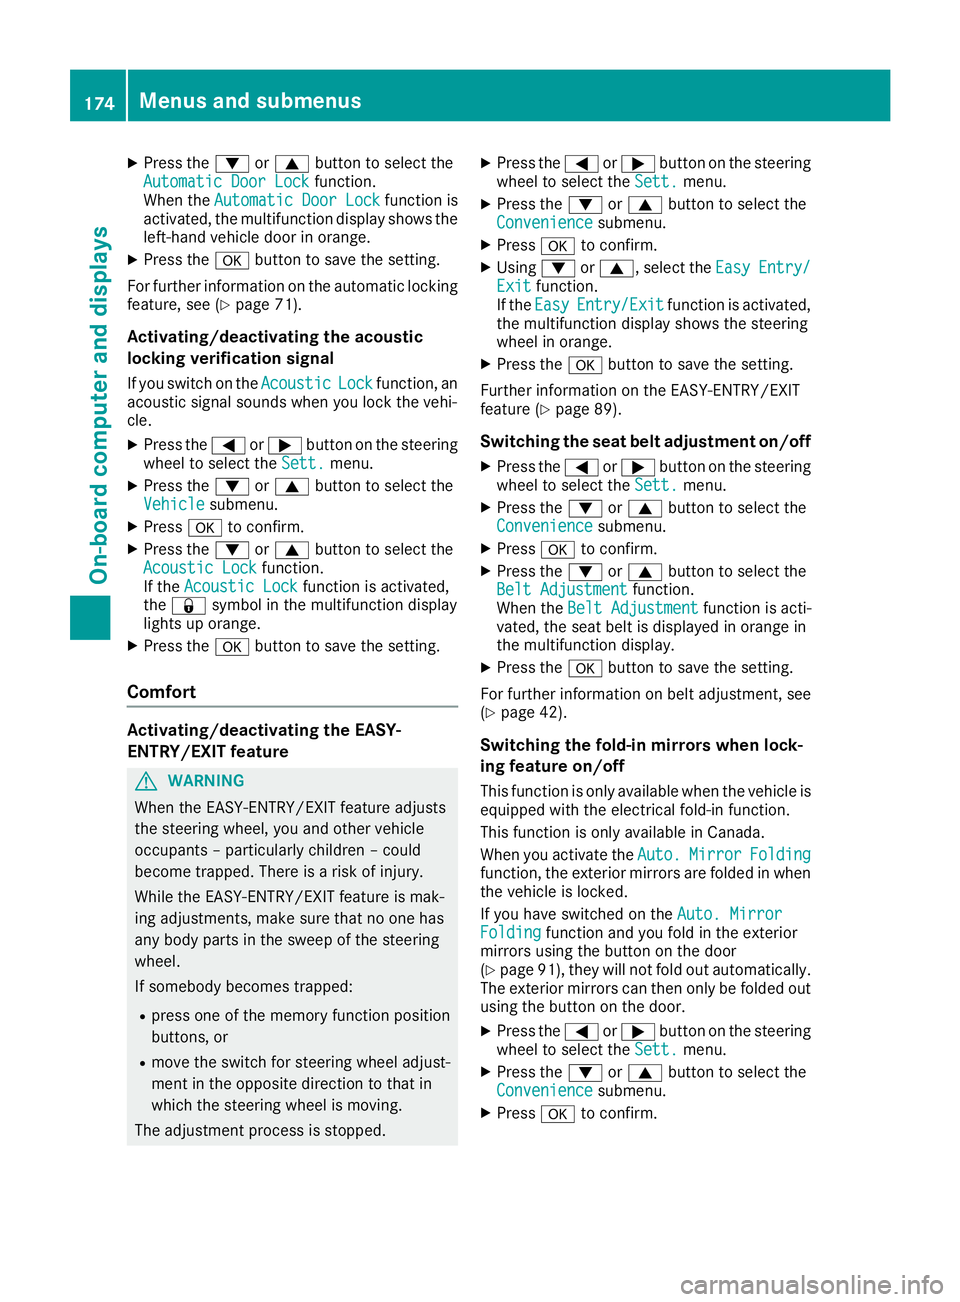
XPress the:or9 button to select the
Automatic Door Lockfunction.
When the Automatic Door Lockfunction is
activated, the multifunction display shows the
left-hand vehicle door in orange.
XPress the abutton to save the setting.
For further information on the automatic locking
feature, see (
Ypage 71).
Activating/deactivating the acoustic
locking verification signal
If you switch on the AcousticLockfunction, an
acoustic signal sounds when you lock the vehi-
cle.
XPress the =or; button on the steering
wheel to select the Sett.menu.
XPress the:or9 button to select the
Vehiclesubmenu.
XPress ato confirm.
XPress the :or9 button to select the
Acoustic Lockfunction.
If the Acoustic Lockfunction is activated,
the & symbol in the multifunction display
lights up orange.
XPress the abutton to save the setting.
Comfort
Activating/deactivating the EASY-
ENTRY/EXITf eature
GWARNING
When the EASY-ENTRY/EXIT feature adjusts
the steerin gwheel, you and other vehicle
occupants–p articularly children –could
become trapped. There is arisk of injury.
While the EASY-ENTRY/EXIT feature is mak-
ing adjustments, make sure that no one has
any body parts in the sweep of the steering
wheel.
If somebody becomes trapped:
Rpress one of the memory function position
buttons, or
Rmove the switch for steerin gwheel adjust-
ment in the opposite direction to that in
which the steerin gwheel is moving.
The adjustmen tprocess is stopped.
XPress the =or; button on the steering
wheel to select the Sett.menu.
XPress the:or9 button to select the
Conveniencesubmenu.
XPress ato confirm.
XUsing :or9,s elect the EasyEntry/Exitfunction.
If the EasyEntry/Exitfunction is activated,
the multifunction display shows the steering
wheel in orange.
XPress the abutton to save the setting.
Further information on the EASY-ENTRY/EXIT
feature (
Ypage 89).
Switching the seat belt adjustment on/off
XPress the =or; button on the steering
wheel to select the Sett.menu.
XPress the:or9 button to select the
Conveniencesubmenu.
XPress ato confirm.
XPress the :or9 button to select the
Belt Adjustmentfunction.
When the Belt Adjustmentfunction is acti-
vated, the seat belt is displayed in orange in
the multifunction display.
XPress the abutton to save the setting.
For further information on belt adjustment, see
(
Ypage 42).
Switching the fold-in mirrors when lock-
ing feature on/off
This function is only availablew hen the vehicle is
equipped with the electrical fold-in function.
This function is only availableinC anada.
When you activat ethe Auto.
MirrorFoldingfunction, the exterior mirrors are folded in when
the vehicle is locked.
If you have switched on the Auto. Mirror
Foldingfunction and you fold in the exterior
mirrors using the button on the door
(
Ypage 91), they will not fold out automatically.
The exterior mirrors can then only be folded out
using the button on the door.
XPress the =or; button on the steering
wheel to select the Sett.menu.
XPress the:or9 button to select the
Conveniencesubmenu.
XPress ato confirm.
174Menus and submenus
On-board computer and displays
Page 254 of 298
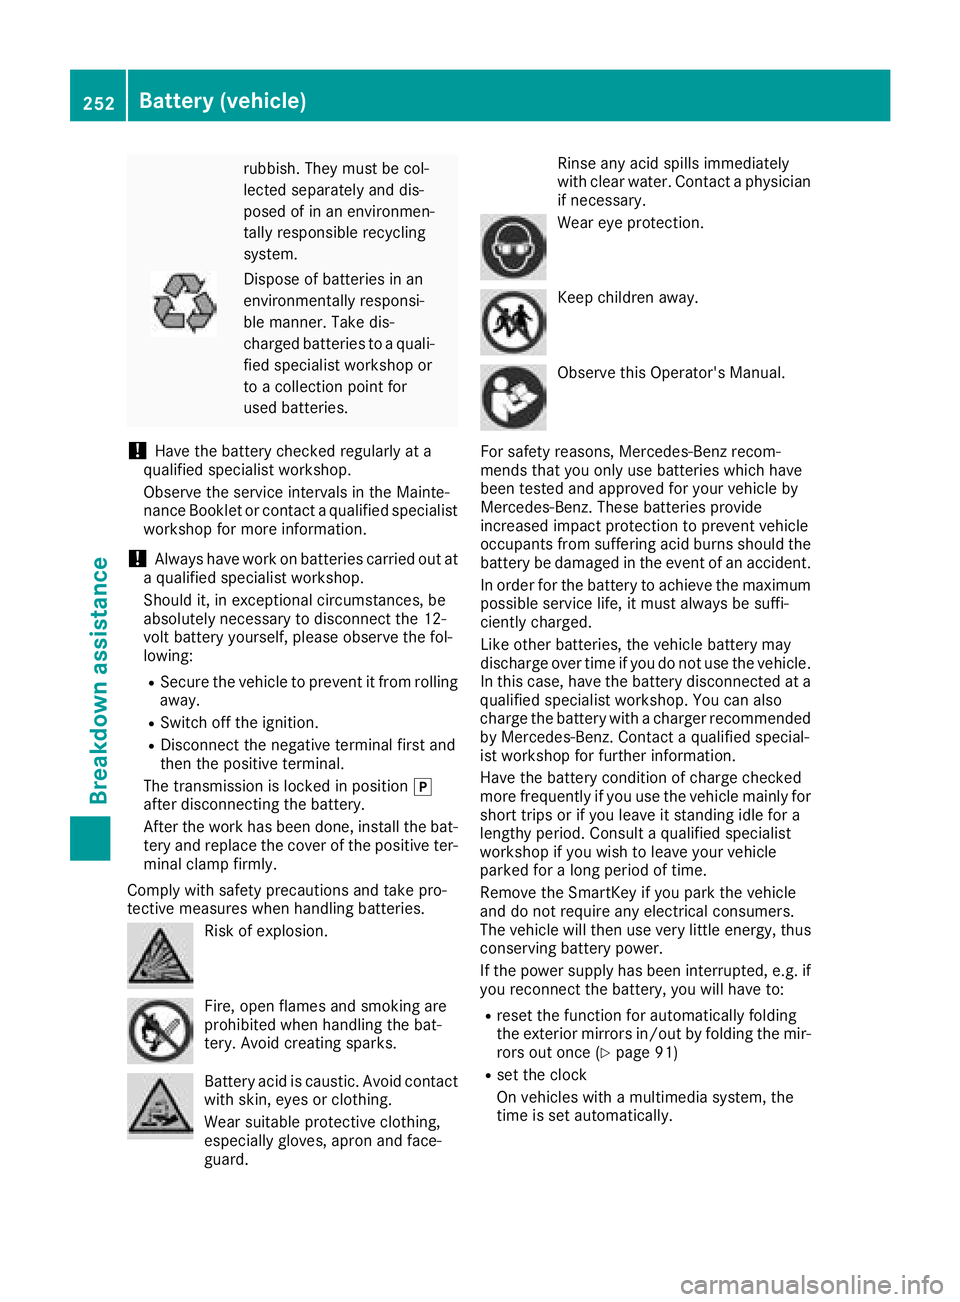
rubbish. They must be col-
lected separately and dis-
posed of in an environmen-
tallyresponsible recycling
system.
Dispose of batterie sinan
environmentally responsi-
ble manner. Take dis-
charge dbatterie stoaq uali-
fied specialist workshop or
to ac ollection point for
used batteries.
!Have the battery checked regularl yata
qualified specialist workshop.
Observe the service interval sinthe Mainte-
nance Booklet or contact aqualified specialist
workshop for more information.
!Always have work on batterie scarrie dout at
aq ualified specialist workshop.
Shoul dit, in exceptionalc ircumstances, be
absolutel ynecessary to disconnect the 12-
volt battery yourself, please observe the fol-
lowing:
RSecure the vehicletop revent it from rolling
away.
RSwitch off the ignition.
RDisconnect the negative terminal first and
then the positive terminal.
The transmission is locked in position j
after disconnecting the battery.
After the work has been done, install the bat- tery and replace the cover of the positive ter-
minal clamp firmly.
Comply with safety precautions and take pro-
tective measures when handling batteries.
Ris kofe xplosion.
Fire, open flame sand smoking are
prohibited when handling the bat-
tery. Avoid creating sparks.
Battery acid is caustic. Avoid contact
with skin, eye sorclothing.
Wears uitable protective clothing,
especially gloves, apro nand face-
guard. Rinse any acid spills immediately
with clearw
ater. Contact aphysician
if necessary.
Weare ye protection.
Keep children away.
Observe this Operator's Manual.
For safety reasons, Mercedes-Benz recom-
mends that you only use batterie swhich have
been tested and approved for you rvehicleb y
Mercedes-Benz. These batterie sprovide
increase dimpact protection to prevent vehicle
occupants from suffering acid burns should the
battery be damaged in the event of an accident.
In order for the battery to achieve the maximum
possible service life,itm ust alwaysbesuffi-
ciently charged.
Like other batteries, the vehicleb attery may
discharge over time if you do not use the vehicle.
In this case, have the battery disconnected at a
qualified specialist workshop.Y ou can also
charge the battery with acharge rrecommended
by Mercedes-Benz. Contact aqualified special-
ist workshop for further information.
Have the battery condition of charge checked
more frequently if you use the vehiclem ainlyfor
short trips or if you leave it standing idlef or a
lengthy period. Consult aqualified specialist
workshop if you wis htoleave you rvehicle
parked for along periodoft ime.
Remove the SmartKey if you park the vehicle
and do not require any electricalc onsumers.
The vehiclew illt hen use very little energy,t hus
conserving battery power.
If the powers upply has been interrupted ,e.g. if
you reconnect the battery ,you wil lhave to:
Rreset the function for automatically folding
the exterior mirrors in/out by folding the mir-
rors out once (
Ypag e91)
Rset the clock
On vehicles with amultimedia system, the
time is set automatically.
252Battery (vehicle)
Breakdown assistance
Page 259 of 298
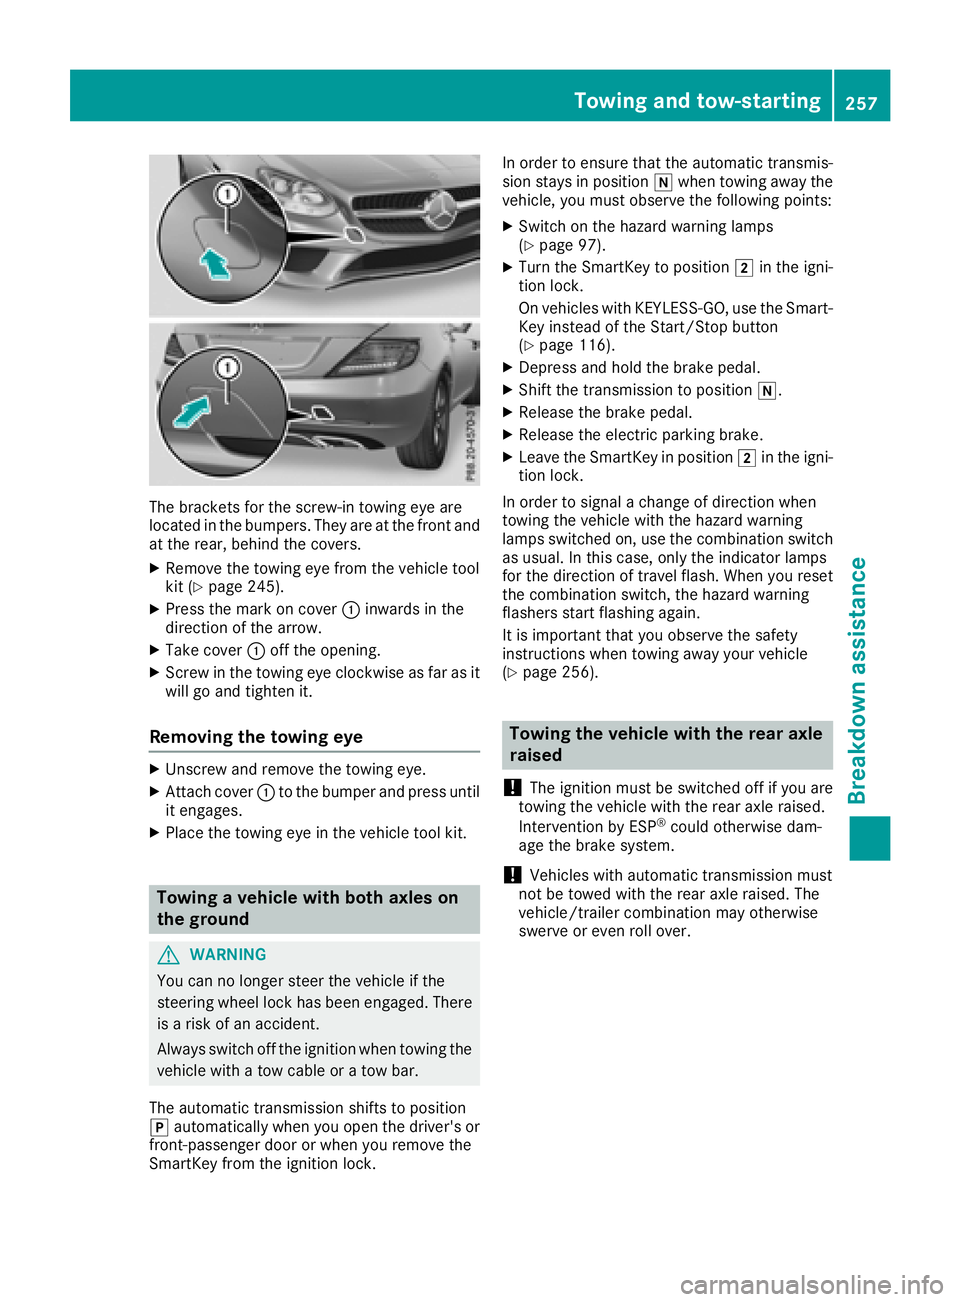
The bracketsfor the screw-in towing eye are
located in the bumpers. They are at the front and
at the rear, behind the covers.
XRemove the towing eye from the vehicle tool
kit (Ypage 245).
XPress the mark on cover :inwards in the
direction of the arrow.
XTake cover :off the opening.
XScrew in the towing eye clockwise as far as it
will go and tighten it.
Removing the towing eye
XUnscrew and remove the towing eye.
XAttach cover :to the bumper and press until
it engages.
XPlace the towing eye in the vehicle tool kit.
Towing avehicle with both axles on
the ground
GWARNING
You can no longer steer the vehicle if the
steerin gwheel lock has been engaged. There
is ar isk of an accident.
Always switch off the ignition when towing the
vehicle with atow cable or atow bar.
The automatic transmission shifts to position
j automatically when you open the driver's or
front-passenger door or when you remove the
SmartKey from the ignition lock. In order to ensure that the automatic transmis-
sion stays in position
iwhen towing away the
vehicle, you must observe the following points:
XSwitch on the hazard warning lamps
(Ypage 97).
XTurn the SmartKey to position 2in the igni-
tion lock.
On vehicles with KEYLESS-GO, use the Smart-
Key instead of the Start/Stop button
(
Ypage 116).
XDepress and hold the brake pedal.
XShift the transmission to position i.
XRelease the brake pedal.
XRelease the electric parking brake.
XLeave the SmartKey in position2in the igni-
tion lock.
In order to signal achange of direction when
towing the vehicle with the hazard warning
lamps switched on, use the combination switch
as usual. In this case, only the indicator lamps
for the direction of travel flash. When you reset
the combination switch, the hazard warning
flashers start flashing again.
It is important that you observe the safety
instructions when towing away your vehicle
(
Ypage 256).
Towing the vehicle with the rear axle
raised
!
The ignition must be switched off if you are
towing the vehicle with the rear axle raised.
Intervention by ESP
®could otherwise dam-
age the brake system.
!Vehicles with automatic transmission must
not be towed with the rear axle raised. The
vehicle/trailer combination may otherwise
swerve or even roll over.
Towing and tow-starting257
Breakdown assistance
Z