lights MERCEDES-BENZ SLK CLASS 2000 Owners Manual
[x] Cancel search | Manufacturer: MERCEDES-BENZ, Model Year: 2000, Model line: SLK CLASS, Model: MERCEDES-BENZ SLK CLASS 2000Pages: 273, PDF Size: 15.92 MB
Page 45 of 273
42 Seats
Te ch n ica l
data Instruments
and controlsOperationDrivingInstrument
cluster displayPractical hints Car care Index
Seat heater (optional)
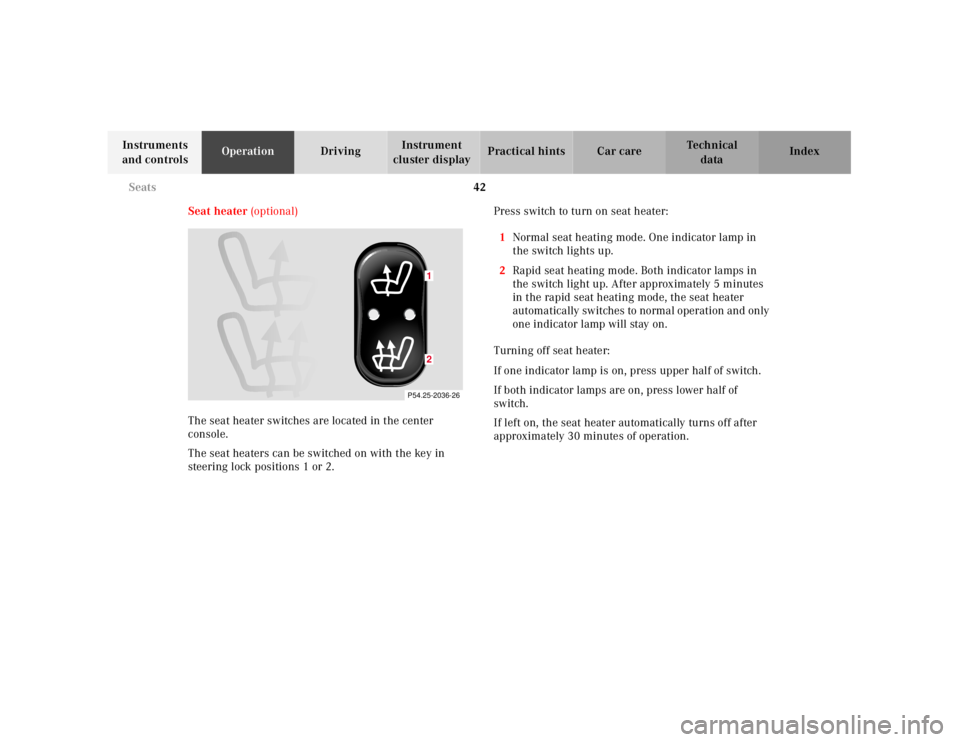
The seat heater switches are located in the center
console.
The seat heaters can be switched on with the key in
steering lock positions 1 or 2.Press switch to turn on seat heater:
1Normal seat heating mode. One indicator lamp in
the switch lights up.
2Rapid seat heating mode. Both indicator lamps in
the switch light up. After approximately 5 minutes
in the rapid seat heating mode, the seat heater
automa tica lly sw itches to norma l operation and only
one indicator lamp will stay on.
Turning off seat heater:
If one indicator lamp is on, press upper half of switch.
If both indicator lamps are on, press lower half of
switch.
If left on, the seat heater automatically turns off after
approximately 30 minutes of operation.
P54.25-2036-26
12
Page 92 of 273
89 Climate control
Te ch n ica l
data Instruments
and controlsOperationDrivingInstrument
cluster displayPractical hints Car care Index Air recirculation
This mode can be selected to temporarily reduce the
entry of annoying odors or dust into the vehicle’s
interior.
Outside air is not supplied to the vehicle’s interior.
To select, press O button.
To cancel, press O button again.
The system will automatically switch from recirculated
air to fresh air
•after approximately 5 minutes at outside
temperatures below approximately 40°F (5°C),
•after approximately 30 minutes, at outside
temperatures above approximately 40°F (5°C),
•after approximately 5 minutes, if button S is
pressed.
At high outside temperatures, the system automatically
engages the recirculated air mode for approximately
30 minutes, thereby increasing the cooling capacity
performance. Press O button again to extend the
recirculated air mode.Residual engine heat utilization (REST)
With the engine switched off, it is possible to continue
heating the interior for a short while.
Air volume is controlled automatically. Select
temperature for each side of the passenger
compartment. Set air distribution control switch to the
desired position.
To select:
Turn key in steering lock to position 1 or 0 or remove.
Press O button. Indicator lamp in the button lights
up.
This function selection will not activate if the battery
charge level is insufficient.
To c a n c e l :
Press O button. Indicator lamp in the button goes
out.
The system will automatically shut off
•if you turn key in steering lock to position 2,
•after approximately 30 minutes,
•if the battery voltage drops.
Page 125 of 273
122 Retractable hardtop
Te ch n ica l
data Instruments
and controlsOperationDrivingInstrument
cluster displayPractical hints Car care Index
3.Slide hardtop switch back (1) and hold:
•The indicator lamp in the hardtop switch lights
up.
Note:
If indicator lamp blinks slowly, a malfunction
has occurred in the system.
If indicator lamp blinks rapidly, the trunk lid
and / or the luggage cover may be open, and need
to be closed.
•The door windows lower.
•The trunk lid opens rearward.
•The hardtop lowers into its storage
compartment, simultaneously the shelf behind
roll bars opens, and rear quarter windows lower.
•The shelf behind the roll bars closes.
•The trunk lid closes.
•The indicator lamp in the hardtop switch goes
out – the opening procedure is completed.If the hardtop switch is held or is released and slid back
again within approximately 30 seconds, the door
windows will close.
However, the door windows can also be closed / opened
later on. Slide hardtop switch twice forward / backward
and hold.
The rear quarter windows cannot be raised with the
hardtop lowered.
Notes:
For safety reasons, the hardtop cannot be lowered while
driving.
Lowering a wet hardtop can result in water reaching the
vehicle interior. The hardtop should be dry when
lowering it into the storage compartment.
Wa r n i n g !
To prevent possible accidents, drive the vehicle
only with the hardtop either completely closed and
locked, or fully lowered into its storage
compartment.
Page 126 of 273
123 Retractable hardtop
Te ch n ica l
data Instruments
and controlsOperationDrivingInstrument
cluster displayPractical hints Car care Index Raising Hardtop
1.E n ga g e p a r k i n g b ra ke .
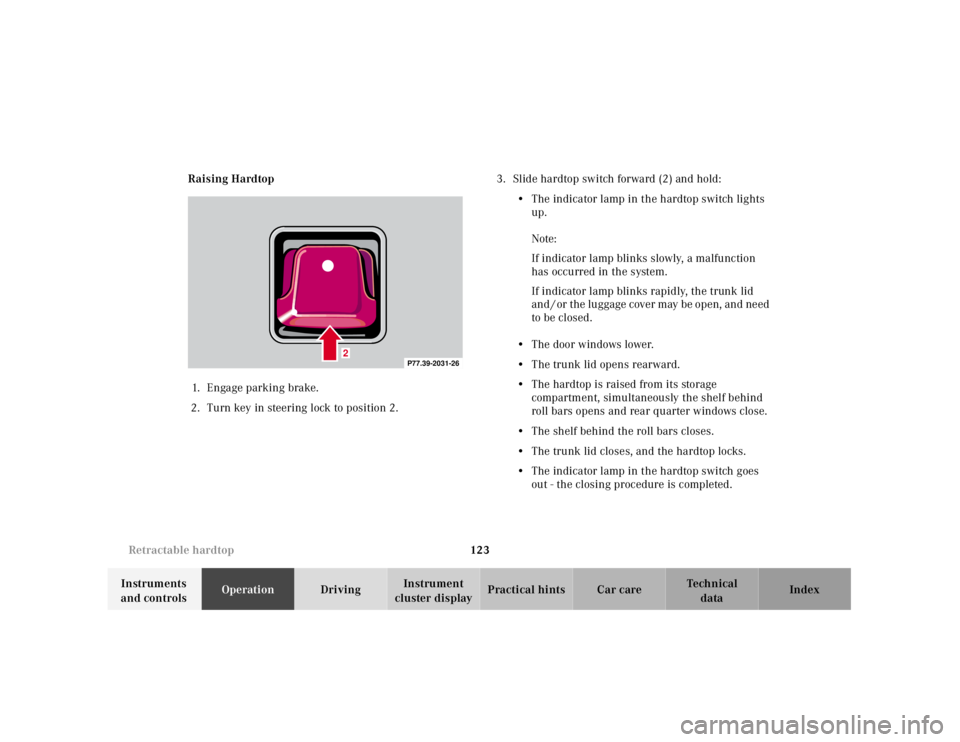
2.Turn key in steering lock to position 2.3.Slide hardtop switch forward (2) and hold:
•The indicator lamp in the hardtop switch lights
up.
Note:
If indicator lamp blinks slowly, a malfunction
has occurred in the system.
If indicator lamp blinks rapidly, the trunk lid
and / or the luggage cover may be open, and need
to be closed.
•The door windows lower.
•The trunk lid opens rearward.
•The hardtop is raised from its storage
compartment, simultaneously the shelf behind
roll bars opens and rear quarter windows close.
•The shelf behind the roll bars closes.
•The trunk lid closes, and the hardtop locks.
•The indicator lamp in the hardtop switch goes
out - the closing procedure is completed.
2
P77.39-2031-26
Page 149 of 273
146 Automatic transmission
Te ch n ica l
data Instruments
and controlsOperationDrivingInstrument
cluster displayPractical hints Car care Index
Stopping
For brief stops, e.g. at traffic lights, leave the
transmission in gear and hold vehicle with the service
brake.
For longer stops with the engine idling, shift into “N”
or “P” and hold the vehicle with the service brake.
When stopping the vehicle on an uphill gradient, do not
hold it with the accelerator, use the brake. This avoids
unnecessary transmission heat build up.
Maneuvering
To maneuver in tight areas, e.g. when pulling into a
parking space, control the vehicle speed by gradually
releasing the brakes. Accelerate gently and never
abruptly step on the accelerator.
To rock a vehicle out of soft ground (mud or snow),
alternately shift from forward to reverse, while applying
only slight partial throttle.
Rocking a vehicle free in this manner may cause the
ABS or traction system malfunction indicator lamp to
come on. Turn off and restart the engine to clear the
malfunction indication.
Wa r n i n g !
Getting out of your vehicle with the selector lever
not fully engaged in position “P” is dangerous.
Also, when parked on an incline, posi tion “P” alone
may not prevent your vehicle from moving,
possibly hitting people or objects.Always set t he parki ng brake in addi tion to sh ifting
to position “P”, see page 153 for parking brake. When parked on an incline, also turn front wheel
towards the road curb.Wa r n i n g !
When leaving the vehicle always remove the key
from the steering lock, and lock the vehicle. Do not
leave children unattended in the vehicle, or with
access to an u nlocked veh ic le. Ch ildren cou ld m ove
the gear selector lever from position “P”, which
could result in an accident or serious injury.
Page 183 of 273
180 Malfunction and indicator lamps
Te ch n ica l
data Instruments
and controlsOperation DrivingInstrument
cluster displayPractical hints Car care Index
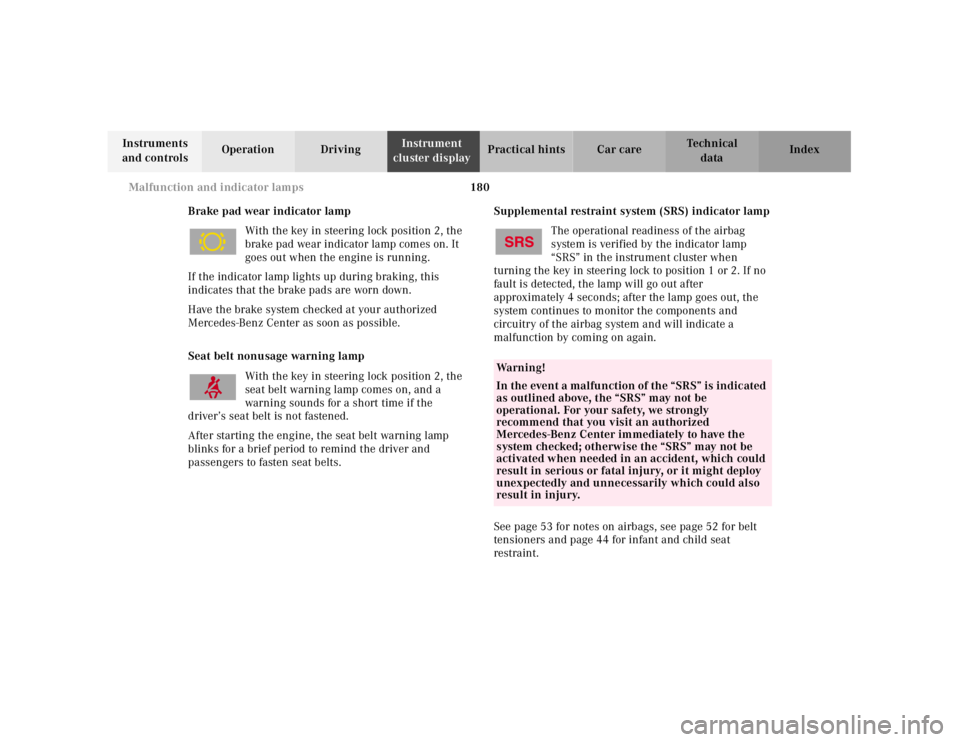
Brake pad wear indicator lamp
With the key in steering lock position 2, the
brake pad wear indicator lamp comes on. It
goes out when the engine is running.
If the indicator lamp lights up during braking, this
indicates that the brake pads are worn down.
Have the brake system checked at your authorized
Mercedes-Benz Center as soon as possible.
Seat belt nonusage warning lamp
With the key in steering lock position 2, the
seat belt warning lamp comes on, and a
warning sounds for a short time if the
driver’s seat belt is not fastened.
After starting the engine, the seat belt warning lamp
blinks for a brief period to remind the driver and
passengers to fasten seat belts.Supplemental restraint system (SRS) indicator lamp
The operational readiness of the airbag
system is verified by the indicator lamp
“SRS” in the instrument cluster when
turning the key in steering lock to position 1 or 2. If no
fault is detected, the lamp will go out after
approximately 4 seconds; after the lamp goes out, the
system continues to monitor the components and
circuitry of the airbag system and will indicate a
malfunction by coming on again.
See page 53 for notes on airbags, see page 52 for belt
tensioners and page 44 for infant and child seat
restraint.
Wa r n i n g !
In the event a malfu nction of th e “SRS” is indic ated
as outlined above, the “SRS” may not be
operational. For your safety, we strongly
recommend that you visit an authorized
Mercedes-Benz Center immediately to have the
system checked; otherwise the “SRS” may not be
activated when needed in an accident, which could
result in serious or fatal injury, or it might deploy
unexpectedly and unnecessarily which could also
result in injury.
Page 184 of 273
181 Malfunction and indicator lamps
Te ch n ica l
data Instruments
and controlsOperation DrivingInstrument
cluster displayPractical hints Car care Index Fuel reserve and fuel cap placement warning
With the key in steering lock position 2, the fuel reserve
warning lamp comes on. It should go out immediately
when the engine is running.
If the warning lamp does not go out after starting the
engine, or if it comes on while driving, it indicates that
the fuel level is down to the reserve quantity of
approximately 2.1 gal (8 liters).
The warning lamp blinks when the fuel cap is not
closed, or a fuel system leak has been detected.
Retighten cap and see if warning lamp goes out after
restart and next OBD selfcheck.
If the warning lamp continues to blink after closing the
fuel cap correctly, have the fuel system checked at your
authorized Mercedes-Benz Center as soon as possible.
Leaving the engine running and the fuel cap open can
a lso c ause t he “CH ECK ENG INE” lamp to ill uminate, see
also page 178.Electronic stability program (ESP) — warning lamp
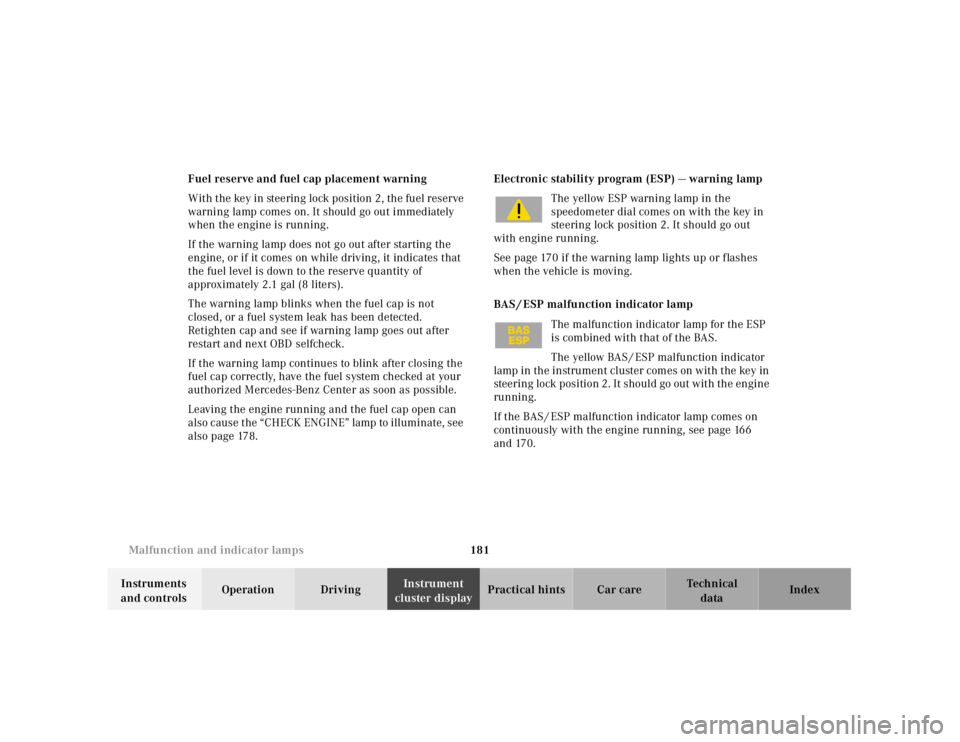
The yellow ESP warning lamp in the
speedometer dial comes on with the key in
steering lock position 2. It should go out
with engine running.
See page 170 if the warning lamp lights up or f lashes
when the vehicle is moving.
BAS / ESP malfunction indicator lamp
The malfunction indicator lamp for the ESP
is combined with that of the BAS.
The yellow BAS / ESP malfunction indicator
lamp in the instrument cluster comes on with the key in
steering lock position 2. It shoul d go out w it h th e engine
running.
If the BAS / ESP malfunction indicator lamp comes on
continuously with the engine running, see page 166
and 170.
Page 192 of 273
189 Fuses
Te ch n ica l
data Instruments
and controlsOperation DrivingInstrument
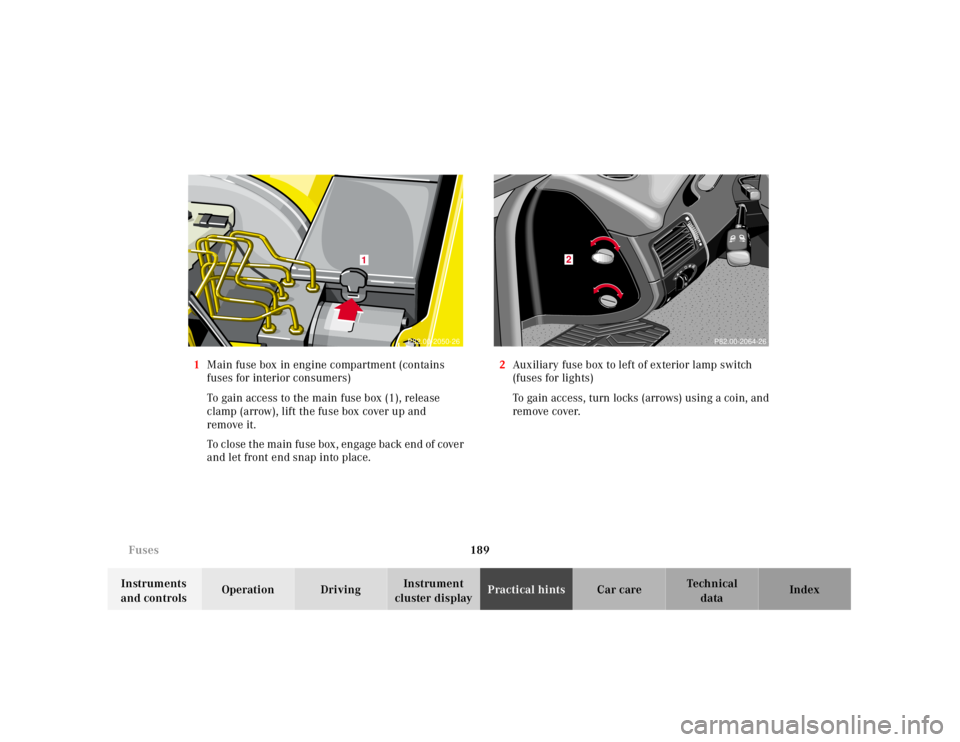
cluster displayPractical hintsCar care Index 1Main fuse box in engine compartment (contains
fuses for interior consumers)
To gain access to the main fuse box (1), release
clamp (arrow), lift the fuse box cover up and
remove it.
To c lose t he ma in fu se box , engage ba ck end of cove r
and let front end snap into place.2Auxiliary fuse box to left of exterior lamp switch
(fuses for lights)
To gain access, turn locks (arrows) using a coin, and
remove cover.
1
P82.00-2050-26
P82.00-2064-26
2
Page 216 of 273
213 Jump starting
Te ch n ica l
data Instruments
and controlsOperation DrivingInstrument
cluster displayPractical hintsCar care Index Proceed as follows:
1.Position the vehicle with the charged battery so that
the jumper cables will reach, but never let the
vehicles touch. Make sure the jumper cables do not
have loose or missing insulation.
2.On both vehicles:
•Turn off engine and all lights and accessories,
except hazard warning flashers or work lights.
•Apply parking brake and shift selector lever to
position “P” (manual transmission to Neutral).
Important!
3.Clamp one end of the first jumper cable to the
positive (+) terminal of the discharged battery and
the other end to the positive (+) terminal of the
charged battery. Make sure the cable clamps do not
touch any other metal parts.
4.Clamp one end of the second jumper cable to the
grounded negative (–) terminal of the charged
battery and the final connection to a grounded
heavy metal bracket in the engine compartment or
on the engine of the disabled vehicle.Important!
5.Start engine of the vehicle with the charged battery
and run at high idle. Make sure the cables are not
on or near pulleys, fans, or other parts that will
move when the engine is started. Allow the
discharged battery to charge for a few minutes. Start
engine of the disabled vehicle in the usual manner.
6.After the engine has started, remove jumper cables
by exactly reversing the above installation
sequence, starting with the last connection made
first. When removing each clamp, make sure that it
does not touch any other metal while the other end
is still attached.
Note:
If engine does not run after several unsuccessful
starting attempts, have it checked at the nearest
authorized Mercedes-Benz Center.
Excessive unburned fuel may damage the catalytic
converter.
Page 227 of 273
224 Remote control
Te ch n ica l
data Instruments
and controlsOperation DrivingInstrument
cluster displayPractical hintsCar care Index
Changing batteries in the remote control
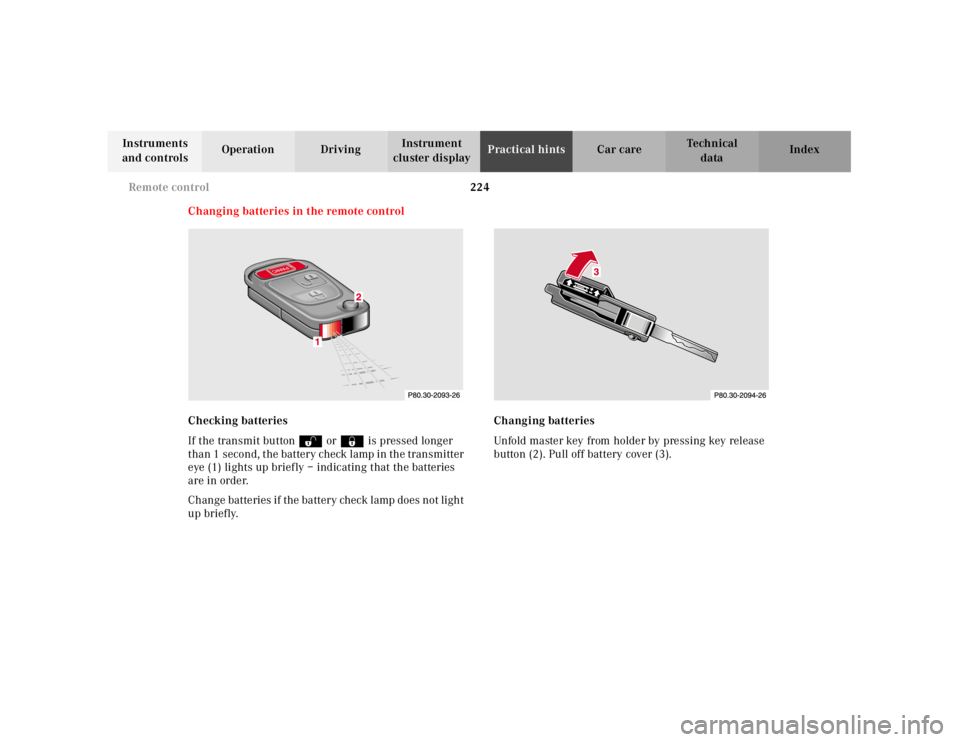
Checking batteries
If the transmit buttonŒ or‹ is pressed longer
than 1 second, the battery check lamp in the transmitter
eye (1) lights up briefly – indicating that the batteries
are in order.
Change batteries if the battery check lamp does not light
up briefly.Changing batteries
Unfold master key from holder by pressing key release
button (2). Pull off battery cover (3).