high beam MERCEDES-BENZ SLK-CLASS ROADSTER 2012 Owners Manual
[x] Cancel search | Manufacturer: MERCEDES-BENZ, Model Year: 2012, Model line: SLK-CLASS ROADSTER, Model: MERCEDES-BENZ SLK-CLASS ROADSTER 2012Pages: 336, PDF Size: 24.02 MB
Page 8 of 336
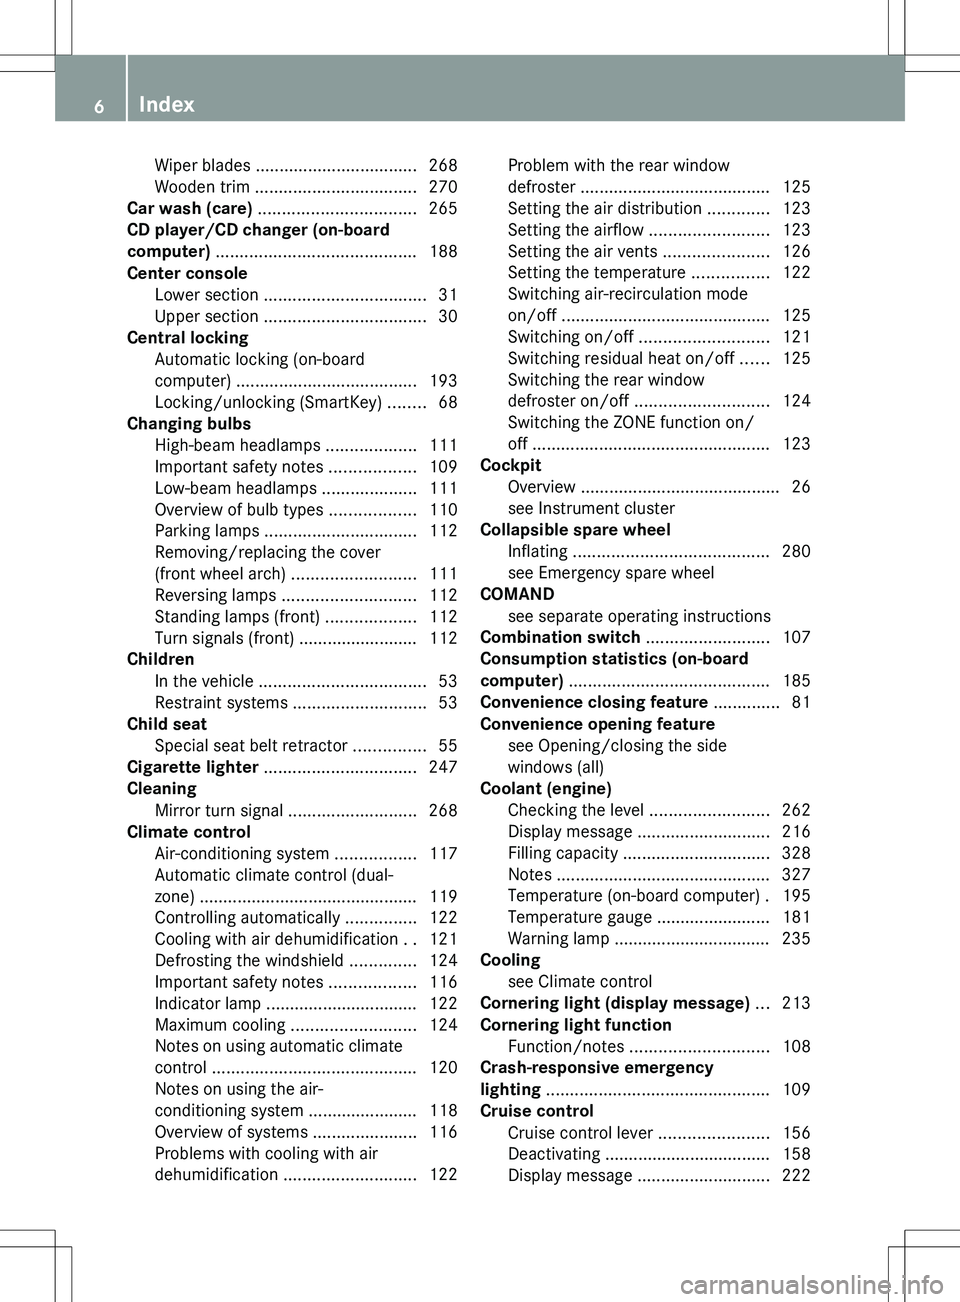
Wiper blades .................................. 268
Wooden trim .................................. 270
Car wash (care) ................................. 265
CD player/CD changer (on-board
computer) .......................................... 188
Center console Lower section .................................. 31
Upper section .................................. 30
Central locking
Automatic locking (on-board
computer) ...................................... 193
Locking/unlocking (SmartKey) ........68
Changing bulbs
High-beam headlamps ...................111
Important safety notes ..................109
Low-beam headlamps ....................111
Overview of bulb types ..................110
Parking lamps ................................ 112
Removing/replacing the cover
(front wheel arch) .......................... 111
Reversing lamps ............................ 112
Standing lamps (front) ...................112
Turn signals (front) ......................... 112
Children
In the vehicle ................................... 53
Restraint systems ............................ 53
Child seat
Special seat belt retractor ...............55
Cigarette lighter ................................ 247
Cleaning Mirror turn signal ........................... 268
Climate control
Air-conditioning system .................117
Automatic climate control (dual-
zone) .............................................. 119
Controlling automatically ...............122
Cooling with air dehumidification ..121
Defrosting the windshield ..............124
Important safety notes ..................116
Indicator lamp ................................ 122
Maximum cooling .......................... 124
Notes on using automatic climate
control ........................................... 120
Notes on using the air-
conditioning system ....................... 118
Overview of systems ......................116
Problems with cooling with air
dehumidification ............................ 122Problem with the rear window
defroster ........................................ 125
Setting the air distribution .............123
Setting the airflow .........................123
Setting the air vents ......................126
Setting the temperature ................122
Switching air-recirculation mode
on/off ............................................ 125
Switching on/off ........................... 121
Switching residual heat on/off ......125
Switching the rear window
defroster on/off ............................ 124
Switching the ZONE function on/
off .................................................. 123
Cockpit
Overview .......................................... 26
see Instrument cluster
Collapsible spare wheel
Inflating ......................................... 280
see Emergency spare wheel
COMAND
see separate operating instructions
Combination switch .......................... 107
Consumption statistics (on-board
computer) .......................................... 185
Convenience closing feature .............. 81
Convenience opening feature see Opening/closing the side
windows (all)
Coolant (engine)
Checking the level .........................262
Display message ............................ 216
Filling capacity ............................... 328
Notes ............................................. 327
Temperature (on-board computer) . 195
Temperature gauge ........................ 181
Warning lamp ................................. 235
Cooling
see Climate control
Cornering light (display message) ... 213
Cornering light function Function/notes ............................. 108
Crash-responsive emergency
lighting ............................................... 109
Cruise control Cruise control lever .......................156
Deactivating ................................... 158
Display message ............................ 2226Index
Page 12 of 336
G
Garage door opener Clearing the memory .....................257
Notes ............................................. 254
Opening/closing the garage door ..257
Programming (button in the rear-
view mirror) ................................... 255
Gear indicator (on-board
computer) .......................................... 195
Gear or selector lever (cleaning
guidelines) ......................................... 270
Genuine Mercedes-Benz parts ......... 322
Glove box ........................................... 242
H
Handbrake see Parking brake
Hazard warning lamps ...................... 108
Head bags Display message ............................ 209
Operation ......................................... 41
Headlamp cleaning system
Notes ............................................. 328
Headlamps
Adding fluid to cleaning system .....263
Cleaning system (function) ............107
Fogging up ..................................... 108
see Automatic headlamp mode
Head level heating (AIRSCARF) .......... 96
Head restraints Adjusting ......................................... 95
see NECK-PRO head restraints
Heating
see Climate control
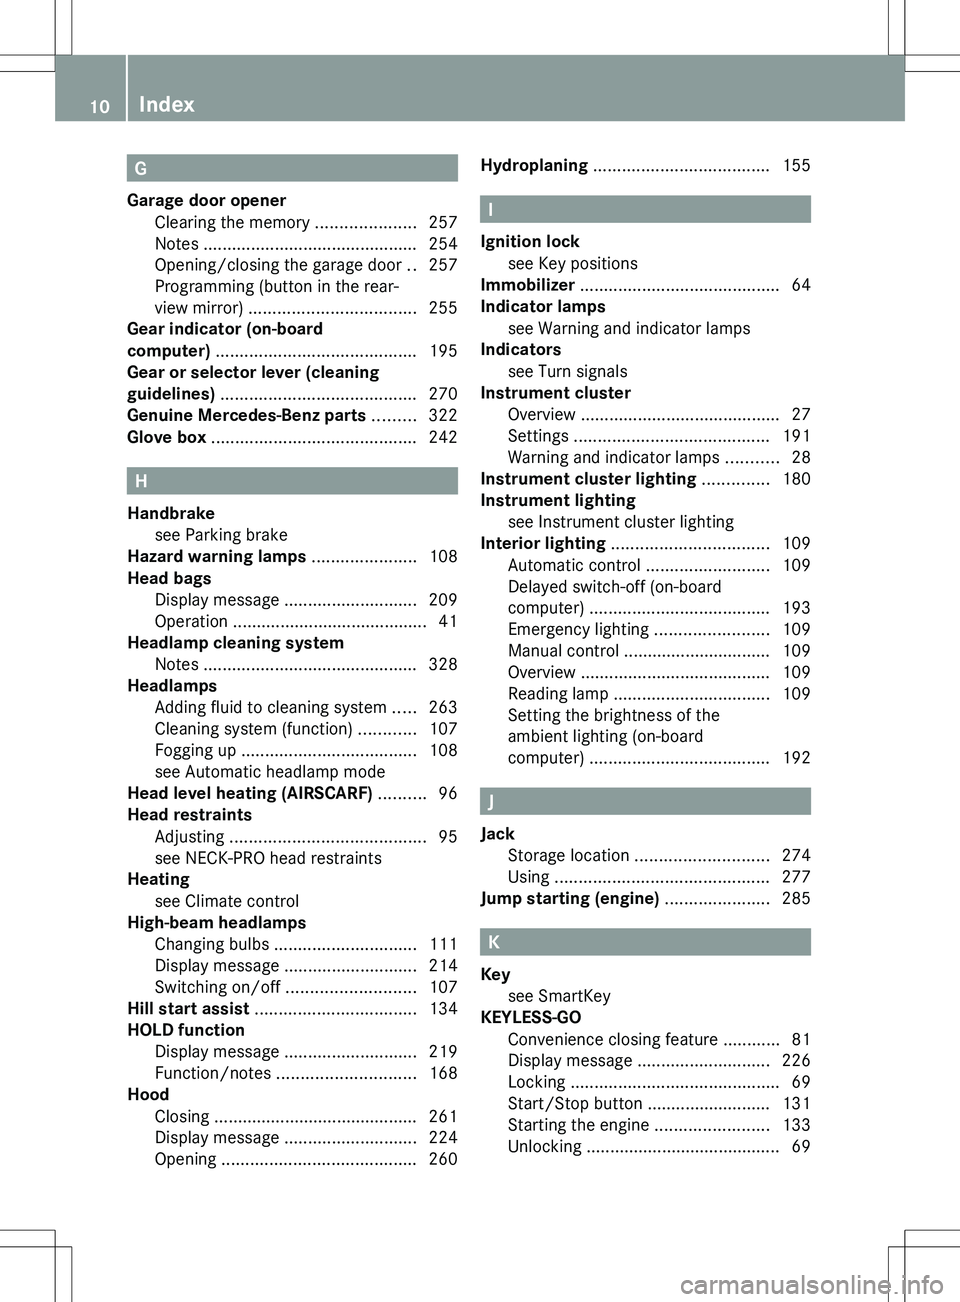
High-beam headlamps
Changing bulbs .............................. 111
Display message ............................ 214
Switching on/off ........................... 107
Hill start assist .................................. 134
HOLD function Display message ............................ 219
Function/notes ............................. 168
Hood
Closing ........................................... 261
Display message ............................ 224
Opening ......................................... 260
Hydroplaning ..................................... 155
I
Ignition lock see Key positions
Immobilizer .......................................... 64
Indicator lamps see Warning and indicator lamps
Indicators
see Turn signals
Instrument cluster
Overview .......................................... 27
Settings ......................................... 191
Warning and indicator lamps ...........28
Instrument cluster lighting .............. 180
Instrument lighting see Instrument cluster lighting
Interior lighting ................................. 109
Automatic control ..........................109
Delayed switch-off (on-board
computer) ...................................... 193
Emergency lighting ........................109
Manual control ............................... 109
Overview ........................................ 109
Reading lamp ................................. 109
Setting the brightness of the
ambient lighting (on-board
computer) ...................................... 192
J
Jack Storage location ............................ 274
Using ............................................. 277
Jump starting (engine) ...................... 285
K
Key see SmartKey
KEYLESS-GO
Convenience closing feature ............81
Display message ............................ 226
Locking ............................................ 69
Start/Stop button .......................... 131
Starting the engine ........................133
Unlocking ......................................... 69
10Index
Page 13 of 336
Key positionsKEYLESS-GO .................................. 131
SmartKey ....................................... 131
Kickdown
Driving tips .................................... 142
Manual drive program ....................145
Knee bag .............................................. 40
L
Lamps see Warning and indicator lamps
Lap time (RACETIMER) ...................... 196
License plate lamp (display
message) ............................................ 214
Light function, active Display message ............................ 215
Lighting
see Lights
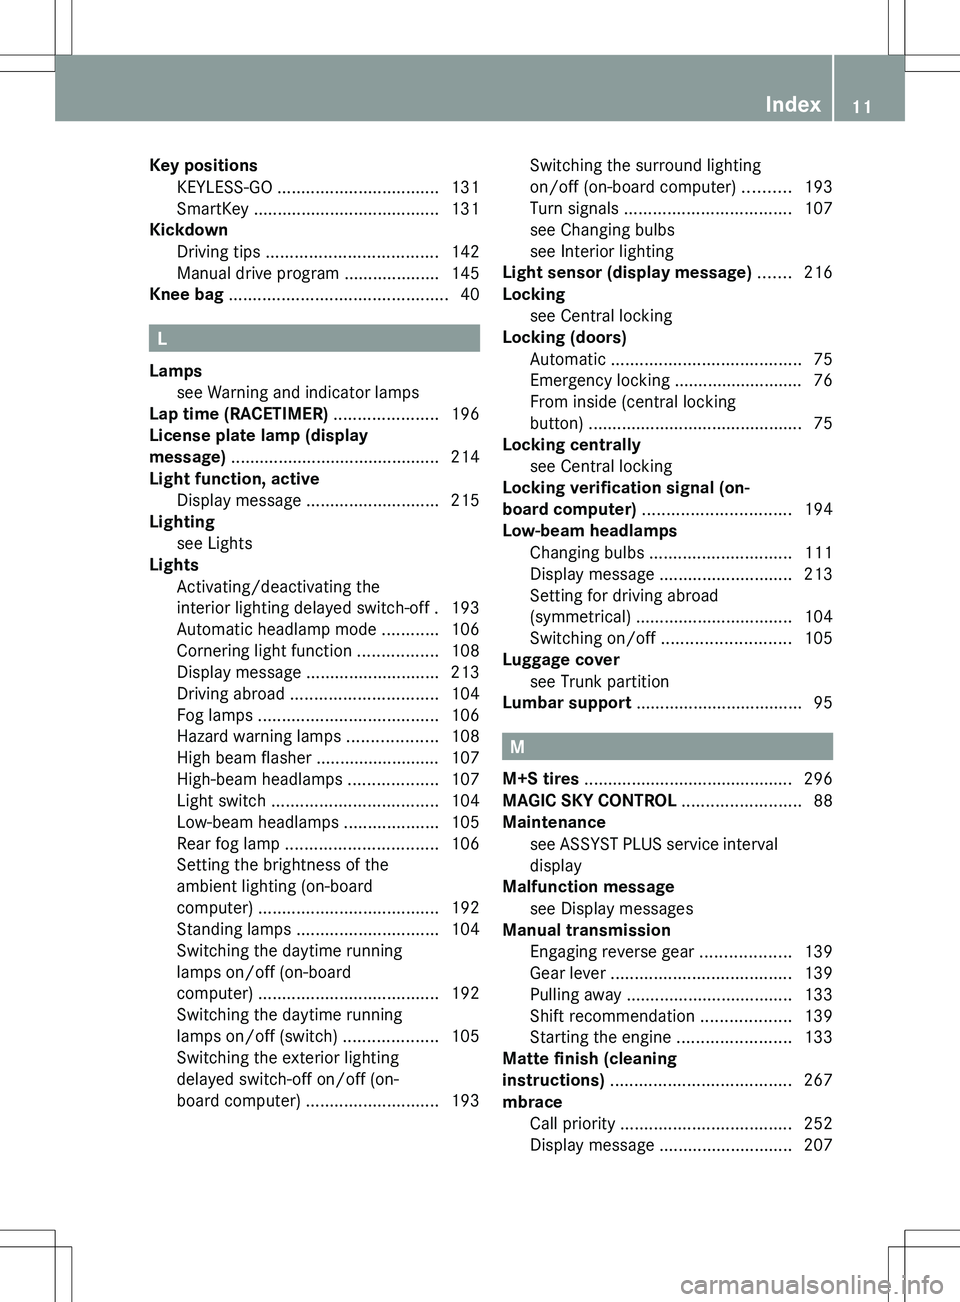
Lights
Activating/deactivating the
interior lighting delayed switch-off . 193
Automatic headlamp mode ............106
Cornering light function .................108
Display message ............................ 213
Driving abroad ............................... 104
Fog lamps ...................................... 106
Hazard warning lamps ...................108
High beam flasher .......................... 107
High-beam headlamps ...................107
Light switch ................................... 104
Low-beam headlamps ....................105
Rear fog lamp ................................ 106
Setting the brightness of the
ambient lighting (on-board
computer) ...................................... 192
Standing lamps .............................. 104
Switching the daytime running
lamps on/off (on-board
computer) ...................................... 192
Switching the daytime running
lamps on/off (switch) ....................105
Switching the exterior lighting
delayed switch-off on/off (on-
board computer) ............................ 193
Switching the surround lighting
on/off (on-board computer) ..........193
Turn signals ................................... 107
see Changing bulbs
see Interior lighting
Light sensor (display message) ....... 216
Locking see Central locking
Locking (doors)
Automatic ........................................ 75
Emergency locking ........................... 76
From inside (central locking
button) ............................................. 75
Locking centrally
see Central locking
Locking verification signal (on-
board computer) ............................... 194
Low-beam headlamps Changing bulbs .............................. 111
Display message ............................ 213
Setting for driving abroad
(symmetrical) ................................. 104
Switching on/off ........................... 105
Luggage cover
see Trunk partition
Lumbar support ................................... 95
M
M+S tires ............................................ 296
MAGIC SKY CONTROL ......................... 88
Maintenance see ASSYST PLUS service interval
display
Malfunction message
see Display messages
Manual transmission
Engaging reverse gear ...................139
Gear lever ...................................... 139
Pulling away ................................... 133
Shift recommendation ...................139
Starting the engine ........................133
Matte finish (cleaning
instructions) ...................................... 267
mbrace Call priority .................................... 252
Display message ............................ 207
Index11
Page 30 of 336
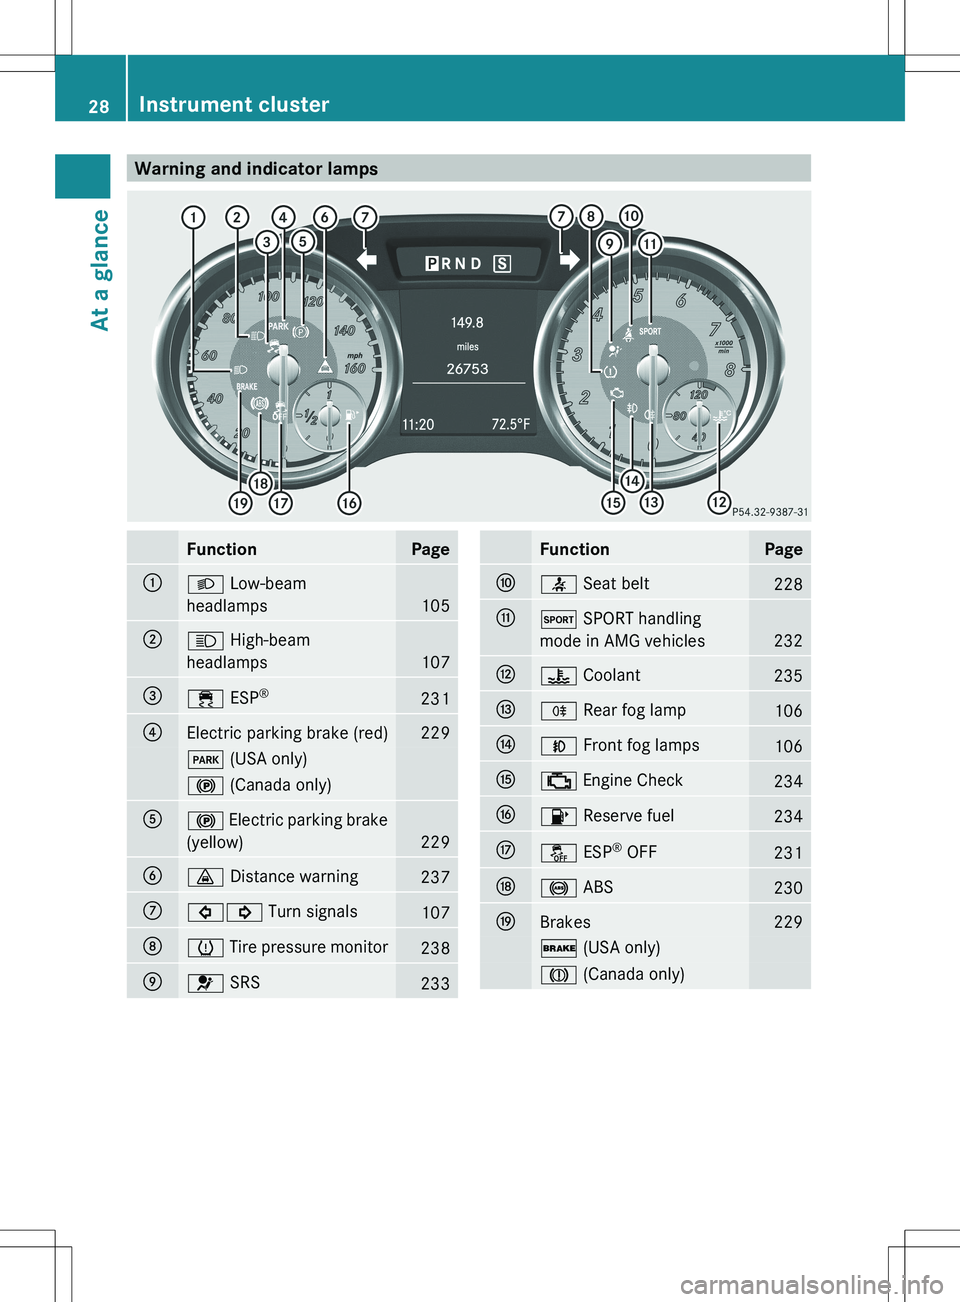
Warning and indicator lampsFunctionPage:L Low-beam
headlamps
105
;K High-beam
headlamps
107
=÷ ESP®231?Electric parking brake (red)229F
(USA only)! (Canada only)A! Electric parking brake
(yellow)
229
B· Distance warning237C#! Turn signals107Dh Tire pressure monitor238E6 SRS233FunctionPageF7 Seat belt228GM SPORT handling
mode in AMG vehicles
232
H? Coolant235IR Rear fog lamp106JN Front fog lamps106K; Engine Check234L8 Reserve fuel234Må ESP®
OFF231N! ABS230OBrakes229$ (USA only)J (Canada only)28Instrument clusterAt a glance
Page 107 of 336
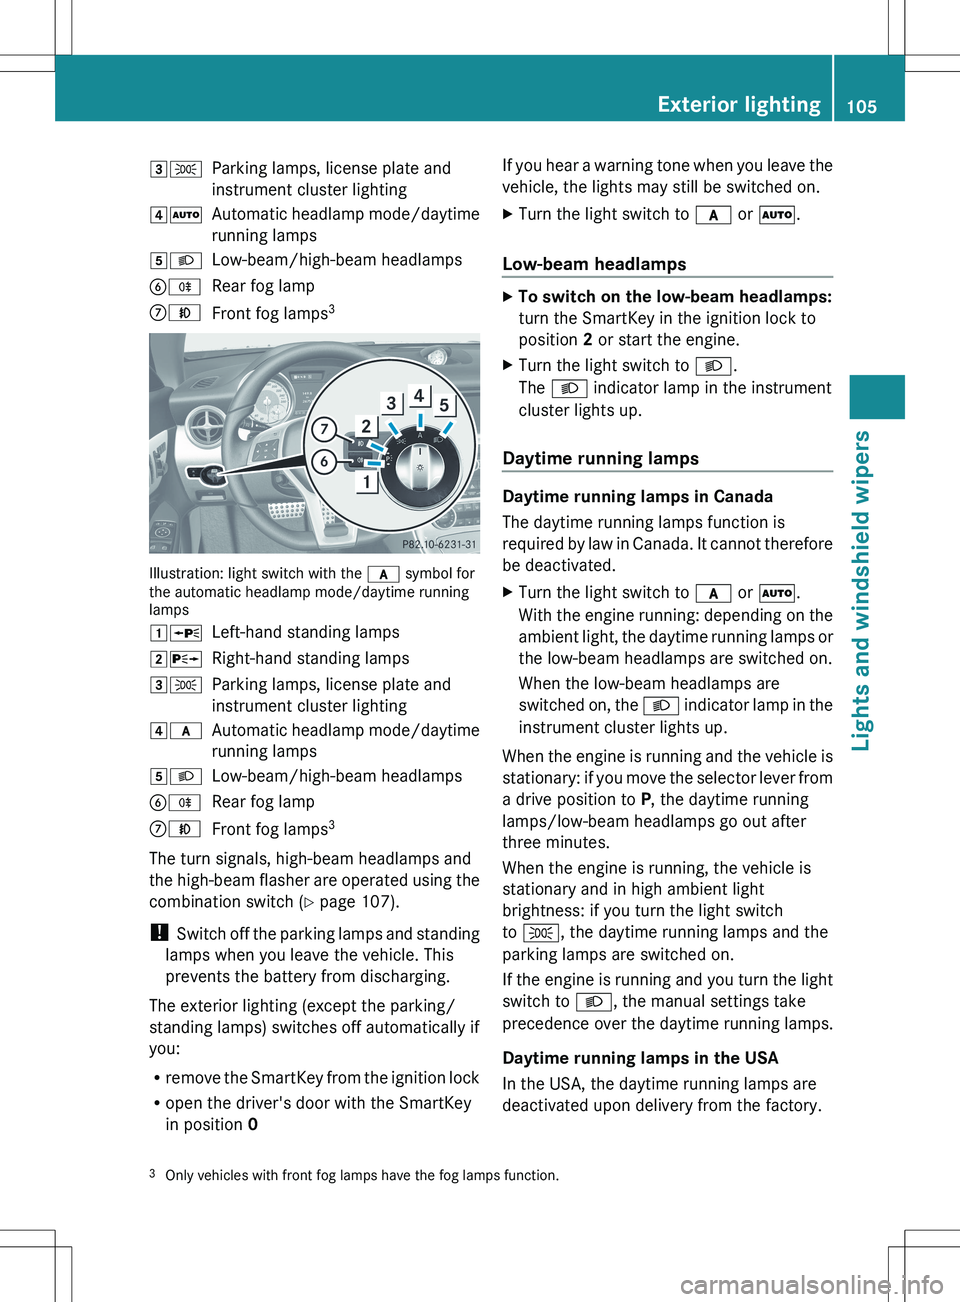
3TParking lamps, license plate and
instrument cluster lighting4 ÃAutomatic headlamp mode/daytime
running lamps5 LLow-beam/high-beam headlampsBRRear fog lampCNFront fog lamps 3
Illustration: light switch with the
c symbol for
the automatic headlamp mode/daytime running
lamps
1 WLeft-hand standing lamps2XRight-hand standing lamps3TParking lamps, license plate and
instrument cluster lighting4 cAutomatic headlamp mode/daytime
running lamps5 LLow-beam/high-beam headlampsBRRear fog lampCNFront fog lamps 3
The turn signals, high-beam headlamps and
the high-beam flasher are operated using the
combination switch ( Y page 107).
! Switch off the parking lamps and standing
lamps when you leave the vehicle. This
prevents the battery from discharging.
The exterior lighting (except the parking/
standing lamps) switches off automatically if
you:
R remove the SmartKey from the ignition lock
R open the driver's door with the SmartKey
in position 0
If you hear a warning tone when you leave the
vehicle, the lights may still be switched on.XTurn the light switch to c or à .
Low-beam headlamps
XTo switch on the low-beam headlamps:
turn the SmartKey in the ignition lock to
position 2 or start the engine.XTurn the light switch to L.
The L indicator lamp in the instrument
cluster lights up.
Daytime running lamps
Daytime running lamps in Canada
The daytime running lamps function is
required by law in Canada. It cannot therefore
be deactivated.
XTurn the light switch to c or à .
With the engine running: depending on the
ambient light, the daytime running lamps or
the low-beam headlamps are switched on.
When the low-beam headlamps are
switched on, the L indicator lamp in the
instrument cluster lights up.
When the engine is running and the vehicle is
stationary: if you move the selector lever from
a drive position to P, the daytime running
lamps/low-beam headlamps go out after
three minutes.
When the engine is running, the vehicle is
stationary and in high ambient light
brightness: if you turn the light switch
to T , the daytime running lamps and the
parking lamps are switched on.
If the engine is running and you turn the light
switch to L, the manual settings take
precedence over the daytime running lamps.
Daytime running lamps in the USA
In the USA, the daytime running lamps are
deactivated upon delivery from the factory.
3 Only vehicles with front fog lamps have the fog lamps function.Exterior lighting105Lights and windshield wipers
Page 109 of 336
XPress the R button.
The yellow R indicator lamp in the
instrument cluster lights up.XTo switch off the rear fog lamp: press the
R button.
The yellow R indicator lamp in the
instrument cluster goes out.
i If you switch the engine off (SmartKey in
position 1 in the ignition lock) and then
restart it, the previous rear fog lamp
settings are restored.
Headlamp cleaning system
If the "Wipe with washer fluid" function is
operated five times ( Y page 113) while the
lights are on and the engine is running, the
headlamps are cleaned automatically. When
you switch off the ignition, the automatic
headlamp cleaning system is reset and
counting is resumed from 0.
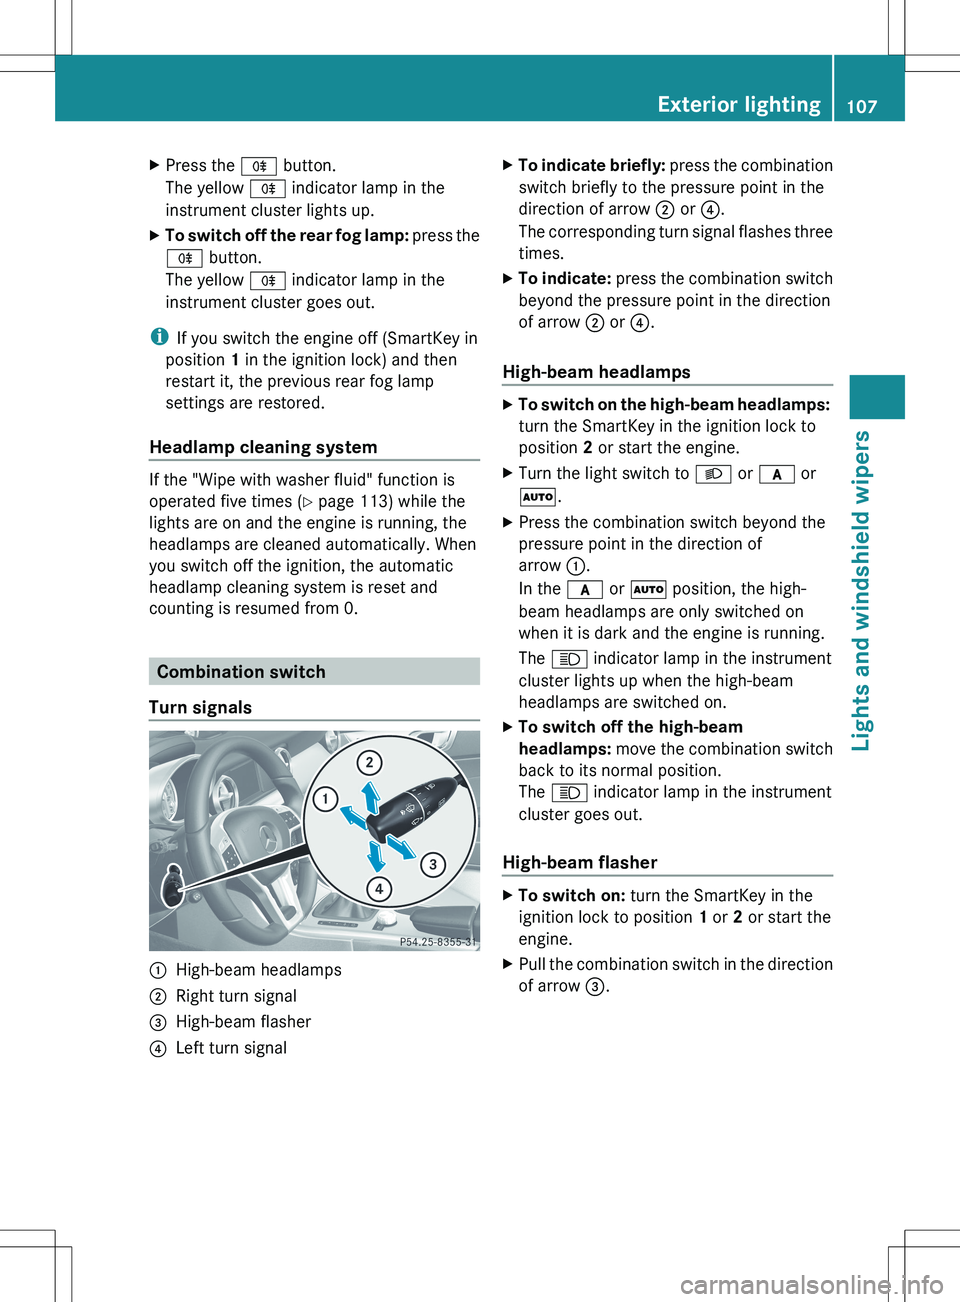
Combination switch
Turn signals
:High-beam headlamps;Right turn signal=High-beam flasher?Left turn signalXTo indicate briefly: press the combination
switch briefly to the pressure point in the
direction of arrow ; or ?.
The corresponding turn signal flashes three
times.XTo indicate: press the combination switch
beyond the pressure point in the direction
of arrow ; or ?.
High-beam headlamps
XTo switch on the high-beam headlamps:
turn the SmartKey in the ignition lock to
position 2 or start the engine.XTurn the light switch to L or c or
à .XPress the combination switch beyond the
pressure point in the direction of
arrow :.
In the c or à position, the high-
beam headlamps are only switched on
when it is dark and the engine is running.
The K indicator lamp in the instrument
cluster lights up when the high-beam
headlamps are switched on.XTo switch off the high-beam
headlamps: move the combination switch
back to its normal position.
The K indicator lamp in the instrument
cluster goes out.
High-beam flasher
XTo switch on: turn the SmartKey in the
ignition lock to position 1 or 2 or start the
engine.XPull the combination switch in the direction
of arrow =.Exterior lighting107Lights and windshield wipersZ
Page 110 of 336
Hazard warning lamps
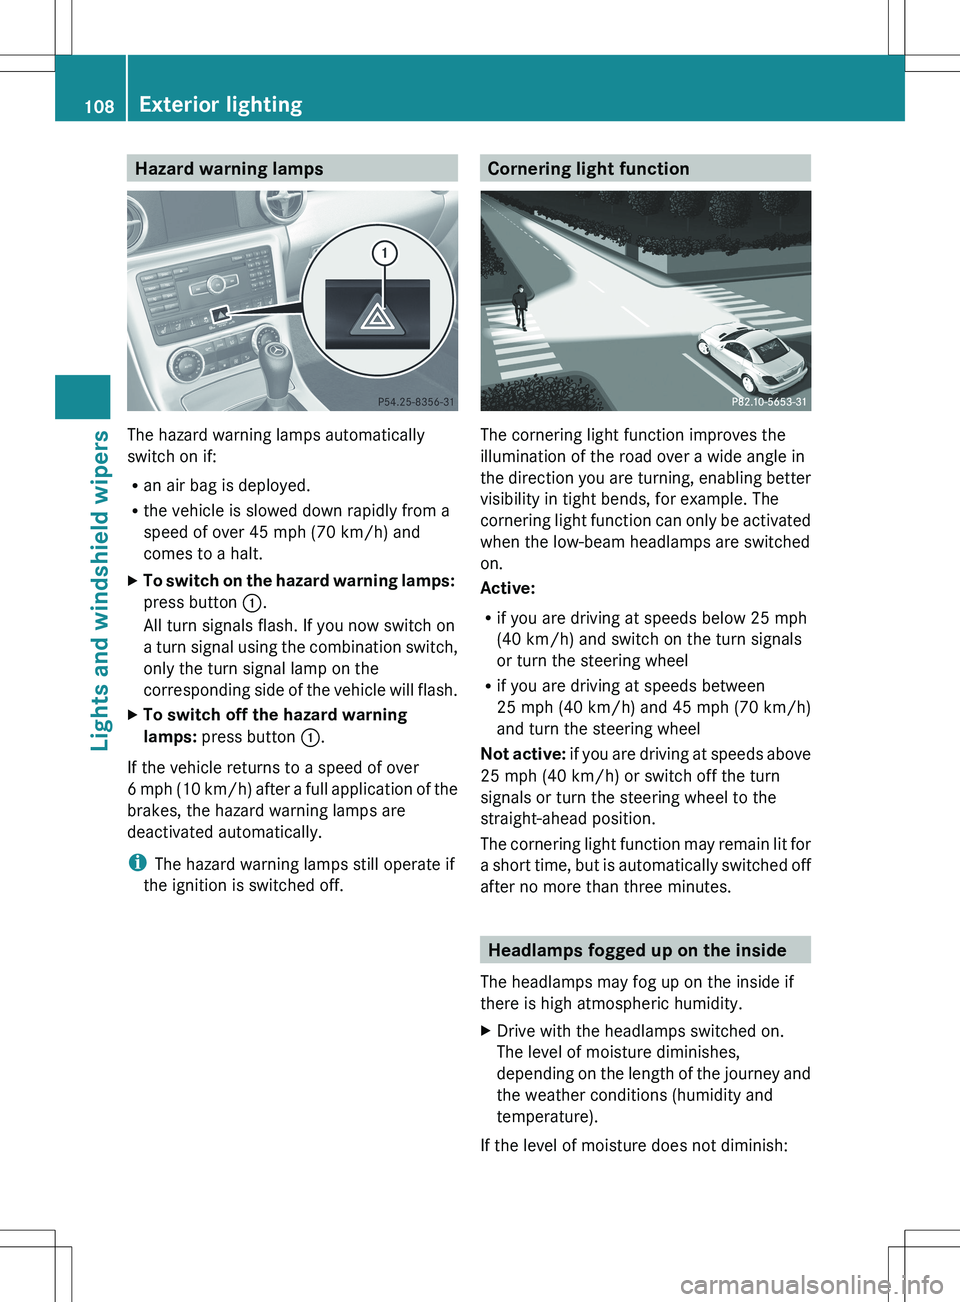
The hazard warning lamps automatically
switch on if:
R an air bag is deployed.
R the vehicle is slowed down rapidly from a
speed of over 45 mph (70 km/h) and
comes to a halt.
XTo switch on the hazard warning lamps:
press button :.
All turn signals flash. If you now switch on
a turn signal using the combination switch,
only the turn signal lamp on the
corresponding side of the vehicle will flash.XTo switch off the hazard warning
lamps: press button :.
If the vehicle returns to a speed of over
6 mph (10 km/h) after a full application of the
brakes, the hazard warning lamps are
deactivated automatically.
i The hazard warning lamps still operate if
the ignition is switched off.
Cornering light function
The cornering light function improves the
illumination of the road over a wide angle in
the direction you are turning, enabling better
visibility in tight bends, for example. The
cornering light function can only be activated
when the low-beam headlamps are switched
on.
Active:
R if you are driving at speeds below 25 mph
(40 km/h) and switch on the turn signals
or turn the steering wheel
R if you are driving at speeds between
25 mph (40 km/h) and 45 mph (70 km/h)
and turn the steering wheel
Not active: if you are driving at speeds above
25 mph (40 km/h) or switch off the turn
signals or turn the steering wheel to the
straight-ahead position.
The cornering light function may remain lit for
a short time, but is automatically switched off
after no more than three minutes.
Headlamps fogged up on the inside
The headlamps may fog up on the inside if
there is high atmospheric humidity.
XDrive with the headlamps switched on.
The level of moisture diminishes,
depending on the length of the journey and
the weather conditions (humidity and
temperature).
If the level of moisture does not diminish:
108Exterior lightingLights and windshield wipers
Page 112 of 336
If your vehicle is equipped with Xenon bulbs,
you can recognize this by the following: the
cone of light from the Xenon bulbs moves
from the top to the bottom and back again
when you start the engine. For this to be
observed, the lights must be switched on
before starting the engine.
Bulbs and lamps are an important aspect of
vehicle safety. You must therefore make sure
that these function correctly at all times.
Have the headlamp setting checked regularly.
Other bulbs
There are bulbs other than the Xenon bulbs
that you cannot replace. Replace only the
bulbs listed (Y page 110). Have the bulbs that
you cannot replace yourself changed at a
qualified specialist workshop.
If you require assistance changing bulbs,
consult a qualified specialist workshop.
Do not touch the glass tube of new bulbs with
your bare hands. Even minor contamination
can burn into the glass surface and reduce
the service life of the bulbs. Always use a lint-
free cloth or only touch the base of the bulb
when installing.
Only use bulbs of the correct type.
If the new bulb still does not light up, consult
a qualified specialist workshop.
Bulbs and lamps are an important aspect of
vehicle safety. You must therefore make sure
that these function correctly at all times.
Have the headlamp setting checked regularly.
GWARNING
Bulbs and lamps can become very hot. For
this reason, allow them to cool down before
changing them. Otherwise, you could burn
yourself when you touch them.
Keep bulbs out of the reach of children.
Otherwise, they could, for example, damage
the bulbs and injure themselves.
Never use a bulb which has been dropped.
Such a bulb may explode and injure you.
Halogen bulbs are pressurized and could
explode when you change them, especially if
they are very hot. You should therefore wear
eye protection and gloves when you are
changing them.
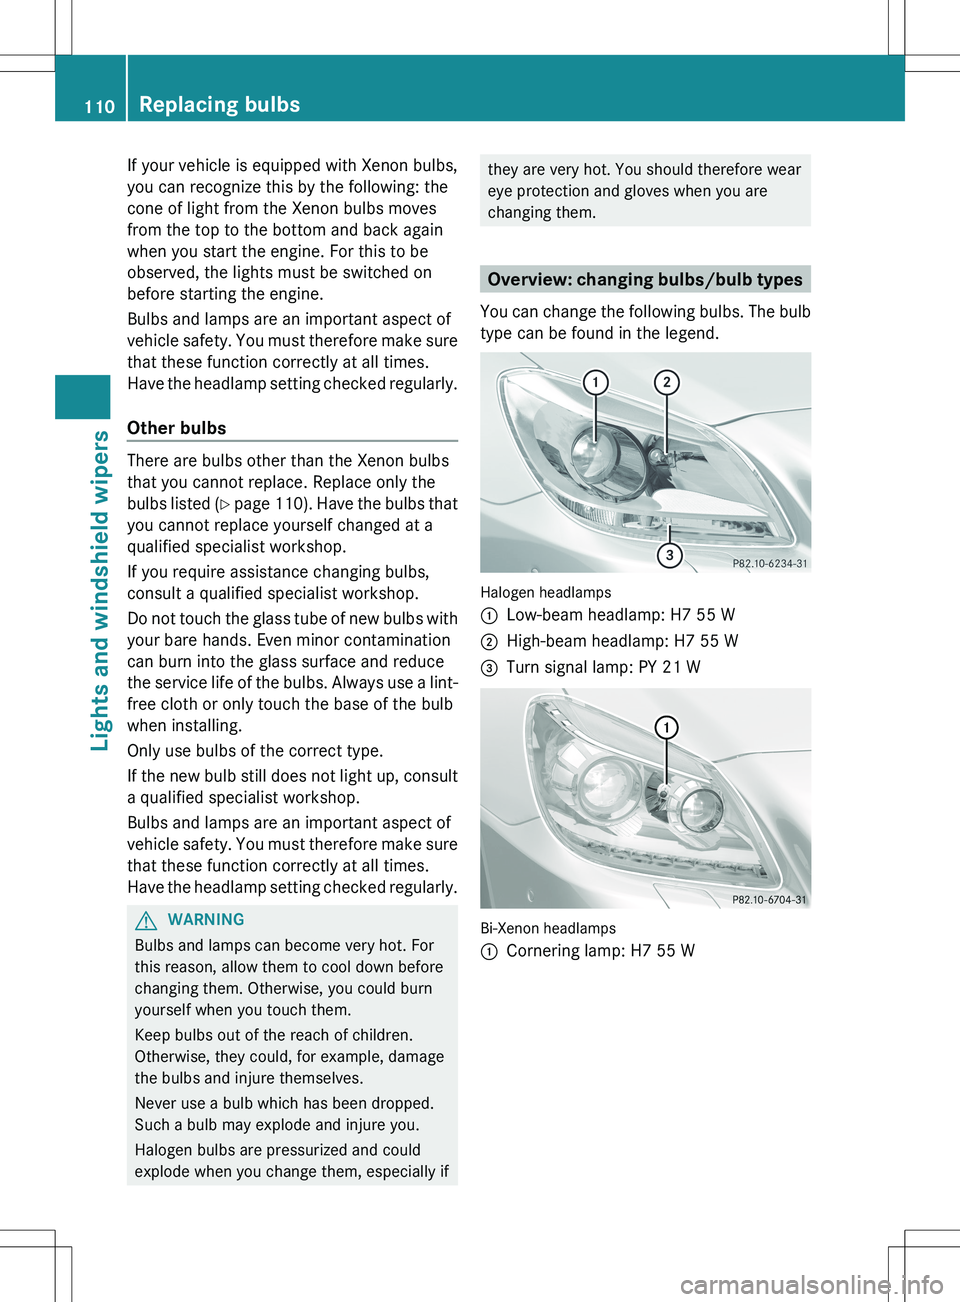
Overview: changing bulbs/bulb types
You can change the following bulbs. The bulb
type can be found in the legend.
Halogen headlamps
:Low-beam headlamp: H7 55 W;High-beam headlamp: H7 55 W=Turn signal lamp: PY 21 W
Bi-Xenon headlamps
:Cornering lamp: H7 55 W110Replacing bulbsLights and windshield wipers
Page 113 of 336
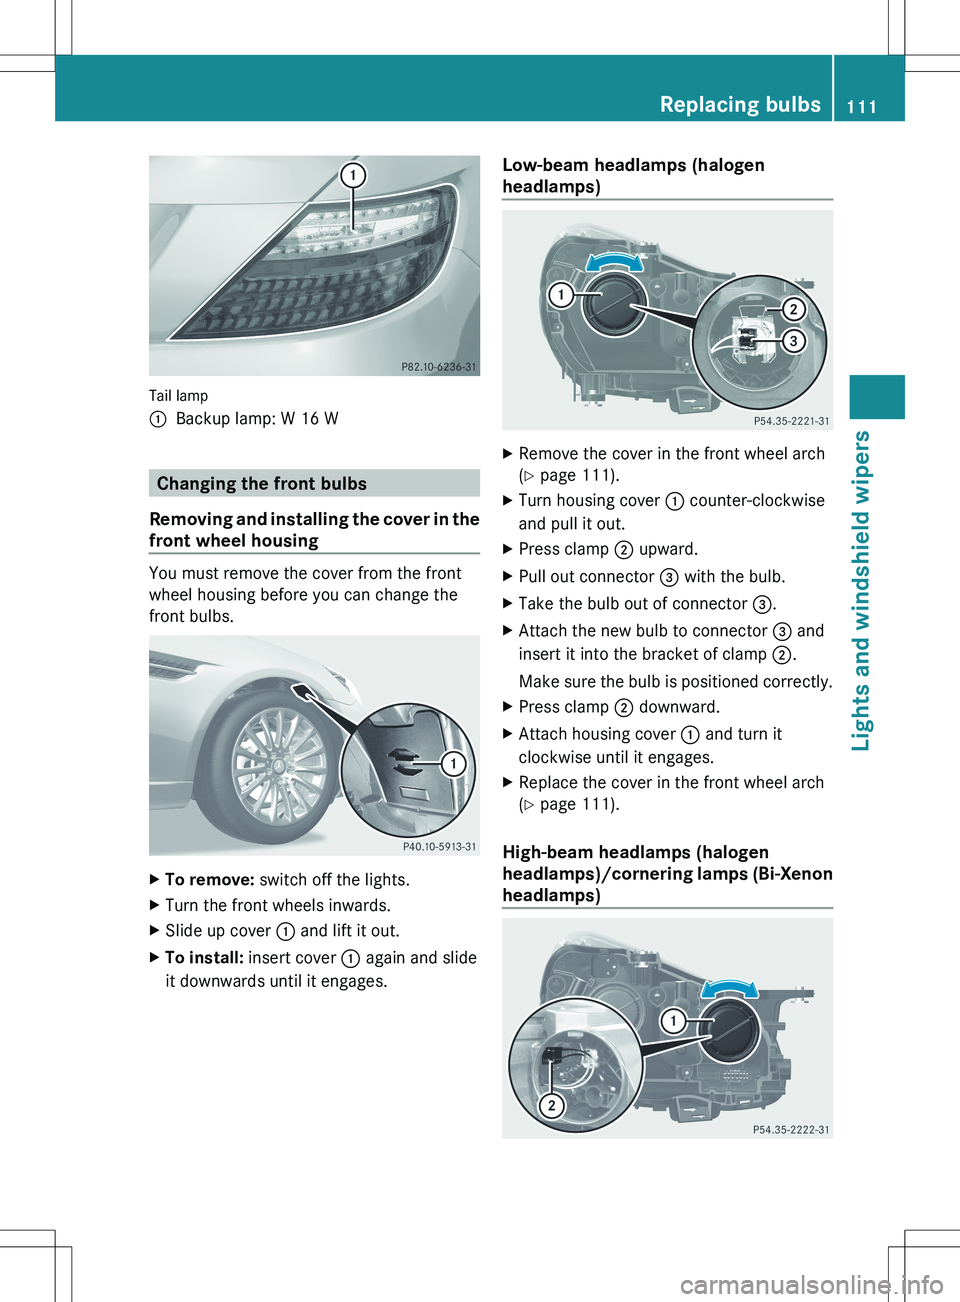
Tail lamp
:Backup lamp: W 16 W
Changing the front bulbs
Removing and installing the cover in the
front wheel housing
You must remove the cover from the front
wheel housing before you can change the
front bulbs.
XTo remove: switch off the lights.XTurn the front wheels inwards.XSlide up cover : and lift it out.XTo install: insert cover : again and slide
it downwards until it engages.Low-beam headlamps (halogen
headlamps)XRemove the cover in the front wheel arch
( Y page 111).XTurn housing cover : counter-clockwise
and pull it out.XPress clamp ; upward.XPull out connector = with the bulb.XTake the bulb out of connector =.XAttach the new bulb to connector = and
insert it into the bracket of clamp ;.
Make sure the bulb is positioned correctly.XPress clamp ; downward.XAttach housing cover : and turn it
clockwise until it engages.XReplace the cover in the front wheel arch
( Y page 111).
High-beam headlamps (halogen
headlamps)/cornering lamps (Bi-Xenon
headlamps)
Replacing bulbs111Lights and windshield wipersZ
Page 216 of 336
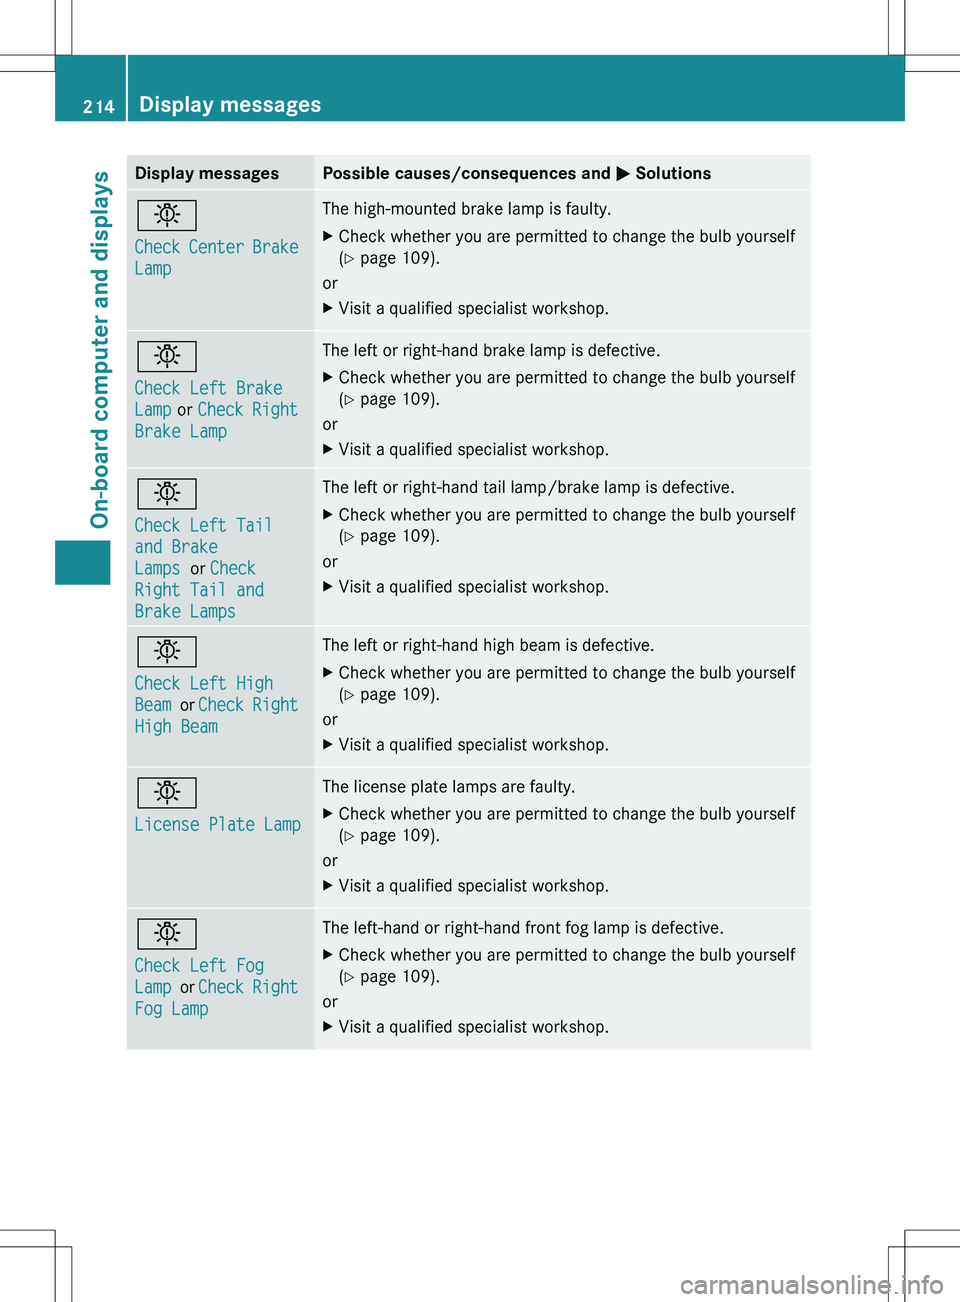
Display messagesPossible causes/consequences and M Solutionsb
Check Center Brake
LampThe high-mounted brake lamp is faulty.XCheck whether you are permitted to change the bulb yourself
( Y page 109).
or
XVisit a qualified specialist workshop.b
Check Left Brake
Lamp or Check Right
Brake LampThe left or right-hand brake lamp is defective.XCheck whether you are permitted to change the bulb yourself
( Y page 109).
or
XVisit a qualified specialist workshop.b
Check Left Tail
and Brake
Lamps or Check
Right Tail and
Brake LampsThe left or right-hand tail lamp/brake lamp is defective.XCheck whether you are permitted to change the bulb yourself
( Y page 109).
or
XVisit a qualified specialist workshop.b
Check Left High
Beam or Check Right
High BeamThe left or right-hand high beam is defective.XCheck whether you are permitted to change the bulb yourself
( Y page 109).
or
XVisit a qualified specialist workshop.b
License Plate LampThe license plate lamps are faulty.XCheck whether you are permitted to change the bulb yourself
( Y page 109).
or
XVisit a qualified specialist workshop.b
Check Left Fog
Lamp or Check Right
Fog LampThe left-hand or right-hand front fog lamp is defective.XCheck whether you are permitted to change the bulb yourself
( Y page 109).
or
XVisit a qualified specialist workshop.214Display messagesOn-board computer and displays