tire pressure reset MERCEDES-BENZ SLK-CLASS ROADSTER 2015 Owners Manual
[x] Cancel search | Manufacturer: MERCEDES-BENZ, Model Year: 2015, Model line: SLK-CLASS ROADSTER, Model: MERCEDES-BENZ SLK-CLASS ROADSTER 2015Pages: 358, PDF Size: 40.28 MB
Page 20 of 358
Overview ........................................312
PSI (pounds per square inch) (def-
inition) .......................................... .333
Replacing ....................................... 334
Service life ..................................... 314
Sidewall (definition) ....................... 333
Speed rating (definition) ................ 332
Storing .......................................... .334
Structure and characteristics
(definition) ..................................... 331
Summer tires ................................. 314
Temperature .................................. 327
TIN (Tire Identification Number)
(definition) ..................................... 333
Tire bead (definition) ..................... .333
Tire pressure (definition) ................ 333
Tire pressures (recommended) ...... 332
Tire size (data) ............................... 339
Tire size designation, load-bearing capacity, speed rating .................... 328
Tire tread ....................................... 313
Tire tread (definition) ..................... 333
Total load limit (definition) ............. 334
Traction ......................................... 327
Traction (definition) ....................... 334
Tread wea r..................................... 327
Uniform Tire Quality Grading
Standards ...................................... 326
Uniform Tire Quality Grading
Standards (definition) .................... 332
Wear indicator (definition) ............. 334
Wheel and tire combination ........... 341
Wheel rim (definition) .................... 332
see Flat tire
Tow-starting
Emergency engine starting ............ 307
Important safety notes .................. 305
Installing the towing eye ................ 306
Removing the towing eye ............... 306
Towing away
Important safety guidelines ........... 305
Installing the towing eye ................ 306
Removing the towing eye ............... 306
With both axles on the ground ....... 306
With the rear axle raised ................ 307
Transmission
Selector lever ................................ 151
see Automatic transmission see Manual transmission
Transporting the vehicle .................. 307
Trim pieces (cleaning instruc-
tions) .................................................. 290
Trip computer (on-board com-puter) .................................................. 197
Trip odometer
Calling up ....................................... 197
Resetting (on-board computer) ...... 198
Trunk
Emergency release .......................... 82
Important safety notes .................... 80
Locking separately ........................... 82
Opening (automatically from out-
side) ................................................. 82
Opening/closing (manually from
outside) ............................................ 81
Overview .......................................... 80
Trunk lid
Display message ............................ 240
Opening dimensions ...................... 355
Opening/closing .............................. 80
Trunk load (maximum) ...................... 355
Trunk partition
Display message ............................ 241
General notes .................................. 89
Opening/closing .............................. 90
Turn signals
Changing bulbs (front) ................... 116
Display message ............................ 225
Switching on/of f........................... 110
Type identification plate
see Vehicle identification plate
U
UnlockingEmergency unlocking ....................... 80
From inside the vehicle (central
unlocking button) ............................. 79
V
Vanity mirror (in the sun visor) ........ 262
Vehicle
Correct use ...................................... 26
Data acquisition ............................... 27
Display message ............................ 238
18Index
Page 168 of 358
Apart from driving style, consumption is
dependent on many factors such as, e.g.: Rload
R tire pressure
R cold start
R choice of route
R electrical consumers switched on
These factors are not included in the ECO dis-
play.
The evaluation of your driving style is carried
out using the following three categories:
R
Acceleration(evaluation of all accelera-
tion processes):
- The bar fills up: moderate acceleration,
especially at higher speeds
- The bar empties: sporty acceleration
R
Constant(assessment of driving behavior
at all times):
- The bar fills up: constant speed and
avoidance of unnecessary acceleration
and deceleration
- The bar empties: fluctuations in speed
R
Coasting(assessment of all deceleration
processes):
- The bar fills up: anticipatory driving,
keeping your distance and early release
of the accelerator. The vehicle can coast
without use of the brakes.
- The bar empties: frequent braking
iAn economical driving style specially
requires driving at moderate engine
speeds.
To achieve a higher value in the categories
AccelerationandConstant:
R observe the gearshift recommendations.
R drive in drive program E(vehicles with an
automatic transmission).
iOn long journeys at a constant speed, e.g.
on the highway, only the bar for
Constant
will change.
iThe ECO display summarizes the driving
characteristics from the start of the journey to its completion. For this reason, the bars
change dynamically at the beginning of the
journey. On longer journeys, there are
fewer changes. For more dynamic changes, carry out a manual reset.
For further information on the ECO display,
see ( Ypage 198).
Braking
Important safety notes
GWARNING
If you shift down on a slippery road surface in an attempt to increase the engine's braking
effect, the drive wheels could lose their grip.
There is an increased danger of skidding and
accidents.
Do not shift down for additional engine brak-
ing on a slippery road surface.
Downhill gradients
!On long, steep gradients, you must
reduce the load on the brakes. To use
engine braking, shift to a lower gear in good time. This helps you to avoid overheating
the brakes and wearing them out exces-
sively.
When making use of the engine braking
effect, it is possible that a drive wheel may
not turn for some time, e.g. in the case of
suddenly changing or slippery road surface conditions. This could cause damage to the
drive train. This type of damage is not cov- ered by the Mercedes-Benz warranty.
Change into a lower gear in good time on long
and steep downhill gradients. This is espe-
cially important if the vehicle is laden.
Heavy and light loads
GWARNING
If you rest your foot on the brake pedal while
driving, the braking system can overheat. This increases the stopping distance and can even
166Driving tips
Driving an d parking
Page 319 of 358
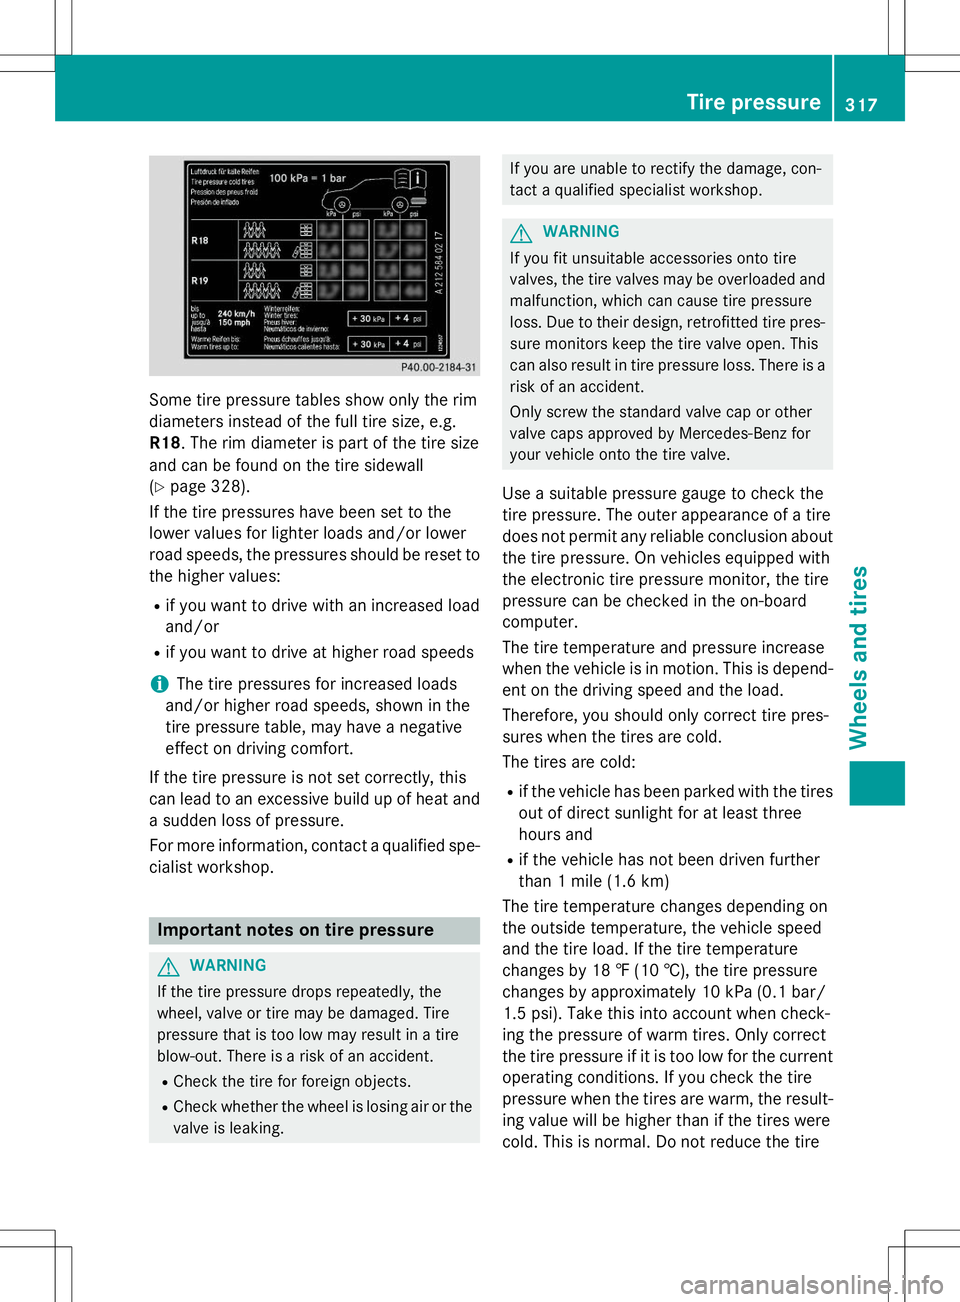
Some tire pressure tables show only the rim
diameters instead of the full tire size, e.g.R18. The rim diameter is part of the tire size
and can be found on the tire sidewall( Y page 328).
If the tire pressures have been set to the
lower values for lighter loads and/or lower
road speeds, the pressures should be reset to the higher values:
R if you want to drive with an increased load
and/or
R if you want to drive at higher road speeds
iThe tire pressures for increased loads
and/or higher road speeds, shown in the
tire pressure table, may have a negative
effect on driving comfort.
If the tire pressure is not set correctly, this
can lead to an excessive build up of heat and
a sudden loss of pressure.
For more information, contact a qualified spe- cialist workshop.
Important notes on tire pressure
GWARNING
If the tire pressure drops repeatedly, the
wheel, valve or tire may be damaged. Tire
pressure that is too low may result in a tire
blow-out. There is a risk of an accident.
R Check the tire for foreign objects.
R Check whether the wheel is losing air or the
valve is leaking.
If you are unable to rectify the damage, con-
tact a qualified specialist workshop.
GWARNING
If you fit unsuitable accessories onto tire
valves, the tire valves may be overloaded andmalfunction, which can cause tire pressure
loss. Due to their design, retrofitted tire pres- sure monitors keep the tire valve open. This
can also result in tire pressure loss. There is a
risk of an accident.
Only screw the standard valve cap or other
valve caps approved by Mercedes-Benz for
your vehicle onto the tire valve.
Use a suitable pressure gauge to check the
tire pressure. The outer appearance of a tire
does not permit any reliable conclusion about the tire pressure. On vehicles equipped with
the electronic tire pressure monitor, the tire
pressure can be checked in the on-board
computer.
The tire temperature and pressure increase
when the vehicle is in motion. This is depend-
ent on the driving speed and the load.
Therefore, you should only correct tire pres-
sures when the tires are cold.
The tires are cold:
R if the vehicle has been parked with the tires
out of direct sunlight for at least three
hours and
R if the vehicle has not been driven further
than 1 mile (1.6 km)
The tire temperature changes depending on
the outside temperature, the vehicle speed
and the tire load. If the tire temperature
changes by 18 ‡ (10 †), the tire pressure
changes by approximately 10 kPa (0.1 bar/
1.5 psi). Take this into account when check-
ing the pressure of warm tires. Only correct
the tire pressure if it is too low for the current
operating conditions. If you check the tire
pressure when the tires are warm, the result- ing value will be higher than if the tires were
cold. This is normal. Do not reduce the tire
Tire pressure317
Wheels and tires
Z