emergency towing MERCEDES-BENZ SLK ROADSTER 2008 Owners Manual
[x] Cancel search | Manufacturer: MERCEDES-BENZ, Model Year: 2008, Model line: SLK ROADSTER, Model: MERCEDES-BENZ SLK ROADSTER 2008Pages: 273, PDF Size: 4.42 MB
Page 15 of 273

12
Tow-away protection
. . . . . . . . . . . . ..53
Towin g. . . . . . . . . . . . . . . . . . . . . . . .236
Towing eye Fitting . . . . . . . . . . . . . . . . . . . . . . .235
Removing . . . . . . . . . . . . . . . . . . . .236
Tow-starting . . . . . . . . . . . . . . . . . . . .236
Transmission Display message . . . . . . . . . . . . . .177
Transmission output (maximum)
Telephone/two-way radio . . . . . . .241
Transport (vehicle) . . . . . . . . . . . . ..236
Trip computer Menu (on-board computer) . . . . . .107
Trip meter . . . . . . . . . . . . . . . . . . . . . . .95
Resettin g.. . . . . . . . . . . . . . . . . . . .90
Turn signal lamps
Display message . . . . . . . . . . . . . .183
Two-way radio
Installatio n.. . . . . . . . . . . . . . . . . .241
Tyre grip . . . . . . . . . . . . . . . . . . . . . . .164
Tyre pressure . . . . . . . . . . . . . . . . . .157
Display message . . . . . . . . . . . . . .178
Tyre pressure loss warning syste m158
Tyre pressure s
Table . . . . . . . . . . . . . . . . . . . . . . .246
Tyres
Direction of rotatio n.. . . . . . . . . . .157
General notes . . . . . . . . . . . . . . . . .155
Technical data . . . . . . . . . . . . . . . .247
Tyre tread . . . . . . . . . . . . . . . . . . . . . .157 U
Unladen weight . . . . . . . . . . . . . . . . .253
Unlocking Emergency unlocking . . . . . . . . . . .210
From the inside (central unlocking
button) . . . . . . . . . . . . . . . . . . . . . . .57
Up (display message) . . . . . . . . . . . ..96 V
Variable Speedtroni c. . . . . . . . . . . . .113
Vario-roo f
see Roof
Vehicle
Emergency unlocking . . . . . . .210, 211
Individual settings (on-board com-
puter) . . . . . . . . . . . . . . . . . . . . . . .101
Leaving parked up . . . . . . . . . . . . .209
Towing . . . . . . . . . . . . . . . . . . . . . .236
Tow-starting . . . . . . . . . . . . . . . . . .236
Transporting . . . . . . . . . . . . . . . . . .236
Vehicle battery . . . . . . . . . . . . . . . . .230
Vehicle dimension s. . . . . . . . . . . . . .253
Vehicle electronics . . . . . . . . . . . . ..241
Vehicle identification number (VIN) 243
Vehicle identification plates . . . . ..242
Vehicle tool kit . . . . . . . . . . . . . . . . . .172
Vehicle weights . . . . . . . . . . . . . . . . .253 W
Warning and indicator lamp ABS (yellow) . . . . . . . . . . . . . . . . . .193
LIM (Cruise control) . . . . . . . . . . . .110
LIM (variable Speedtronic) . . . . . . .113
Warning signal
Audible . . . . . . . . . . . . . . . . . . . . . .197
Warning triangl e. . . . . . . . . . . . . . . .172
Washer fluid Display message . . . . . . . . . . . . . .189
Wearing seat belts . . . . . . . . . . . . . . ..69
Wheel bolts Tightening torque . . . . . . . . . . . . . .229
Wheels
General notes . . . . . . . . . . . . . . . . .155
Interchanging . . . . . . . . . . . . . . . . .160
Technical data . . . . . . . . . . . . . . . .247
Windows
Cleaning . . . . . . . . . . . . . . . . . . . . .168
Cleaning the windscreen . . . . . . . .167
Side windows . . . . . . . . . . . . . . . . . .79
Windscreen
Cleaning . . . . . . . . . . . . . . . . . . . . .167
Windscreen washer fluid . . . . . . . ..260
Topping up . . . . . . . . . . . . . . . . . . .154
Windscreen washer fluid reservoir
. . . . . . . . . . . . . . . . . . . . . . . . . .154, 260
Windscreen washer reservoir Capacity . . . . . . . . . . . . . . . . . . . . .260 Index
171_AKB; 3; 4, en-GB
vpfaff7,
2007-11-13T10:50:25+01:00 - Seite 12
Page 22 of 273

Exterior view
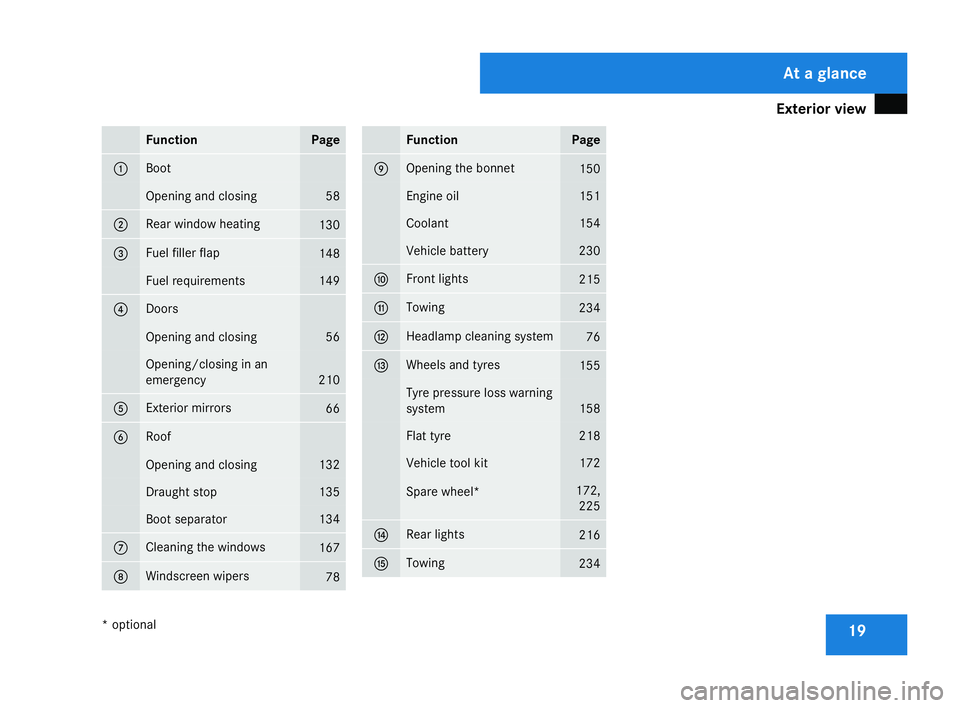
19Function Pag
e 1 Boot
Opening and closing 58
2 Rear window heatin
g 130
3 Fuel filler fla
p 148
Fuel requirements 149
4 Doors
Opening and closing 56
Opening/closing in an
emergency
210
5 Exterior mirrors
66
6 Roof
Opening and closin
g 132
Draught stop 135
Boot separator 134
7 Cleaning the windows
16
7 8 Windscreen wipers
78 Function Page
9 Opening the bonnet
150
Engine oil 151
Coolant 154
Vehicle battery 230
a Front lights
215
b Towing
234
c Headlamp cleaning system
76
d Wheels and tyres
155
Tyre pressure loss warning
system
158
Flat tyre 218
Vehicle tool kit 172
Spare wheel* 172,
225 e Rear lights
21
6 f Towing
234 At a glance
* optional
171_AKB; 3; 4, en-GB
vpfaff7,
2007-11-13T10:50:25+01:00 - Seite 19
Page 232 of 273

Flat tyre
2291
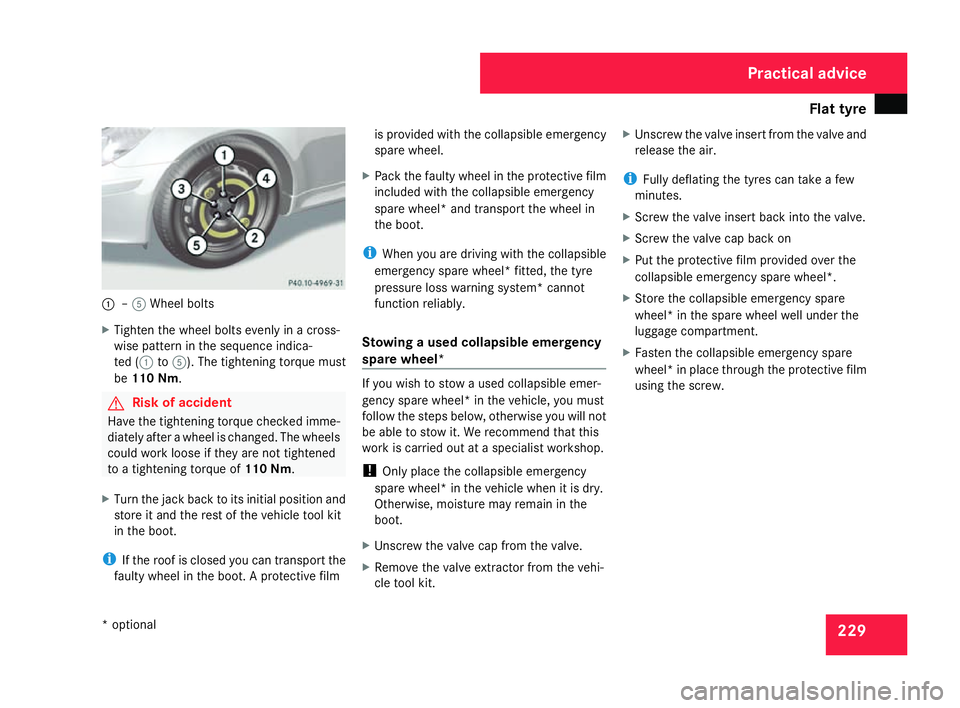
–5 Wheel bolts
X Tighten the wheel bolts evenly in a cross-
wise pattern in the sequence indica-
ted (1 to5 ). The tightening torque must
be 110 Nm. G
Risk of acciden
t
Have the tightening torque checked imme-
diately after a wheel is changed. The wheels
could work loose if they are not tightened
to a tightening torque of 110 Nm.
X Turn the jack back to its initial position and
store it and the rest of the vehicle tool kit
in the boot.
i If the roof is closed you can transport the
faulty wheel in the boot. A protective film is provided with the collapsible emergency
spare wheel.
X Pack the faulty wheel in the protective film
included with the collapsible emergency
spare wheel* and transport the wheel in
the boot .
i When you are driving with the collapsible
emergency spare wheel* fitted, the tyre
pressure loss warning system* cannot
function reliably.
Stowing a used collapsible emergency
spare wheel* If you wish to stow a used collapsible emer-
gency spare wheel* in the vehicle, you must
follow the steps below, otherwise you will not
be able to stow it. We recommend that this
work is carried out at a specialist workshop.
!
Only place the collapsible emergency
spare wheel* in the vehicle when it is dry.
Otherwise, moisture may remain in the
boot.
X Unscrew the valve cap from the valve .
X Remove the valve extractor from the vehi -
cle tool kit. X
Unscrew the valve insert from the valve and
release the air.
i Fully deflating the tyres can take a few
minutes.
X Screw the valve insert back into the valve .
X Screw the valve cap back on
X Put the protective film provided over the
collapsible emergency spare wheel*.
X Store the collapsible emergency spar e
wheel* in the spare wheel well under the
luggage compartment.
X Fasten the collapsible emergency spar e
wheel* in place through the protective film
using the screw. Practical advice
* optional
171_AKB; 3; 4, en-GB
vpfaff7,
2007-11-13T10:50:25+01:00 - Seite 229
Page 239 of 273

Towing and tow-startin
g236 Towing the vehicle
! You may tow the vehicle for a maximum
of 50 km. A towing speed of 50 km/h must
not be exceeded.
With towing distances over 50 km, the
entire vehicle needs to be lifted up and
transported.
! The engine must be switched off (key in
ignition lock in position 0or position 1) if
the vehicle is being towed with the fron t
axle raised or if the parking brake is bein g
tested on a dynamometer. Intervention by
ESP ®
could otherwise damage the brake
system.
Vehicles with manual transmission X
Turn the key to position 2in the ignition
lock .
X Shift to neutral .
Vehicles with automatic transmission *X
Turn the key to position 2in the ignition
lock .
X Move the selector lever to N. Tow-starting (emergency engine
starting )
Please note:
R Vehicles with an automatic transmission*
must not be tow-started.
R The battery must be connected.
R The engine and catalytic converter must be
cold.
R Avoid repeated and lengthy starting
attempts .
Vehicles with manual transmission X
Turn the key to position 2in the ignition
lock .
X Shift to neutral .
X Tow the vehicle or let it roll.
X Shift to a suitable gear and bring the clutch
pedal up slowly. Do not depress the accel-
erator pedal.
The engine is started. Removing the towing ey
e
X Take the wheel wrench from the vehicle
tool kit (Y page 172).
X Insert the wheel wrench handle into the
towing eye and turn it anti-clockwise.
X Unscrew the towing eye.
X Replace the cover and press it until it
engages.
X Return the towing eye and the whee l
wrench to the vehicle tool kit . Transporting the vehicle
The towing eyes can be used to pull the vehi-
cle onto a trailer or transporter for transport-
ing purposes.
! Only lash the vehicle down by the wheels
or wheel rims, not by parts of the vehicl e
such as axle or steering components. The
vehicle could otherwise be damaged.
Vehicles with manual transmission X
Shift to neutral . Practical advice
* optional
171_AKB; 3; 4, en-GB
vpfaff7,
2007-11-13T10:50:25+01:00 - Seite 236