turn signal bulb MERCEDES-BENZ SLK ROADSTER 2008 Owners Manual
[x] Cancel search | Manufacturer: MERCEDES-BENZ, Model Year: 2008, Model line: SLK ROADSTER, Model: MERCEDES-BENZ SLK ROADSTER 2008Pages: 273, PDF Size: 4.42 MB
Page 7 of 273
4Removing/fitting . . . . . . . . . . . . .
.232
Vehicle battery . . . . . . . . . . . . . . . .230
Voltage (on-board computer) . . . . . .97
Belt force limiters
Activation . . . . . . . . . . . . . . . . . . . . .39
Belt tensioners
Activation . . . . . . . . . . . . . . . . . . . . .39
Belt warnin g. . . . . . . . . . . . . . . . . . . . .71
Bonne t
Bonnet catch . . . . . . . . . . . . . . . . .151
Display message . . . . . . . . . . . . . .179
Opening/closing . . . . . . . . . . . . . .150
Bonnet release lever
Release lever . . . . . . . . . . . . . . . . .151
Boot
Emergency release . . . . . . . . . . . . .211
Locking separatel y.. . . . . . . . . . . . .59
Opening/closing . . . . . . . . . . . . . . .58
Boot li d
Display message . . . . . . . . . . . . . .179
Boot separator . . . . . . . . . . . . . . . . . .134
Display message . . . . . . . . . . . . . .181
Brake
Warning lamp . . . . . . . . . . . . . . . . .194
Brake Assist
see BAS
Brake fluid . . . . . . . . . . . . . . . . . . . . .260
Display message . . . . . . . . . . . . . .180
Brake lamps
Display message . . . . . . . . . . . . . .184 Brake syste
m
Display message . . . . . . . . . . . . . .180
Bulb
Dipped-beam headlamps . . . . . . . .215
Licence plate lamp . . . . . . . . . . . . .217
Main-beam headlamps . . . . . . . . . .216
Parking lamp . . . . . . . . . . . . . . . . .216
Rear foglamp . . . . . . . . . . . . . . . . .216
Replacing . . . . . . . . . . . . . . . .215, 216
Reversing lamp . . . . . . . . . . . . . . .216
Side lamp . . . . . . . . . . . . . . . . . . . .216
Turn signal lamp . . . . . . . . . . . . . . .216
see Lamp
Bulbs
Overview . . . . . . . . . . . . . . . . . . . .214 C
Calling up a malfunction see Message memory men u
Car e. . . . . . . . . . . . . . . . . . . . . . . . . . .166
Automatic car wash . . . . . . . . . . . .166
Headlamps . . . . . . . . . . . . . . . . . . .168
High-pressure cleaners . . . . . . . . .167
Parktroni c.. . . . . . . . . . . . . . . . . .169
Plastic trim . . . . . . . . . . . . . . . . . . .168
Rear window . . . . . . . . . . . . . . . . .168
Side windows . . . . . . . . . . . . . . . . .168
CD player/CD changer
Operating (on-board computer) . . . .99 Central locking
Automatic locking (on-board com -
puter) . . . . . . . . . . . . . . . . . . . . . . .105
Key . . . . . . . . . . . . . . . . . . . . . . . . . .56
Central locking/unlocking button . ..5 7
Central unlocking Key . . . . . . . . . . . . . . . . . . . . . . . . . .56
Centre console
Lower section . . . . . . . . . . . . . . . . . .31
Upper section . . . . . . . . . . . . . . . . . .29
Changing a wheel
see Flat tyr e
Children
In the vehicle . . . . . . . . . . . . . . . . . .44
Restraint systems . . . . . . . . . . . . . .44
Child seat
Automatic recognition . . . . . . . . . . .46
Automatic recognition (malfunc-
tion) . . . . . . . . . . . . . . . . . . . . . . . .192
Recommendations . . . . . . . . . . . . . .48
Suitable positions . . . . . . . . . . . . . .47
Cigarette lighter . . . . . . . . . . . . . . . .141
Cockpit Overview . . . . . . . . . . . . . . . . . . . . .20
Collapsible emergency spare wheel
Stowage . . . . . . . . . . . . . . . . . . . . .229
Collapsible wheel
Pumping up . . . . . . . . . . . . . . . . . .228
Technical data . . . . . . . . . . . . . . . .252 Index
171_AKB; 3; 4, en-GB
vpfaff7,
2007-11-13T10:50:25+01:00 - Seite
4
Page 186 of 273
Display
messages 18
3 Display messages Possible cause/consequence Possible solution
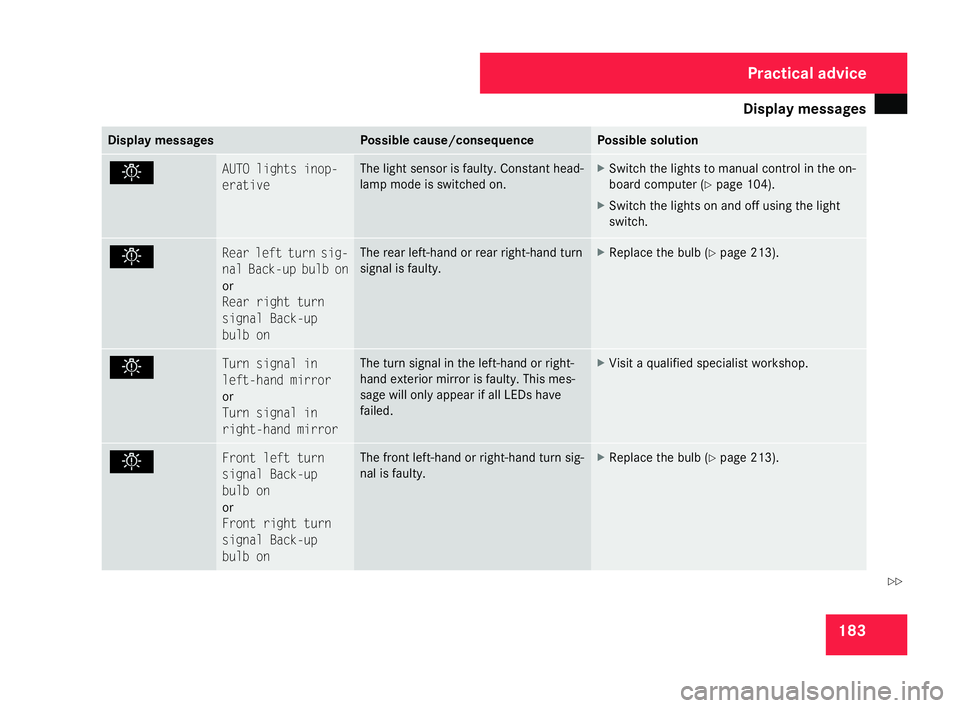
. AUTO lights inop-
erative The light sensor is faulty. Constant head-
lamp mode is switched on. X
Switch the lights to manual control in the on-
board computer (Y page 104).
X Switch the lights on and off using the light
switch. . Rear left turn sig-
nal Back-up bulb on
or
Rear right turn
signal Back-up
bulb on The rear left-hand or rear right-hand turn
signal is faulty. X
Replace the bulb (Y page 213). . Turn signal in
left-hand mirror
or
Turn signal in
right-hand mirror The turn signal in the left-hand or right-
hand exterior mirror is faulty. This mes-
sage will only appear if all LEDs have
failed. X
Visit a qualified specialist workshop. . Front left turn
signal Back-up
bulb on
or
Front right turn
signal Back-up
bulb on The front left-hand or right-hand turn sig-
nal is faulty. X
Replace the bulb (Y page 213). Practical advice
171_AKB; 3; 4, en-GB
vpfaff7,
2007-11-13T10:50:25+01:00 - Seite 183 Z
Page 217 of 273
Changing the bulbs
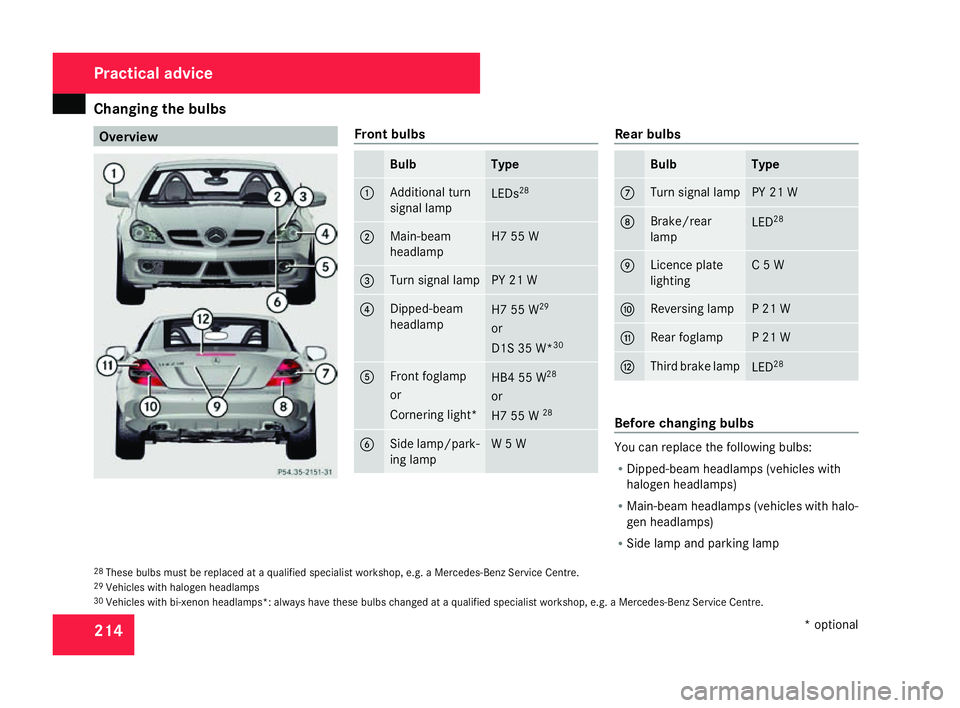
214 Overview Front bulbs
Bulb Typ
e 1 Additional turn
signal lamp
LEDs
28 2 Main-beam
headlamp H7 55
W 3 Turn signal lamp PY 21
W 4 Dipped-beam
headlamp
H7 55
W29
or
D1S 35 W* 30 5 Front foglamp
or
Cornering light*
HB4 55
W28
or
H7 55 W 28 6 Side lamp/park-
ing lamp W 5
W Rear bulb
s Bul
b Type
7 Turn signal lamp PY 21
W 8 Brake/rea
r
lamp LED
28 9 Licence plate
lighting C 5
W a Reversing lamp P 21
W b Rear foglamp P 21
W c Third brake lamp
LED
28 Before changing bulbs
You can replace the following bulbs:
R
Dipped-beam headlamps (vehicles with
halogen headlamps)
R Main-beam headlamps (vehicles with halo-
gen headlamps)
R Side lamp and parking lamp
28 These bulbs must be replaced at a qualified specialist workshop, e.g. a Mercedes-Benz Service Centre .
29 Vehicles with halogen headlamps
30 Vehicles with bi-xenon headlamps*: always have these bulbs changed at a qualified specialist workshop, e.g. a Mercedes-Benz Service Centre. Practical advic
e
* optional
171_AKB; 3; 4, en-GB
vpfaff7,
2007-11-13T10:50:25+01:00 - Seite 214
Page 218 of 273
Changing the bulbs
215
R
Turn signal lamp (front )
R Reversing lamp
R Rear foglamp
R Turn signal (rear)
R Licence plate lighting
Observe the following points:
R Use only the bulb types specified here.
R To prevent a short-circuit, switch off the
lights before changing a bulb.
R Only hold bulbs with a clean, lint-free cloth.
R Do not work with wet or greasy fingers.
R If the new bulb still does not light up, con-
sult a qualified specialist workshop, e.g. a
Mercedes-Benz Service Centre.
i Have the headlamp setting checked reg-
ularly at a qualified specialist workshop ,
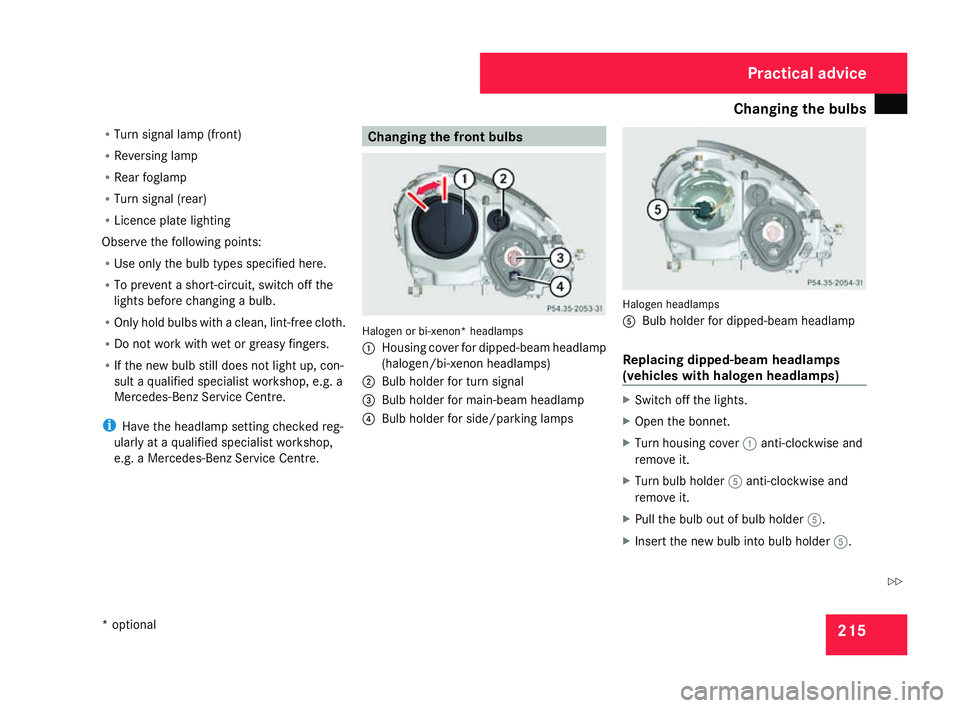
e.g. a Mercedes-Benz Service Centre. Changing the front bulbs
Halogen or bi-xenon* headlamps
1
Housing cover for dipped-beam headlam p
(halogen/bi-xenon headlamps)
2 Bulb holder for turn signa l
3 Bulb holder for main-beam headlamp
4 Bulb holder for side/parking lamps Halogen headlamps
5
Bulb holder for dipped-beam headlamp
Replacing dipped-beam headlamps
(vehicles with halogen headlamps) X
Switch off the lights.
X Open the bonnet.
X Turn housing cover 1anti-clockwise and
remove it.
X Turn bulb holder 5anti-clockwise and
remove it.
X Pull the bulb out of bulb holder 5.
X Insert the new bulb into bulb holder 5. Practical advice
* optional
171_AKB; 3; 4, en-GB
vpfaff7,
2007-11-13T10:50:25+01:00 - Seite 215 Z
Page 219 of 273
Changing the bulbs
216
X
Insert bulb holder 5into the lamp and tur n
it clockwise .
X Align housing cover 1and turn it clock -
wise.
Replacing main-beam headlamps (vehi-
cles with halogen headlamps) X
Switch off the lights .
X Open the bonnet.
X Turn bulb holder 3anti-clockwise and
remove it.
X Pull the bulb out of bulb holder 3.
X Insert the new bulb into bulb holder 3.
X Insert bulb holder 3into the headlamp
and turn it clockwise .
Changing the bulbs in the side lamps
and parking lamps X
Switch off the lights .
X Open the bonnet.
X Pull out bulb holder 4with the bulb.
X Pull the bulb out of bulb holder 4. X
Insert the new bulb into bulb holder 4.
X Insert bulb holder 4into the lamp.
Replacing the turn signal lamps X
Switch off the lights .
X Open the bonnet.
X Turn bulb holder 2anti-clockwise and
remove it together with the bulb.
X Unscrew the bulb from bulb holder 2
X Insert the new bulb into bulb holder 2.
X Insert bulb holder 2into the headlamp
and turn it clockwise . Changing the rear bulb
s
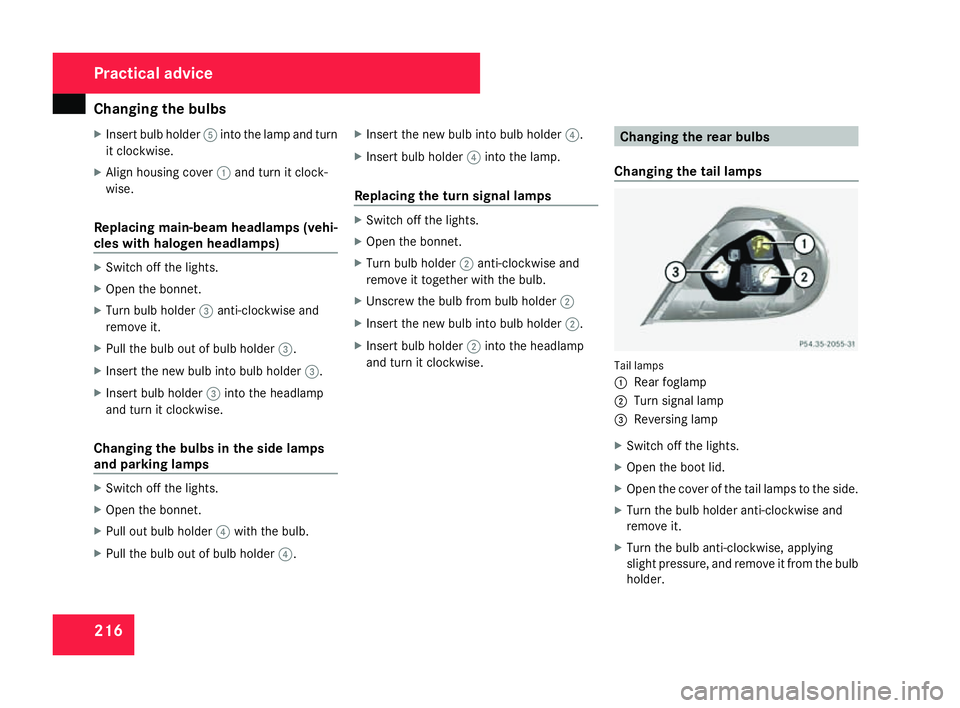
Changing the tail lamps Tail lamps
1
Rear foglamp
2 Turn signal lamp
3 Reversing lamp
X Switch off the lights .
X Open the boot lid.
X Open the cover of the tail lamps to the side.
X Turn the bulb holder anti-clockwise and
remove it.
X Turn the bulb anti-clockwise, applying
slight pressure, and remove it from the bulb
holder. Practical advice
171_AKB; 3; 4, en-GB
vpfaff7,
2007-11-13T10:50:25+01:00 - Seite 216