washer fluid MERCEDES-BENZ SLK ROADSTER 2008 Owners Manual
[x] Cancel search | Manufacturer: MERCEDES-BENZ, Model Year: 2008, Model line: SLK ROADSTER, Model: MERCEDES-BENZ SLK ROADSTER 2008Pages: 273, PDF Size: 4.42 MB
Page 13 of 273
10
Rear window heating
Malfunction indicator lamp . . . . . .191
Refuelling . . . . . . . . . . . . . . . . . . . . . .148
Remote control Garage door opene r.. . . . . . . . . . .144
Programming (garage door
opener) . . . . . . . . . . . . . . . . . . . . . .144
Replacing the wiper blade s. . . . . . .217
Reserve Display message . . . . . . . . . . . . . .187
Reserve fuel . . . . . . . . . . . . . . . . . . . .255
Display message . . . . . . . . . . . . . .187
Fuel tank . . . . . . . . . . . . . . . . . . . .255
Warning lamp . . . . . . . . . . . . . . . . .197
Reset button . . . . . . . . . . . . . . . . .25, 27
Restraint syste m. . . . . . . . . . . . . . . .178
Airbags . . . . . . . . . . . . . . . . . . . . . . .41
Restraint systems
For childre n.. . . . . . . . . . . . . . . . . .44
Rev counte r. . . . . . . . . . . . . . . . . . . . .90
Reverse gear Engaging (automatic transmission) .85
Engaging (manual transmission) . . .85
Reversing lamp
Display messag e.. . . . . . . . . . . . .185
Roof . . . . . . . . . . . . . . . . . . . . . . . . . . .132
Closing (key ).. . . . . . . . . . . . . . . .134
Closing (switch) . . . . . . . . . . . . . . .133
Display message . . . . . . . . . . . . . .188
Opening (key ).. . . . . . . . . . . . . . . .134 Opening (switch) . . . . . . . . . . . . .
.133
Relocking . . . . . . . . . . . . . . . . . . . .134
Roof load, maximum . . . . . . . ..253, 254
Roof rack . . . . . . . . . . . . . . . . . . . . . .136
Roof switch . . . . . . . . . . . . . . . . . . . .133
Run-on time (mobile phone ). . . . . . .143 S
Seat Adjusting . . . . . . . . . . . . . . . . . .60, 61
Correct driver's seat position . . . . . .71
Storing settings . . . . . . . . . . . . . . . .68
Seat belt
Fastening. . . . . . . . . . . . . . . . . . . . .69
Warning lamp . . . . . . . . . . . . . .71, 195
Seat heatin g. . . . . . . . . . . . . . . . . . . . .63
Seat ventilation Malfunction indicator lamp . . . . . .190
Selector lever
Positions . . . . . . . . . . . . . . . . . . . . .85
Service
Display message . . . . . . . . . . . . . .165
Service display
see ASSYST PLUS
Service indicator
see ASSYST PLUS
Service products . . . . . . . . . . . . . . . .255
Brake fluid . . . . . . . . . . . . . . . . . . .260 Coolant . . . . . . . . . . . . . . . . . . . .
.259
Windscreen washer fluid . . . . . . . .260
Settings
Calling up a stored setting . . . . . . . .68
Factory (key ).. . . . . . . . . . . . . .56, 57
Factory (on-board computer) . . . . .101
Setting the unit (on-board computer)
Speedometer . . . . . . . . . . . . . . . . .102
Shift range s
Automatic transmission . . . . . . . . . .86
Display in the speedomete r.. . . . ..85
Side window
Fault . . . . . . . . . . . . . . . . . . . . . . . .206
Opening/closing . . . . . . . . . . . . . . .79
Resettin g.. . . . . . . . . . . . . . . . . . . .81
Side windows
Cleaning . . . . . . . . . . . . . . . . . . . . .168
Snow chains . . . . . . . . . . . . . . . . . . . .161
Socket . . . . . . . . . . . . . . . . . . . . . . . . .141
Soft top see Roo f
Spare wheel
Fitting . . . . . . . . . . . . . . . . . . . . . . .225
Storage location . . . . . . . . . . . . . . .172
Technical data . . . . . . . . . . . . . . . .252
Spee d
Technical data . . . . . . . . . . . . . . . .245
Speed limiter
Speedtronic . . . . . . . . . . . . . . . . . .112 Index
171_AKB; 3; 4, en-GB
vpfaff7,
2007-11-13T10:50:25+01:00 - Seite 10
Page 15 of 273
12
Tow-away protection
. . . . . . . . . . . . ..53
Towin g. . . . . . . . . . . . . . . . . . . . . . . .236
Towing eye Fitting . . . . . . . . . . . . . . . . . . . . . . .235
Removing . . . . . . . . . . . . . . . . . . . .236
Tow-starting . . . . . . . . . . . . . . . . . . . .236
Transmission Display message . . . . . . . . . . . . . .177
Transmission output (maximum)
Telephone/two-way radio . . . . . . .241
Transport (vehicle) . . . . . . . . . . . . ..236
Trip computer Menu (on-board computer) . . . . . .107
Trip meter . . . . . . . . . . . . . . . . . . . . . . .95
Resettin g.. . . . . . . . . . . . . . . . . . . .90
Turn signal lamps
Display message . . . . . . . . . . . . . .183
Two-way radio
Installatio n.. . . . . . . . . . . . . . . . . .241
Tyre grip . . . . . . . . . . . . . . . . . . . . . . .164
Tyre pressure . . . . . . . . . . . . . . . . . .157
Display message . . . . . . . . . . . . . .178
Tyre pressure loss warning syste m158
Tyre pressure s
Table . . . . . . . . . . . . . . . . . . . . . . .246
Tyres
Direction of rotatio n.. . . . . . . . . . .157
General notes . . . . . . . . . . . . . . . . .155
Technical data . . . . . . . . . . . . . . . .247
Tyre tread . . . . . . . . . . . . . . . . . . . . . .157 U
Unladen weight . . . . . . . . . . . . . . . . .253
Unlocking Emergency unlocking . . . . . . . . . . .210
From the inside (central unlocking
button) . . . . . . . . . . . . . . . . . . . . . . .57
Up (display message) . . . . . . . . . . . ..96 V
Variable Speedtroni c. . . . . . . . . . . . .113
Vario-roo f
see Roof
Vehicle
Emergency unlocking . . . . . . .210, 211
Individual settings (on-board com-
puter) . . . . . . . . . . . . . . . . . . . . . . .101
Leaving parked up . . . . . . . . . . . . .209
Towing . . . . . . . . . . . . . . . . . . . . . .236
Tow-starting . . . . . . . . . . . . . . . . . .236
Transporting . . . . . . . . . . . . . . . . . .236
Vehicle battery . . . . . . . . . . . . . . . . .230
Vehicle dimension s. . . . . . . . . . . . . .253
Vehicle electronics . . . . . . . . . . . . ..241
Vehicle identification number (VIN) 243
Vehicle identification plates . . . . ..242
Vehicle tool kit . . . . . . . . . . . . . . . . . .172
Vehicle weights . . . . . . . . . . . . . . . . .253 W
Warning and indicator lamp ABS (yellow) . . . . . . . . . . . . . . . . . .193
LIM (Cruise control) . . . . . . . . . . . .110
LIM (variable Speedtronic) . . . . . . .113
Warning signal
Audible . . . . . . . . . . . . . . . . . . . . . .197
Warning triangl e. . . . . . . . . . . . . . . .172
Washer fluid Display message . . . . . . . . . . . . . .189
Wearing seat belts . . . . . . . . . . . . . . ..69
Wheel bolts Tightening torque . . . . . . . . . . . . . .229
Wheels
General notes . . . . . . . . . . . . . . . . .155
Interchanging . . . . . . . . . . . . . . . . .160
Technical data . . . . . . . . . . . . . . . .247
Windows
Cleaning . . . . . . . . . . . . . . . . . . . . .168
Cleaning the windscreen . . . . . . . .167
Side windows . . . . . . . . . . . . . . . . . .79
Windscreen
Cleaning . . . . . . . . . . . . . . . . . . . . .167
Windscreen washer fluid . . . . . . . ..260
Topping up . . . . . . . . . . . . . . . . . . .154
Windscreen washer fluid reservoir
. . . . . . . . . . . . . . . . . . . . . . . . . .154, 260
Windscreen washer reservoir Capacity . . . . . . . . . . . . . . . . . . . . .260 Index
171_AKB; 3; 4, en-GB
vpfaff7,
2007-11-13T10:50:25+01:00 - Seite 12
Page 79 of 273
Light
s 76 Hazard warning lamps
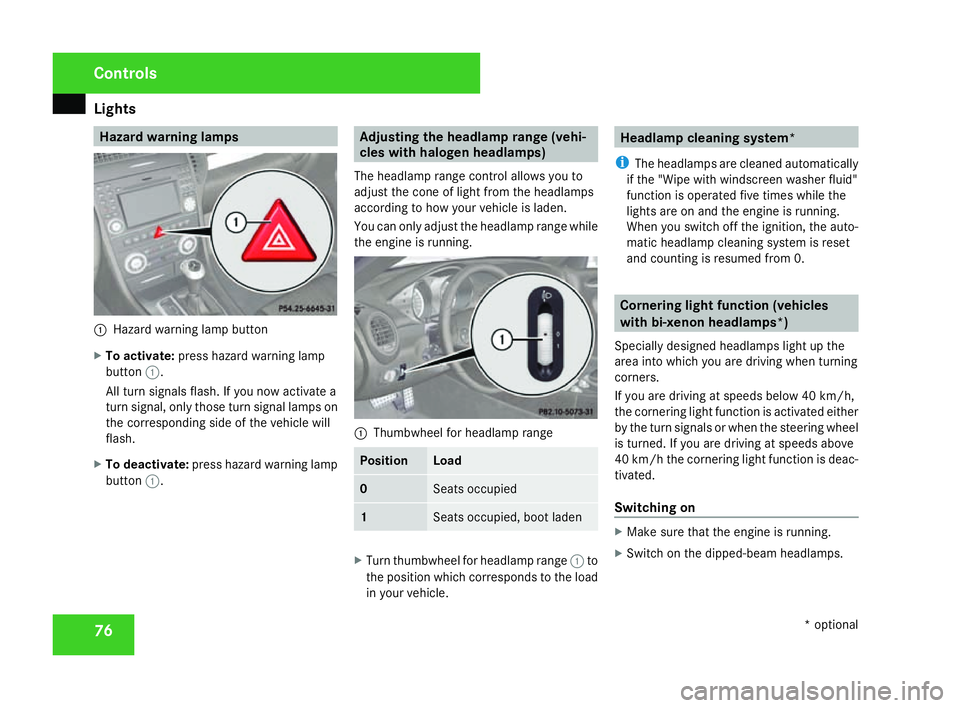
1
Hazard warning lamp button
X To activate :press hazard warning lamp
button 1.
All turn signals flash. If you now activate a
turn signal, only those turn signal lamps on
the corresponding side of the vehicle will
flash.
X To deactivate :press hazard warning lamp
button 1. Adjusting the headlamp range (vehi-
cles with halogen headlamps)
The headlamp range control allows you to
adjust the cone of light from the headlamps
according to how your vehicle is laden.
You can only adjust the headlamp range while
the engine is running. 1
Thumbwheel for headlamp range Position Load
0 Seats occupied
1 Seats occupied, boot lade
n X
Turn thumbwheel for headlamp range 1to
the position which corresponds to the load
in your vehicle. Headlamp cleaning system*
i The headlamps are cleaned automatically
if the "Wipe with windscreen washer fluid"
function is operated five times while the
lights are on and the engine is running.
When you switch off the ignition, the auto-
matic headlamp cleaning system is reset
and counting is resumed from 0. Cornering light function (vehicles
with bi-xenon headlamps*)
Specially designed headlamps light up the
area into which you are driving when turning
corners.
If you are driving at speeds below 40 km/h,
the cornering light function is activated either
by the turn signals or when the steering wheel
is turned. If you are driving at speeds above
40 km/h the cornering light function is deac-
tivated.
Switching on X
Make sure that the engine is running.
X Switch on the dipped-beam headlamps. Control
s
* optional
171_AKB; 3; 4, en-GB
vpfaff7,
2007-11-13T10:50:25+01:00 - Seite 76
Page 81 of 273

Windscreen wipers
78
Manual control
Interior lighting
X
To switch on/off: press theðbutton.
Reading lamps
X To switch on/off: press theXbutton.
Depending on the equipment, the reading
lamps are in the overhead control panel or,
for vehicles equipped with the light pack-
age*, at the bottom of the rear-view mirror . Windscreen wipers
Combination switch
1
To switch on the windscreen wipers
2 Single wipe/to wipe the windscreen using
washer fluid
Settings: 0 Windscreen wipers off
I Intermittent wipe
II Continuous wipe, slow
III Continuous wipe, fast
!
Vehicles with a rain sensor*: If the windscreen becomes dirty in dry
weather conditions, the windscreen wiper
s
may be activated inadvertently. This could
then damage the windscreen wiper blades
or scratch the windscreen.
For this reason, you should always switch
off the windscreen wipers in dry weather.
X Make sure that the key is in position 1or
2 in the ignition lock .
The various wiper settings can be selected
as follows: Single wipe
X Briefly press the combination switch to the
pressure point in the direction of arrow
2 . Cont
rols
* optional
171_AKB; 3; 4, en-GB
vpfaff7,
2007-11-13T10:50:25+01:00 - Seite 78
Page 82 of 273
Side windows
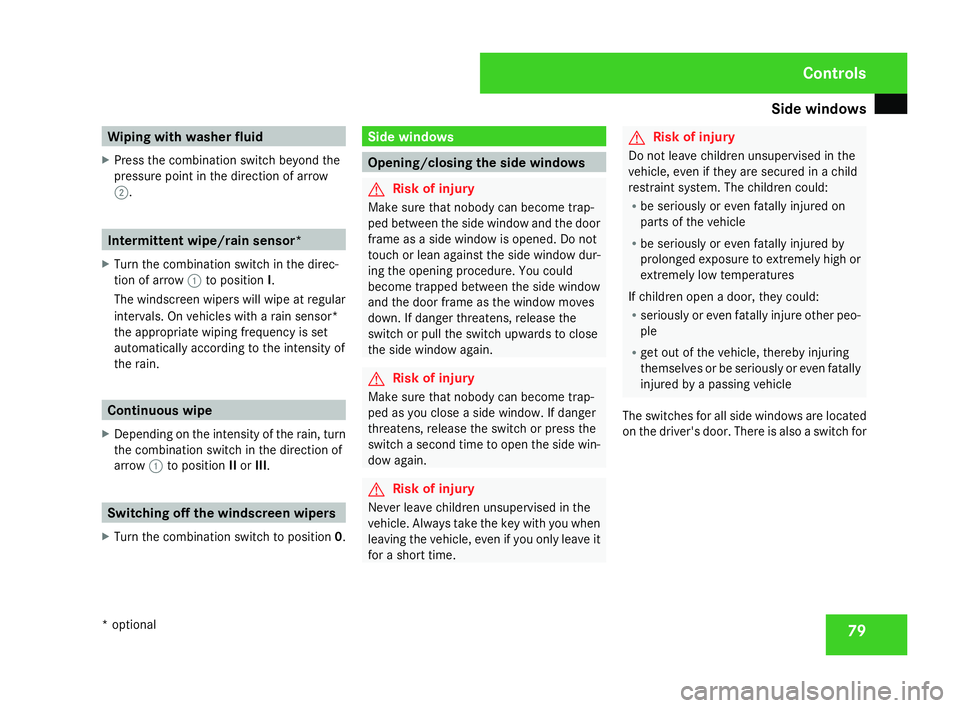
79Wiping with washer fluid
X Press the combination switch beyond the
pressure point in the direction of arrow
2 . Intermittent wipe/rain sensor*
X Turn the combination switch in the direc-
tion of arrow 1to position I.
The windscreen wipers will wipe at regular
intervals. On vehicles with a rain sensor*
the appropriate wiping frequency is set
automatically according to the intensity of
the rain. Continuous wipe
X Depending on the intensity of the rain, tur n
the combination switch in the direction of
arrow 1to position IIor III. Switching off the windscreen wipers
X Turn the combination switch to position 0. Side windows
Opening/closing the side windows
G
Risk of injury
Make sure that nobody can become trap -
ped between the side window and the door
frame as a side window is opened. Do not
touch or lean against the side window dur-
ing the opening procedure. You could
become trapped between the side window
and the door frame as the window moves
down. If danger threatens, release the
switch or pull the switch upwards to close
the side window again. G
Risk of injury
Make sure that nobody can become trap -
ped as you close a side window. If danger
threatens, release the switch or press the
switch a second time to open the side win-
dow again. G
Risk of injury
Never leave children unsupervised in the
vehicle. Always take the key with you when
leaving the vehicle, even if you only leave it
for a short time . G
Risk of injury
Do not leave children unsupervised in the
vehicle, even if they are secured in a chil d
restraint system. The children could:
R be seriously or even fatally injured on
parts of the vehicle
R be seriously or even fatally injured by
prolonged exposure to extremely high or
extremely low temperatures
If children open a door, they could:
R seriously or even fatally injure other peo-
ple
R get out of the vehicle, thereby injuring
themselves or be seriously or even fatally
injured by a passing vehicle
The switches for all side windows are located
on the driver's door. There is also a switch for Controls
* optional
171_AKB; 3; 4, en-GB
vpfaff7,
2007-11-13T10:50:25+01:00 - Seite 79
Page 157 of 273
Engine compartment
154 Coolan
t G
Risk of injury
The cooling system is pressurised. There-
fore, only unscrew the cap once the engine
has cooled down. The coolant temperature
gauge must display less than 70°C. Yo u
could otherwise be scalded by escaping hot
coolant.
Coolant consists of water and antifreeze/cor-
rosion inhibitor. Only check the coolant level
when the vehicle is on a level surface and the
engine has cooled down. Checking the coolant leve
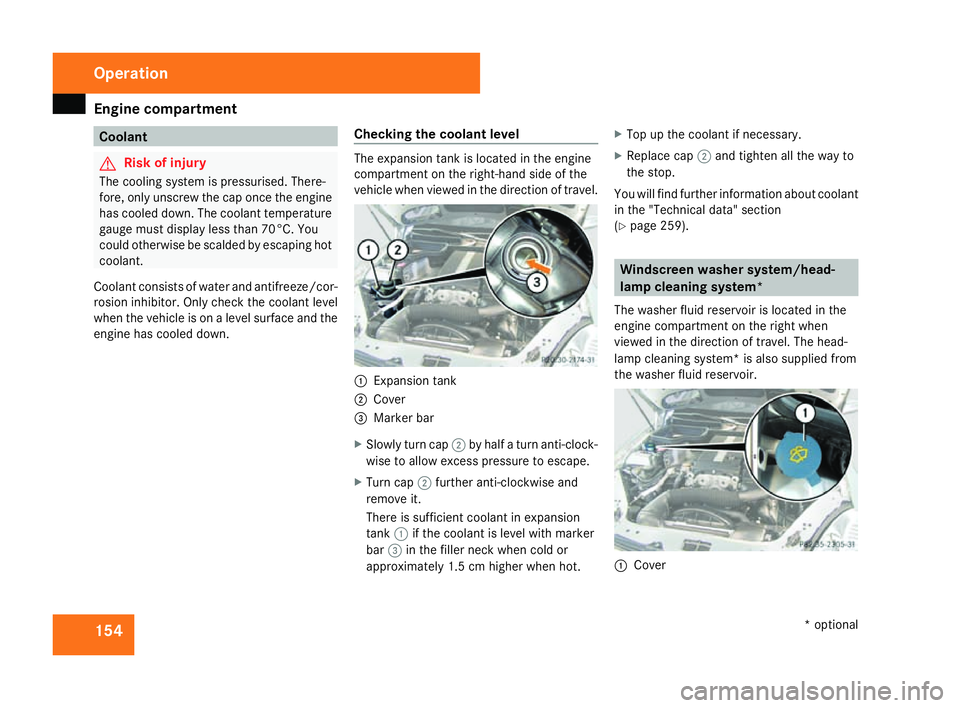
l The expansion tank is located in the engine
compartment on the right-hand side of the
vehicle when viewed in the direction of travel.
1
Expansion tank
2 Cove r
3 Marker bar
X Slowly turn cap 2by half a turn anti-clock -
wise to allow excess pressure to escape.
X Turn cap 2further anti-clockwise and
remove it.
There is sufficient coolant in expansion
tank 1if the coolant is level with marker
bar 3in the filler neck when cold or
approximately 1.5 cm higher when hot .X
Top up the coolant if necessary.
X Replace cap 2and tighten all the way to
the stop.
You will find further information about coolan t
in the "Technical data" section
( Y page 259). Windscreen washer system/head-
lamp cleaning system
*
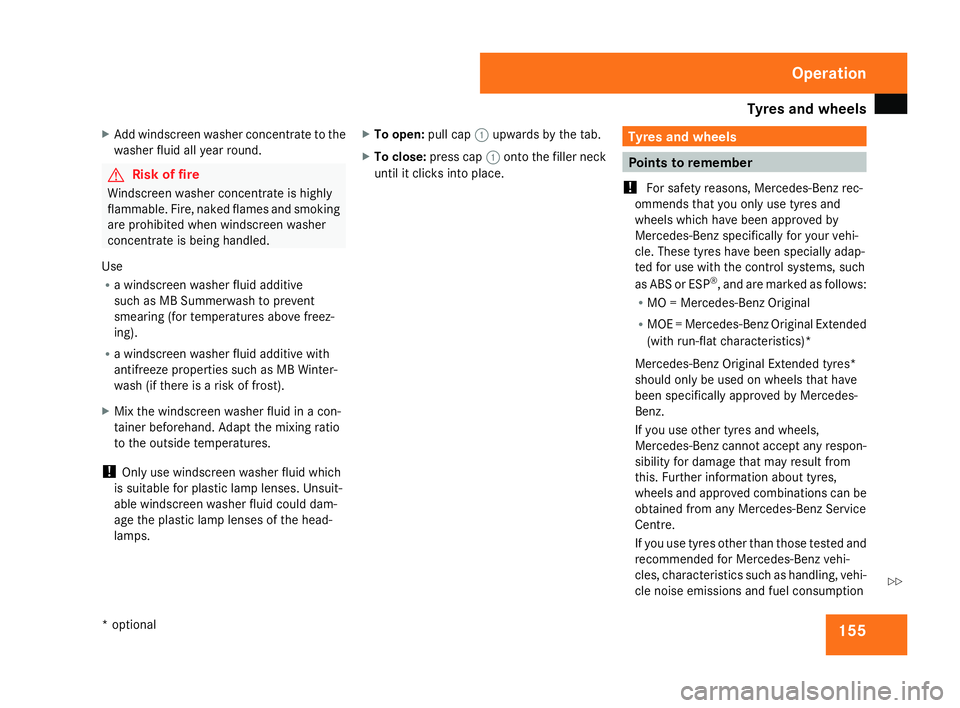
The washer fluid reservoir is located in the
engine compartment on the right when
viewed in the direction of travel. The head-
lamp cleaning system* is also supplied from
the washer fluid reservoir. 1
Cove r Operation
* optional
171_AKB; 3; 4, en-GB
vpfaff7,
2007-11-13T10:50:25+01:00 - Seite 154
Page 158 of 273
Tyres and wheels
15
5
X
Add windscreen washer concentrate to the
washer fluid all year round. G
Risk of fire
Windscreen washer concentrate is highly
flammable. Fire, naked flames and smoking
are prohibited when windscreen washe r
concentrate is being handled.
Use
R a windscreen washer fluid additive
such as MB Summerwash to preven t
smearing (for temperatures above freez-
ing).
R a windscreen washer fluid additive wit h
antifreeze properties such as MB Winter-
wash (if there is a risk of frost).
X Mix the windscreen washer fluid in a con-
tainer beforehand. Adapt the mixing ratio
to the outside temperatures.
! Only use windscreen washer fluid which
is suitable for plastic lamp lenses. Unsuit-
able windscreen washer fluid could dam-
age the plastic lamp lenses of the head-
lamps. X
To open: pull cap1upwards by the tab .
X To close: press cap 1onto the filler neck
until it clicks into place. Tyres and wheels
Points to remember
! For safety reasons, Mercedes-Benz rec-
ommends that you only use tyres and
wheels which have been approved by
Mercedes-Benz specifically for your vehi-
cle. These tyres have been specially adap-
ted for use with the control systems, such
as ABS or ESP ®
, and are marked as follows:
R MO = Mercedes-Benz Original
R MOE = Mercedes-Benz Original Extended
(with run-flat characteristics)*
Mercedes-Benz Original Extended tyres*
should only be used on wheels that have
been specifically approved by Mercedes-
Benz.
If you use other tyres and wheels,
Mercedes-Benz cannot accept any respon-
sibility for damage that may result from
this. Further information about tyres,
wheels and approved combinations can be
obtained from any Mercedes-Benz Service
Centre.
If you use tyres other than those tested and
recommended for Mercedes-Benz vehi-
cles, characteristics such as handling, vehi-
cle noise emissions and fuel consumption Operation
* optional
171_AKB; 3; 4, en-GB
vpfaff7,
2007-11-13T10:50:25+01:00 - Seite 155 Z
Page 171 of 273
Car
e 168
X
Turn the key to position 1in the ignition
lock (Y page 59).
X Set the windscreen wipers to position Ion
the combination switch (Y page 78).
X Turn the key to position 0or remove it when
the wiper arms are vertical (Y page 59).
! Only fold the windscreen wipers away
from the windscreen when vertical, other -
wise you will damage the bonnet .
X Fold the wiper arms away from the wind-
screen until you feel them engage.
X Clean the windscreen and the wiper blades .
X Fold the windscreen wipers back agai n
before the ignition is switched on.
! Do not clean the wiper blades too often,
as otherwise the coating may come off.
This could cause wiper noise.
Cleaning the windows !
Do not use dry cloths, abrasive products,
solvents or cleaning agents containing sol-
vents to clean the inside of the windows.
Clean the insides of the windows with a
damp cloth or commercially-available glass
cleaner. Avoid touching the inside of the rear windscreen and the side windows with
hard objects, e.g. ice scrapers or rings. You
could otherwise cause damage to the win-
dows, rear window heating or aerial on the
rear window.
i Anti-glare film retrofitted to the insides of
the windows could interfere with radio or
mobile phone reception, especially if it is
conductive or metal-coated film. Informa -
tion about anti-glare film can be obtained
from any Mercedes-Benz Service Centre.
Cleaning the headlamps X
Clean the headlamp lenses with a wet
sponge.
! Only use washer fluid which is suitable
for plastic lenses. Unsuitable washer fluid
could damage the plastic lenses of th e
headlamps.
Therefore, do not use the following:
R dry cloths
R abrasive cleaning agents
R solvents
R cleaning agents containing solvent You could otherwise scratch or damage the
surface of the lenses
.
Plastic trim !
Do not use dry, coarse or hard cloths and
do not scrub. Doing so will scratch or dam-
age the surfaces.
X Wipe plastic parts with a damp, lint-free
cloth (e.g. a microfibre cloth).
X Light soiling: use a low-foaming soap (e.g .
a light liquid hand soap) diluted in water.
X Heavy soiling: use a cleaning agent that is
solvent-free and non-corrosive. Mercedes-
Benz recommends that you use a
Mercedes-Benz cleaning product for this
purpose.
Cleaning the steering wheel boss and
dashboard X
Moisten a clean lint-free cloth with water.
X Clean the plastic parts and the dashboard.
X If particularly dirty, use a mild detergent. Operation
171_AKB; 3; 4, en-GB
vpfaff7,
2007-11-13T10:50:25+01:00 - Seite 168
Page 192 of 273
Display
messages 18
9 Display messages Possible cause/consequence Possible solution
W Top up washer fluid The washer fluid level in the washer fluid
reservoir has dropped below the mini-
mum. X
Top up the washer fluid (Y page 154). Practical advice
171_AKB; 3; 4, en-GB
vpfaff7,
2007-11-13T10:50:25+01:00 - Seite 189
Page 258 of 273
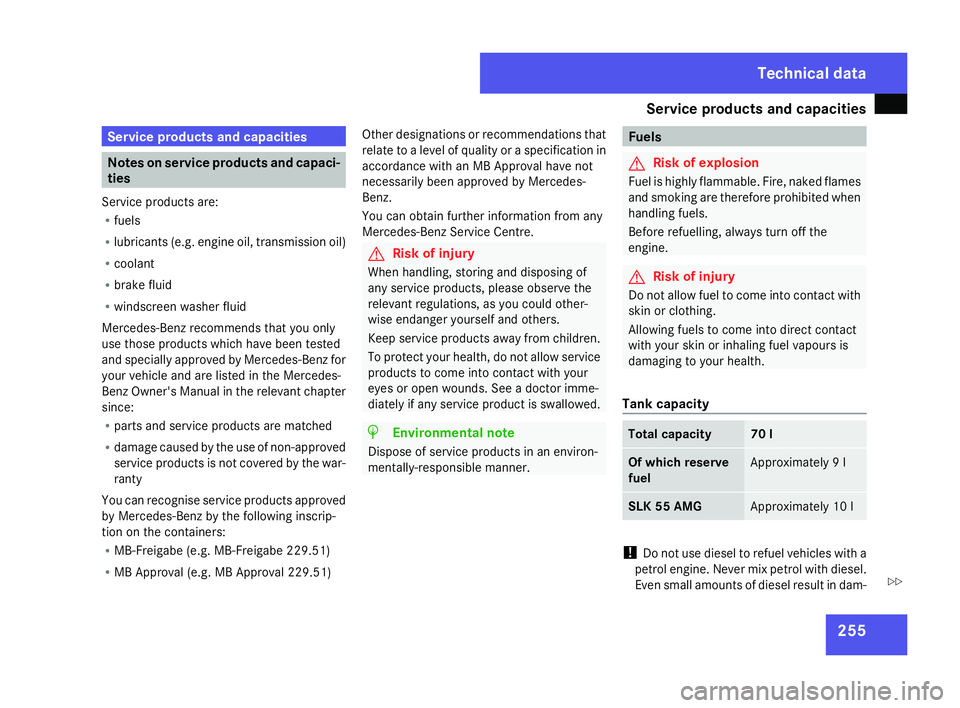
Service products and capacities
255Service products and capacities
Notes on service products and capaci-
ties
Service products are:
R fuel s
R lubricants (e.g. engine oil, transmission oil)
R coolant
R brake fluid
R windscreen washer fluid
Mercedes-Benz recommends that you onl y
use those products which have been tested
and specially approved by Mercedes-Benz for
your vehicle and are listed in the Mercedes-
Benz Owner's Manual in the relevant chapter
since :
R parts and service products are matched
R damage caused by the use of non-approved
service products is not covered by the war-
rant y
You can recognise service products approved
by Mercedes-Benz by the following inscrip-
tion on the containers:
R MB-Freigabe (e.g. MB-Freigabe 229.51)
R MB Approval (e.g. MB Approval 229.51) Other designations or recommendations that
relate to a level of quality or a specification in
accordance with an MB Approval have not
necessarily been approved by Mercedes-
Benz.
You can obtain further information from any
Mercedes-Benz Service Centre. G
Risk of injury
When handling, storing and disposing of
any service products, please observe the
relevant regulations, as you could other-
wise endanger yourself and others.
Keep service products away from children.
To protect your health, do not allow service
products to come into contact with your
eyes or open wounds. See a doctor imme-
diately if any service product is swallowed. H
Environmental not
e
Dispose of service products in an environ-
mentally-responsible manner. Fuel
s G
Risk of explosion
Fuel is highly flammable. Fire, naked flames
and smoking are therefore prohibited when
handling fuels.
Before refuelling, always turn off the
engine. G
Risk of injury
Do not allow fuel to come into contact with
skin or clothing .
Allowing fuels to come into direct contact
with your skin or inhaling fuel vapours is
damaging to your health.
Tank capacity Total capacity 70
l Of which reserve
fuel Approximately 9
l SLK 55 AMG Approximately 10
l !
Do not use diesel to refuel vehicles with a
petrol engine. Never mix petrol with diesel.
Even small amounts of diesel result in dam- Technical data
171_AKB; 3; 4, en-GB
vpfaff7,
2007-11-13T10:50:25+01:00 - Seite 255 Z