MERCEDES-BENZ SLK250 2012 R172 Owner's Manual
Manufacturer: MERCEDES-BENZ, Model Year: 2012, Model line: SLK250, Model: MERCEDES-BENZ SLK250 2012 R172Pages: 334, PDF Size: 4.26 MB
Page 191 of 334
If track information is stored on the audio
device or medium, the multifunction display
will show the number and name of the track.
The current track does not appear in audio
AUX mode (Auxiliary audio mode: external
audio source connected).
Video DVD operation X
Switch on COMAND and select video DVD
(see the separate operating instructions).
X Press the 0002or0005 button on the
steering wheel to select the Audio menu.
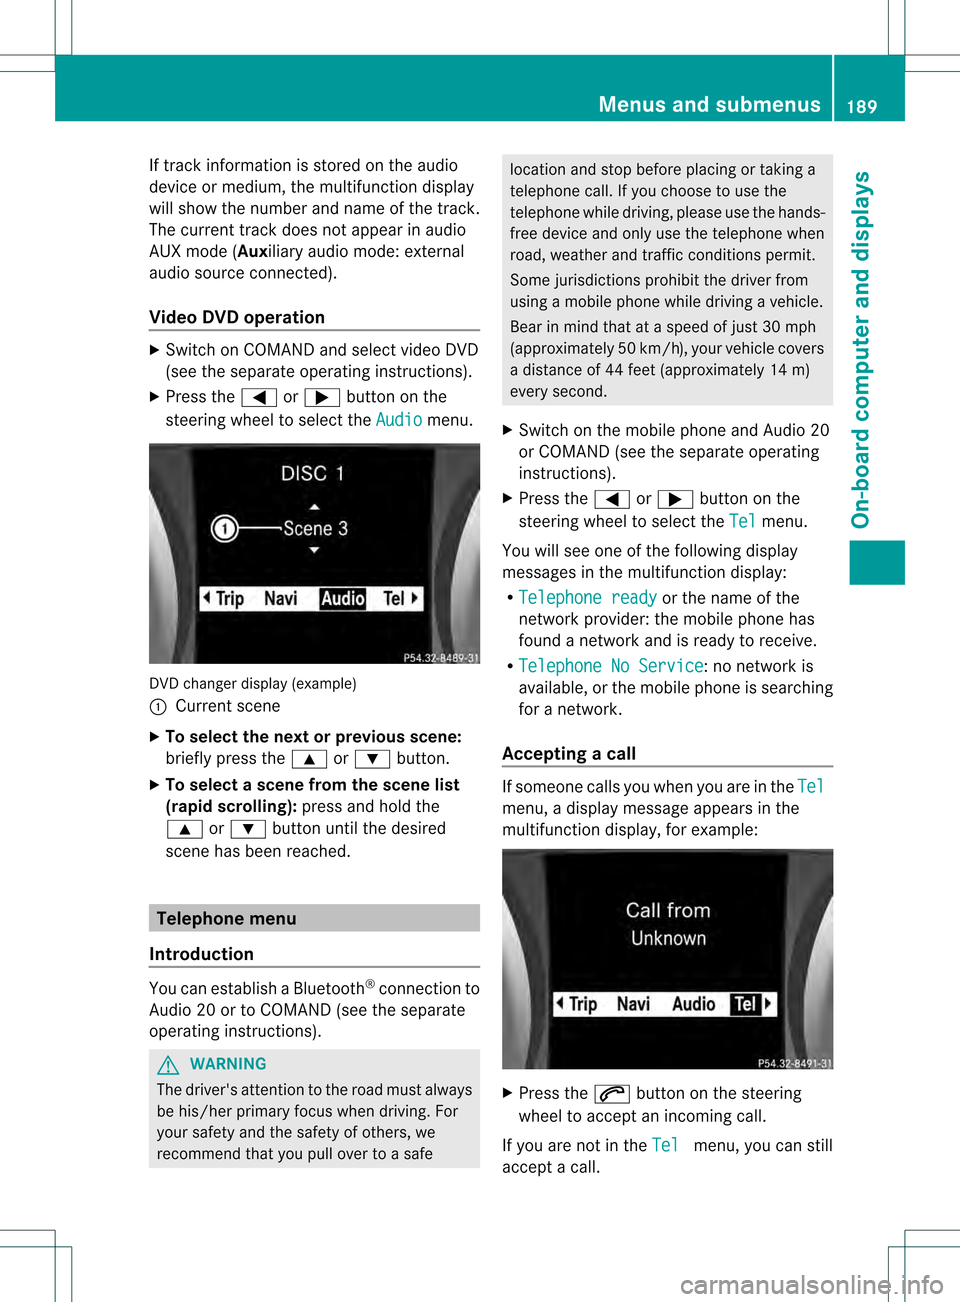
DVD changer display (example)
0002
Current scene
X To select the next or previous scene:
briefly press the 0003or0004 button.
X To select ascene from the scene list
(rapid scrolling): press and hold the
0003 or0004 buttonuntil the desired
scene has been reached. Telephone menu
Introduction You can establish a Bluetooth
®
connection to
Audio 20 or to COMAND (see the separate
operating instructions). G
WARNING
The driver's attentio nto the road must always
be his/her primary focus when driving. For
your safety and the safety of others, we
recommend that you pull over to a safe location and stop before placing or taking a
telephone call. If you choose to use the
telephone while driving, please use the hands-
free device and only use the telephone when
road, weather and traffic conditions permit.
Some jurisdictions prohibit the driver from
using a mobile phone while driving a vehicle.
Bear in mind that at a speed of just 30 mph
(approximately 50 km/h) , your vehicle covers
a distance of 44 feet (approximately 14 m)
every second.
X Switch on the mobile phone and Audio 20
or COMAN D(see the separate operating
instructions).
X Press the 0002or0005 button on the
steering wheel to select the Tel menu.
You will see one of the following display
messages in the multifunction display:
R Telephone ready or the name of the
network provider: the mobile phone has
found a network and is ready to receive.
R Telephone No Service : no network is
available, or the mobile phone is searching
for a network.
Accepting acall If someone calls you whe
nyou are in the Tel menu, a display message appears in the
multifunction display, for example:
X
Press the 0005button on the steering
wheel to accept an incoming call.
If you are not in the Tel menu, you can still
accept a call. Menus and submenus
189On-board computer and displays Z
Page 192 of 334
Rejecting or ending
acall X
Press the 0004button on the steering
wheel.
If you are not in the Tel menu, you can still
reject or end a call.
Dialing a number from the phone book If you
rmobile phone is able to receive calls,
you can search for and dial a number from the
phone book in Audio 20 or COMAND.
X Press the 0002or0005 button on the
steering wheel to select the Tel menu.
X Press the 0003,0004or000C button to call
up the phone book.
X Press the 0003or0004 button to select the
desired name.
To start scrolling rapidly ,press and hold the
0003 or0004 button for longer than one
second. After a short time, the rapid scroll
speeds up.
Rapid scrolling stops when you release the
button or reach the end of the list.
X If onlyo ne telephone number is stored
for a name: press the0005or000C button
to start dialing.
or
X If there is more than one number for a
particular name: press the0005or000C
button to display the numbers.
X Press the 0003or0004 button to select the
number you want to dial.
X Press the 0005or000C button to start
dialing.
or
X If you do not want to make a call: press
the 0004 or0001 button.
Redialing The on-board computer saves the last names
or numbers dialed in the redial memory. X
Press the 0002or0005 button on the
steering wheel to select the Tel menu.
X Press the 0005button to switch to the
redial memory.
X Press the 0003or0004 button to select the
desired name or number.
X Press the 0005or000C button to start
dialing.
or
X If you do not want to make a call: press
the 0004 or0001 button. Assistance menu
Showing the distance display This function is only available with
DISTRONIC PLUS.
X Press the 0002or0005 button on the
steering wheel to select the DriveAssist menu.
X Press the 0003or0004 button to select
Distance Display .
X Press 000C.
The DISTRONIC PLUS distance display
(Y page 165) appears in the multifunction
display.
Activating/deactivating PRE-SAFE ®
Brake PRE-SAFE
®
Brake is only available in vehicles
with DISTRONIC PLUS.
X Press the 0002or0005 button on the
steering wheel to select the DriveAssist menu.
X Press 0003or0004 to select PRE-SAFE Brake .
X Press 000C.
The curren tselection is displayed.
X To activate/deactivate: press000C
again.
When PRE-SAFE ®
Brake (Y page 62) is
activated, the multifunction display shows 190
Menus and submenusOn-board computer and displays
Page 193 of 334
the
0001 symbol as long as the HOLD
function is not activated (Y page 168).
Vehicles with Parking Guidance: if
PARKTRONIC is activated and you are driving
at a speed under 22 mph (35km/h) the 0013
symbol for Parking Guidanc eis displayed
instead of the 0001symbol.
Activating/deactivating ATTENTION
ASSIST X
Press the 0002or0005 button on the
steering wheel to select the DriveAssistmenu.
X Press the 0003or0004 button to select
Attention Asst. .
X Press 000C.
The current selection is displayed.
X To activate/deactivate: press000C
again.
When ATTENTION ASSIST (Y page 176) is
activated, the 0001symbol appears in the
multifunction display when the ignition is on. Service menu
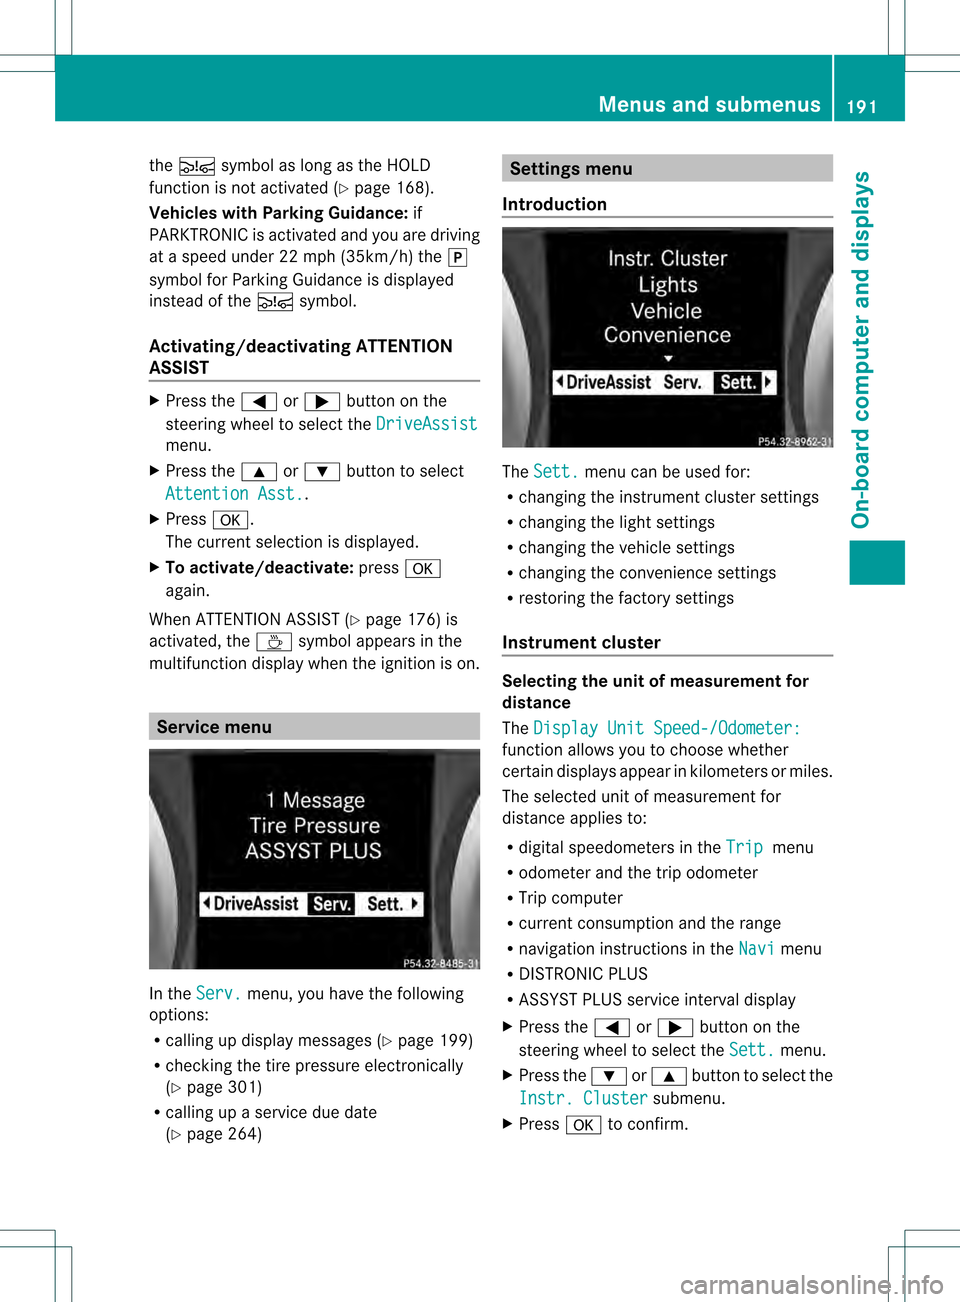
In the
Serv. menu, you have the following
options:
R calling up display messages (Y page 199)
R checking the tire pressure electronically
(Y page 301)
R calling up a service due date
(Y page 264) Settings menu
Introduction The
Sett. menu can be used for:
R changing the instrument cluster settings
R changing the light settings
R changing the vehicle settings
R changing the convenience settings
R restoring the factory settings
Instrument cluster Selecting the unit of measurement for
distance
The
Display Unit Speed-/Odometer: function allows you to choose whether
certain displays appearink
ilometers or miles.
The selected unit of measuremen tfor
distance applies to:
R digital speedometers in the Trip menu
R odometer and the trip odometer
R Trip computer
R current consumption and the range
R navigation instructions in the Navi menu
R DISTRONIC PLUS
R ASSYST PLUS service interval display
X Press the 0002or0005 button on the
steering wheel to select the Sett. menu.
X Press the 0004or0003 button to select the
Instr. Cluster submenu.
X Press 000Cto confirm. Menus and submenus
191On-board computer and displays Z
Page 194 of 334
X
Press the 0004or0003 button to select the
Display Unit Speed-/Odometer: function.
You will see the selected setting:
km or
miles .
X Press the 000Cbutton to save the setting.
Switching the additional speedometer on
or off
Only vehicles with manual transmission have
this function.
The Additional Speedometer function
allows you to choose whether the status area
of the multifunction display shows the speed
in km/h( USA) or mph (Canada) instead of the
outside temperature.
X Press the 0002or0005 button on the
steering wheel to select the Settingsmenu.
X Press the 0004or0003 button to select the
Instr. cluster submenu.
X Press the 000Cbutton to confirm.
X Press the 0004or0003 button to select the
Additional Speedometer function.
You will see the selected setting: On or
Off .
X Press the 000Cbutton to save the setting.
Selecting the permanent display function
Only vehicles with automatic transmission
have this function.
The Permanent Display: function allows
you to choose whether the multifunction
display always shows the outside
temperature or the speed in km/h (USA) or
mph (Canada).
X Press the 0002or0005 button on the
steering wheel to select the Settingsmenu.
X Press the 0004or0003 button to select the
Instr. cluster submenu.
X Press the 000Cbutton to confirm. X
Press the 0004or0003 button to select the
Permanent display function.
You will see the selected setting Outside Temperature or
Speedometer [km/h]: .
X Press the 000Cbutton to save the setting.
Lights Switching the daytime running lamps on/
off
This function is not available in Canada.
If you have activated the
Daytime Running
Lights: function and the light switch is in the
0008 or0005 position, the daytime running
lamps are switched on automatically when
the engine is running.
Depending on the ambient light, the following
will additionally light up:
R low-beamh eadlamps
R parking lamps
R tail lamps
R license plate lamp
R side marker lamps
X Press the 0002or0005 button on the
steering wheel to select the Settings menu.
X Press the 0004or0003 button to select the
Light submenu.
X Press the 000Cbutton to confirm.
X Press the 0004or0003 button to select the
Daytime running lights function.
You will see the selected setting: on or
off .
X Press the 000Cbutton to save the setting.
Setting the brightness of the ambient
lighting
X Press the 0002or0005 button on the
steering wheel to select the Settings menu.
X Press the 0004or0003 button to select the
Lights submenu.
X Press the 000Cbutton to confirm. 192
Menus and submenusOn-board computer and displays
Page 195 of 334
X
Press the 0004or0003 button to select
Ambient light .
You will see the selected setting.
X Press the 000Cbutton to confirm.
X Press the 0004or0003 button to adjust the
brightness to any level from Off to
Level 5 (bright).
X Press the 000Cor0001 button to save the
setting.
Activating/deactivating surround
lighting and exterior lighting delayed
switch-off
If you have activated the Lighting: function
and the light switch is in the 0008or0005
position, the following functions are active
when it is dark:
R Surround lighting: the exterior lighting
remains lit for 40 seconds after unlocking
with the key. The exterior lighting switches
off when you open the driver's door.
R Exterior lighting delayed switch-off: the
exterior lighting remains lit for 60 seconds
after the engine is switched off. If you close
all the doors, the exterior lighting goes off
after 15 seconds.
If you activate the Surround lighting: function, the following light up depending on
the vehicle's equipment:
R
parking lamps
R front fog lamps
R low-beam headlamps
R daytime running lamps
R side marker lamps
X Press the 0002or0005 button on the
steering wheel to select the Sett. menu.
X Press the 0004or0003 button to select the
Lights submenu.
X Press the 000Cbutton to confirm.
X Press the 0004or0003 button to select the
Locator Lighting function.
You will see the selected setting: on or
off .
X Press the 000Cbutton to save the setting. Deactivating delayed switch-off of the
exterior lighting temporarily:
X
Before leaving the vehicle, turn the
SmartKey to position 0in the ignition lock.
X Turn the SmartKey to position 2in the
ignition lock and back to position 0.
The exterior lighting delayed switch-off is
deactivated.
Delayed switch-off of the exterior lighting is
reactivated the next time you start the
engine.
Activating/deactivating the interior
lighting delayed switch-off
If you activate the Interior lighting delay sw. off function, the interior lighting
remains on for 20seconds after you remove
the key from the ignition lock.
X Press the 0002or0005 button on the
steering wheel to select the Settings menu.
X Press the 0004or0003 button to select the
Light submenu.
X Press the 000Cbutton to confirm.
X Press the 0004or0003 button to select the
Interior lighting delay sw. off: function.
You will see the selected setting:
on or
off .
X Press the 000Cbutton to save the setting.
Vehicle Activating/deactivating the automatic
door locking mechanism
If you select the
Automatic Door Lock: function, the vehicle is centrally locked above
a speed of around
9mph (15km/h).
i For further information on the automatic
locking feature, see (Y page 75). Menus and submenus
193On-board computer and displays Z
Page 196 of 334
X
Press the 0002or0005 button on the
steering wheel to select the Settingsmenu.
X Press the 0004or0003 button to select the
Vehicle submenu.
X Press the 000Cbutton to confirm.
X Press the 0004or0003 button to select the
Automatic door locks function.
You will see the selected setting: on or
off .
X Press the 000Cbutton to save the setting.
Activating/deactivating the acoustic
locking verification signal
If you switch on the Acoustic Lockfeedback function, an acoustic signal sounds
when you lock the vehicle.
X Press the 0002or0005 button on the
steering wheel to select the Settingsmenu.
X Press the 0004or0003 button to select the
Vehicle submenu.
X Press the 000Cbutton to confirm.
X Press the 0004or0003 button to select the
Acoustic Lock feedback: function.
You will see the selected setting:
Activated or
Deactivated .
X Press the 000Cbutton to save the setting.
Activating/deactivating the radar sensor
system
The following systems are switched off when
the radar sensor system is deactivated:
R DISTRONIC PLUS (Y page 158)
R BAS PLUS (Y page 57)
R PRE-SAFE ®
Brake (Y page 62)
X Press the 0002or0005 button on the
steering wheel to select the Sett. menu.
X Press the 0004or0003 button to select the
Vehicle submenu.
X Press 000Cto confirm. X
Press the 0003or0004 button to select
Radar Sensor (See Oper. Manual): .
You will see the selected setting: Enabled or
Disabled .
X Press the 000Cbutton to save the setting.
Convenience Activating/deactivating the EASY-
ENTRY/EXIT feature
You can use the
Easy Entry/Exit: function
to activate or deactivate the EASY ENTRY/
EXIT feature (Y page 97). G
WARNING
You must make sure no one can become
trapped or injured by the moving steering
wheel when the easy-entry/exit feature is
activated.
To stop steering wheel movement, move
steering wheel adjustmen tlever or press one
of the memory position buttons.
Do not leave children unattended in the
vehicle, or with access to an unlocked vehicle.
Children could open the driver's door and
unintentionally activate the easy-entry/exit
feature, which could result in an accident
and/or serious personal injury.
X Press the 0002or0005 button on the
steering wheel to select the Settings menu.
X Press the 0004or0003 button to select the
Convenience submenu.
X Press the 000Cbutton to confirm.
X Press the 0004or0003 button to select the
Easy Entry/Exit: function.
You will see the selected setting: on or
off .
X Press the 000Cbutton to save the setting.
Switching the belt adjustment on/off
For further information on belt adjustment,
see (Y page 51). 194
Menus and submenusOn-board computer and displays
Page 197 of 334
X
Press the 0002or0005 button on the
steering wheel to select the Sett. menu.
X Press the 0004or0003 button to select the
Convenience submenu.
X Press 000Cto confirm.
X Press the 0004or0003 button to select the
Belt Adjustment function.
You will see the selected setting: on or
off .
X Press the 000Cbutton to save the setting.
Switching the fold-in mirrors when
locking feature is on/off
If you switch on the Fold Mirrors in when
Locking function, the exterior mirrors fold in
when you lock the vehicle. If you unlock the
vehicle and then open a door, the exterior
mirrors fold out again.
If you have switched the function on and you
fold the exterior mirrors in using the button
on the door (Y page 99), they will not fold out
automatically. The exterior mirrors can then
only be folded out using the button on the
door.
X Press the 0002or0005 button on the
steering wheel to select the Settingsmenu.
X Press the 0004or0003 button to select the
Convenience submenu.
X Press the 000Cbutton to confirm.
X Press the 0004or0003 button to select the
Fold mirrors in when locking: function.
You will see the selected setting:
Enabledor
Disabled .
X Press the 000Cbutton to save the setting.
Restoring the factory settings For safety reasons, the
Daytime RunningLights: function in the
Lights submenu is
only reset when the vehicle is stationary. X
Press the 0002or0005 button on the
steering wheel to select the Sett. menu.
X Press the 0004or0003 button to select the
Factory Setting submenu.
X Press the 000Cbutton to confirm.
The Reset All Settings? message
appears.
X Press the 0004or0003 button to select
No or
Yes .
X Press the 000Cbutton to confirm the
selection.
If you select Yes , the multifunction display
shows a confirmation message. AMG menu in AMG vehicles
AMG displays X
Press the 0002or0005 button on the
steering wheel to select the AMG menu.
0002
Digital speedometer
0003 Gear indicator
0023 Upshift indicator
0022 Engine oil temperature
0020 Coolant temperature
0021 Status display of the ECO start/stop
function (Y page 135)
Upshift indicator UP 0023
indicates that the
engine has reached the overrevving range
when in the manual gearshift program.
Upshift indicator UP 0023
fades out other
messages until you have shifted up. Menus and submenus
195On-board computer and displays Z
Page 198 of 334
When the engine temperature is below
80 †, the oil temperature gauge flashes.
Avoid driving at full engine output during this
time.
SETUP SETUP shows the drive program, the ESP
®
(Electronic Stability Program) mode and the
SPORT handling mode.
X Press the 0002or0005 button on the
steering wheel to select the AMG menu.
X Press the 0003button repeatedly until
SETUP is displayed. 0002
Drive program (C /S /M )
0003 ESP ®
mode (ON /OFF ) or SPORT handling
mode (SPORT )
RACETIMER Displaying and starting RACETIMER
G
WARNING
The RACETIMER feature is only for use on
roads and in conditions where high speed
driving is permitted. Racing on public roads is
prohibited under all circumstances. The driver
is and must always remain responsible for
following posted speed limits.
You can use the RACETIMER to store lap
times.
X Press the 0002or0005 button on the
steering wheel to select the AMG menu.
X Press the 0003button repeatedly until the
RACETIMER is shown. i
If RACETIMER is selected, the menu bar
cannot be called up with the 0002
and 0005 buttons. 0002
Lap
0003 RACETIMER
You can start the RACETIMER when the
engine is running or if the SmartKey is in
position 2in the ignition lock.
X To start: press the 000Cbutton to start the
RACETIMER.
Displaying the intermediate time X
Press the 0002or0005 button to select
Interm. Time .
X Press the 000Cbutton to confirm.
The intermediate time is displayed for five
seconds.
Starting a new lap
X Press 000Cto confirm New Lap .196
Menus and submenusOn-board computer and displays
Page 199 of 334
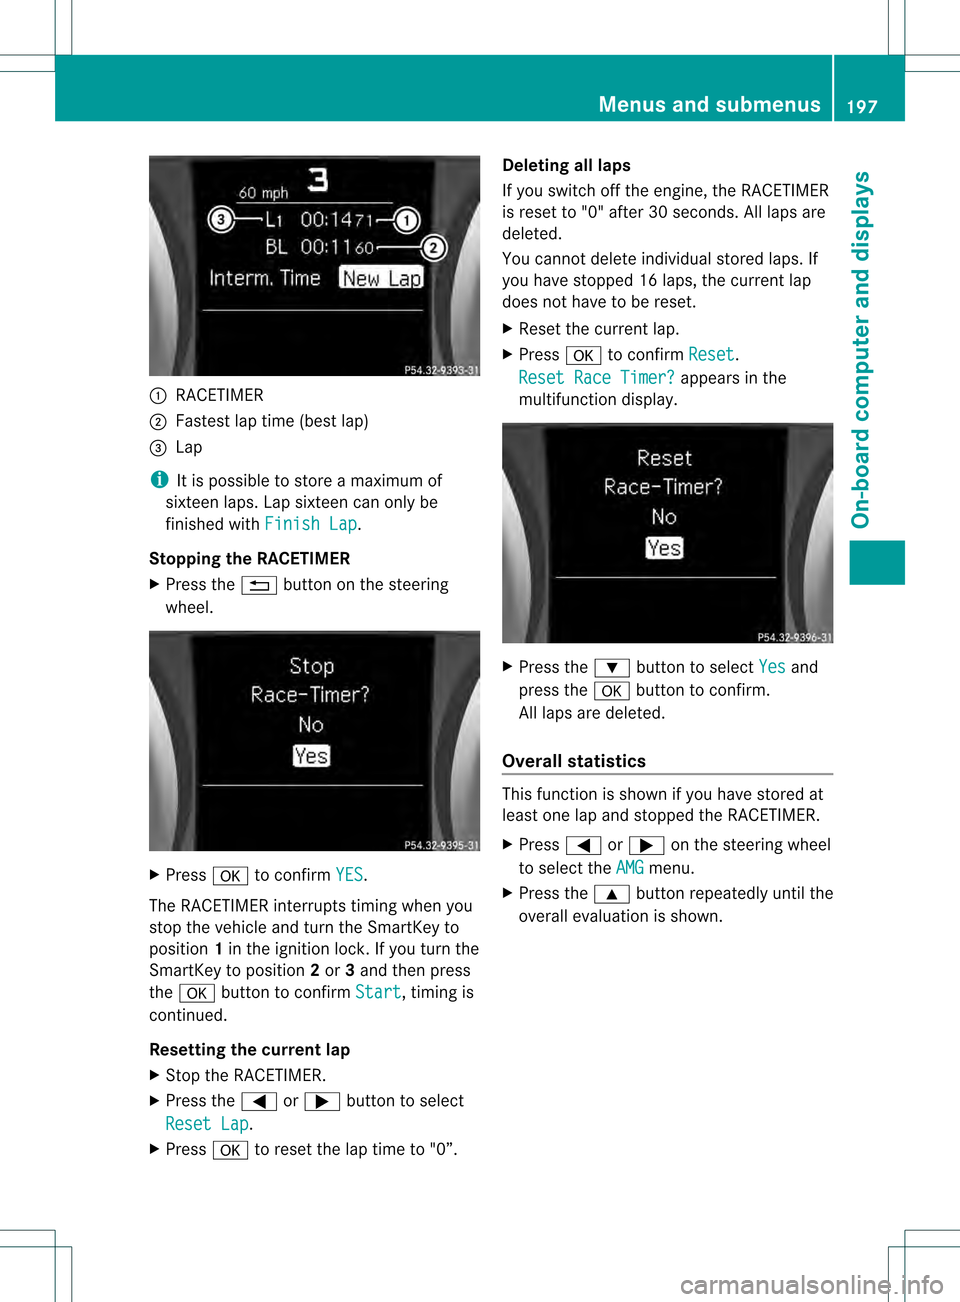
0002
RACETIMER
0003 Fastest lap time (bes tlap)
0023 Lap
i It is possible to store a maximum of
sixteen laps. Lap sixteen can only be
finished with Finish Lap .
Stopping the RACETIMER
X Press the 0001button on the steering
wheel. X
Press 000Cto confirm YES .
The RACETIMER interrupts timing when you
stop the vehicle and turn the SmartKey to
position 1in the ignition lock. If you turn the
SmartKey to position 2or 3and then press
the 000C button to confirm Start , timing is
continued.
Resetting the current lap
X Stop the RACETIMER.
X Press the 0002or0005 buttonto select
Reset Lap .
X Press 000Cto reset the lap time to "0”. Deleting all laps
If you switch off the engine, the RACETIMER
is reset to "0" after 30 seconds. All laps are
deleted.
You cannot delete individual stored laps. If
you have stopped 16 laps, the current lap
does not have to be reset.
X
Reset the current lap.
X Press 000Cto confirm Reset .
Reset Race Timer? appears in the
multifunction display. X
Press the 0004button to select Yes and
press the 000Cbutton to confirm.
All laps are deleted.
Overall statistics This function is shown if you have stored at
least one lap and stopped the RACETIMER.
X
Press 0002or0005 on the steering wheel
to select the AMG menu.
X Press the 0003button repeatedly until the
overall evaluation is shown. Menus and submenus
197On-board computer and displays Z
Page 200 of 334
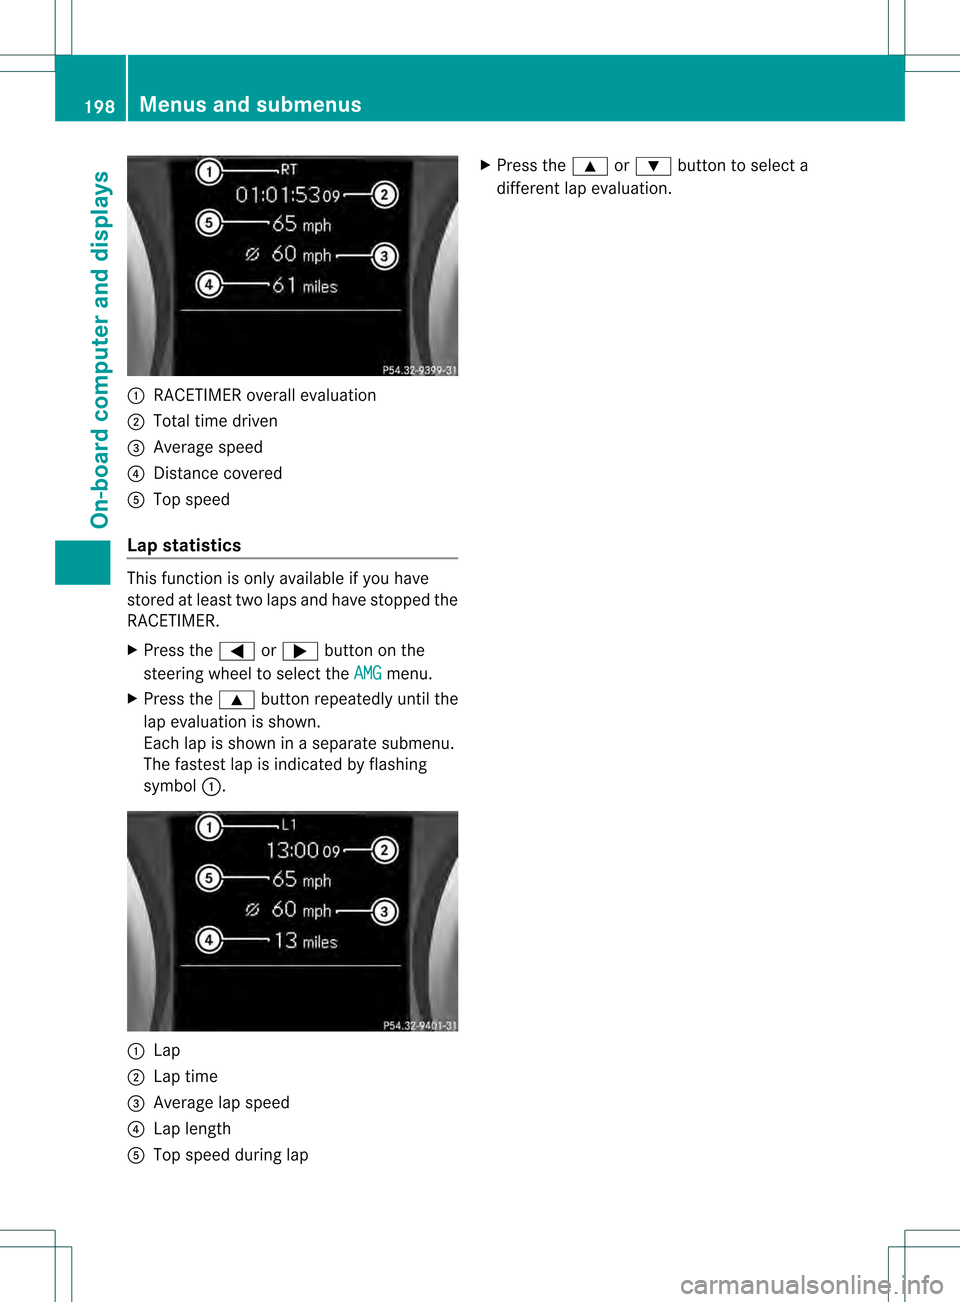
0002
RACETIMER overall evaluation
0003 Total time driven
0023 Average speed
0022 Distance covered
0020 Top speed
Lap statistics This function is only available if you have
stored at least two laps and have stopped the
RACETIMER.
X
Press the 0002or0005 button on the
steering wheel to select the AMG menu.
X Press the 0003buttonrepeatedly until the
lap evaluation is shown.
Each lap is shown in a separate submenu.
The fastest lap is indicated by flashing
symbol 0002. 0002
Lap
0003 Lap time
0023 Average lap speed
0022 Lap length
0020 Top speed during lap X
Press the 0003or0004 button to select a
differen tlap evaluation. 198
Menus and submenusOn-board computer and displays