Comand MERCEDES-BENZ SLK300 2010 R171 Owner's Manual
[x] Cancel search | Manufacturer: MERCEDES-BENZ, Model Year: 2010, Model line: SLK300, Model: MERCEDES-BENZ SLK300 2010 R171Pages: 312, PDF Size: 5.75 MB
Page 8 of 312
Clear button .......................................
116
Climate control see Climate control system
Climate control system ....................162
Air conditioning ............................. 165
Air conditioning refrigerant ............ 303
Air distribution ............................... 168
Air recirculation mode ................... 169
Air vents ........................................ 166
Air volume ..................................... 168
Automatic mode ............................ 166
Deactivating system ......................165
Front defroster .............................. 168
Maximum cooling MAX COOL ........169
Residual heat and ventilation ......... 169
Temperature .................................. 166
Clock ...................................... 26, 93, 105
Cockpit ................................................. 25
Cold tire inflation pressure ..............217
Collapsible tire (spare wheel) ..........300
Collapsible wheel chock ...................234
COMAND system see separate COMAND system
operating instructions
Combination switch ............................73
Control system .................................... 93
Multifunction display .......................95
Multifunction steering wheel ............ 94
Resetting to factory settings .......... 102
Control system menus ........................ 96
AMG ................................................. 97
Audio/DVD .................................... 100
Navigation ..................................... 101
Settings ......................................... 102
Standard display .............................. 96
Telephone ...................................... 110
Trip computer ................................ 109
Vehicle status message memory ...101
Control system submenus
Convenience .................................. 108
Instrument cluster .........................103
Lighting .......................................... 105
Time/Date ..................................... 105
Vehicle ........................................... 108
Convenience submenu
Easy-entry/exit feature .................. 108 Coolant
Anticorrosion/antifreeze ...............305
Capacities ...................................... 301
Checking level ............................... 196
Messages in the multifunction
display ........................................... 247
Corner-illuminating front fog
lamps .................................................... 75
Cruise control .................................... 159
Activating ....................................... 160
Canceling ....................................... 160
Changing the set speed .................161
Last stored speed .......................... 161
Lever .............................................. 160
Messages in the multifunction
display ........................................... 241
Resume function ............................ 161
Setting current speed .................... 160
Cup holders ........................................ 176
Curb weight ....................................... 217
Customer Assistance Center (CAC) ...21
Customer Relations Department .......21 D
Dashboard see Instrument cluster
Data recording ..................................... 21
Date, Setting ...................................... 105
Daytime running lamp mode ..............72
Switching on or off ......................... 106
Deep water
see Standing water
Defogging (windshield) .....................169
Defroster Front (Climate control system) ......168
Rear window .................................. 170
Delayed shut-off
Exterior lamps ................................ 107
Interior lighting .............................. 107
Department of Transportation
see DOT
Difficulties
While driving .................................... 82
With starting .................................... 80
Digital speedometer ............................ 97
Dimensions (vehicle) see Vehicle specification 6
Index 171_AKB; 3; 60, en-US
d2ureepe,
Version: 2.11.8.1 2009-05-11T16:00:23+02:00 - Seite 6
Page 30 of 312
Function Page
Press button & or *
briefly: to move within a menu
to select previous or next
track, scene or stored
station within Audio/DVD
menu
100
to switch to the phone book
and select a name or
number within Telephone
menu
110
Press and hold button
& or *:
to select previous or next
track with quick search or
to select previous or next
station in station list or
wave band within
Audio/
DVD menu 100
to start the quick search in
the phone book within
Telephone
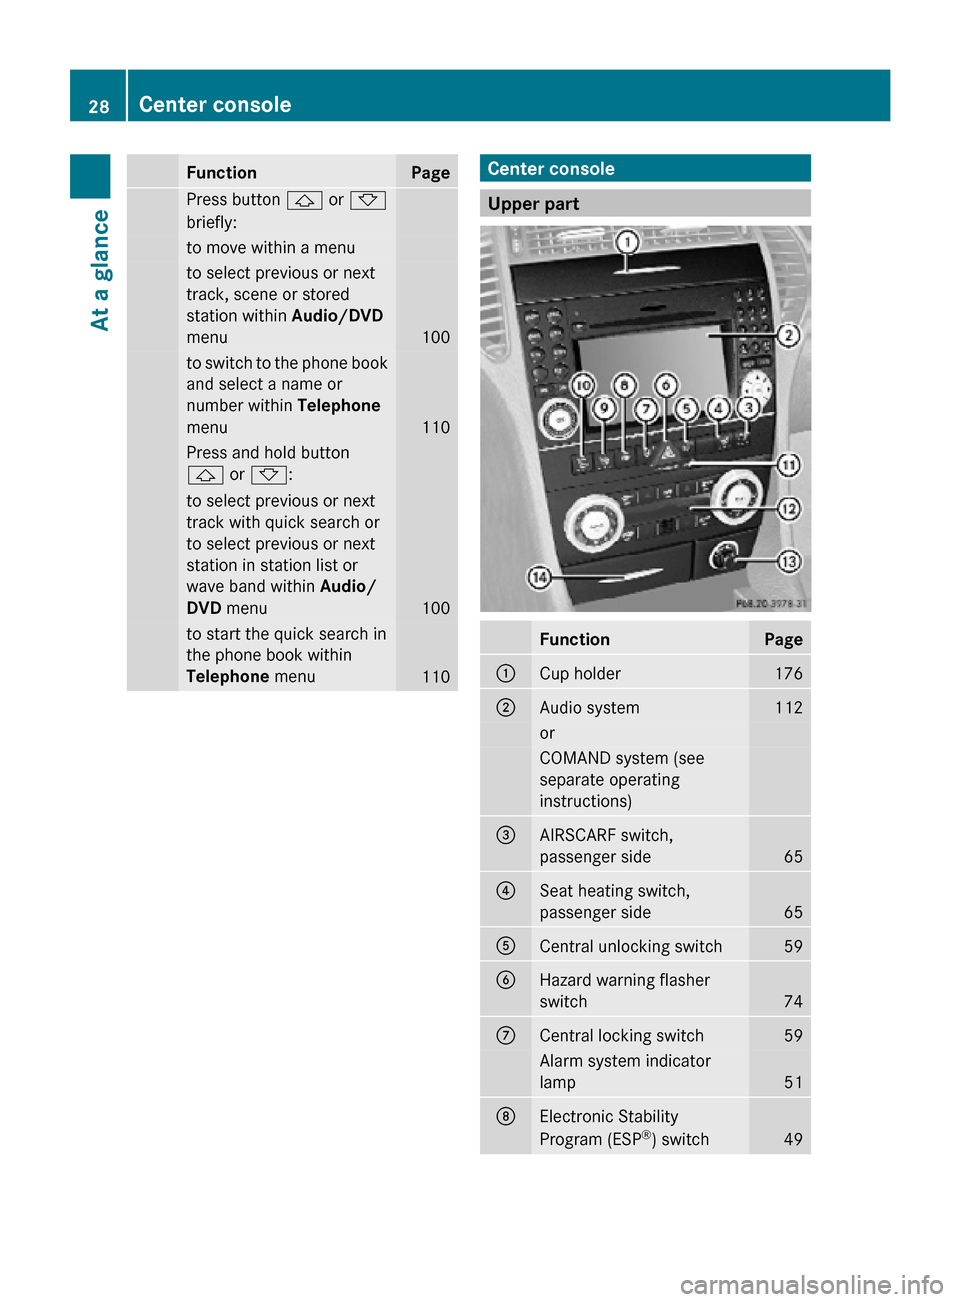
menu 110 Center console
Upper part
Function Page
:
Cup holder 176
;
Audio system 112
or
COMAND system (see
separate operating
instructions)
=
AIRSCARF switch,
passenger side
65
?
Seat heating switch,
passenger side
65
A
Central unlocking switch 59
B
Hazard warning flasher
switch
74
C
Central locking switch 59
Alarm system indicator
lamp
51
D
Electronic Stability
Program (ESP
®
) switch 4928
Center consoleAt a glance
171_AKB; 3; 60, en-US
d2ureepe,
Version: 2.11.8.1 2009-05-11T16:00:23+02:00 - Seite 28
Page 95 of 312
Activating the instrument cluster
The instrument cluster is activated when you
R open the driver’s door
R switch on the ignition
R press reset button .
R switch on the exterior lamps
i Opening the driver’s door or pressing the
reset button . without switching on the
ignition or the exterior lamps activates the
instrument cluster illumination only for
30 seconds. Adjusting the instrument cluster
illumination
X To brighten illumination: Press knob :
briefly.
X To dim illumination: Press knob ;
briefly.
The illumination brightness for the instrument
cluster changes each time you press
knob :
or ;. Several settings are possible.
i The instrument cluster illumination is
dimmed or brightened automatically to suit
ambient light conditions.
You can only adjust the brightness of the
instrument cluster illumination when it is
dark outside.
i With the exterior lighting switched on, the
brightness of the switches in the center
console will also be adjusted when using
knob : or ;. Resetting trip odometer
X Make sure you are viewing the standard
display
(Y page 96) in the multifunction
display.
X Press and hold reset button .
until the trip
odometer is reset. Tachometer
The red marking on the tachometer
(Y
page 26) denotes excessive engine speed.
! Avoid driving at excessive engine speeds,
as it may result in serious engine damage
that is not covered by the Mercedes-Benz
Limited Warranty.
To help protect the engine, the fuel supply is
interrupted if the engine is operated within
the red marking. Clock
In vehicles with the audio system, the clock
can be set via the control system
(Y page 105).
For setting the time with the COMAND
system, see separate COMAND system
operating instructions. Control system
Introduction
The
control system is activated as soon as the
starter switch is in position 1.
The control system enables you to call up
information about your vehicle and to change
vehicle settings.
For example, you can use the control system
to find out when your vehicle is next due for
maintenance service, to set the language for
messages in the instrument cluster display,
and much more. G
Warning!
A driver’s attention to the road and traffic
conditions must always be his/her primary
focus when driving.
For your safety and the safety of others,
selecting features through the multifunction
steering wheel should only be done by the
driver
when traffic and road conditions permit
it to be done safely. Control system
93
Controls in detail
171_AKB; 3; 60, en-US
d2ureepe, Version: 2.11.8.1 2009-05-11T16:00:23+02:00 - Seite 93 Z
Page 102 of 312
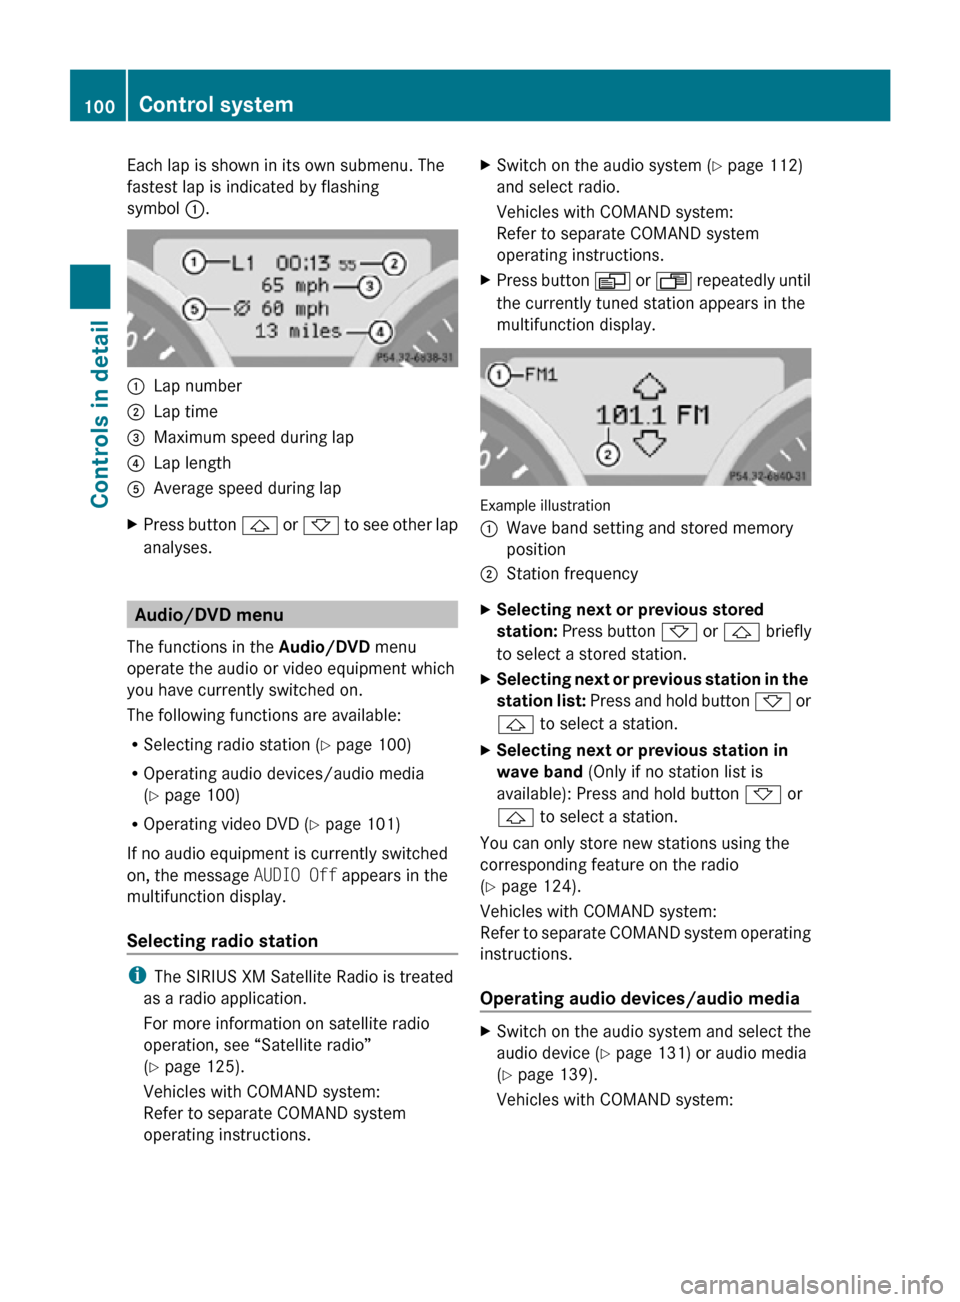
Each lap is shown in its own submenu. The
fastest lap is indicated by flashing
symbol
:. :
Lap number
; Lap time
= Maximum speed during lap
? Lap length
A Average speed during lap
X Press button & or * to see other lap
analyses. Audio/DVD menu
The functions in the Audio/DVD menu
operate the audio or video equipment which
you have currently switched on.
The following functions are available:
R Selecting radio station (Y page 100)
R Operating audio devices/audio media
(Y page 100)
R Operating video DVD (Y page 101)
If no audio equipment is currently switched
on, the message AUDIO Off appears in the
multifunction display.
Selecting radio station i
The SIRIUS XM Satellite Radio is treated
as a radio application.
For more information on satellite radio
operation, see “Satellite radio”
(Y page 125).
Vehicles with COMAND system:
Refer to separate COMAND system
operating instructions. X
Switch on the audio system ( Y page 112)
and select radio.
Vehicles with COMAND system:
Refer to separate COMAND system
operating instructions.
X Press button V or U repeatedly until
the currently tuned station appears in the
multifunction display. Example illustration
:
Wave band setting and stored memory
position
; Station frequency
X Selecting next or previous stored
station: Press button * or & briefly
to select a stored station.
X Selecting next or previous station in the
station list: Press and hold button * or
& to select a station.
X Selecting next or previous station in
wave band (Only if no station list is
available): Press and hold button * or
& to select a station.
You can only store new stations using the
corresponding feature on the radio
(Y page 124).
Vehicles with COMAND system:
Refer to separate COMAND system operating
instructions.
Operating audio devices/audio media X
Switch on the audio system and select the
audio device ( Y page 131) or audio media
(Y page 139).
Vehicles with COMAND system: 100
Control systemControls in detail
171_AKB; 3; 60, en-US
d2ureepe,
Version: 2.11.8.1 2009-05-11T16:00:23+02:00 - Seite 100
Page 103 of 312
Refer to separate COMAND system
operating instructions.
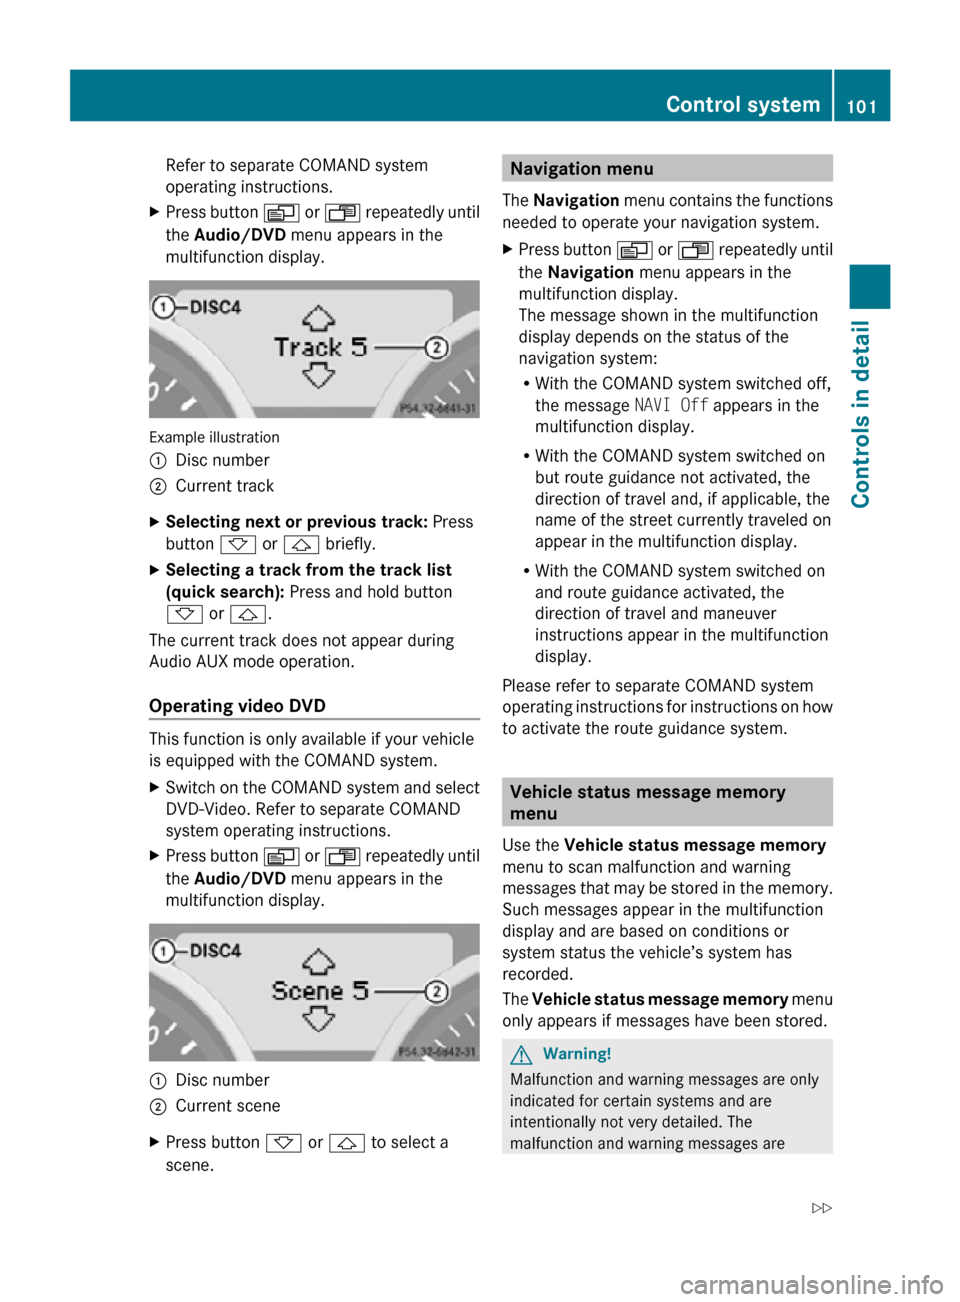
X Press button V or U repeatedly until
the Audio/DVD menu appears in the
multifunction display. Example illustration
:
Disc number
; Current track
X Selecting next or previous track: Press
button * or & briefly.
X Selecting a track from the track list
(quick search): Press and hold button
* or &.
The current track does not appear during
Audio AUX mode operation.
Operating video DVD This function is only available if your vehicle
is equipped with the COMAND system.
X
Switch on the COMAND system and select
DVD-Video. Refer to separate COMAND
system operating instructions.
X Press button V or U repeatedly until
the Audio/DVD menu appears in the
multifunction display. :
Disc number
; Current scene
X Press button * or & to select a
scene. Navigation menu
The Navigation menu contains the functions
needed to operate your navigation system.
X Press button V or U repeatedly until
the Navigation menu appears in the
multifunction display.
The message shown in the multifunction
display depends on the status of the
navigation system:
R With the COMAND system switched off,
the message NAVI Off appears in the
multifunction display.
R With the COMAND system switched on
but route guidance not activated, the
direction of travel and, if applicable, the
name of the street currently traveled on
appear in the multifunction display.
R With the COMAND system switched on
and route guidance activated, the
direction of travel and maneuver
instructions appear in the multifunction
display.
Please refer to separate COMAND system
operating instructions for instructions on how
to activate the route guidance system. Vehicle status message memory
menu
Use the Vehicle status message memory
menu to scan malfunction and warning
messages that may be stored in the memory.
Such messages appear in the multifunction
display and are based on conditions or
system status the vehicle’s system has
recorded.
The Vehicle status message memory menu
only appears if messages have been stored. G
Warning!
Malfunction and warning messages are only
indicated for certain systems and are
intentionally not very detailed. The
malfunction and warning messages are Control system
101Controls in detail
171_AKB; 3; 60, en-US
d2ureepe, Version: 2.11.8.1 2009-05-11T16:00:23+02:00 - Seite 101 Z
Page 107 of 312
X
Press button W or X to select the
desired setting.
The selected display is then shown
continuously in the status indicator (lower
display).
The other display now appears in the
Standard display menu (Y page 96).
Time/Date submenu Access the
Time/Date submenu via the
Settings menu. Use the Time/Date
submenu to change the time and date display
settings.
The following functions are available:
R Setting the time ( Y page 105)
R Setting the date (Y page 105)
Setting the time
This function is only available in vehicles with
audio system.
Vehicles with COMAND system:
For information on setting the time in the
COMAND system, refer to the separate
COMAND system operating instructions.
X Press button V or U repeatedly until
the Settings menu appears in the
multifunction display.
X Press button &.
X Move the selection marker with button
W or X to the Time/Date submenu.
X Press button & or * repeatedly until
the message Time-Hours Press R To
Confirm or Time-Minute(s) Press R
To Confirm appears in the multifunction
display.
The selection marker is on the current
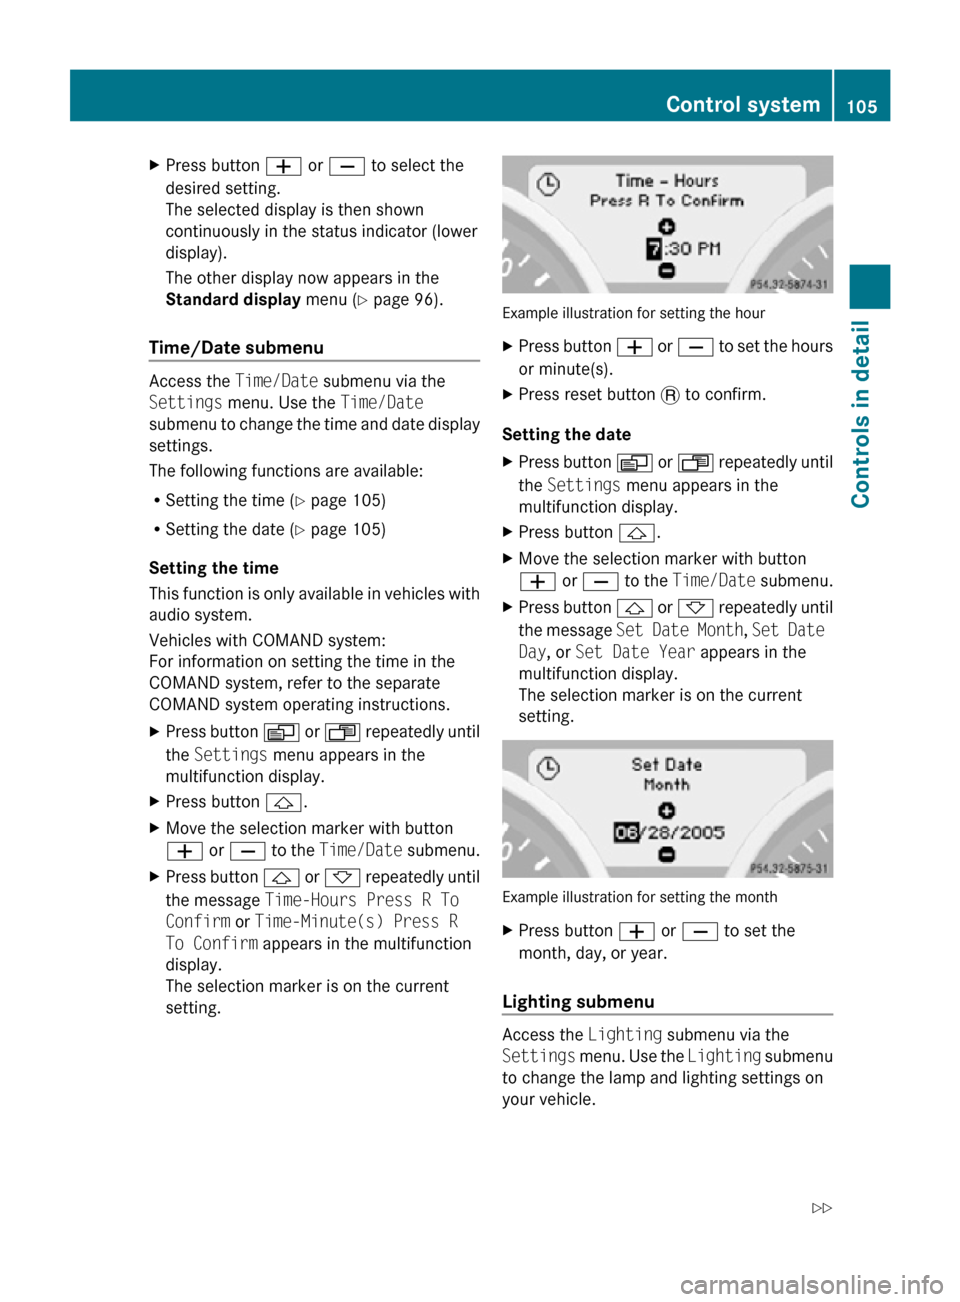
setting. Example illustration for setting the hour
X
Press button W or X to set the hours
or minute(s).
X Press reset button . to confirm.
Setting the date
X Press button V or U repeatedly until
the Settings menu appears in the
multifunction display.
X Press button &.
X Move the selection marker with button
W or X to the Time/Date submenu.
X Press button & or * repeatedly until
the message Set Date Month , Set Date
Day, or Set Date Year appears in the
multifunction display.
The selection marker is on the current
setting. Example illustration for setting the month
X
Press button W or X to set the
month, day, or year.
Lighting submenu Access the
Lighting submenu via the
Settings menu. Use the Lighting submenu
to change the lamp and lighting settings on
your vehicle. Control system
105Controls in detail
171_AKB; 3; 60, en-US
d2ureepe, Version: 2.11.8.1 2009-05-11T16:00:23+02:00 - Seite 105 Z
Page 112 of 312
Resetting fuel consumption statistics
X
Press button U or V repeatedly until
the message From Start appears in the
multifunction display.
X Press button & or * repeatedly until
the reading that you want to reset appears
in the multifunction display.
X Press and hold the reset button . in the
instrument cluster until the respective
values are reset to 0.
The fuel consumption statistics reset
automatically to 0 after 99 999 miles or
9 999 hours, whichever occurs first.
Distance to empty X
Press button U or V repeatedly until
the message From Start appears in the
multifunction display.
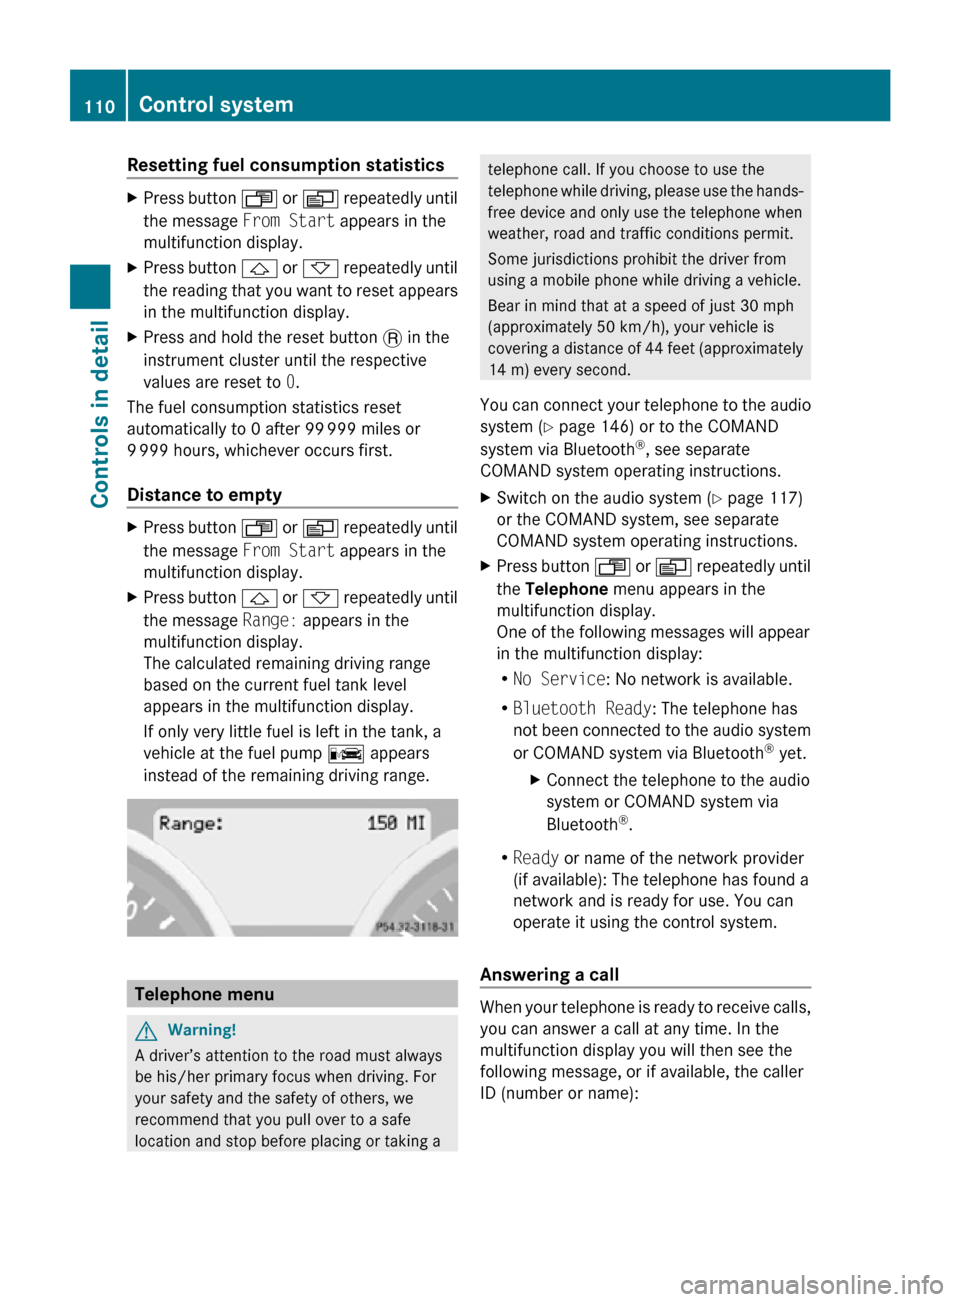
X Press button & or * repeatedly until
the message Range: appears in the
multifunction display.
The calculated remaining driving range
based on the current fuel tank level
appears in the multifunction display.
If only very little fuel is left in the tank, a
vehicle at the fuel pump C appears
instead of the remaining driving range. Telephone menu
G
Warning!
A driver’s attention to the road must always
be his/her primary focus when driving. For
your safety and the safety of others, we
recommend that you pull over to a safe
location and stop before placing or taking a telephone call. If you choose to use the
telephone while driving, please use the hands-
free device and only use the telephone when
weather, road and traffic conditions permit.
Some jurisdictions prohibit the driver from
using a mobile phone while driving a vehicle.
Bear in mind that at a speed of just 30 mph
(approximately 50 km/h), your vehicle is
covering a distance of 44 feet (approximately
14 m) every second.
You can connect your telephone to the audio
system (Y page 146) or to the COMAND
system via Bluetooth ®
, see separate
COMAND system operating instructions.
X Switch on the audio system ( Y page 117)
or the COMAND system, see separate
COMAND system operating instructions.
X Press button U or V repeatedly until
the Telephone menu appears in the
multifunction display.
One of the following messages will appear
in the multifunction display:
R No Service: No network is available.
R Bluetooth Ready: The telephone has
not been connected to the audio system
or COMAND system via Bluetooth ®
yet.
X Connect the telephone to the audio
system or COMAND system via
Bluetooth ®
.
R Ready or name of the network provider
(if available): The telephone has found a
network and is ready for use. You can
operate it using the control system.
Answering a call When your telephone is ready to receive calls,
you can answer a call at any time. In the
multifunction display you will then see the
following message, or if available, the caller
ID (number or name):110
Control systemControls in detail
171_AKB; 3; 60, en-US
d2ureepe,
Version: 2.11.8.1 2009-05-11T16:00:23+02:00 - Seite 110
Page 113 of 312
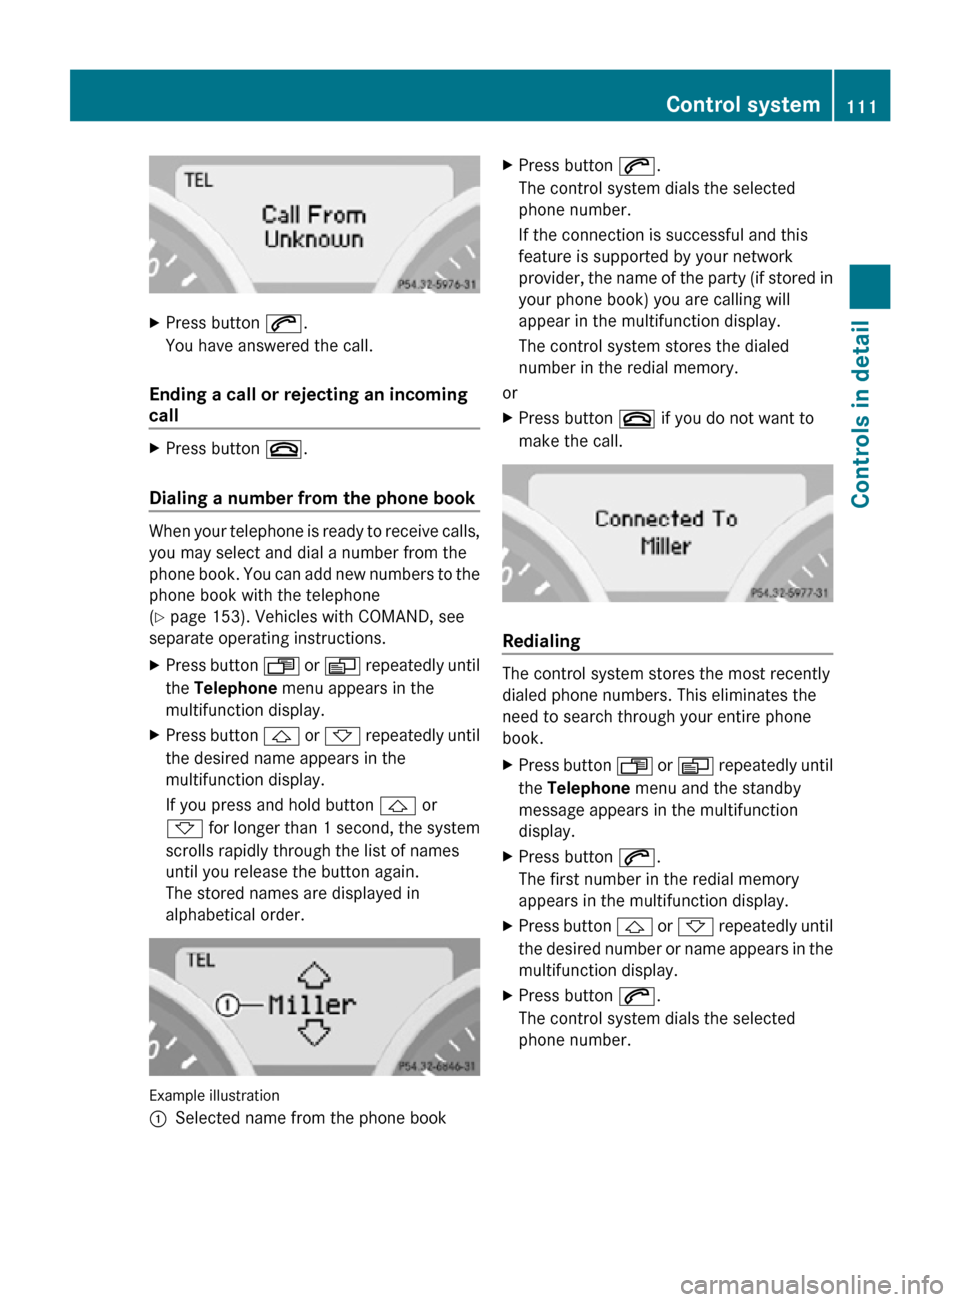
X
Press button 6.
You have answered the call.
Ending a call or rejecting an incoming
call X
Press button ~.
Dialing a number from the phone book When your telephone is ready to receive calls,
you may select and dial a number from the
phone book. You can add new numbers to the
phone book with the telephone
(Y page 153). Vehicles with COMAND, see
separate operating instructions.
X
Press button U or V repeatedly until
the Telephone menu appears in the
multifunction display.
X Press button & or * repeatedly until
the desired name appears in the
multifunction display.
If you press and hold button & or
* for longer than 1 second, the system
scrolls rapidly through the list of names
until you release the button again.
The stored names are displayed in
alphabetical order. Example illustration
:
Selected name from the phone book X
Press button 6.
The control system dials the selected
phone number.
If the connection is successful and this
feature is supported by your network
provider, the name of the party (if stored in
your phone book) you are calling will
appear in the multifunction display.
The control system stores the dialed
number in the redial memory.
or
X Press button ~ if you do not want to
make the call. Redialing
The control system stores the most recently
dialed phone numbers. This eliminates the
need to search through your entire phone
book.
X
Press button U or V repeatedly until
the Telephone menu and the standby
message appears in the multifunction
display.
X Press button 6.
The first number in the redial memory
appears in the multifunction display.
X Press button & or * repeatedly until
the desired number or name appears in the
multifunction display.
X Press button 6.
The control system dials the selected
phone number. Control system
111Controls in detail
171_AKB; 3; 60, en-US
d2ureepe, Version: 2.11.8.1 2009-05-11T16:00:23+02:00 - Seite 111 Z
Page 116 of 312
K
Tuning to a station via station search
(Y page 123)
Fast rewind (Y page 138)
Skipping backwards to a track
(Y page 138) L
Tuning to a station via station search
(Y page 123)
Fast forward (
Y page 138)
Skipping forwards to a track
(Y page 138) M
Rejecting a call (
Y page 158)
Ending an active call (Y page 158) N
Confirming a passcode
(Y page 150)
Accepting a call (Y page 158)
Initiating a call (
Y page 156)
Redial ( Y page 157) O
Switching sound on/off
(Y page 118)
Switching hands-free microphone
on/off (
Y page 158) P
Sound settings (
Y page 118) Audio display
!
Avoid touching the audio display at all
times. The display has a very sensitive high-
gloss surface, there is a risk of it being
scratched. Do not press directly in the
display face. Otherwise, the audio display
will be damaged.
i For information about cleaning and care
of the audio display, see “Audio or
COMAND display” ( Y page 231).
Display
The currently selected mode and the
associated menus are shown on the audio
display. The audio display is divided into
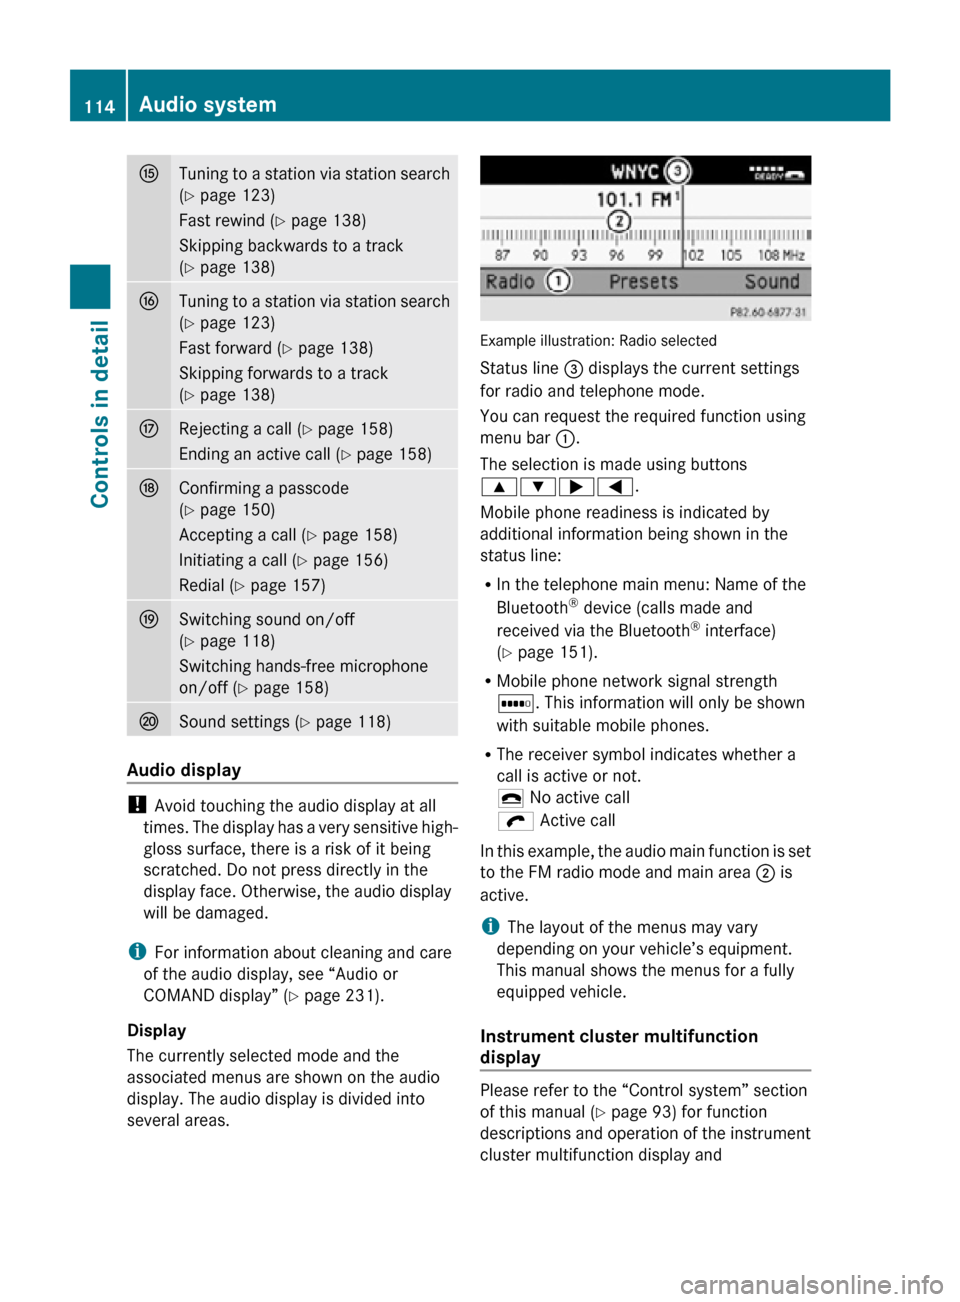
several areas. Example illustration: Radio selected
Status line = displays the current settings
for radio and telephone mode.
You can request the required function using
menu bar
:.
The selection is made using buttons
9:;=.
Mobile phone readiness is indicated by
additional information being shown in the
status line:
R In the telephone main menu: Name of the
Bluetooth ®
device (calls made and
received via the Bluetooth ®
interface)
(Y page 151).
R Mobile phone network signal strength
r. This information will only be shown
with suitable mobile phones.
R The receiver symbol indicates whether a
call is active or not.
¢ No active call
ö Active call
In this example, the audio main function is set
to the FM radio mode and main area ; is
active.
i The layout of the menus may vary
depending on your vehicle’s equipment.
This manual shows the menus for a fully
equipped vehicle.
Instrument cluster multifunction
display Please refer to the “Control system” section
of this manual (
Y page 93) for function
descriptions and operation of the instrument
cluster multifunction display and 114
Audio systemControls in detail
171_AKB; 3; 60, en-US
d2ureepe,
Version: 2.11.8.1 2009-05-11T16:00:23+02:00 - Seite 114
Page 180 of 312
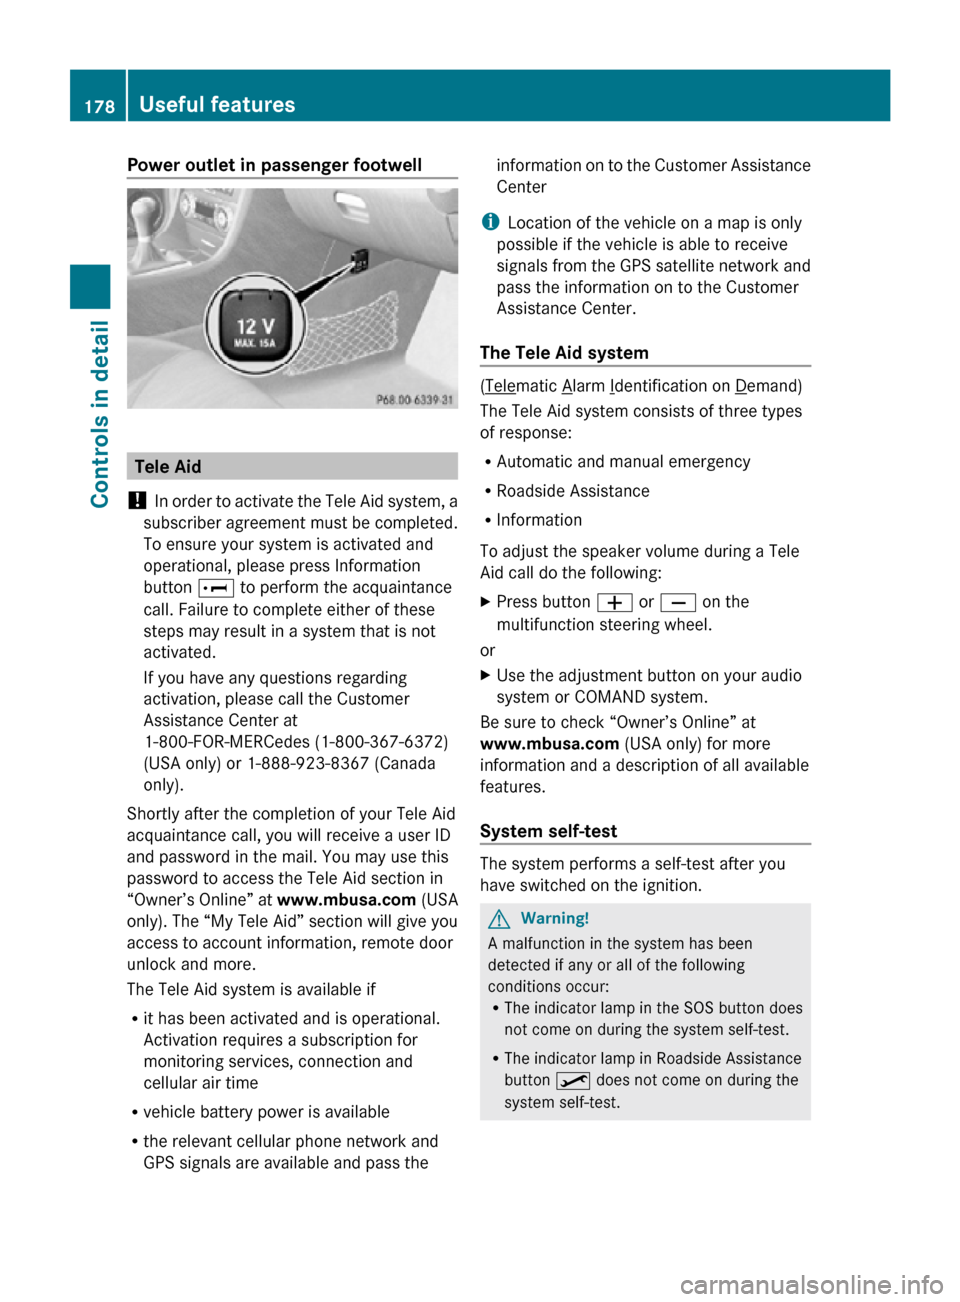
Power outlet in passenger footwell
Tele Aid
! In order to activate the Tele Aid system, a
subscriber agreement must be completed.
To ensure your system is activated and
operational, please press Information
button E to perform the acquaintance
call. Failure to complete either of these
steps may result in a system that is not
activated.
If you have any questions regarding
activation, please call the Customer
Assistance Center at
1-800-FOR-MERCedes (1-800-367-6372)
(USA only) or 1-888-923-8367 (Canada
only).
Shortly after the completion of your Tele Aid
acquaintance call, you will receive a user ID
and password in the mail. You may use this
password to access the Tele Aid section in
“Owner’s Online” at www.mbusa.com (USA
only). The “My Tele Aid” section will give you
access to account information, remote door
unlock and more.
The Tele Aid system is available if
R it has been activated and is operational.
Activation requires a subscription for
monitoring services, connection and
cellular air time
R vehicle battery power is available
R the relevant cellular phone network and
GPS signals are available and pass the information on to the Customer Assistance
Center
i Location of the vehicle on a map is only
possible if the vehicle is able to receive
signals from the GPS satellite network and
pass the information on to the Customer
Assistance Center.
The Tele Aid system ( Telematic Alarm Identification on Demand)
The Tele Aid system consists of three types
of response:
R Automatic and manual emergency
R Roadside Assistance
R Information
To adjust the speaker volume during a Tele
Aid call do the following:
X Press button W or X on the
multifunction steering wheel.
or
X Use the adjustment button on your audio
system or COMAND system.
Be sure to check “Owner’s Online” at
www.mbusa.com (USA only) for more
information and a description of all available
features.
System self-test The system performs a self-test after you
have switched on the ignition.
G
Warning!
A malfunction in the system has been
detected if any or all of the following
conditions occur:
R The indicator lamp in the SOS button does
not come on during the system self-test.
R The indicator lamp in Roadside Assistance
button º does not come on during the
system self-test. 178
Useful featuresControls in detail
171_AKB; 3; 60, en-US
d2ureepe,
Version: 2.11.8.1 2009-05-11T16:00:23+02:00 - Seite 178