lights MERCEDES-BENZ SLS AMG 2013 Workshop Manual
[x] Cancel search | Manufacturer: MERCEDES-BENZ, Model Year: 2013, Model line: SLS AMG, Model: MERCEDES-BENZ SLS AMG 2013Pages: 286, PDF Size: 3.26 MB
Page 175 of 286
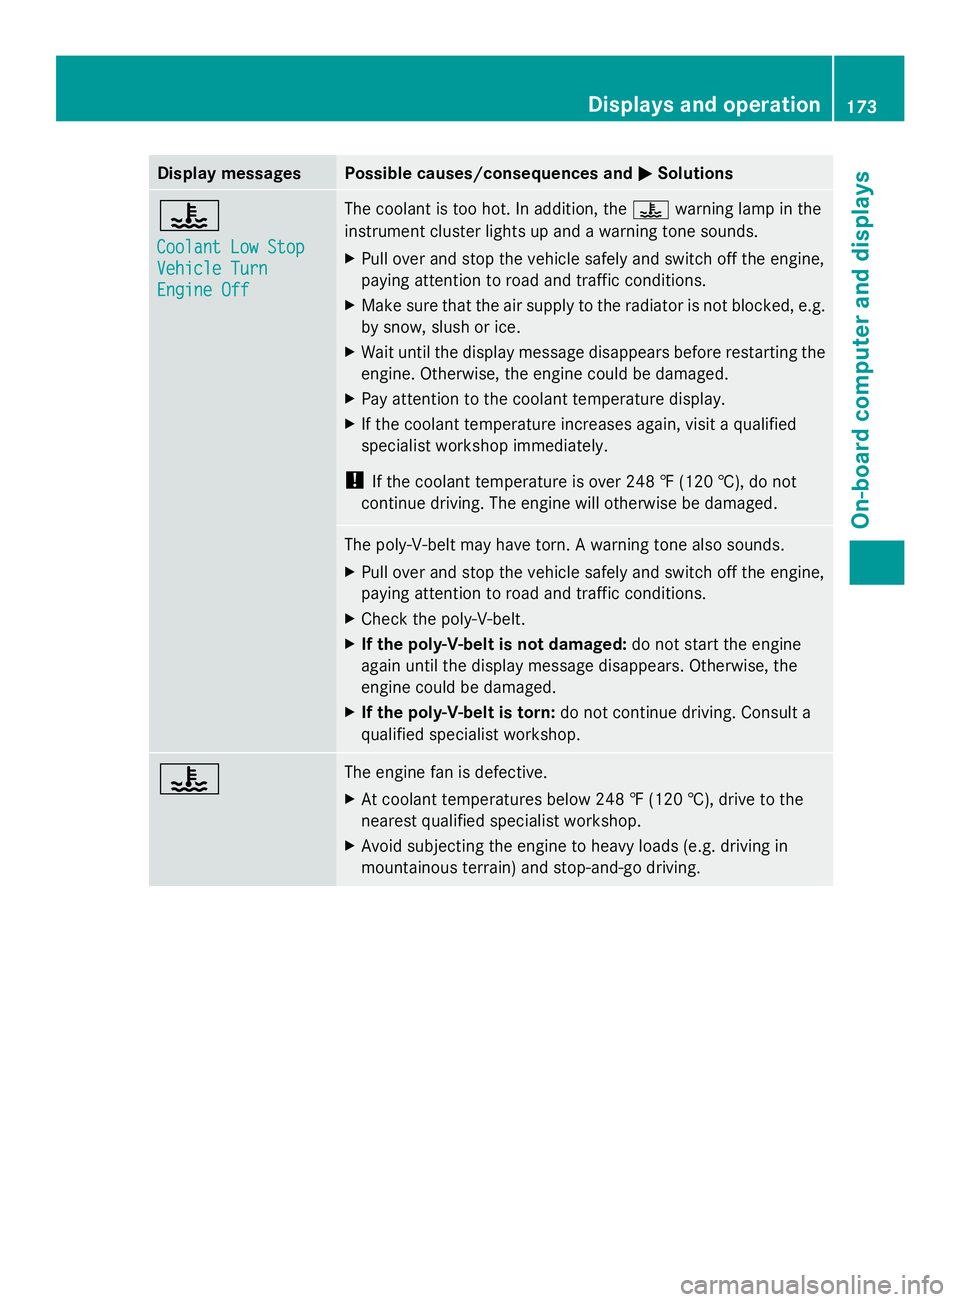
Display messages Possible causes/consequences and
0050
0050Solutions 00AC
Coolant Low Stop Coolant Low Stop
Vehicle Turn Vehicle Turn
Engine Off Engine Off The coolant is too hot. In addition, the
00ACwarning lamp in the
instrument cluster lights up and a warning tone sounds.
X Pull over and stop the vehicle safely and switch off the engine,
paying attention to road and traffic conditions.
X Make sure that the air supply to the radiator is not blocked, e.g.
by snow, slush or ice.
X Wait until the display message disappears before restarting the
engine. Otherwise, the engine could be damaged.
X Pay attention to the coolant temperature display.
X If the coolant temperature increases again, visit a qualified
specialist workshop immediately.
! If the coolant temperature is over 248 ‡ (120 †), do not
continue driving. The engine will otherwise be damaged. The poly-V-belt may have torn. A warning tone also sounds.
X
Pull over and stop the vehicle safely and switch off the engine,
paying attention to road and traffic conditions.
X Check the poly-V-belt.
X If the poly-V-belt is not damaged: do not start the engine
again until the display message disappears. Otherwise, the
engine could be damaged.
X If the poly-V-belt is torn: do not continue driving. Consult a
qualified specialist workshop. 00AC The engine fan is defective.
X
At coolant temperatures below 248 ‡ (120 †), drive to the
nearest qualified specialist workshop.
X Avoid subjecting the engine to heavy loads (e.g. driving in
mountainous terrain) and stop-and-go driving. Displays and operation
173On-board computer and displays Z
Page 188 of 286
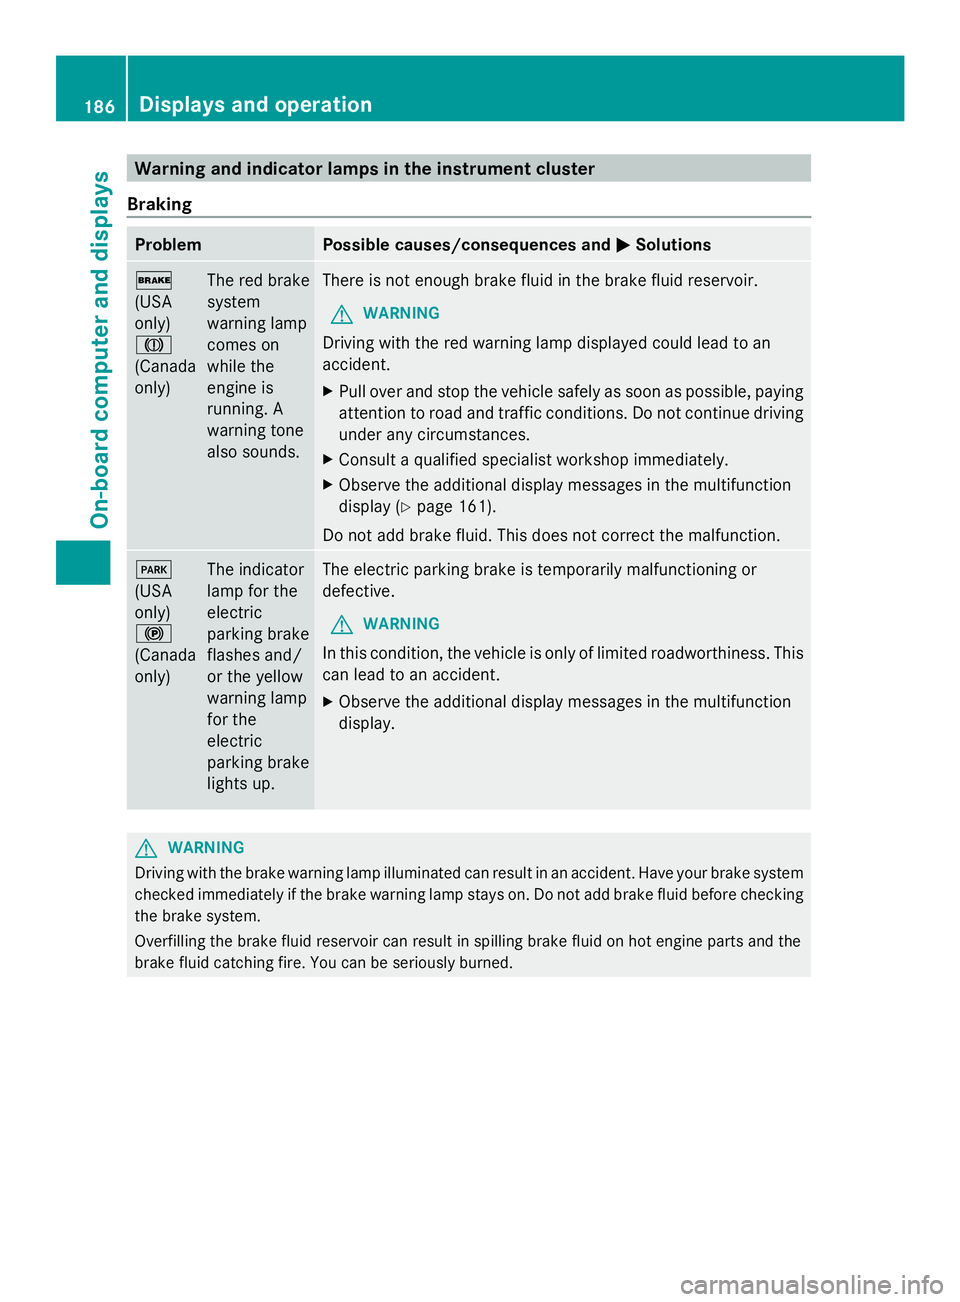
Warning and indicator lamps in the instrument cluster
Braking Problem Possible causes/consequences and
0050
0050Solutions 0027
(USA
only)
004D
(Canada
only)
The red brake
system
warning lamp
comes on
while the
engine is
running. A
warning tone
also sounds. There is not enough brake fluid in the brake fluid reservoir.
G WARNING
Driving with the red warning lamp displayed could lead to an
accident.
X Pull over and stop the vehicle safely as soon as possible, paying
attention to road and traffic conditions. Do not continue driving
under any circumstances.
X Consult a qualified specialist workshop immediately.
X Observe the additional display messages in the multifunction
display (Y page 161).
Do not add brake fluid. This does not correct the malfunction. 0049
(USA
only)
0024
(Canada
only)
The indicator
lamp for the
electric
parking brake
flashes and/
or the yellow
warning lamp
for the
electric
parking brake
lights up. The electric parking brake is temporarily malfunctioning or
defective.
G WARNING
In this condition, the vehicle is only of limited roadworthiness. This
can lead to an accident.
X Observe the additional display messages in the multifunction
display. G
WARNING
Driving with the brake warning lamp illuminated can result in an accident. Have your brake system
checked immediately if the brake warning lamp stays on. Do not add brake fluid before checking
the brake system.
Overfilling the brake fluid reservoir can result in spilling brake fluid on hot engine parts and the
brake fluid catching fire. You can be seriously burned. 186
Displays and operationOn-board computer and displays
Page 189 of 286
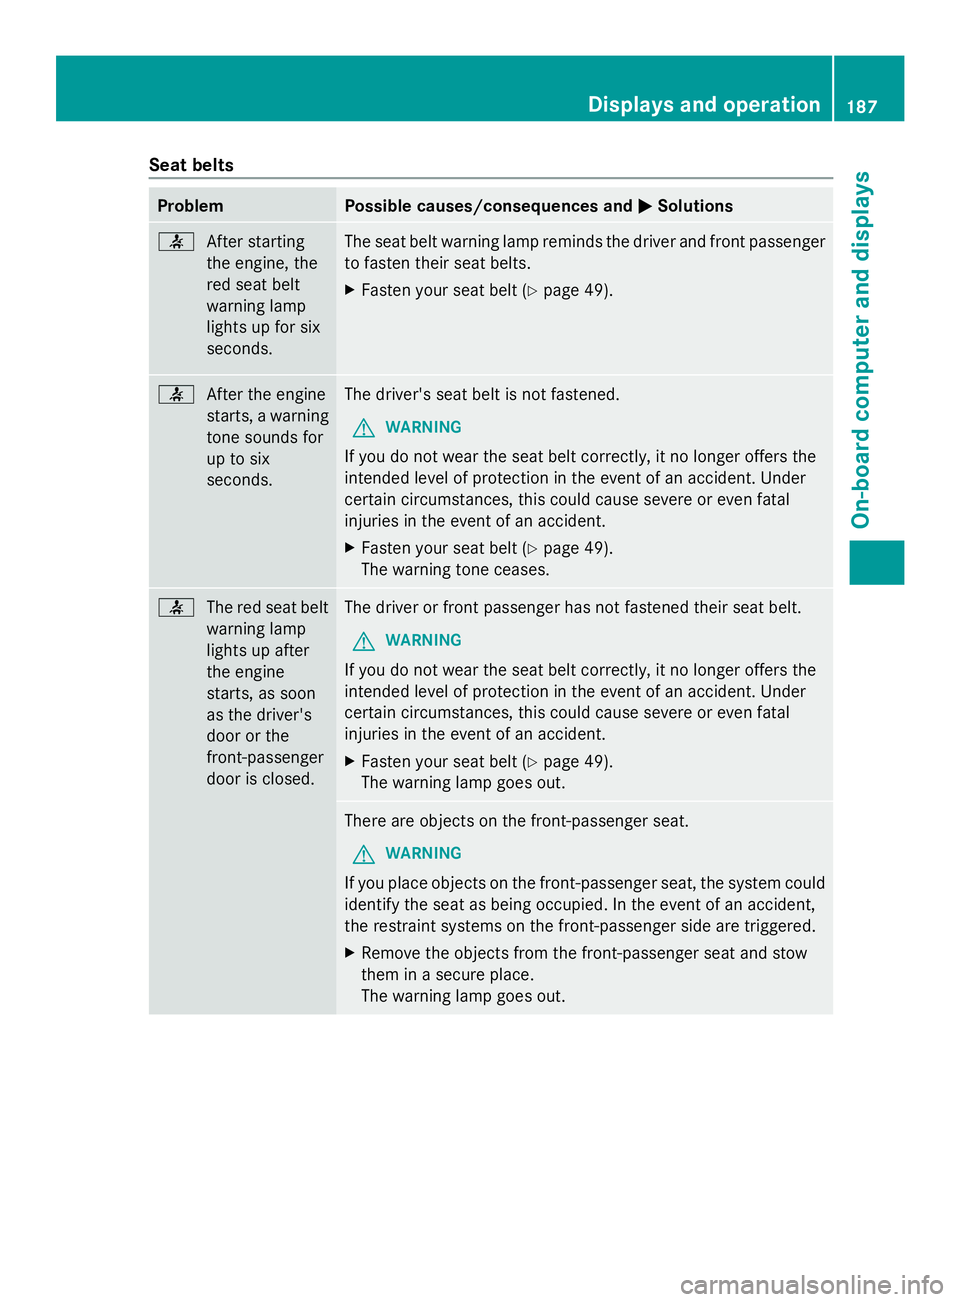
Seat belts
Problem Possible causes/consequences and
0050
0050Solutions 0076
After starting
the engine, the
red seat belt
warning lamp
lights up for six
seconds. The seat belt warning lamp reminds the driver and front passenger
to fasten their seat belts.
X
Fasten your seat belt (Y page 49).0076
After the engine
starts, a warning
tone sounds for
up to six
seconds. The driver's seat belt is not fastened.
G WARNING
If you do not wear the seat belt correctly, it no longer offers the
intended level of protection in the event of an accident. Under
certain circumstances, this could cause severe or even fatal
injuries in the event of an accident.
X Fasten your seat belt (Y page 49).
The warning tone ceases. 0076
The red seat belt
warning lamp
lights up after
the engine
starts, as soon
as the driver's
door or the
front-passenger
door is closed. The driver or front passenger has not fastened their seat belt.
G WARNING
If you do not wear the seat belt correctly, it no longer offers the
intended level of protection in the event of an accident. Under
certain circumstances, this could cause severe or even fatal
injuries in the event of an accident.
X Fasten your seat belt (Y page 49).
The warning lamp goes out. There are objects on the front-passenger seat.
G WARNING
If you place objects on the front-passenger seat, the system could
identify the seat as being occupied. In the event of an accident,
the restraint systems on the front-passenger side are triggered.
X Remove the objects from the front-passenger seat and stow
them in a secure place.
The warning lamp goes out. Displays and operation
187On-board computer and displays Z
Page 193 of 286
For your safety, we strongly recommend that you contact an authorized Mercedes-Benz Center
immediately to have the system checked. Otherwise the SRS may not be activated when needed
in an accident, which could result in serious or fatal injury, or it might deploy unexpectedly and
unnecessarily which could also result in injury.
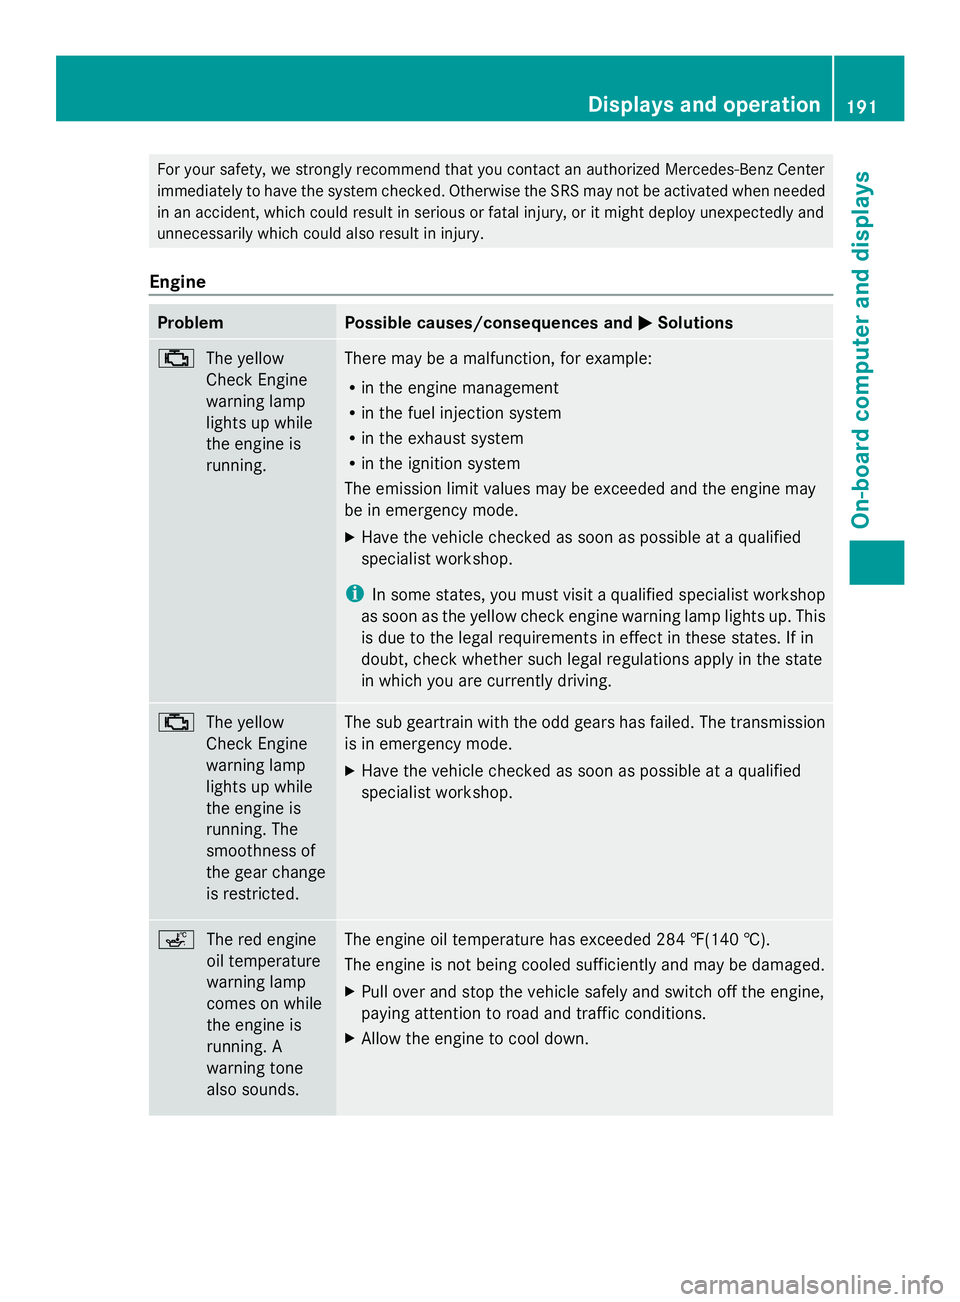
Engine Problem Possible causes/consequences and
0050 0050Solutions 00B9
The yellow
Check Engine
warning lamp
lights up while
the engine is
running. There may be a malfunction, for example:
R
in the engine management
R in the fuel injection system
R in the exhaust system
R in the ignition system
The emission limit values may be exceeded and the engine may
be in emergency mode.
X Have the vehicle checked as soon as possible at a qualified
specialist workshop.
i In some states, you must visit a qualified specialist workshop
as soon as the yellow check engine warning lamp lights up. This
is due to the legal requirements in effect in these states. If in
doubt, check whether such legal regulations apply in the state
in which you are currently driving. 00B9
The yellow
Check Engine
warning lamp
lights up while
the engine is
running. The
smoothness of
the gear change
is restricted. The sub geartrain with the odd gears has failed. The transmission
is in emergency mode.
X
Have the vehicle checked as soon as possible at a qualified
specialist workshop. 00E4
The red engine
oil temperature
warning lamp
comes on while
the engine is
running. A
warning tone
also sounds. The engine oil temperature has exceeded 284 ‡(140 †).
The engine is not being cooled sufficiently and may be damaged.
X
Pull over and stop the vehicle safely and switch off the engine,
paying attention to road and traffic conditions.
X Allow the engine to cool down. Displays and operation
191On-board computer and displays Z
Page 194 of 286
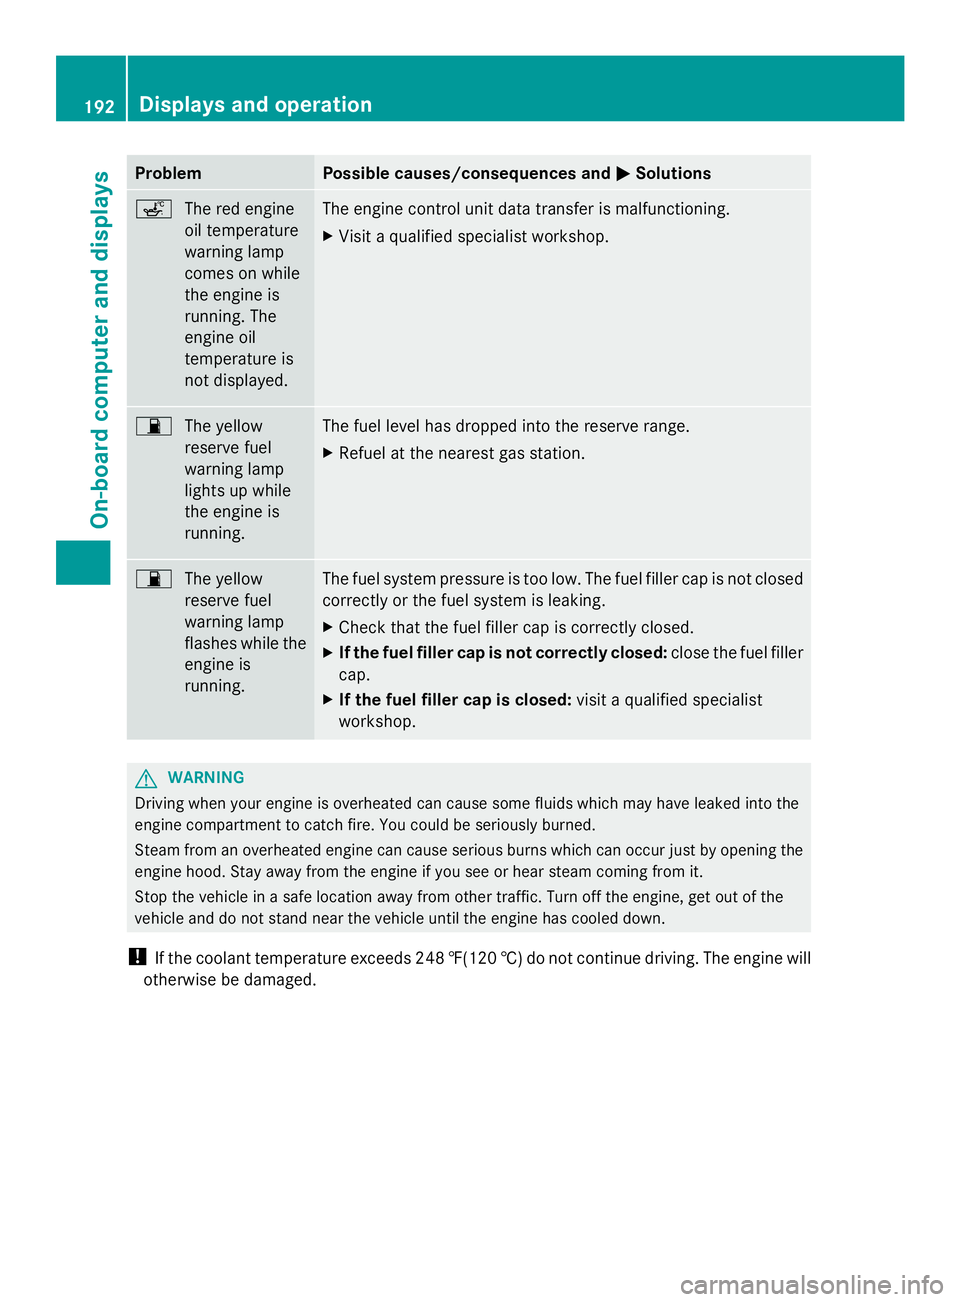
Problem Possible causes/consequences and
0050
0050Solutions 00E4
The red engine
oil temperature
warning lamp
comes on while
the engine is
running. The
engine oil
temperature is
not displayed. The engine control unit data transfer is malfunctioning.
X
Visit a qualified specialist workshop. 00B5
The yellow
reserve fuel
warning lamp
lights up while
the engine is
running. The fuel level has dropped into the reserve range.
X
Refuel at the nearest gas station. 00B5
The yellow
reserve fuel
warning lamp
flashes while the
engine is
running. The fuel system pressure is too low. The fuel filler cap is not closed
correctly or the fuel system is leaking.
X
Check that the fuel filler cap is correctly closed.
X If the fuel filler cap is not correctly closed: close the fuel filler
cap.
X If the fuel filler cap is closed: visit a qualified specialist
workshop. G
WARNING
Driving when your engine is overheated can cause some fluids which may have leaked into the
engine compartment to catch fire. You could be seriously burned.
Steam from an overheated engine can cause serious burns which can occur just by opening the
engine hood. Stay away from the engine if you see or hear steam coming from it.
Stop the vehicle in a safe location away from other traffic. Turn off the engine, get out of the
vehicle and do not stand near the vehicle until the engine has cooled down.
! If the coolant temperature exceeds 248 ‡(120 †) do not continue driving. The engine will
otherwise be damaged. 192
Displays and operationOn-board computer and displays
Page 208 of 286
1-800-FOR-MERCede
s(1-800-367-6372)
or 1-866-990-9007
R Canada: Customer Service at
1-888-923-8367
You will be asked for your PIN.
The next time you are inside the vehicle and
you switch on the ignition, the Tele Aid
Tele Aid
Doors Locked Remotely
Doors Locked Remotely message appears
in the multifunction display.
Alternatively, the vehicle can also be locked
via the Internet or an iPhone in the "Owners
Online" section using your ID number and
password.
i The vehicle remote closing feature is
available when the relevant mobile phone
network is available and data connection is
possible.
Stolen vehicle recovery service If your vehicle has been stolen:
X
Notify the police.
The police will issue a numbered incident
report.
X This number will be forwarded to the
Mercedes-Benz Customer Assistance
Center together with your PIN.
The Mercedes-Benz Customer Assistance
Center then attempts to locate the mbrace
system. The Mercedes-Benz Customer
Assistance Center contacts you and the
local law enforcement agency if the vehicle
is located. However, only the law
enforcement agency is informed of the
location of the vehicle.
i If the anti-theft alarm system is active for
longer than 30 seconds, mbrace
automatically informs the Mercedes-Benz
Customer Assistance Center. Rear spoiler
The rear spoiler improves the handling of the
vehicle. It adapts the vehicle's aerodynamics to the operating conditions, dependent on the
speed of the vehicle.
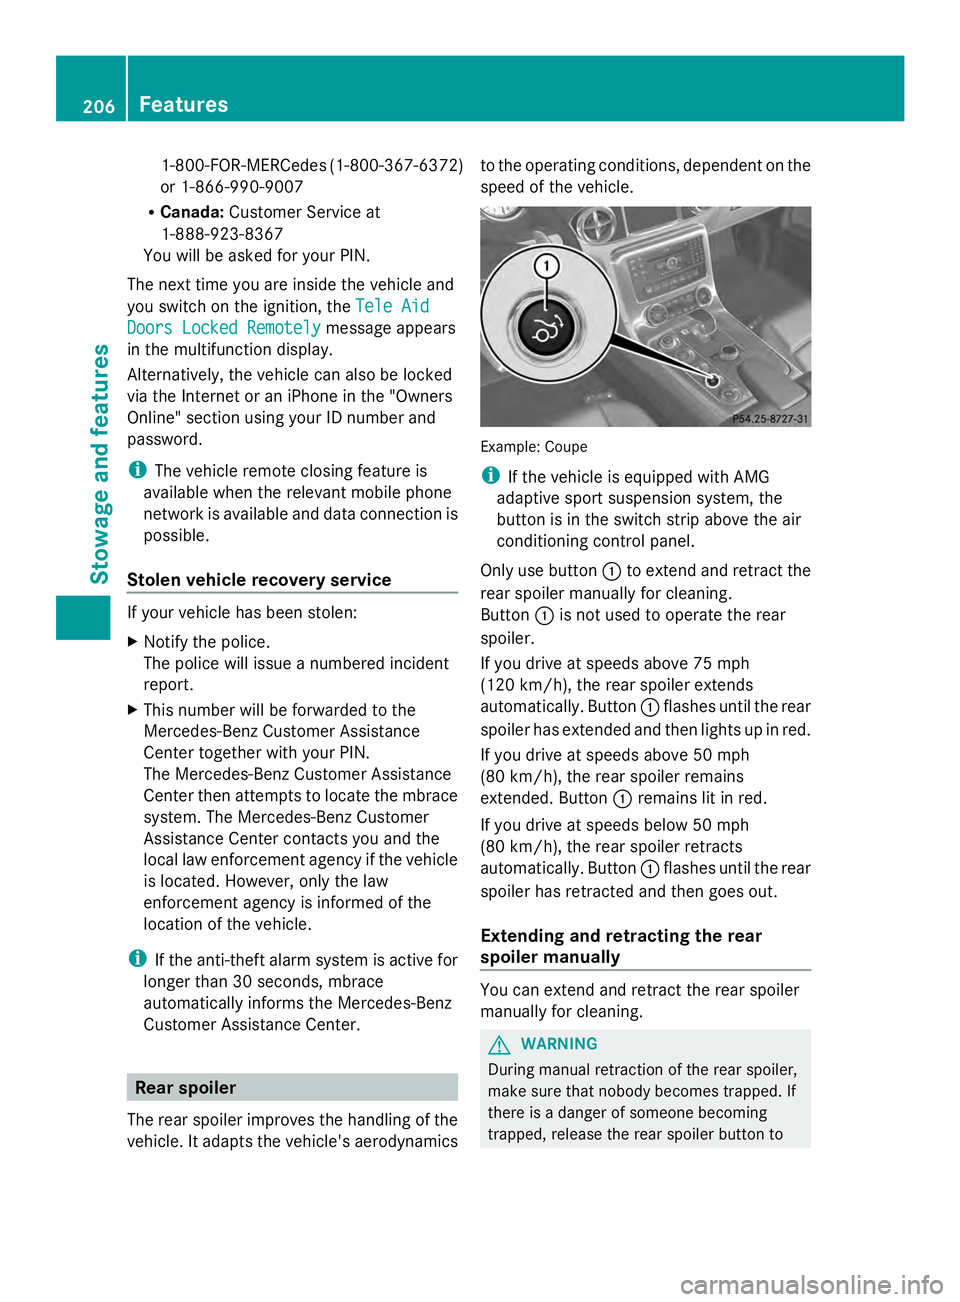
Example: Coupe
i
If the vehicle is equipped with AMG
adaptive sport suspension system, the
button is in the switch strip above the air
conditioning control panel.
Only use button 0043to extend and retract the
rear spoiler manually for cleaning.
Button 0043is not used to operate the rear
spoiler.
If you drive at speeds above 75 mph
(120 km/h), the rear spoiler extends
automatically. Button 0043flashes until the rear
spoiler has extended and then lights up in red.
If you drive at speeds above 50 mph
(80 km/h), the rear spoiler remains
extended. Button 0043remains lit in red.
If you drive at speeds below 50 mph
(80 km/h), the rear spoiler retracts
automatically. Button 0043flashes until the rear
spoiler has retracted and then goes out.
Extending and retracting the rear
spoiler manually You can extend and retract the rear spoiler
manually for cleaning.
G
WARNING
During manual retraction of the rear spoiler,
make sure that nobody becomes trapped. If
there is a danger of someone becoming
trapped, release the rear spoiler button to 206
FeaturesStowage and features
Page 209 of 286
pause retraction. The rear spoiler is then
extended again.
Never leave children unsupervised in the
vehicle. They could unintentionally retract the
extended rear spoiler. Someone could then
become trapped and seriously injured.
! Do not enter an automatic car wash with
the rear spoiler extended. Otherwise, the
rear spoiler may be damaged.
Only extend the rear spoiler in order to
clean it by hand. Retract it again when you
have finished cleaning it.
X Close the trunk lid.
X Select key position 2with the Start/Stop
button.
X To extend: press button 0043.
The rear spoiler is extended.
Button 0043flashes until the rear spoiler has
extended and then lights up in red.
X To retract: press and hold button 0043until
the rear spoiler is completely retracted.
Button 0043flashes until the rear spoiler has
retracted and then goes out.
Rear Spoiler retracts manually
Rear Spoiler retracts manually
appears in the display.
i If you release button 0043while retracting
the rear spoiler, it extends again
automatically. Features
207Stowage and features Z
Page 211 of 286
Do not run the engine while programming the
integrated remote control. Inhalation of
exhaust gas is hazardous to your health. All
exhaust gas contains carbon monoxide (CO),
and inhaling it can cause unconsciousness
and possible death. All exhaust gas contains
carbon monoxide (CO), and inhaling it can
cause unconsciousness and possible death.
i Notes about the declaration of conformity
can be found here (Y page 21).
Programming the integrated garage
door opener on the rear-view mirror Programming buttons
G
WARNING
Only press the button on the integrated
garage door opener if there are no persons or
objects present within the sweep of the
garage door. Persons could otherwise be
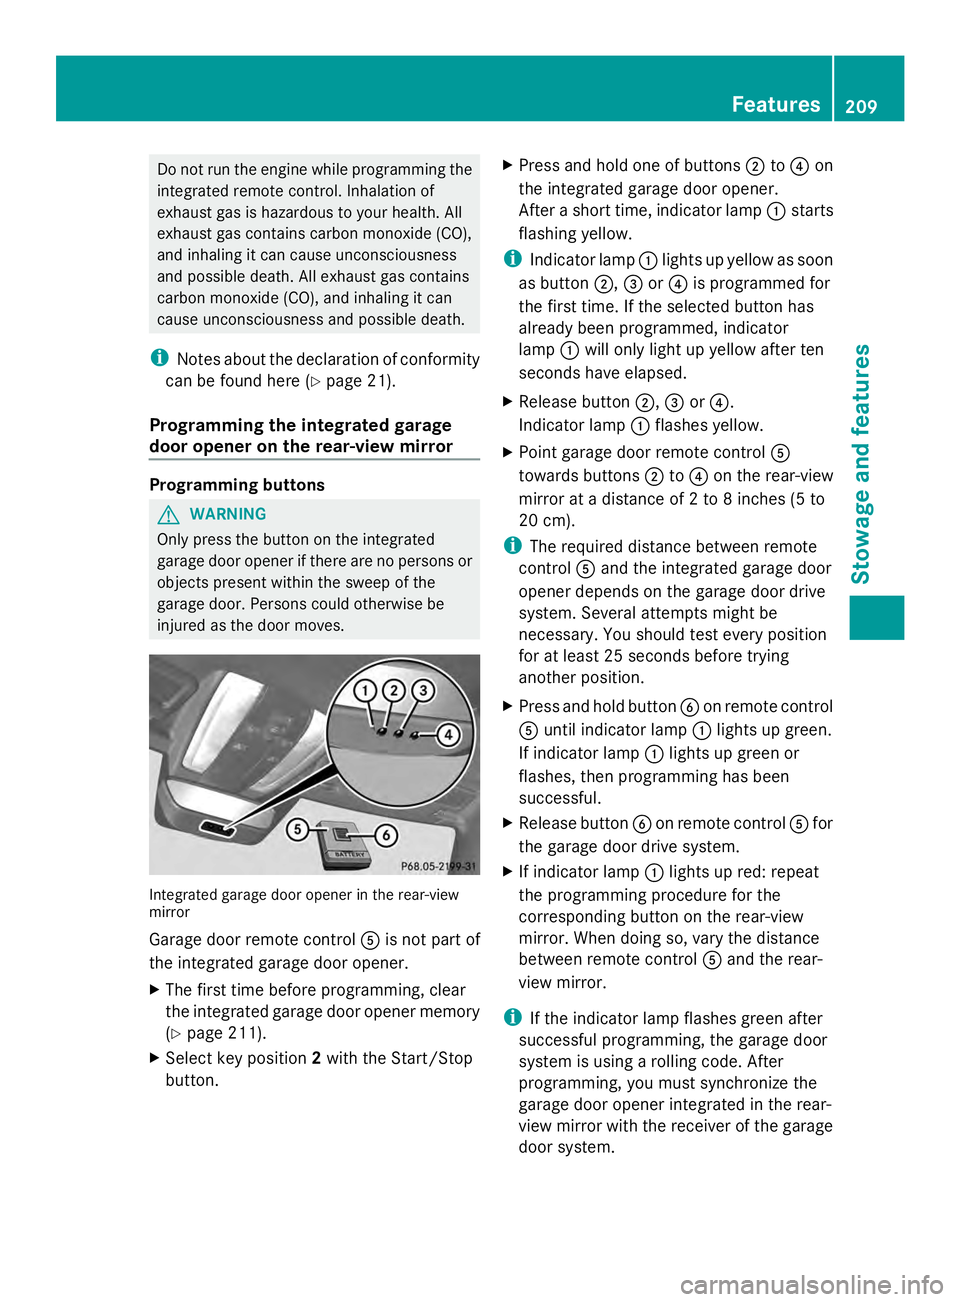
injured as the door moves. Integrated garage door opener in the rear-view
mirror
Garage door remote control
0083is not part of
the integrated garage door opener.
X The first time before programming, clear
the integrated garage door opener memory
(Y page 211).
X Select key position 2with the Start/Stop
button. X
Press and hold one of buttons 0044to0085 on
the integrated garage door opener.
After a short time, indicator lamp 0043starts
flashing yellow.
i Indicator lamp 0043lights up yellow as soon
as button 0044,0087or0085 is programmed for
the first time. If the selected button has
already been programmed, indicator
lamp 0043will only light up yellow after ten
seconds have elapsed.
X Release button 0044,0087or0085.
Indicator lamp 0043flashes yellow.
X Point garage door remote control 0083
towards buttons 0044to0085 on the rear-view
mirror at a distance of 2 to 8 inches (5 to
20 cm).
i The required distance between remote
control 0083and the integrated garage door
opener depends on the garage door drive
system. Several attempts might be
necessary. You should test every position
for at least 25 seconds before trying
another position.
X Press and hold button 0084on remote control
0083 until indicator lamp 0043lights up green.
If indicator lamp 0043lights up green or
flashes, then programming has been
successful.
X Release button 0084on remote control 0083for
the garage door drive system.
X If indicator lamp 0043lights up red: repeat
the programming procedure for the
corresponding button on the rear-view
mirror. When doing so, vary the distance
between remote control 0083and the rear-
view mirror.
i If the indicator lamp flashes green after
successful programming, the garage door
system is using a rolling code. After
programming, you must synchronize the
garage door opener integrated in the rear-
view mirror with the receiver of the garage
door system. Features
209Stowage an d features Z
Page 212 of 286
Synchronizing the rolling code
Your vehicle must be within reach of the
garage door or exterior gate drive. Make sure
that neither your vehicle nor any persons/
objects are present within the sweep of the
door or gate.
Observe the safety notes when performing
the rolling code synchronization
(Y page 208).
X Select key position 2with the Start/Stop
button.
X Press the programming button of the door
or gate drive (see the door or gate drive
operating instructions, e.g. under
"Programming of additional remote
controls").
i Usually, you now have 30seconds to
initiate the next step.
X Press previously programmed button 0044,
0087 or0085 of the integrated garage door
opener until the door starts to move.
The rolling code synchronization is then
complete.
Notes on programming the remote
control
Canadian radio frequency laws require a
"break" (or interruption) of the transmission
signals after broadcasting for a few seconds.
Therefore, these signals may not last long
enough for the integrated garage door
opener. The signal is not recognized during
programming. Comparable with Canadian
law, some U.S. garage door openers also
feature a "break".
Proceed as follows:
R if you live in Canada
R if you have difficulties programming the
garage door opener (regardless of where
you live) when using the programming
steps X
Press and hold one of buttons 0044to0085 on
the integrated garage door opener.
After a short time, indicator lamp 0043lights
up yellow.
X Release the button.
Indicator lamp 0043flashes yellow.
X Press button 0084of garage door remote
control 0083for two seconds, then release it
for two seconds.
X Press button 0084again for two seconds.
X Repeat this sequence on button 0084of
remote control 0083until indicator lamp 0043
lights up green.
If indicator lamp 0043turns red, repeat the
process.
X Continue with the other programming
steps (see above).
Problems when programming
If you are experiencing problems
programming the integrated garage door
opener on the rear-view mirror, take note of
the following instructions:
R Check the transmitter frequency of garage
door drive remote control 0083. This can
usually be found on the back of the remote
control.
The integrated garage door opener is
compatible with devices that have units
which operate in the frequency range of
280to 433MHz.
R Replace the batteries in garage door
remote control 0083. This increases the
likelihood that garage door remote control
0083 will transmit a strong and precise signal
to the integrated garage door opener in the
rear-view mirror.
R When programming, hold remote control
0083 at varying distances and angles from the
button that you are programming. Try
various angles at a distance between 2and
12 inches (5to 30 cm) or at the same angle
but at varying distances.
R If another remote control for the same
garage door drive is available, repeat the 210
FeaturesStowage and features
Page 213 of 286
same programming steps with this remote
control. Before performing these steps,
make sure that new batteries have been
installed in garage door drive remote
control
0083.
R Note that some remote controls only
transmit for a limited amount of time (the
indicator lamp on the remote control goes
out). Press button 0084on remote control
0083 again before transmission ends.
R Align the antenna cable of the garage door
opener unit. This can improve signal
reception/transmission.
Opening/closing the garage door Once programmed, the integrated garage
door opener 0083will assume the function of
the garage door system's remote control.
Please also read the operating instructions
for the garage door system.
X Select key position 2with the Start/Stop
button.
X Press button 0044,0087or0085 which you have
programmed to operate the garage door.
Garage door system with a fixed code:
indicator lamp 0043lights up green.
Garage door system with a rolling code:
indicator lamp 0043flashes green.
i The transmitter will transmit a signal as
long as the button is pressed. The
transmission is halted after a maximum of
ten seconds and indicator lamp 0043lights
up yellow. Press button 0044,0087or0085 again
if necessary.
Clearing the memory of the integrated
garage door opener on the rear-view
mirror X
Select key position 2with the Start/Stop
button.
X Press buttons 0044and 0085.
The indicator lamp lights up yellow.
X Press and hold buttons 0044and 0085until the
indicator lamp turns green. i
Make sure that you clear the memory of
the integrated garage door opener before
selling the vehicle. Charge maintenance socket
The battery may drain if the vehicle is left
stationary for long periods. In this case,
Mercedes-Benz recommends attaching the
trickle charger to the charge maintenance
socket.
The charge maintenance socket is designed
solely for connecting a trickle charger. A
trickle charger can be obtained from an
authorized Mercedes-Benz Center, for
example. X
Switch the ignition off.
X Open the trunk lid.
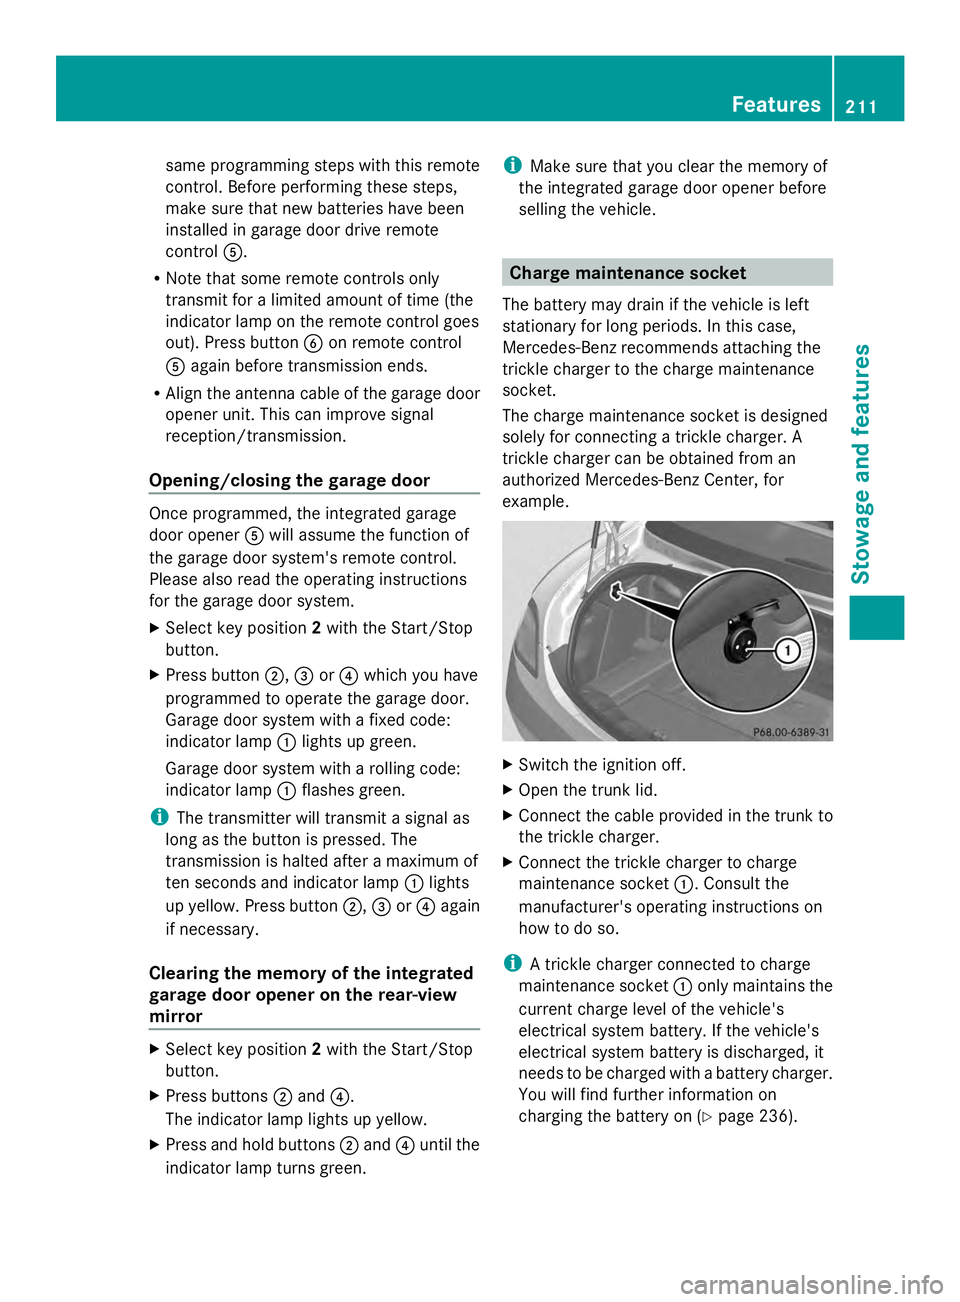
X Connect the cable provided in the trunk to
the trickle charger.
X Connect the trickle charger to charge
maintenance socket 0043. Consult the
manufacturer's operating instructions on
how to do so.
i A trickle charger connected to charge
maintenance socket 0043only maintains the
current charge level of the vehicle's
electrical system battery. If the vehicle's
electrical system battery is discharged, it
needs to be charged with a battery charger.
You will find further information on
charging the battery on (Y page 236). Features
211Stowage and features Z