fuel pressure MERCEDES-BENZ SLS AMG GT COUPE 2014 C197 Owner's Manual
[x] Cancel search | Manufacturer: MERCEDES-BENZ, Model Year: 2014, Model line: SLS AMG GT COUPE, Model: MERCEDES-BENZ SLS AMG GT COUPE 2014 C197Pages: 290, PDF Size: 3.34 MB
Page 16 of 290
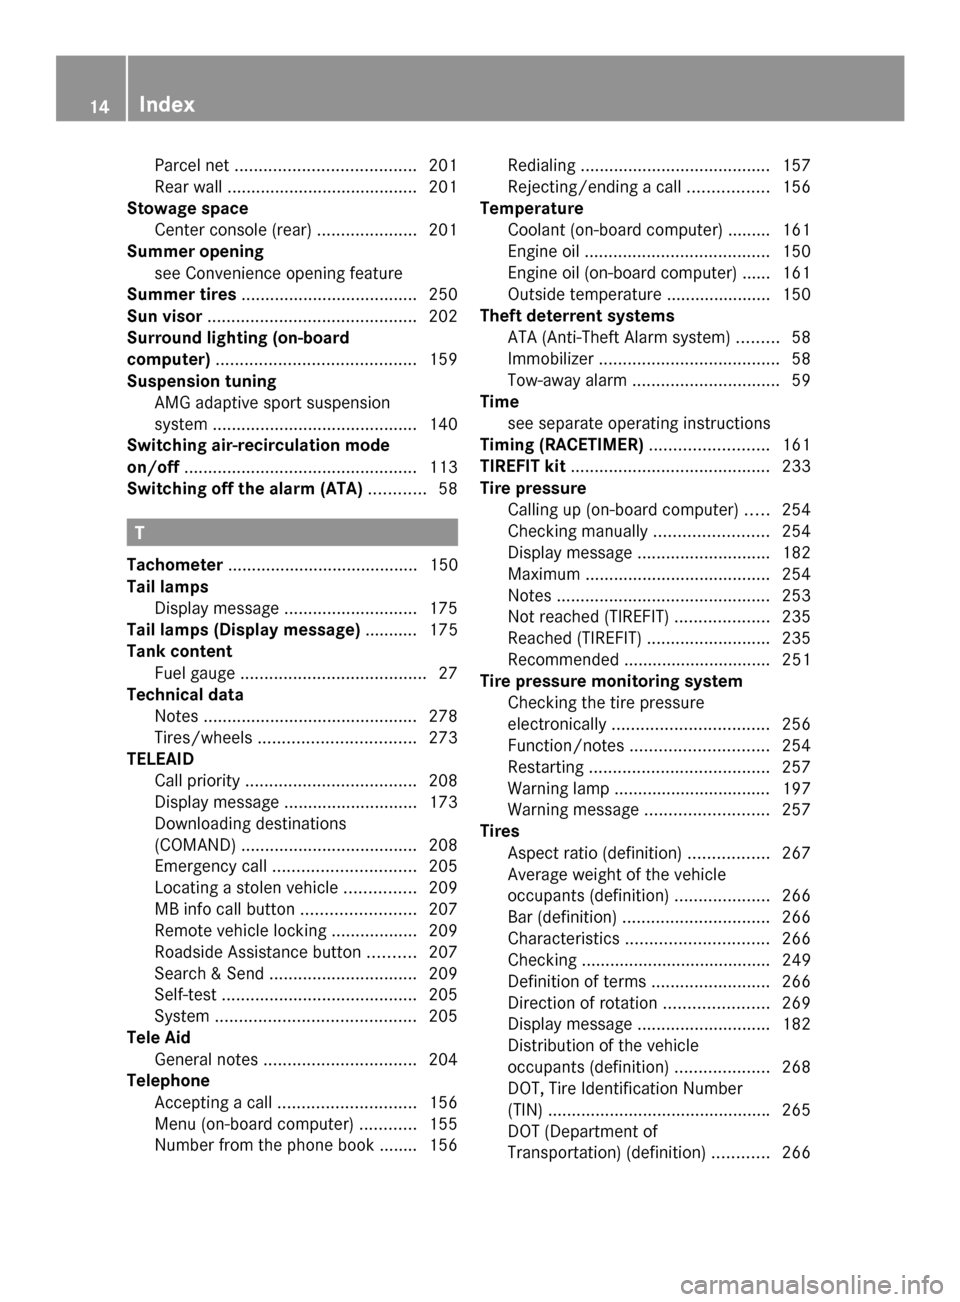
Parcel net
...................................... 201
Rear wall ........................................ 201
Stowage space
Center console (rear) .....................201
Summer opening
see Convenience opening feature
Summer tires ..................................... 250
Sun visor ............................................ 202
Surround lighting (on-board
computer) .......................................... 159
Suspension tuning AMG adaptive sport suspension
system ........................................... 140
Switching air-recirculation mode
on/off ................................................. 113
Switching off the alarm (ATA) ............58 T
Tachometer ........................................ 150
Tail lamps Display message ............................ 175
Tail lamps (Display message) ........... 175
Tank content Fuel gauge ....................................... 27
Technical data
Notes ............................................. 278
Tires/wheels ................................. 273
TELEAID
Call priority .................................... 208
Display message ............................ 173
Downloading destinations
(COMAND) ..................................... 208
Emergency call .............................. 205
Locating a stolen vehicle ...............209
MB info call button ........................207
Remote vehicle locking ..................209
Roadside Assistance button ..........207
Search & Send ............................... 209
Self-test ......................................... 205
System .......................................... 205
Tele Aid
General notes ................................ 204
Telephone
Accepting a call ............................. 156
Menu (on-board computer) ............155
Number from the phone book ....... .156 Redialing
........................................ 157
Rejecting/ending a call .................156
Temperature
Coolant (on-board computer) ......... 161
Engine oil ....................................... 150
Engine oil (on-board computer) ...... 161
Outside temperature ..................... .150
Theft deterrent systems
ATA (Anti-Theft Alarm system) .........58
Immobilizer ...................................... 58
Tow-away alarm ............................... 59
Time
see separate operating instructions
Timing (RACETIMER) .........................161
TIREFIT kit .......................................... 233
Tire pressure Calling up (on-board computer) .....254
Checking manually ........................254
Display message ............................ 182
Maximum ....................................... 254
Notes ............................................. 253
Not reached (TIREFIT) ....................235
Reached (TIREFIT) ..........................235
Recommended ............................... 251
Tire pressure monitoring system
Checking the tire pressure
electronically ................................. 256
Function/notes ............................. 254
Restarting ...................................... 257
Warning lamp ................................. 197
Warning message .......................... 257
Tires
Aspect ratio (definition) .................267
Average weight of the vehicle
occupants (definition) ....................266
Bar (definition) ............................... 266
Characteristics .............................. 266
Checking ........................................ 249
Definition of terms .........................266
Direction of rotatio n...................... 269
Display message ............................ 182
Distribution of the vehicle
occupants (definition) ....................268
DOT, Tire Identification Number
(TIN) .............................................. .265
DOT (Department of
Transportation) (definition) ............266 14
Index
Page 18 of 290
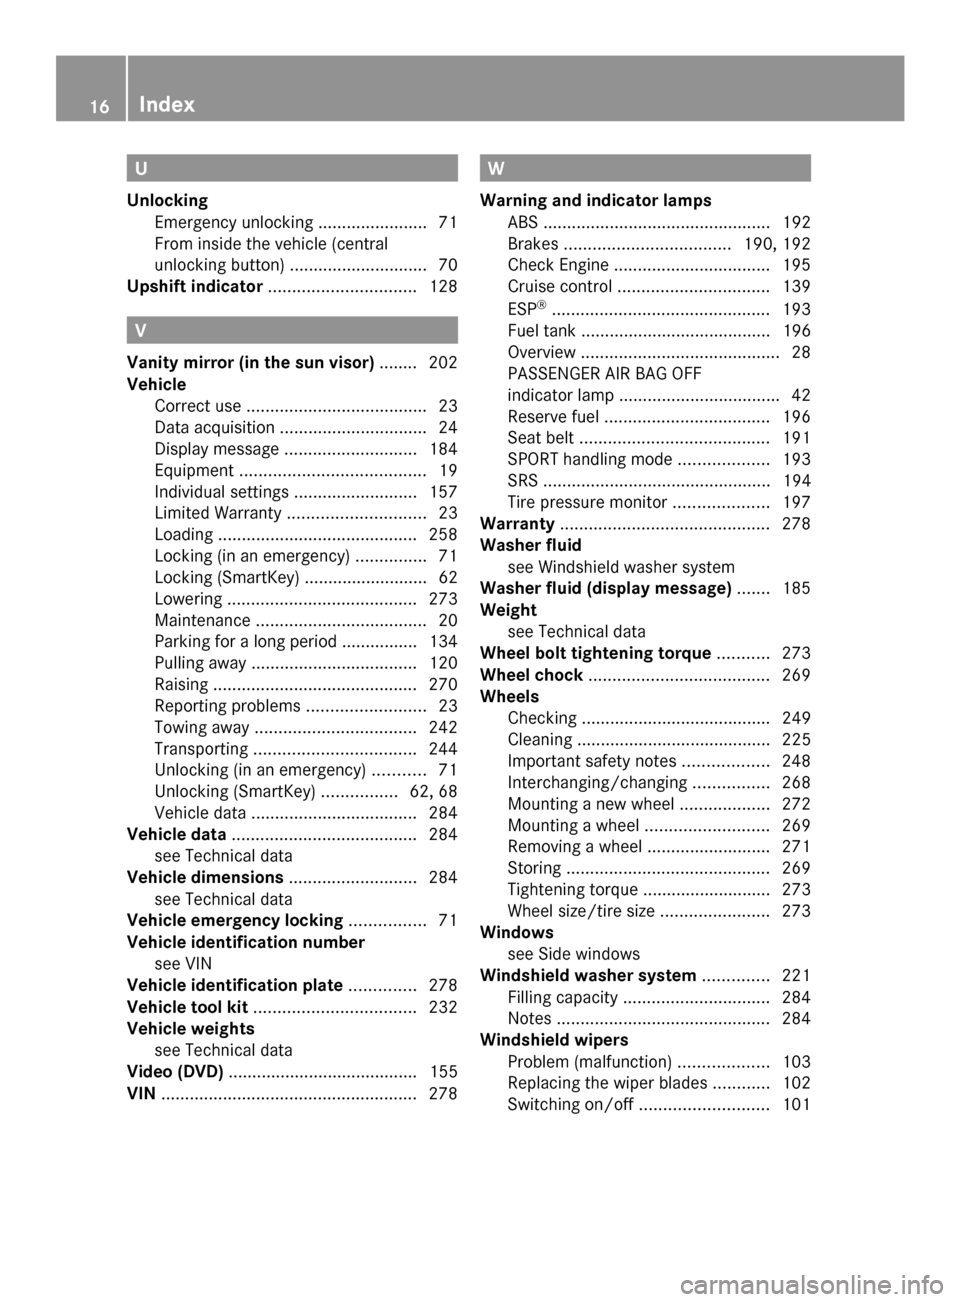
U
Unlocking Emergency unlocking .......................71
From inside the vehicle (central
unlocking button) ............................. 70
Upshift indicator ............................... 128V
Vanity mirror (in the sun visor) ........202
Vehicle Correct use ...................................... 23
Data acquisition ............................... 24
Display message ............................ 184
Equipment ....................................... 19
Individual settings ..........................157
Limited Warranty ............................. 23
Loading .......................................... 258
Locking (in an emergency) ...............71
Locking (SmartKey) .......................... 62
Lowering ........................................ 273
Maintenance .................................... 20
Parking for a long period ................ 134
Pulling away ................................... 120
Raising ........................................... 270
Reporting problems .........................23
Towing away .................................. 242
Transporting .................................. 244
Unlocking (in an emergency) ...........71
Unlocking (SmartKey) ................62, 68
Vehicle data ................................... 284
Vehicle data ....................................... 284
see Technical data
Vehicle dimensions ...........................284
see Technical data
Vehicle emergency locking ................71
Vehicle identification number see VIN
Vehicle identification plate ..............278
Vehicle tool kit .................................. 232
Vehicle weights see Technical data
Video (DVD) ........................................ 155
VIN ...................................................... 278 W
Warning and indicator lamps ABS ................................................ 192
Brakes ................................... 190, 192
Check Engine ................................. 195
Cruise control ................................ 139
ESP ®
.............................................. 193
Fuel tank ........................................ 196
Overview .......................................... 28
PASSENGER AIR BAG OFF
indicator lamp .................................. 42
Reserve fuel ................................... 196
Seat belt ........................................ 191
SPORT handling mode ...................193
SRS ................................................ 194
Tire pressure monitor ....................197
Warranty ............................................ 278
Washer fluid see Windshield washer system
Washer fluid (display message) .......185
Weight see Technical data
Wheel bolt tightening torque ...........273
Wheel chock ...................................... 269
Wheels Checking ........................................ 249
Cleaning ......................................... 225
Important safety notes ..................248
Interchanging/changing ................268
Mounting a new wheel ...................272
Mounting a wheel .......................... 269
Removing a wheel ..........................271
Storing ........................................... 269
Tightening torque ........................... 273
Wheel size/tire size .......................273
Windows
see Side windows
Windshield washer system ..............221
Filling capacity ............................... 284
Notes ............................................. 284
Windshield wipers
Problem (malfunction) ...................103
Replacing the wiper blades ............102
Switching on/off ........................... 10116
Index
Page 20 of 290
Protection of the environment
General notes
H
Environmental note
Daimler's declared policy is one of
comprehensive environmental protection.
The objectives are for the natural resources
that form the basis of our existence on this
planet to be used sparingly and in a manner
that takes the requirements of both nature
and humanity into account.
You too can help to protect the environment
by operating your vehicle in an
environmentally responsible manner.
Fuel consumption and the rate of engine,
transmission, brake and tire wear are affected
by these factors:
R operating conditions of your vehicle
R your personal driving style
You can influence both factors. You should
bear the following in mind:
Operating conditions:
R avoid short trips as these increase fuel
consumption.
R always make sure that the tire pressures
are correct.
R do not carry any unnecessary weight.
R remove roof racks once you no longer need
them.
R a regularly serviced vehicle will contribute
to environmental protection. You should
therefore adhere to the service intervals.
R always have service work carried out at a
qualified specialist workshop.
Personal driving style:
R do not depress the accelerator pedal when
starting the engine.
R do not warm up the engine when the vehicle
is stationary.
R drive carefully and maintain a safe distance
from the vehicle in front.
R avoid frequent, sudden acceleration and
braking. R
change gear in good time and use each gear
only up to 00C3of its maximum engine speed.
R switch off the engine in stationary traffic.
R keep an eye on the vehicle's fuel
consumption. Environmental concerns and
recommendations
Wherever the operating instructions require
you to dispose of materials, first try to
regenerate or re-use them. Observe the
relevant environmental rules and regulations
when disposing of materials. In this way you
will help to protect the environment. Genuine Mercedes-Benz parts
H
Environmental note
Daimler AG also supplies reconditioned major
assemblies and parts which are of the same
quality as new parts. They are covered by the
same Limited Warranty entitlements as new
parts.
! Air bags and Emergency Tensioning
Devices, as well as control units and
sensors for these restraint systems, may be
installed in the following areas of your
vehicle:
R doors
R door pillars
R door sills
R seats
R cockpit
R instrument cluster
R center console
Do not install accessories such as audio
systems in these areas. Do not carry out
repairs or welding. You could impair the
operating efficiency of the restraint
systems. 18
Introduction
Page 30 of 290

Warning and indicator lamps
Function Page
0043
ESP
® 193
0044
Seat belts 191
0087
Brakes (USA only)
004D
Brakes (Canada only) 0085
High-beam headlamps 98
0083
Low-beam headlamps 97
0084
Turn signal 98
006B
SRS 194
006C
Check Engine
006D
ABS
192 Function Page
006E
Engine oil temperature 150
006F
Tire pressure 197
0070
Electric parking brake (USA
only)
0024
Electric parking brake
(Canada only) 0071
Reserve fuel 196
0072
SPORT handling mode 56
0073
ESP
®
OFF 5528
Instrument clusterAt a glance
Page 132 of 290

0043
To open the fuel filler flap
0044 Tire pressure table
0087 Fuel type
0085 To insert the fuel filler cap
Opening X
Switch off the engine.
i When the engine is running and the fuel
filler flap is open, the engine diagnostics
warning lamp 00B9may light up.
Further information can be found in the
"Warning and indicator lamps in the
instrument cluster" chapter (Y page 195).
X Open the driver's door. This switches the
ignition to position 0, which corresponds to
having removed the SmartKey. The driver’s
door can be closed again.
X Press the fuel filler flap in the direction of
arrow 0043.
The fuel filler flap opens slightly.
X Open the fuel filler flap.
X Turn the fuel filler cap counter-clockwise
and remove it.
X Insert the fuel filler cap into the holder
bracket on the inside of filler flap 0085.
X Completely insert the fuel pump nozzle into
the filler neck and refuel.
X Only fill the tank until the pump nozzle
switches off.
! Overfilling the fuel tank could damage the
fuel system. Closing X
Replace the fuel filler cap and turn it
clockwise. The fuel filler cap audibly
engages.
X Close the fuel filler flap. 130
RefuelingDriving and parking
Page 136 of 290
X
While driving, push handle 0043of the electric
parking brake (Y page 133).
i The vehicle is braked as long as you keep
the handle of the electric parking brake
pressed. The longer the electric parking
brake handle is depressed, the greater the
braking force.
During braking:
R a warning tone sounds
R the Release Parking Brake
Release Parking Brake message
appears
R the red 0049(USA only) or 0024(Canada
only) indicator lamp in the instrument
cluster appears.
When the vehicle has been braked to a
standstill, the electric parking brake is
engaged. Parking the vehicle for a long period
If you leave the vehicle parked for longer than
four weeks, the battery may be damaged by
exhaustive discharging.
If you leave the vehicle parked up for longer
than six weeks, the vehicle may suffer
damage as a result of lack of use.
X Visit a qualified specialist workshop and
seek advice.
i You can obtain information about trickle
chargers from a qualified specialist
workshop. Driving tips
General driving tips
Important safety notes G
WARNING
If you switch off the ignition while driving,
safety-relevant functions are only available
with limitations, or not at all. This could affect,
for example, the power steering and the brake
boosting effect. You will require considerably more effort to steer and brake. There is a risk
of an accident.
Do not switch off the ignition while driving.
G
WARNING
If you operate mobile communication
equipment while driving, you will be
distracted from traffic conditions. You could
also lose control of the vehicle. There is a risk
of an accident.
Only operate this equipment when the vehicle
is stationary.
Observe the legal requirements for the
country in which you are driving. Some
jurisdictions prohibit the driver from using a
mobile phone while driving a vehicle.
If you make a call while driving, always use
hands-free mode. Only operate the telephone
when the traffic situation permits. If you are
unsure, pull over to a safe location and stop
before operating the telephone.
Bear in mind that at a speed of only 30 mph
(approximately 50 km/h), the vehicle covers
a distance of 44 ft (approximately 14 m) per
second.
Drive sensibly – save fuel Observe the following tips to save fuel:
X
The tires should always be inflated to the
recommended tire pressure.
X Remove unnecessary loads.
X Warm up the engine at low engine speeds.
X Avoid frequent acceleration or braking.
X Have all maintenance work carried out
according to the service intervals listed in
the Maintenance Booklet or the service
interval display.
Fuel consumption also increases when
driving in cold weather, in stop-start traffic
and in hilly terrain. 134
Driving tipsDriving and parking
Page 181 of 290
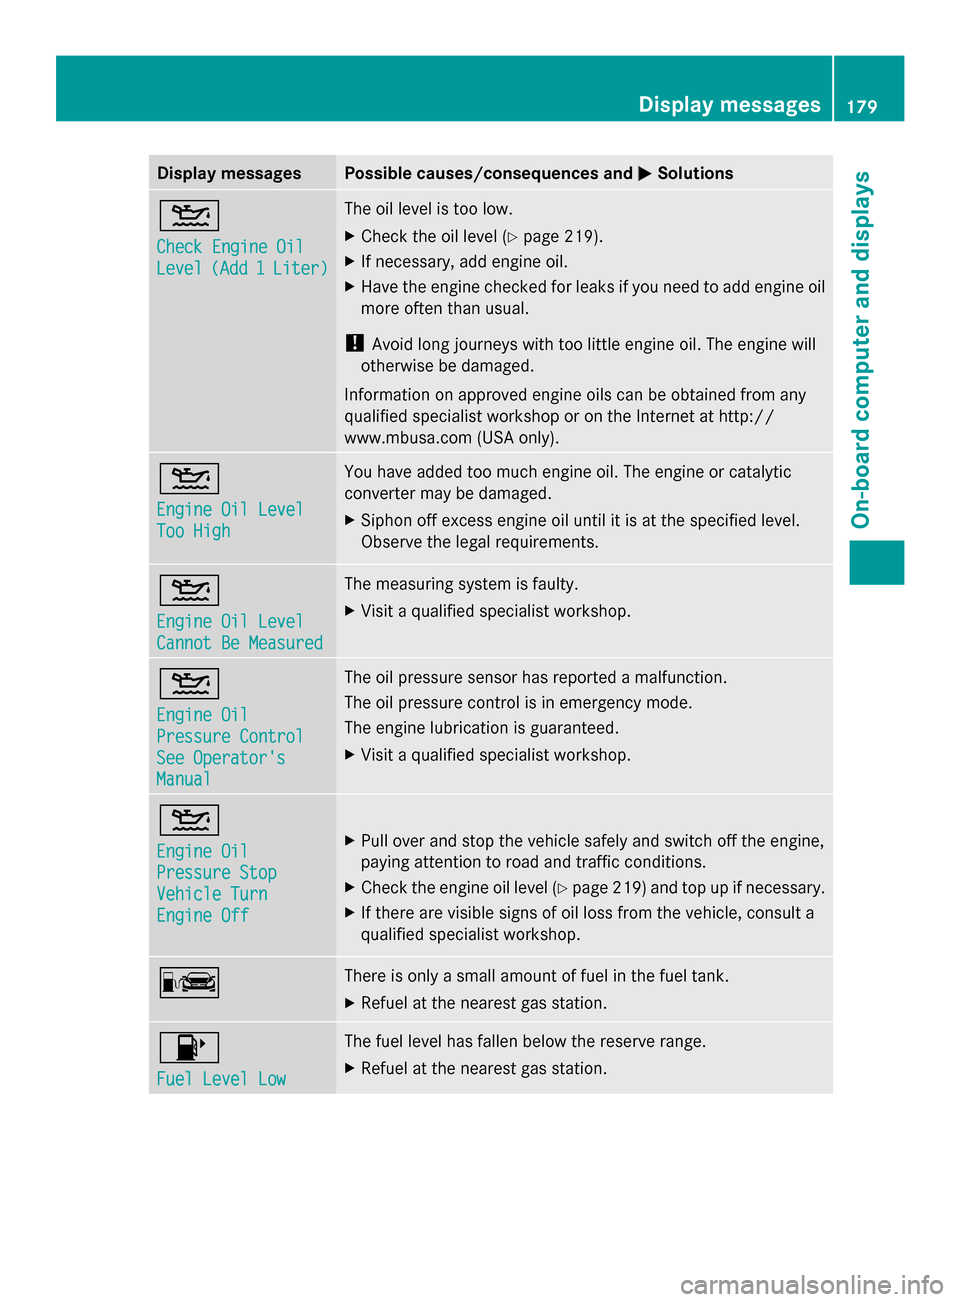
Display messages Possible causes/consequences and
0050
0050Solutions 00B2
Check Engine Oil Check Engine Oil
Level Level
(Add 1
(Add 1 Liter)
Liter) The oil level is too low.
X
Check the oil level (Y page 219).
X If necessary, add engine oil.
X Have the engine checked for leaks if you need to add engine oil
more often than usual.
! Avoid long journeys with too little engine oil. The engine will
otherwise be damaged.
Information on approved engine oils can be obtained from any
qualified specialist workshop or on the Internet at http://
www.mbusa.com (USA only). 00B2
Engine Oil Level Engine Oil Level
Too High Too High You have added too much engine oil. The engine or catalytic
converter may be damaged.
X
Siphon off excess engine oil until it is at the specified level.
Observe the legal requirements. 00B2
Engine Oil Level Engine Oil Level
Cannot Be Measured Cannot Be Measured The measuring system is faulty.
X
Visit a qualified specialist workshop. 00B2
Engine Oil Engine Oil
Pressure Control Pressure Control
See Operator's See Operator's
Manual Manual The oil pressure sensor has reported a malfunction.
The oil pressure control is in emergency mode.
The engine lubrication is guaranteed.
X
Visit a qualified specialist workshop. 00B2
Engine Oil Engine Oil
Pressure Stop Pressure Stop
Vehicle Turn Vehicle Turn
Engine Off Engine Off
X
Pull over and stop the vehicle safely and switch off the engine,
paying attention to road and traffic conditions.
X Check the engine oil level (Y page 219) and top up if necessary.
X If there are visible signs of oil loss from the vehicle, consult a
qualified specialist workshop. 00A8 There is only a small amount of fuel in the fuel tank.
X
Refuel at the nearest gas station. 00B6
Fuel Level Low Fuel Level Low The fuel level has fallen below the reserve range.
X
Refuel at the nearest gas station. Display
messages
179On-board computer and displays Z
Page 182 of 290
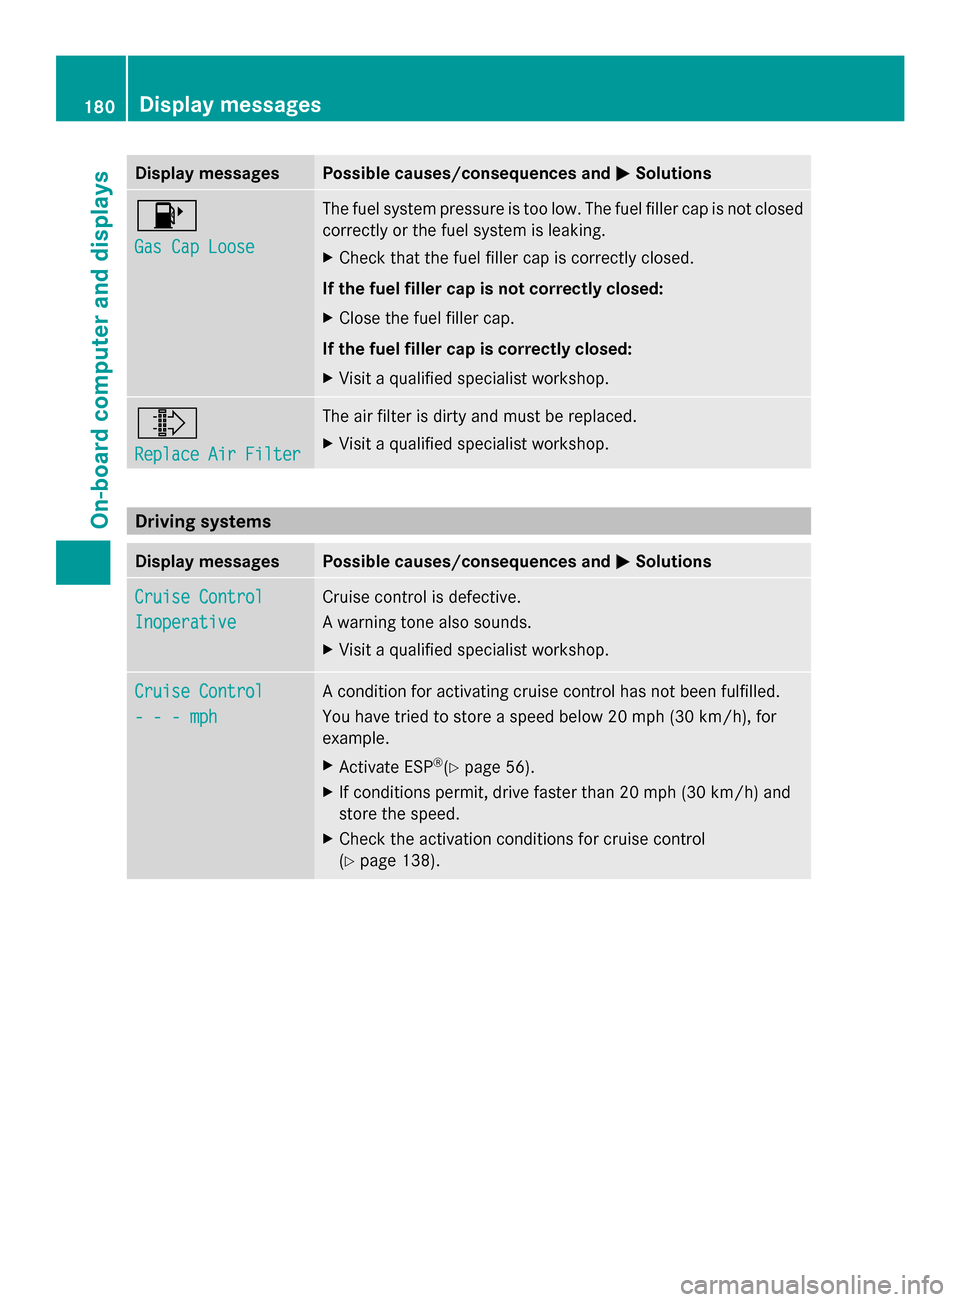
Display messages Possible causes/consequences and
0050
0050Solutions 00B6
Gas Cap Loose Gas Cap Loose The fuel system pressure is too low. The fuel filler cap is not closed
correctly or the fuel system is leaking.
X
Check that the fuel filler cap is correctly closed.
If the fuel filler cap is not correctly closed:
X Close the fuel filler cap.
If the fuel filler cap is correctly closed:
X Visit a qualified specialist workshop. 009E
Replace Air Filter Replace Air Filter The air filter is dirty and must be replaced.
X
Visit a qualified specialist workshop. Driving systems
Display messages Possible causes/consequences and
0050 0050Solutions Cruise Control
Cruise Control
Inoperative Inoperative Cruise control is defective.
A warning tone also sounds.
X
Visit a qualified specialist workshop. Cruise Control Cruise Control
- - - mph - - - mph A condition for activating cruise control has not been fulfilled.
You have tried to store a speed below 20 mph (30 km/h), for
example.
X
Activate ESP ®
(Y page 56).
X If conditions permit, drive faster than 20 mph (30 km/h) and
store the speed.
X Check the activation conditions for cruise control
(Y page 138). 180
Display
messagesOn-board computer and displays
Page 198 of 290
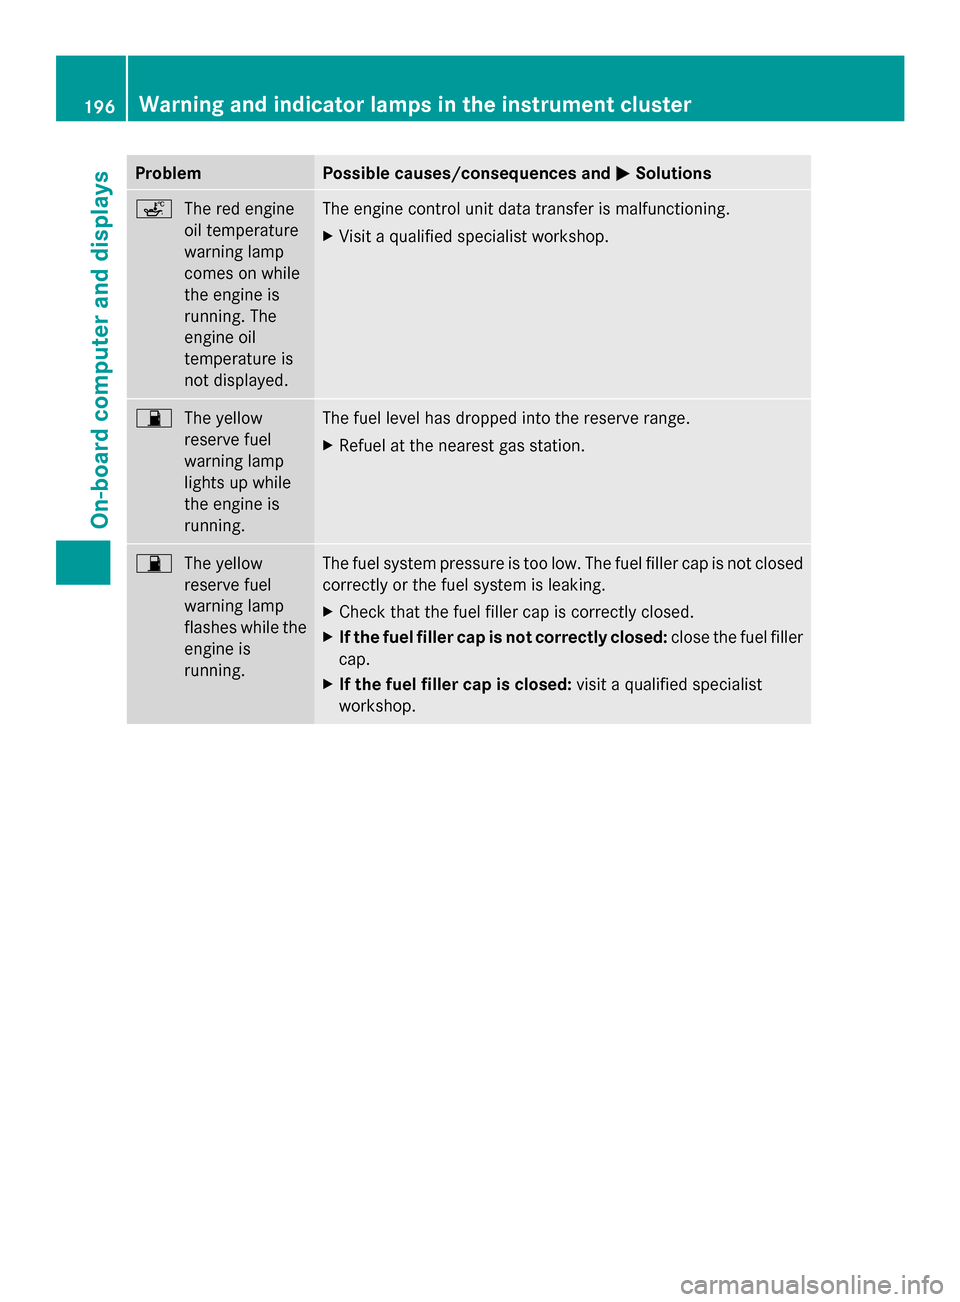
Problem Possible causes/consequences and
0050
0050Solutions 00E4
The red engine
oil temperature
warning lamp
comes on while
the engine is
running. The
engine oil
temperature is
not displayed. The engine control unit data transfer is malfunctioning.
X
Visit a qualified specialist workshop. 00B5
The yellow
reserve fuel
warning lamp
lights up while
the engine is
running. The fuel level has dropped into the reserve range.
X
Refuel at the nearest gas station. 00B5
The yellow
reserve fuel
warning lamp
flashes while the
engine is
running. The fuel system pressure is too low. The fuel filler cap is not closed
correctly or the fuel system is leaking.
X
Check that the fuel filler cap is correctly closed.
X If the fuel filler cap is not correctly closed: close the fuel filler
cap.
X If the fuel filler cap is closed: visit a qualified specialist
workshop. 196
Warning and indicator lamps in the instrument clusterOn-board computer and displays
Page 238 of 290
X
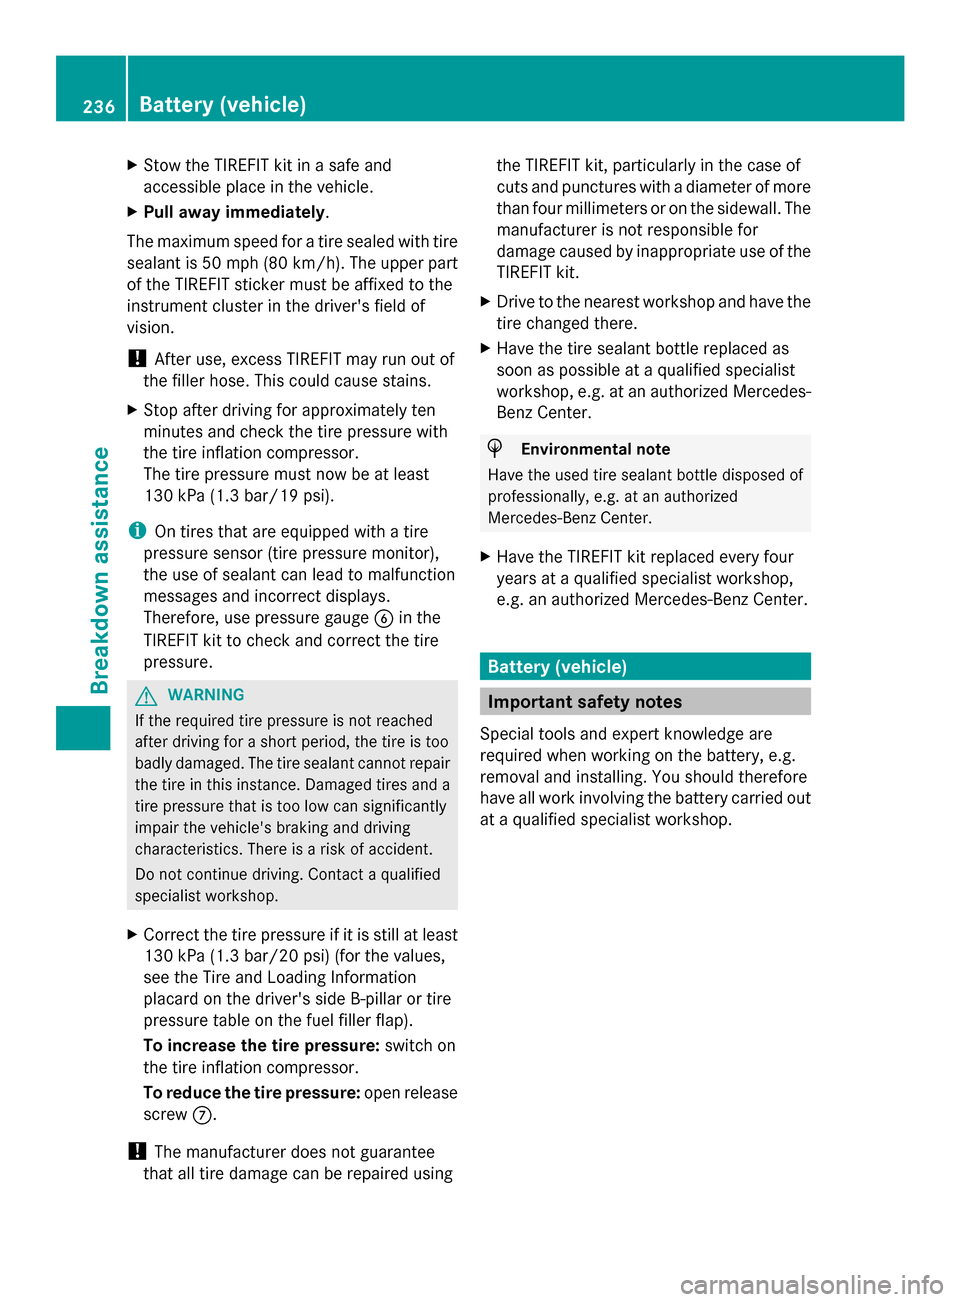
Stow the TIREFIT kit in a safe and
accessible place in the vehicle.
X Pull away immediately.
The maximum speed for a tire sealed with tire
sealant is 50 mph (80 km/h). The upper part
of the TIREFIT sticker must be affixed to the
instrument cluster in the driver's field of
vision.
! After use, excess TIREFIT may run out of
the filler hose. This could cause stains.
X Stop after driving for approximately ten
minutes and check the tire pressure with
the tire inflation compressor.
The tire pressure must now be at least
130 kPa (1.3 bar/19 psi).
i On tires that are equipped with a tire
pressure sensor (tire pressure monitor),
the use of sealant can lead to malfunction
messages and incorrect displays.
Therefore, use pressure gauge 0084in the
TIREFIT kit to check and correct the tire
pressure. G
WARNING
If the required tire pressure is not reached
after driving for a short period, the tire is too
badly damaged. The tire sealant cannot repair
the tire in this instance. Damaged tires and a
tire pressure that is too low can significantly
impair the vehicle's braking and driving
characteristics. There is a risk of accident.
Do not continue driving. Contact a qualified
specialist workshop.
X Correct the tire pressure if it is still at least
130 kPa (1.3 bar/20 psi) (for the values,
see the Tire and Loading Information
placard on the driver's side B-pillar or tire
pressure table on the fuel filler flap).
To increase the tire pressure: switch on
the tire inflation compressor.
To reduce the tire pressure: open release
screw 006B.
! The manufacturer does not guarantee
that all tire damage can be repaired using the TIREFIT kit, particularly in the case of
cuts and punctures with a diameter of more
than four millimeters or on the sidewall. The
manufacturer is not responsible for
damage caused by inappropriate use of the
TIREFIT kit.
X Drive to the nearest workshop and have the
tire changed there.
X Have the tire sealant bottle replaced as
soon as possible at a qualified specialist
workshop, e.g. at an authorized Mercedes-
Benz Center. H
Environmental note
Have the used tire sealant bottle disposed of
professionally, e.g. at an authorized
Mercedes-Benz Center.
X Have the TIREFIT kit replaced every four
years at a qualified specialist workshop,
e.g. an authorized Mercedes-Benz Center. Battery (vehicle)
Important safety notes
Special tools and expert knowledge are
required when working on the battery, e.g.
removal and installing. You should therefore
have all work involving the battery carried out
at a qualified specialist workshop. 236
Battery (vehicle)Breakdown assistance