fuel MERCEDES-BENZ SLS AMG GT COUPE 2015 C197 Owner's Guide
[x] Cancel search | Manufacturer: MERCEDES-BENZ, Model Year: 2015, Model line: SLS AMG GT COUPE, Model: MERCEDES-BENZ SLS AMG GT COUPE 2015 C197Pages: 290, PDF Size: 6.24 MB
Page 152 of 290
Useful information
i This Operator's Manual describes all
models and all standard and optional equip- ment of your vehicle available at the time of
publication of the Operator's Manual.
Country-specific differences are possible.
Please not ethat your vehicle may not be
equipped with all feature sdescribed. This
also applies to safety-related system sand
functions.
i Please read the information on qualified
specialist workshops (Y page 23).Important safet
ynotes
You will find an illustration of the instrument
cluster in the "At aglance" section
(Y page 27). G
WARNING
If you operate information system sand com-
munication equipment integrated in the vehi- cle while driving, you will be distracted from
traffic conditions. You could also lose control of the vehicle. There is arisk of an accident.
Only operate the equipment when the traffic
situatio npermits. If you are not sure that this
is possible, park the vehicle paying attention
to traffic condition sand operate the equip-
ment when the vehicle is stationary. G
WARNING
If the instrumen tcluster has failed or mal-
functioned, you may not recogniz efunction
restrictions in system srelevan ttosafety. The
operatin gsafet yofy our vehicle may be
impaired. There is arisk of an accident.
Driv eonc arefully. Have the vehicle checked
at aq ualified specialist workshop immedi-
ately.
You must observ ethe legal requirements for
the country in which you are currently driving when operatin gthe on-board computer. The on-board computer only shows messages
or warnings from certain system sinthe mul-
tifunction display. You should therefore make
sure your vehicle is operatin gsafely at all
times .Otherwise, avehicle that is not oper-
ating safely may cause an accident. Displays and operation
Engine oil temperatured
isplay
The engin eoil temperature gauge is in the
instrumen tcluster on the right-han dside.
Under normal operatin gconditions, the tem-
perature may rise to 140 †.
The transmission fluid temperature and the
coolan ttemperature are displayed in the
AMG menu (Y page 160). Tachometer
The red band in the tachometer indicates the engine's overrevvin grange.
! Do not drive in the overrevvin
grange, as
this could damage the engine.
The fuel supply is interrupted to protect the
engin ewhen the red band is reached. Outside temperatured
isplay
You should pay special attention to road con-
dition swhen temperature sare around freez-
ing point.
The outside temperature display is in the mul- tifunction display (Y page 152).
Changes in the outside temperature are dis-
played after ashort delay. 150
Displays and operationOn-boar
dcomputer and displays
Page 155 of 290
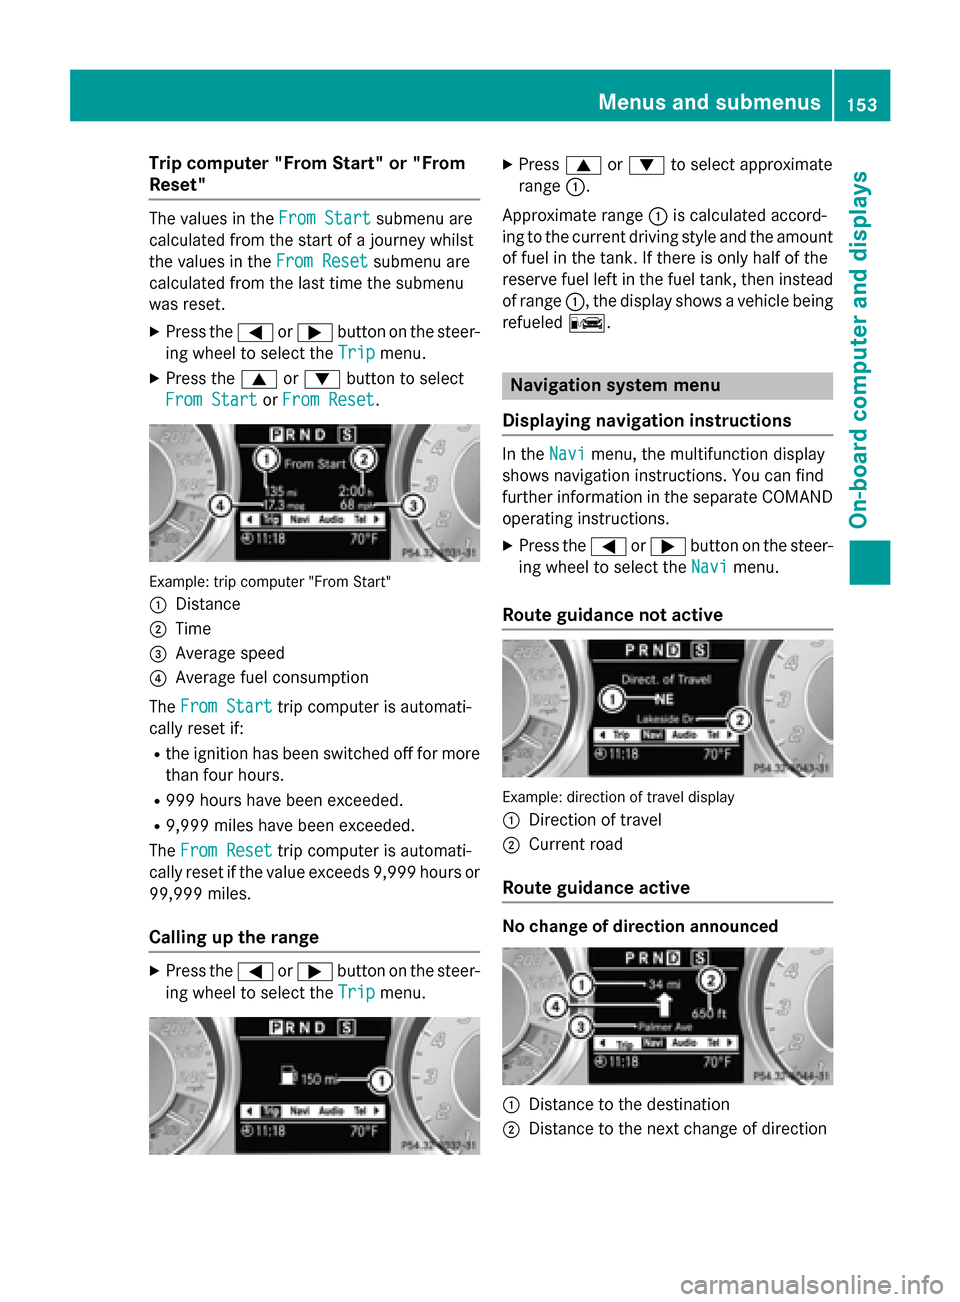
Trip compute
r"From Start" or "From
Reset" The values in the
FromStart
Fro mStart submenu are
calculate dfromt he start of ajourney whilst
the values in the FromReset
Fro mReset submenu are
calculate dfromt he last time the submenu
wa sreset.
X Press the 0059or0065 button on the steer-
ing whee ltoselect the Trip
Tripmenu.
X Press the 0063or0064 button to select
Fro mStart
Fro mStart orFro mReset
Fro mReset. Example: trip compute
r"From Start"
0043 Distance
0044 Time
0087 Averag espeed
0085 Averag efuelconsumption
The FromStart
Fro mStart trip compute risautomati-
cally reset if:
R the ignition ha sbeens witched off for more
tha nfourh ours.
R 999 hours have been exceeded.
R 9,999 miles have been exceeded.
The FromReset
Fro mReset trip compute risautomati-
cally reset if the valu eexceed s9,999 hours or
99,999 miles.
Callin gupt he range X
Press the 0059or0065 button on the steer-
ing whee ltoselect the Trip Tripmenu. X
Press 0063or0064 to select approximate
range 0043.
Approximate range 0043is calculate daccord-
ing to the current driving style and the amount of fuel in the tank. If there is onl yhalfoft he
reserv efuellef tint he fuel tank, the ninstead
of range 0043,the displa yshows avehicl ebeing
refueled 00A8. Navigation system menu
Displaying navigatio ninstructions In the
Navi
Navimenu ,the multifunctio ndisplay
shows navigation instructions. Yo ucan find
furthe rinformatio ninthe separate COMAND
operating instructions.
X Press the 0059or0065 button on the steer-
ing whee ltoselect theNavi
Navi menu.
Route guidanc enotactive Example: direction of travel display
0043
Directio noftravel
0044 Current road
Route guidanc eactive No chang
eofdirection announced 0043
Distance to the destination
0044 Distance to the next change of direction Menus and submenus
153On-board computer and displays Z
Page 181 of 290
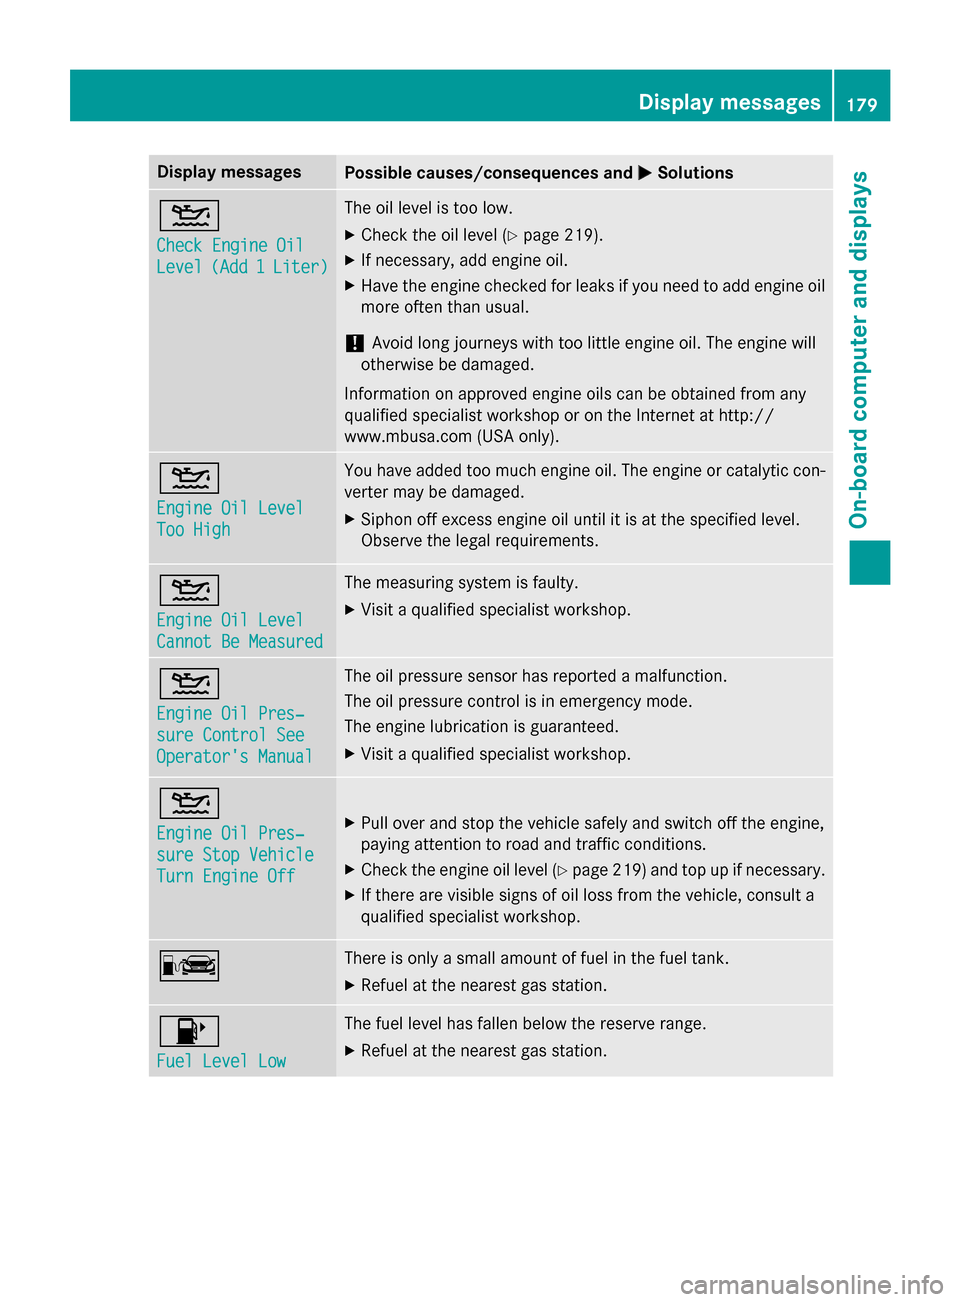
Display messages
Possible causes/consequences and
0050
0050Solutions 00B2
Check Engine Oil Check Engine Oil
Level Level
(Add1
(Ad d1Liter) Liter) The oil level is to
olow.
X Chec kthe oil level (Y page 219).
X If necessary, add engin eoil.
X Hav ethe engin echecked forleak sify ou need to add engin eoil
mor eoften than usual.
! Avoid lon
gjou rneys wit htoo littl eengineo il. The engin ewill
otherwise be damaged.
Information on approve dengineo ils can be obtained from any
qualified specialist workshop or on th eInterne tathttp://
www.mbusa.com (US Aonly). 00B2
Engine Oil Level Engine Oil Level
Too High Too High You hav
eadded to omuche ngineo il. The engin eorcatalytic con-
verte rmay be damaged.
X Siphon of fexces sengineo il until it is at th especified level.
Observ ethe legal requirements. 00B2
Engine Oil Level Engine Oil Level
Cannot Be Measured Cannot Be Measured The measurin
gsystem is faulty.
X Visit aqualified specialist workshop. 00B2
Engine Oil Pres‐ Engine Oil Pres‐
sur
eC ontro lSee
sur eC ontro lSee
Operator' sManual
Operator' sManual The oil pressur
esensor has reported amalfunction.
The oil pressur econtro lisine mergenc ymode.
The engin elubrication is guaranteed.
X Visit aqualified specialist workshop. 00B2
Engine Oil Pres‐ Engine Oil Pres‐
sur
eS topV ehicle
sur eS topV ehicle
Tur nE ngine Off
Tur nE ngine Off X
Pull ove rand stop th evehicl esafely and switch of fthe engine,
payin gattention to roa dand traffic conditions.
X Chec kthe engin eoil level (Y page 219) and to pupifnecessary.
X If there are visible signs of oil los sfromt hevehicle, consult a
qualified specialist workshop. 00A8 There is only
asma ll amount of fue linthefuel tank.
X Refuel at th eneares tgas station. 00B6
Fue
lL evel Low
Fue lL evel Low The fuel level has fallen belo
wthe reserv erange.
X Refuel at th eneares tgas station. Display
messages
179On-boardcomputer an ddisplays Z
Page 182 of 290
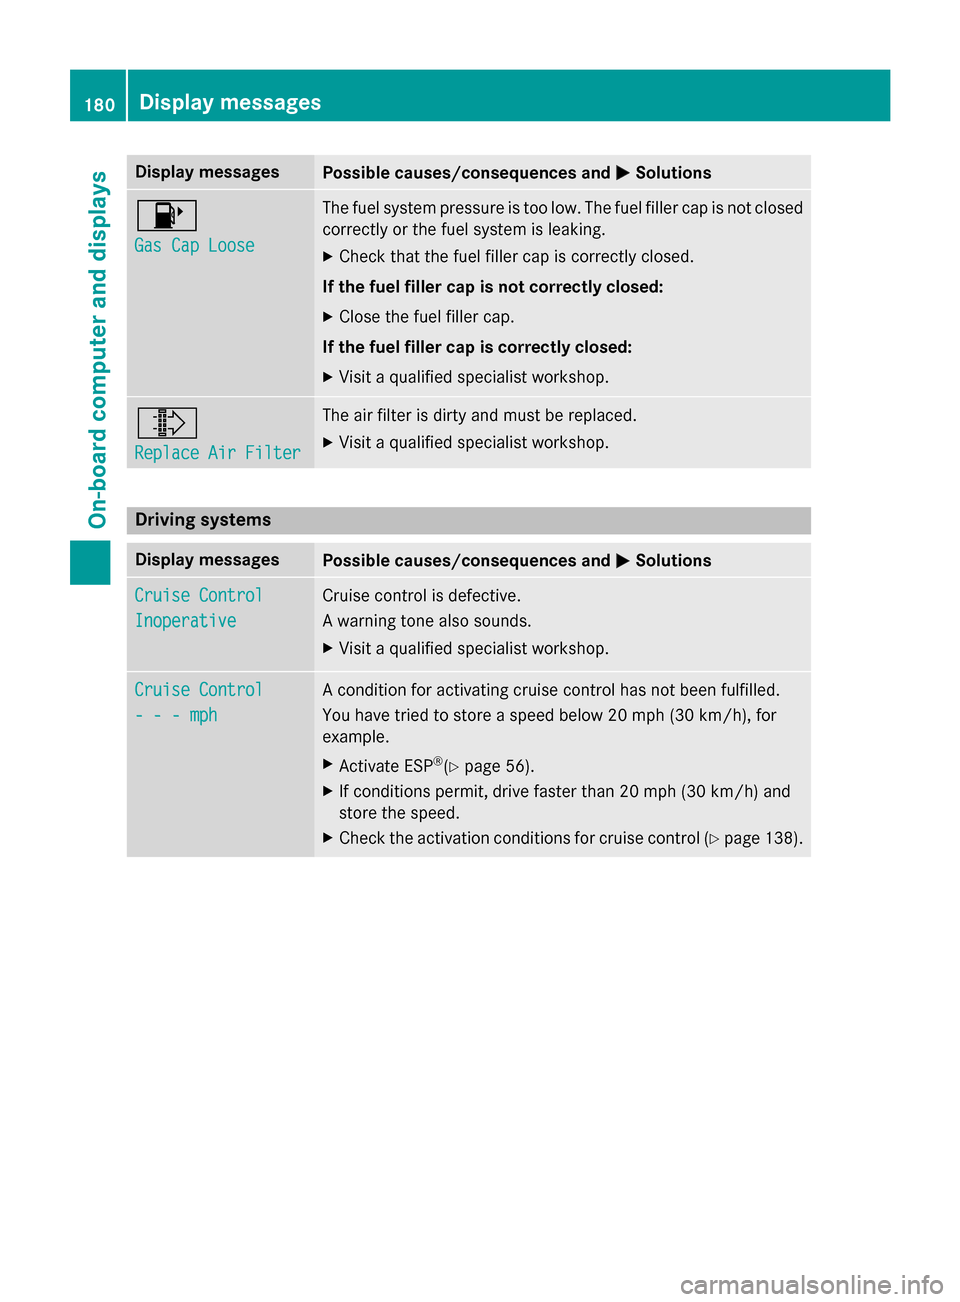
Display messages
Possible causes/consequences and
0050
0050Solutions 00B6
Gas Cap Loose Gas Cap Loose The fuel system pressur
eistoolow. The fuel filler cap is no tclosed
correctl yorthefue lsystem is leaking.
X Chec kthatthe fuel filler cap is correctl yclosed.
If th efuelfiller cap is not correctl yclosed:
X Clos ethe fuel filler cap.
If th efuelfiller cap is correctl yclosed:
X Visit aqualified specialist workshop. 009E
Replac
eAir Filter
Replac eAir Filter The air filte
risdirty and mus tbereplaced.
X Visit aqualified specialist workshop. Driving systems
Display messages
Possible causes/consequences and
0050 0050Solutions Cruise Control
Cruise Control
Inoperative Inoperative Cruis
econtro lisdefective.
Aw arnin gtonea lso sounds.
X Visit aqualified specialist workshop. Cruise Control
Cruise Control
---m
ph
---m ph Ac
onditi on foractivatin gcruise control has no tbeen fulfilled.
You hav etried to store aspeed belo w20m ph(30 km/ h),for
example.
X Activat eESP®
(Y page 56).
X If condition spermit ,drive faster than 20 mph (3 0km/ h)and
store th espeed.
X Chec kthe activation condition sfor cruise control (Y page 138).180
Display messagesOn-boar
dcomputer and displays
Page 197 of 290
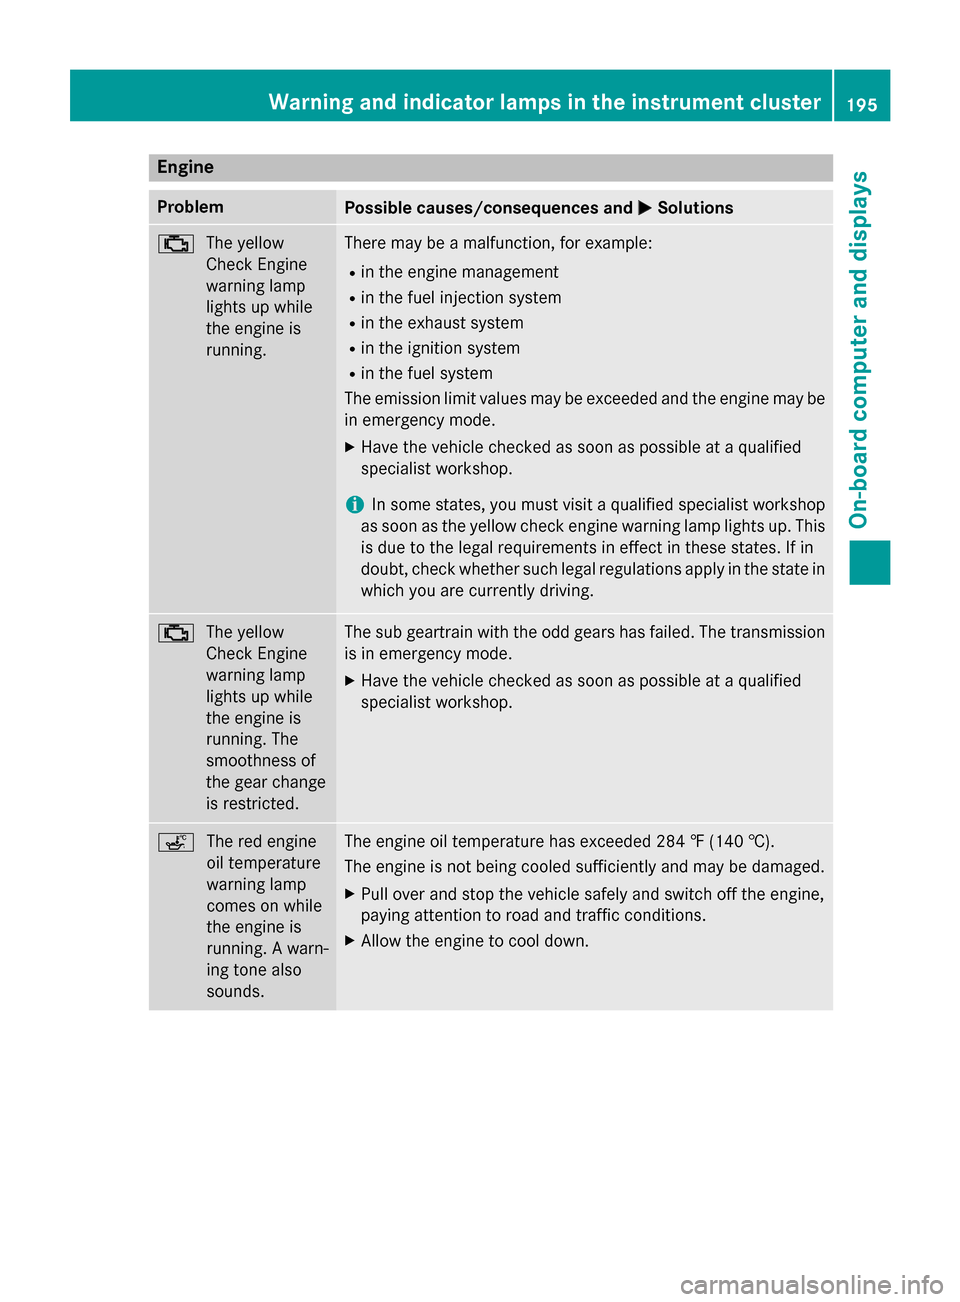
Engine
Problem
Possible causes/consequences and
0050
0050Solutions 00B9
The yellow
CheckEngine
warning lamp
light supw hile
th ee ngineis
running. Ther
emay be amalfunction, for example:
R in th eenginem anagement
R in th efuel injection system
R in th eexhaust system
R in th eignition system
R in th efuel system
The emission limit values may be exceeded and th eenginem ay be
in emergency mode.
X Hav ethe vehicle checked as soon as possible at aqualified
specialist workshop.
i In som
estates, you must visi taqualifie dspecialist workshop
as soon as th eyellow check engin ewarning lamp light sup. This
is due to th elegal requirements in effect in these states. If in
doubt ,che ck whether suc hlegal regulations apply in th estate in
whic hyou are currently driving. 00B9
The yellow
CheckEngine
warning lamp
light supw hile
th ee ngineis
running. The
smoothness of
th eg ear change
is restricted. The sub geartrain with th
eodd gear shas failed .The transmission
is in emergency mode.
X Hav ethe vehicle checked as soon as possible at aqualified
specialist workshop. 00E4
The red engine
oil temperature
warning lamp
comes on while
thee ngineis
running. Awarn-
ing tone also
sounds. The engin
eoil temperatur ehas exceeded 28 4‡(140† ).
The engin eisnotbein gcooled sufficiently and may be damaged.
X Pull ove rand stop th evehicle safely and switch off th eengine,
paying attentio ntoroad and traffic conditions.
X Allo wthe engin etoc ooldown. Warning and indicator lamps in th
einstrumen tcluster
195On-boar dcomputer and displays Z
Page 198 of 290
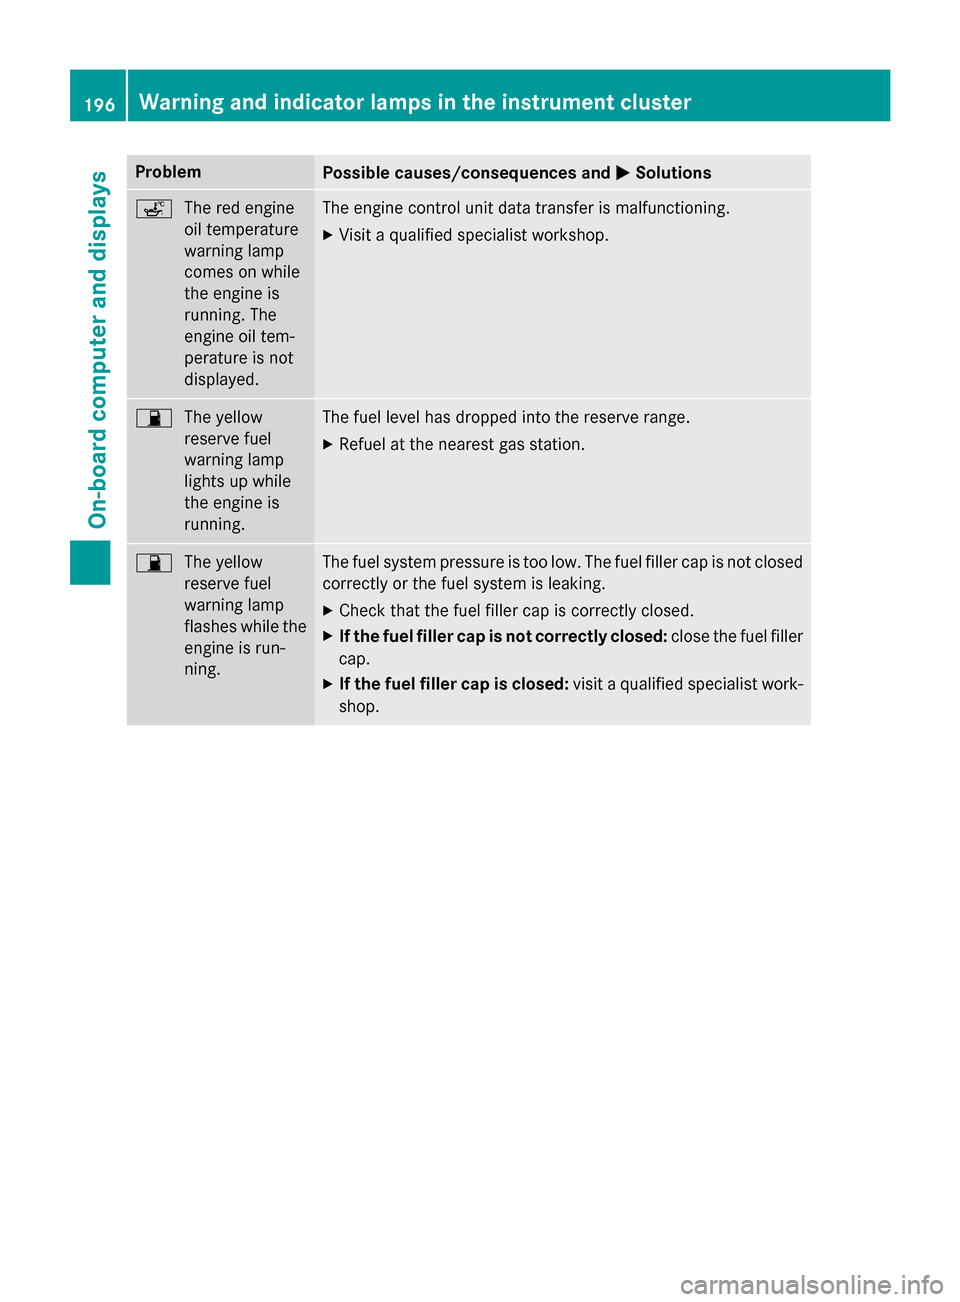
Problem
Possible causes/consequences and
0050
0050Solutions 00E4
The red engine
oil temperature
warning lamp
comes on while
the engine is
running. The
engine oil tem-
perature is not
displayed. The engine control unit data transfer is malfunctioning.
X Visit aqualified specialist workshop. 00B5
The yellow
reserve fuel
warning lamp
lights up while
the engine is
running. The fuel level has dropped into the reserve range.
X Refuel at the nearest gas station. 00B5
The yellow
reserve fuel
warning lamp
flashes while the
engine is run-
ning. The fuel system pressure is too low. The fuel filler cap is not closed
correctly or the fuel system is leaking.
X Check that the fuel filler cap is correctly closed.
X If the fuel filler cap is not correctly closed: close the fuel filler
cap.
X If the fuel filler cap is closed: visitaqualified specialist work-
shop. 196
Warning and indicator lampsint
he instrument clusterOn-board computer and displays
Page 228 of 290
X
Remove coolant, brak efluid ,tre er esin,
oils ,fuel sand greases by rubbin ggently
wit hac loth soaked in petroleum ether or
lighte rfluid.
X Use tar remove rtoremove tar stains.
X Use silicon eremove rtoremove wax.
! Do no
taffix:
R stickers
R films
R magneti cplates or similar items
to painte dsurfaces. You could otherwise
damag ethe paintwork.
If water no longer forms "beads "onthe paint
surface, use th epaintcarep roducts recom-
mended and approve dbyMercedes-Benz.
This is th ecasea pproximately every three to
fiv em onths, dependin gontheclimat econ-
dition sand th ecarep roduc tused.
If dir thas penetrated th epaintsurfac eort he
pain thas become dull, th epaintcleane rrec-
ommended and approve dbyMercedes-Benz
should be used.
Do no tuse these car eproducts in th esun or
on th ehoodw hile th ehoodish ot.
X Use asuitable touch-up stick ,e.g.MB
Touch-Up Stick ,toc orrect smaller area sof
pain tdamag equickl yand provisionally.
Matt efinish care If your vehicl
ehasac lear matte finish,
observ ethe followin ginstructions in order to
avoid damag etothepaintwork due to incor-
rec tcare.
These note salso apply to ligh talloy wheels
wit hac lear matte finish.
! Never polis
hthe vehicl eortheligh talloy
wheels. Polishing causes th efinish to
shine. !
The followin
gmay caus ethe pain tto
become shiny and thus reduce th ematte
effect:
R Vigorous rubbin gwithu nsuitable mate-
rials.
R Frequen tuse of car washes.
R Washin gthe vehicl eindirectsunlight.
! Never use pain
tcleaner, buffin gorpol-
ishin gproducts suc hasglossp reserver
(wax). These products are only suitable for
high-gloss surfaces. Their use on vehicles
wit hm atte finish leads to considerable sur-
fac ed amag e(shiny, spotted areas).
If wax comes into contact wit hthe painted
surfac ebyaccident, remove it immediately
wit hc omme rcially available petroleum
ether .Dosoc arefully and do no tapply too
muc hpressur etothepainte dsurface.
Ensur ethatnor esinous, greasy or oily sub-
stances come into contact wit hthe paint,
as these can leav earesidue. If suc hsub-
stances do come into contact wit hthe
painte dsurfac eaccidentally, remove these
immediately wit hcomme rcially available
petroleum ether .Dosocarefully and do not
apply to omuchp ressur etothepainted
surface.
Tar stain sormarks on th epainte dsurface
can be remove dwithac omme rcially avail-
able tar remover. Do so carefully and do not
apply to omuchp ressur etothepainted
surface.
Always hav epaintwork repairs carrie dout
at aq ualified specialist workshop ,e.g.an
authorize dMercedes-Ben zCenter.
! Do no
tuse wash programs wit hahot wax
treatmen tunder any circumstances.
i The vehicl
eshould preferably be washed
by han dusingas ofts ponge, car shampoo
and plenty of water.
i Use only insec
tremove rand car shampoo
from th erange of recommended and
approve dMercedes-Ben zcarep roducts. 226
CareMaintenance and care
Page 244 of 290
Jump-starting
G
WARNING
Battery acid is caustic. There is arisk of injury.
Avoid contact with the skin, eyes or clothing. Do not inhale any battery gases. Do not lean over the battery. Keep children away from batteries. Wash battery acid immediately with water and seek
medical attention. G
WARNING
During charging and jump-starting, explosive gases can escape from the battery. There is arisk
of an explosion.
Particularly avoid fire, open flames, creating sparks and smoking. Ensure there is sufficient ven-
tilation while charging and jump-starting. Do not lean over abattery. G
WARNING
During the charging process, abattery produces hydrogen gas. If ashort circuit occurs or sparks
are created, the hydrogen gas can ignite. There is arisk of an explosion.
R Make sure that the positive terminal of aconnected battery does not come into contact with
vehicle parts.
R Never place metal objects or tools on abattery.
R It is important that you observe the described order of the battery terminals when connecting
and disconnecting abattery.
R When jump-starting, make sure that the battery poles with identical polarity are connected.
R It is particularly important to observe the described order when connecting and disconnecting
the jumper cables.
R Never connect or disconnectt he battery terminals while the engine is running.G
WARNING
Ad ischarged battery can freeze at temperatures below freezing point. When jump-starting the
vehicle or charging the battery, gases can escape from the battery. There is arisk of an explosion.
Allow the frozen battery to thaw out before charging it or jump-starting.
! Avoid repeated and lengthy startinga
ttempts. Otherwise, the catalytic converter could be
damaged by the non-combusted fuel.
Do not start the vehicle using arapid charging device. If your vehicle's battery is discharged,
the engine can be jump-started from another vehicle or from asecond battery using jumper
cables. Observe the following points:
R The battery is not accessible in all vehicles. If the other vehicle's battery is not accessible,
jump-start the vehicle using asecond battery or ajump-starting device.
R You may only jump-start the vehicle when the engine and exhaust system are cold.
R Do not start the engine if the battery is frozen.L et the battery thaw first.
R Only jump-start from batteries with a12Vvoltage rating.
R Only use jumper cables which have asufficient cross-section and insulated terminal clamps. 242
Jump-startingBreakdown assistance
Page 252 of 290
Useful information
i This Operator's Manual describes all
models and all standard and optional equip- ment of your vehicle available at the time of
publication of the Operator's Manual.
Country-specific differences are possible.
Please not ethat your vehicle may not be
equipped with all feature sdescribed. This
also applies to safety-related system sand
functions.
i Please read the information on qualified
specialist workshops (Y page 23).Important safet
ynotes G
WARNING
If wheels and tires of the wrong size are used, the wheel brakes or suspensio ncomponents
may be damaged. There is arisk of an acci-
dent.
Always replace wheels and tires with those
that fulfill the specification softhe original
part.
When replacin gwheels, make sure to use the
correct:
R designation
R model
When replacin gtires ,make sure to use the
correct:
R designation
R manufacturer
R model G
Warning
Af lat tire severely impairs the driving, steer-
ing and brakin gcharacteristic softhe vehicle.
There is arisk of an accident.
do not drive with aflat tire. Immediately
replace the flat tire with your spare wheel, or
consult aqualified specialist workshop.
Accessories that are not approved for your
vehicle by Mercedes-Benz or that are not being used correctly can impair the operating
safety.
Before purchasin gand using non-approved
accessories, visit aqualified specialist work-
shop and inquire about:
R suitability
R legal stipulations
R factory recommendations
Information on dimensions and types of
wheels and tires for your vehicle can be found (Y page 275).
Information on air pressure for the tires on
your vehicle can be found:
R on the vehicle' sTire and Loading Informa-
tion placard on the B-pillar
R on the tire pressure label on the fuel filler
flap
R under "Tire pressure"
i Further information on wheels and tires
can be obtained at any qualified specialist
workshop. Operation
Information on driving
R If the vehicle is heavily loaded, chec kthe
tire pressures and correct them if neces-
sary.
R While driving, pay attention to vibrations,
noises and unusual handling characteris-
tics, e.g. pulling to one side. This may indi- cate that the wheels or tires are damaged.If you suspect that atire is defective,
reduce your speed immediately. Stop the
vehicle as soon as possible to chec kthe
wheels and tires for damage. Hidden tire
damage could also be causing the unusual
handling characteristics. If you find no
signs of damage, have the wheels and tires checked at aqualified specialist workshop.
R When parkin gyour vehicle, make sure that
the tires do not get deformed by the curb or
other obstacles. If it is necessary to drive
over curbs, speed humps or similar eleva- 250
OperationWheels and tires
Page 256 of 290
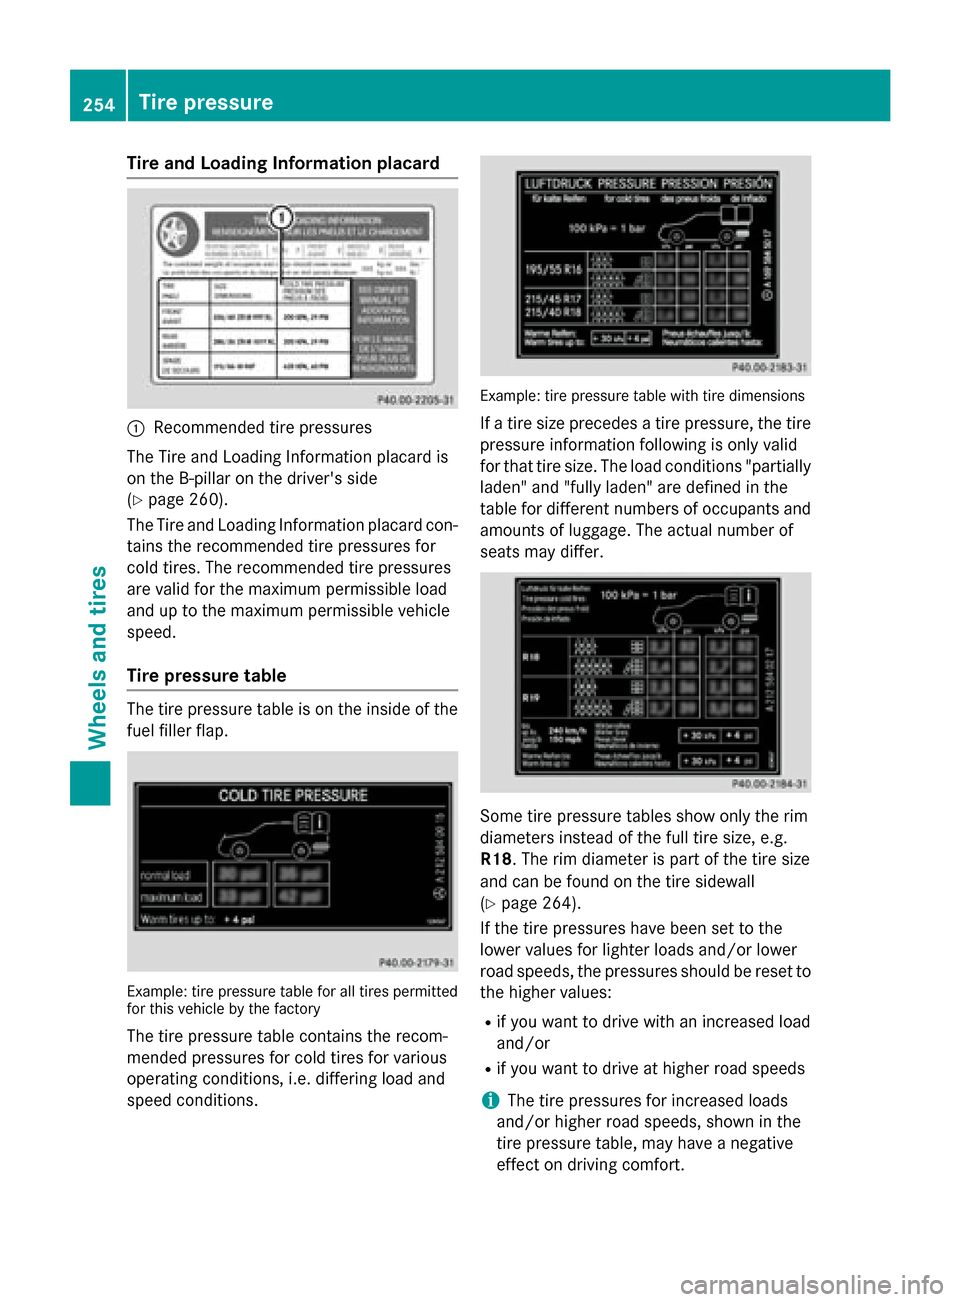
Tire and Loadin
gInfor matio nplacard 0043
Recommended tire pressures
The Tire and Loading Informatio nplacard is
on the B-pillar on the driver's side
(Y page 260).
The Tire and Loading Informatio nplacard con-
tains the recommende dtire pressures for
col dtires. The recommende dtire pressures
ar ev alid for the maximum permissibl eload
and up to the maximum permissibl evehicle
speed.
Tire pressure table The tire pressure table is on the insid
eofthe
fuel fille rflap. Example: tire pressure table for al
ltire sp ermitted
for thi svehicl ebyt he factory
The tire pressure table contains the recom-
mended pressures for col dtiresfor various
operating conditions, i.e .differing load and
spee dconditions. Example: tire pressure table with tire dimensions
If at ire size precedes atire pressure, the tire
pressure informatio nfollowing is onl yvalid
for tha ttire size. The load conditions "partially
laden" and "fully laden" ar edefine dint he
table for different numbers of occupants and
amounts of luggage. The actual numbe rof
seats ma ydiffer. Some tire pressure table
sshowo nlyt he rim
diameters instea dofthe full tire size, e.g.
R18 .The rim diamete rispartoft he tire size
and can be found on the tire sidewall
(Y page 264).
If the tire pressures have been se ttothe
lowe rvalues for lighte rloads and/or lower
roa dspeeds, the pressures shoul dbereset to
the highe rvalues:
R if yo uwanttod rive with an increase dload
and/or
R if yo uwanttod rive at highe rroa ds peeds
i The tire pressures for increase
dloads
and/or highe rroa ds peeds, shown in the
tire pressure table ,mayhave anegative
effect on driving comfort. 254
Tire pressureWheel
sand tires