MERCEDES-BENZ SLS AMG GT ROADSTER 2015 C197 Owner's Manual
Manufacturer: MERCEDES-BENZ, Model Year: 2015, Model line: SLS AMG GT ROADSTER, Model: MERCEDES-BENZ SLS AMG GT ROADSTER 2015 C197Pages: 290, PDF Size: 6.24 MB
Page 111 of 290
Condensation may drip from th
eunderside of
th ev ehicle when it is in coolin gmode. This is
normal and no tasign that there is amalfunc-
tion.
Activating/deactivating X
To activate: press the005Abutton.
The indicator lamp in the 005Abuttonlights
up.
X To deactivate: press the005Abutton.
The indicator lamp in the 005Abuttongoes
out .The "Coolin gwitha ir dehumidification"
function has adelayed switch-off feature. Operating th
eclimat econtrol systems
109Climatecont rol
Page 112 of 290
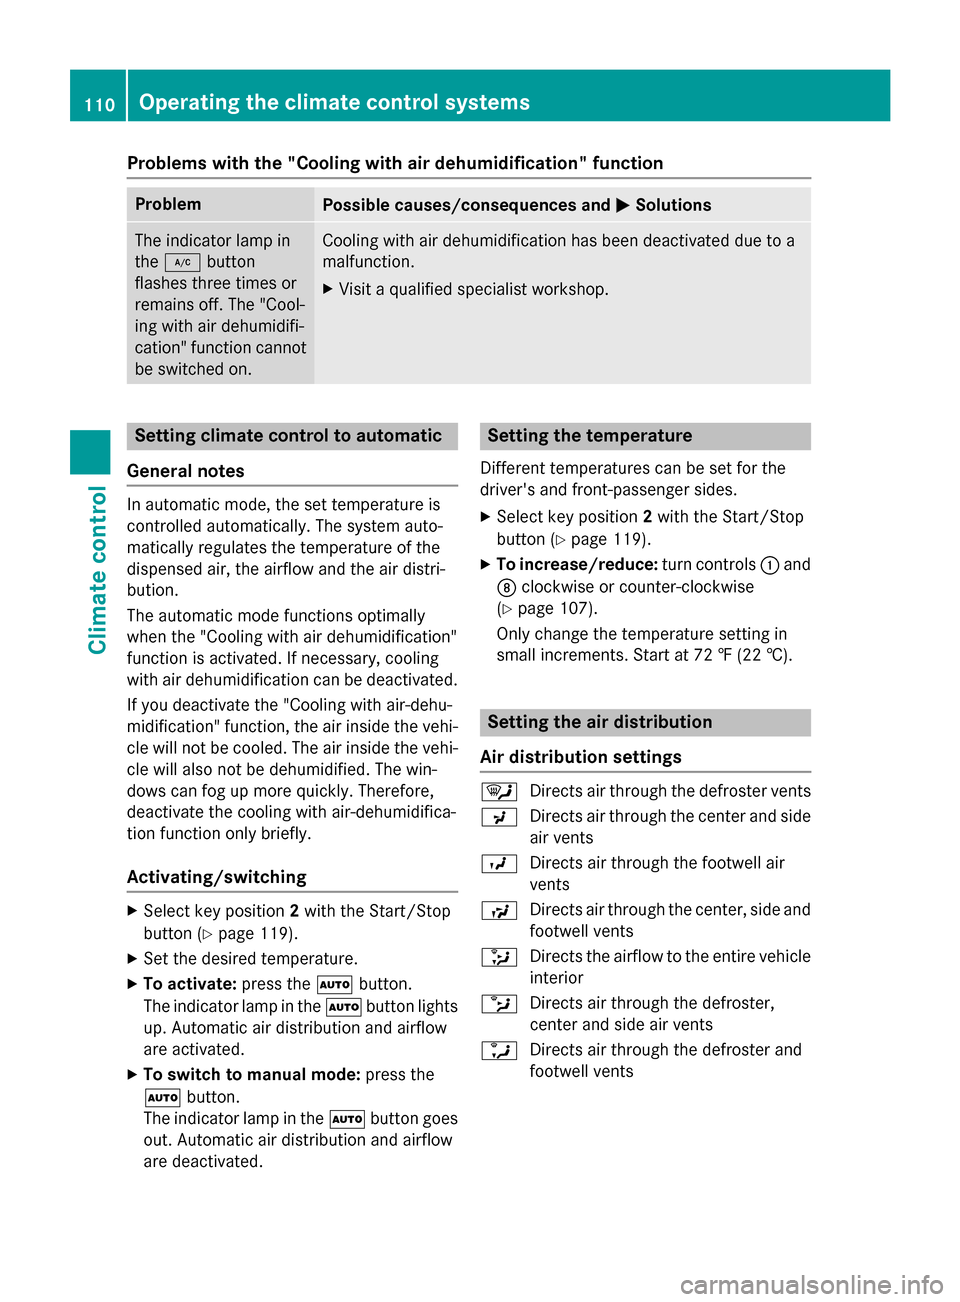
Problems with the "Cooling with air dehumidification" function
Problem
Possible causes/consequences and
0050
0050Solutions The indicator lamp in
the
005A button
flashes three times or
remains off. The "Cool-
ing with air dehumidifi-
cation" function cannot
be switched on. Cooling with air dehumidification has been deactivated due to a
malfunction.
X Visit aqualified specialist workshop. Setting climate control to automatic
General notes In automatic mode, the set temperature is
controlled automatically. The system auto-
matically regulates the temperature of the
dispensed air, the airflow and the air distri-
bution.
The automatic mode functions optimally
when the "Cooling with air dehumidification"
function is activated. If necessary, cooling
with air dehumidification can be deactivated.
If you deactivate the "Cooling with air-dehu-
midification" function, the air inside the vehi- cle will not be cooled. The air inside the vehi-
cle will also not be dehumidified. The win-
dows can fog up more quickly. Therefore,
deactivate the cooling with air-dehumidifica-
tion function only briefly.
Activating/switching X
Select key position 2with the Start/Stop
button (Y page 119).
X Set the desired temperature.
X To activate: press the0058button.
The indicator lamp in the 0058button lights
up. Automatic air distribution and airflow
are activated.
X To switch to manualm ode:press the
0058 button.
The indicator lamp in the 0058button goes
out. Automatic air distribution and airflow
are deactivated. Setting the temperature
Differentt emperatures can be set for the
driver's and front-passenger sides.
X Select key position 2with the Start/Stop
button (Y page 119).
X To increase/reduce: turn controls0043and
006C clockwise or counter-clockwise
(Y page 107).
Only change the temperature settingin
small increments. Start at 72 ‡(22 †). Setting the air distribution
Air distribution settings 0061
Directsa ir through the defroster vents
009C Directsa ir through the center and side
air vents
009B Directsa ir through the footwell air
vents
009F Directsa ir through the center, side and
footwell vents
008F Directst he airflow to the entire vehicle
interior
0087 Directsa ir through the defroster,
center and side air vents
0086 Directsa ir through the defroster and
footwell vents 110
Operating the climate control systemsClimatec
ontrol
Page 113 of 290
Setting the air distribution
X
Select key position 2with the Start/Stop
button (Y page 119).
X Press the 008Fbutton repeatedly until the
desired symbol appears in the display.
The indicator lamp in the 0058button goes
out. Automatic control is deactivated and
the air distribution is controlled according
to the selected setting. Setting the airflow
X Select key position 2with the Start/Stop
button (Y page 119).
X To increase/reduce: press the0097or
0095 button. Switching the mono function on/off
The MONO function is only available in vehi-
cles for Canada.
You can use the MONO function to adopt the temperature and air distribution settings on
the driver's side for the front-passenger side.
X Press the 005Bbutton.
The indicator lamp in the 005Bbutton lights
up or goes out. Defrosting the windshield
i You should only select the "Windshield
defrosting" function until the windshield is
clear again.
X Select key position 2with the Start/Stop
button (Y page 119).
X To activate: press the0064button.
The indicator lamp in the 0064button lights
up.
The system automatically switches to the
following functions:
R high airflow
R high temperature R
air distribution to the windshield and
front side windows
R air-recirculation mode off
X To deactivate: press the0064button.
The indicator lamp in the 0064button goes
out. The previously selected settings are
restored. Air-recirculation mode remains
deactivated.
or X Press the 0058button.
The indicator lamp in the 0064button goes
out. Airflow and air distribution are set to
automatic mode.
or
X Turn controls 0043or006C clockwise or coun-
ter-clockwise (Y page 107).
or
X Press the 0097or0095 button. Switching maximum cooling on/off
The MAX COOL function is only available in
vehicles for the USA.
MAX COOL is only operational when the
engine is running.
When you activate MAX COOL, climate
control switches to the following functions:
R maximum cooling
R maximum airflow
R air-recirculation mode on
X To activate: press the00C9button.
The indicator lamp in the button lights up.
X To deactivate: press the00C9button
again.
The indicator lamp in the button goes out.
The previously selected settings come into
effect again.
i To deactivate MAX COOL press the
0078,
0058,or 0064button. Operating the climate control systems
111Climatecontrol
Page 114 of 290
Defrosting th
ewindows
Windows fogged up on th einside X
Activat ethe "Coolin gwitha ir dehumidifi-
cation "function 005A.
X Activat eautomatic mode 0058.
X If th ewindows continue to fo gup, activate
th e" Windshield defrosting" function 0064.
Windows fogged up on th eoutside X
Activat ethe windshield wipers.
X Press the 008Fbuttonrepeatedly until the
009B or009C symbol appears in th edis-
play.
i You should only selec
tthiss etting until
th ew indshield is clear again. Rea
rwindow defroster
General notes The rea
rwindow defroster has ahighc urrent
draw. You should therefore switch it of fas
soo nast herea rwindow is clear .Otherwise,
th er earw indow defroster switches of fauto-
matically after severa lminutes.
If th ebattery voltage is to olow, th erearw in-
dow defroster may switch off.
Activating/deactivating X
Selec tkey position 2wit hthe Start/Stop
butto n(Ypage 119).
X Press the 006Cbutton.
The indicator lamp in the 006Cbuttonlights
up or goe sout. 112
Operating th
eclimat econt rol systemsClimat econt rol
Page 115 of 290
Problems with the rear window defroster
Problem
Possible causes/consequences and
0050
0050Solutions The rear window
defroster has deacti-
vated prematurely or
cannot be activated. The on-board voltage is too low because too many electrical con-
sumers are switched on.
X Switch off any consumers that are not required, e.g. reading
lamps, interior lighting or the seat heating.
When the battery is sufficiently charged, the rear window
defroster can be activated again. Activating/deactivating air-recircula-
tion mode
General notes You can deactivate the flow of fresh air if
unpleasant odors are enteringt
he vehicle
from outside. The air already inside the vehi-
cle will then be recirculated.
If you switch on air-recirculation mode, the
windows can fog up more quickly, in particu-
lar at low temperatures. Only use air-recircu-
lation mode briefly to prevent the windows
from fogging up.
Activating/deactivating X
Select key position 2with the Start/Stop
button (Y page 119).
X To activate: press the0072button.
The indicator lamp in the 0072button lights
up.
i Air-recirculation mode is activated auto-
matically at high outside temperatures.
When air-recirculation mode is activated
automatically, the indicator lamp in the
0072 button is not lit.
Outside air is added after about 30
minutes.
X To deactivate: press the0072button.
The indicator lamp in the 0072button goes
out. i
Air-recirculation mode deactivates auto-
matically:
R after approximately five minutes at out-
side temperatures below approximately
41 ‡(5†)
R after approximately five minutes if cool-
ing with air dehumidification is deacti-
vated
R after approximately 30 minutes at out-
side temperatures above approximately
41 ‡(5†)ift he "Cooling with air dehu-
midification" function is activated Setting the air vents
Important safety notes
G
WARNING
Very hot or very cold air can flow from the air vents. This could result in burns or frostbitein the immediate vicinity of the air vents. There
is ar isk of injury.
Make sure that all vehicle occupants always
maintain asufficient distance to the air out-
lets. If necessary, redirect the airflow to
another area of the vehicle interior. Setting the air vents
113Climatecontrol Z
Page 116 of 290
In order to ensure the direct flow of fresh air
through the air vents into the vehicle interior, please observe the following notes:
R keep the air inlet on the right-hand side of
the hood free of blockages, such as ice,
snow or leaves.
R never cover the air vents or air intake grilles
in the vehicle interior.
i For virtually draft-free ventilation, adjust
the sliders of the air vents to the center
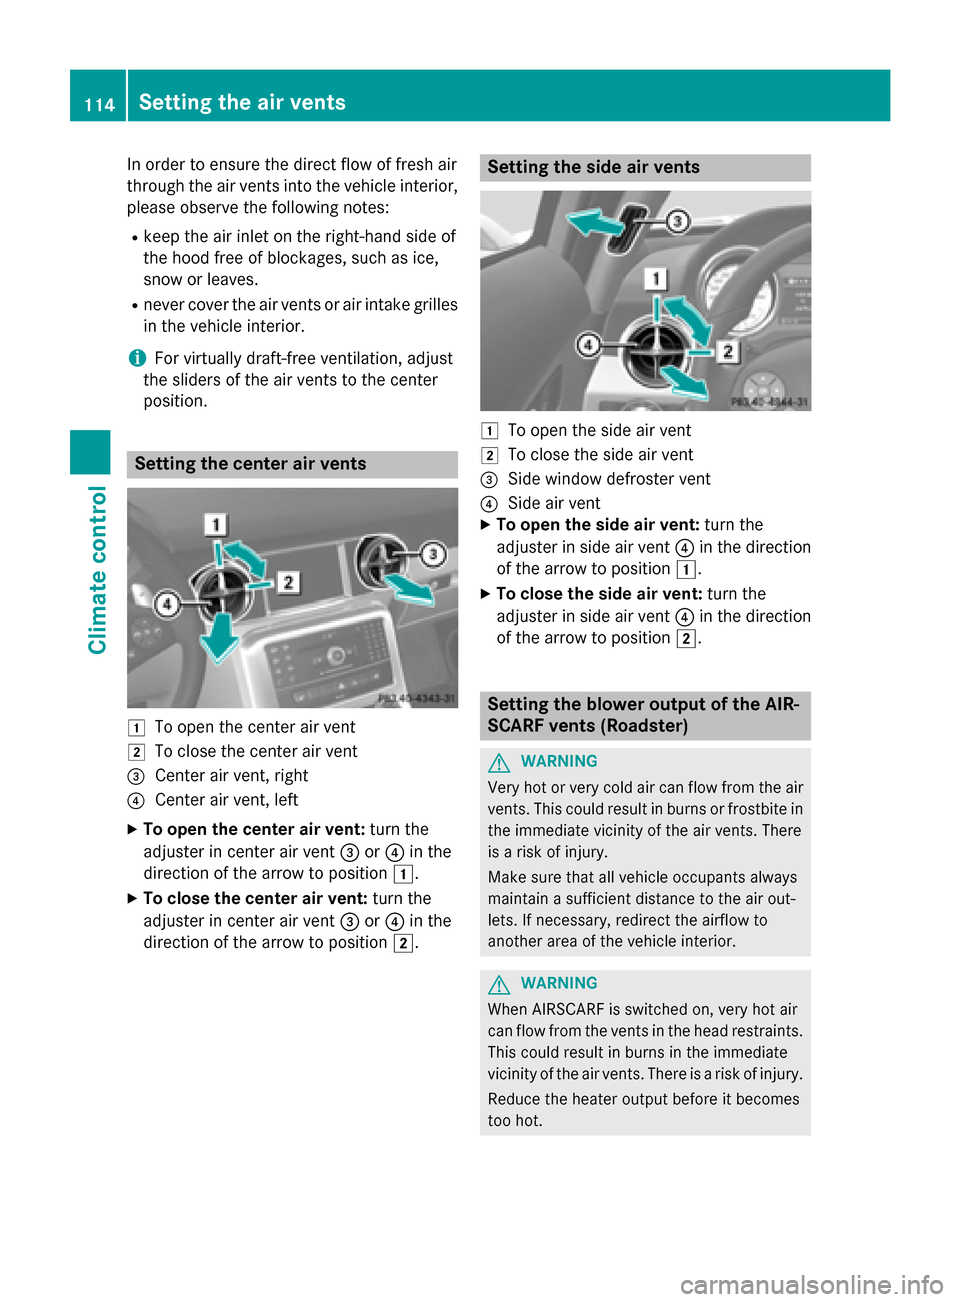
position. Setting the center air vents
0047
To open the center air vent
0048 To close the center air vent
0087 Center air vent, right
0085 Center air vent, left
X To open the center air vent: turn the
adjuster in center air vent 0087or0085 in the
direction of the arrow to position 0047.
X To close the center air vent: turn the
adjuster in center air vent 0087or0085 in the
direction of the arrow to position 0048. Setting the side air vents
0047
To open the side air vent
0048 To close the side air vent
0087 Side window defroster vent
0085 Side air vent
X To open the side air vent: turn the
adjuster in side air vent 0085in the direction
of the arrow to position 0047.
X To close the side air vent: turn the
adjuster in side air vent 0085in the direction
of the arrow to position 0048. Setting the blowero
utput of the AIR-
SCARF vents (Roadster) G
WARNING
Very hot or very cold air can flow from the air vents. This could resultinb urns or frostbite in
the immediate vicinity of the air vents. There
is ar isk of injury.
Make sure that all vehicle occupants always
maintain asufficient distance to the air out-
lets. If necessary ,redirect the airflow to
another area of the vehicle interior. G
WARNING
When AIRSCARF is switched on, very hot air
can flow from the vents in the head restraints. This could resultinb urns in the immediate
vicinity of the air vents. There is arisk of injury.
Reduce the heater outputb efore it becomes
too hot. 114
Setting the air ventsClimate control
Page 117 of 290
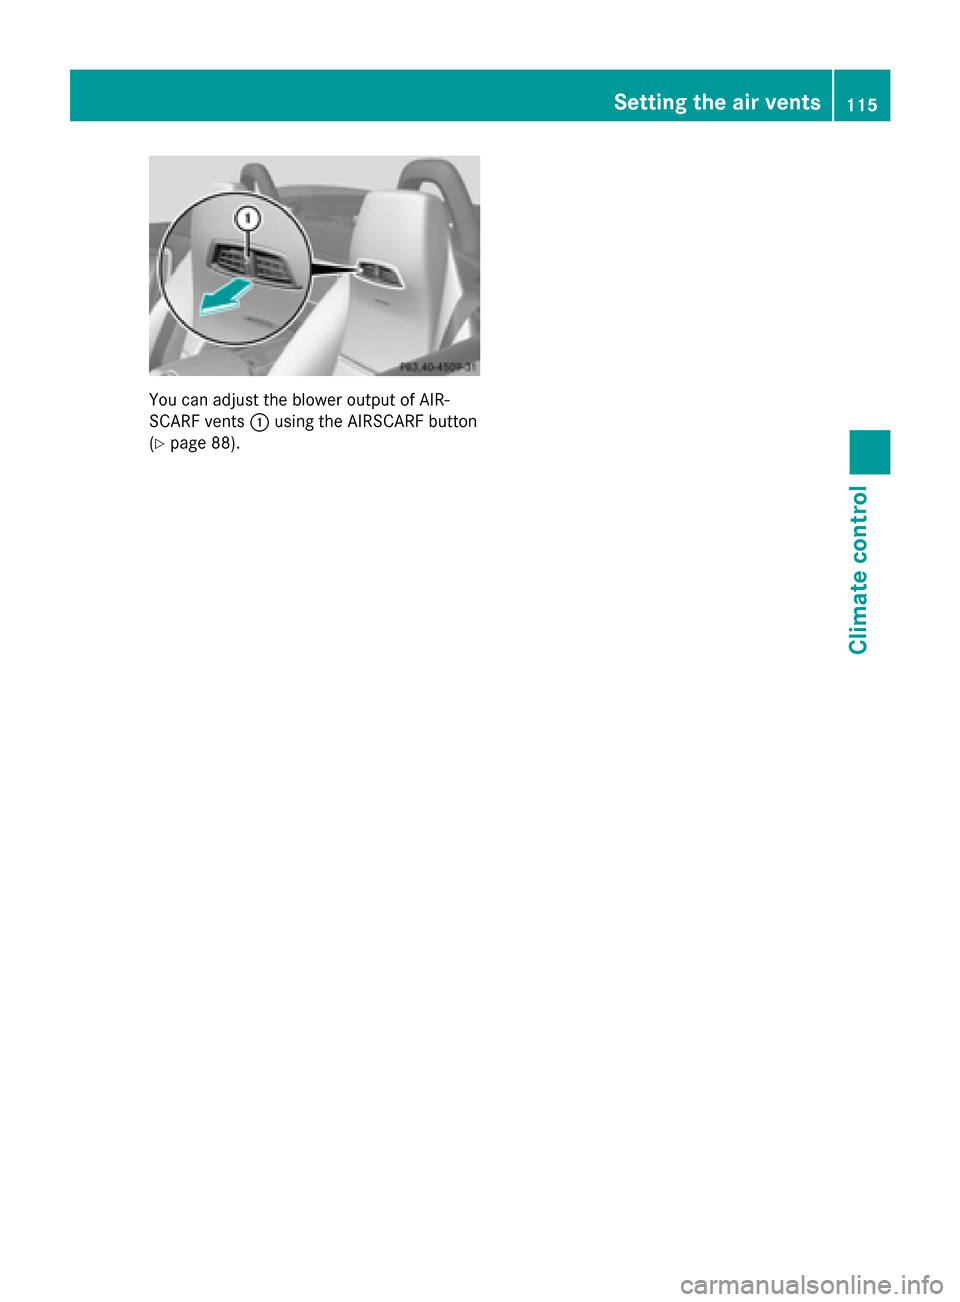
You can adjust the blower output of AIR-
SCARF vents 0043using the AIRSCARF button
(Y page 88). Setting thea
ir vents
115Climate control Z
Page 118 of 290

116
Page 119 of 290
Useful information
............................118
Notes on breaking-in anew vehicle ..118
Driving ............................................... 118
AMG SPEEDSHIFT DCT 7-speed
sports transmission .........................121
AMG button (SETUP) .........................128
Refueling ............................................ 128
Parking ............................................... 131
Driving tips ........................................ 134
Driving systems ................................ 138 117Driving and parking
Page 120 of 290
Useful information
i This Operator's Manual describes all
models and all standard and optional equip- ment of your vehicle available at the time of
publication of the Operator's Manual.
Country-specific differences are possible.
Please not ethat your vehicle may not be
equipped with all feature sdescribed. This
also applies to safety-related system sand
functions.
i Please read the information on qualified
specialist workshops (Y page 23).Notes on breaking-in
anew vehicle Important safet
ynotes
New brake pads/linings only reach their opti-
mum brakin geffec tafter several hundred
kilometers of driving. Until that time, you may
need to use increased brake pedal pressure
while braking. This also applies after the
brake discs or the brake pads/linings have
been replaced. The first 1000 miles (1500 km)
The more you look after the engin ewhen it is
new, the more satisfied you will be with its
performanc einthe future.
R You should therefore drive at varying vehi-
cle and engin espeeds for the first
1,00 0miles (1,50 0km).
R Do not drive faster than 85 mph
(140 km/h) for the first 1,00 0miles
(1,50 0km).
R Only allow the engin etoreach amaximum
engin espeed of 4,50 0rpm briefly.
R Avoid heavy loads, e.g. drivin gatfull throt-
tle, during this period. Do not exceed 00C3of
the maximum permitted engin espeed for
each gear.
R Selec tthe manual drive program Min good
time. R
Do not carry out aRACE START.
R Do not manually shift to alower gear to
brake the vehicle.
R Try to avoid depressin gthe accelerator
pedal beyond the point of resistance (kick-
down).
R Only select the shift range limits 3,2or 1
when drivin gslowly, e.g. in mountainous
terrain.
After 1,00 0miles (1,500 km), you can
increase the engin espeed gradually and bring
the vehicle to full speed.
i You should also observ
ethes ebreaking-
in notes if your vehicle' sengin eort rans-
mission has been replaced.
i Always observ
ethe respective speed lim-
its. Driving
Important safet
ynotes G
WARNING
Objects in the driver's footwell can restrict the pedal travel or obstruct adepressed pedal.
The operatin gand road safet yofthe vehicle is
jeopardized. There is arisk of an accident.
Make sure that all objects in the vehicle are
stowed correctly, and that they cannot enter
the driver' sfootwell. Install the floormats
securely and as specified in order to ensure
sufficient clearance for the pedals. Do not use loose floormats and do not place floormats on
top of one another. G
WARNING
If you switc hoff the ignition while driving,
safety-relevant function sare only available
with limitations, or not at all. This could affect, for example, the power steering and the brake
boosting effect. You will require considerably
more effor ttosteer and brake. There is arisk
of an accident.
Do not switc hoff the ignition while driving. 118
DrivingDriving and parking