check engine MERCEDES-BENZ SPRINTER 2017 MY17 Operator’s Manual
[x] Cancel search | Manufacturer: MERCEDES-BENZ, Model Year: 2017, Model line: SPRINTER, Model: MERCEDES-BENZ SPRINTER 2017Pages: 286, PDF Size: 4.36 MB
Page 29 of 286
When driving off road or on unpaved roads,
check the vehicle's underside regularly. In
particular, remove parts of plants or other
flammable materials which have become
trapped. In the case of damage, contact a
qualified specialist workshop.
Have the vehicle checked and repaired immedi-
ately at a qualified specialist workshop. If you
become aware when continuing the journey that
driving safety has been effected, stop as soon as
possible in accordance with the traffic condi-
tions. In such cases, consult a qualified special- ist workshop.
Declaration of conformity
Radio-based vehicle components
USA: "The wireless devices of this vehicle com-
ply with Part 15 of the FCC Rules. Operation is
subject to the following two conditions: 1) These
devices may not cause harmful interference. 2.
This device must accept any interference
received, including interference that may cause
undesired operation. Changes or modifications
not expressly approved by the party responsible
for compliance could void the user’s authority to
operate the equipment."
Canada: "The wireless devices of this vehicle
comply with Industry Canada license-exempt
RSS standard(s). Operation is subject to the fol-
lowing two conditions: 1) These devices may not
cause interference, and 2) these devices must
accept any interference received, including
interference that may cause undesired opera-
tion of the device".
Diagnostics connection
The diagnostics connection is only intended for the connection of diagnostic equipment at a
qualified specialist workshop.
GWARNING
If you connect equipment to a diagnostics
connection in the vehicle, it may affect the
operation of vehicle systems. As a result, the
operating safety of the vehicle could be affec-
ted. There is a risk of an accident.
Only connect equipment to a diagnostics con-
nection in the vehicle, which is approved for
your vehicle by Mercedes-Benz.
Changing the engine power output
!
Increases in engine power can:
Rchange the emission values
Rcause malfunctions
Rcause consequential damage
The operating reliability of the engine is not
guaranteed in all cases.
Any tampering with the engine management
system in order to increase the engine power
output will lead to the loss of the New Vehicle
Limited Warranty and other warranty entitle-
ments.
If you sell the vehicle, inform the purchaser
about the changes to the engine power output of
the vehicle. If you do not inform the buyer, this
may constitute a punishable offense under
national legislation.
Qualified specialist workshops
An authorized Sprinter Dealer is a qualified spe-
cialist workshop.
A qualified specialist workshop has the neces-
sary specialist knowledge, tools and qualifica-
tions to correctly carry out the work required on
the vehicle.
This is especially the case for work relevant to
safety. Observe the notes in the Maintenance or
Service Booklet.
The following work should always be carried out
at qualified specialist workshop:
Rwork relevant to safety
Rservice and maintenance work
Rrepair work
Rmodifications as well as installations and
alterations
Rwork on electronic components
For this reason, we recommend an authorized
Sprinter Dealer.
!Only have work carried out on the engine
electronics and its associated parts, such as
control units, sensors, actuating components
and connector leads, at a qualified specialist
Introduction27
Z
Page 42 of 286
Useful information
This Operator's Manual describes all models as
well as standard and optional equipment of your
vehicle that were available at the time of going
to print. Country-specific variations are possi-
ble. Note that your vehicle may not be equipped
with all of the described functions. This also
applies to systems and functions relevant to
safety.
Read the information on qualified specialist
workshops (
Ypage 27).
Occupant safety
Restraint system introduction
The restraint system can reduce the risk of vehi-cle occupants coming into contact with parts of
the vehicle's interior in the event of an accident.
The restraint system can also reduce the forces to which vehicle occupants are subjected during
an accident.
The restraint system comprises:
RSeat belt system
RAir bags
RChild restraint system
RChild seat securing systems
The components of the restraint system work in
conjunction with each other. They can only
deploy their protective function if, at all times, all
vehicle occupants:
Rhave fastened their seat belts correctly
(Ypage 42)
Rhave the seat and head restraint adjusted
properly (Ypage 72)
As the driver, you also have to make sure that
the steering wheel is adjusted correctly.
Observe the information relating to the correct
driver's seat position (
Ypage 72).
You also have to make sure that an air bag can
inflate properly if deployed (
Ypage 44).
An air bag supplements a correctly worn seat
belt. As an additional safety device, the air bag
increases the level of protection for vehicle
occupants in the event of an accident. For exam-
ple, if, in the event of an accident, the protection
offered by the seat belt is sufficient, the air bags are not deployed. When an accident occurs, only
the air bags that increase protection in that par-
ticular accident situation are deployed. How- ever, seat belts and air bags generally do not
protect against objects penetrating the vehicle
from the outside.
Information on restraint system operation can
be found under "Triggering of the Emergency
Tensioning Devices and air bags" (
Ypage 46).
See "Children in the vehicle" for information on
children traveling with you in the vehicle as well
as on child restraint systems (
Ypage 47).
Important safety notes
GWARNING
Modifications to the restraint system may
cause it to no longer work as intended. The
restraint system may then not perform its
intended protective function and may fail in an
accident or trigger unexpectedly, for example.
This poses an increased risk of injury or even fatal injury.
Never modify parts of the restraint system.
Never tamper with the wiring, the electronic
components or their software.
If it is necessary to modify components of the
restraint system to accommodate a person with
disabilities, contact an authorized Sprinter
dealer for details. USA only: contact our Cus-
tomer Assistance Center at 1‑ 877‑762‑ 8267 for
details.
Restraint system warning lamp
The functions of the restraint system are
checked after the ignition is switched on and at regular intervals while the engine is running.
Therefore, malfunctions can be detected in
good time.
The 6 restraint system warning lamp on the
instrument cluster lights up when the ignition is
switched on. It goes out no later than a few sec-
onds after the vehicle is started. The compo-
nents of the restraint system are in operational
readiness.
40Occupant safety
Safety
Page 43 of 286
A malfunction has occurred if the6restraint
system warning lamp:
Rdoes not light up after the ignition is switched
on
Rdoes not go out after a few seconds
Rgoes out but then lights up again while the
engine is running, for example
GWARNING
If the restraint system is malfunctioning,
restraint system components may be trig-
gered unintentionally or may not deploy as
intended during an accident. This can affect
for example the Emergency Tensioning
Device or the air bag. This poses an increased
risk of injury or even fatal injury.
Have the restraint system checked and
repaired in a qualified specialist workshop as
soon as possible.
Seat belts
Introduction
Seat belts are the most effective means of
restricting the movement of vehicle occupants
in the event of an accident or the vehicle rolling
over. This reduces the risk of vehicle occupants coming into contact with parts of the vehicle
interior or being ejected from the vehicle. Fur-
thermore, the seat belt helps to keep the vehicle
occupant in the best position in relation to the
air bag.
The seat belt system comprises:
RSeat belts
REmergency Tensioning Devices for the front
seat belts
The seat belt system also includes a belt force
limiter for the relevant seat if the vehicle is
equipped with a front air bag.
On vehicles with a front-passenger bench
seat, only the seat belt of the outer front-
passenger seat has a belt force limiter.
The seat belt system does not include an Emer- gency Tensioning Device and a belt force limiter
if the vehicle does not have a driver's air bag.
If the seat belt is pulled out of the belt outlet
quickly or with a jerky movement, the belt
retractor locks. The belt strap cannot be extrac-
ted any further. The Emergency Tensioning Device tightens the
seat belt in an accident, pulling the belt close
against the body. However it does not pull the
vehicle
occup
ant back in the direction of the
backrest.
The Emergency Tensioning Device does not cor-
rect an incorrect seat position or the routing of
an incorrectly fastened seat belt.
When triggered, a belt force limiter helps to
reduce the force exerted by the seat belt on the
vehicle occupant.
The belt force limiters are synchronized with the
front air bags which absorb part of the deceler-
ation force. This can reduce the force exerted on
the vehicle occupants during an accident.
The Emergency Tensioning Device of the front-
passenger seat is triggered independently of the
lock status of the seat belt.
Important safety notes
The use of seat belts and child restraint systems
is required by law in:
Rall 50 states
Rthe U.S. territories
Rthe District of Columbia
Rall Canadian provinces
Even where this is not required by law, all vehicle
occupants should correctly fasten their seat
belts before starting the journey.
GWARNING
If the seat belt is not worn correctly, it cannot
perform its intended protective function. An
incorrectly fastened seat belt can also cause
injuries, for example, in the event of an acci-
dent or when braking or changing direction
abruptly. This poses an increased risk of injury
or even fatal injury.
Always ensure that all vehicle occupants have
their seat belts fastened correctly and are sit-
ting properly.
GWARNING
The seat belt does not offer the intended level of protection if you have not moved the back-
rest to an almost vertical position. When brak-
ing or in the event of an accident, you could
slide underneath the seat belt and sustain
abdomen or neck injuries, for example. This
Occupant safety41
Safety
Z
Page 55 of 286
As a result, they could:
Ractivate vehicle equipment and become
trapped, for example
Ractivate or deactivate systems, thereby
endangering other road users
Unsecured animals could also be flung around
the vehicle in the event of an accident or sud-
den steering or braking, thereby injuring vehi- cle occupants. There is a risk of an accident
and injury.
Never leave animals unattended in the vehi-
cle. Always secure animals properly during
the journey, e.g. use a suitable animal trans-
port box.
Driving safety systems
Overview
In this section, you will find information about
the following driving safety systems:
RABS ( Anti-lock Braking System)
RASR (Acceleration SkidControl)
RBAS ( Brake Assist System)
REBD ( Electronic Brake Force Distribution)
RESP®(E lectronic StabilityProgram)
Important safety notes
If you fail to adapt your driving style or if you are
inattentive, the driving safety systems can nei-
ther reduce the risk of accident nor override the
laws of physics. Driving safety systems are
merely aids designed to assist driving. You are
responsible for the distance to the vehicle in
front, for vehicle speed, braking in good time
and for staying in your lane. Always adapt your
driving style to the prevailing road and weather
conditions and maintain a sufficient, safe dis-
tance from other road users. Drive carefully.
Please note that the driving safety systems
described only work optimally when:
Rthere is adequate contact between the tires
and the road surface
Ryou use winter tires (M+S tires), with snow
chains if necessary, when the road conditions
are wintry Pay particular attention to the information
regarding tires, tire tread and winter operation
under "Wheels and tires" (
Ypage 243).
ABS (Anti-lock Braking System)
Important safety notes
Observe the important safety guidelines for the
driving safety system (Ypage 53).
GWARNING
If ABS is faulty, the wheels could lock when
braking. The steerability and braking charac-
teristics may be severely impaired. Addition-
ally, further driving safety systems are deac-
tivated. There is an increased danger of skid-
ding and accidents.
Drive on carefully. Have ABS checked imme-
diately at a qualified specialist workshop.
If ABS is malfunctioning, other systems will also
fail, including driving safety systems. Observe
the information relating to the !warning
lamp (
Ypage 191).
ABS regulates brake pressure in such a way that
the wheels do not lock when you brake. This
allows you to continue steering the vehicle when
braking.
ABS works from a speed of about 5 mph
(8 km/h), regardless of road-surface conditions. ABS works on slippery surfaces, even when you
only brake gently.
The yellow !warning lamp in the instrument
cluster lights up when the ignition is switched
on. The lamp goes out when the engine starts
running.
Braking
If ABS intervenes when braking, you will feel a
pulsating in the brake pedal.
The pulsating brake pedal can be an indication
of hazardous road conditions and functions as a
reminder to take extra care while driving.
XIf ABS intervenes: continue to depress the
brake pedal with force until the braking sit-
uation is over.
XTo make a full brake application: depress
the brake pedal with full force.
Driving safety systems53
Safety
Z
Page 57 of 286
In an emergency braking situation, depress
the brake pedal with full force. ABS prevents
the wheels from locking.
Vehicles without steering wheel buttons: if the
BAS driving safety system is malfunctioning,
the : warning lamp lights up while the
engine is running (
Ypage 191).
BAS operates in emergency braking situations.
If you depress the brake quickly, BAS automat-
ically increases the brake pressure, thereby
reducing the stopping distance.
The brakes will function as usual once you
release the brake pedal. BAS is deactivated.
EBD (electronic brake force distribu-
tion)
GWARNING
If EBD is malfunctioning, the rear wheels can
lock, e.g. under full braking. This increases the
risk of skidding and an accident.
You should therefore adapt your driving style
to the different handling characteristics. Have
the brake system checked at a qualified spe-
cialist workshop.
EBD monitors and controls the brake pressure
to the rear wheels. This enables EBD to improve
handling during braking.
Observe the information on warning and indica-
tor lamps (
Ypage 191).
ESP®(Electronic Stability Program)
Important safety notes
GWARNING
If ESP
®is malfunctioning it will not provide
any vehicle stabilization. There is an increased
risk of skidding or of an accident.
Exercise caution when continuing to drive.
Have ESP
®checked at a qualified specialist
workshop.
!Do not run the vehicle on a roller dynamom-
eter (e.g. for performance tests). If you must
operate the vehicle on a roller dynamometer, please consult a qualified specialist workshop
in advance. You could otherwise damage the
drive train or the brake system.
If you activate or deactivate the all-wheel drive
in a vehicle with this option, ESP
®will be deac-
tivated for the duration of the activation/deac-
tivation process.
If ESP
®is malfunctioning, the hindicator
lamp lights up while the engine is running and
the engine power may be reduced
(
Ypage 190).
iOnly use wheels with the recommended tire
sizes. Only then will ESP®function properly.
4ETS (Electronic Traction System)
!A function or performance test should only
be carried out on a two-axle dynamometer.
Before you operate the vehicle on such a
dynamometer, please consult a qualified
workshop. You could otherwise damage the
drive train or the brake system.
4ETS is only active when all-wheel drive is acti-
vated (
Ypage 145).
4ETS ensures permanent drive for all four
wheels, and together with ESP
®it improves the
vehicle's traction.
If a driven wheel spins due to lack of traction:
RWhen pulling away, make use of the traction
control integrated in ESP®. Depress the
accelerator pedal as far as necessary.
RWhile driving, slowly take your foot off the
accelerator pedal.
In wintry driving conditions, always use winter
tires (M+S tires) and if necessary, snow chains
(
Ypage 246). This is the only way to get the full
benefit from the all-wheel drive system.
Crosswind Assist
Crosswind Assist does not work if ESP®is deac-
tivated or disabled because of a malfunction.
Crosswind Assist does not react:
Rin the event of severe jolts and vibrations, e.g.
as a result of uneven surfaces or potholes.
Rif the vehicle loses traction, e.g. on snow or
ice or when hydroplaning.
Rto large and sudden steering movements by
the driver.
Driving safety systems55
Safety
Z
Page 61 of 286
Useful information
This Operator's Manual describes all models as
well as standard and optional equipment of your
vehicle that were available at the time of going
to print. Country-specific variations are possi-
ble. Note that your vehicle may not be equipped
with all of the described functions. This also
applies to systems and functions relevant to
safety.
Read the information on qualified specialist
workshops (
Ypage 27).
Key
Important safety notes
GWARNING
When the double locks are activated, the
doors can no longer be opened from the
inside. People in the vehicle can no longer get
out, e.g. in hazardous situations. There is a
risk of injury.
Therefore, do not leave any people unsuper-
vised in the vehicle, particularly children, eld-
erly people or people in need of special assis-
tance. Do not activate the double lock when
people are in the vehicle.
GWARNING
If you leave children unsupervised in the vehi-
cle, they could set it in motion by, for example:
Rrelease the parking brake.
Rshift the automatic transmission out of park
position Por shift manual transmission into
neutral.
Rstart the engine.
In addition, they may operate vehicle equip-
ment and become trapped. There is a risk of
an accident and injury.
When leaving the vehicle, always take the
SmartKey with you and lock the vehicle. Never
leave children unsupervised in the vehicle.
GWARNING
If you attach heavy or large objects to the
SmartKey, the SmartKey could be uninten-
tionally turned in the ignition lock. This could
cause the engine to be switched off. There is a risk of an accident.
Do not attach any heavy or large objects to the
SmartKey. Remove any bulky key rings before
inserting the SmartKey into the ignition lock.
Do not keep the key with remote control:
Rwith electronic devices, e.g. a mobile phone
or another key with remote control
Rwith metallic objects, e.g. coins or metal foil
Rin metallic objects, e.g. metal cases
This can affect the key's functionality.
Key functions of the remote control
General notes
The vehicle is equipped with either 2 or 4 remote
controls with a folding key, or 4 mechanical
keys. In this Operator's Manual, both the
mechanical keys and the keys with remote con-
trol are referred to as keys. The remote control
key has a range of up to 32 ft (10 m). Use the
remote control of the key only when in immedi-
ate proximity of the vehicle. This prevents theft.
Remote controls that are not included in the
scope of delivery for the vehicle must be pro-
grammed before use. Further information can
be obtained at any authorized Sprinter Dealer.
The key's remote control locks/unlocks the
driver's door and/or the following centrally if
the factory settings have not been changed:
Rthe driver's and the front-passenger door
Rthe sliding doors
Rthe rear doors
iIf the driver's or front-passenger door is not
closed, the corresponding door is not locked.
If a sliding door or a rear door is not closed
properly, none of the rear doors are locked.
If there is a key is in the ignition lock, the remote
control is inoperative. When locking or unlock-
ing the vehicle with the remote control, always
pay attention to the indicator lamp signaling.
Also check the locking knobs of the doors.
Key59
Opening and closing
Z
Page 65 of 286
ProblemPossible causes/consequences andMSolutions
The engine cannot be
started using the key.The on-board voltage is too low.
XSwitch off all non-essential consumers, such as interior lighting, and
try to start the engine again.
If this does not work:
XCheck the starter battery and charge it if necessary (Ypage 228).
or
XJump-start the vehicle (Ypage 238).
or
XConsult a qualified specialist workshop.
You have lost a key.XHave the key deactivated at a qualified specialist workshop.
XReport the loss immediately to the vehicle insurers.
XIf necessary, have the mechanical locks replaced.
Central locking
Important safety notes
GWARNING
If children are left unsupervised in the vehicle,
they could:
Ropen the doors, thus endangering other
people or road users.
Rget out and disrupt traffic.
Roperate the vehicle's equipment.
Additionally, children could set the vehicle in
motion if, for example, they:
Rrelease the parking brake.
Rshifting the automatic transmission out of
park position P
RStart the engine.
There is a risk of an accident and injury.
When leaving the vehicle, always take the
SmartKey with you and lock the vehicle. Never
leave children or animals unattended in the
vehicle. Always keep the SmartKey out of
reach of children.
GWARNING
If persons, particularly children are subjected to prolonged exposure to extreme heat or
cold, there is a risk of injury, possibly even
fatal. Never leave children unattended in the
vehicle.
You can open a locked front door from the inside
at any time. You can open a locked sliding door
or rear door from the inside if it has been previ-
ously unlocked from inside.
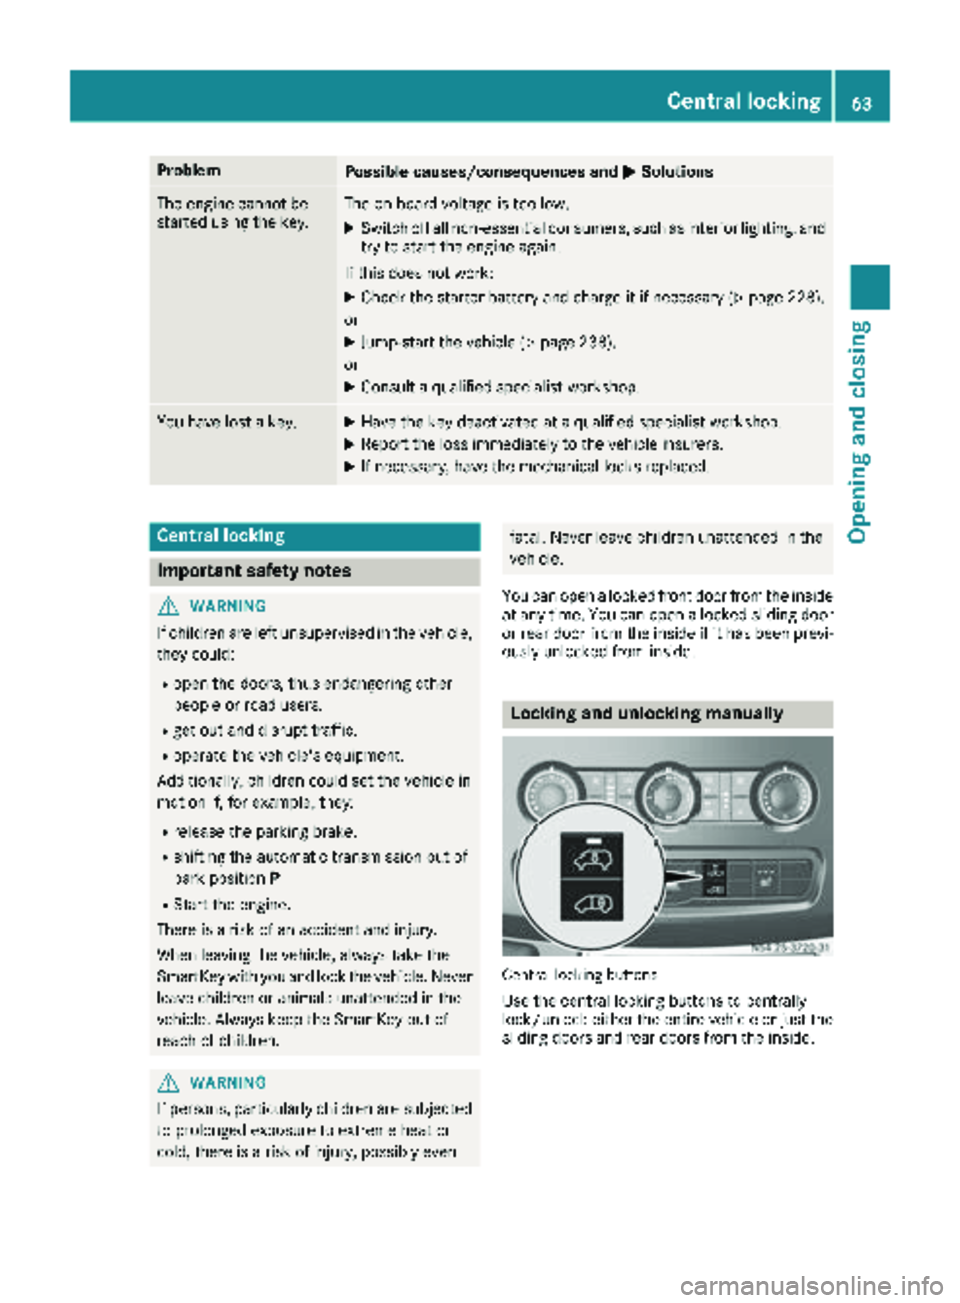
Locking and unlocking manually
Central locking buttons
Use the central locking buttons to centrally
lock/unlock either the entire vehicle or just the sliding doors and rear doors from the inside.
Central locking63
Opening and closing
Z
Page 82 of 286
Useful information
This Operator's Manual describes all models as
well as standard and optional equipment of your
vehicle that were available at the time of going
to print. Country-specific variations are possi-
ble. Note that your vehicle may not be equipped
with all of the described functions. This also
applies to systems and functions relevant to
safety.
Read the information on qualified specialist
workshops (
Ypage 27).
Exterior lighting
Important safety notes
For reasons of safety, we recommend that you
drive with the lights switched on even during the
daytime. There may be differences in operation
due to legal requirements and voluntary recom-
mendations in some countries.
Bulb failure indicator
The bulb failure indicator is only an aid. You are
responsible for the proper functioning of the
vehicle lighting. Insufficient or non-functioning
vehicle lighting puts the operating safety of the
vehicle at risk.
For this reason, check the condition and func-
tion of your vehicle's lighting system and, if nec-
essary, that of the trailer before each journey.
The bulb failure indicator monitors all of the
exterior lighting lamps, except the perimeter
lamp and the trailer lighting. If a bulb fails, either
the b(
Ypage 34) indicator lamp lights up, or
you will see a corresponding message in the
display (
Ypage 182).
iDepending on the equipment, the bulb fail-
ure indicator can fail for all lamps with the
exception of the turn signal lamps.
Light switch
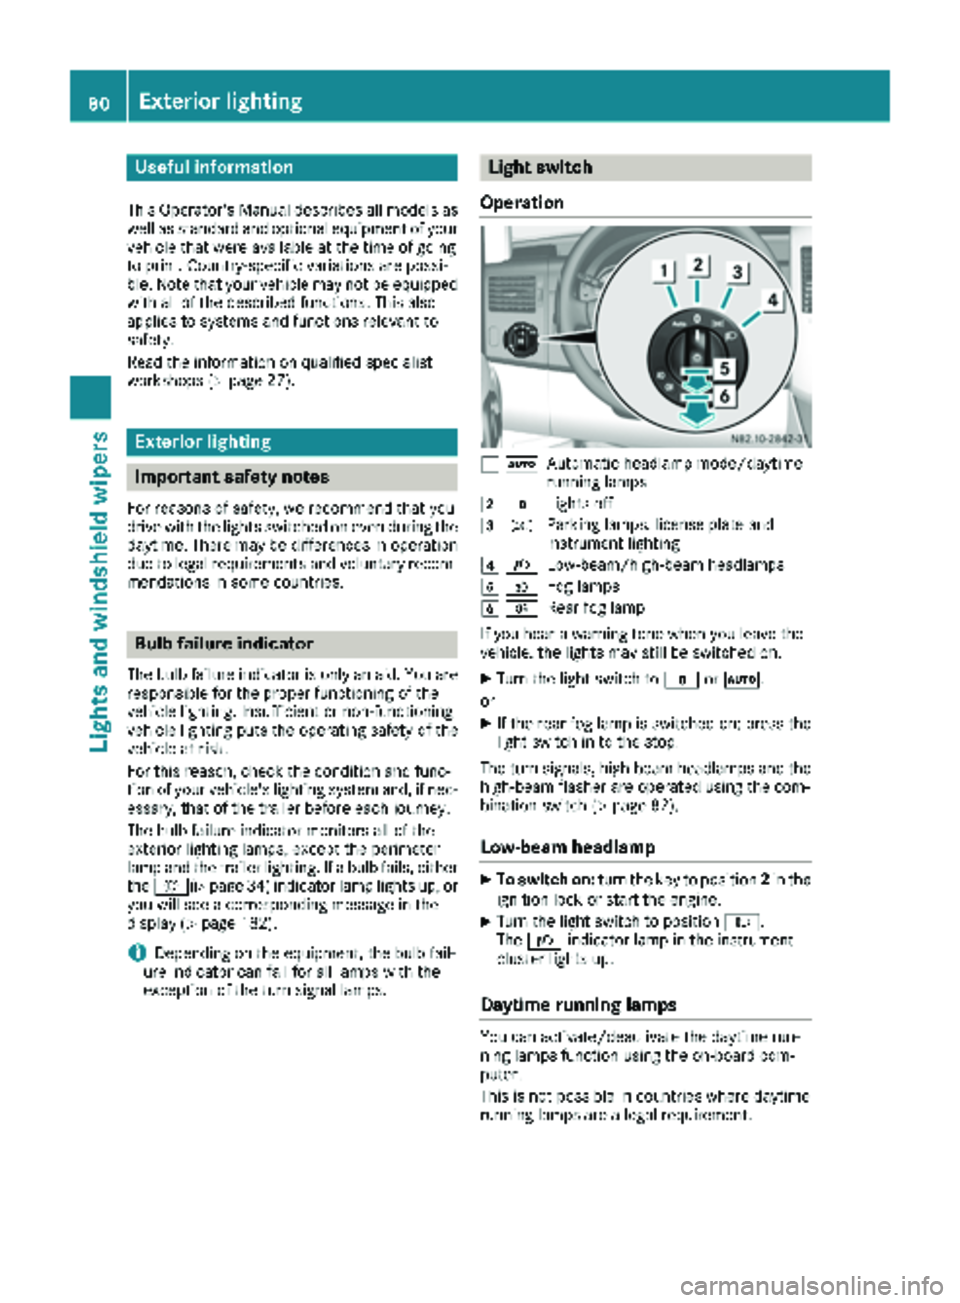
Operation
1 ÃAutomatic headlamp mode/daytime
running lamps
2$Lights off
3TParking lamps, license plate and
instrument lighting
4LLow-beam/high-beam headlamps
5NFog lamps
6RRear fog lamp
If you hear a warning tone when you leave the
vehicle, the lights may still be switched on.
XTurn the light switch to $orÃ.
or
XIf the rear fog lamp is switched on: press the
light switch in to the stop.
The turn signals, high-beam headlamps and the
high-beam flasher are operated using the com-
bination switch (
Ypage 82).
Low-beam headlamp
XTo switch on: turn the key to position 2in the
ignition lock or start the engine.
XTurn the light switch to position L.
The L indicator lamp in the instrument
cluster lights up.
Daytime running lamps
You can activate/deactivate the daytime run-
ning lamps function using the on-board com-
puter.
This is not possible in countries where daytime
running lamps are a legal requirement.
80Exterior lighting
Lights and windshield wipers
Page 89 of 286
Changing bulbs
Important safety notes
GDANGER
Xenon bulbs carry a high voltage. You can get an electric shock if you remove the cover of
the Xenon bulb and touch the electrical con-
tacts. There is a risk of fatal injury.
Never touch the parts or the electrical con-
tacts of the Xenon bulb. Always have work on
the Xenon bulbs carried out at a qualified spe-
cialist workshop.
GWARNING
Bulbs, lamps and connectors can get very hot
when operating. If you change a bulb, you
could burn yourself on these components.
There is a risk of injury.
Allow these components to cool down before
changing a bulb.
!Make sure the bulbs are always securely
installed.
If your vehicle is equipped with Bi-Xenon bulbs,
you can recognize this by the following: the cone
of light from the Xenon bulbs moves from the
top to the bottom and back again when you start
the engine. For this to be observed, the low-
beam headlamps must be switched on before
starting the engine.
The bulbs and lamps are an essential compo-
nent of vehicle safety. You must therefore make
sure that these function correctly at all times.
Have the headlamp setting checked regularly.
RAlways switch off the vehicle's lighting sys-
tem before changing a bulb.
This will prevent a short circuit.
RDo not touch the glass tube of new bulbs with your bare hands. Always use a clean, lint-free
cloth or only touch the base of the bulb when
installing.
Even minor contamination can burn into the
glass surface and reduce the service life of the
bulbs.
RDo not use a bulb that has been dropped or
that has scratches on its glass tube.
The bulb could explode.
ROnly use bulbs in closed lamps which have
been designed for this purpose.
ROnly use spare bulbs of the same type and
with the prescribed voltage
RProtect the bulbs from moisture when in use.
If the new bulb still does not light up, consult a
qualified specialist workshop.
RHave the LEDs and bulbs of the following
lamps changed at a qualified specialist work-
shop:
-the additional turn signals in the exterior
mirrors
-the high-mounted brake lamp
-LED daytime running lamps (Bi-Xenon
headlamps)
-Bi-Xenon lamps (Bi-Xenon headlamps)
-front fog lamps
If you require assistance changing bulbs, con-
sult a qualified specialist workshop.
Front bulbs
Overview of bulb replacement – bulb
types
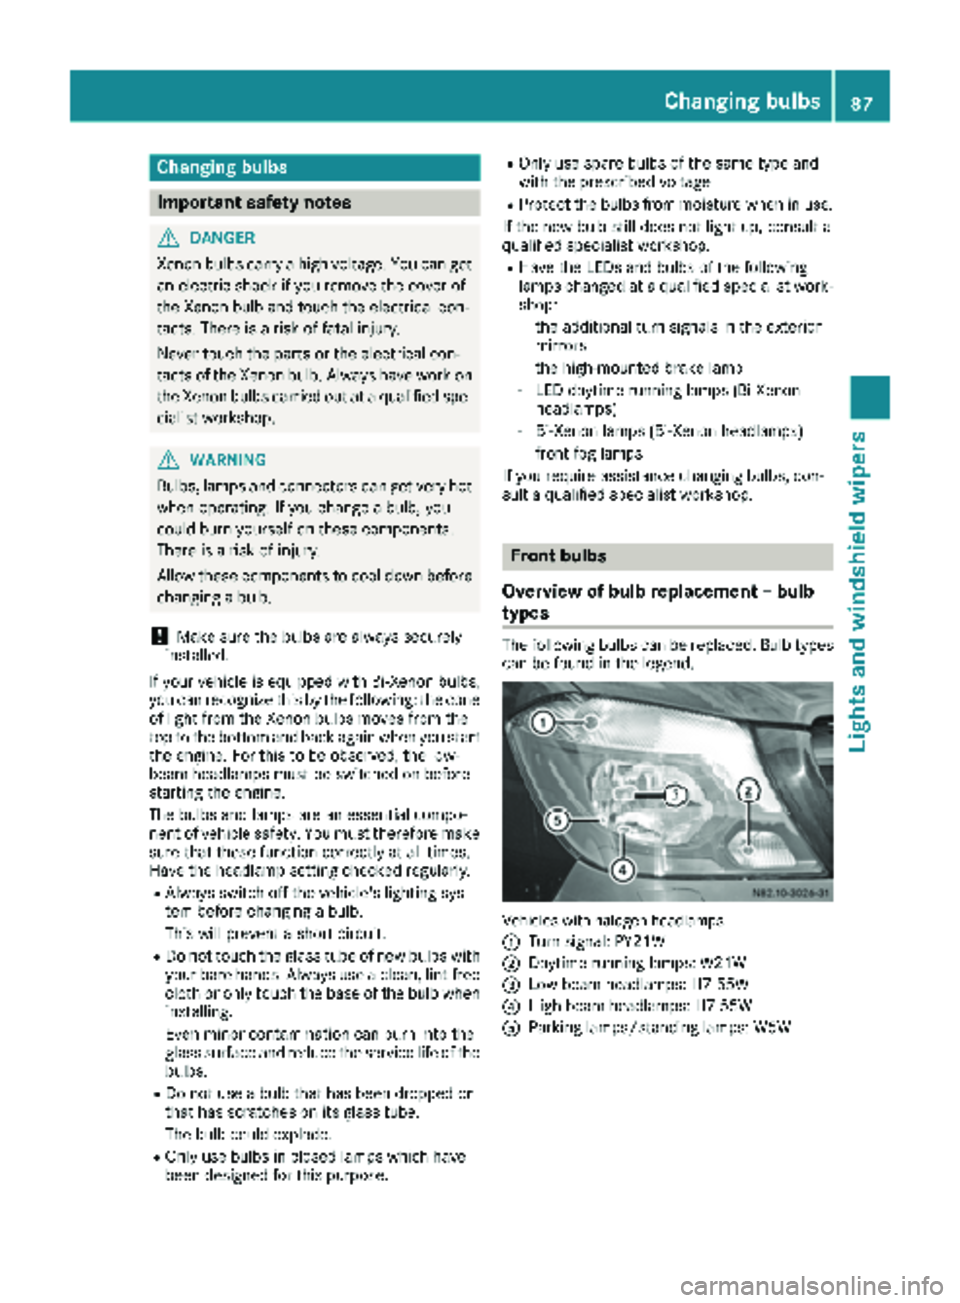
The following bulbs can be replaced. Bulb types can be found in the legend.
Vehicle swit hhalogen headlamps
:
Turn signal: PY21W
;Daytime running lamps: W21W
=Low-beam headlamps: H7 55W
?High-beam headlamps: H7 55W
AParking lamps/standing lamps: W5W
Changing bulbs87
Lights and windshield wipers
Z
Page 109 of 286
Outside tempera-
tureEngine runtime
Above 32 ‡ (0 †)at least 10 minutes
32 ‡ (0 †) to 14 ‡
(Ò10 †)at least 15 minutes
Below 14 ‡ (Ò10 †)at least 20 minutes
Before switching on
XCheck the fuel level and top up if necessary.
The auxiliary heating is operated directly
using the vehicle's fuel. The tank must be at
least a quarter full to ensure that the auxiliary
heating functions.
XSwitch on climate control (Ypage 100).
XSet the temperature control to the desired
temperature (Ypage 101).
XSet the air distribution as required
(Ypage 101).
XOpen the center (Ypage 104) and side air
vents (Ypage 105) and set them to the middle
position.
iThe auxiliary heating automatically switches
to heater booster mode after the engine is
started.
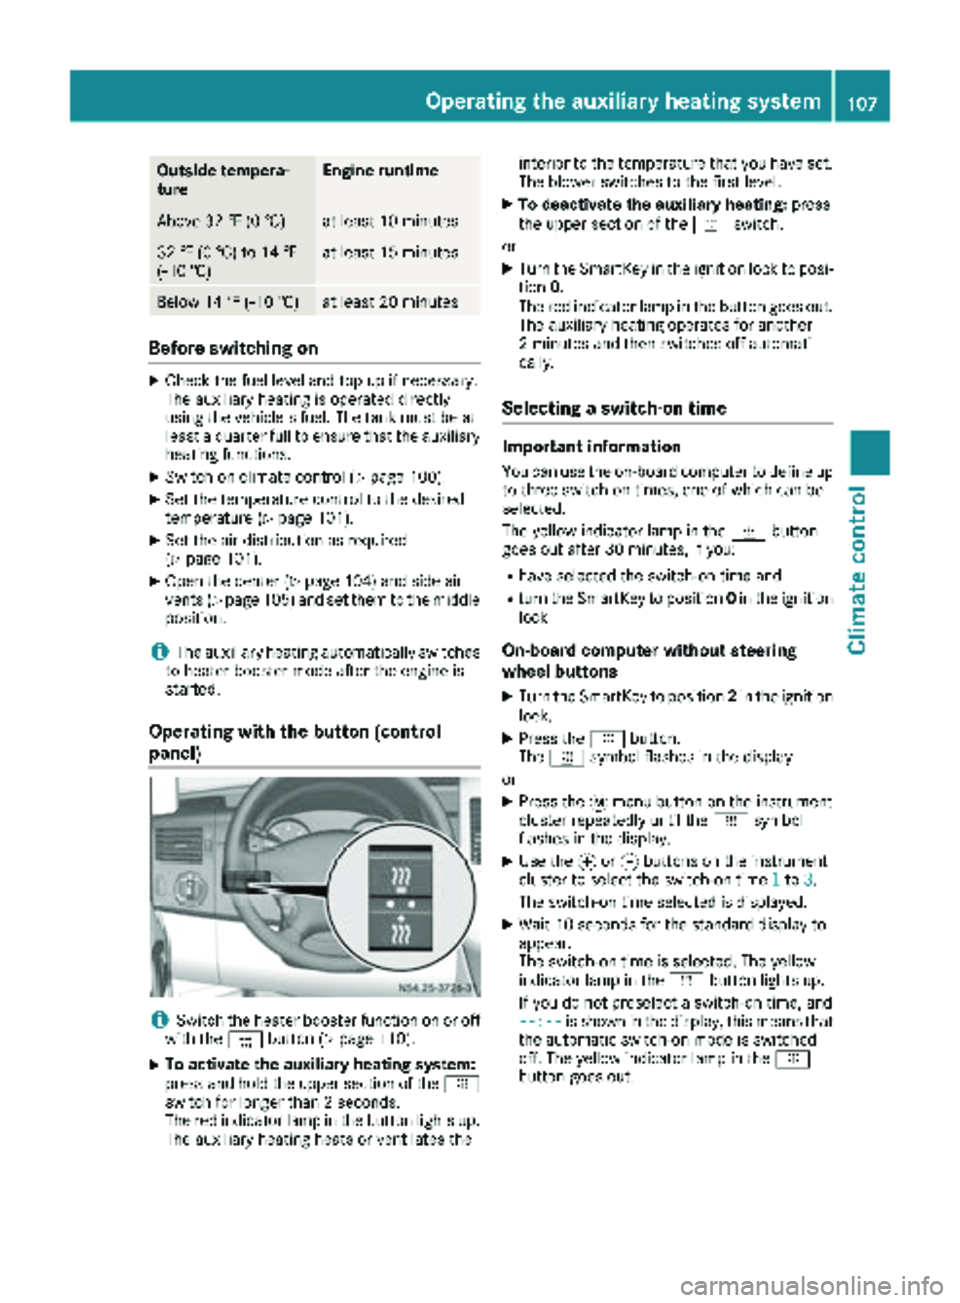
Operating with the button (control
panel)
iSwitch the heater booster function on or off
with the ¢button (Ypage 110).
XTo activate the auxiliary heating system:
press and hold the upper section of the y
switch for longer than 2 seconds.
The red indicator lamp in the button lights up.
The auxiliary heating heats or ventilates the interior to the temperature that you have set.
The blower switches to the first level.
XTo deactivate the auxiliary heating:
press
the upper section of the yswitch.
or
XTurn the SmartKey in the ignition lock to posi-
tion 0.
The red indicator lamp in the button goes out.
The auxiliary heating operates for another
2 minutes and then switches off automati-
cally.
Selecting a switch-on time
Important information
You can use the on-board computer to define up
to three switch-on times, one of which can be
selected.
The yellow indicator lamp in the ybutton
goes out after 30 minutes, if you:
Rhave selected the switch-on time and
Rturn the SmartKey to position 0in the ignition
lock
On-board computer without steering
wheel buttons
XTurn the SmartKey to position 2in the ignition
lock.
XPress the ybutton.
The y symbol flashes in the display.
or
XPress the 4menu button on the instrument
cluster repeatedly until the ysymbol
flashes in the display.
XUse the forg buttons on the instrument
cluster to select the switch-on time 1to3.
The switch-on time selected is displayed.
XWait 10 seconds for the standard display to
appear.
The switch-on time is selected. The yellow
indicator lamp in the ybutton lights up.
If you do not preselect a switch-on time, and
--:--
is shown in the display, this means that
the automatic switch-on mode is switched
off. The yellow indicator lamp in the y
button goes out.
Operating the auxiliary heating system107
Climate control
Z